
Master the art of picture hanging with these simple, effective tips! Learn how high to hang pictures, arrange gallery walls, and select the perfect art for your space.
Hanging artwork is an essential part of transforming a house into a home, injecting personality and style into every room. Yet, for many, determining the ideal placement and height for pictures can feel like an intimidating design puzzle. Some individuals possess an innate eye for aesthetics, effortlessly placing art in just the right spot, while others find themselves wrestling with tape measures, levels, and a wall full of unnecessary nail holes. If you belong to the latter group and are seeking clear, actionable guidance on how high to hang pictures, creative strategies for grouping artwork, and expert tips for achieving a polished look, you’ve come to the right place.
This comprehensive guide will equip you with all the must-have knowledge and practical tips to make your next art hanging project a breeze. Say goodbye to guesswork and hello to beautifully curated walls! (This post includes commissionable links; for more information, please refer to our full disclosure statement {here})
The Golden Rule: How High to Hang a Single Picture
When you’re hanging a single piece of art on a blank wall with no furniture beneath it, the most universally accepted guideline is to position the artwork so that its center is approximately **57-60 inches from the floor**. This measurement is widely considered the “museum standard” and aligns with the average person’s eye level, ensuring comfortable viewing for most individuals. This standard height creates a natural and inviting focal point in any room.
To accurately achieve this, follow these simple steps:
- **Measure Your Artwork:** Use a tape measure to find the total height of the picture, including the frame.
- **Find the Midpoint:** Divide the total height by two to determine the center point of your artwork.
- **Calculate Hanging Point:** Add 57-60 inches (depending on your preference and room specifics) to the midpoint measurement. This final number indicates the exact height from the floor where the top of your picture should be, assuming the hanging hardware is at the very top of the frame. If your hanging hardware (e.g., a wire) is lower than the top of the frame, you’ll need to adjust. Measure from the top of the frame to the taut wire at its highest point when lifted. Subtract this distance from your calculated top-of-picture height to find where to place your nail or hook.
For instance, let’s consider {this 34-inch high floral bouquet picture}, which was perfectly placed during our kitchen remodel. Dividing its height in half gives us 17 inches. Adding 57-60 inches to this value means the center of the picture should be at 74-77 inches from the floor.
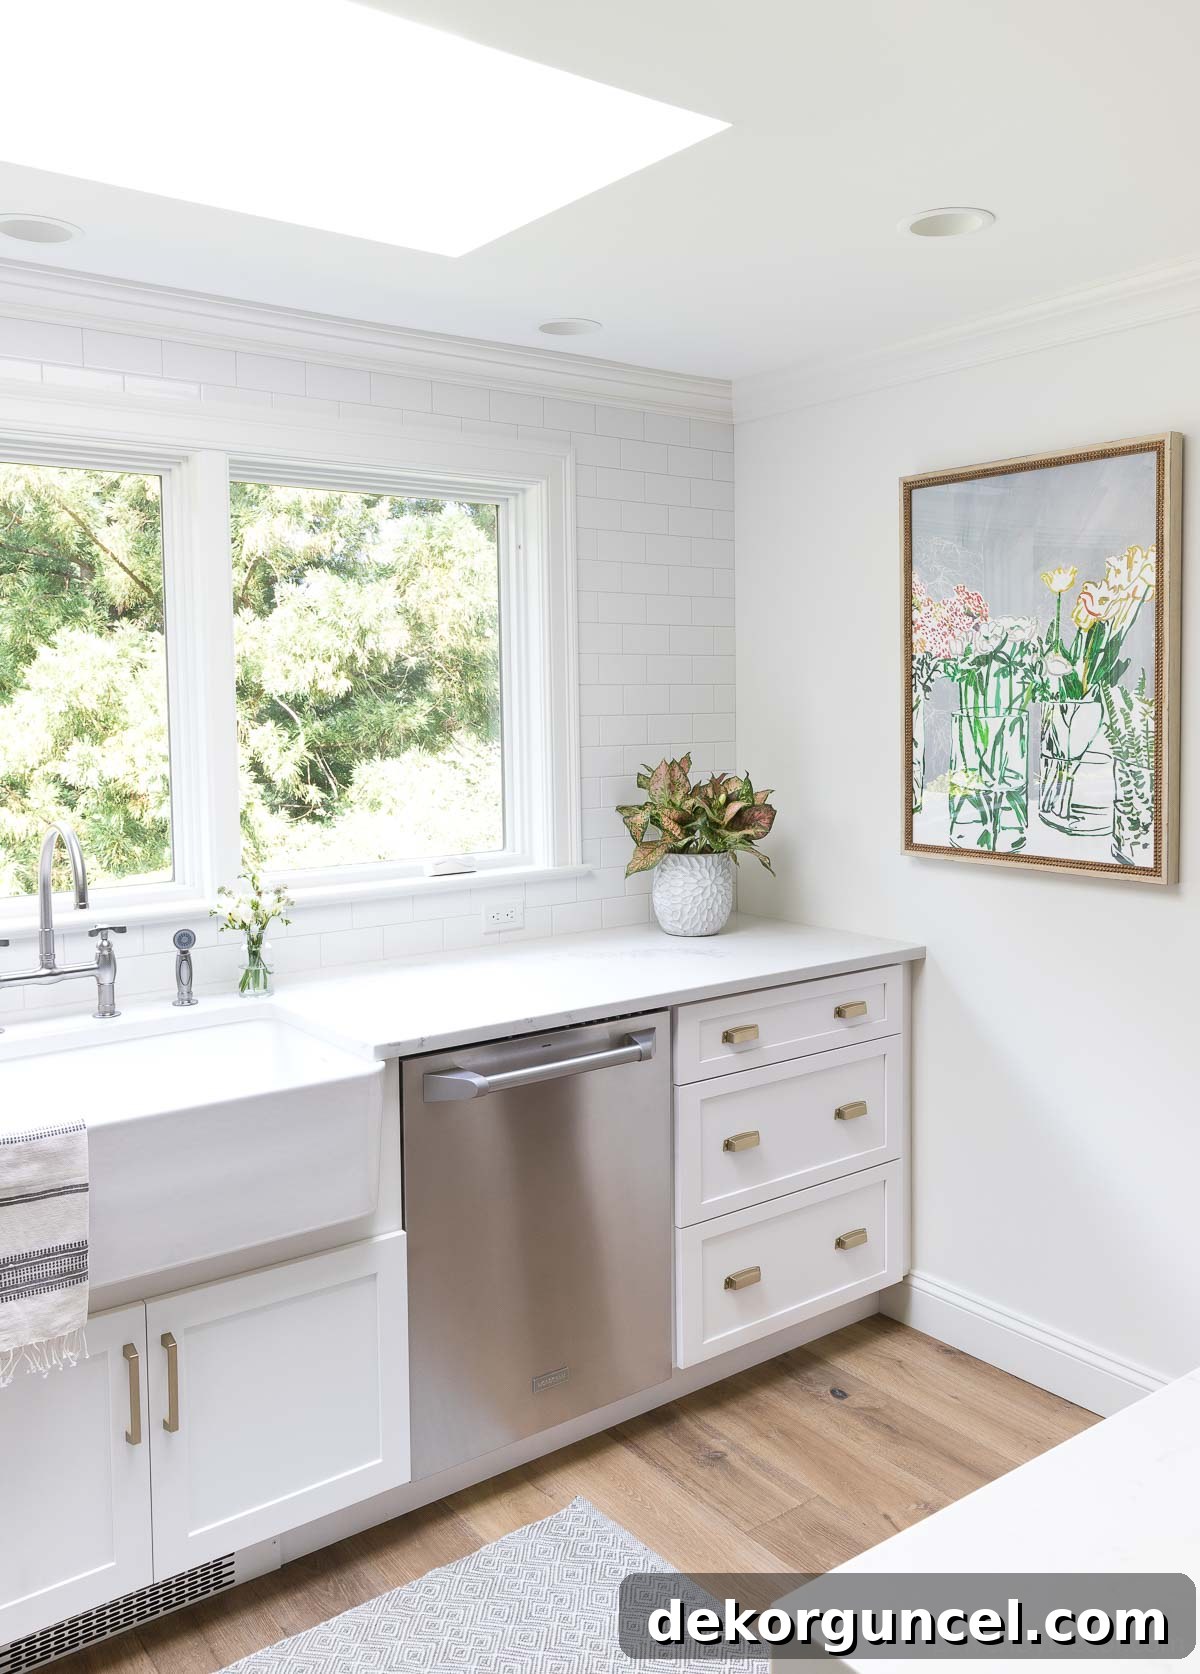
Kitchen Sources: Gray geometric rug | Black & white dish towel | Kitchen sink | Cabinet pulls | Cup pulls
While 57-60 inches is a strong guideline, it’s not a rigid law. Several factors can influence the ideal height:
- **Room Function & Occupants:** In spaces where people are primarily standing, such as hallways or entryways, or if your family tends to be taller, leaning towards the 60-inch mark can feel more natural. Conversely, in rooms where people are mostly seated, like dining rooms or living rooms, a slightly lower center (closer to 57 inches) might be more comfortable for viewing.
- **Ceiling Height:** For rooms with high ceilings, you might err on the side of 60 inches or even slightly higher to ensure the art doesn’t feel dwarfed or lost on the expansive wall. For rooms with lower ceilings (8 feet or less), a center closer to 57 inches can help maintain visual balance and prevent the art from feeling too close to the ceiling.
- **Visual Impact:** Ultimately, trust your eye. After calculating the suggested height, stand back and assess. Does it look balanced? Does it draw you in? Sometimes, a slight adjustment based on the surrounding decor or the specific art piece can make all the difference.
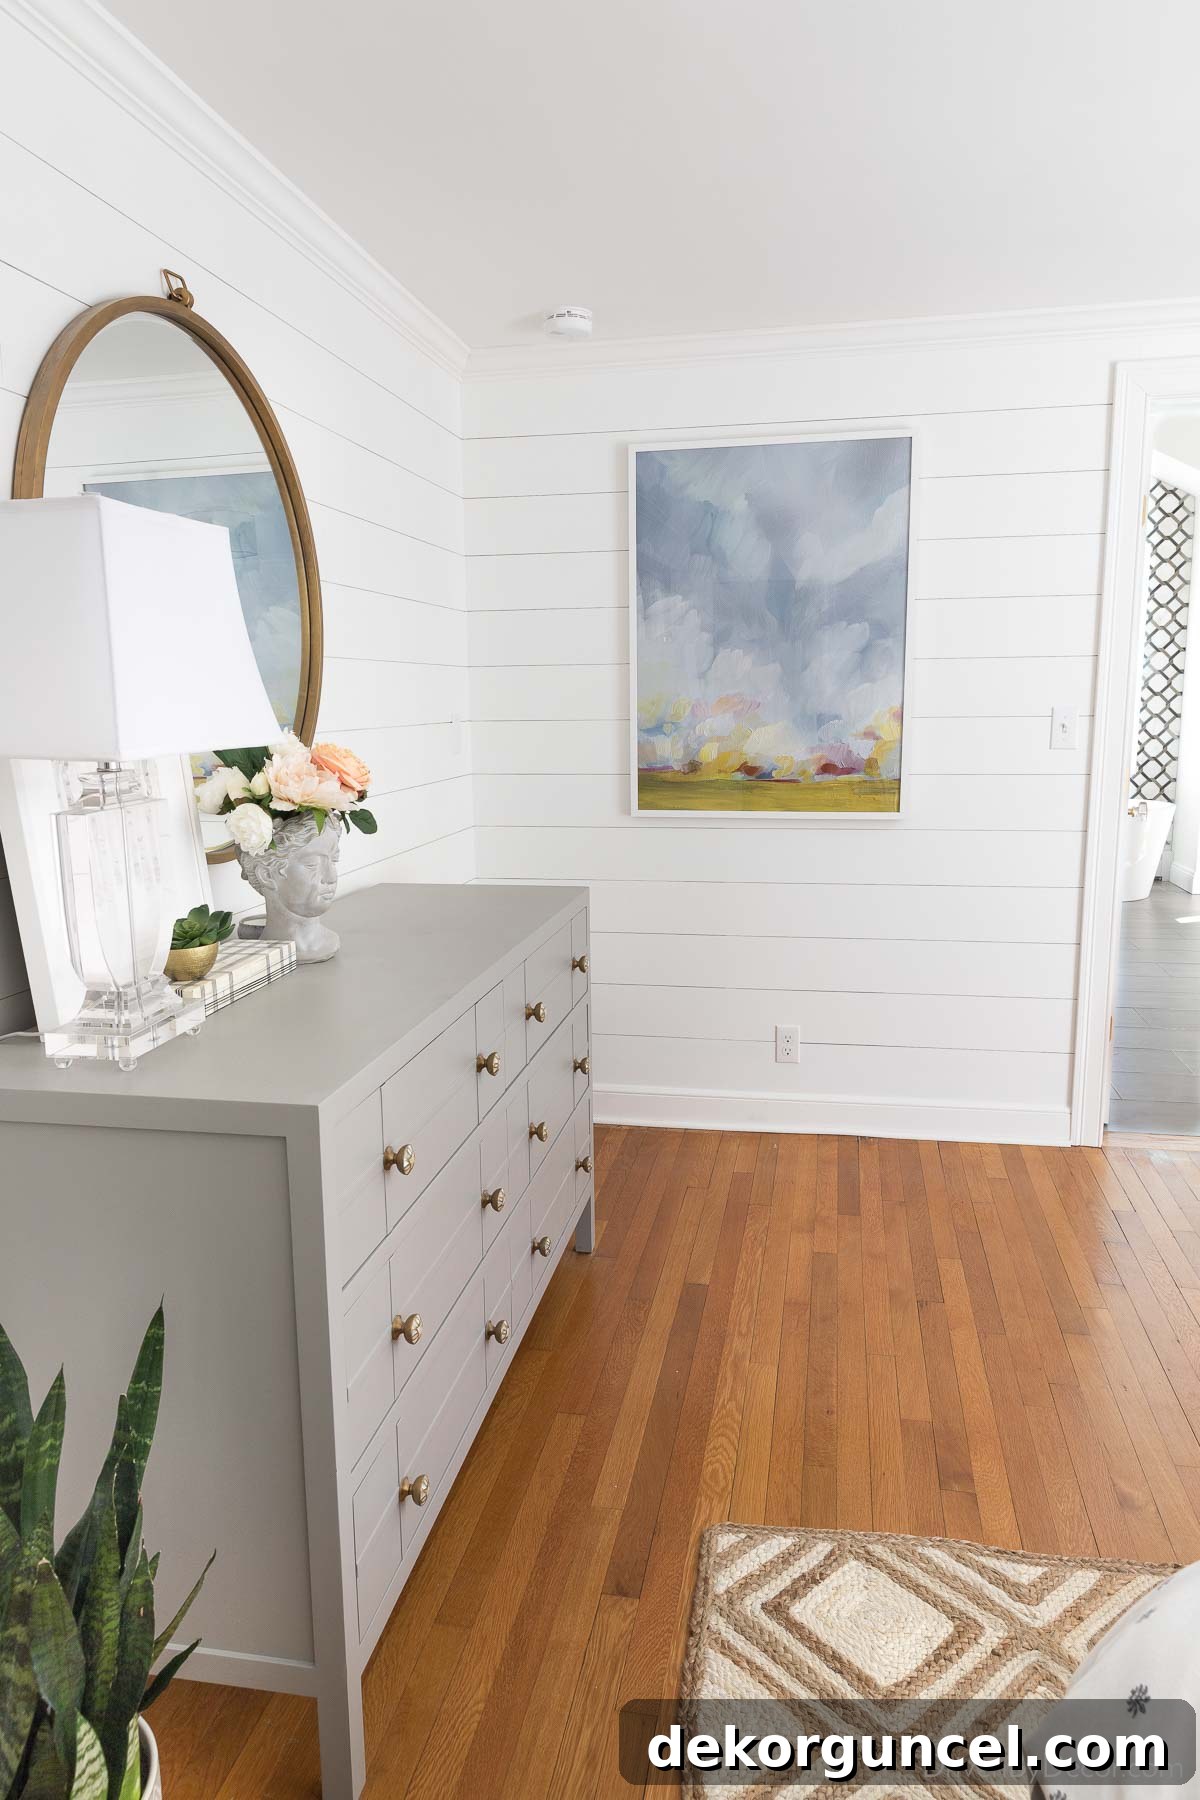
For example, {this large art print} (30″ x 40″) was hung on DIY shiplap walls in a bedroom with lower 7’6″ ceilings, so it was centered at 57 inches to optimize its appearance within the space.
Hanging Multiple Pictures or Collections: The Grouping Strategy
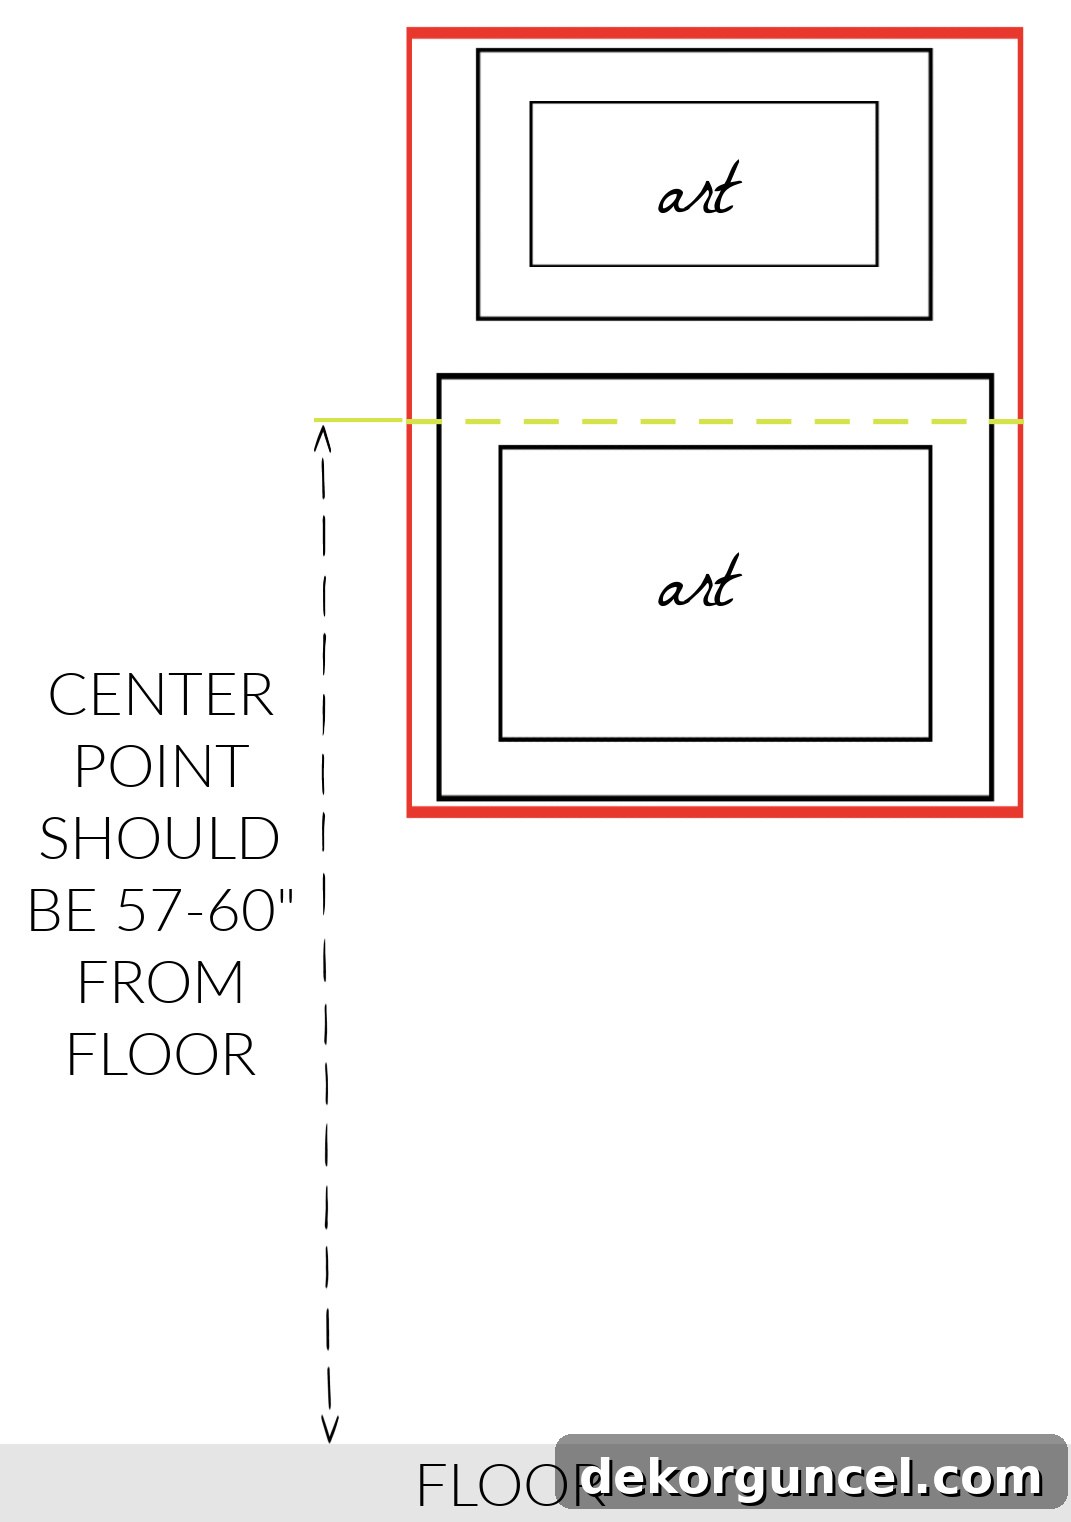
The 57-60 inch rule isn’t just for single pieces; it’s also incredibly useful when hanging multiple pictures or creating a collection on a blank wall. The key here is to **treat the entire grouping as one large piece of art**. Find the visual center of your entire arrangement, and that point should align with the 57-60 inch mark from the floor.
This principle applies whether you’re hanging two pictures stacked vertically or an entire gallery wall without any furniture underneath. For example, when hanging two pictures one directly above the other, measure the combined height of both frames, including the space you plan to leave between them. Then, find the center of this combined height and position it at 57-60 inches from the floor.
The same strategy holds true for larger collections or unique arrangements like the decorative plates in our dining room. In this case, the center point of the entire plate arrangement was strategically placed at 57 inches from the floor, creating a cohesive and visually appealing display. This method ensures that even eclectic collections maintain a harmonious and professional appearance, drawing the eye naturally.
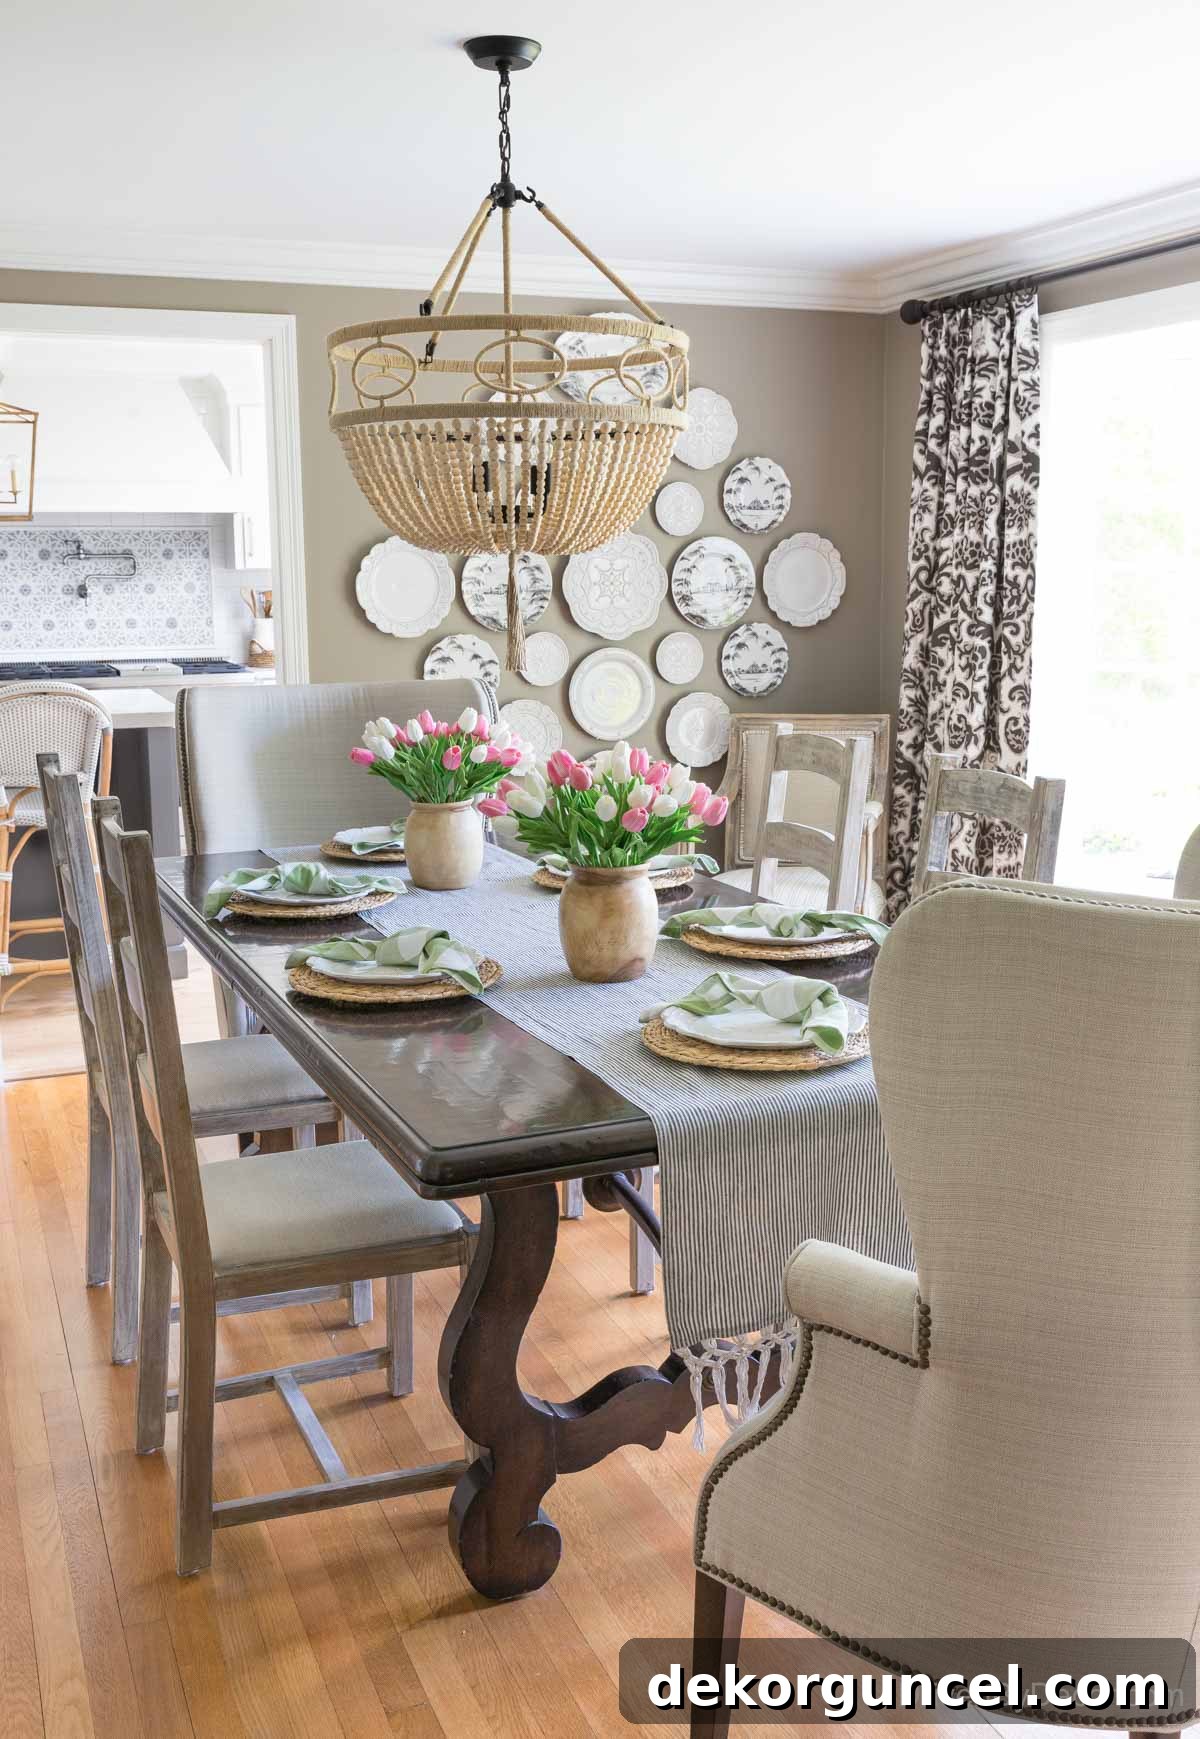
Dining Room Sources: Wood bead chandelier | Table & chairs – no longer available | 13″ Rattan chargers (similar) | Green & white plaid napkins | Wood vases (similar) | Faux pink tulips | Faux white tulips | White wall plates | Patterned wall plates | Drapes – no longer available
For more in-depth guidance on how to plan and execute such decorative arrangements, be sure to check out my detailed post on how to hang plates on the wall, where I share specific planning techniques and the plate holders I recommend.
Art Above Furniture: Creating Connection and Balance
When your artwork isn’t destined for a blank wall but rather to hang above a piece of furniture—such as a bed, sofa, dresser, or console table—the rules shift slightly to create a cohesive vignette. Instead of focusing on the 57-60 inch center rule, the primary goal here is to establish a visual connection between the art and the furniture piece. To achieve this, hang your picture so that the **bottom of the frame is between 3-8 inches above the top of the furniture**. This range ensures the artwork doesn’t float too high and disconnect from the furniture, nor does it feel too cramped.
- **Smaller Art, Greater Distance:** For smaller pieces of art, you might lean towards the 6-8 inch mark to give them a bit more breathing room above the furniture.
- **Larger Art, Closer Placement:** For larger, more substantial artworks, placing them closer to the 3-5 inch range can create a stronger, more grounded connection with the furniture below, especially if the furniture itself is a significant piece.
As an illustration, for {this large piece of framed canvas art} (40″ x 30″) in my daughter’s room, it was hung approximately 4 inches above the headboard. Had the art been smaller, it might have been placed an inch or two higher to maintain optimal visual balance.
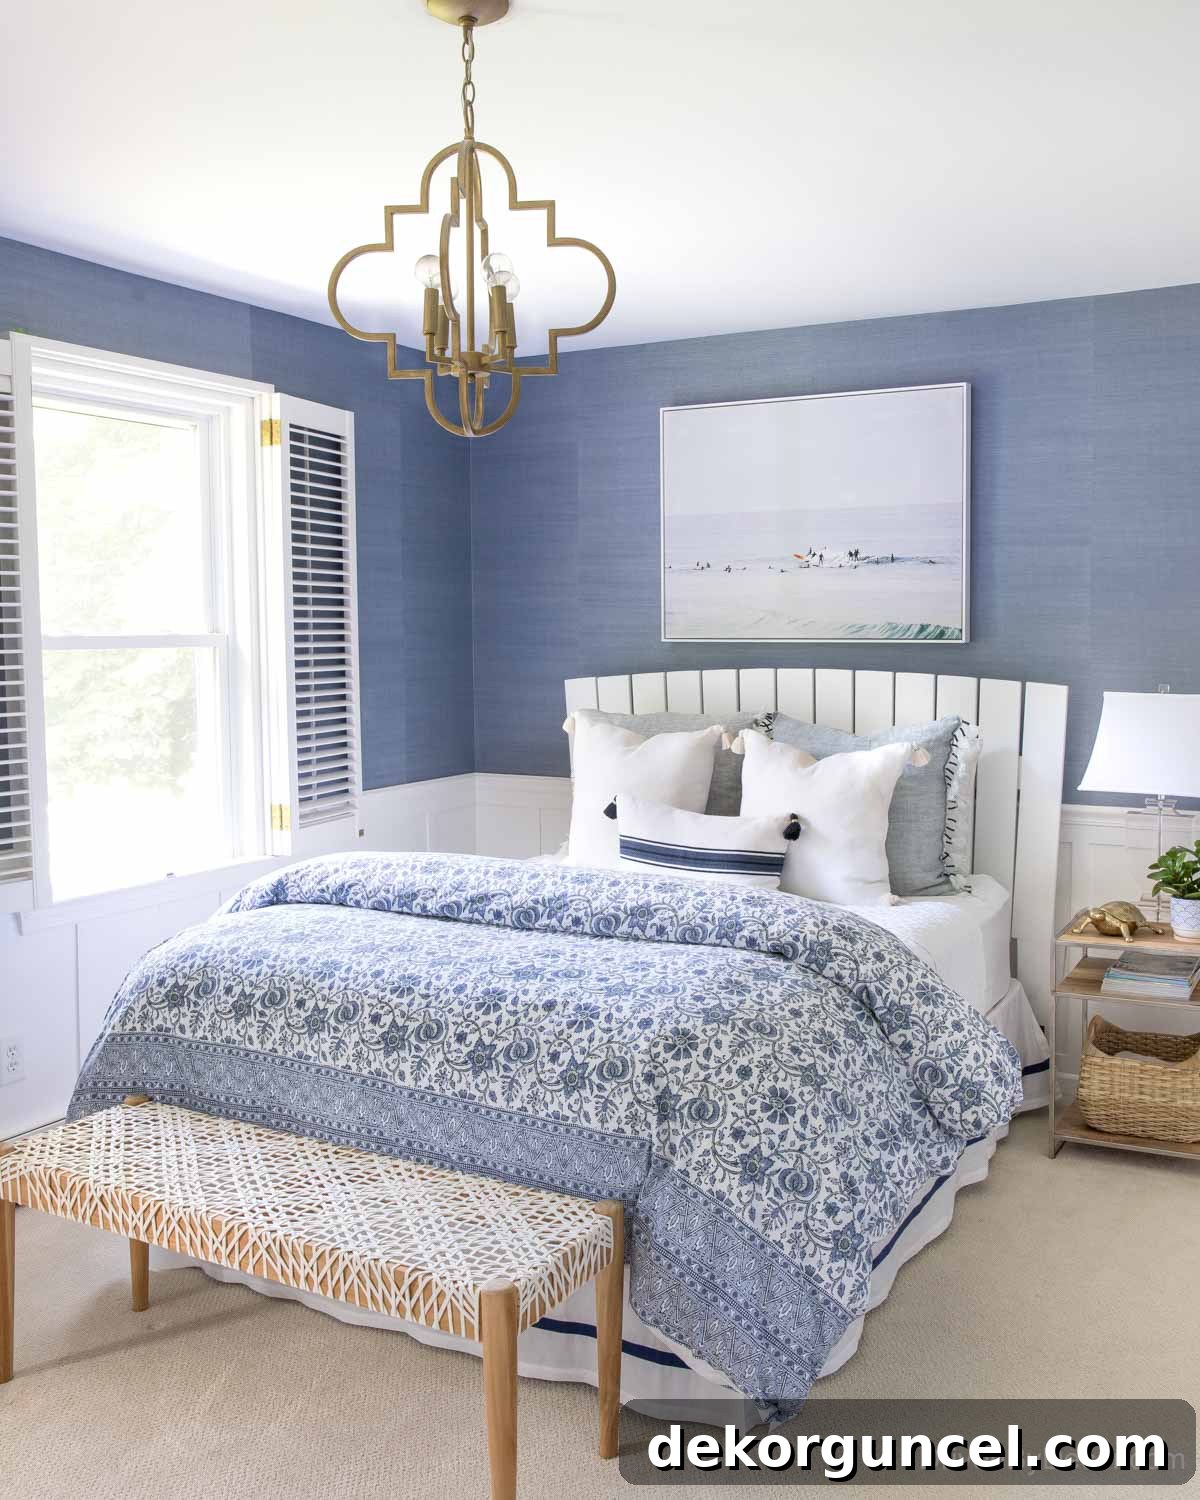
Room Sources: Blue grasscloth wallpaper | Gold quatrefoil pendant | Canvas surf scene art | Leather weave bench | Urn lamp
In another instance, the two abstract art prints ({this Sorento I print} and {this Sorento II print}, both 24″ x 30″) above the twin beds in my girls’ bedroom are hung a little over 3 inches above the peak of each bed’s arch, and about 8 inches above the mattress at the frame’s ends. This placement creates a cozy, integrated look without overwhelming the space.
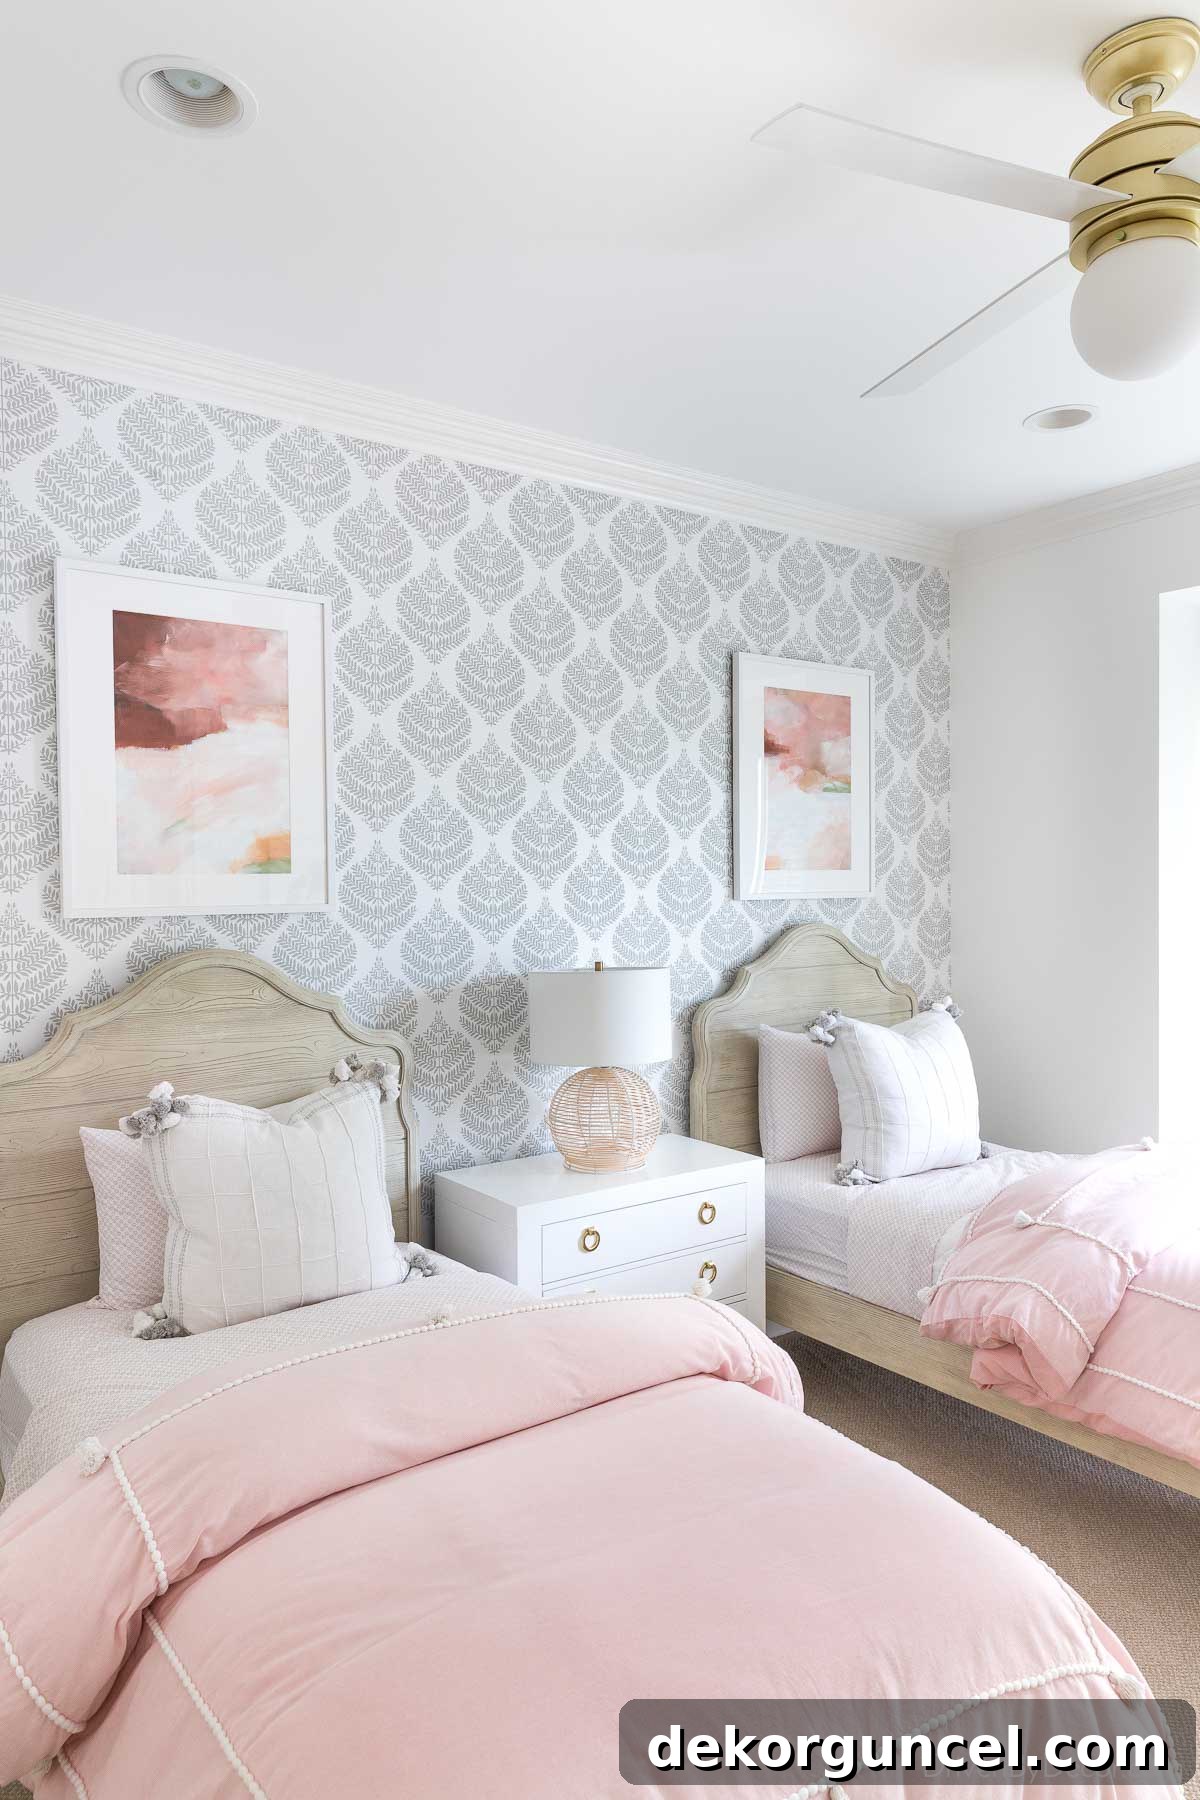
Room Sources: Gray damask peel & stick wallpaper | Globe light ceiling fan | Arched wood beds | Framed art (left) | Framed art (right) | Duvet covers | Rattan lamp
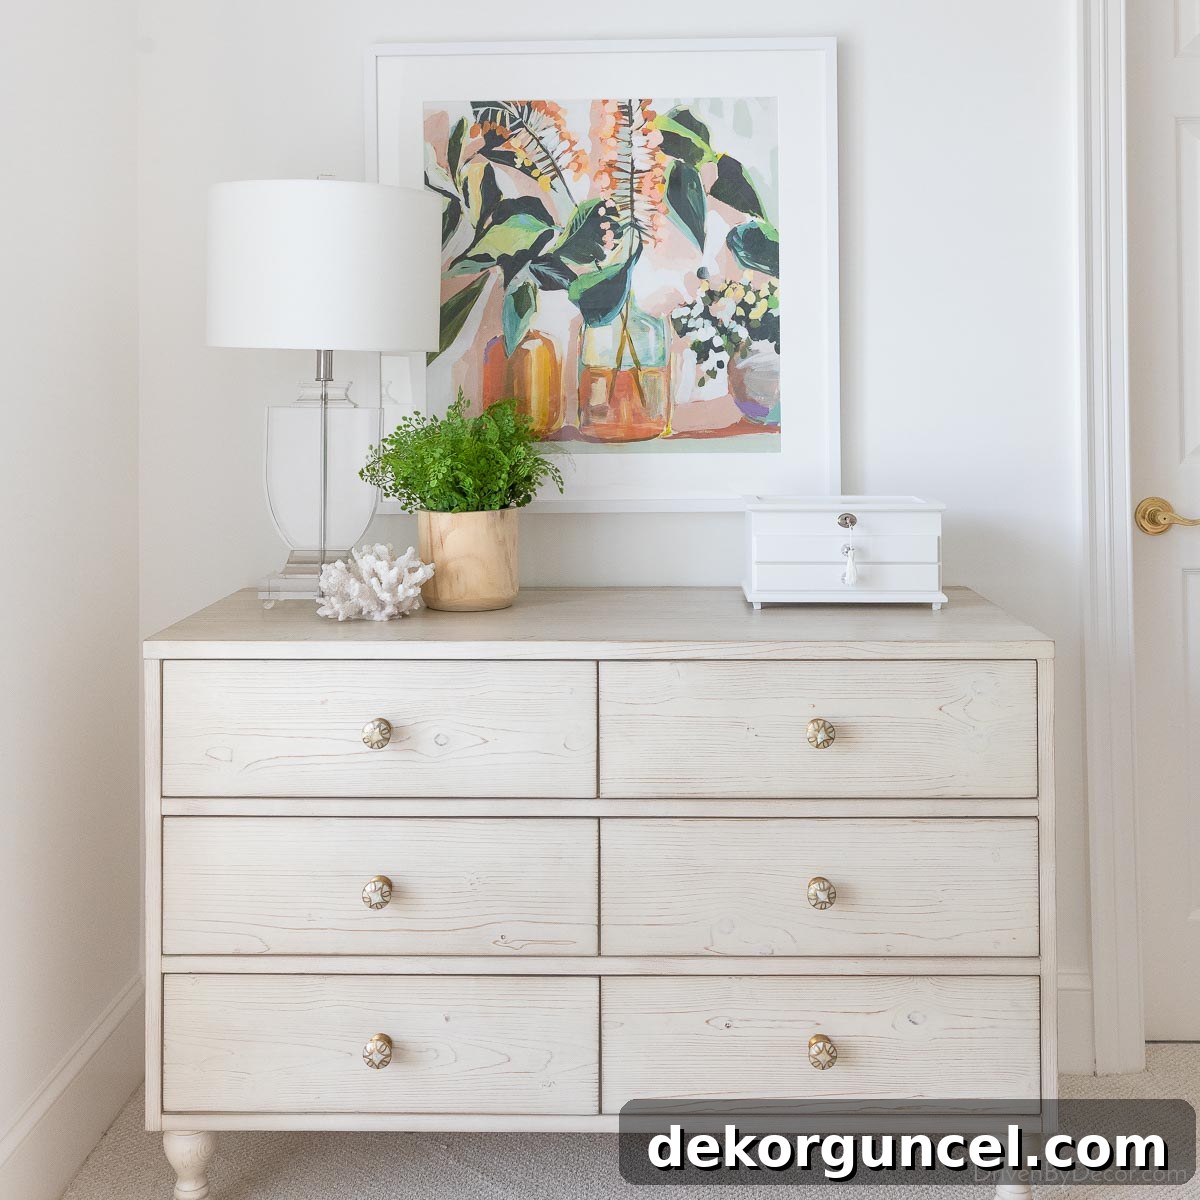
When hanging {this square floral art print} (30″ x 30″) above a dresser in the girls’ bedroom, a spacing of approximately 5 inches between the art print and the dresser top was chosen. This distance allowed the artwork to feel anchored by the furniture without sacrificing its individual presence.
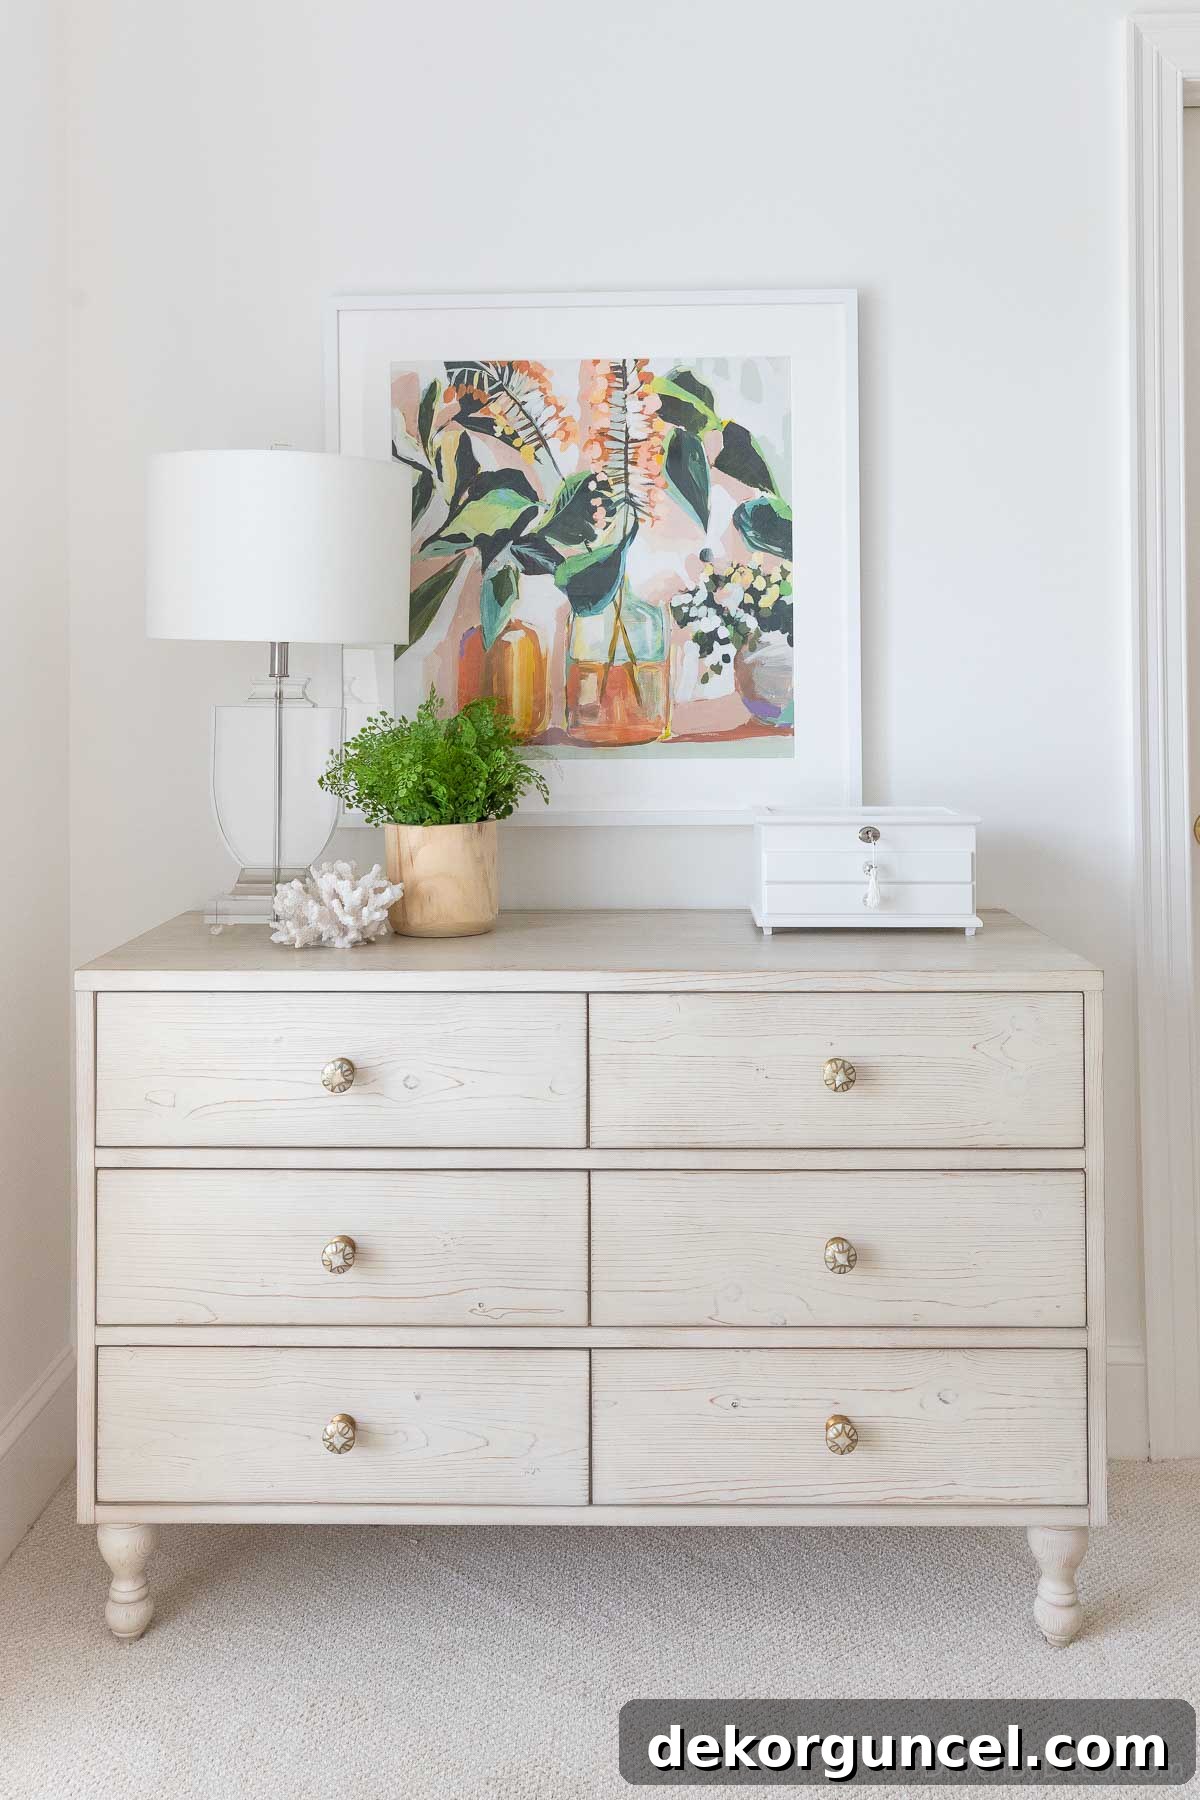
Room Sources: Floral artwork | Urn lamp | Faux fern (similar) | Coral (similar) | Dresser | Dresser knobs
Beyond vertical placement, the **width of your artwork relative to the furniture** is also crucial for balance. A good rule of thumb is for the artwork or art grouping to be approximately **two-thirds the width of the furniture piece** beneath it. Going much narrower can make the art look insignificant, while going slightly wider than two-thirds can sometimes work, but avoid art that’s significantly wider than the furniture, as this can make the arrangement feel top-heavy and unbalanced. This ratio creates a sense of harmony and intentionality in your decor.
Gallery Walls and Groupings: Mastering Spacing
When it comes to arranging multiple pictures in a gallery wall or a cohesive grouping, proper spacing is paramount to achieving a polished and intentional look. The general guideline for spacing between individual pictures is to leave approximately **1 ½ to 4 inches of space** between frames. This range allows each piece to breathe while still forming a unified collection.
- **Smaller Pieces:** For smaller pieces of art, a tighter spacing of 1 ½ to 2 inches often works best, allowing them to feel intimately connected.
- **Larger Pieces:** Larger artworks typically benefit from slightly more space, around 2-4 inches apart, to prevent the grouping from feeling overcrowded.
Consistent vs. Eclectic Gallery Walls
The type of gallery wall you create will also influence your spacing approach:
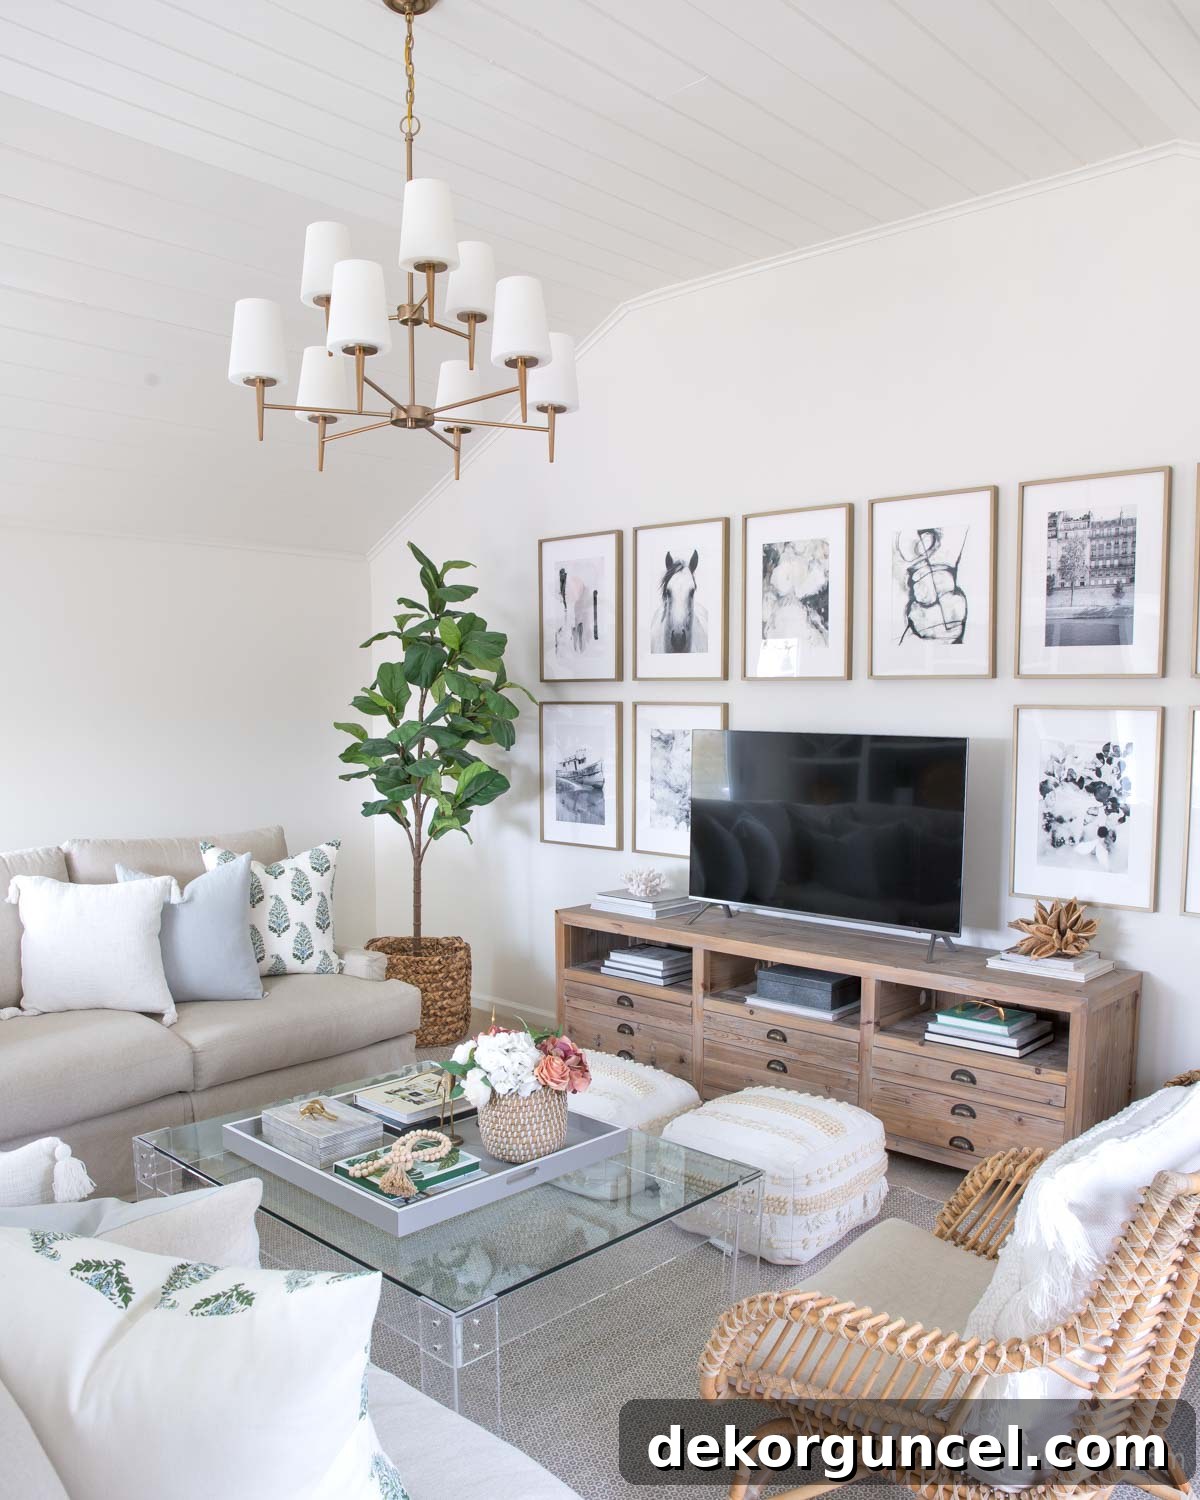
- **Grid Gallery Walls:** If you’re arranging same-sized pictures in a structured, symmetrical grid, **consistent spacing** is key. This creates a clean, uniform, and modern aesthetic. Each gap, both horizontal and vertical, should be identical. Our family room, with its organized collection around the television, exemplifies this precise approach.

Family Room Sources: Chandelier (satin bronze) | White tasseled pillow cover | Blue linen pillow cover | Green & blue block print pillow cover | Faux fiddle leaf fig tree | Rug | Pair of floor poufs | Art prints (details in {this post} | Acrylic coffee table (similar) | Coffee table tray (28″ square) | Black and white striped box (on coffee table) | Wood beads | Rattan chair
- **Eclectic Gallery Walls:** For a more organic, collected, or “salon-style” gallery wall, as seen in our home office, the spacing doesn’t need to be rigidly consistent. A starting point of around 2-3 inches between pictures is a good general guide, but some pieces can be slightly closer, and others a bit farther apart. The goal here is visual balance and flow, creating a dynamic display that feels curated over time rather than rigidly planned.
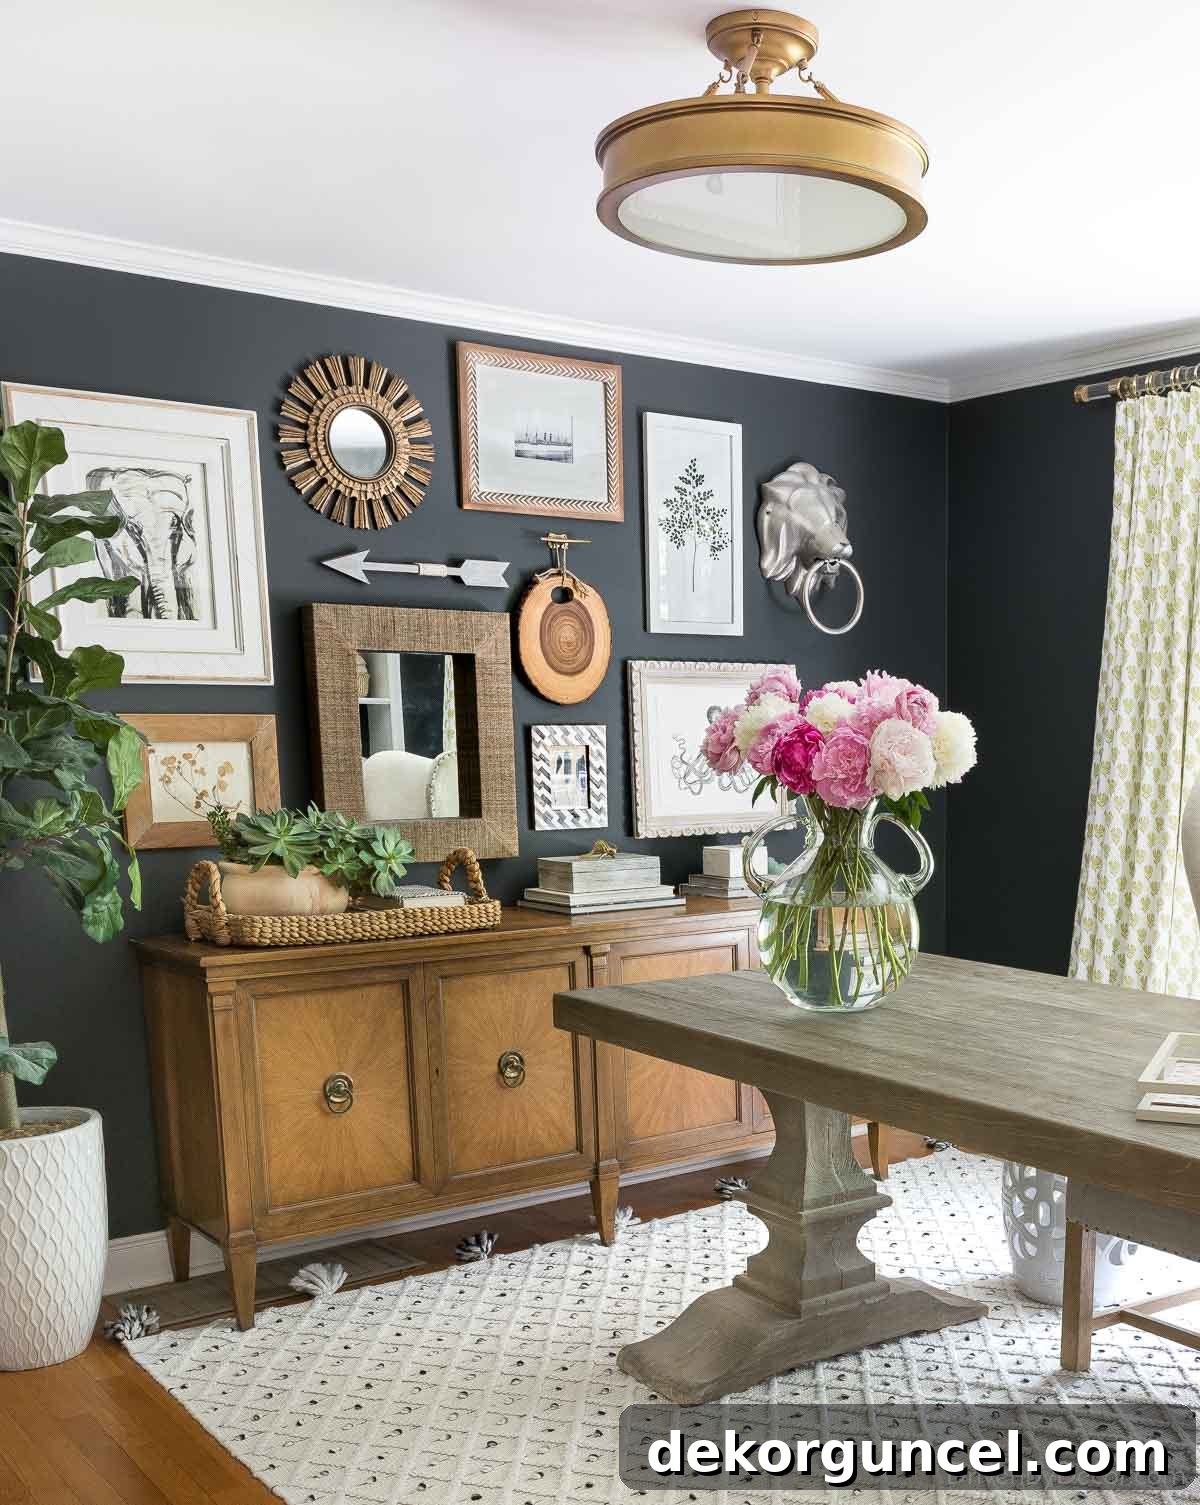
Sources: Desk (similar) | Rug | Semi flush mount ceiling light | Acrylic curtain rods | Faux fiddle leaf fig tree (similar) | Console is thrifted | Elephant art print | Woven tray (similar)
The Secret to Stress-Free Gallery Walls: Planning
The absolute best way to hang an eclectic grouping of art without turning your wall into Swiss cheese is meticulous planning. Before you even think about picking up a hammer, conceptualize your entire wall layout:
- **Lay it Out on the Floor:** Arrange all your pictures, frames, and objects on the floor in front of the wall you intend to decorate. This allows you to easily move pieces around, experiment with different arrangements, and adjust spacing until you achieve a composition that feels balanced and visually pleasing.
- **Create Paper Templates:** Once you’re happy with the floor layout, trace each frame onto butcher paper or newspaper, cut out the templates, and label them. Tape these paper templates to your wall using painter’s tape, mimicking your floor arrangement. This provides a precise visual representation and allows you to confirm the spacing and overall impact before making any permanent holes. You can even use a level on the paper templates to ensure straight lines.
This pre-planning step saves time, prevents mistakes, and ensures a stunning result. For more detailed tips and creative inspiration, explore my post dedicated to gallery wall ideas and design tips.
Where to Find Your Perfect Art: Best Online Shops for Prints
Once you’ve mastered the art of hanging, the next step is finding the perfect pieces to adorn your walls. The online world offers an incredible array of options, catering to every style and budget. Here are my go-to sources for beautiful art prints:
1. Minted: Curated Collections & Customization
My absolute favorite and most frequently used source for art prints is Minted {here}. What makes Minted stand out is its commitment to supporting independent artists, offering a unique and constantly evolving collection of art that you won’t find anywhere else. You have the flexibility to purchase prints unframed and frame them yourself, or you can opt for their professional matting and framing services, with your artwork delivered ready to hang. We have Minted artwork proudly displayed in various rooms of our home, including our family room, my daughter’s previous bedroom, the girls’ current room, and our primary bedroom, attesting to their versatility and quality.
{This gorgeous art piece}, which has graced the entryway of both our previous and current homes, is also a Minted find. (For more details on styling this space, check out my post on entryway decor ideas).
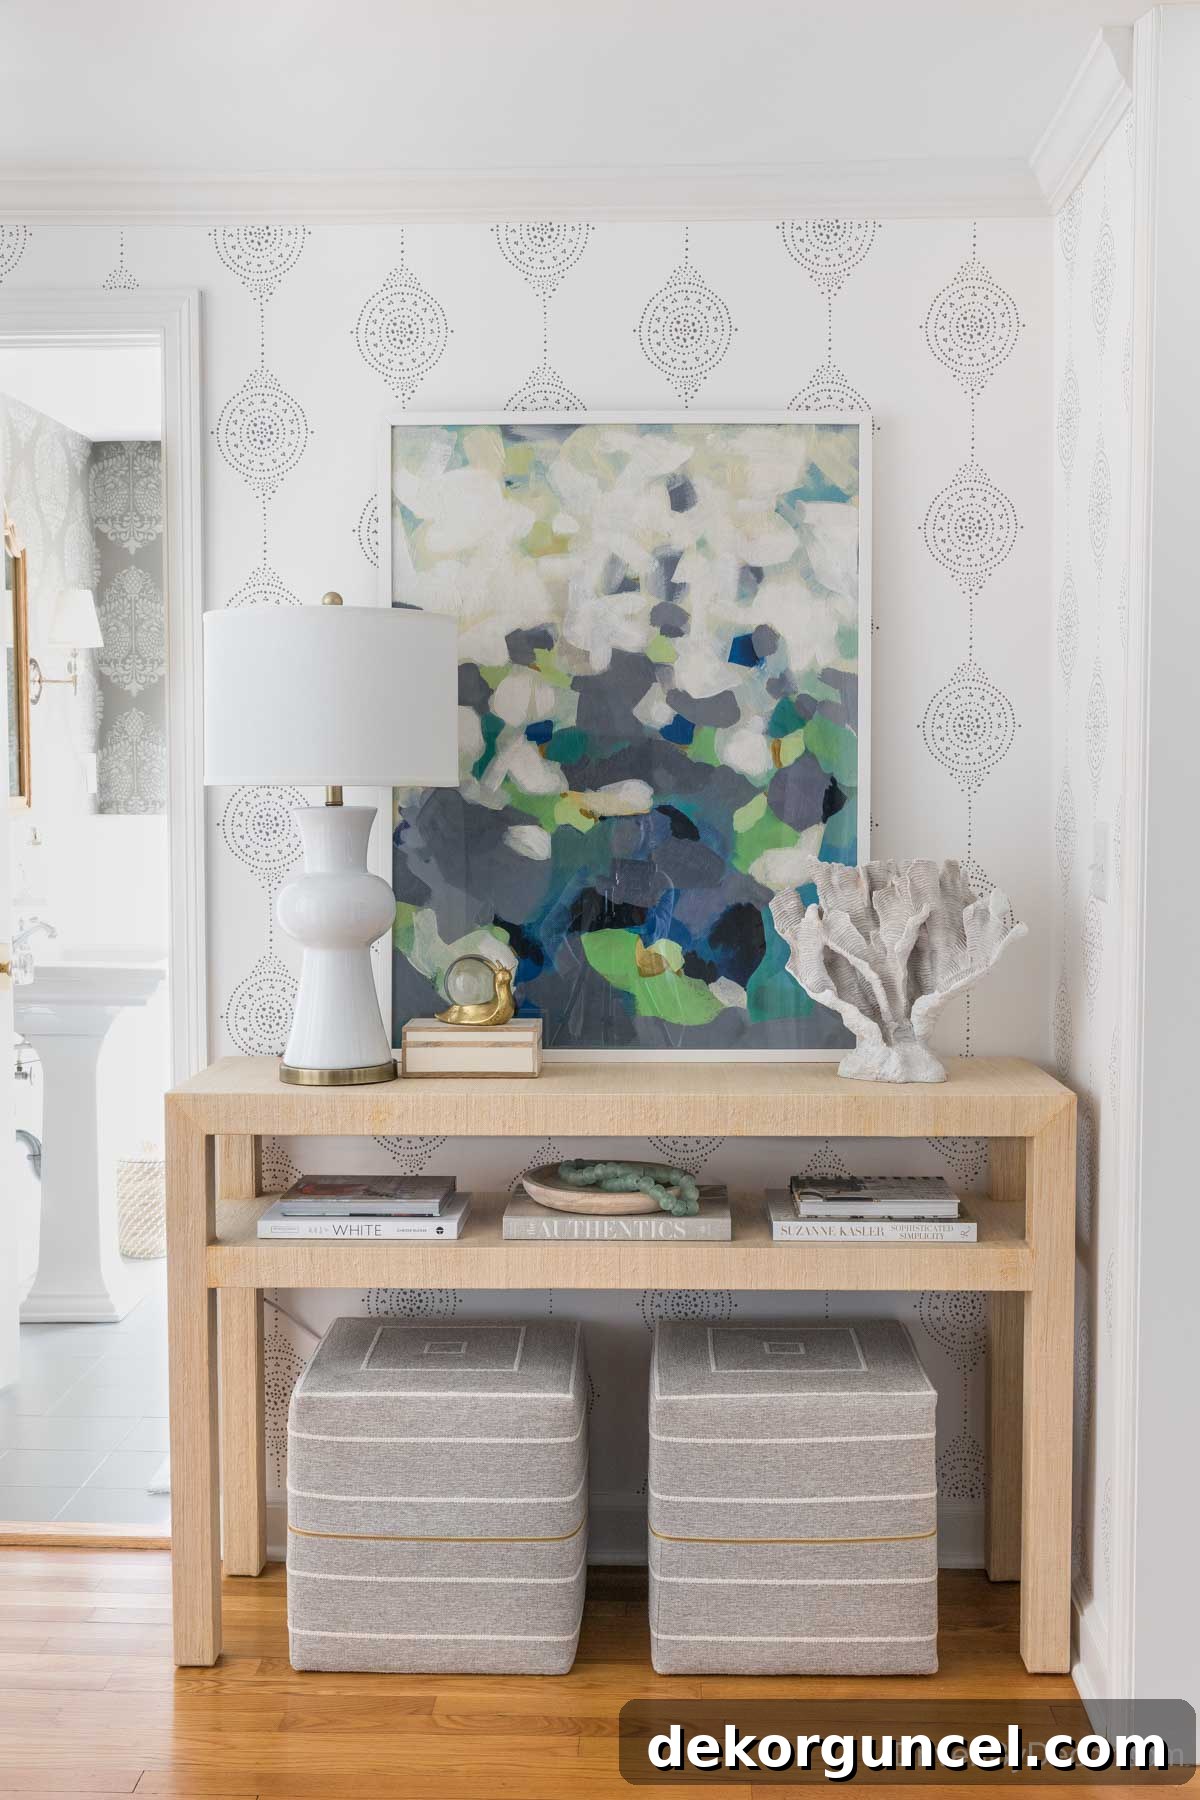
Entryway Sources: Wallpaper | Linen console (also see {this similar console}) | White table lamp | 30″ x 40″ Framed art print | Decorative snail | Wave coral – HomeGoods | Shallow wood bowl | Glass beads | Cube ottomans
Minted also offers an incredibly innovative feature: the ability to **customize the colors in some of their art prints**. You can find their customizable art prints {here}. For instance, on the product page for {this art print}, you’ll see a clickable option titled “Customize this print to fit your decor” under the size selections. This feature empowers you to rotate, zoom in on, or even completely change the color palette of the artwork.
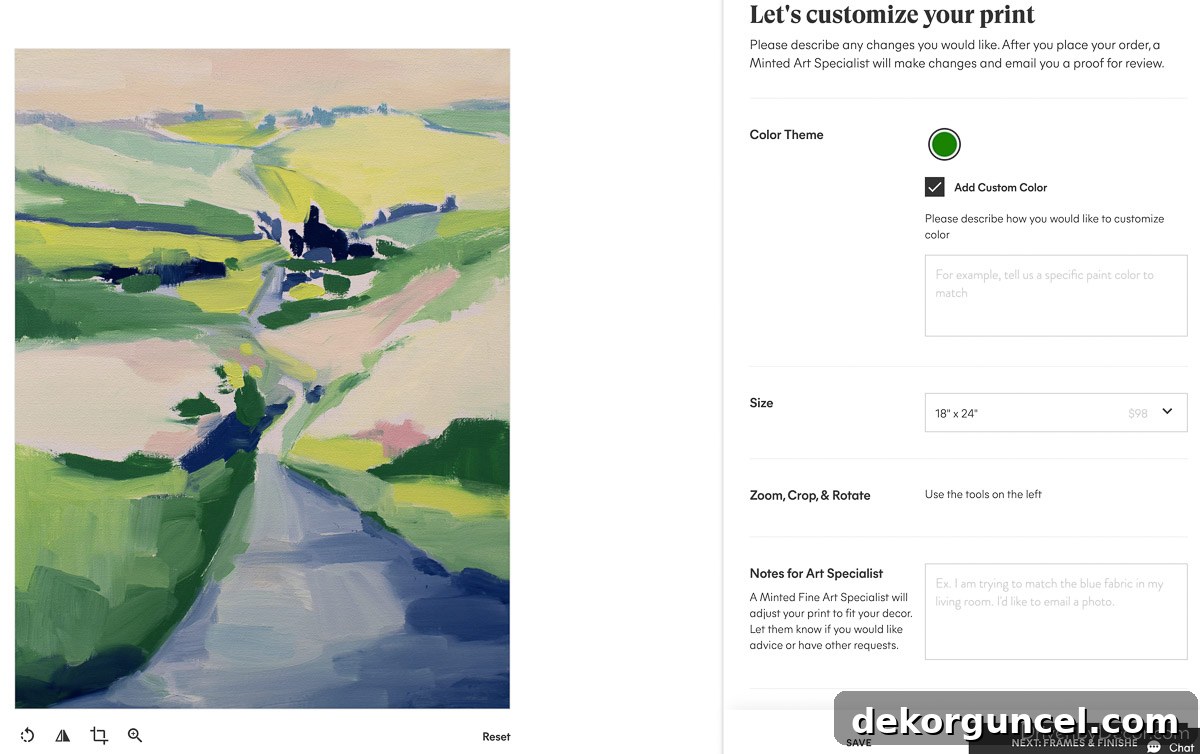
Simply click “Customize” to make your own adjustments, such as cropping or zooming, and add notes detailing any desired color changes for Minted’s art specialists. You can even provide specific paint color names (e.g., “Please match color to Sherwin Williams Lucky Green”) or upload photos of a fabric swatch, rug, or any other item you’d like your new artwork to complement. After you place your order, an Art Specialist will email you a proof of your revised artwork for your approval or further revisions.
2. Artfully Walls: Curated Style, Often Better Value
Another fantastic online resource for discovering unique art is Artfully Walls {here}. Many of their curated pieces exude an “Anthropologie-esque” vibe, and in fact, you can often find many of the same art prints sold at Anthropologie directly on the Artfully Walls website. The added benefit? They’re frequently available at a lower price point and with a wider range of size options. This makes it an excellent choice for achieving that designer look without the premium price tag. We utilized a grouping of three Artfully Walls pieces to beautifully adorn our kitchen eat-in wall.
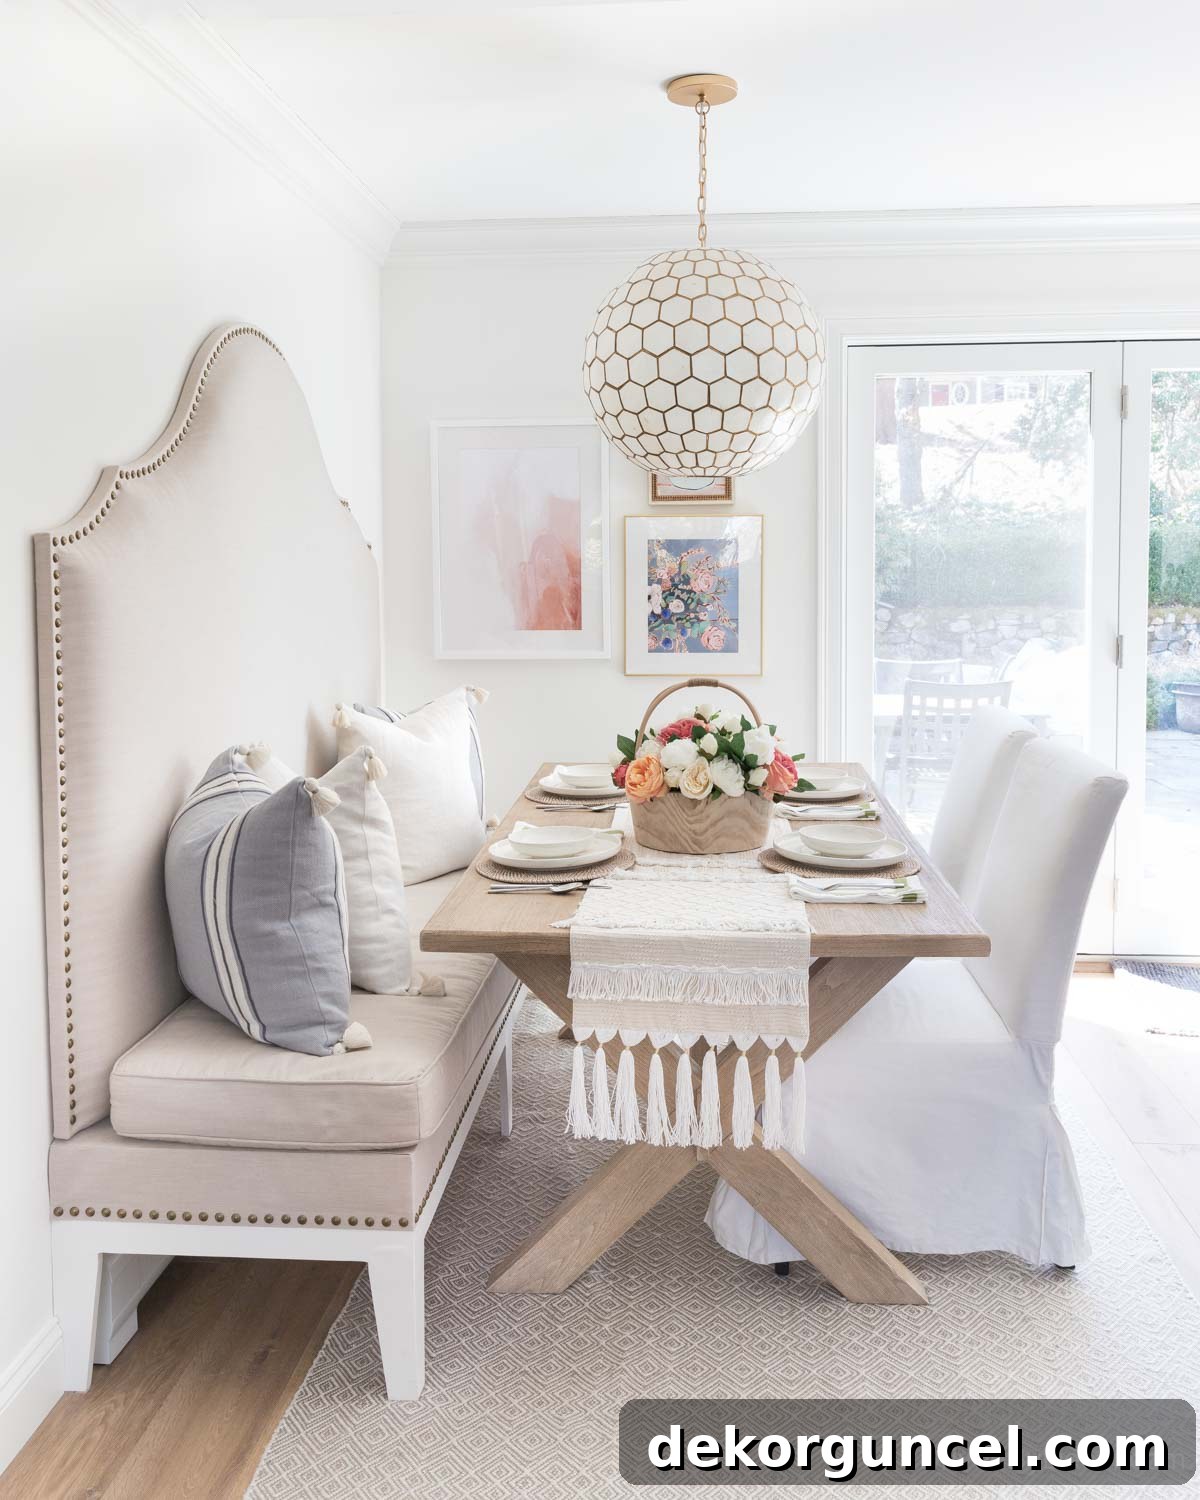
Sources: Capiz pendant | Geometric gray rug | Faux peonies (similar) | Rattan chargers | Large blush abstract framed art | Blue floral framed art | Pink floral framed art | Slipcovered dining chairs (similar) | Table runner no longer available
3. Etsy: Discover Unique Independent Artists
For truly unique finds and to support independent creators, I consistently love shopping on Etsy {here}. It’s a treasure trove of original art pieces and prints from artists around the globe. You can find everything from intricate paintings to downloadable digital prints, which offer a budget-friendly way to get custom art by printing and framing it yourself. For example, {this charming floral print}, which now enhances the shelving in our bathroom, was a wonderful Etsy discovery.
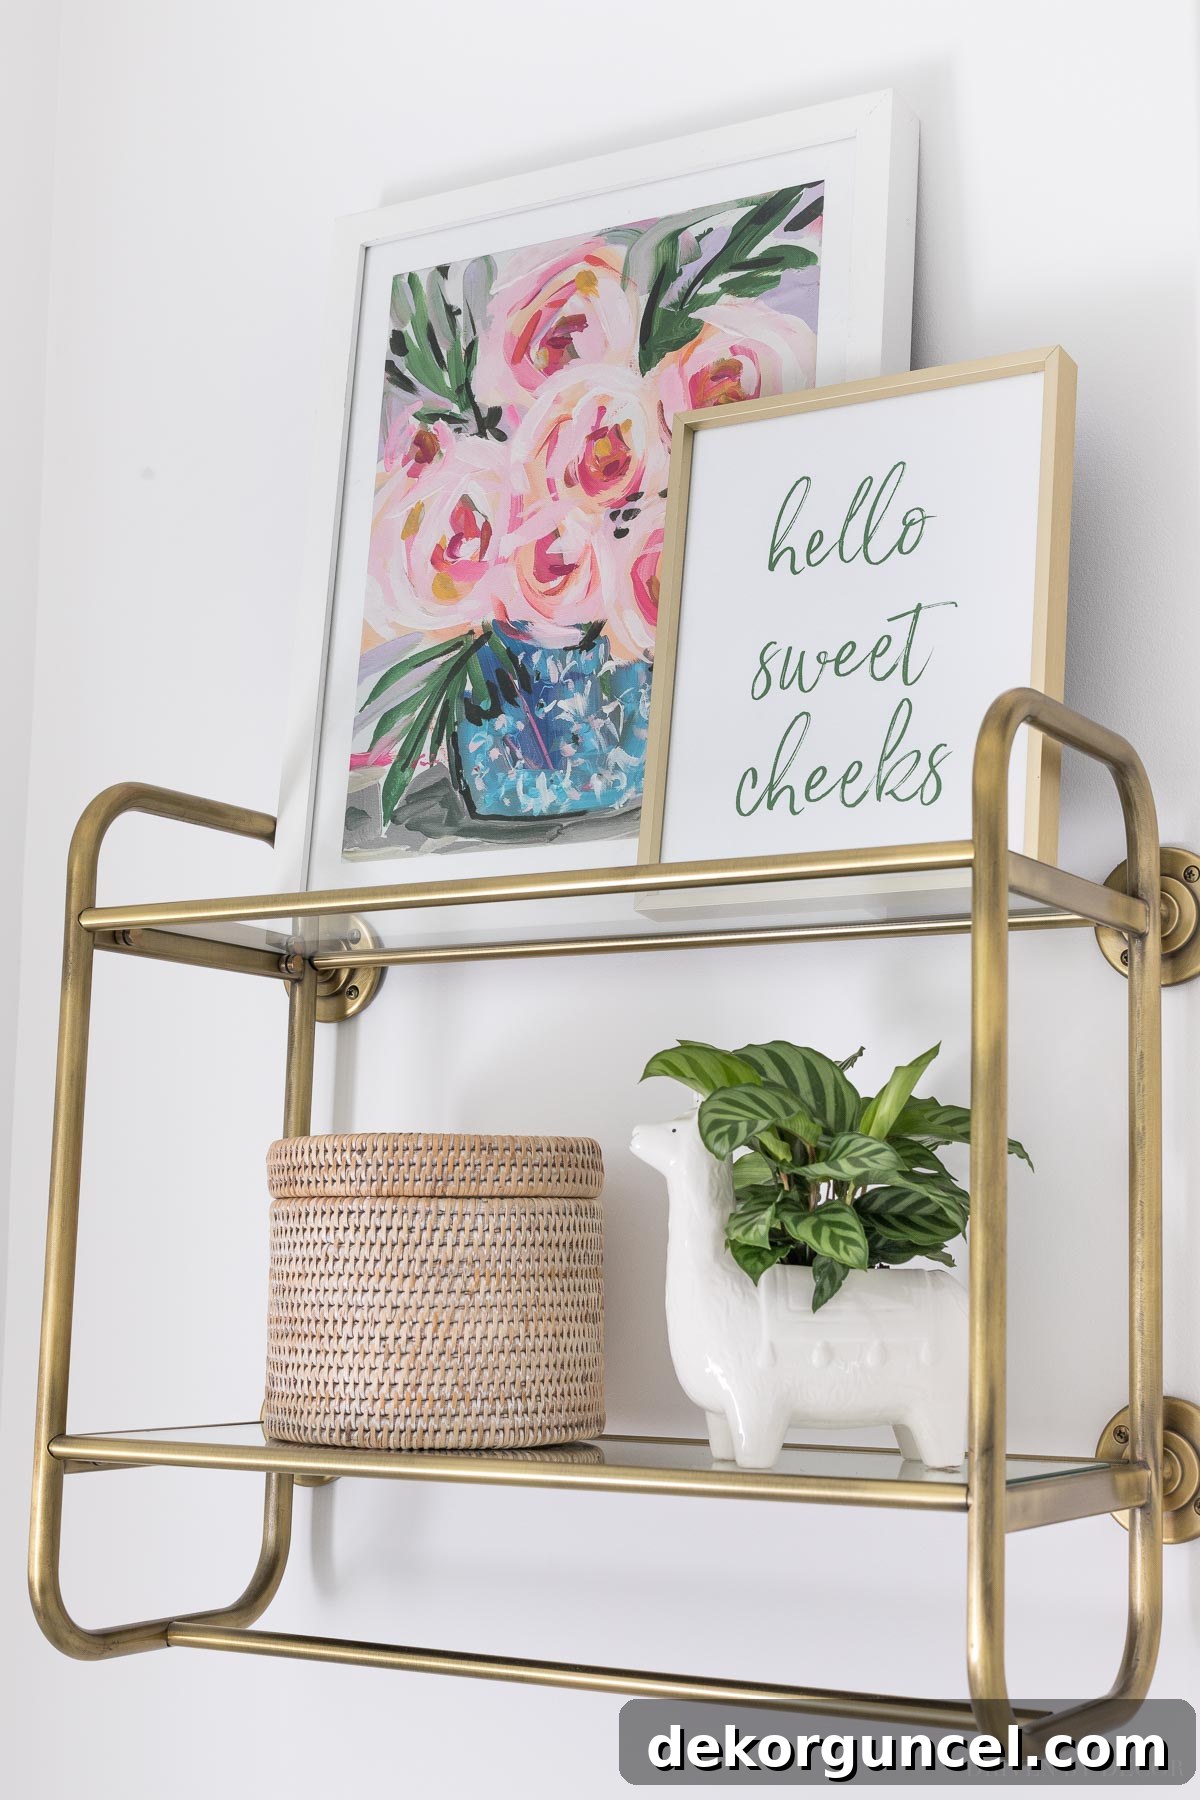
Shelf Sources: Brass wall shelf (similar) | Rose print – 11 x 14 | Hello Sweet Cheeks – printable | Brass frame | Rattan TP holder | Llama planter (similar)
And to add a touch of vibrant charm to our hall bathroom, I selected {this tropical bird art print} from Etsy.
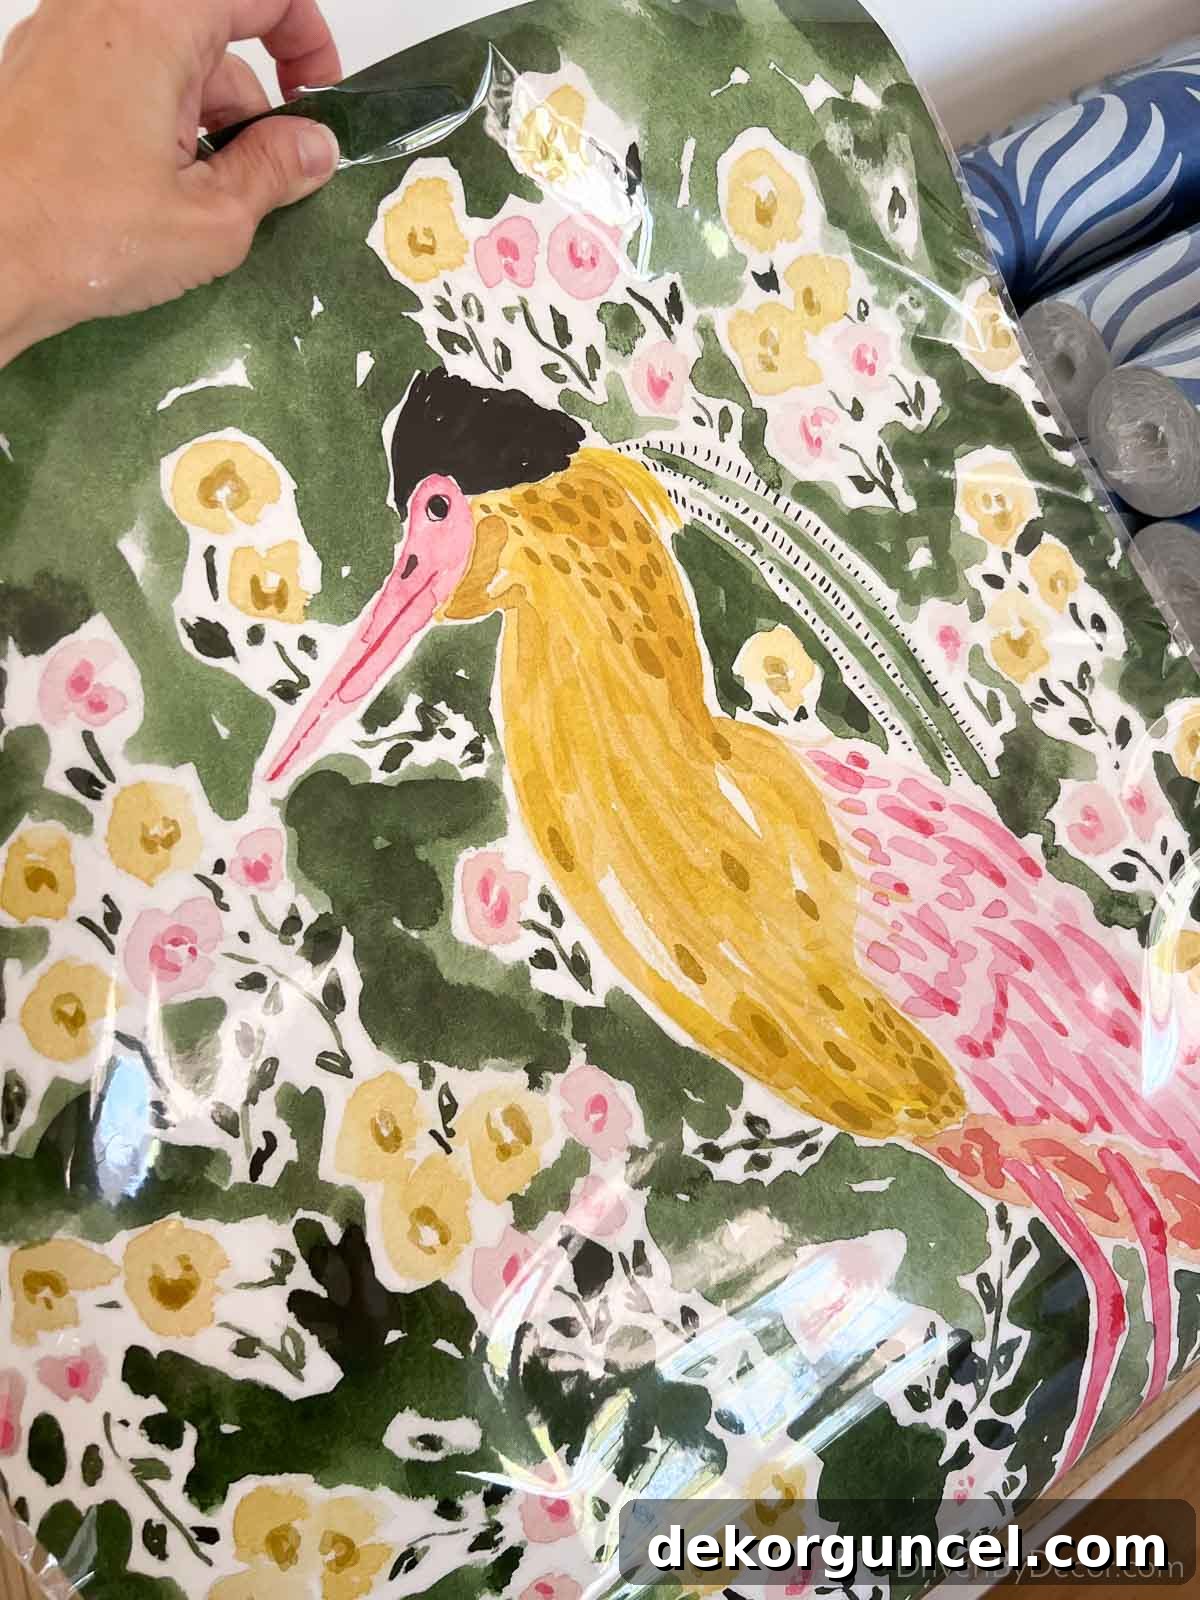
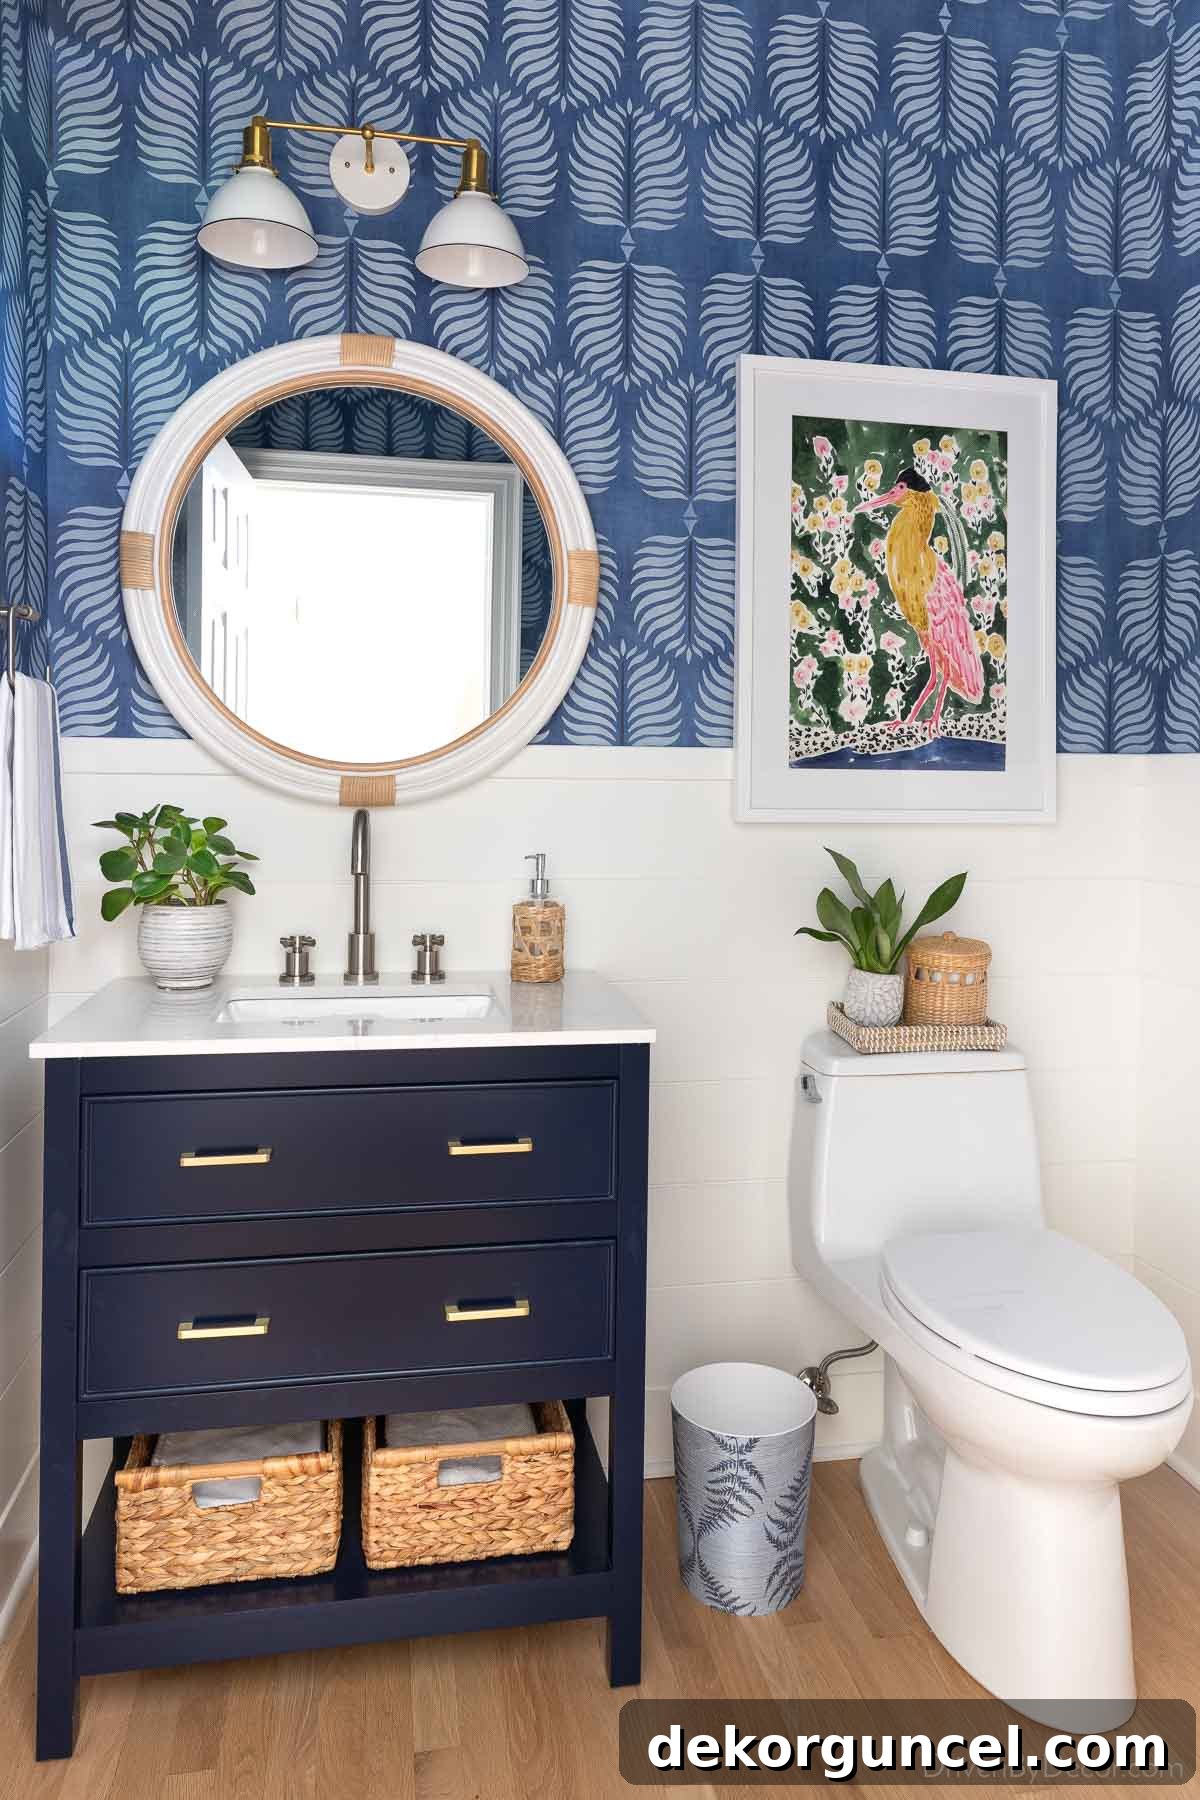
You can find all the other sources and details for our charming powder room remodel in my post dedicated to our powder room shiplap project.
Choosing the Right Hardware: What Hangers Should I Use?
The success of your art display isn’t just about placement; it’s also about secure hanging. The type of hanger you choose depends on several factors: the weight of your picture, the type of wall material (drywall, plaster, or a stud), and the specific hardware already attached to the back of your framed art (e.g., D-rings, picture wire, sawtooth hangers).
- **OOK Picture Hangers:** For most standard-weight pictures, particularly when hanging into drywall or even a stud, {these OOK picture hangers} are my top recommendation. Their slim nails create minimal holes in your wall, a huge advantage if you like to rearrange your decor frequently. Despite their thinness, they provide excellent stability, making them reliable for many applications.
- **Self-Drilling Zinc Anchors:** If your picture has hardware designed to hang on the end of a screw (like a D-ring or keyhole), and you’re hanging it on drywall where no stud is present, {these self-drilling zinc anchors} are an excellent choice. They install easily with just a screwdriver, providing a secure anchor point without needing a pilot hole.
- **Toggle Bolts for Heavy Art:** For extremely heavy pieces of art, the safest and most secure method is always to drill your hanger directly into a wall stud. Use a stud finder to locate these. However, if a stud isn’t available exactly where you need it, **toggle bolts** are your best bet. These heavy-duty anchors expand behind the drywall, offering superior weight support compared to standard anchors.
Always check the weight rating of your chosen hanger and compare it to the weight of your artwork. When in doubt, err on the side of caution and use a stronger hanger. Additional tools like a stud finder, a reliable level, and a pencil for marking will also be invaluable for a precise and professional finish.
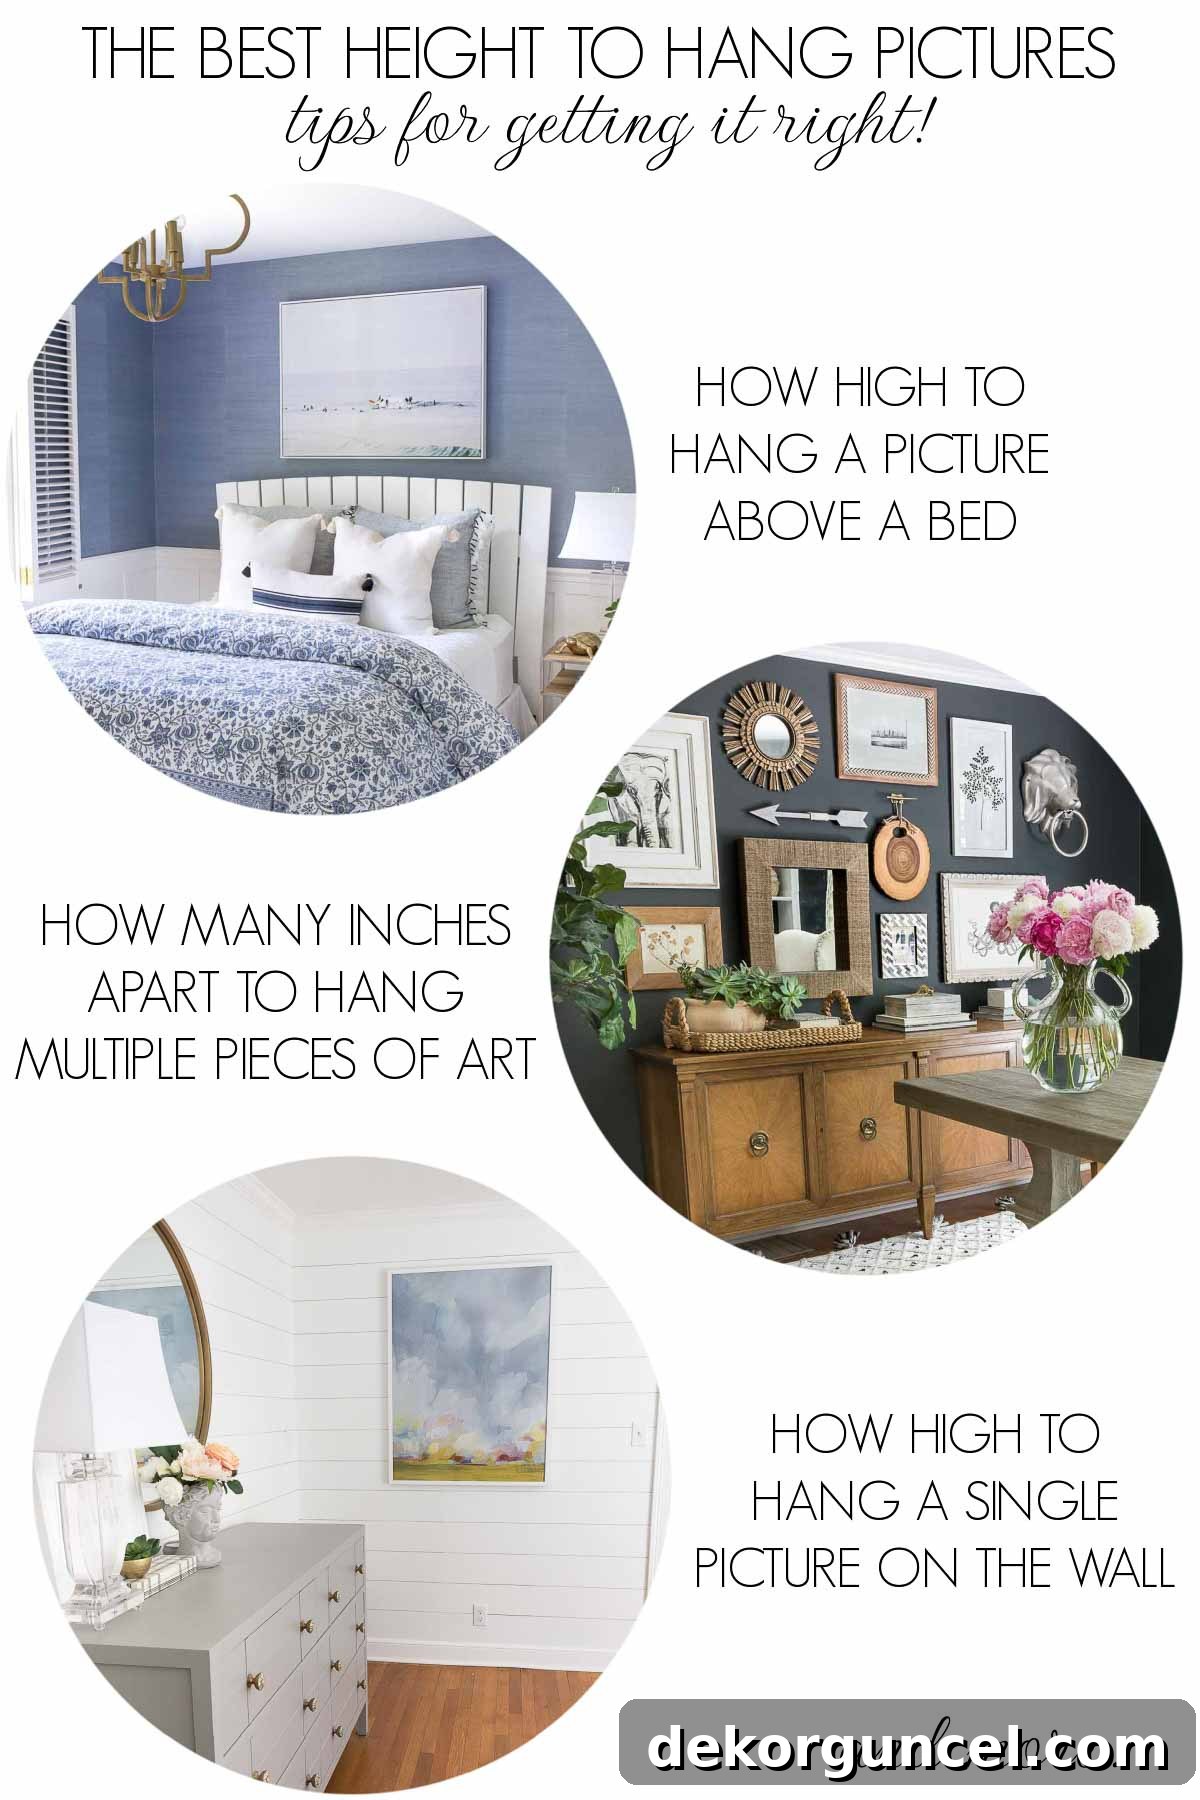
With these comprehensive tips and tricks, you are now equipped to hang artwork like a seasoned interior designer! Say goodbye to crooked frames and uncertain placements, and confidently transform your walls into beautifully curated displays. To keep this valuable information readily accessible for your next home decor project, make sure to Pin the image below:
If you found this post helpful and empowering, you’ll likely appreciate some of our other essential measurement guides, including our detailed post on the ideal pendant light height over your kitchen island and our guide to must-have bathroom measurements for towel bars and toilet paper holders. Happy decorating!
We hope you all have a fantastic and beautifully decorated week!
