
Unlock Your Furniture’s Hidden Potential: A Comprehensive Guide to Refinishing a Table
Transforming a beloved yet worn piece into a stunning centerpiece doesn’t have to be daunting. Follow my detailed step-by-step journey to breathe new life into your cherished furniture, just like I did with my sentimental end table!
Do you own a piece of furniture that holds immense sentimental value but no longer fits your aesthetic or shows signs of wear and tear? Many of us cherish items inherited from family, or furniture that reminds us of significant life milestones. While painting can offer a quick update for flea market finds, preserving the natural wood grain of a truly special piece requires a different approach: professional-level refinishing. This process not only revitalizes the wood but also allows its inherent beauty to shine through, creating a truly unique and meaningful addition to your home decor.
Take, for instance, this dark, round side table. For years, it sat in a dim corner of our living room, its once-elegant mahogany finish fading into obscurity. This table wasn’t just a piece of furniture; it was a memory – one of the first substantial purchases my husband and I made together, marking a step towards building our home. Its rich, reddish hue was once the height of my “mahogany phase” two decades ago. Now, however, my design preferences have evolved significantly, and the dark finish felt dated and heavy. From a distance, it appeared decent, but closer inspection revealed a story of neglect and unfortunate accidents.
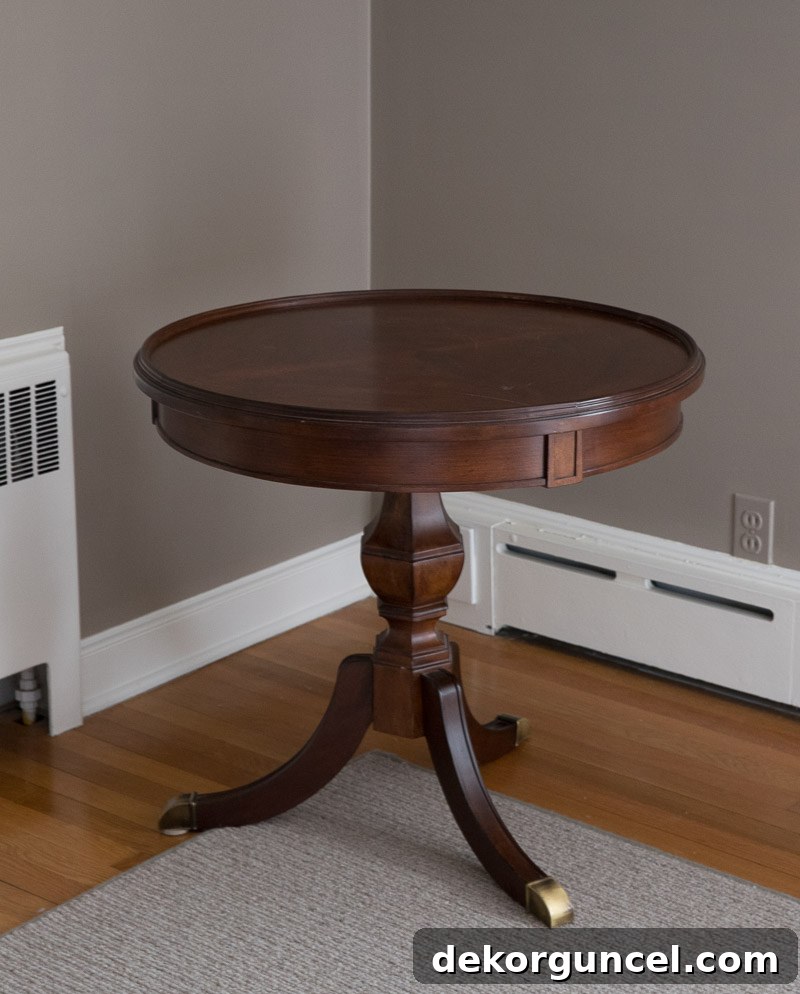
The surface of the table bore numerous scratches, each a testament to a particular moment in time. The most prominent ones were inflicted during a memorable incident years ago when our previous dog, feeling left out of the front yard commotion, decided the table was the perfect perch for window-watching. Her efforts resulted in deep gouges across the tabletop. At the time, I was heartbroken. This wasn’t just another mass-produced item; it symbolized our shared journey. Letting go was never an option. Instead, after a decade of contemplating its fate, I decided it was time to honor its story by giving it a complete refresh. This guide will walk you through the precise steps I took to refinish this table, providing you with the knowledge and confidence to tackle your own furniture restoration project. Get ready to transform your cherished pieces from hidden gems to dazzling focal points!
Preparation is Key: Workspace and Materials for Refinishing Furniture
Before diving into the hands-on process of refinishing, proper preparation is crucial for a successful and safe project. First, choose a well-ventilated area, ideally outdoors or in a garage with open doors and windows. Working with strippers, stains, and finishes can produce strong fumes, so ample air circulation is paramount. Protect your floors and surrounding surfaces with drop cloths or old sheets to prevent damage from spills or dust. Gather all necessary tools and materials beforehand to avoid interruptions during the process. This typically includes essential safety gear (a high-quality respirator, impact-resistant safety glasses, and chemical-resistant gloves), along with cleaning supplies, various sandpaper grits, wood stripper, pre-stain wood conditioner, your chosen wood stain, a durable protective topcoat, a selection of brushes, plenty of clean rags, and a sturdy putty knife. Having everything organized and within reach will streamline your refinishing process and make the entire project much more enjoyable and efficient.
1. Deep Clean the Furniture Surface Thoroughly
The foundational step in any successful refinishing project is a thorough cleaning. Over the years, furniture accumulates layers of dirt, grease, dust, and old polishes, which can hinder the effectiveness of strippers and the proper absorption of new stains. To begin, mix a small amount of mild dish soap (or a TSP substitute for tougher grime) with warm water. Avoid harsh chemical cleaners, as they can potentially damage the wood or react negatively with subsequent refinishing products. Dampen a sponge with this solution, making sure to wring out any excess water to prevent saturating the wood, and gently scrub the entire surface. Pay close attention to any intricate carvings, crevices, or areas where grime might be caked on. After scrubbing, wipe the table down with a clean sponge dipped in fresh water to remove all soap residue. Finally, dry the surface completely and meticulously with a clean microfiber cloth. Ensure the wood is absolutely dry before moving on to the next step, as any lingering moisture can cause issues with stain absorption or finish adhesion.
2. Sand Out Scratches and Begin Removing the Old Finish
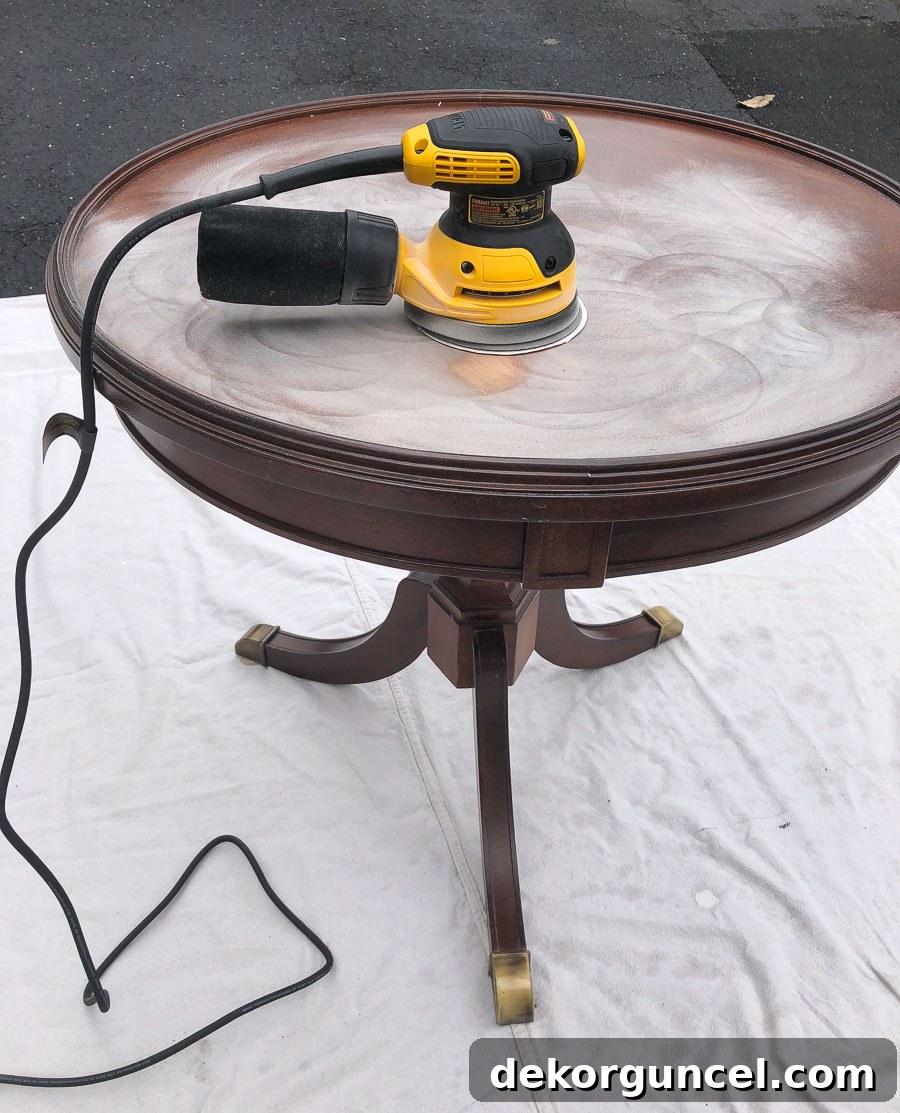
This critical step addresses any existing scratches, dents, or unevenness in the wood, while also beginning the process of removing the old finish. If your furniture piece is in pristine condition with no surface damage, you might consider skipping directly to chemical stripping for the bulk of the finish removal (Step 3). However, for pieces with significant imperfections like my table, sanding is indispensable. Always wear a respirator and safety glasses during this stage to protect yourself from airborne dust particles. For flat surfaces, an orbital sander is a game-changer, significantly speeding up the process and ensuring an even finish. I used this orbital sander on my table, starting with a coarser 150-grit sandpaper. This grit is ideal for efficiently removing deep scratches, minor dents, and the initial layer of the old finish.
It’s vital to exercise caution, especially when working with wood veneer furniture, which has a thin, decorative layer of real wood glued over a substrate like particle board or MDF. Unlike solid wood, veneer can be easily sanded through if you apply too much pressure or sand excessively in one spot. Always sand evenly and consistently, moving the sander with the grain of the wood. Once the scratches are visibly reduced and you start to see the lighter, raw wood beneath, switch to a finer 220-grit sandpaper. This finer grit smooths out any sanding marks left by the coarser paper, creating a uniformly smooth surface that is perfectly prepared for an even stain application. For intricate areas, curved surfaces, or delicate antique pieces, hand-sanding with a sanding block or flexible sanding sponges might be a safer and more controlled option. If you suspect your furniture might have lead-based paint (common in pieces made before 1978), consult a professional or take extreme precautions, including proper lead testing kits and containment methods, before any sanding begins.
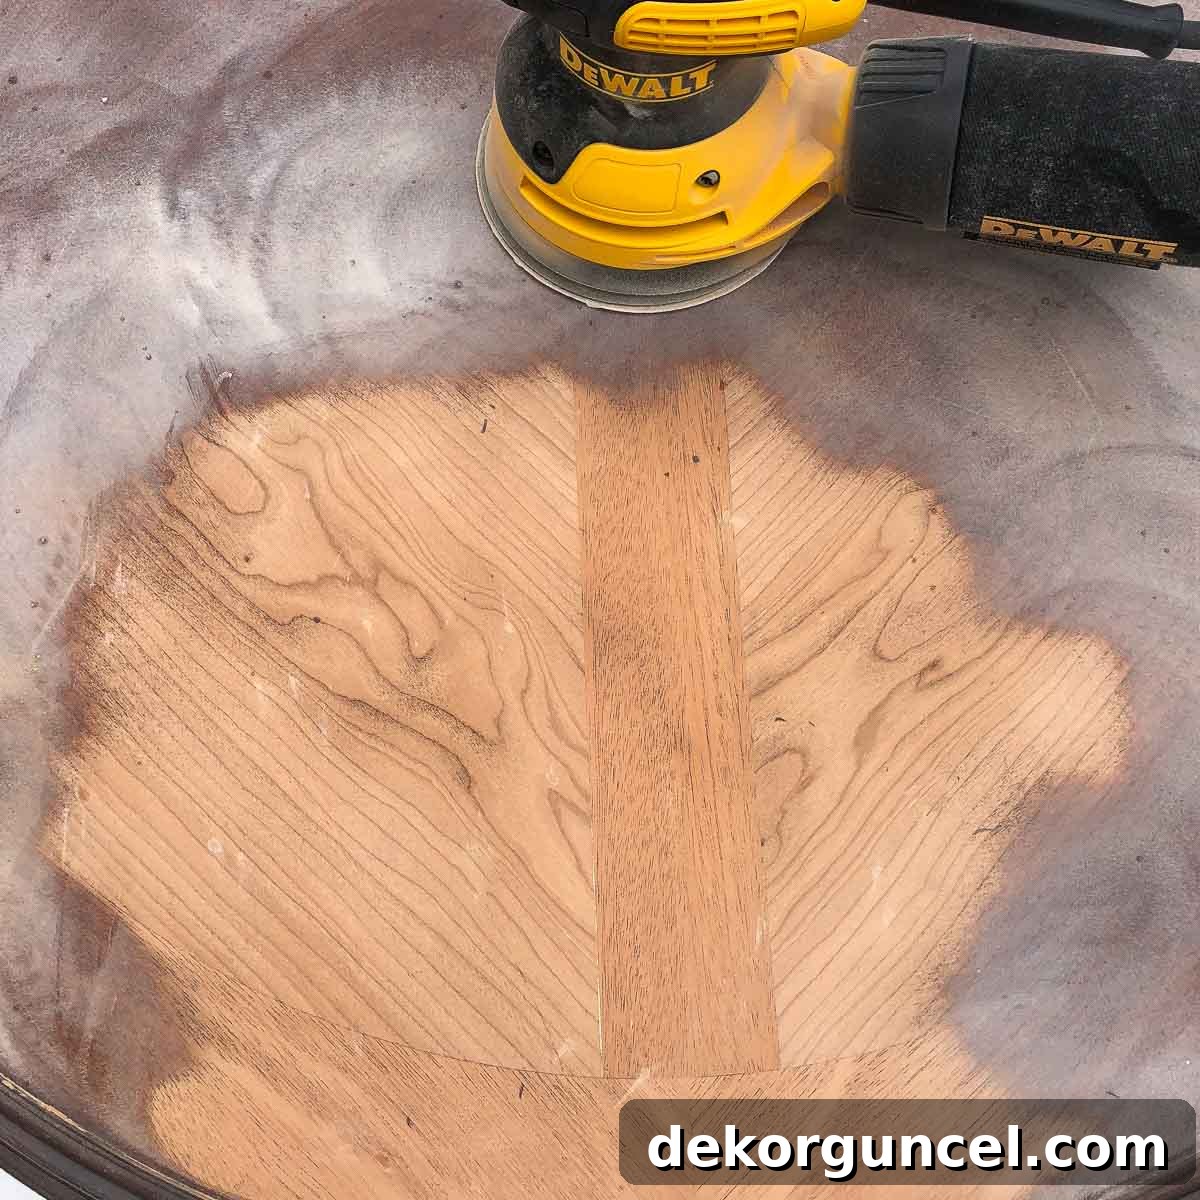
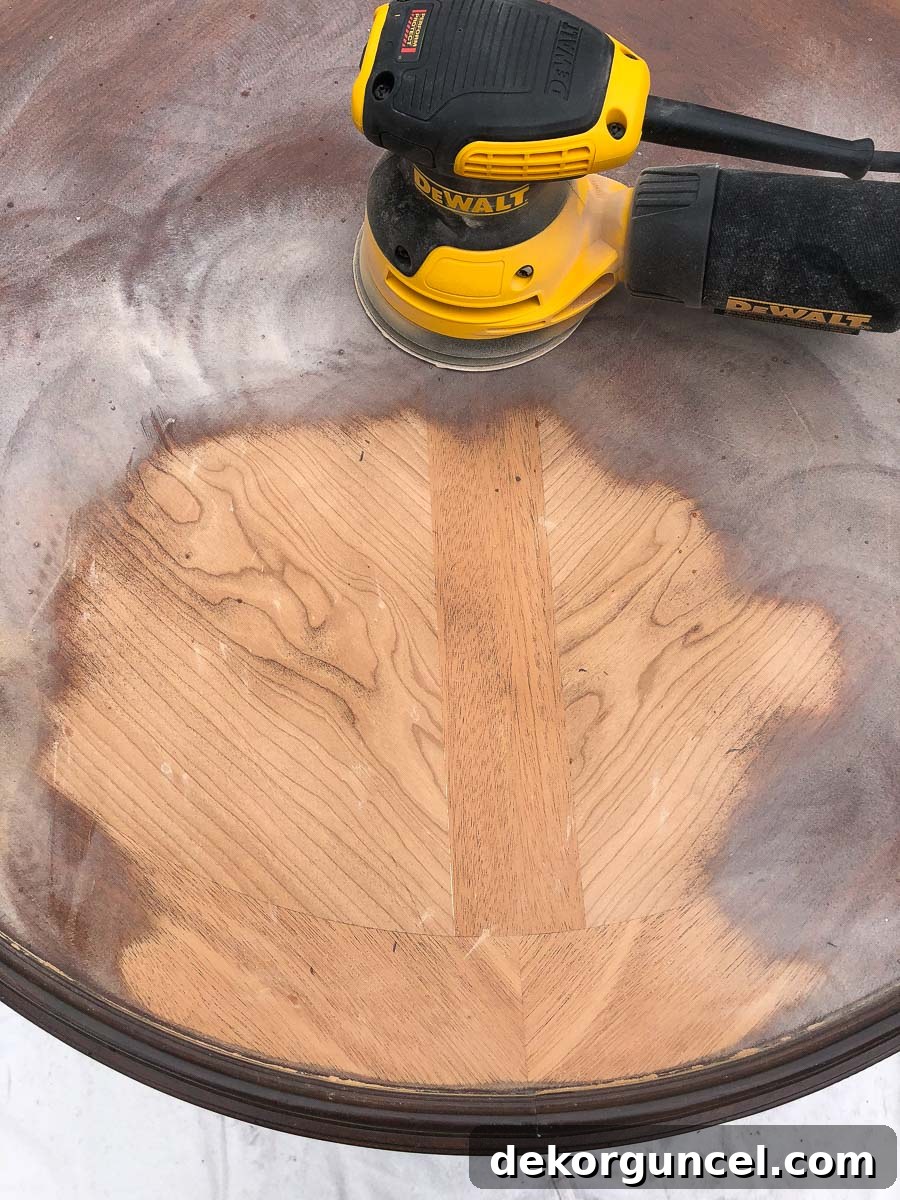
The transformation during this sanding phase can be incredibly rewarding. About halfway through sanding the tabletop, a stunning, intricate grain pattern began to emerge, hidden beneath decades of dark mahogany stain. It was a beautiful surprise, underscoring the potential locked within this old piece. This hidden beauty often makes the meticulous effort of furniture refinishing worthwhile, as you uncover the original craftsmanship and natural elegance of the wood. The goal here is not just to remove the old finish, but to create a flawless, uniform surface that will allow your new stain and protective coats to adhere beautifully and evenly, ensuring a professional-quality final result.
3. Apply Wood Stripper for Complete Finish Removal
While sanding addresses scratches and surface imperfections, chemical wood stripper is often the most effective method for completely removing stubborn old paint, varnish, or stain, especially from intricate details, curved sections, or areas not easily reached by a power sander. I highly recommend using a gel wood stripper, such as this one, as its thicker, non-drip consistency allows it to cling effectively to vertical surfaces and complex carvings without running. Before you begin, always refer to the manufacturer’s specific safety instructions on the product label. This typically includes wearing robust chemical-resistant gloves, safety glasses, and working in a thoroughly well-ventilated area to protect against strong fumes. Applying a stripper is straightforward: brush a generous, even layer over the surface, ensuring complete coverage of the old finish. Allow the stripper to sit for the recommended dwell time, usually between 10-25 minutes, depending on the product and the thickness of the old finish. It’s crucial not to let the stripper dry out completely, as it becomes significantly harder to remove if it does. Keep a close eye on the finish; you’ll often see it bubbling, blistering, or softening, indicating it’s ready for removal.
Once the finish has softened sufficiently, use a plastic putty knife or a scraper to gently remove the stripper and the loosened finish. Always scrape with the grain of the wood to avoid damaging the underlying surface. For detailed areas, such as turned legs or carved elements, use an old toothbrush, a stiff nylon brush, or fine steel wool to meticulously work the stripper into crevices and lift the dissolved finish. You might find that some areas, especially those with multiple layers of old finish, require multiple applications of stripper to achieve a completely bare wood surface. After removing the bulk of the stripper and softened finish, wipe down the entire piece thoroughly with paper towels or old rags. It’s important to dispose of these used rags and stripper residue properly, as they can be flammable. Consult your local waste disposal guidelines for safe and environmentally responsible disposal methods.
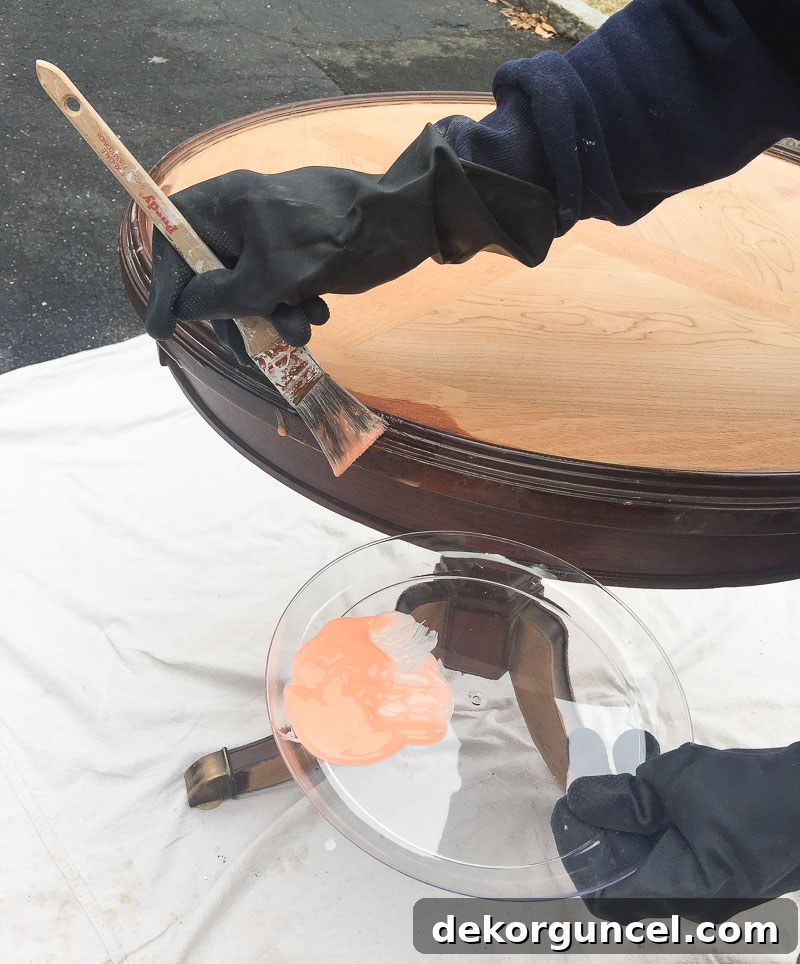
After the chemical stripping is complete, it’s essential to neutralize the surface and remove any lingering stripper residue. Saturate a clean rag with mineral spirits and meticulously wipe down the entire table. Mineral spirits will help dissolve and remove any remaining chemicals, oily residues, and provide a final clean surface ready for sanding. Once the mineral spirits have evaporated and the wood is dry, inspect the wood carefully. Any areas that still show remnants of the old finish or feel rough can be addressed with fine 220-grit sandpaper or very fine steel wool. For highly detailed sections, flexible sanding sponges, like these, are incredibly effective for contouring to curves and intricate designs without flattening details. The goal at this stage is a perfectly clean, smooth, and bare wood surface, ready to absorb your chosen stain evenly and beautifully. Achieving this blank canvas is truly one of the most exciting stages of refinishing a table, as the potential for a stunning transformation becomes clear.
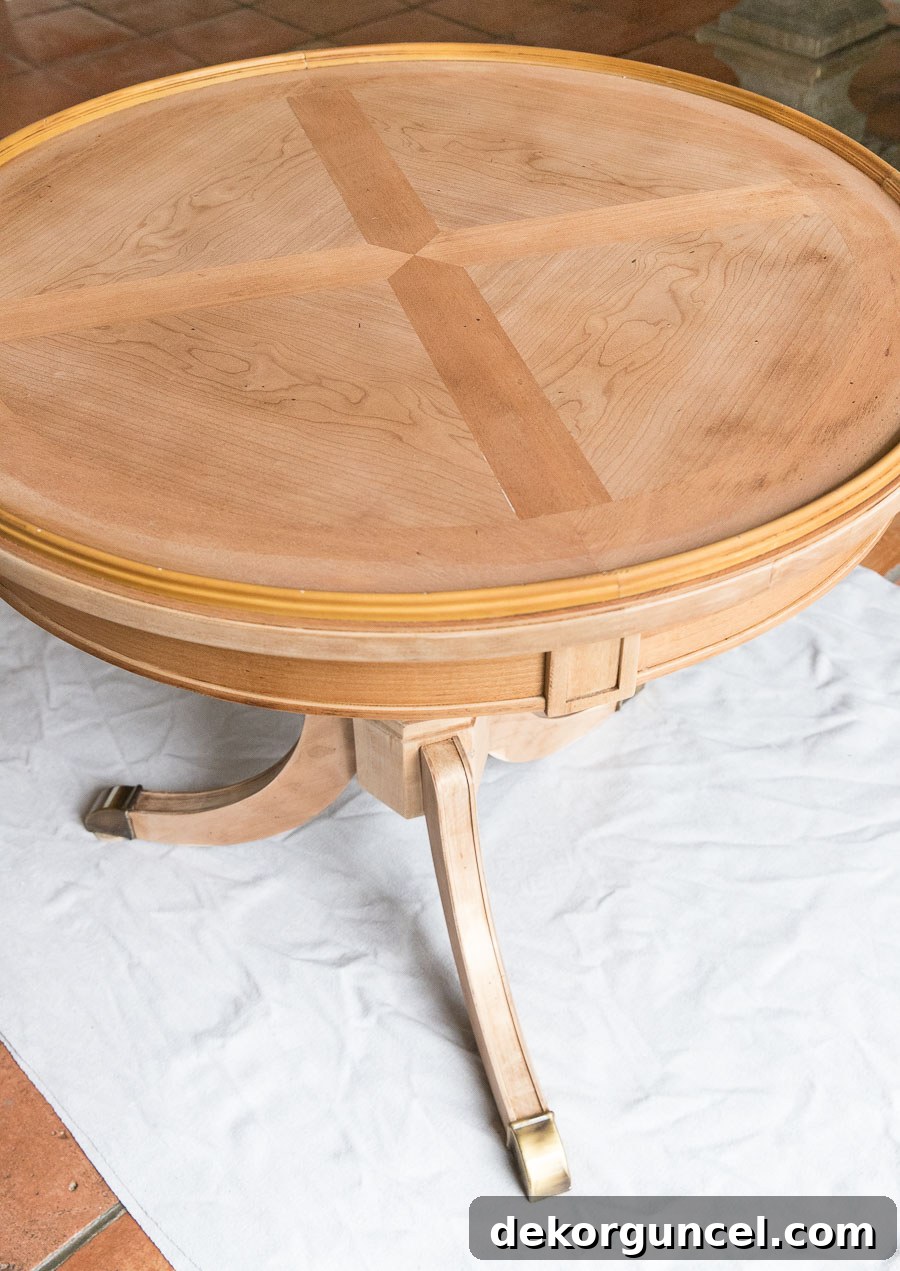
4. Apply a Pre-Stain Wood Conditioner for Even Absorption
Before any stain touches the wood, applying a pre-stain wood conditioner is an absolute must, especially on softer woods (like pine, maple, or birch) or woods with varied grain patterns that are prone to blotching. This crucial step prevents streaking and uneven absorption by helping the wood absorb the stain more uniformly. Different types of wood have varying porosities, which, if not conditioned, can lead to a patchy final look with darker and lighter areas. A conditioner pre-seals the wood, allowing the stain to penetrate more consistently and ensuring a professional, even finish. First, use a tack cloth to meticulously wipe down the entire surface, removing every last speck of sanding dust or debris that might interfere with stain absorption. Dust particles, even tiny ones, can cause imperfections in your final finish, so this step should not be skipped.
Once the table is completely dust-free, apply your chosen pre-stain conditioner. It’s essential to match the conditioner to your stain type: always use an oil-based conditioner for oil-based stains and a water-based conditioner for water-based stains. For my project, preparing the wood for an oil-based stain, I used this Minwax conditioner. If you’re working with a water-based stain, then this Minwax conditioner would be the appropriate choice. Apply the conditioner generously with a clean cloth or a foam brush, always following the grain of the wood. Allow it to penetrate for about 5-15 minutes, as per the specific product instructions. Do not let it dry completely. After the recommended time, use a clean, dry rag to wipe off any excess conditioner. This ensures the wood is properly prepared without leaving a thick layer that could impede stain absorption. Your table is now primed and ready for a beautiful, even stain application, setting the stage for a flawless transformation.
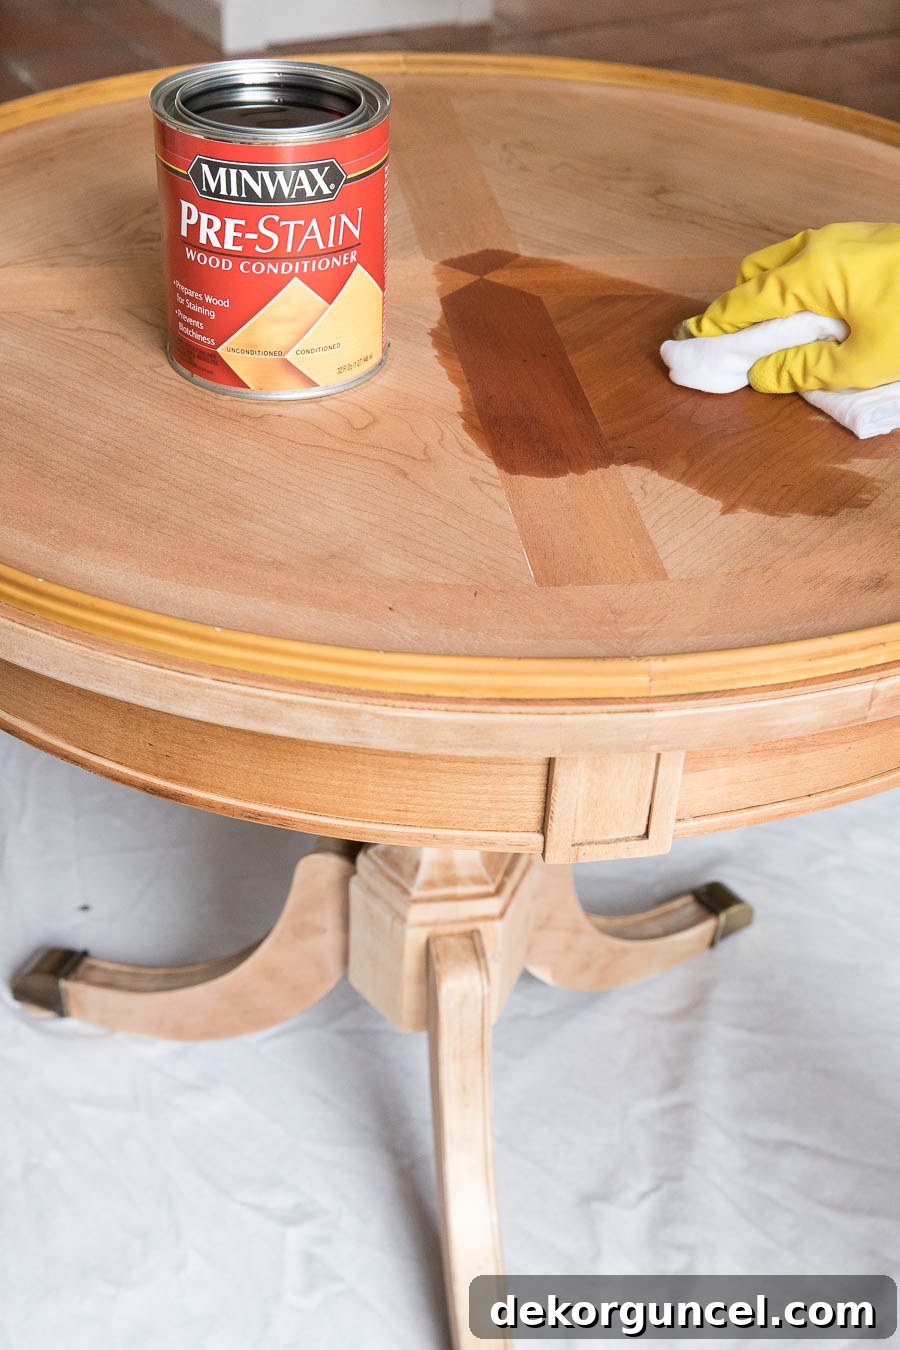
5. Choose and Apply the Perfect Wood Stain
This is where the true character of your refinished table begins to emerge – the staining process! Selecting the right stain color is crucial and can significantly impact the final look. Remember that stain appearance varies based on several key factors: (1) the inherent wood species (different woods have different undertones and grain patterns that react uniquely with stain pigments), (2) the amount of time the stain is allowed to penetrate before wiping off the excess, and (3) the number of coats applied. Always test your chosen stain on an inconspicuous area of your furniture, such as the underside or a hidden leg, or even better, on a scrap piece of the same wood if available. This crucial step allows you to see precisely how the stain interacts with your specific wood and helps you determine the ideal dwell time for your desired depth of color.
For my table, I experimented with several stains and even mixed a few oil-based varieties (remember, always mix oil with oil, and water with water to ensure compatibility). After thorough testing, I fell in love with Minwax’s Classic Gray Wood Finish. Its subtle, modern gray tones beautifully complemented the newly revealed wood grain, achieving the fresh, sophisticated look I envisioned for my updated space. The timing of stain application after conditioning is also important; ideally, apply the stain within two hours of conditioning, but I’ve personally found that applying it about 15-30 minutes after the conditioner (before it fully dries) yields the best and most consistent results. Using a clean, lint-free cloth or a foam applicator, apply the stain evenly, always working in the direction of the wood grain. For a light, “whitewash” or “graywash” effect, as I desired, let the stain sit for only about five minutes before wiping off the excess with another clean cloth. If you prefer a deeper, richer, and more opaque color, you can allow the stain to penetrate for up to 15 minutes before wiping.
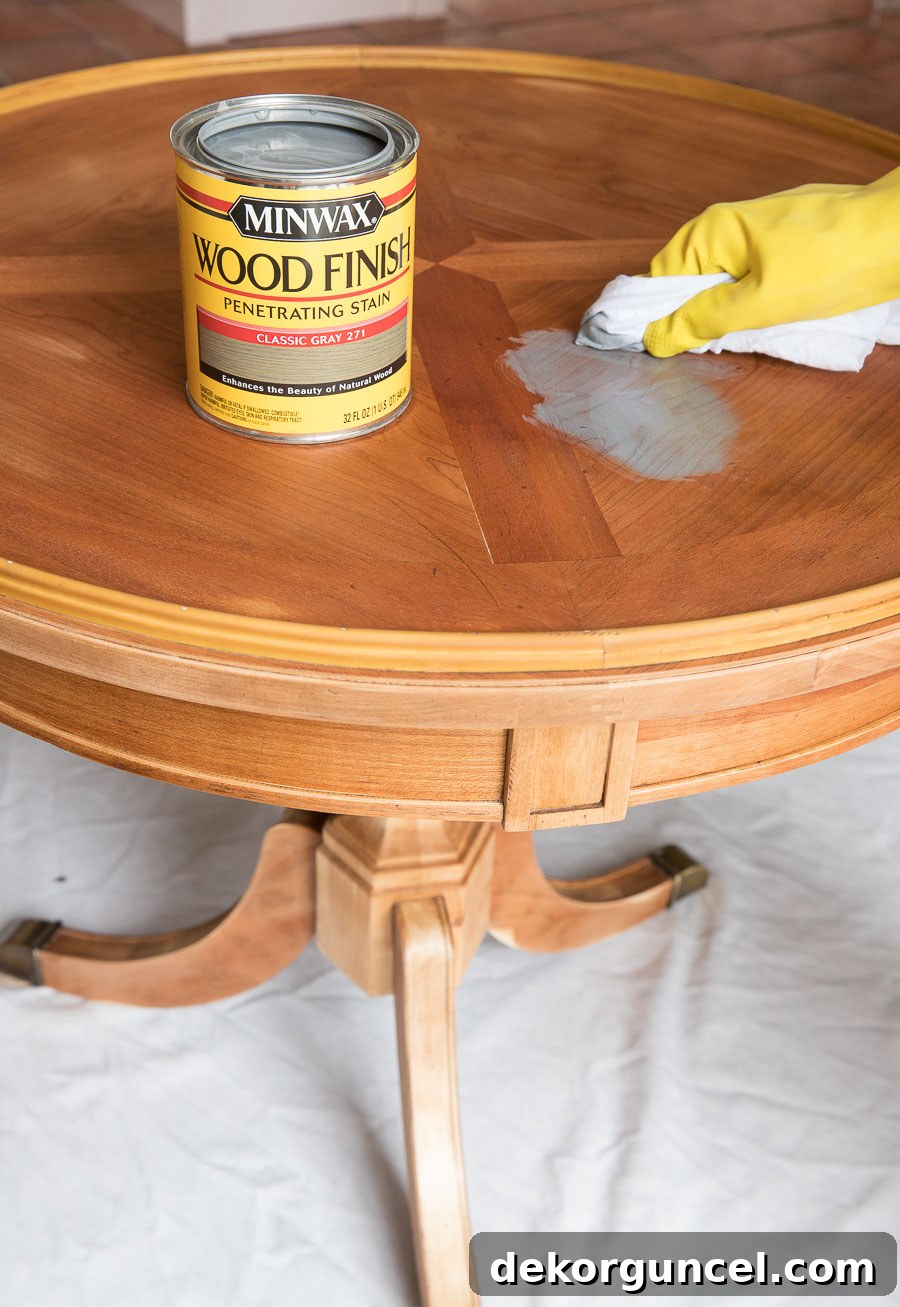
Given my preference for a lighter, muted gray, I worked in manageable sections, allowing the stain to sit for only a few minutes on each area before wiping. The immediate results on the tabletop were exhilarating – it was precisely the soft, contemporary finish I had been hoping for! The transformation from dark, heavy mahogany to this elegant gray was remarkable, perfectly highlighting the natural wood texture. I continued applying the stain to the remaining parts of the table, maintaining the same technique for consistency. For my desired depth of color and translucent effect, a single coat was sufficient. However, if you wish for a darker, more intense, or more opaque finish, you can apply a second coat 4-6 hours after the first, ensuring adequate drying time between applications. Always ensure you achieve your desired color and saturation before moving to the next step, as applying a topcoat will seal in the stain and prevent further color adjustments, making it a permanent choice.
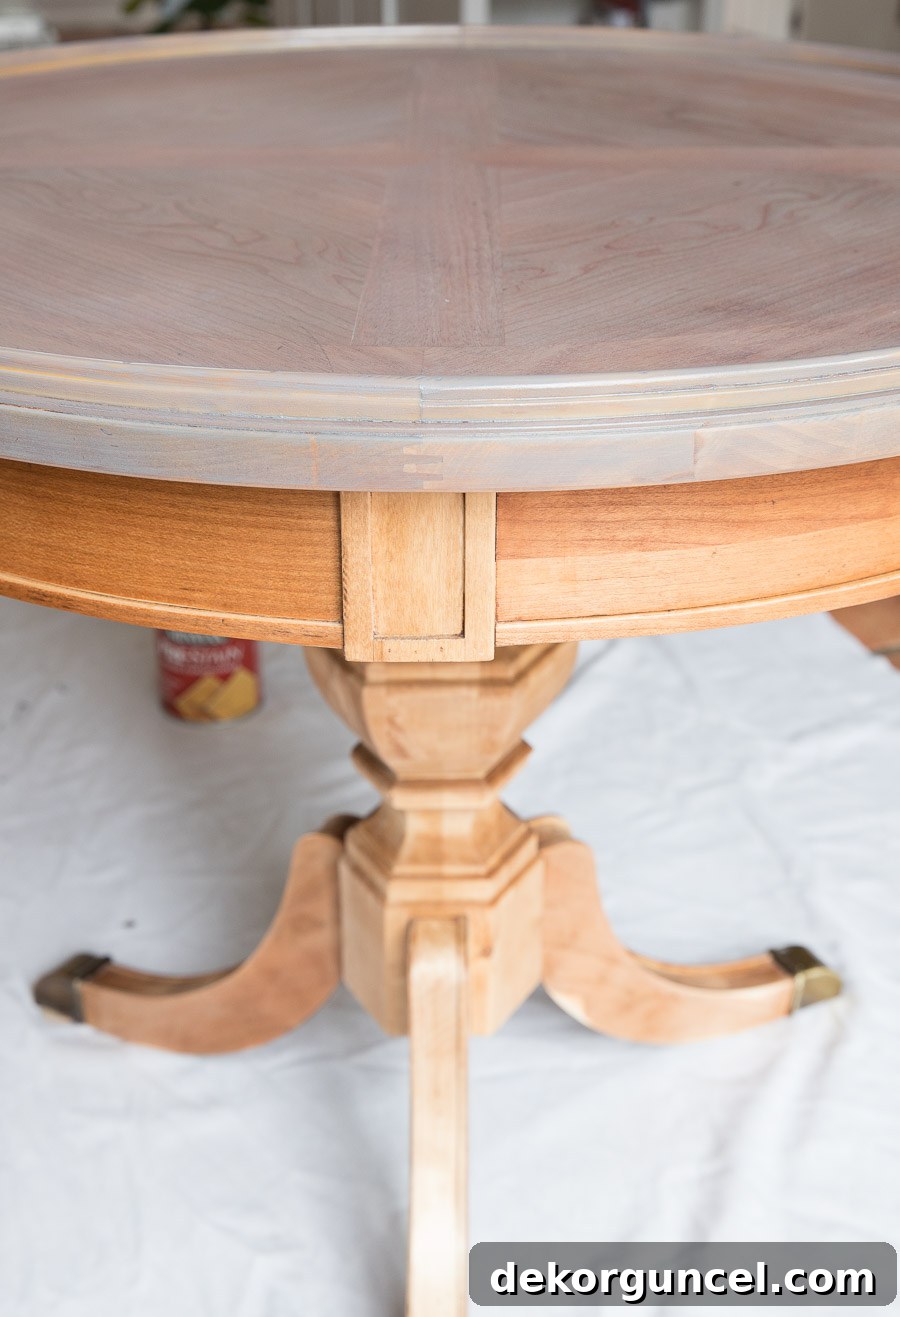
6. Apply a Durable Protective Finish
The final and arguably most crucial step in refinishing your table is applying a protective topcoat. This layer is essential for safeguarding your beautiful new finish against the rigors of daily use, including spills, scratches, and general wear and tear, thereby ensuring its longevity. Choosing the right topcoat depends on your desired aesthetic and the intended functionality of the piece. Options range from waxes and oils for a natural, low-sheen look, to polyurethanes and polycrylics for superior durability and water resistance. While I initially considered a natural finishing wax to embrace the raw wood aesthetic, the practical need for robust water resistance (for holding a vase or drinks, for example) led me to opt for Minwax’s Polycrylic Protective Finish. This water-based finish is a personal favorite, especially over light-colored stains, because it steadfastly resists the yellowing that can occur with oil-based polyurethanes over time. Its fast-drying nature also significantly reduces project completion time, allowing you to enjoy your newly refinished piece sooner.
Applying Polycrylic is straightforward and yields excellent results if done carefully. I used a high-quality nylon paint brush for a smooth, even application, always working in thin coats with the grain of the wood. Avoid applying the topcoat too thickly, as this can lead to unsightly drips, brush marks, or an uneven, cloudy finish. After allowing the first coat to dry for approximately two hours (or as per product instructions, which may vary by climate), I performed a very light sanding with ultra-fine 320-grit sandpaper. This crucial step creates a microscopically smooth surface for subsequent coats, eliminates any minor imperfections, and helps with intercoat adhesion. After sanding, use a tack cloth to meticulously remove all sanding dust before applying the second coat. Depending on the expected use and traffic of your table, you might choose to apply a third coat for maximum durability and protection. Ensure each coat is fully dry before re-coating to achieve the best results. Proper curing time (which can be several days to weeks, even if dry to the touch) is essential for the finish to reach its full hardness and protective capabilities. During this period, handle the piece with care and avoid placing heavy or hot objects on it.
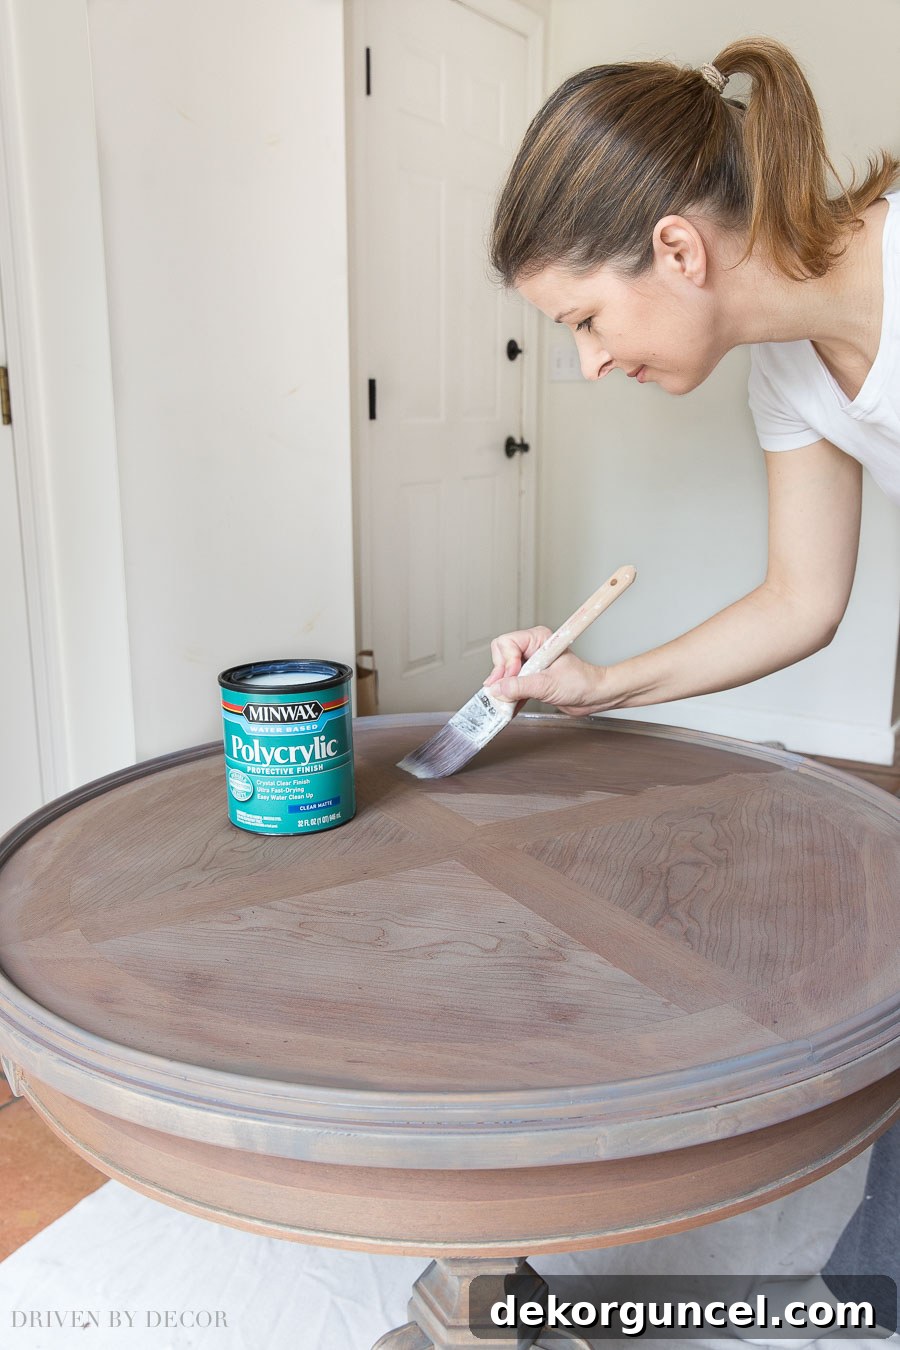
For this project, I specifically opted for the Matte finish of Polycrylic, a choice I had not extensively explored before, but one that proved absolutely perfect for the look I was aiming for. I’m generally not a fan of high-gloss or shiny finishes, and the Matte Polycrylic delivered exactly what I wanted: virtually no sheen or reflection, allowing the subtle elegance of the gray stain and the natural beauty of the wood grain to be the undisputed stars. The result is a beautifully restored table that feels incredibly natural, sophisticated, and updated. Seeing this once-neglected, dark piece transformed into a gorgeous, functional work of art brings immense satisfaction. It’s a powerful testament to the value of thoughtful furniture restoration and the immense joy that can be found in a well-executed DIY project, enhancing both your home and your sense of accomplishment.
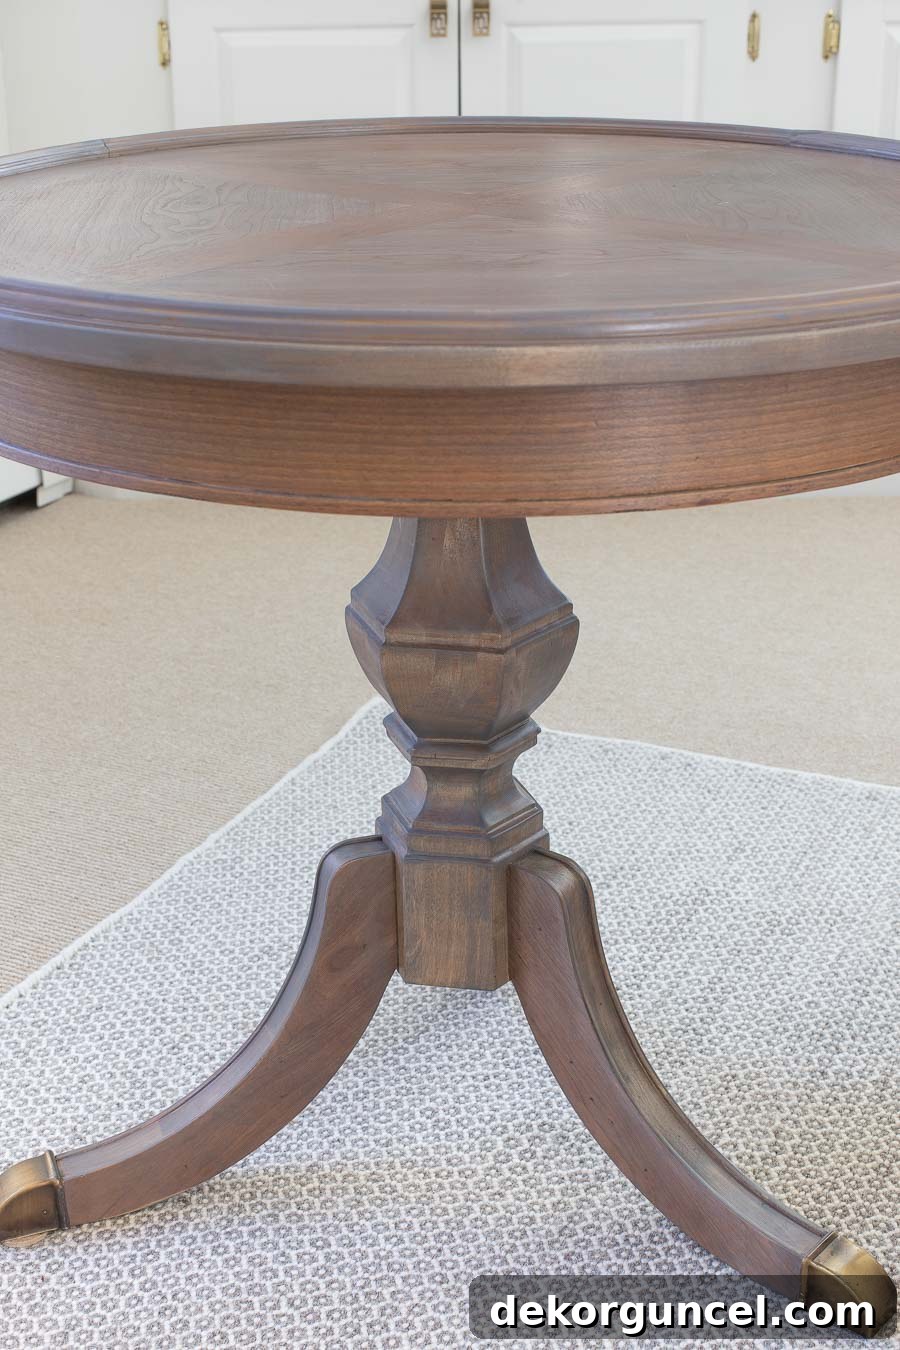
7. Display Your Beautiful, Newly Refinished Piece!
The journey from a worn-out, dark corner fixture to a bright, elegant statement piece has been incredibly rewarding. This side table, once destined to blend into the shadows, now commands attention with its fresh, contemporary finish and revitalized character. While its original home was indeed that living room corner, its new lease on life has inspired me to rethink its placement. Currently, as I work on a larger living room painting project, I’m allowing it to shine in our family room, where its subtle gray tones beautifully complement the existing decor and bring a fresh focal point to the space. It’s truly heartwarming to see a piece with such personal history not just saved but elevated, its story continuing in a new, more vibrant chapter within our home. This restoration project stands as a powerful reminder that with a little effort, the right tools, and a clear step-by-step guide, any beloved piece of furniture can be transformed and enjoyed for many more years to come, becoming a cherished heirloom for future generations.
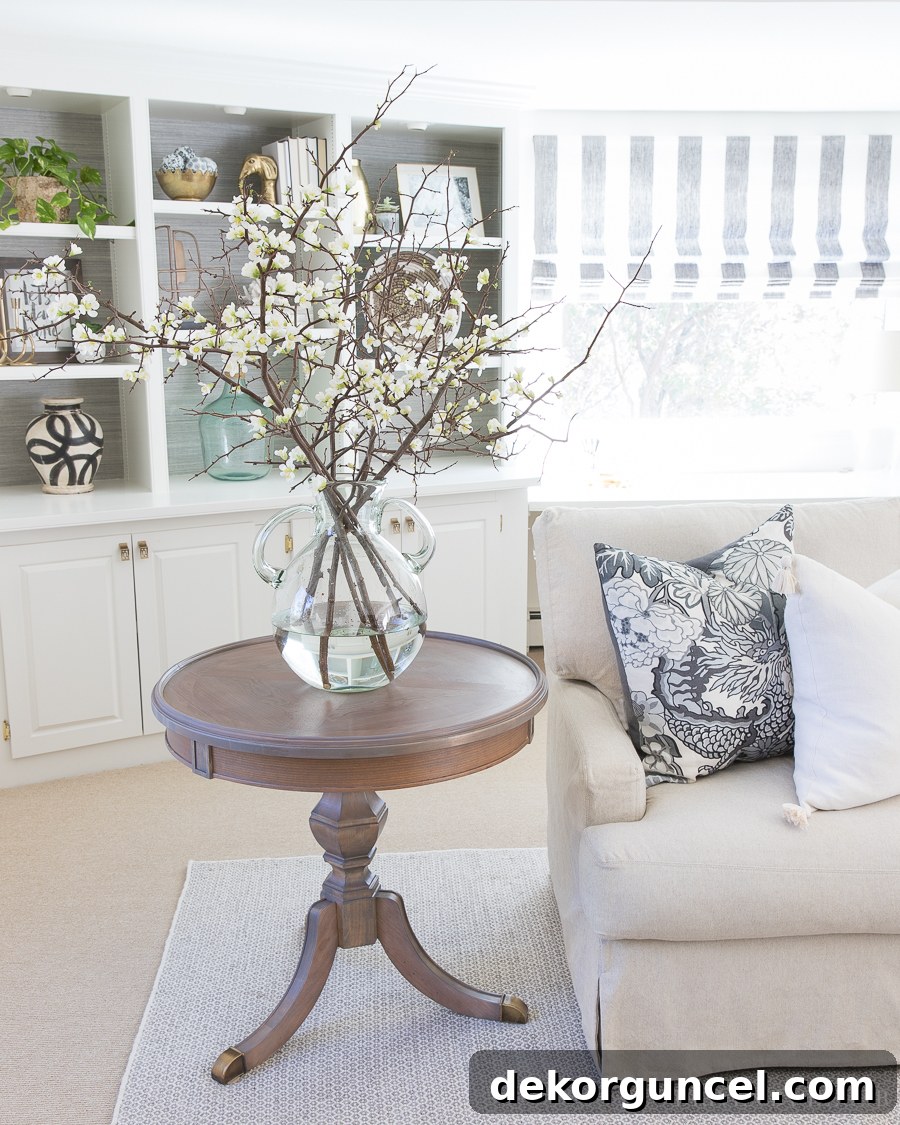

Room Sources: Slipcovered Sectional | Acrylic Coffee Table (similar) | Chandelier (satin bronze) | Honeycomb Ivory/Grey Wool Rug | Large Glass Jug Vase – HomeGoods
I genuinely hope this detailed guide has equipped you with the comprehensive information and confidence needed to embark on your own furniture refinishing adventure. There’s immense satisfaction in bringing a worn piece back to life, especially one that holds deep personal meaning and history within your family. If, however, you’re considering a different approach for your furniture piece, perhaps painting it instead of refinishing, many of the initial preparation steps (like cleaning and light sanding) remain the same. Feel free to explore my guide on our painted bathroom vanity for additional insights into a successful furniture painting project.
For more home decor inspiration, in-depth DIY tips, and behind-the-scenes glimpses into my latest projects, be sure to follow me on Instagram and Instagram Stories. I look forward to connecting with you there and welcoming you back to the blog soon for more exciting home transformations and creative ideas!
