
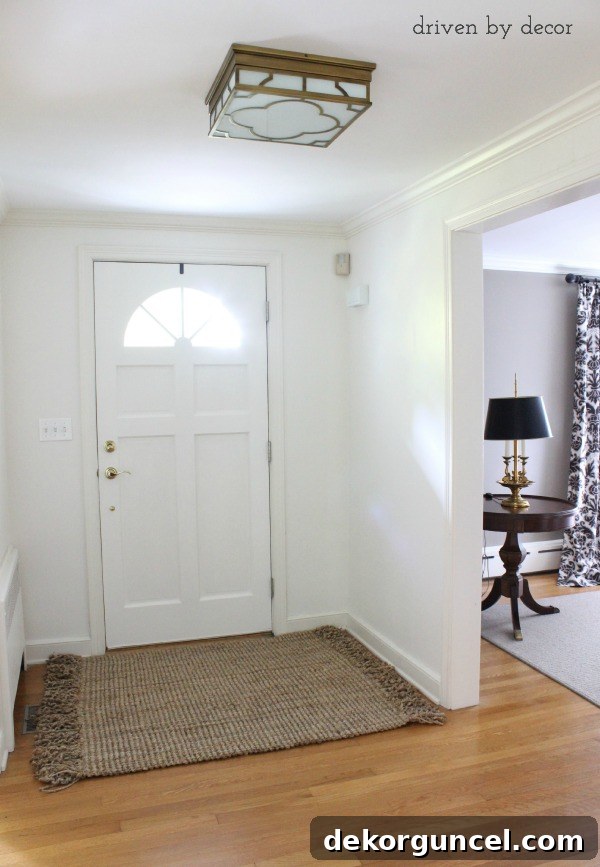
DIY Jute Rug Resizing: Achieving the Perfect Fit for Your Entryway
Finding the ideal rug for a specific space, especially a unique or oddly sized entryway, can often feel like an endless quest. We’ve all been there – moving rugs around, trying different styles, and consistently coming up short on achieving that perfect fit. Recently, our house underwent a little “rug musical chairs,” as I affectionately call it, in the quest for the ultimate entryway rug. My initial solution, a beautiful new West Elm geometric rug, seemed promising at first, offering a fresh, modern touch. However, after its placement by the front door, it quickly became apparent that it wasn’t the right fit for that particular spot. (I’ll dive into the specifics of why it didn’t work in a moment.) This experience, familiar to many homeowners, led me down a path often dreaded: considering custom-sized rugs.
Our entryway called for a precise 4′ x 5′ dimension, a measurement that falls outside standard rug sizes, making the search even more challenging. I was ready to bite the bullet and explore bespoke options, anticipating a significant investment. Unfortunately, visits to several local carpet and rug stores revealed a harsh reality: custom-cut and bound rugs that wouldn’t “break the bank” were, frankly, quite unappealing aesthetically. The designs were limited, and the quality often didn’t match the inflated price point for a made-to-measure piece. Faced with this dilemma, a creative solution sparked – why not take what I already had and transform it?
I owned a versatile, chunky 4 x 6 jute rug, a piece I genuinely loved for its texture and natural appeal. I realized its potential for a DIY makeover. Instead of settling for an expensive, custom option that compromised on style, or continuing the frustrating search for a ready-made rug that didn’t exist, I decided to tailor my existing rug to the exact dimensions my entryway demanded. The result? A perfectly sized, charming custom jute rug that now feels right at home, effortlessly anchoring the space and enhancing our home’s first impression.
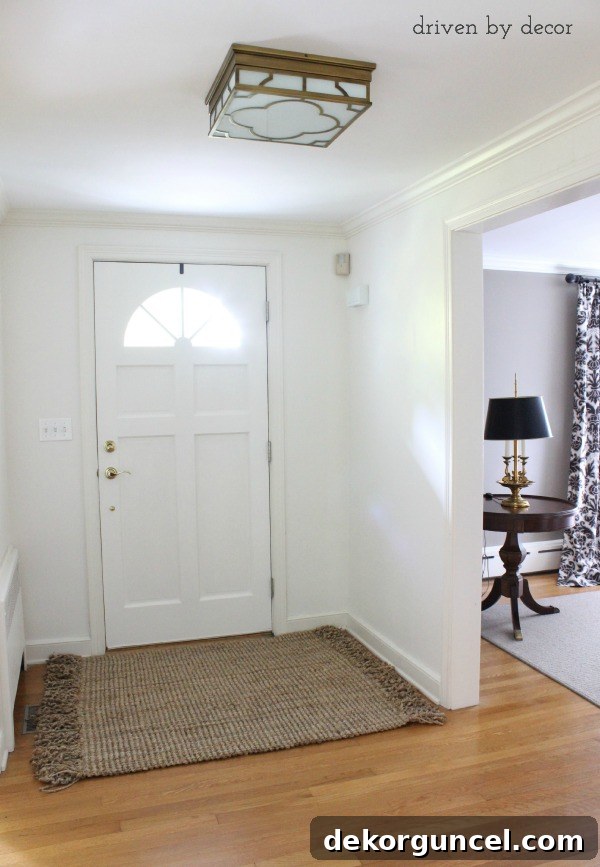
The Persistent Quest for the “Just Right” Entryway Rug
(Please note: This post includes affiliate links; a full disclosure statement is available here.)
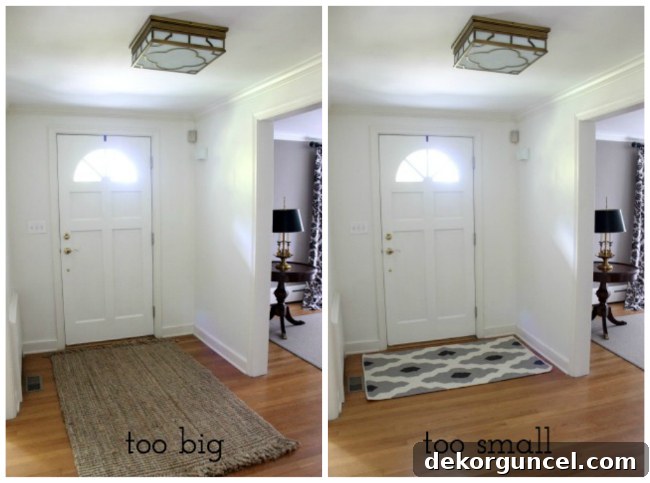
My quest for the perfect entryway rug has been a persistent and, at times, frustrating one. The 4 x 6 jute rug that ultimately became the subject of this DIY project (you can find a similar versatile option here) had served us remarkably well in the entryway of our previous home. Its generous size filled that space beautifully, creating a warm, inviting, and well-defined first impression. However, upon moving into our new house, its dimensions proved problematic. It simply wouldn’t fit comfortably widthwise in the entryway, forcing me to place it lengthwise down the hall instead. This created an awkward and disproportional look, making the hall feel cramped and the rug appear significantly oversized for its new location. It lacked the intentionality and balance I craved for our home’s entrance.
In an attempt to rectify this spatial mismatch, I replaced the jute rug with a more compact 3 x 5 West Elm wool dhurrie rug. I genuinely loved the intricate pattern and soft texture of this new rug, and for a while, I optimistically thought it might be the answer. But after living with it for some time, a subtle yet undeniable truth emerged: it was simply too small. While photographs can sometimes mask the nuances of scale in a room, in real life, the rug looked undersized for the space. It left too much empty floor around its edges and failed to adequately anchor the entryway as I desired. The overall impression was one of imbalance and a missed opportunity to truly define the area. It just felt “off,” preventing the cohesive look I was striving for.
I constantly found myself analyzing the space, mentally adjusting rug dimensions, and visualizing different possibilities. What was the elusive “just right” size that would harmoniously fit our entryway’s unique footprint? After much consideration, detailed measurement, and sketching, the answer became crystal clear: 4 x 5 feet. This specific dimension would perfectly fill the entryway, creating a defined zone without encroaching on adjacent spaces or overwhelming the area. A thought then struck me with sudden clarity: if only I could somehow trim a foot off my existing 4 x 6 jute rug, I would have exactly what I needed. This seemingly simple idea sparked the inspiration for a DIY project that promised not only significant cost savings but also the immense satisfaction of creating a truly custom, perfectly tailored piece for our home.
The Delightful Transformation: A Custom Jute Rug Born from Ingenious DIY
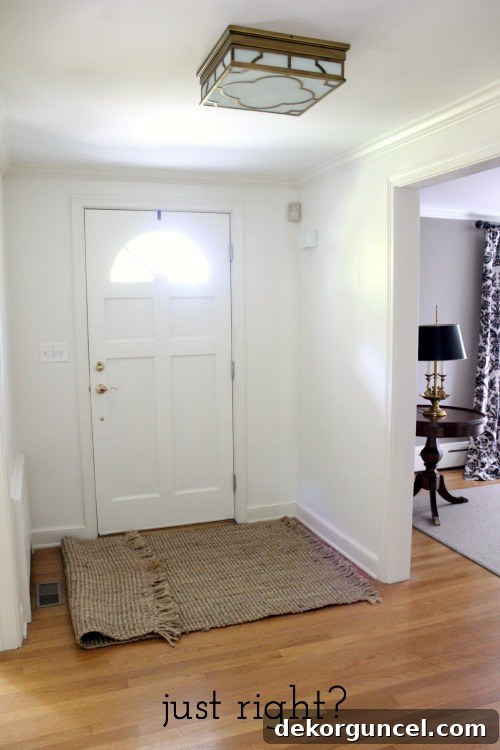
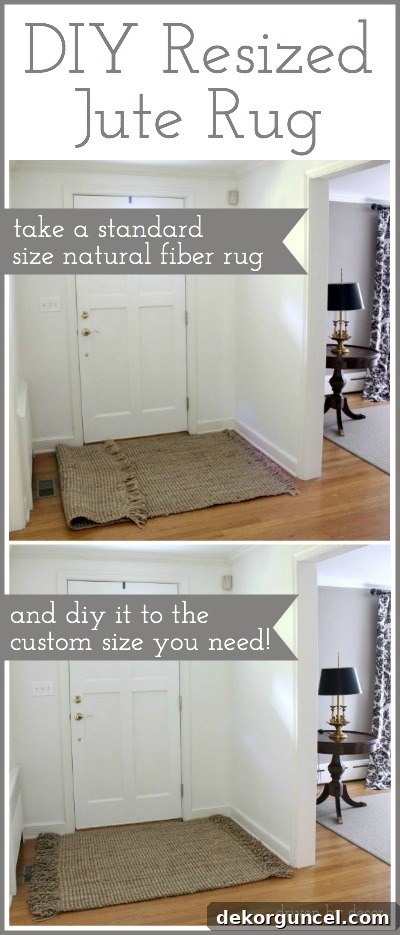
That pivotal “aha!” moment, when I truly grasped the possibility of resizing my beloved jute rug myself, was incredibly liberating. It felt like unlocking a secret level in home decor. Instead of continuing the frustrating, often fruitless search for an elusive standard size or settling for an expensive, uninspiring custom option, I decided to roll up my sleeves and tackle the project head-on. It was a choice rooted in both practicality and a desire for personalized style. A few dedicated hours later, the transformation was complete, and I proudly welcomed my newly sized 4 x 5 chunky jute beauty into our home! This DIY approach proved to be a powerful solution, allowing me to achieve the precise fit I had been searching for, effectively turning a slightly oversized rug into a perfectly proportioned and functional focal point for the entryway.
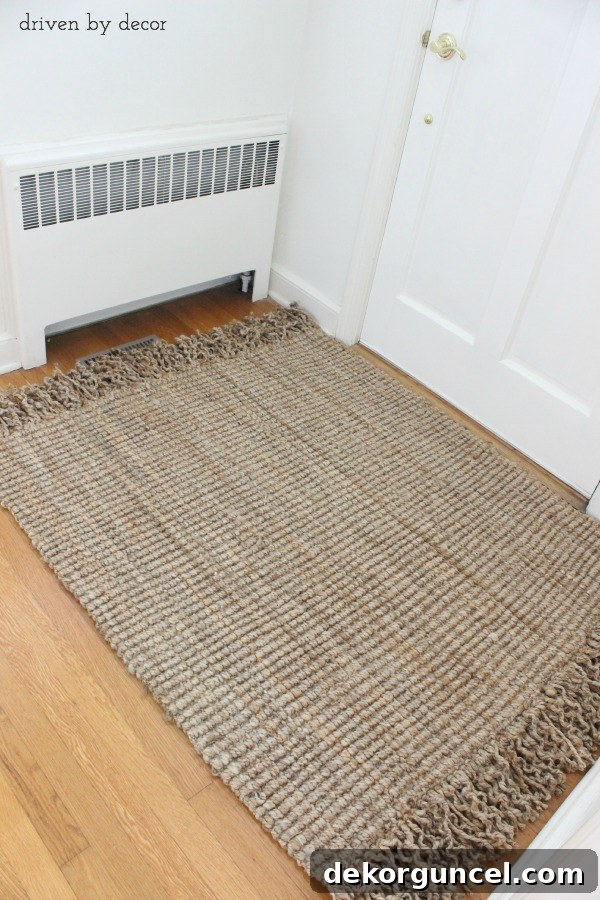
The days of my old 4 x 6 rug annoyingly overlapping the doorways to the living and dining rooms were officially over. That subtle encroachment, though seemingly minor, had a surprisingly significant impact on the space. It disrupted the visual flow, made the area feel less expansive, and often caused the rug to catch on the door edges when opened or closed, creating an untidy and inconvenient obstacle. It was a constant source of minor irritation that subtly detracted from the overall harmony and ease of movement within our home.
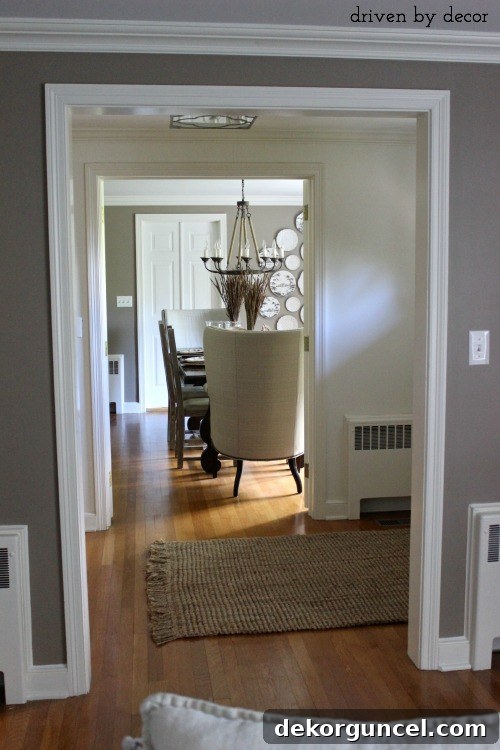
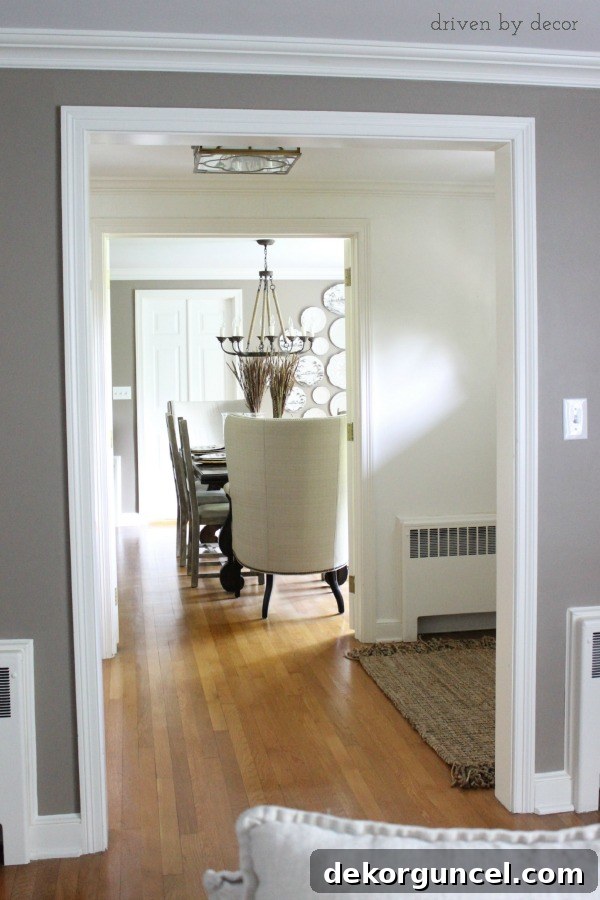
Now, with its newly resized dimensions, the 4 x 5 rug behaves exactly as it should. It is substantial enough to define and fill the entryway, creating a warm, inviting, and clearly delineated zone that welcomes guests. Crucially, it’s not so large that it disrupts the seamless transition and open flow from one room to the next. The balance is simply perfect, enhancing both the aesthetic appeal and the daily functionality of our home’s entrance. This small adjustment has made a world of difference in how the entire area feels and functions, proving the immense value of a custom fit.
DIY Rug Resizing: A Detailed Step-by-Step Guide to Customizing Your Jute Rug
While the DIY rug resizing project wasn’t the quickest endeavor (it took me approximately three dedicated hours from start to finish), nor was it the cleanest (you wouldn’t believe the amount of dust, dirt, and hidden debris that gets trapped within a rug and subsequently comes out during the unweaving process!), it was undeniably simple to execute and incredibly rewarding. The final result made every minute spent and every speck of dirt cleaned up absolutely worth it. The key to successfully undertaking this DIY project lies in selecting the right kind of rug to begin with. You’ll want a natural fiber rug that is handwoven and features distinct fringed ends. My rug, for instance, was this inexpensive chunky jute rug, which fit these essential criteria perfectly.
The beauty and genius of this method is that while the width of your rug remains constant – a characteristic determined by its original weave – you have complete control over shortening its length as much as needed. For the best aesthetic outcome, it’s crucial to shorten the rug from both fringed ends. This symmetrical approach ensures that the appearance, density, and overall length of your newly created fringe remain consistent and balanced on both sides of the rug, maintaining a polished and professional look that belies its DIY origins.
Phase 1: Preparing to Unweave and Measure for Your Custom Size
- Carefully Untie the Fringe Knots: Begin by methodically untying all the existing fringe knots on one side of the rug. As you work through each knot, pay very close attention to how they were originally tied. Observe the pattern, the number of strands involved, and the direction of the loops. This detailed observation will be absolutely invaluable when it comes time to re-knot the fringe, as it will enable you to replicate the original design as closely and authentically as possible, ensuring a seamless finish.
- Begin the Unweaving Process: Once all the knots on one end are loose, gently and carefully begin to unweave the rug. This process involves delicately pulling out the individual warp and weft threads from the end of the rug, one by one or in small groups. Proceed slowly to avoid damaging the remaining weave. Continue unweaving until you have removed the precise number of inches required to achieve your desired shorter length. For example, if you need to shorten a 4×6 rug to a 4×5, you’ll likely aim to unweave 6 inches from each end, totaling 12 inches removed from the overall length. Double-check your measurements to ensure accuracy before proceeding further.
Phase 2: Meticulously Re-knotting the Fringe for a Professional Finish
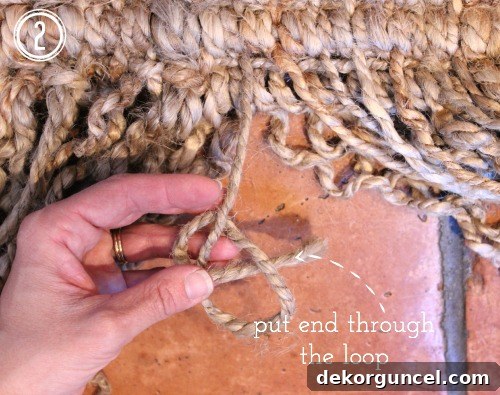
Now, it’s time for the most intricate part of the project: re-knotting the newly exposed end of your rug. This is where your careful observation from step one truly comes into play. For my particular jute rug, I noticed a consistent pattern in the fringe construction: each section comprised two distinctive curly strands and one straighter, more rigid strand. Replicating this exact pattern is key to ensuring your new fringe blends seamlessly and naturally with the rug’s original character. Here’s a detailed, step-by-step breakdown of the re-knotting process:
- Form a Loop with the Straight Strand: Take the straight strand from your three-strand section and create a small, neat, and symmetrical loop with it. This initial loop will serve as the foundational element of your new knot.
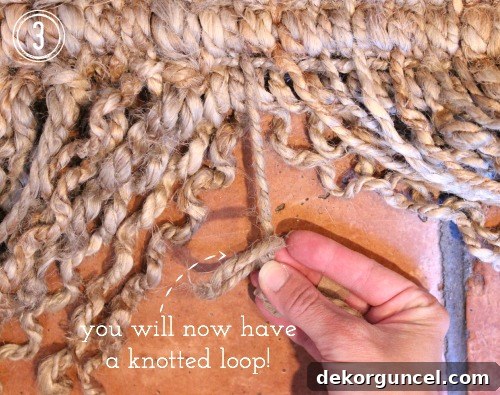
- Thread the End Through the Loop: Carefully guide the very end of the straight strand through the loop you just formed. Ensure the thread passes through from the front towards the back. This action begins to secure the loop, creating the initial structure of the knot.
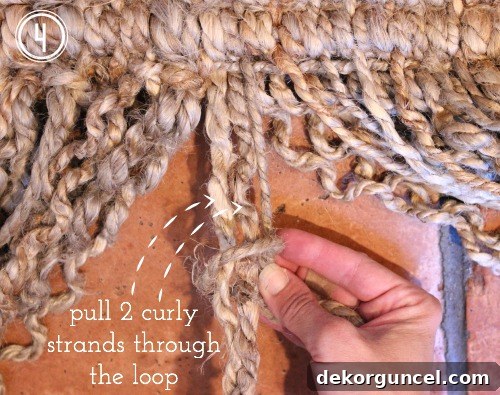
- Pull Curly Strands Through: Now, carefully gather the two curly strands that belong to this specific section. Gently but firmly pull these two curly strands through the loop you’ve just created with the straight strand. Ensure they pass through smoothly without snagging or tangling.
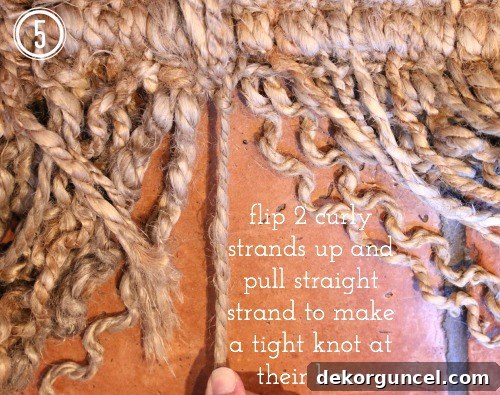
- Tighten the Knot Securely: Once the curly strands are through the loop, flip them upwards and gently out of your way to expose the base of the loop. Then, firmly pull the straight strand’s loop tight. This action will secure all three strands together, forming a complete, robust, and aesthetically pleasing knot at the end of your rug.
- Repeat and Trim for Uniformity: Congratulations, you’ve completed your first piece of newly knotted fringe! Simply continue this process, moving down the line and diligently tying one knot after another until the entire end of the rug is re-fringed. Once all knots are securely in place, you can then use sharp scissors to trim your fringe to your desired uniform length, ensuring a neat and polished edge. A little patience, some energizing background music, and perhaps a bit of caffeine can certainly help keep you focused and motivated during this repetitive but ultimately rewarding task!
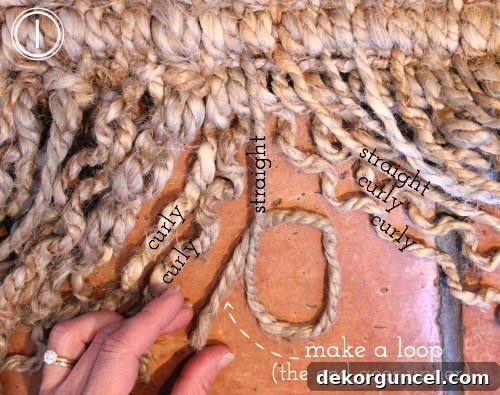
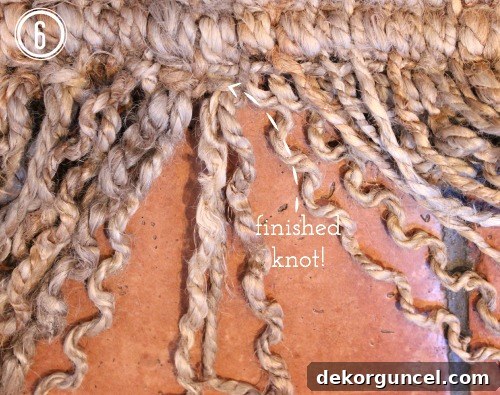
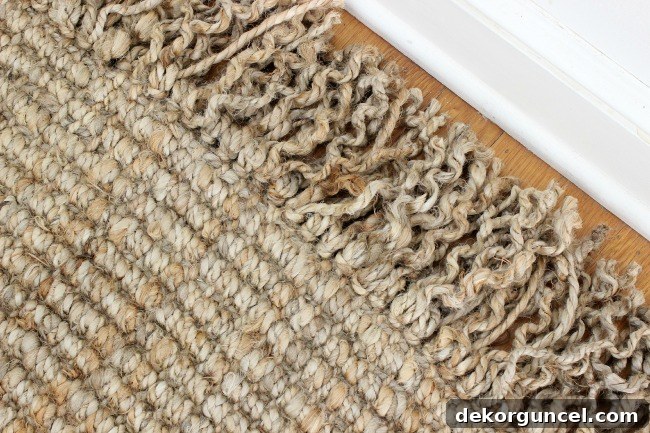
A delightful characteristic you’ll almost certainly notice with your newly knotted fringe, especially on natural fibers like jute, is its charming curliness! I personally adore the organic texture and visual interest this curly fringe adds to the overall look of the rug; I believe it significantly contributes to its natural, handcrafted appeal and unique character. However, if you prefer a straighter fringe and are feeling particularly ambitious after your knotting triumph, you might find that gently dampening and then carefully ironing the fringe on a low setting could help to straighten the fibers, giving it a more uniform appearance.
Essential Rug Care and Ongoing Foyer Finishing Touches
Beyond the immediate aesthetic appeal and perfect fit of your new custom-sized rug, there’s a crucial practical consideration that’s absolutely vital for any natural fiber rug, especially one placed over hardwood floors: the rug pad. I’ve learned from personal experience, and often the hard way through past mistakes, that neglecting to use a proper, high-quality rug pad can lead to unfortunate and costly consequences. Without this protective layer, the constant friction generated from daily foot traffic and the subtle shifting movement of the rug can cause it to rub abrasively against the hardwood. Over time, this continuous abrasion can actually alter the sheen of the hardwood in the covered area, leaving a dull, scuffed, or even permanently damaged patch that stands out. A high-quality rug pad not only effectively prevents this kind of damage but also offers a host of additional benefits: it adds an extra layer of cushioning, significantly enhancing comfort underfoot; it helps to absorb impact, extending the life of both your rug and your floors; and, crucially, it helps keep your rug securely in place, preventing frustrating slips, dangerous falls, and unsightly bunching.
Completing this DIY rug resizing project marks the successful completion of one more satisfying task on our extensive foyer renovation list. It’s incredibly rewarding to see the space slowly but surely come together, piece by piece, reflecting our personal style and enhancing functionality. However, the journey to a fully transformed entryway is still ongoing, with several exciting projects yet to tackle that promise to further elevate its appeal. Among these is the plan to introduce some much-needed color and depth to the walls; I’m currently deliberating between these appealing light gray paint options, seeking that perfect shade that will complement the existing decor, brighten the space, and create a sophisticated backdrop. Additionally, I’m seriously considering painting the interior of the front door. Wouldn’t it create a dramatic and sophisticated statement if it were painted a sleek, deep black, mirroring the striking elegance of the exterior door? These thoughtful details are what truly elevate a home’s aesthetic from good to great, and I’m eagerly anticipating seeing the final results of these upcoming improvements.
Conclusion: Embrace the Empowering World of DIY Home Decor
This DIY jute rug resizing project stands as a powerful testament to the impact of creativity, ingenuity, and a hands-on approach in home decor. Instead of being forced to compromise on size, style, or budget, I was empowered to transform an existing item into a perfectly tailored piece for a challenging and specific space. It vividly demonstrates that with just a little effort, a willingness to learn, and the right technique, you can achieve professional-looking results and truly personalize your living environment in ways that store-bought items often cannot. If you’ve been struggling to find that elusive ideal rug, facing similar decor dilemmas due to odd dimensions, or simply looking for ways to inject more character into your home, I wholeheartedly encourage you to explore the vast possibilities of DIY. You might be genuinely surprised and delighted at what unique, functional, and beautiful creations you can bring to life!
