
Transform Your Chaotic Closet: The Ultimate Step-by-Step Guide to a Functional & Beautiful Storage Space
Do you have that one closet? The one overflowing with forgotten items, where opening the door feels like a risky game of Jenga? For many of us, it’s a universal dilemma: a storage space that gradually transforms from a functional area into a disorganized abyss. In our home, this notorious spot was an upstairs walk-in closet we affectionately (or perhaps despairingly) dubbed “The Hoard Closet.” It wasn’t just a closet; it was the sole designated storage space, becoming a catch-all for everything imaginable. From a staggering collection of fabrics and paint swatches to spare pillows, seasonal clothing, and winter gear, it held a universe of clutter.
When we first moved in four years ago, there was a faint glimmer of order. However, as life progressed, shelves filled, then overflowed, and soon items began to accumulate on the floor. This gradual decline led to a chaotic state, a testament to the power of unattended clutter. Before the intervention, our closet looked like this:
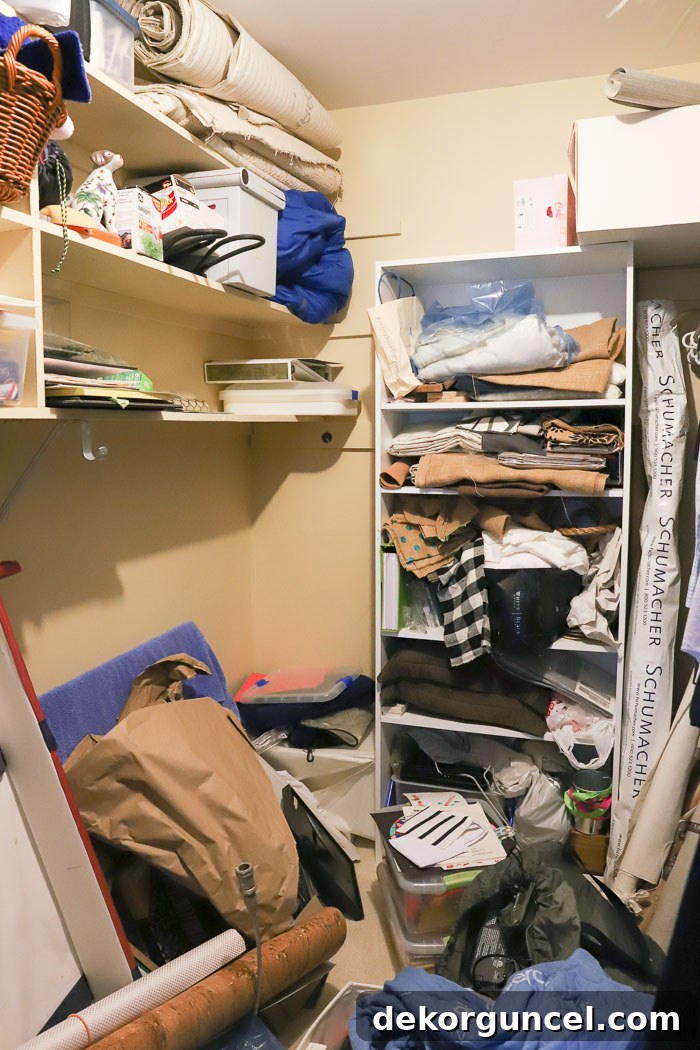
Admittedly, it might have been prudent to tidy up slightly for the “before” photos, presenting a mere state of disarray rather than a full-blown catastrophe. But authenticity triumphs, and so I share the raw, unvarnished reality of my hoard closet in all its glory (sorry, mom!). The transformation, however, is truly remarkable. This space, once so packed the door couldn’t fully open:
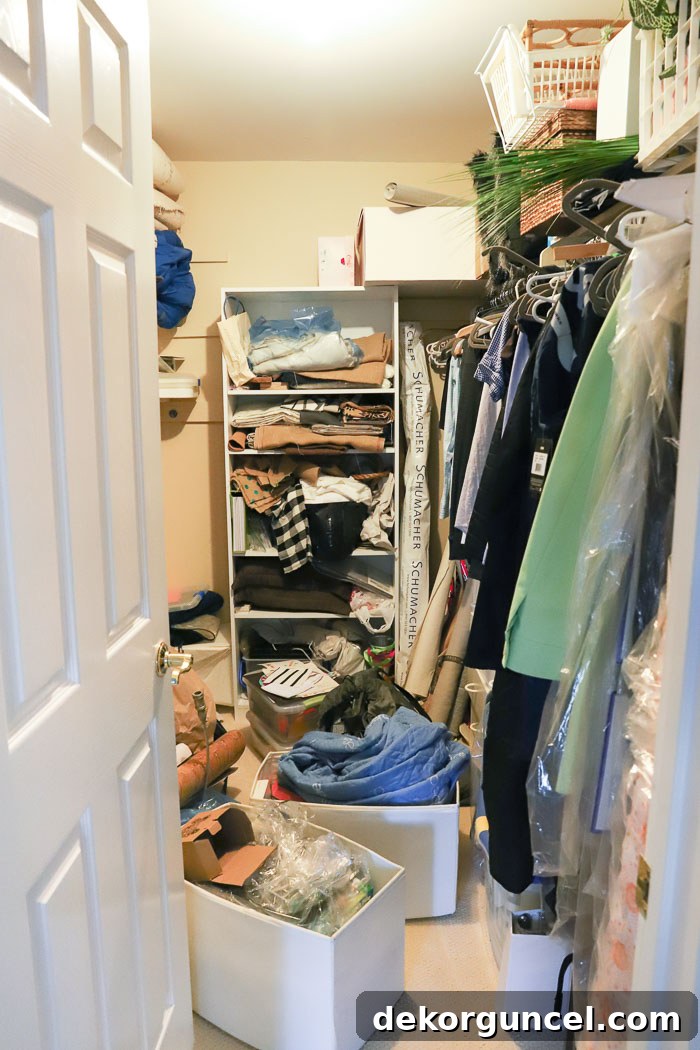
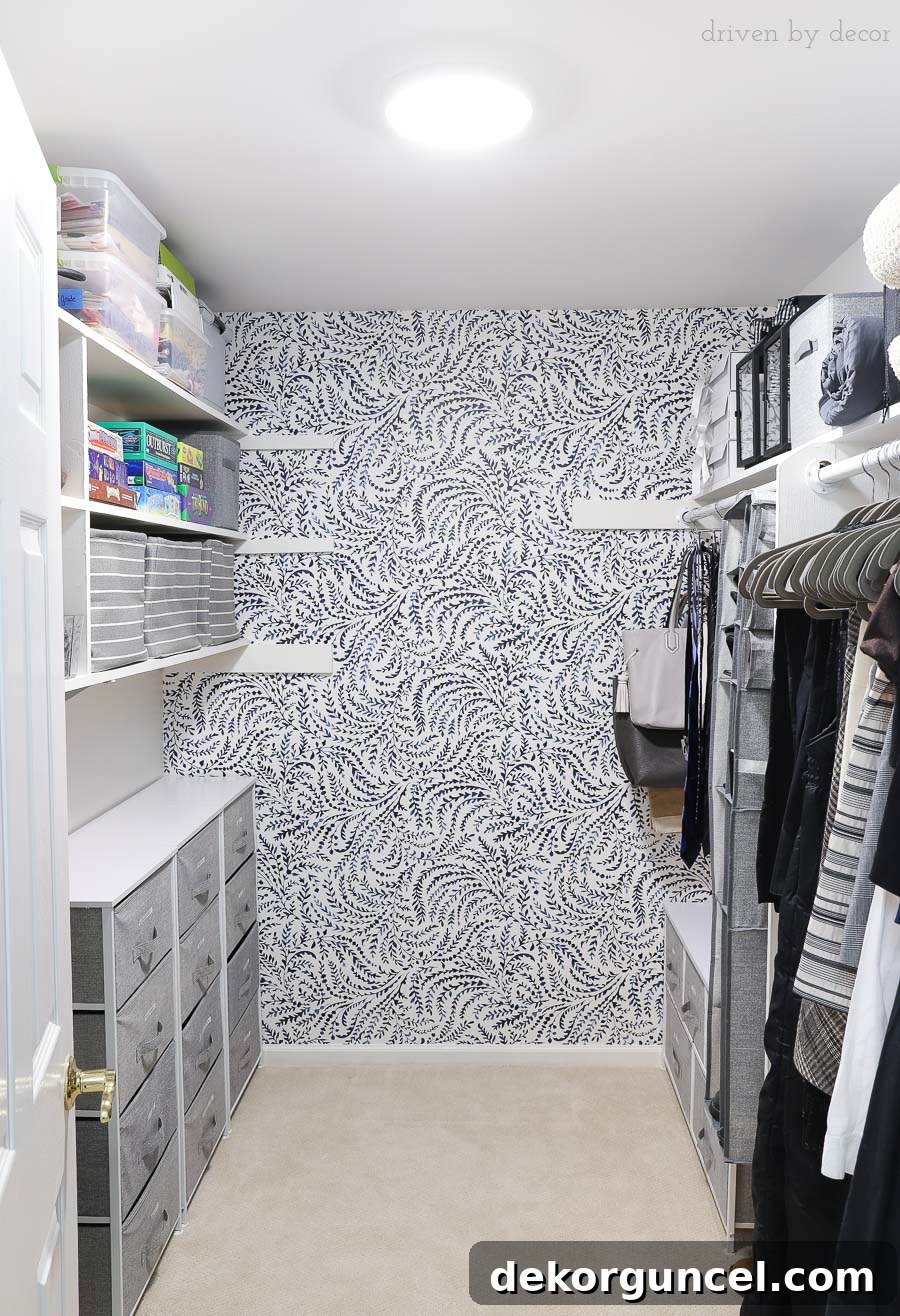
Now boasts an entirely new, aesthetically pleasing, and remarkably organized appearance:
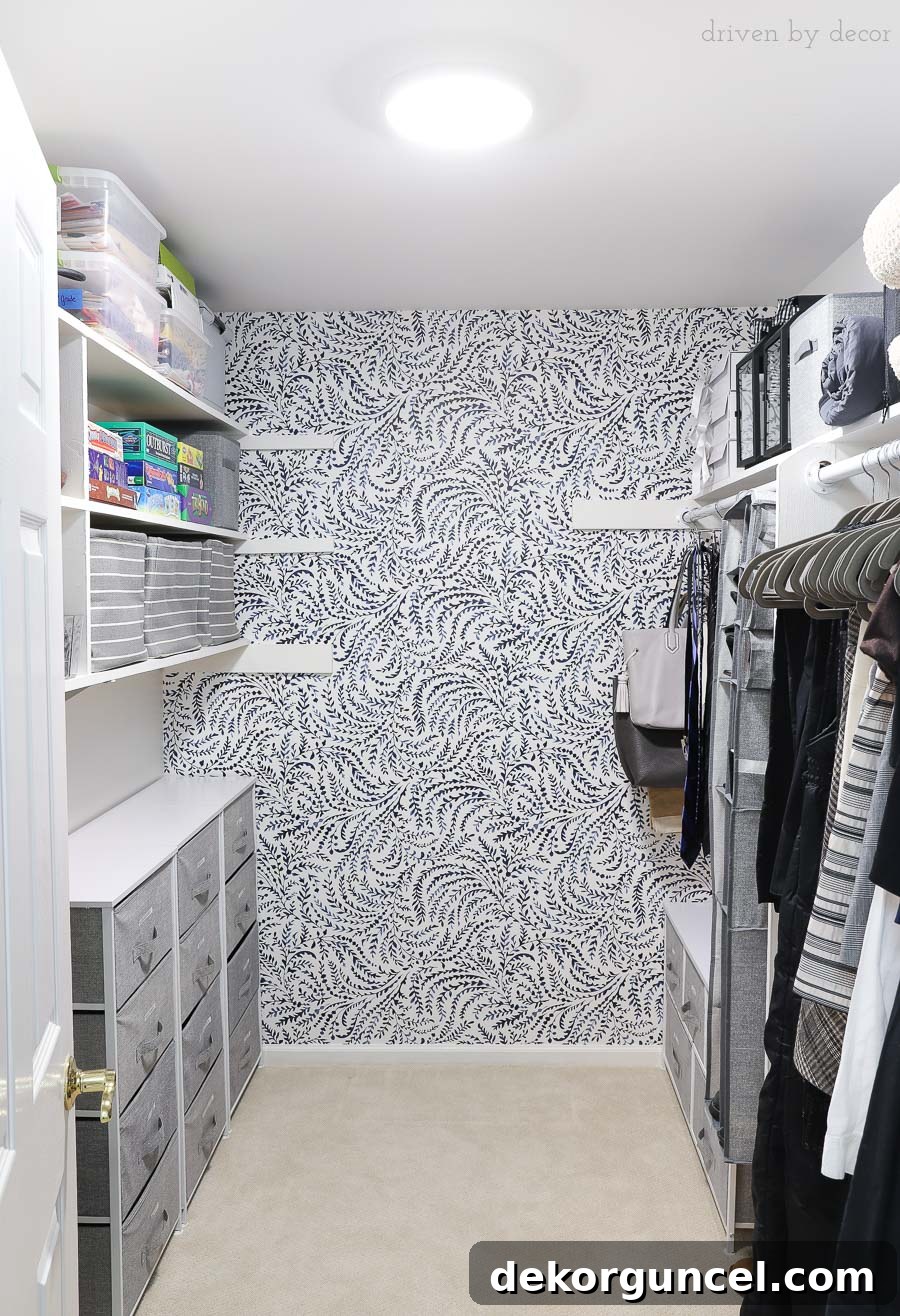
The “after” reveal left my husband speechless, his jaw quite literally dropping. His initial reaction was a bewildered, “Where is everything?” – a question tinged with a hint of terror, likely fearing I’d purged his belongings (a threat I’d playfully issued for years!). While I did manage to declutter roughly a quarter of the closet’s contents (all my own, sparing his!), the real magic lies in the selection and strategic use of smart, efficient organization products that have completely revitalized this space. This wasn’t just a clean-up; it was a full-scale storage closet makeover, and I’m thrilled to share the step-by-step process of how to organize a closet, transforming it from an embarrassing mess into a beacon of order and functionality. (Affiliate links are included in this post; please see my full disclosure statement here).
Step 1: Declutter ruthlessly – Take Everything Out!
When your storage closet has reached a state of extreme disarray, akin to my “hoard closet,” the very first and most crucial step is to completely empty it. This isn’t just about moving things around; it’s about gaining a full, unobstructed view of every single item you possess. Seeing everything laid out allows for objective decision-making: what truly deserves a place back in the closet, and what can be donated, sold, trashed, or relocated to more appropriate long-term storage. Attempting to organize a cluttered closet without first emptying it often leads to simply shuffling items, making it harder to purge effectively and ultimately prolonging the entire process.
I must confess, the process was a bit painful. Our newly made-over bonus room, adjacent to the closet, was temporarily sacrificed to the overflowing contents. The sheer volume of items extracted from that seemingly modest closet was shocking, a humbling visual reminder of years of accumulated clutter (please excuse the informal iPhone photo):
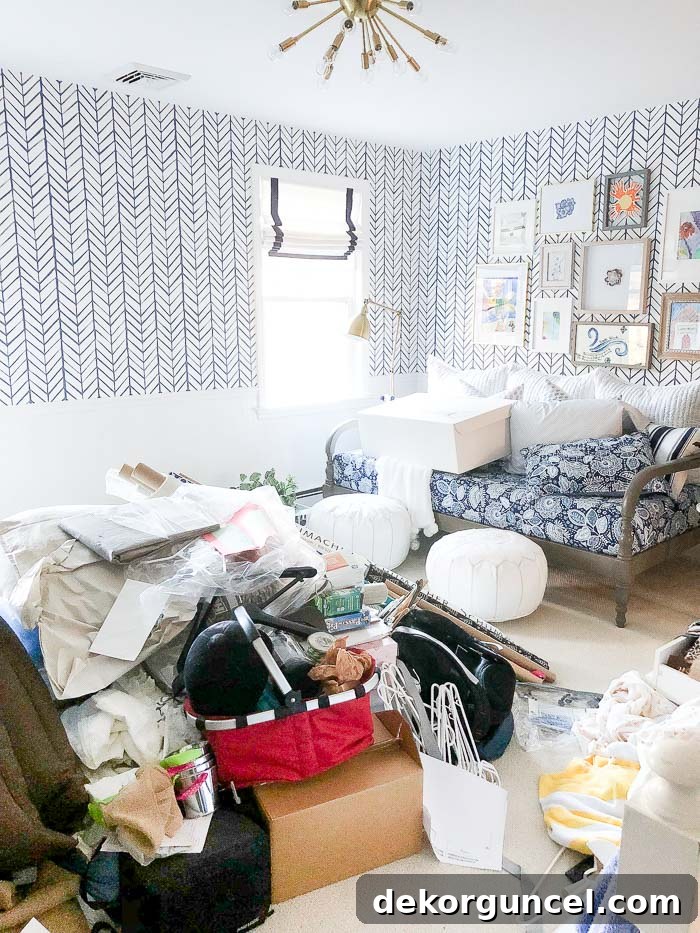
During this comprehensive purge, I discovered numerous items we no longer needed or used. These were either earmarked for donation, sale, or disposal. Other items, rarely if ever used but still valuable to keep, found a new home in our unfinished basement for long-term storage. This initial decluttering phase is foundational; it clears the slate, making way for a truly organized and efficient system.
Step 2: Assess Your Inventory and Invest in Smart Storage Solutions
Every closet is unique, reflecting the individual needs and collections of its owner. For instance, my passion for fabrics, drapes, and pillow covers means my storage requirements differ vastly from someone with fewer textile-related items. Once your closet is empty and the purging is complete, it’s time to meticulously assess your remaining inventory. This critical evaluation will guide you in selecting the most effective and tailored organization solutions.
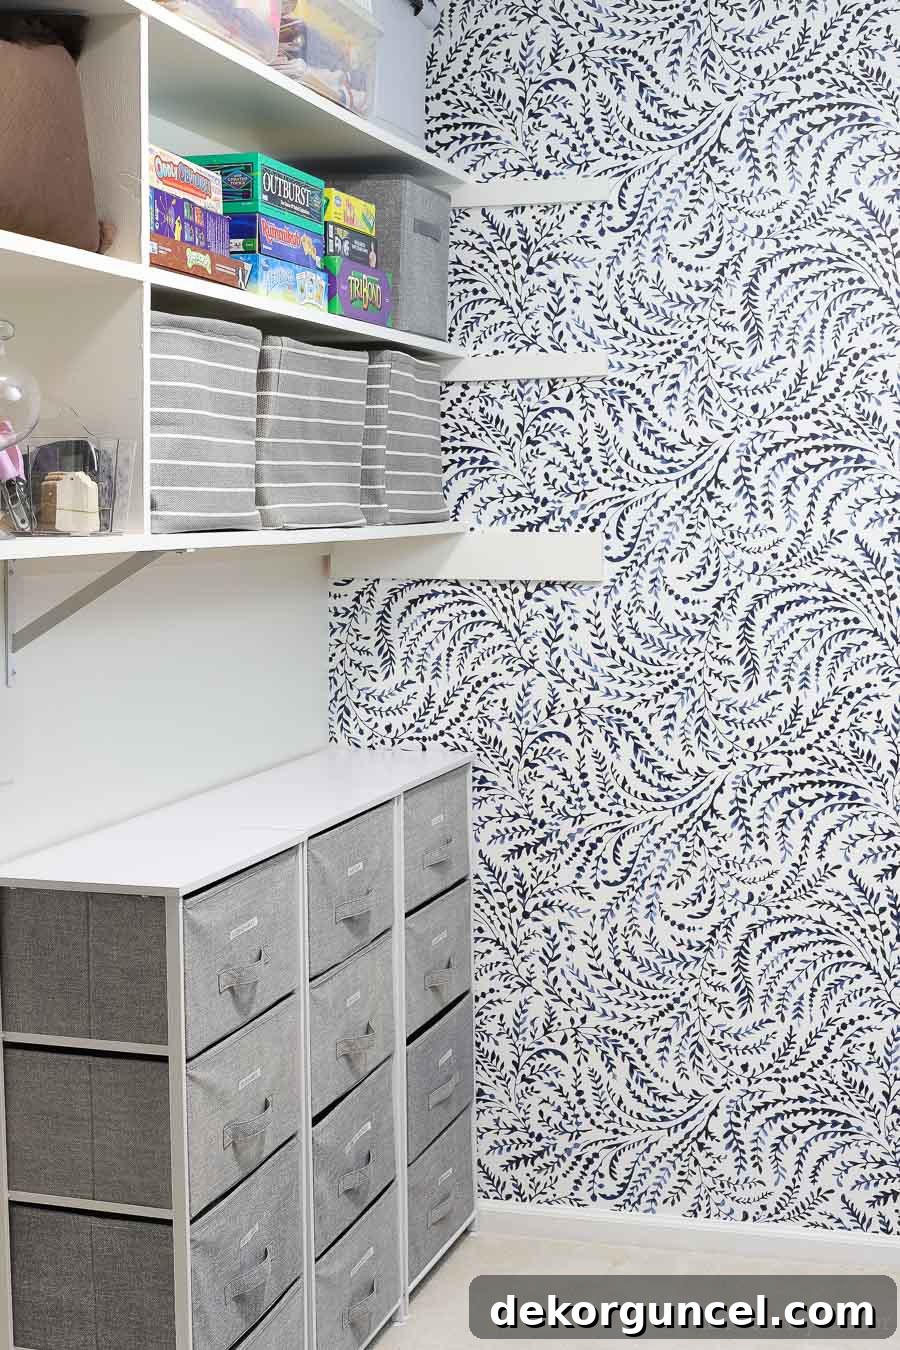
For my extensive fabric collection, I needed a storage solution that offered protection from dust while ensuring easy accessibility. The idea of constantly unstacking and restacking plastic containers was unappealing and inefficient. My solution? Fabric dressers! These have proven to be an absolute game-changer. On the left side of my closet, I arranged three {four-drawer fabric dressers} side-by-side. Their design perfectly combines covered storage with effortless access:
On the right side, a {lower five-drawer dresser} provides versatile storage while leaving ample space above for hanging items:
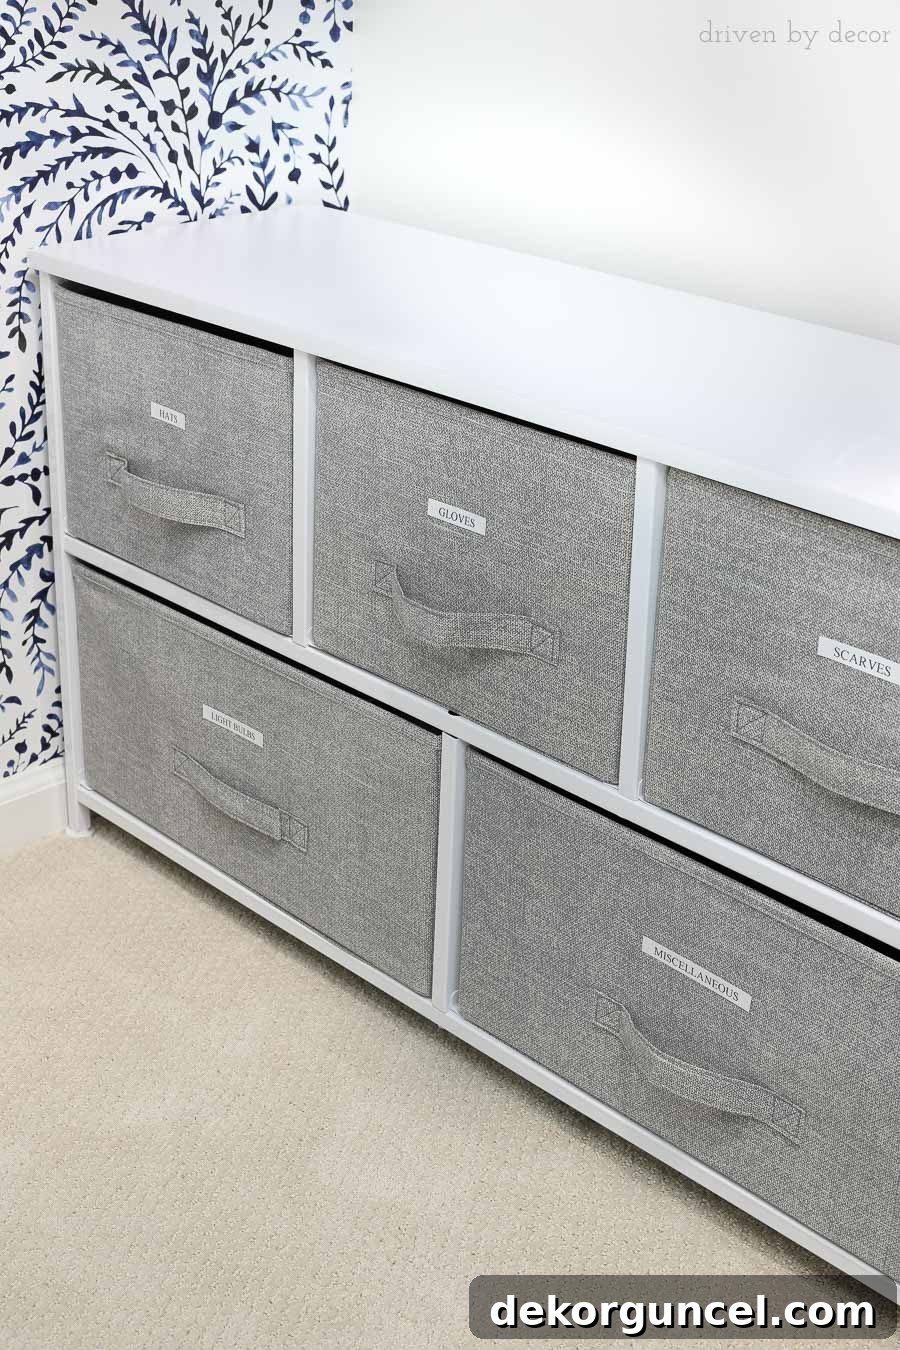
The assembly was surprisingly straightforward – my daughter put them together without needing any tools or assistance from me! It’s astonishing how much capacity these dressers offer. All the previously overflowing piles of fabric, pillow covers, winter accessories (hats, gloves, scarves), lightbulbs, and craft supplies that once littered the closet are now neatly contained within these drawers. The full-extension drawers are a key feature; I can easily pull them out and place them on top of the dresser (which is why I kept the dresser tops clear!) to browse through contents without hassle. Beyond the dressers, I also identified a need for larger bins for bulkier items, as well as specialized products for organizing shoes, totes, and wristlets. These additional solutions will be revealed in the subsequent steps.
Step 3: Enhance the Aesthetics and Upgrade the Lighting for Motivation and Functionality
While not everyone shares my aesthetic inclination, I find that a visually appealing space significantly boosts my motivation to keep it tidy and organized. Part of the reason my closet devolved into a “hoard status” was its uninviting atmosphere – dimly lit and painted in a dreary beige. This lack of appeal fostered neglect. Once emptied, I began the process of refreshing the space by applying a fresh coat of white paint throughout. This quick, inexpensive change made an astonishing difference, immediately brightening and opening up the area.
Just as I was about to return items to the newly painted closet, I remembered having leftover {wallpaper} from my recent craft room makeover. Seizing the opportunity, I decided to wallpaper the far wall of the closet. While some might deem wallpapering a closet excessive, for me, this cost-free addition elevated the space, making me cherish my newly organized haven even more:
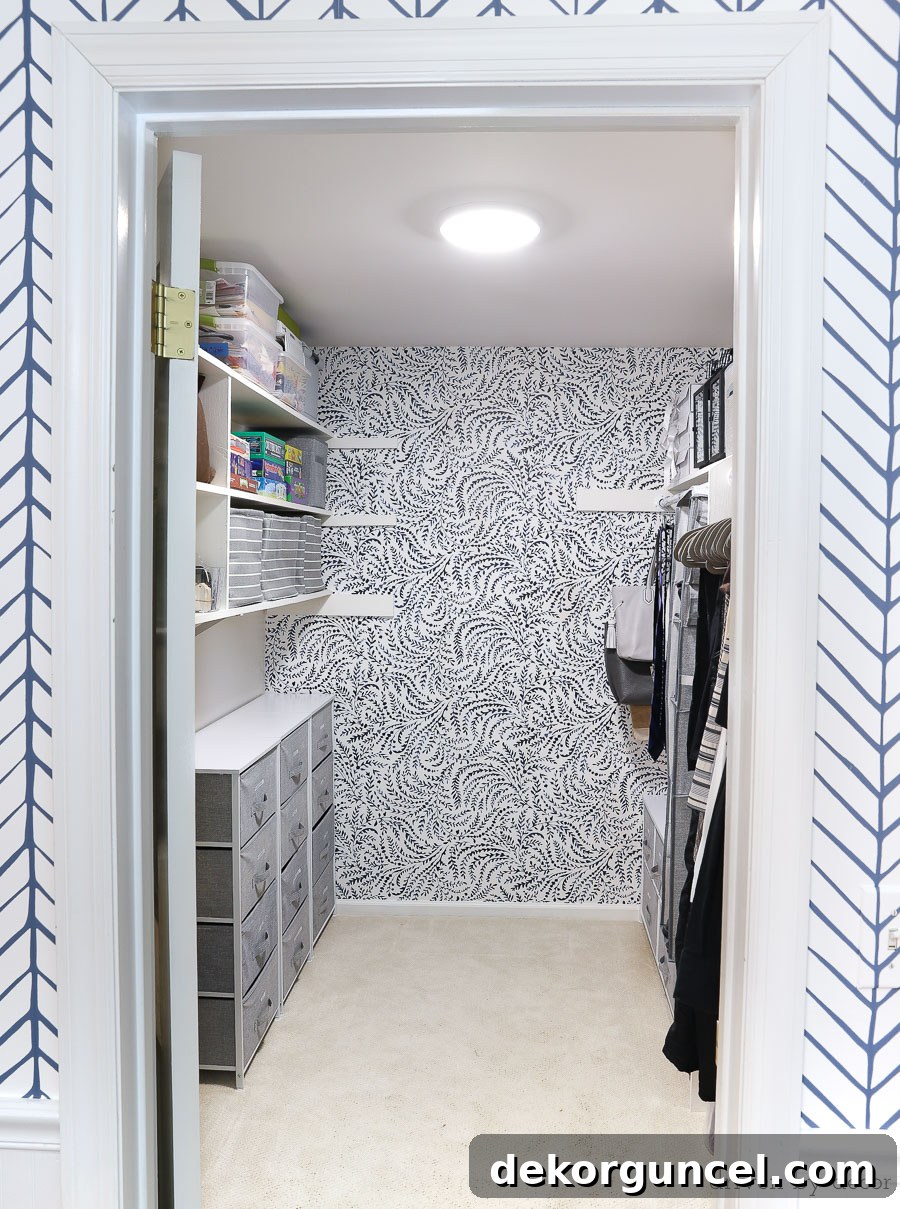
This phase is also the ideal time to address any inadequate lighting. Our closet previously had a single, bare lightbulb that offered poor illumination and cast an unappealing yellowish glow. More importantly, in most regions, a bare bulb in a closet is a fire hazard and against safety codes. I took about 20 minutes to swap it out for {this simple, low-profile 4000K LED flush mount light}. Priced under $50 and boasting a ten-year lifespan, this upgrade brought the closet up to code and flooded the space with bright, clear “whiter” light, making it far more functional and inviting.
Step 4: Strategically Place Your Main Storage Solutions and Furniture
This is often the most satisfying part of the organization process – watching your closet begin to take shape! The key here is to start by placing your “major players” first. These include any furniture pieces or larger organizational units that will form the backbone of your system and typically fit best in specific locations. In addition to the fabric dressers, I had a precise spot in mind for {these new rope-handled striped storage bins} (I opted for the medium size):
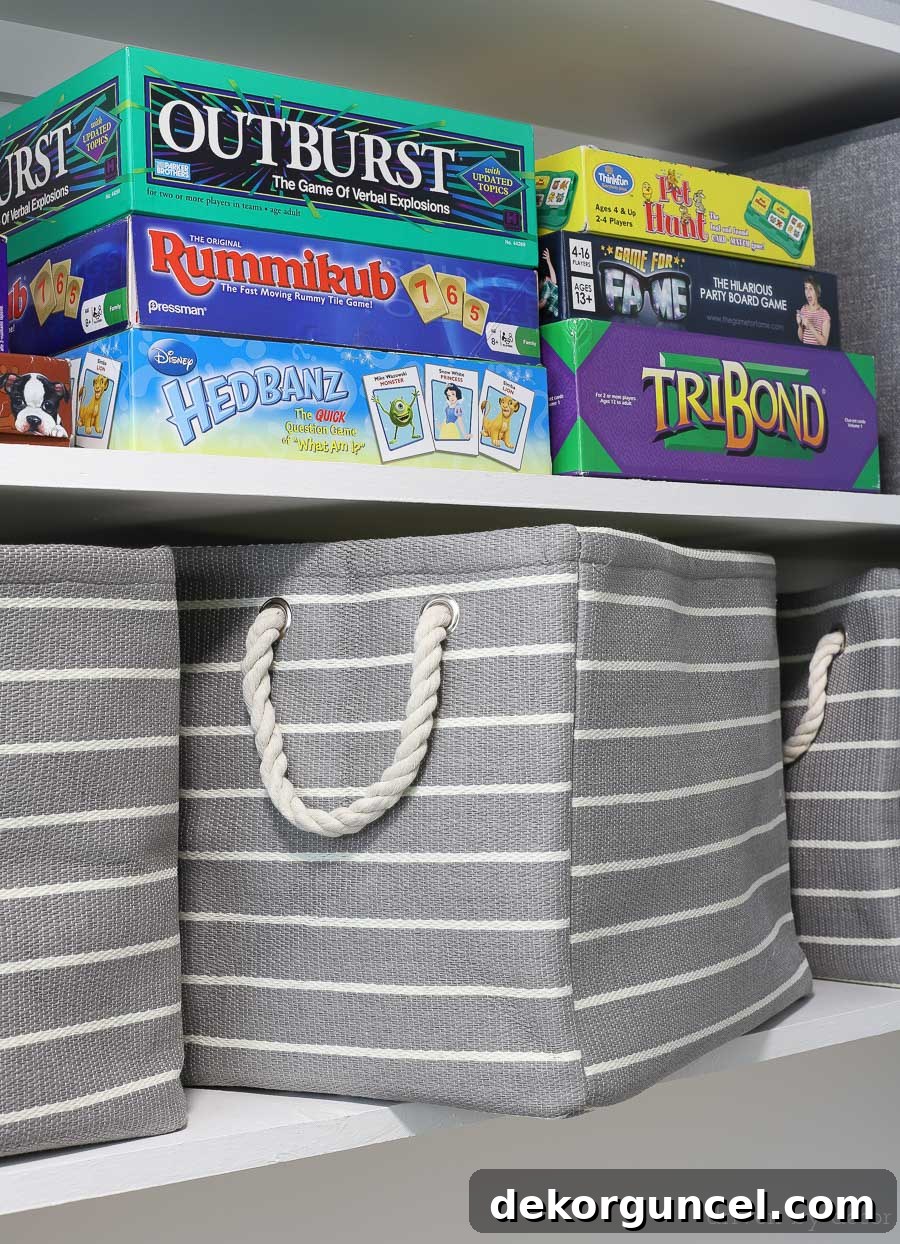
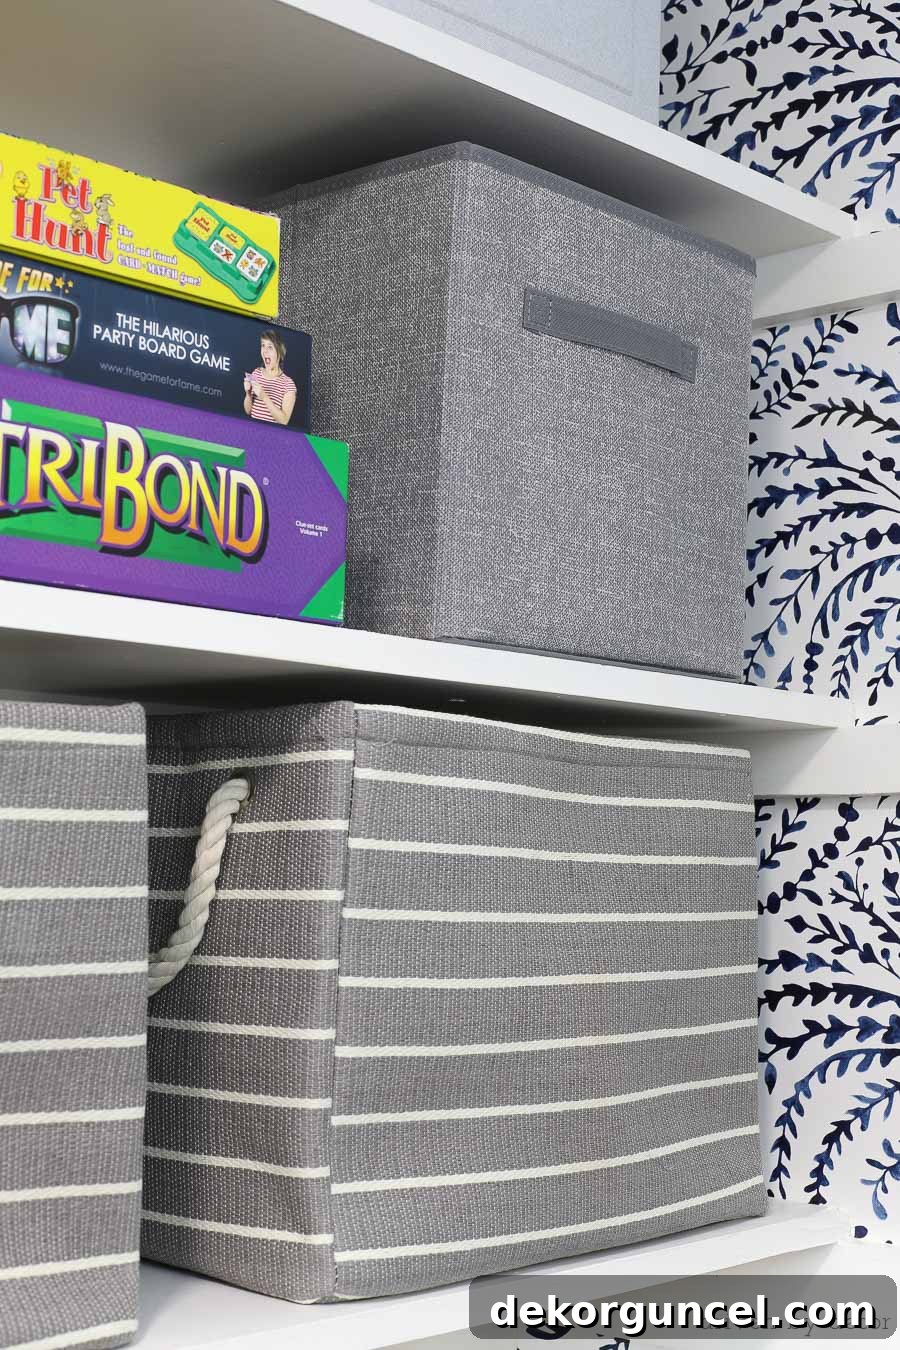
Their dimensions were perfect, fitting lengthwise on a standard 12-inch deep shelf. The rope handles on both sides are incredibly practical, allowing for easy pulling and carrying. One bin now neatly stores all the bedding for our AeroBed, making it effortlessly accessible when setting up the inflatable guest bed. I also integrated a couple of {gray fabric storage cubes} (medium size), which also perfectly complement the 12-inch shelves. One sits above my rope basket, housing small games:
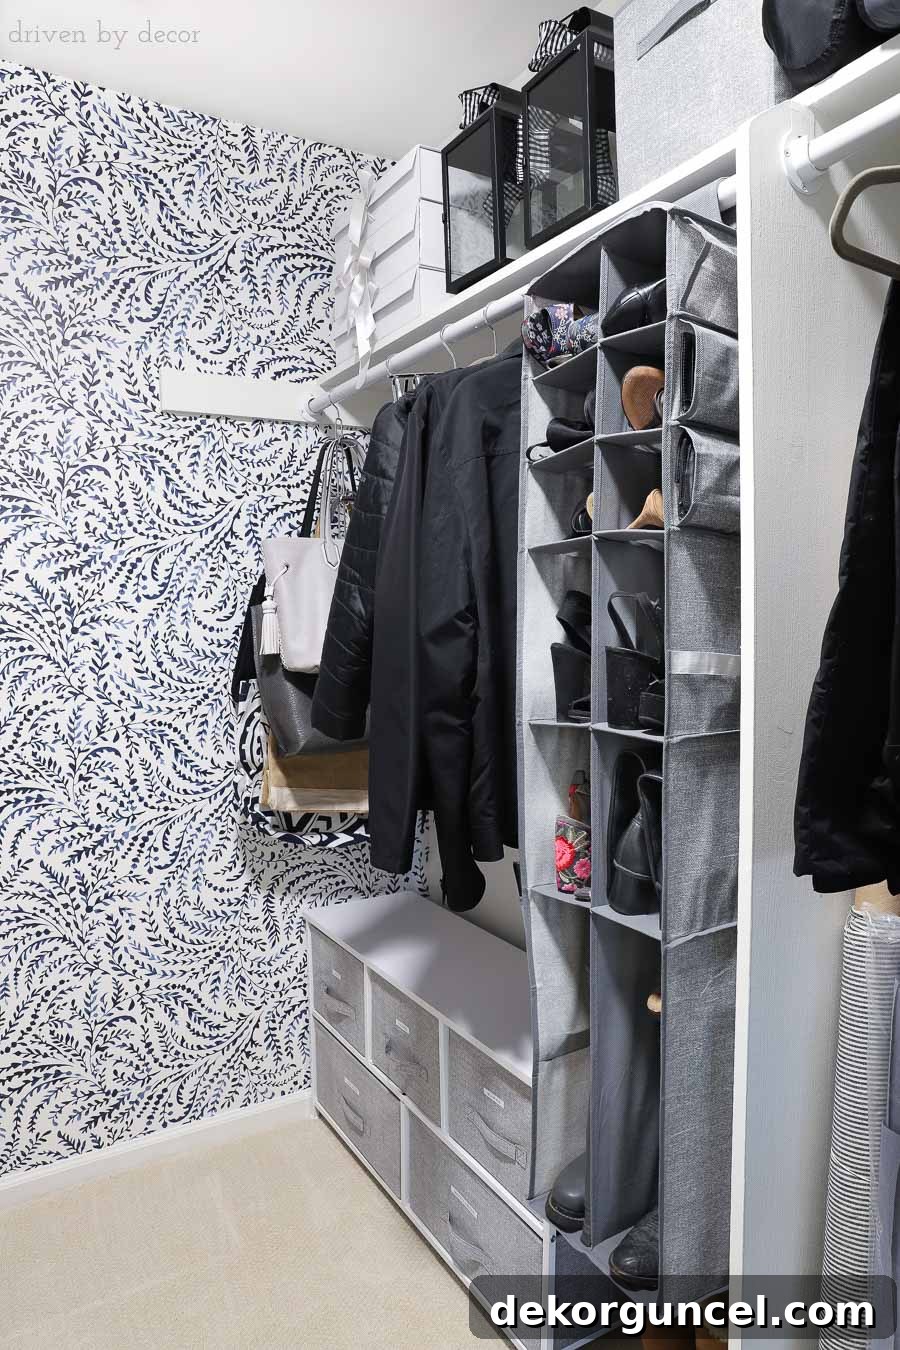
Another cube, positioned on the shelf above my {new fabric shoe & boot organizer}, now neatly contains flip-flops:
A standout feature of {this hanging shoe/boot organizer} is its integrated side pockets. A spacious pocket on the left side proved perfect for stashing a couple of clutches:
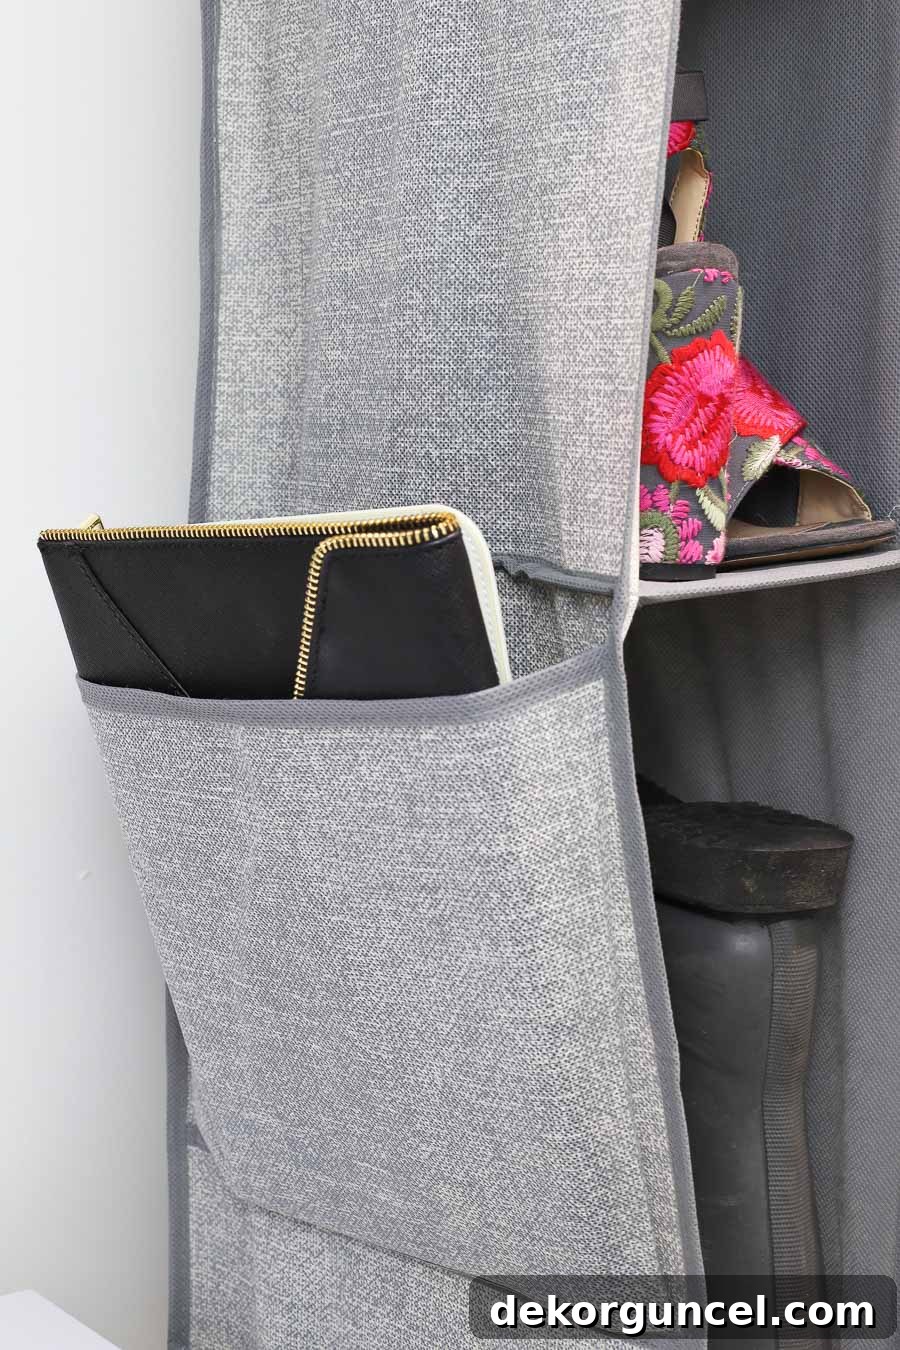
While three smaller pockets on the right side now hold wallets I’m not yet ready to part with. With all the foundational organizational elements in place, the structure of our newly organized closet began to emerge, paving the way for the next crucial step.
Step 5: The Power of Labeling – Make Your System Sustainable
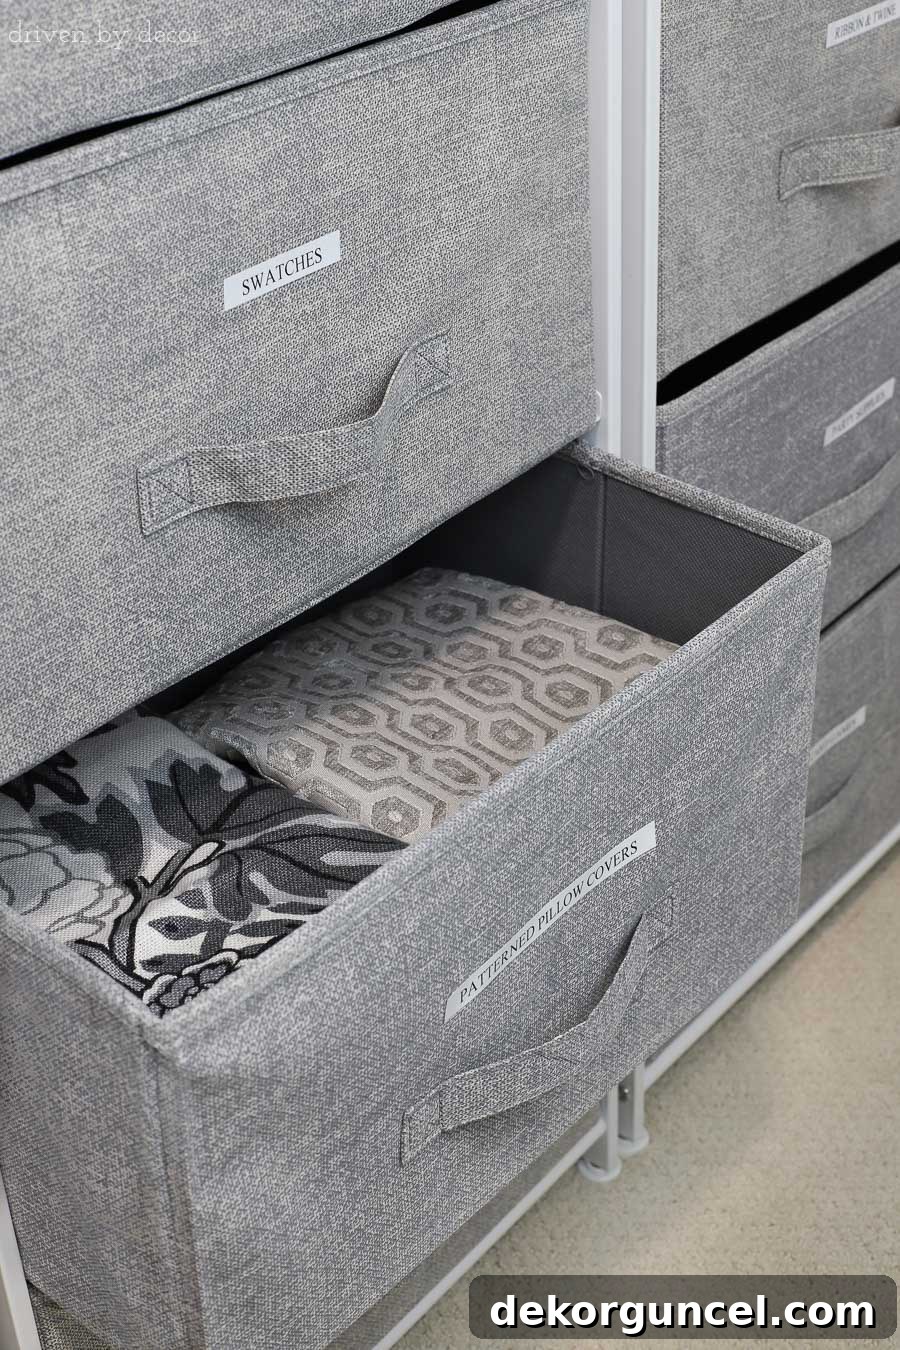
As an avid organizer, I absolutely love labeling things – a passion my youngest daughter has inherited! While it only takes about 15 minutes with a good label maker, this step is a game-changer, saving you countless hours of searching for items down the road. I can easily recall what’s in my larger, distinct bins, but remembering the contents of every single drawer in the fabric dressers would be impossible. Therefore, we meticulously labeled each and every one of them:
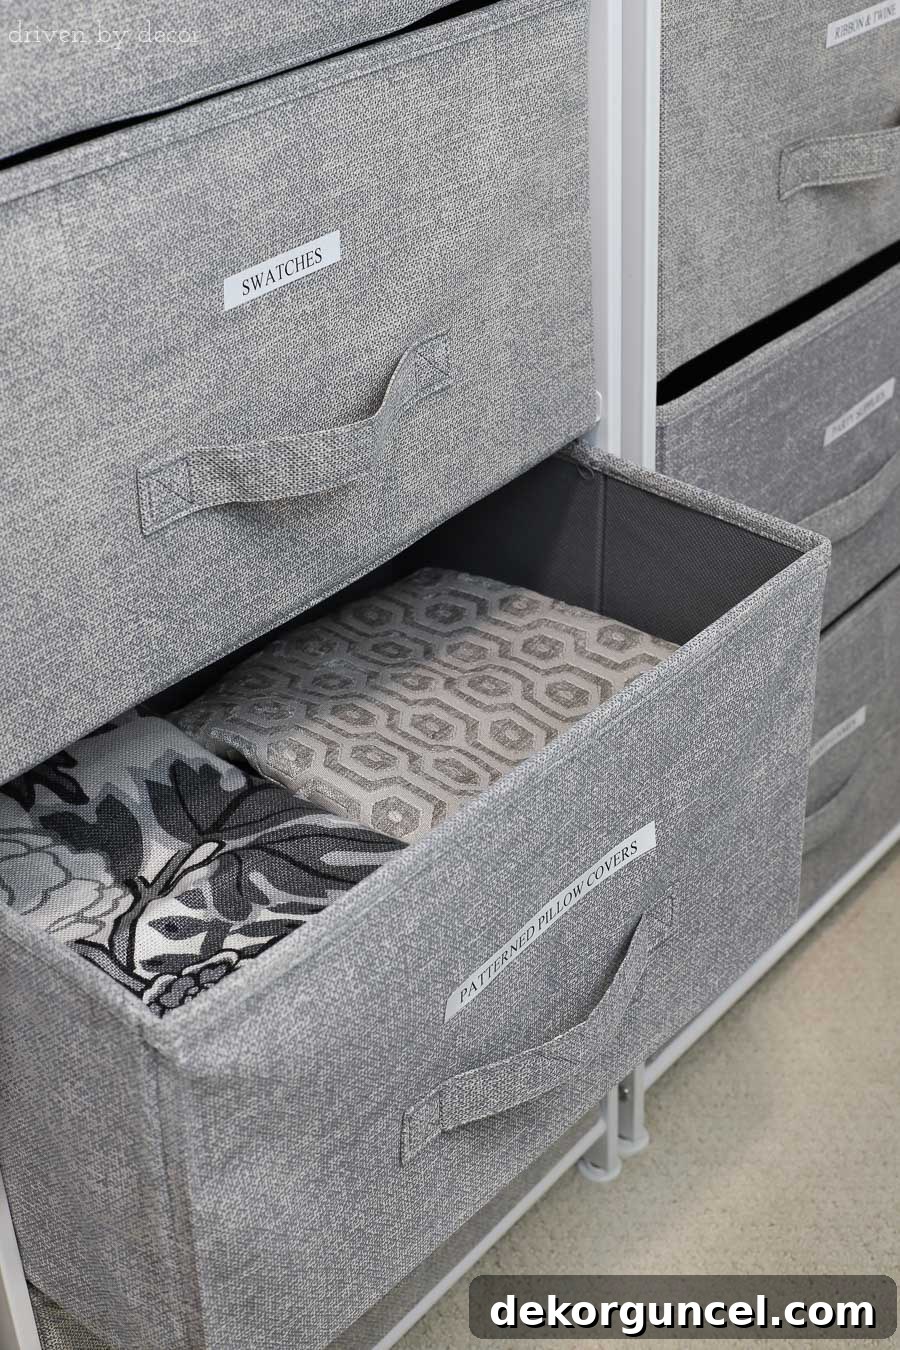
I use {this LM280 labeler}, chosen for its feature that allows custom fonts from your computer, though I often find myself sticking to one of its excellent preloaded fonts. It’s incredibly user-friendly to set up and operate. The thoughtful design of the fabric dressers, with drawer pulls slightly below the center, leaves an ideal space for labels. A quick tip: I found some labels began to peel after a few months on the fabric. A simple fix was to cover them with clear packing tape, which has effectively kept them in place!
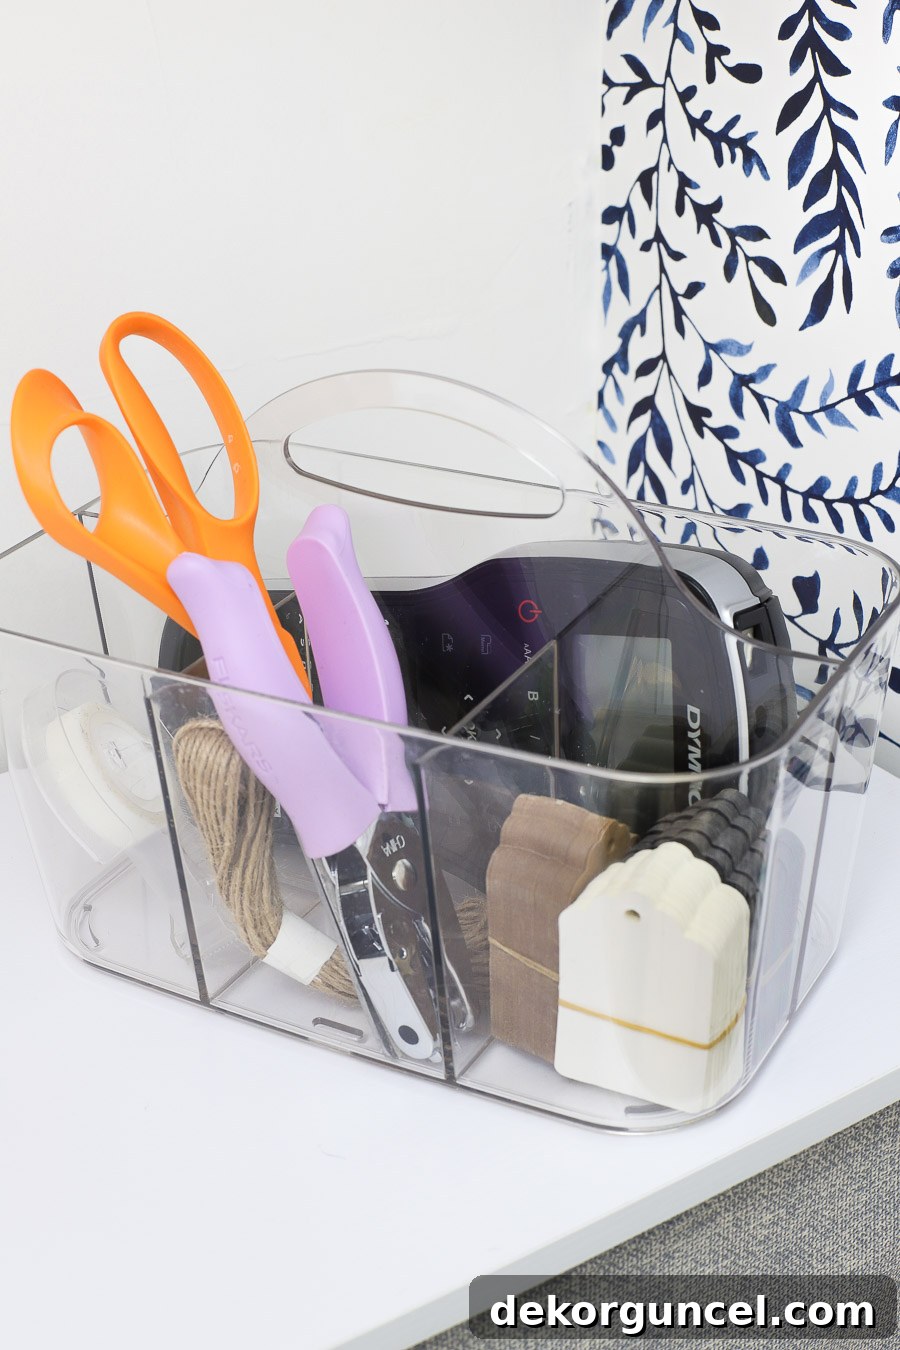
To ensure I’d consistently label items and maintain order, I placed my labeler, along with other frequently needed small items for closet upkeep, into {this acrylic tote}. It now sits on a low shelf, making it a convenient “grab-and-go” tool for ongoing organization.
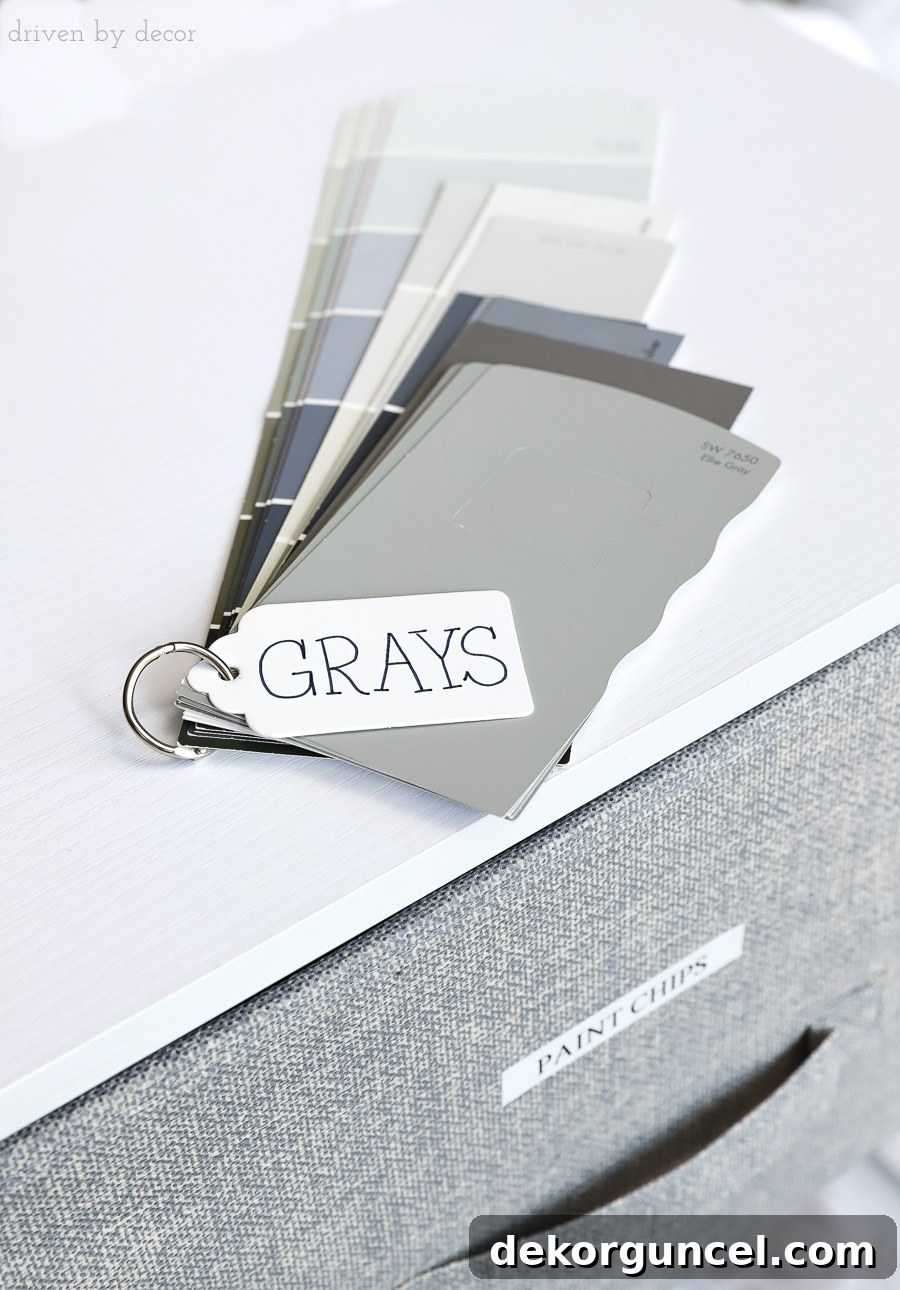
I also tackled my collection of paint chips. Despite having what felt like three duplicates of every paint strip ever made, I could never find the right one when inspiration struck. Instead of organizing them by brand, which didn’t suit my workflow, I reorganized them by color – a much more intuitive system for how I actually use them. For example, I gathered all my favorite gray paint chips and strips, punched a hole in the corner of each, and then secured them with a small loose-leaf ring and a labeled white tag. Now, when I’m searching for a gray paint color, all my top picks from various brands are consolidated in one easily accessible place!
Step 6: Integrate Smaller Organizers and Return Remaining Items
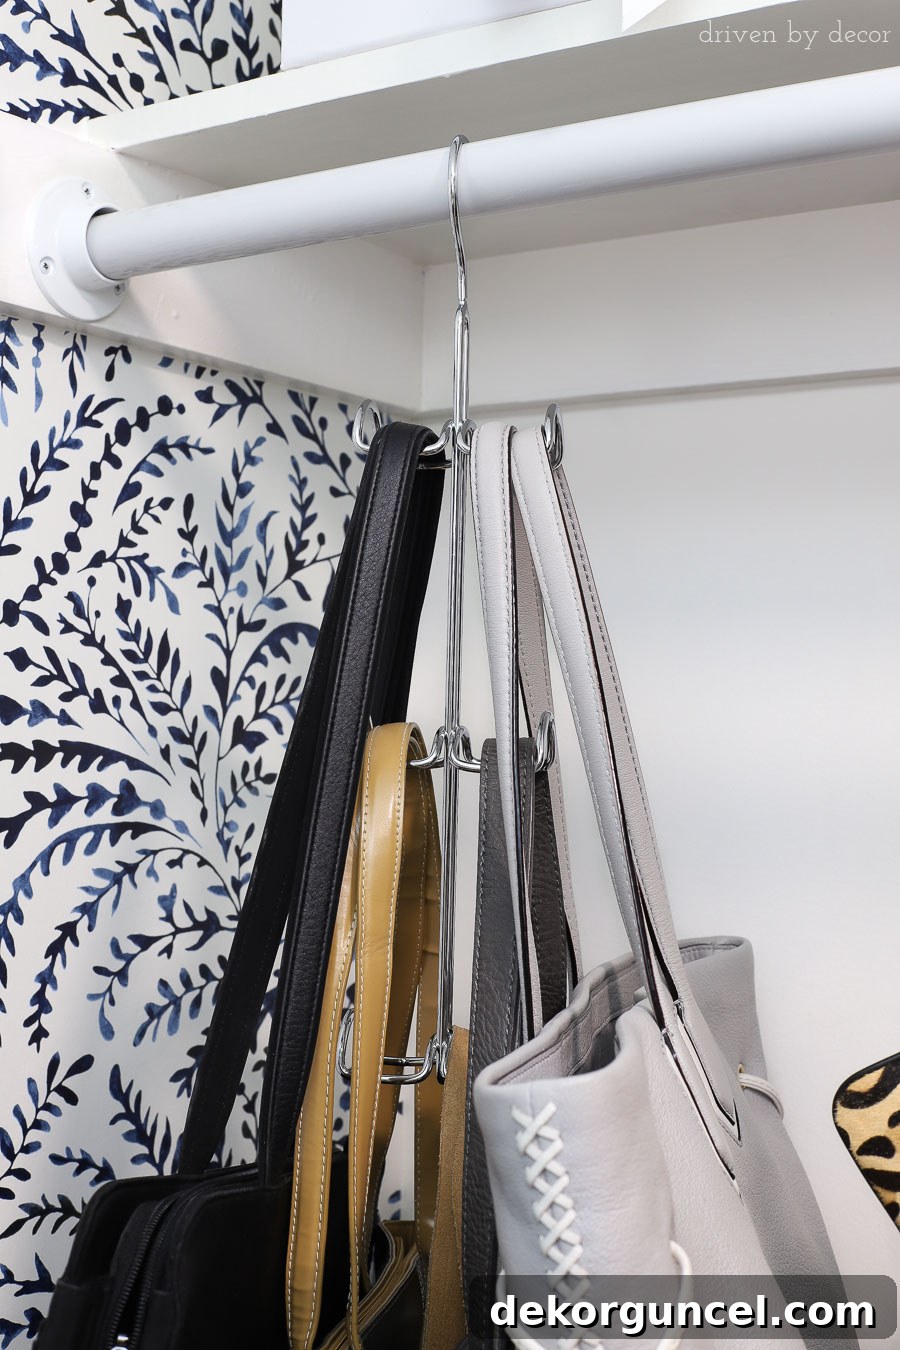
With the major storage pieces and the labeling system in place, it’s time to bring back the rest of your belongings and complete the organization. I started by installing the smaller, specialized organizers. This included {this purse organizer} and {this organizer hook}, both strategically hung over my 5-drawer fabric dresser:
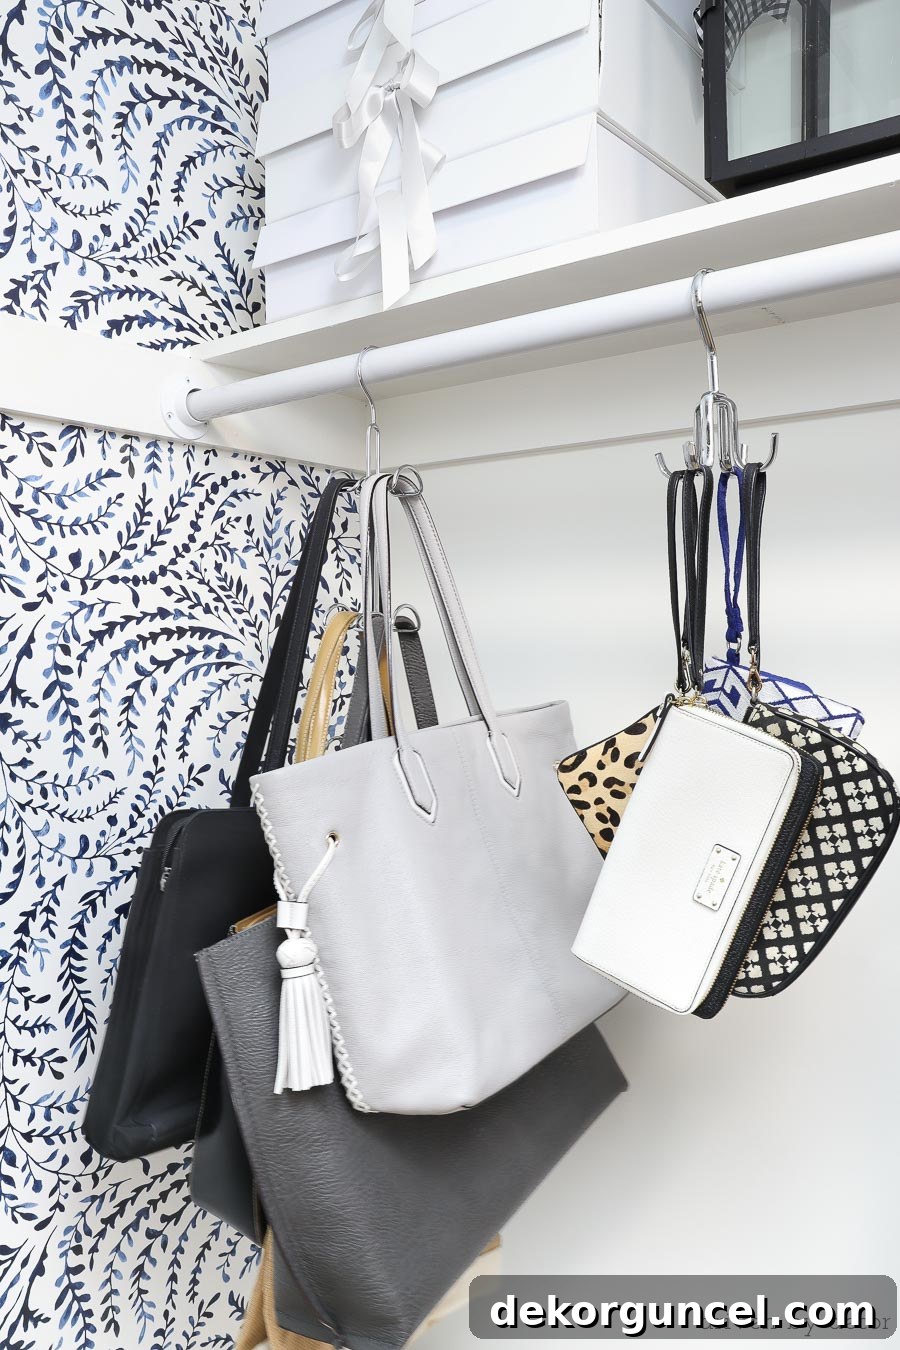
My goal was to make items like totes and wristlets easily accessible, especially since I often find myself rushing when I need them. The {InterDesign’s purse organizer} proved ideal for my larger totes and offers versatile storage for other items like scarves or baseball caps:
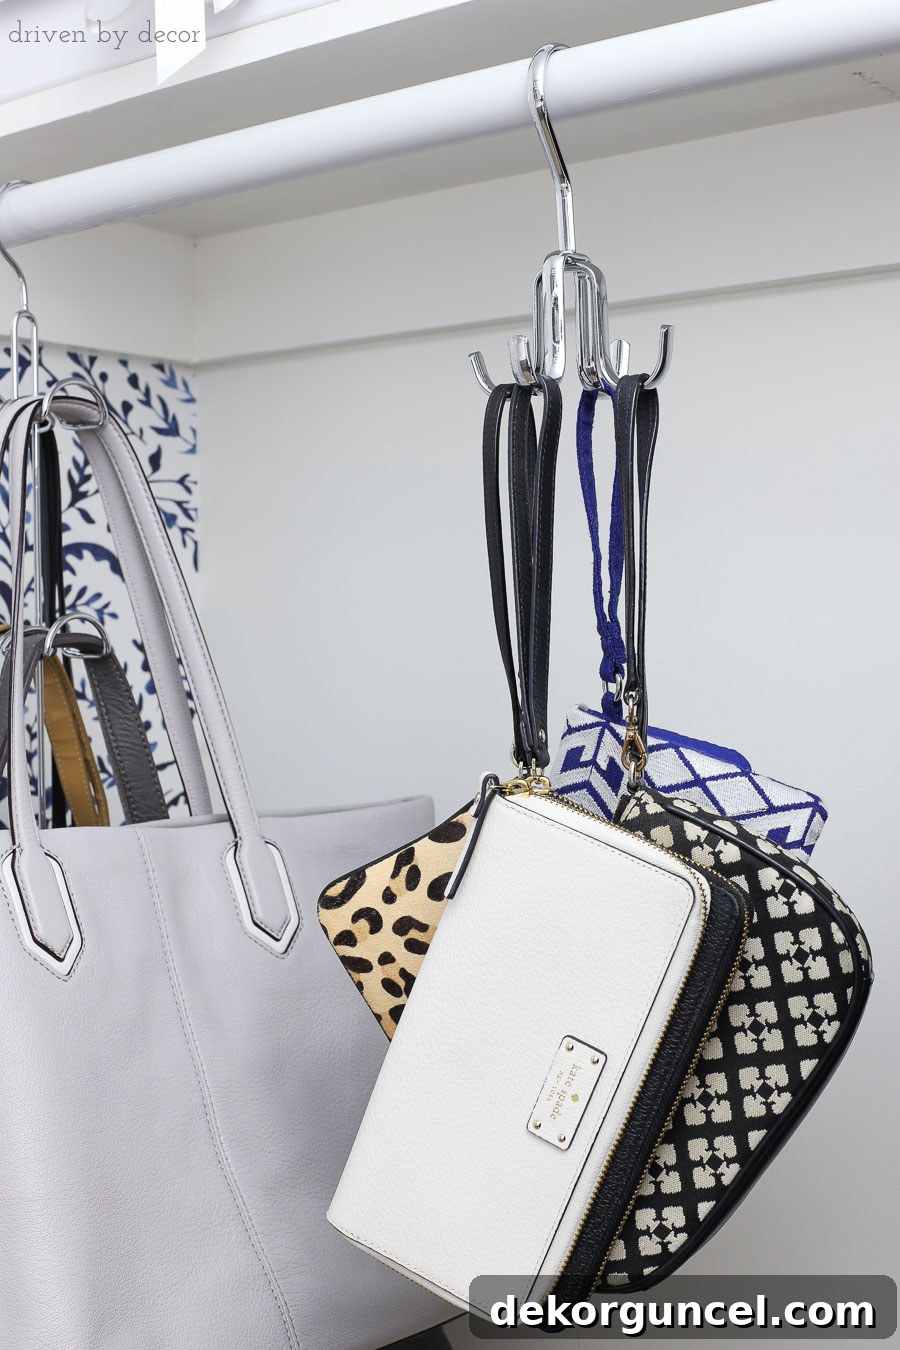
For my wristlets, {this all-purpose organizer hook} works perfectly and is incredibly versatile. Many users find it useful as a quick hanging spot for clothes that might otherwise end up on a chair, or for organizing bras, umbrellas, and belts, showcasing its adaptable design.
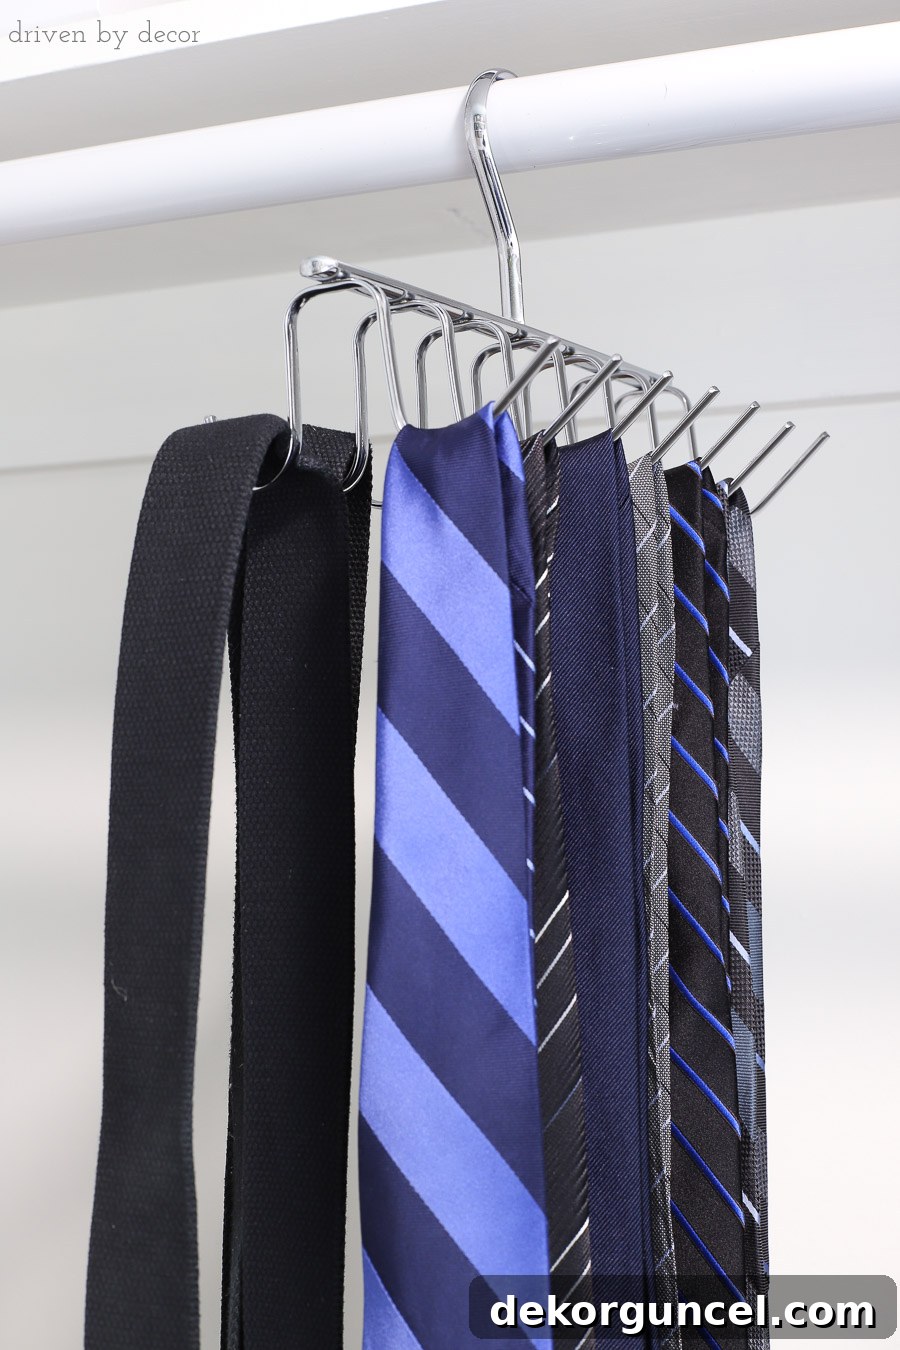
Adjacent to these, I installed {this belt & tie rack}. Traditionally, belts are hung by their buckle, but given the storage dresser below, I simply looped the entire belt over the hooks, which works just as effectively:
With all the organizers in place, I meticulously returned every remaining item to its designated spot. I was genuinely astonished by how much fit into the fabric dresser drawers and how much more spacious the closet now appears. Despite only decluttering about a quarter of its original contents, the visual impact makes it seem as though three-quarters of the clutter has vanished! The agony of rummaging through a disorganized “hoard closet” is now a distant memory; grabbing a tote, a game, or a pair of winter gloves is utterly effortless.
The transformation of this closet from a dreaded, chaotic space to a beautifully functional and organized storage solution has been incredibly rewarding. All the fantastic closet organization products used in this makeover are linked throughout the post for your convenience, and I’ve also compiled them into a comprehensive source list below. With the holidays approaching, many of us are busy, but the “January urge” to clean and organize is just around the corner! I’ve created a pinnable image below, so if now isn’t the perfect time for your closet makeover, you can easily save this post and revisit it when your organizational fever strikes.
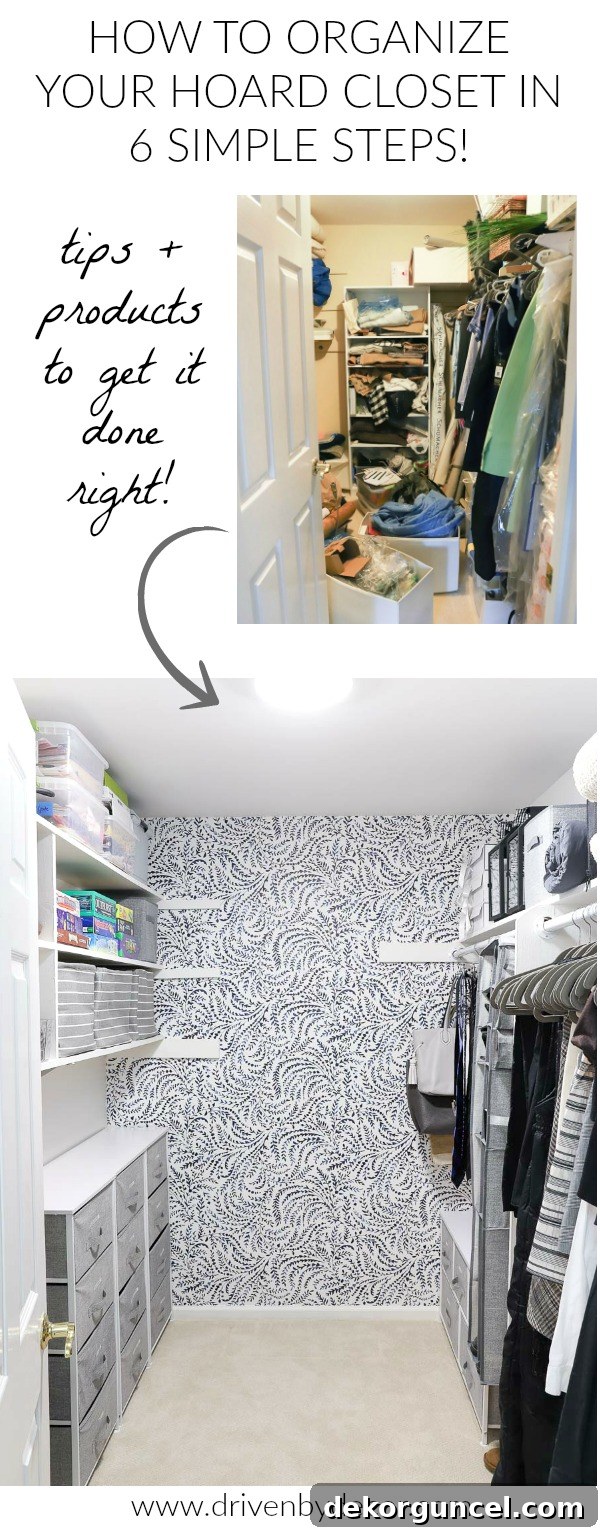
I hope you enjoyed following this makeover journey – home transformations are truly my favorite projects! Thanks, as always, for stopping by. If you’re feeling inspired to continue organizing, you might love my post featuring 20 of my favorite home organization ideas!


Essential Organizational Elements: 5-Drawer Low Fabric Dresser | 4-Drawer Tall Fabric Dresser (similar item) | Rope Handled Striped Storage Bins | Fabric Storage Cubes | Shoe & Boot Organizer | Acrylic Tote | Hanging Purse Organizer | Hanging Organizer Hooks | Belt & Tie Rack
Other Decor & Tools: Paint: Benjamin Moore’s Simply White | Wallpaper | LED Flush Mount Ceiling Light | Labeler (LM280) | Small Metal Rings | White Tags