
Mastering DIY Painting: Professional Results with These 7 Essential Tips
Embarking on a room painting project can be a deeply satisfying and cost-effective way to refresh your home. Whether you’re a seasoned DIY enthusiast or a first-timer holding a paintbrush, achieving a flawless, professional-looking finish is always the goal. Having personally painted multiple homes from top to bottom over nearly two decades – with only a few ceilings outsourced – I’ve accumulated a wealth of practical, time-saving, and money-saving strategies that consistently deliver exceptional results. These aren’t just mere suggestions; they are game-changers I’ve discovered through countless hours with rollers and brushes. Today, I’m thrilled to share my top seven painting tips that will not only streamline your process but also elevate the quality of your finished work, making your DIY painting journey a truly rewarding experience. Get ready to transform your space like a pro! (Please note: this post includes some affiliate links to helpful products; a full disclosure is available {here}).
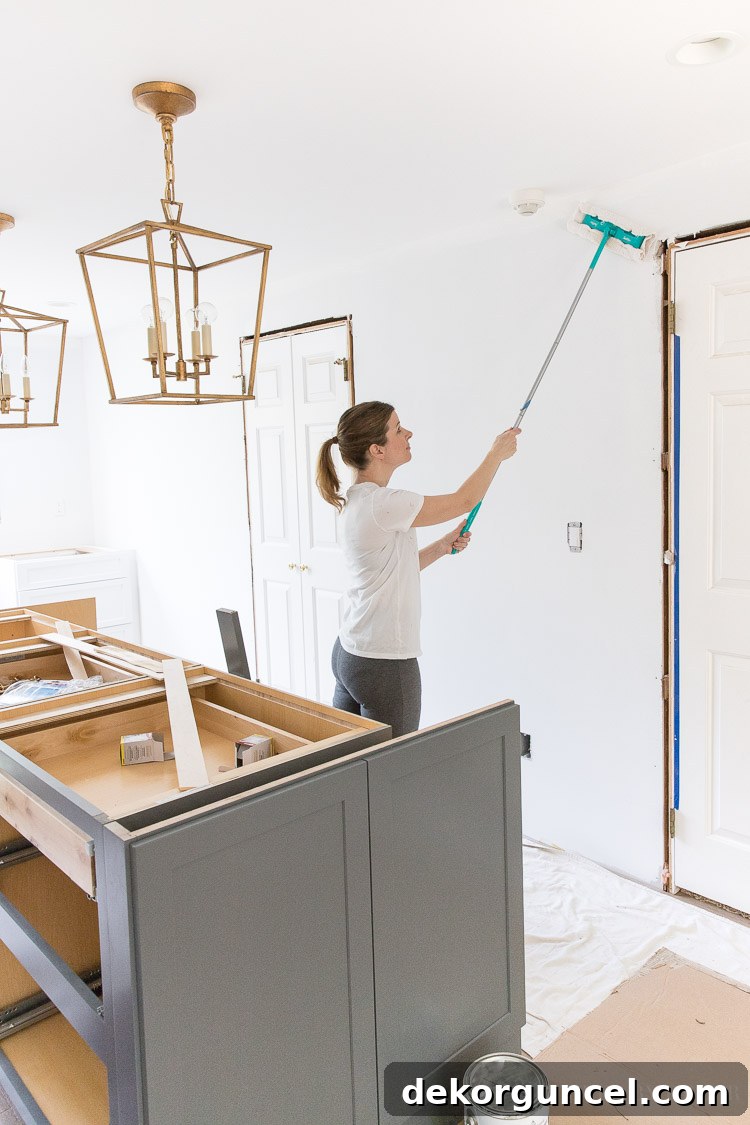
1. The Swiffer Secret: Effortlessly Clean Drywall Dust Before Painting
A pristine surface is the bedrock of any successful paint job. Whether you’re priming newly installed drywall or refreshing existing walls laden with dust from spackling and sanding, meticulous cleaning is non-negotiable. Ignoring this crucial step can lead to a bumpy, uneven finish and poor paint adhesion, compromising both the appearance and longevity of your work. Traditional cleaning methods often involve cumbersome wiping with a damp cloth, which can be messy, time-consuming, and require frequent ladder adjustments. But what if there was a simpler, more efficient way to achieve beautifully smooth, dust-free walls?
My secret weapon for making quick work of drywall dust is surprisingly simple: a Swiffer Duster. This innovative tool isn’t just for everyday household chores; it’s a brilliant hack for pre-painting wall prep. While the manufacturer’s cleaning cloths work well, they can quickly accumulate dust and are not the most economical choice for larger areas. Instead, I recommend using your own cloths – microfibers are ideal for their dust-trapping capabilities, but even old washcloths work perfectly. Simply wrap your chosen cloth around the Swiffer head, securing it as you would a standard Swiffer sheet. As you glide it across your walls, it effortlessly captures and holds onto fine dust particles.
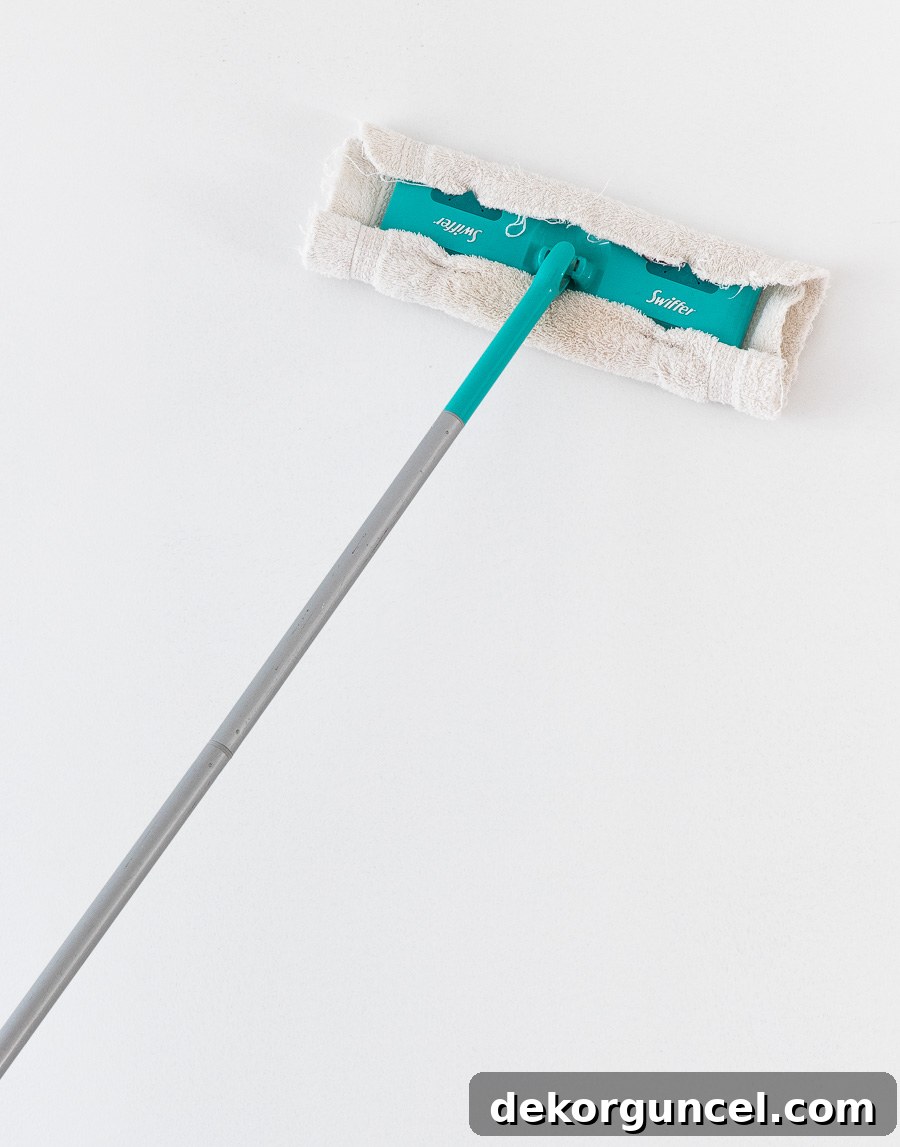
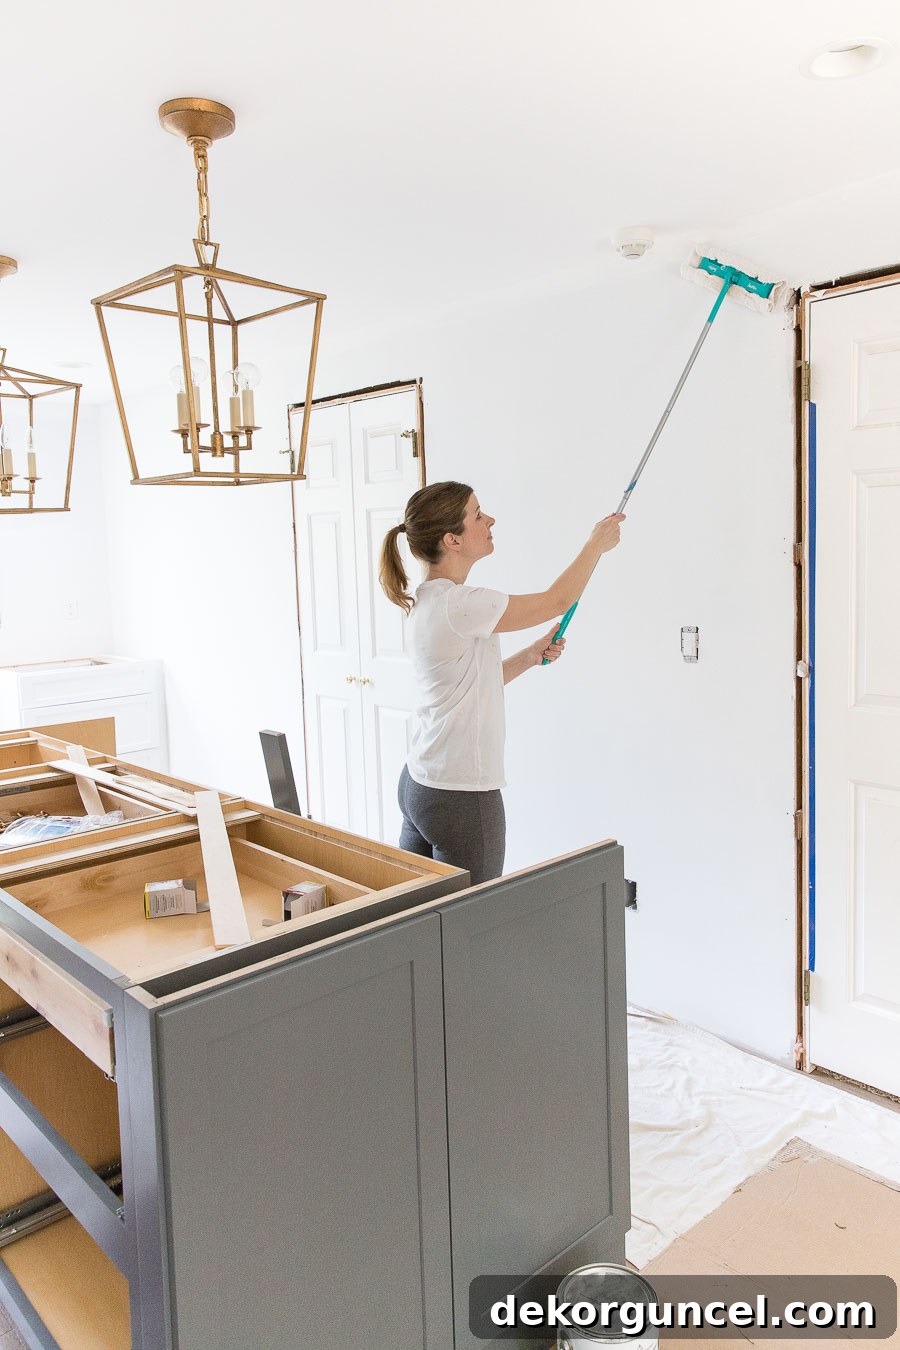
High-quality microfiber cloths like {these} are exceptionally effective, but don’t hesitate to use clean, old washcloths if you’re out of dedicated microfibers. The key advantage of the Swiffer method is its extended reach. You can easily clean from floor to ceiling without constantly climbing up and down a ladder, saving invaluable time and reducing physical strain. As one cloth becomes saturated with dust, simply replace it with a fresh one. This technique ensures that your walls are impeccably clean, providing an optimal surface for paint adhesion and guaranteeing a remarkably smooth finish free from unsightly dust particles.
2. Illuminate with Precision: The Power of a Stand-alone LED Work Light
Proper lighting is paramount for a professional paint job, yet it’s often overlooked by DIY painters. In my early days of learning to paint, the standard recommendation was a clip-on light attached to a ladder – a solution that, while functional, presented numerous challenges. These lights often created harsh shadows, forcing constant repositioning and leading to uneven illumination that could easily obscure imperfections or missed spots. The result was often a paint job that looked good under the clip-on light but revealed flaws in natural daylight.
Enter the modern stand-alone LED work light. These powerful, portable lighting solutions have revolutionized how we illuminate our workspaces. Unlike their predecessors, a quality LED work light placed strategically on the floor can bathe a significant section of your wall in bright, even light. This widespread illumination minimizes shadows, making it far easier to identify uneven paint application, missed areas, and subtle imperfections before they dry. The time saved by not having to constantly adjust your light source is substantial, allowing you to maintain a consistent painting rhythm and focus on the task at hand.
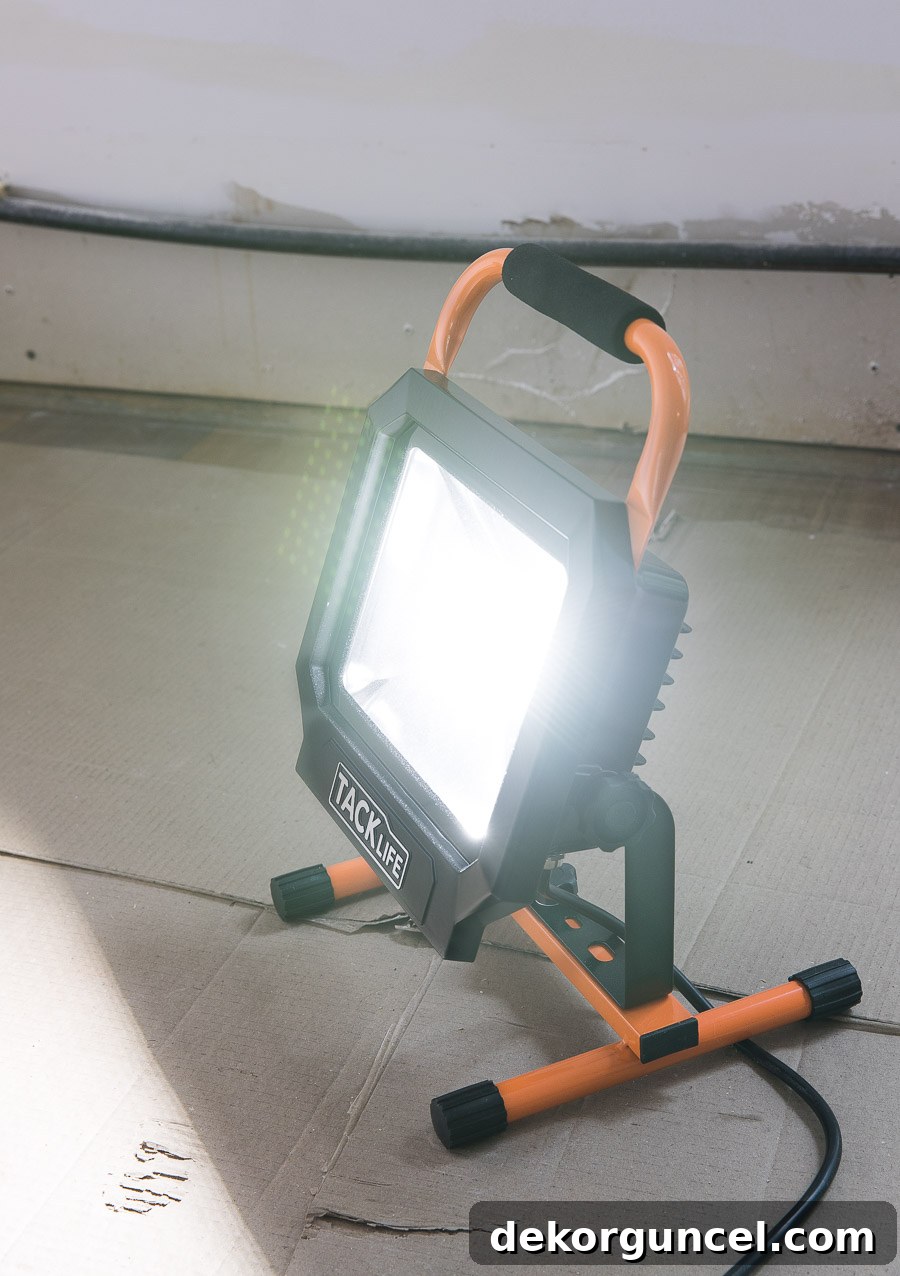
Beyond superior illumination, LED work lights offer several advantages. They are remarkably energy-efficient, drawing less power than traditional halogen lights, which can be a relief for your utility bill during long projects. More importantly, LED lights generate significantly less heat. Old-school work lights could become incredibly hot, posing a burn risk and even a potential fire hazard. The cooler operation of LEDs not only enhances safety but also makes for a more comfortable working environment. I personally rely on an LED work light similar to {this one}, paired with a {15-foot extension cord}. This generous cord length provides ample flexibility, allowing me to move the light freely without tangles or constant unplugging, ensuring optimal visibility throughout the entire painting process.
3. Banish Roller Lint: A Simple Painter’s Tape Trick for Smooth Walls
Few things are as frustrating during a painting project as rolling paint onto a beautifully prepped wall only to discover an army of tiny lint fibers embedded in the fresh coat. This common annoyance can ruin an otherwise perfect finish, often necessitating tedious sanding and repainting. I learned this lesson the hard way when lint from a cheap roller marred a kitchen ceiling, leading to 45 minutes of delicate sanding to remove the countless imperfections. The good news is, this problem is largely preventable.
The first line of defense against lint is to invest in quality tools. While it might be tempting to save a few dollars on inexpensive rollers, the trade-off in performance and the potential for a lint-filled mess isn’t worth it. Higher-quality rollers are designed with more durable fibers that shed significantly less. For all my wall painting projects, I consistently use and recommend {these Purdy ⅜″ nap rollers}, known for their excellent paint pickup and minimal shedding.
However, even the best rollers can have some loose fibers right out of the package. This is where my second, incredibly effective tip comes in: use painter’s tape to “de-lint” your roller before you even dip it into paint. Simply take a long strip of painter’s tape and wrap it completely around your roller cover, pressing it down firmly. Then, peel the tape off. As you remove the tape, it will lift away any loose fuzz or manufacturing debris clinging to the roller’s surface. Repeat this process a few times until no more lint adheres to the tape.
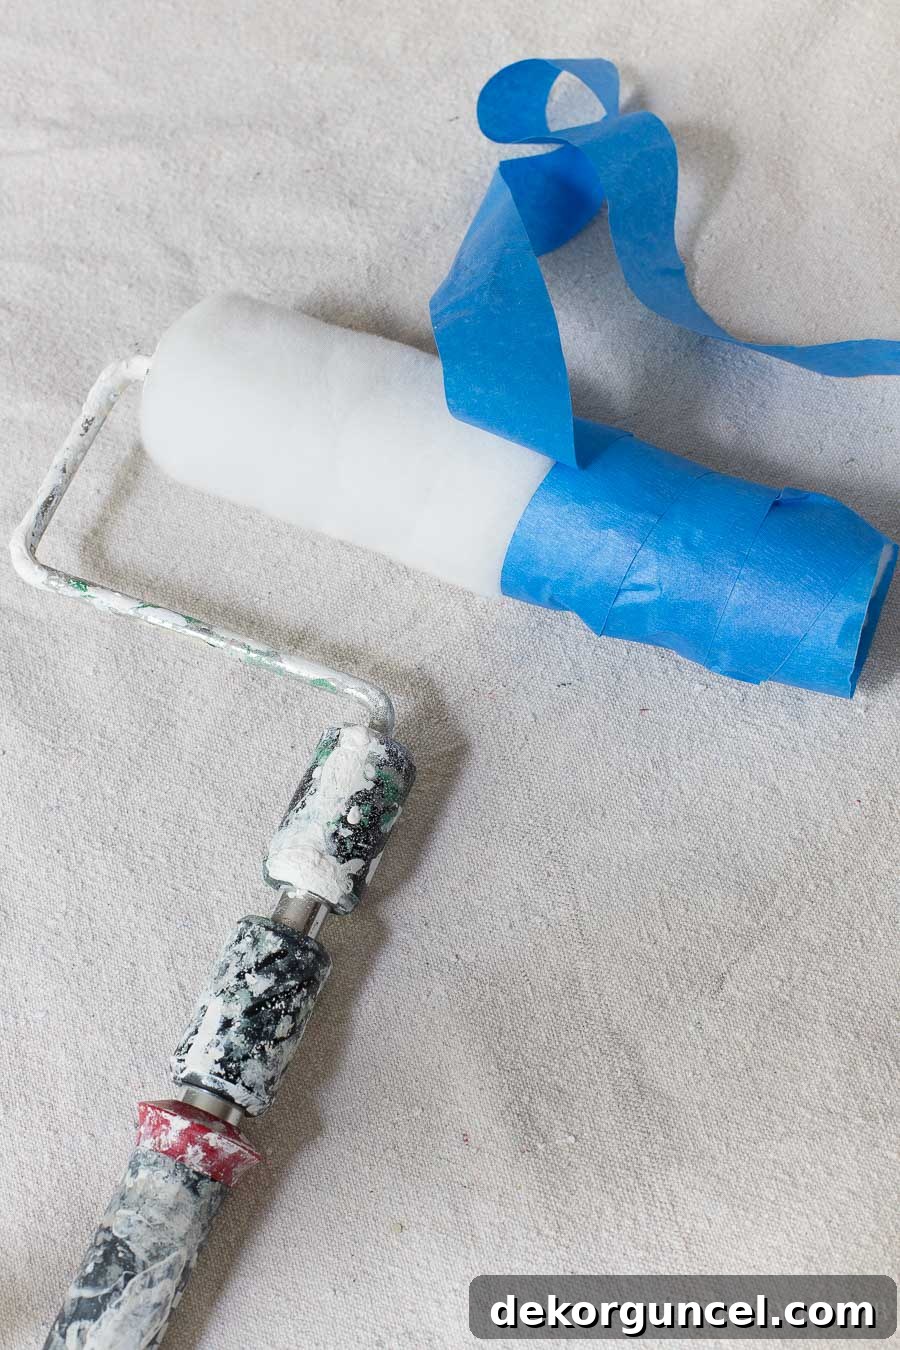
This simple, quick step significantly reduces the amount of lint that could potentially transfer into your fresh paint, ensuring a smoother, more professional-looking finish right from the start. By combining a quality roller with this easy tape trick, you’ll save yourself the headache of corrective work and enjoy beautifully smooth, lint-free walls.
4. Smart Cleanup: Line Your Roller Tray with Aluminum Foil
Cleaning up after a painting session can be one of the most tedious parts of the process. For those like myself living with a septic system, conserving water and minimizing the amount of paint rinsed down the drain is not just a preference, but a necessity. This makes disposable roller tray liners an attractive option. While plastic liners are readily available at hardware stores, they often come with their own set of frustrations – primarily, their tendency to shift and slide around within the tray, leading to potential spills and uneven paint distribution.
My go-to solution for an easy, inexpensive, and stable disposable liner is everyday aluminum foil. This hack is incredibly simple yet remarkably effective. The key is to use an 18-inch wide roll of heavy-duty foil for maximum coverage and durability. Cut a piece of foil that is generously longer than your roller tray – you’ll need enough excess to mold it securely. Carefully press the foil into the contours of your roller tray, smoothing out any wrinkles to create a custom-fit liner. Once the foil is shaped, fold the excess edges down over all four sides of the tray. This creates a tight, secure fit that prevents the liner from moving while you’re rolling, ensuring a stable painting surface.
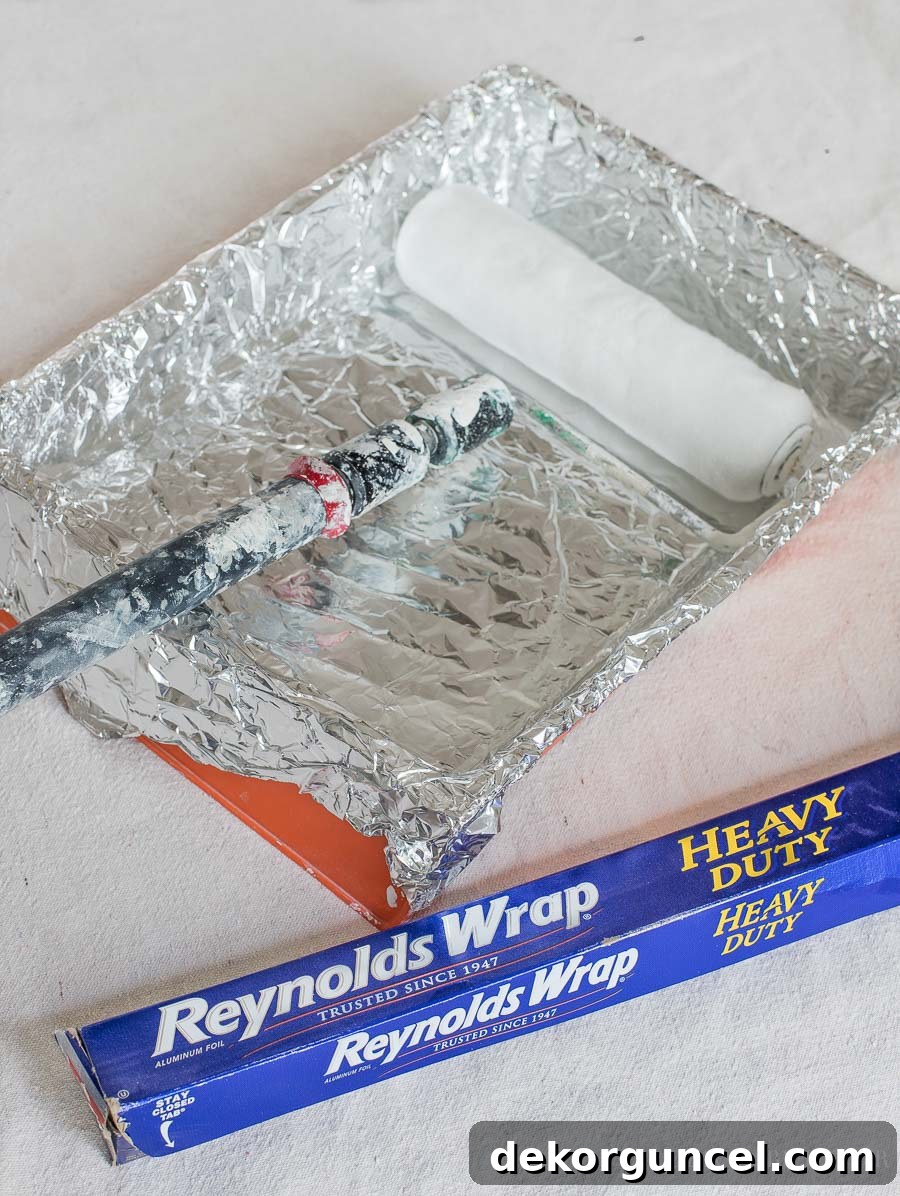
While the foil liner is nearly perfect, there’s a minor caveat: occasionally, a small rip can occur, allowing a tiny amount of paint to seep into the actual roller tray. However, this is easily remedied with a quick wipe-down of the tray once you’ve finished painting and discarded the foil. The convenience and environmental benefits far outweigh this minor inconvenience. As an alternative, Glad Press & Seal also works wonderfully for lining trays, offering similar ease of cleanup and stability. Both methods significantly reduce cleanup time and water usage, making your painting project more efficient and eco-friendly.
5. Maximize Efficiency: Embrace the Telescoping Roller Frame
For anyone tackling a painting project, especially those of us who aren’t vertically challenged, a telescoping roller frame is an absolute game-changer. This tool is, without exaggeration, one of my most highly recommended tips for painting walls efficiently and comfortably. The traditional method of constantly moving a ladder around the room, climbing up, painting a section, climbing down, and repeating the process, is not only incredibly time-consuming but also physically exhausting. A telescoping roller frame eliminates much of this arduous back-and-forth, dramatically speeding up your work.
The beauty of a telescoping frame lies in its adjustable length. You can use it at a standard roller length for lower wall sections or twist and extend it to nearly double its size, allowing you to comfortably reach the uppermost parts of your walls, including the often-tricky areas near the ceiling. This means you can maintain a more continuous painting flow, covering larger areas from a single standing position without the constant interruption of ladder repositioning. The improved ergonomics not only saves significant time but also reduces strain on your back and legs, making long painting sessions far more manageable.
My own telescoping roller frame has been a cherished tool for many years, bearing the marks of countless projects – a testament to its durability and indispensability. While my exact model is no longer available, it functions very similarly to {this extendable roller frame}. When selecting one, look for a sturdy, lightweight model with a reliable locking mechanism that holds the extended length securely. Investing in a quality telescoping roller frame is an investment in your time, comfort, and the overall efficiency of your painting endeavors, allowing you to achieve professional results with greater ease.
6. The Secret to Flawless Ceilings: Choosing the Best Ceiling Paint
Let’s be honest: painting ceilings is rarely anyone’s favorite task. It’s often physically demanding, messy, and can be frustrating to get right. This is precisely why selecting the absolute best ceiling paint is paramount – you want to do it once and do it right, avoiding the misery of extra coats or visible imperfections. After experimenting with numerous brands and formulations over the years, I’ve distilled my top ceiling painting tip down to one crucial recommendation: choose a paint specifically designed for ceilings, ideally one with a flat sheen and a subtle hint of gray.
The “flat sheen” aspect is critical. Unlike walls, where various sheens can add visual interest, a flat finish on a ceiling is your best friend for hiding flaws. Ceilings, particularly older ones, often have subtle imperfections, minor plaster repairs, or uneven textures that become glaringly obvious under the reflective qualities of a higher sheen paint. A flat paint diffuses light rather than reflecting it, effectively minimizing the visibility of these imperfections and creating a smooth, uniform appearance. The “touch of gray” further enhances this effect, providing a soft, subtle backdrop that absorbs light more effectively than stark white, which can sometimes highlight shadows and unevenness.
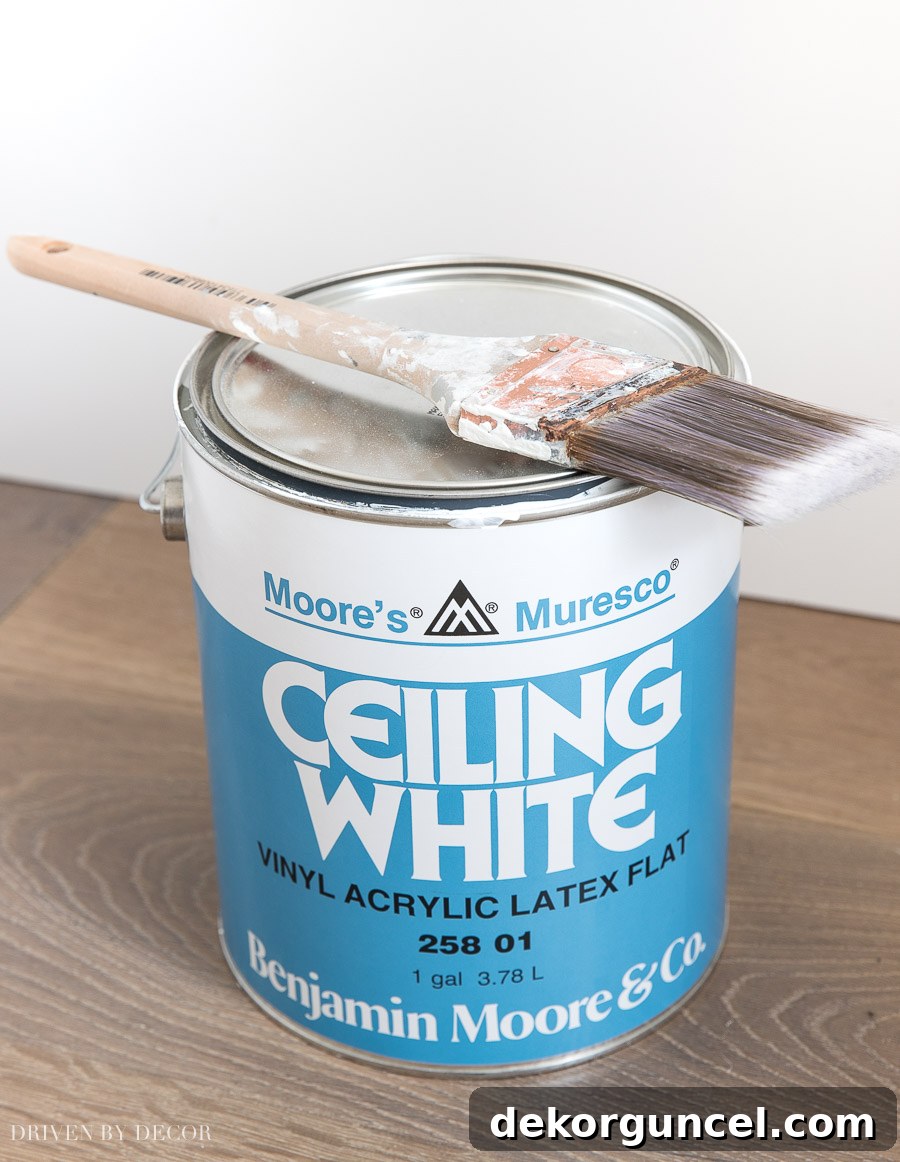
My absolute favorite, and the one I consistently return to for its unmatched performance, is Benjamin Moore’s Muresco ceiling paint. This particular formulation stands out for several reasons. Firstly, I have never experienced roller marks when using Muresco – a common complaint with many ceiling paints. The paint applies smoothly, levels beautifully, and dries to an incredibly consistent finish. Secondly, it offers excellent coverage, rarely requiring more than two coats, even over existing colors or patched areas. This saves considerable time and effort, transforming the most dreaded part of a painting project into a far more manageable task. By opting for a specialized ceiling paint like Benjamin Moore Muresco, you’re not just buying paint; you’re investing in a flawless, professional-grade ceiling finish that enhances the entire room.
7. Preserve Your Tools: Smart Storage for Brushes and Rollers
One of the most time-consuming aspects of painting, aside from the actual painting, is the daily cleanup of brushes and rollers. For many years, I painstakingly rinsed my tools at the end of each day, a process that not only consumed valuable time but also wasted a considerable amount of water. This routine was not only inefficient but also contributed to wear and tear on brushes and rollers. However, a brilliant tip from a friend completely transformed my approach, saving me hours of cleanup and preserving my tools for extended use.
The secret lies in air-tight storage, preferably in a cool environment like a refrigerator (for low VOC latex paints). For paint rollers, simply leave the roller cover on the frame. Then, slide the entire roller and frame into a large zip-top baggie. Squeeze out as much air as possible and seal the baggie tightly. For paint brushes, place the head of the brush into a smaller zip-top baggie, again removing air and sealing securely. I also use plastic Solo cups for holding paint for cutting in and edging; these can also be covered with a baggie and secured with a rubber band around the rim. Once sealed, place all your bagged tools into the refrigerator. The cold temperature significantly slows down the drying process of latex paint, effectively preserving your tools in a ready-to-use state for days, or even weeks.
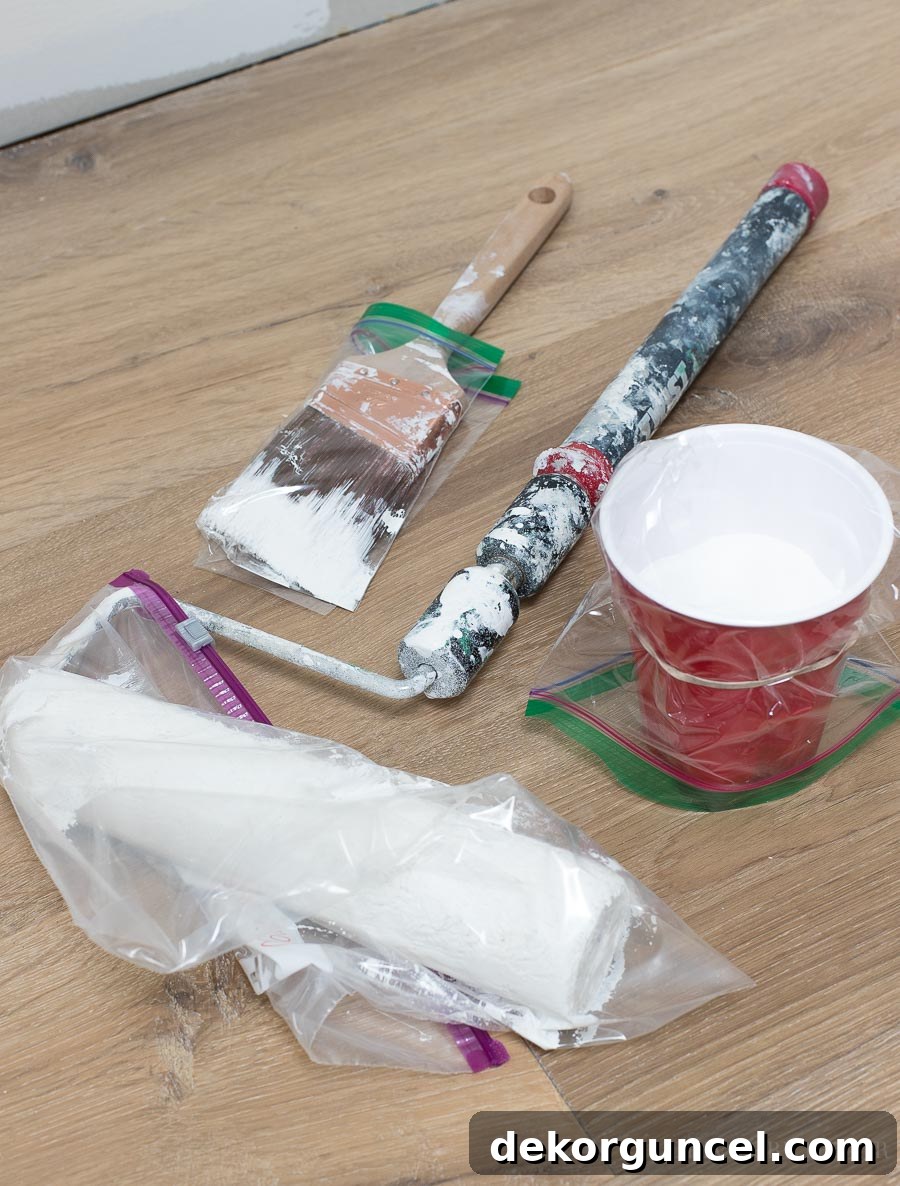
I’ve personally kept brushes and rollers fresh using this method for weeks at a time, allowing me to pick up right where I left off without the hassle of daily cleaning or buying new tools. It’s crucial to use high-quality brushes and rollers for this method, as cheaper tools may not withstand prolonged storage as effectively. A note on safety: if you choose to store paint in your refrigerator, ensure all items are sealed *very* tightly to prevent any odor transfer to food. While I’ve never experienced issues with low VOC latex paints when sealed properly, individual sensitivities vary, so proceed with caution and at your own risk. This ingenious storage hack is a testament to working smarter, not harder, enabling you to save time, conserve water, and extend the life of your valuable painting tools.
Transform Your Space: A Recap of Professional Painting Success
Embarking on a DIY painting project doesn’t have to be a daunting task. By incorporating these seven expert tips into your routine, you’re not just applying paint; you’re adopting techniques that seasoned professionals use to achieve superior results. From meticulously prepping your surfaces with a Swiffer, to illuminating your workspace with an LED light, preventing lint with painter’s tape, simplifying cleanup with foil, maximizing reach with a telescoping roller, selecting the perfect ceiling paint, and ingeniously preserving your tools, each step is designed to save you time, reduce effort, and elevate the quality of your finished project. You’ll not only save money but also gain immense satisfaction from a beautifully painted room that truly reflects your effort and skill.
I genuinely hope these insights empower you, whether you’re a novice or an experienced DIYer, to approach your next painting project with confidence and efficiency. The world of DIY is always evolving, and there’s always something new to learn. If you have any tried-and-true painting tips that you swear by, please share them! I’m always eager to discover new ideas and techniques to further refine the art of home painting. Happy painting, and enjoy the beautiful transformations you’ll create!
For more comprehensive painting tips and DIY guides, be sure to explore these related posts:
How to Prep Walls for Painting
How to Paint a Door
How to Paint Bathroom Cabinets
How to Paint Tile
Enjoy the rest of your weekend everyone!
