
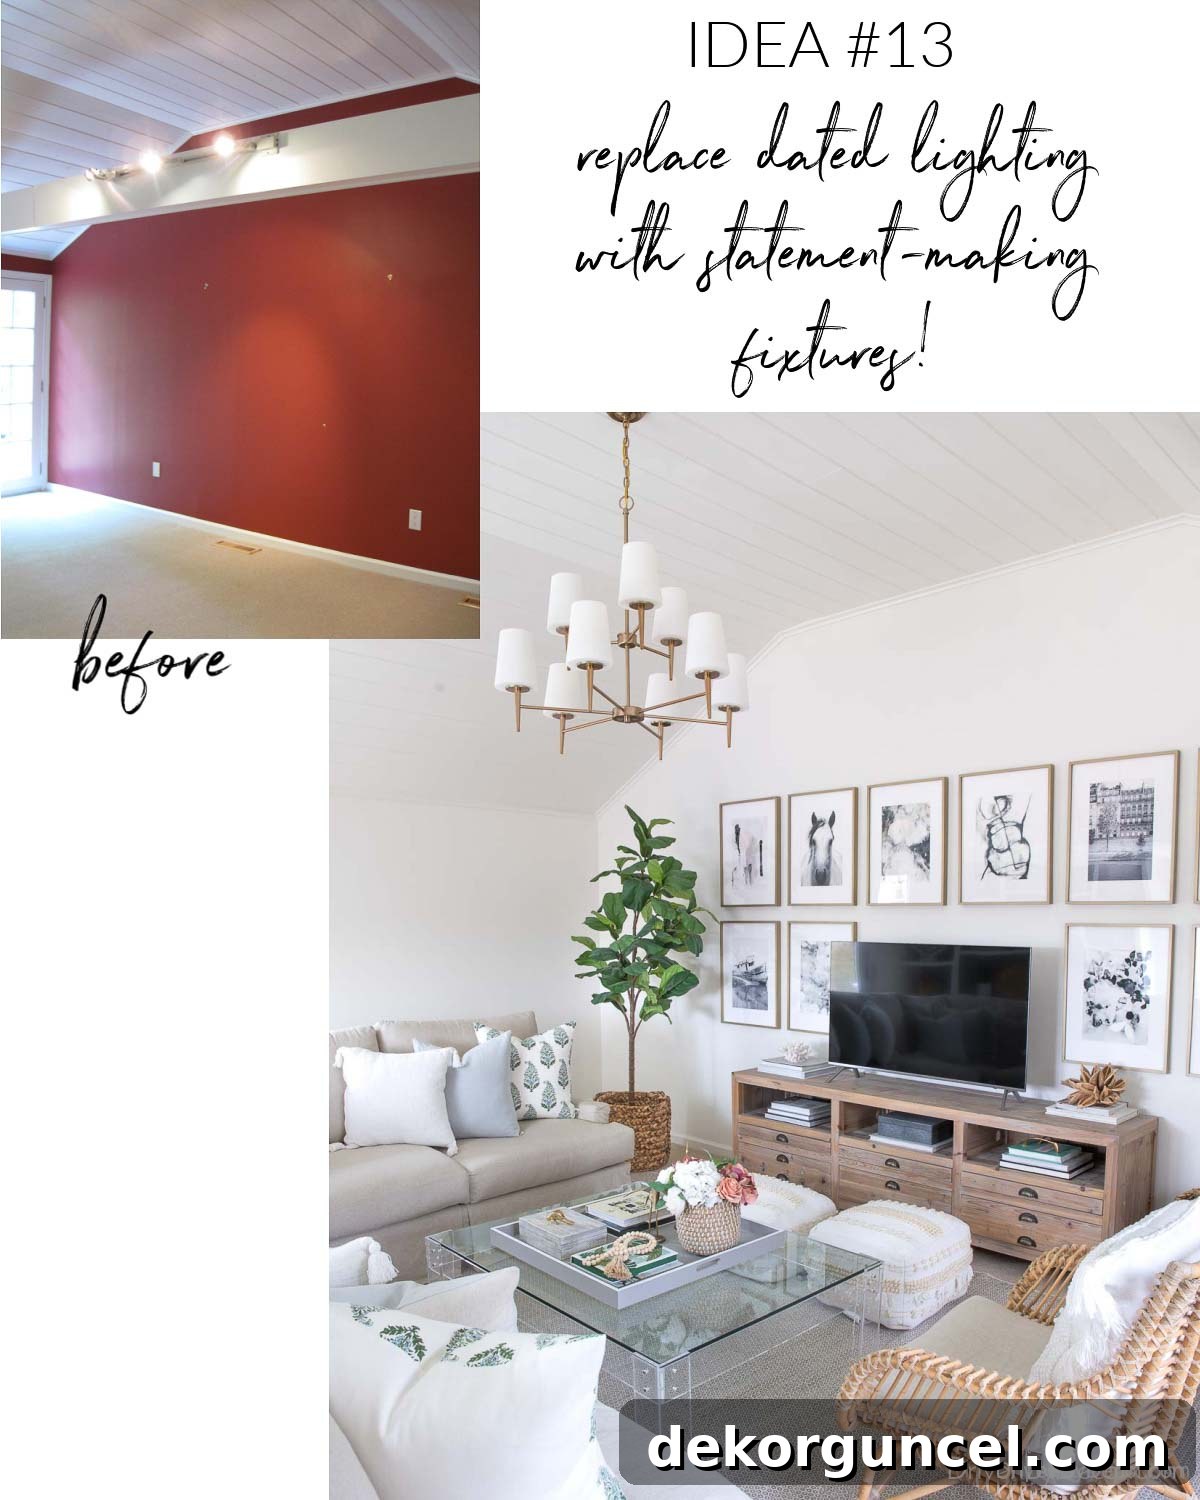
For eight wonderful years, our Connecticut home was a canvas for continuous transformation, rarely seeing a period of more than a few weeks without some exciting home remodeling project underway! Those years taught us invaluable lessons about making a house truly feel like home. Today, I’m thrilled to share 15 of my most cherished home remodeling ideas – the very projects that delivered the most significant impact and transformed our living spaces. These are the renovations I’d enthusiastically undertake again, knowing the immense value and joy they brought. Let’s dive into these truly transformative home updates! (This post includes commissionable links; for more information, please refer to my comprehensive disclosure statement {here})
1. Elevate Your Home with Substantial Molding and Trim
One of the most impactful yet often overlooked elements in home design is molding. In many rooms of our Connecticut home, the existing molding felt thin and underwhelming – a classic sign of builder-grade finishes that lacked character. Our dining room, for instance, had adequate baseboards, but the crown molding and chair rail were noticeably skinny and detracted from the room’s potential elegance.
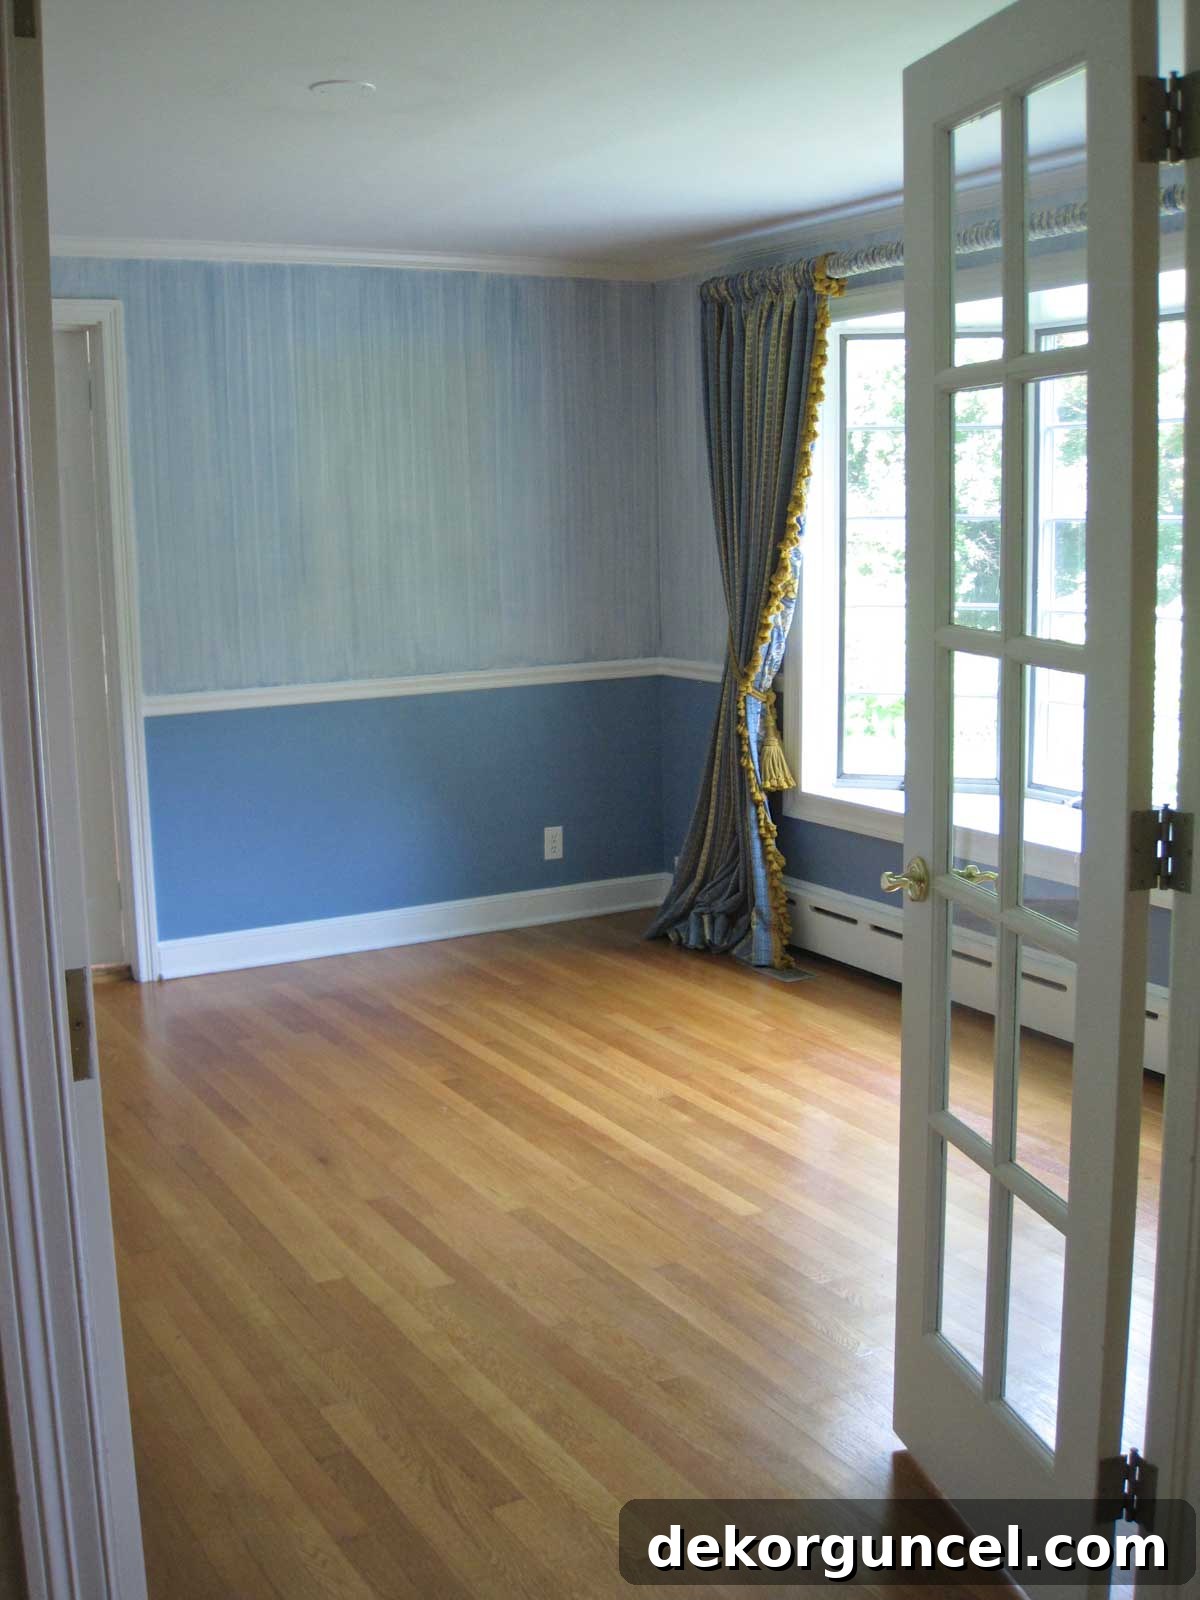
Alongside a fresh coat of paint, updated drapes, and a striking new light fixture, our most significant improvement here was replacing the undersized crown molding with a much more substantial and architecturally appealing alternative. The difference was remarkable, instantly adding a layer of sophistication and bespoke charm to the space.
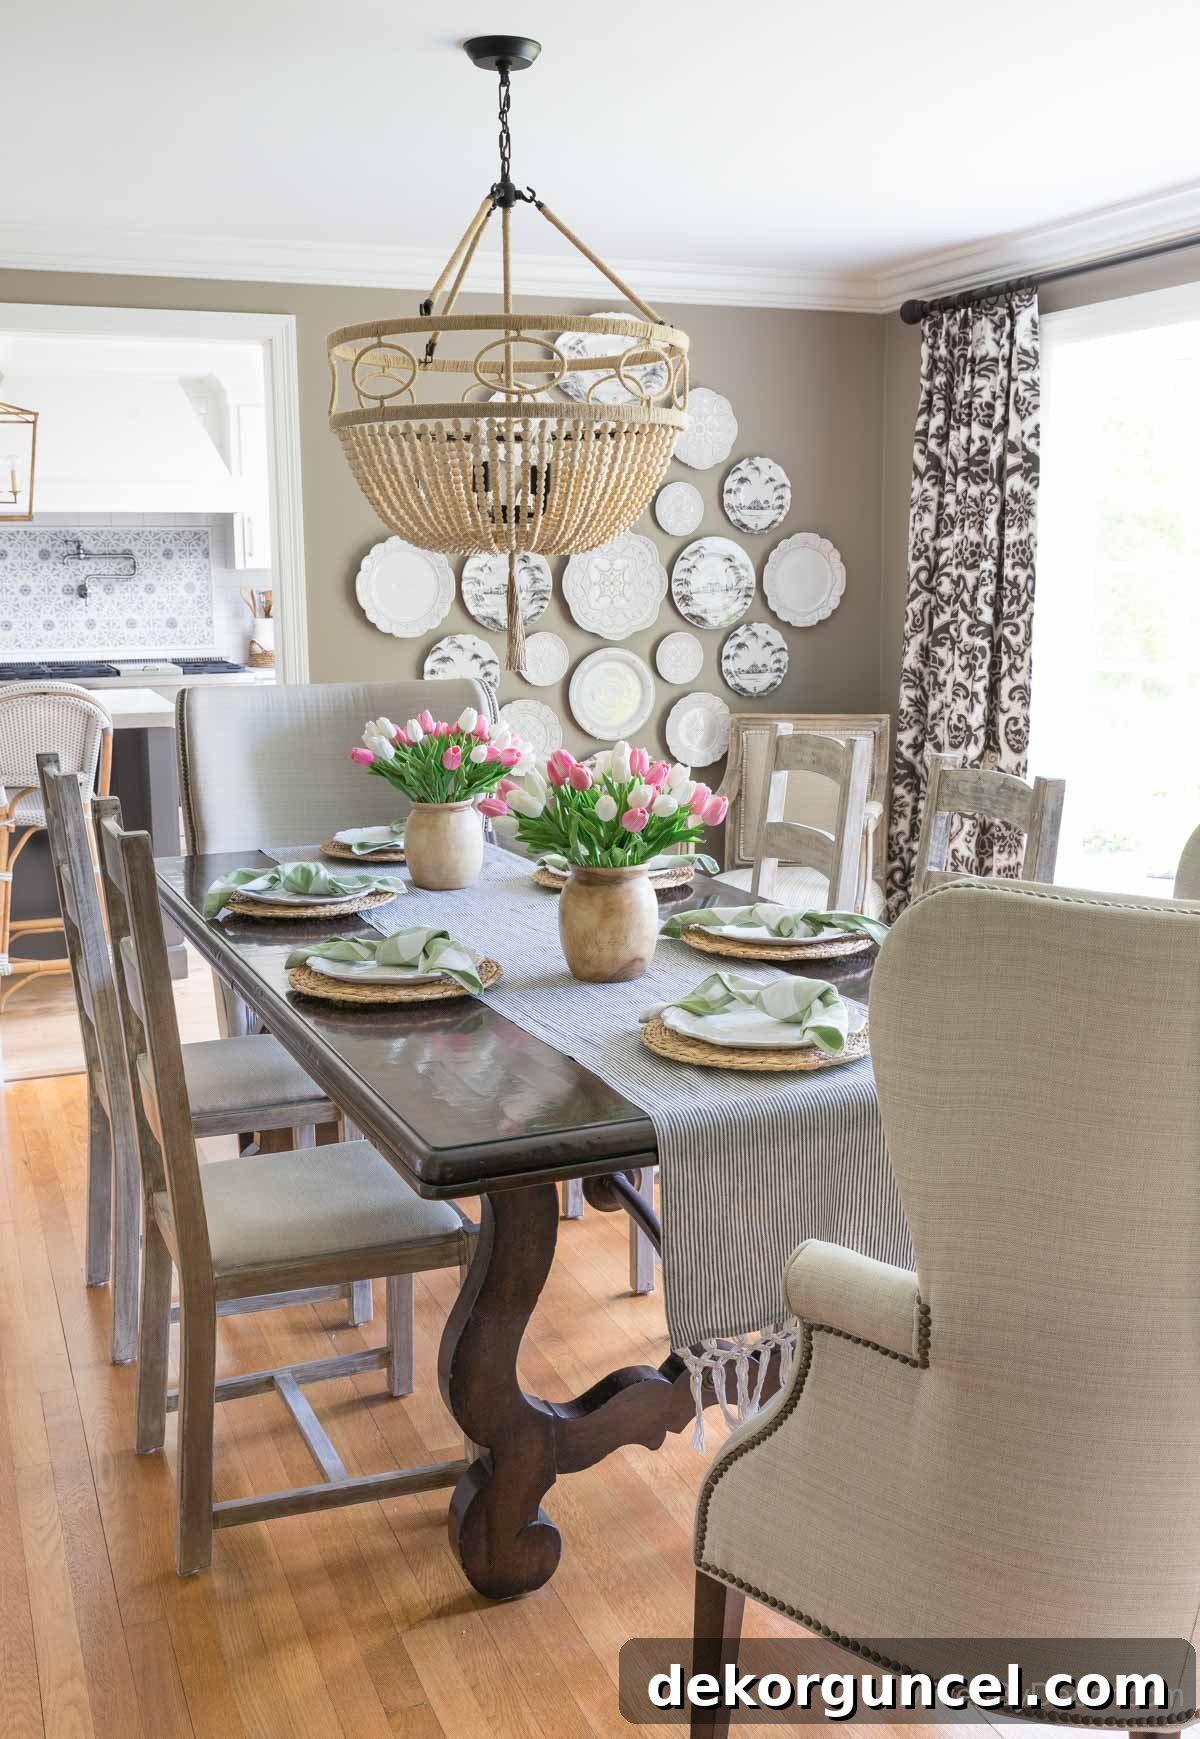
Dining Room Design Resources: Elegant wood bead chandelier | Stylish rattan chargers (13.5″) | Chic green & white plaid napkins | DIY Macrame fringe table runner guide | Decorative wood vases (similar styles) | Lifelike faux pink tulips | Beautiful faux white tulips | Classic white wall plates | Artistic patterned wall plates | Drapes, table, & chairs: currently unavailable
You might also observe that we opted to remove the chair rail entirely from the dining room. My personal preference leans towards either removing a subtle chair rail or enhancing it with additional molding below. For the dining room, my vision was to create a prominent plate wall (detailed instructions on how to stylishly hang plates on a wall are available), making its complete removal the ideal choice. Conversely, in my oldest daughter’s bedroom, I chose to augment the existing chair rail by adding molding beneath it. This is how her room appeared initially:
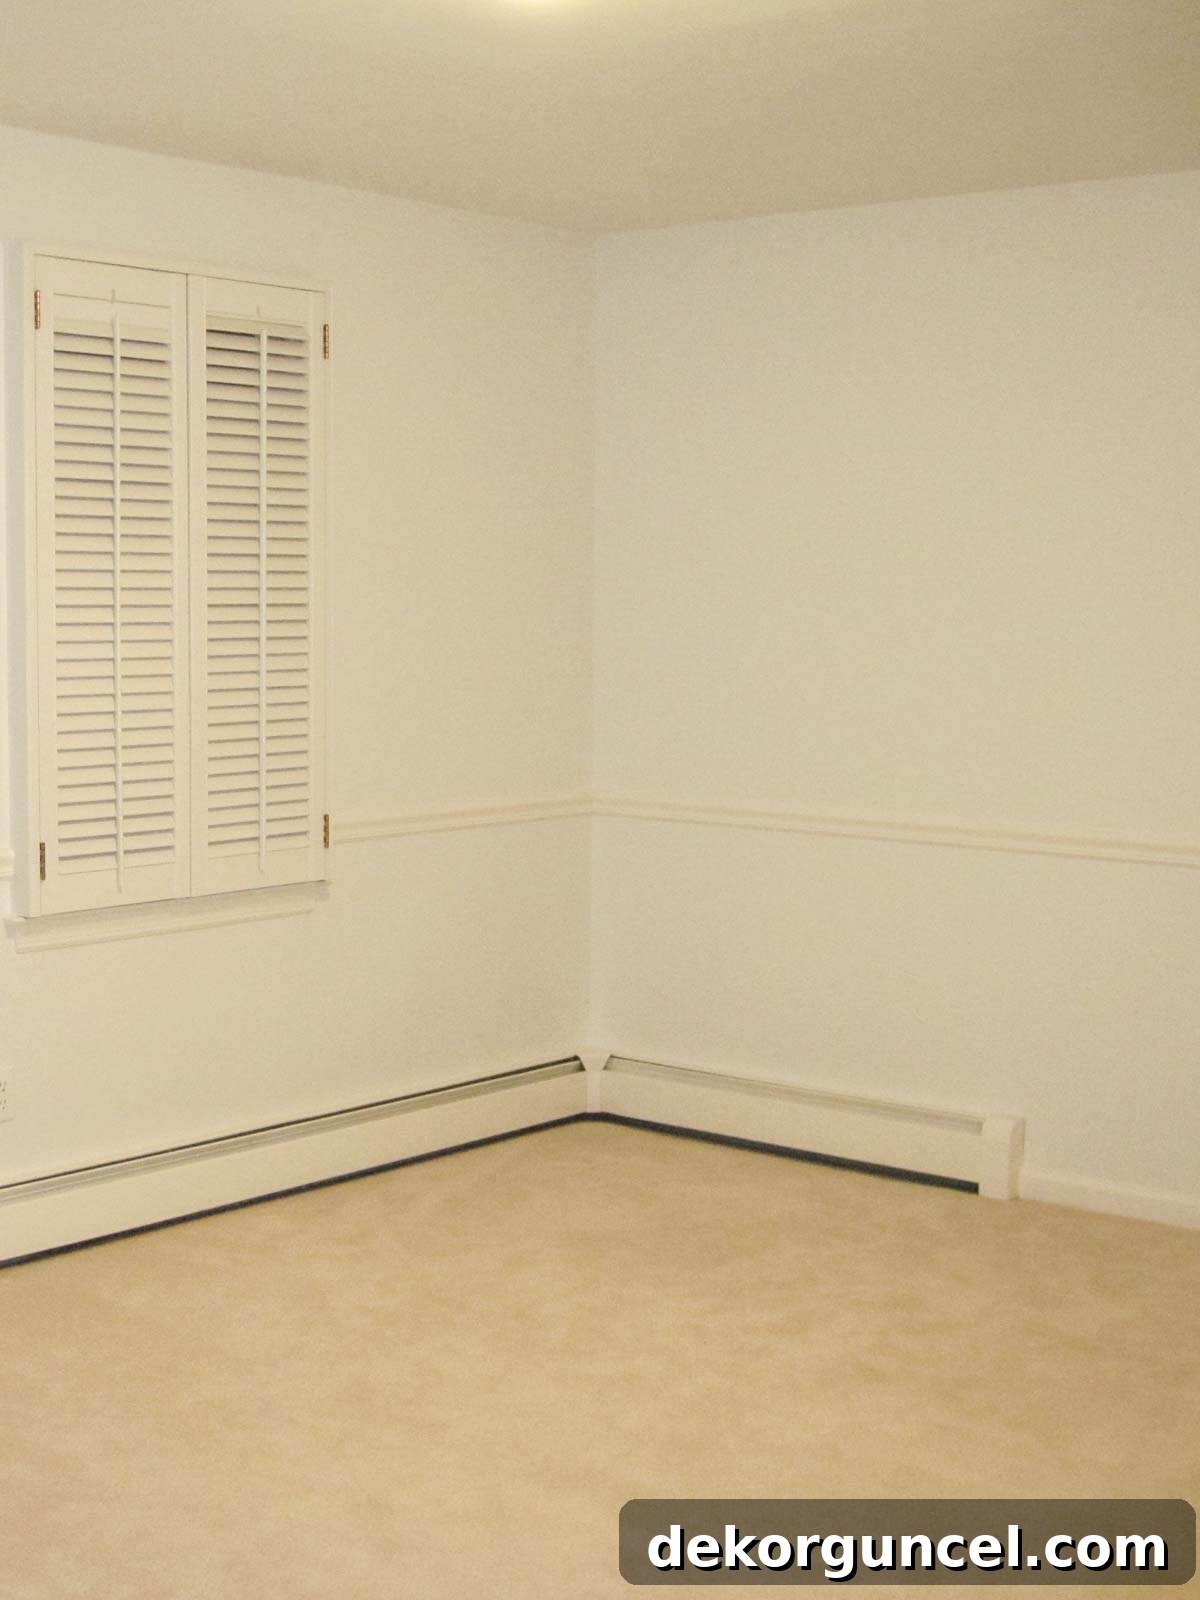
The transformation was dramatic after I installed a beautiful board and batten molding below the chair rail, painted it a crisp white, and adorned the area above with a sophisticated grasscloth wallpaper. This design choice brought texture, depth, and a bespoke feel to the space:
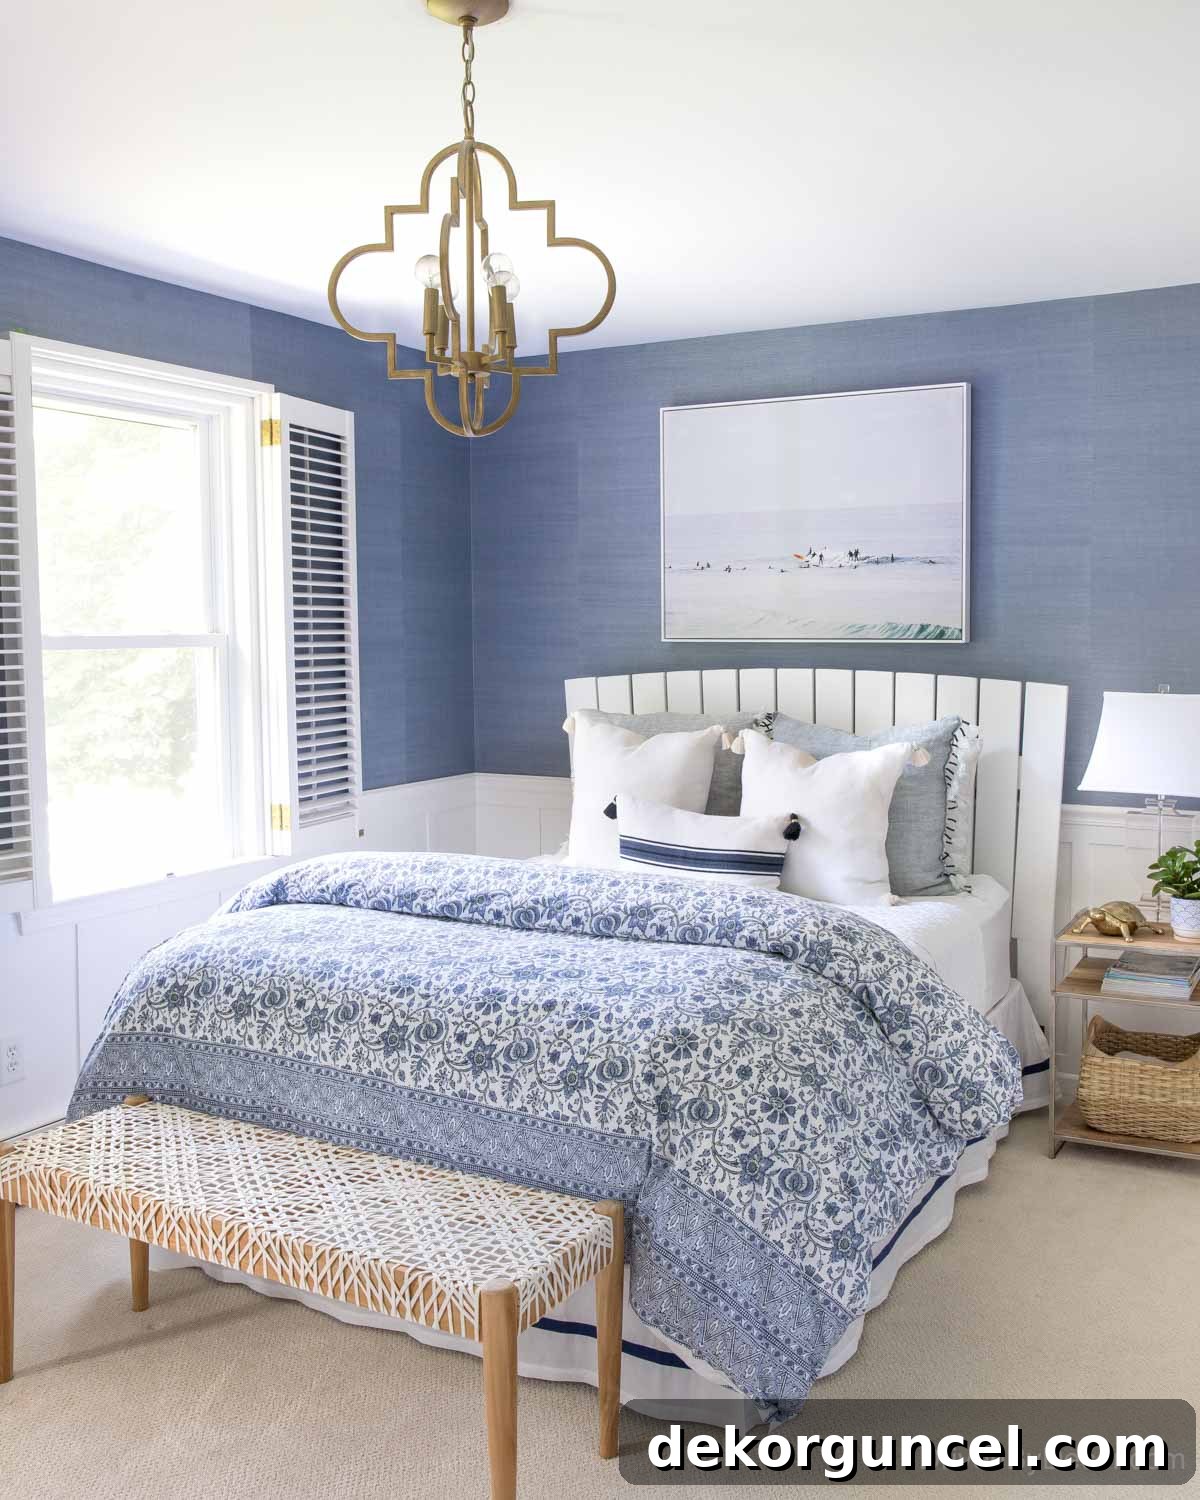
Bedroom Decor Elements: Elegant blue grasscloth wallpaper (similar option) | Chic gold quatrefoil pendant light | Serene canvas surf scene art | Stylish leather weave bench | Modern acrylic lamp | Bedding: no longer available
The board and batten installation was a surprisingly straightforward DIY project! I sourced thin strips of wood, meticulously cut them to form box outlines, and secured them to the wall using a nail gun. This project genuinely required minimal specialized skill but dramatically elevated the room’s aesthetic, imparting a much more sophisticated and custom-built appearance. Whether you’re considering a new architectural detail like board and batten or simply upgrading standard three-inch baseboards to more substantial ones, enhancing your molding is an essential home improvement that makes an enormous difference in perceived quality and design.
2. Unleash the Wow Factor with Thoughtfully Chosen Wallpaper
Throughout our time in our Connecticut home, I integrated wallpaper into several rooms, and every single instance yielded a more dramatic and positive impact than I had initially anticipated. The transformation that surprised and delighted me the most was in our entryway. This particular project was one of the last we tackled before relocating, and if I could rewind time, it would undoubtedly be one of the very first renovations on my list!
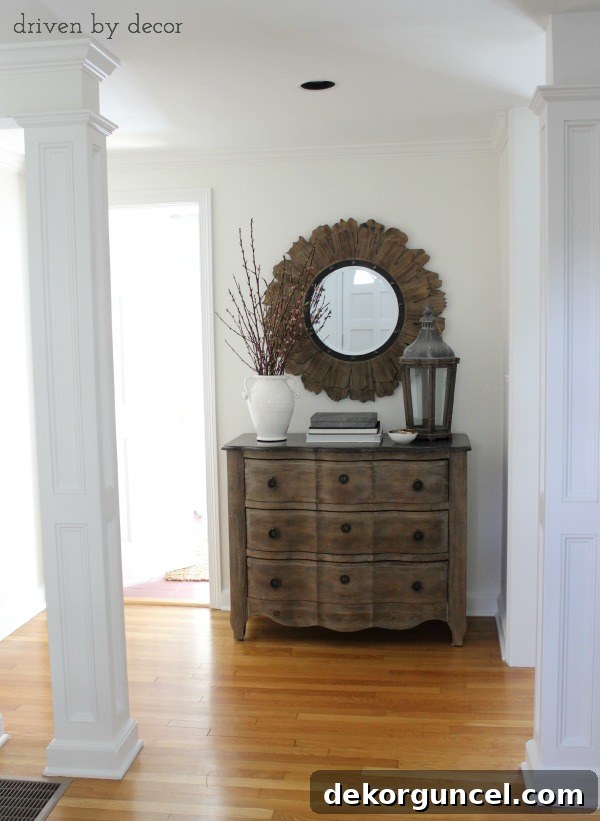
Upon moving in, we promptly removed the dated and stained wallpaper that originally adorned the entryway. We then painted the walls a crisp white and positioned a chest from our previous living room in the space. While functional, the area remained rather bland and lacked any distinct personality or welcoming warmth.
When the task of revitalizing our entryway finally reached the top of my priority list, the combination of installing {this captivating wallpaper} and refreshing the decor with new furniture and accessories proved to be an absolute game-changer. The space was instantly imbued with character, elegance, and a vibrant sense of style.
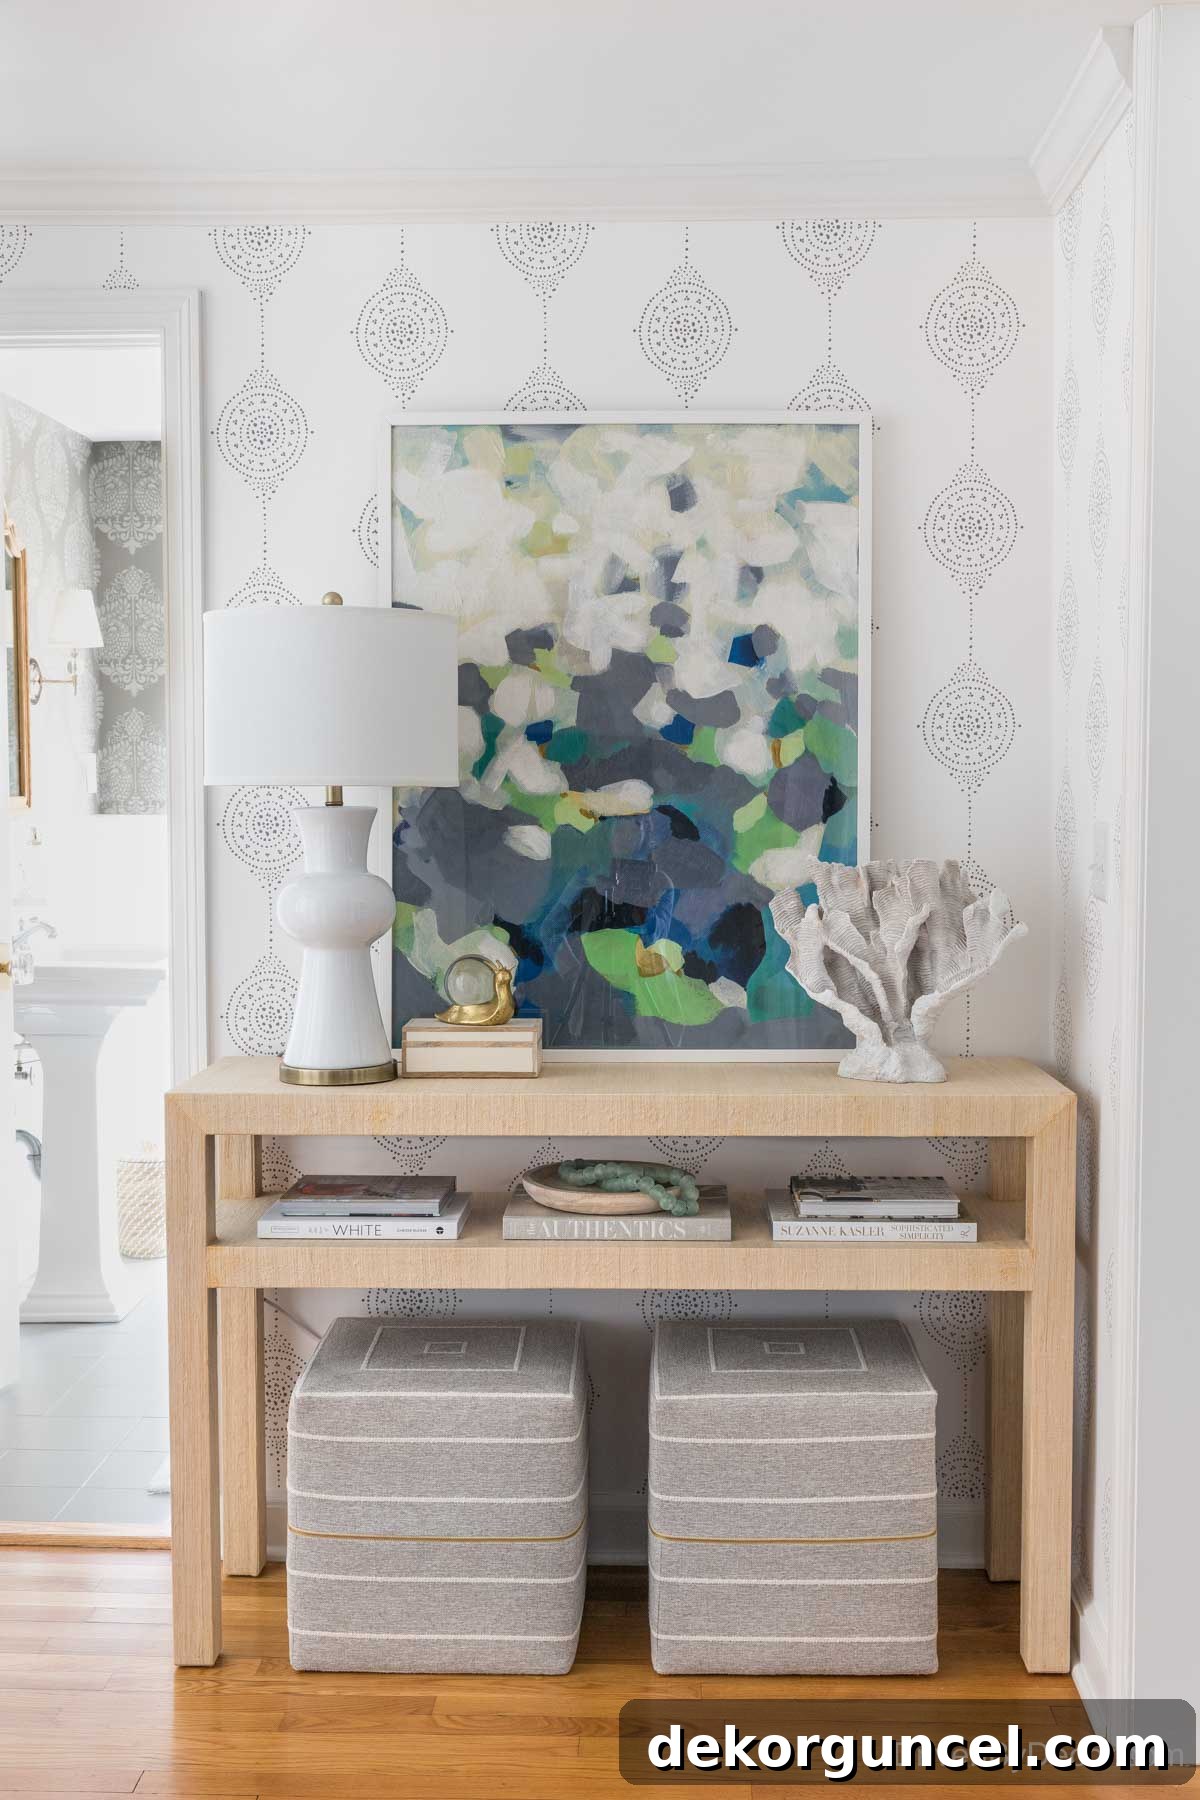
Entryway Design Elements: Exquisite wallpaper choice | Elegant linen console table (explore {this similar console}) | Classic white table lamp | Striking 30″ x 40″ Framed art print | Charming decorative snail | Artistic wave coral sculpture (similar) | Shallow wood bowl for display | Decorative glass beads | Versatile cube ottomans
This experience served as a powerful reminder of just how significantly your entryway’s design influences the overall ambiance and first impression of your entire home! Other enhancements we made to our entryway included spray painting the previously black recessed light housings with {this high-heat spray paint} to create a more cohesive look, swapping out the outdated flush-mount light fixture for a modern alternative, adding {this inviting entryway rug}, and adorning a wall with {this distinctive large round basket}.
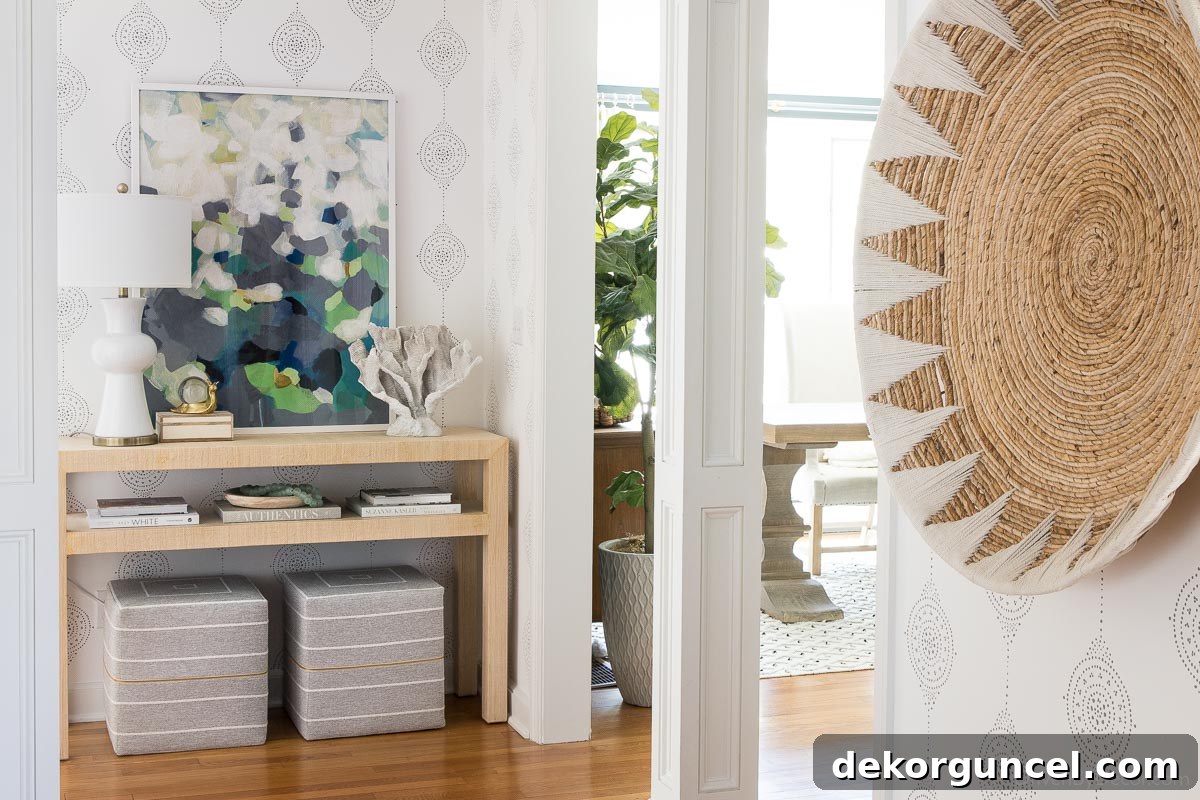
For a deeper dive into our entryway’s design, explore my dedicated post on creative entryway decor ideas. If you’re seeking inspiration for patterns and textures, you can find more of my preferred wallpapers in my article on Serena & Lily wallpaper favorites. Should your project require removing existing wallpaper before installing new, consult my guide on how to efficiently remove wallpaper. And for those intimidated by traditional pasted wallpaper, consider starting with peel-and-stick options – my tips on how to hang peel and stick wallpaper will set you up for success.
3. Breathe New Life into Dated Cabinets with a Fresh Coat of Paint
Our girls’ bathroom was desperately in need of a refreshing update. The dark cabinets were not only aesthetically dated but also showed considerable signs of wear and tear, detracting from the overall appeal of the space. Mindful of budget constraints, and recognizing that the bathroom already featured attractive floor tiles and granite countertops, I decided to work creatively with the existing elements rather than undertaking a costly full replacement.
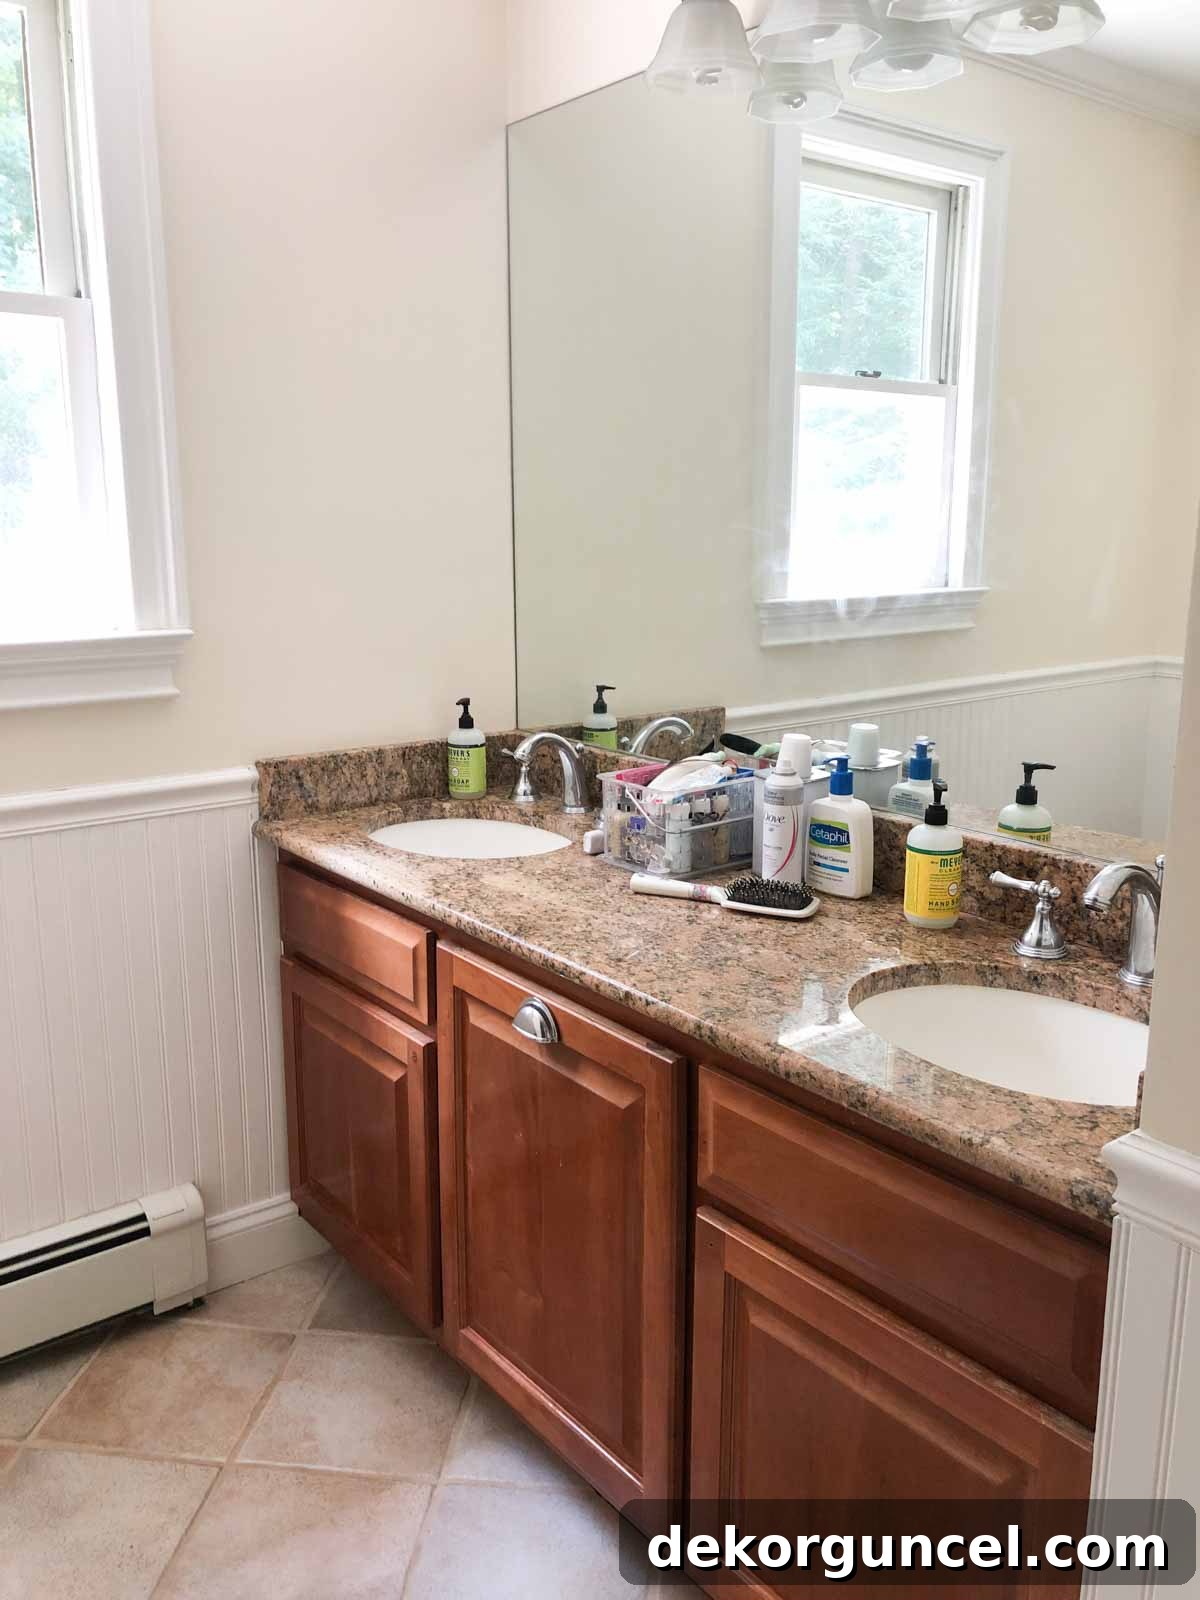
Instead of opting for new cabinets, I meticulously repaired any scratches and gouges, then transformed them with a crisp white paint. This immediately brightened the space and provided a clean, modern foundation. To complete the room’s revival, I updated the cabinet hardware, painted the walls a complementary color, and replaced the old glass shades on the light fixture above the mirror with more contemporary ones. This series of thoughtful, budget-friendly updates was precisely the refresh this space needed, demonstrating the power of paint and minor changes to achieve a significant transformation.
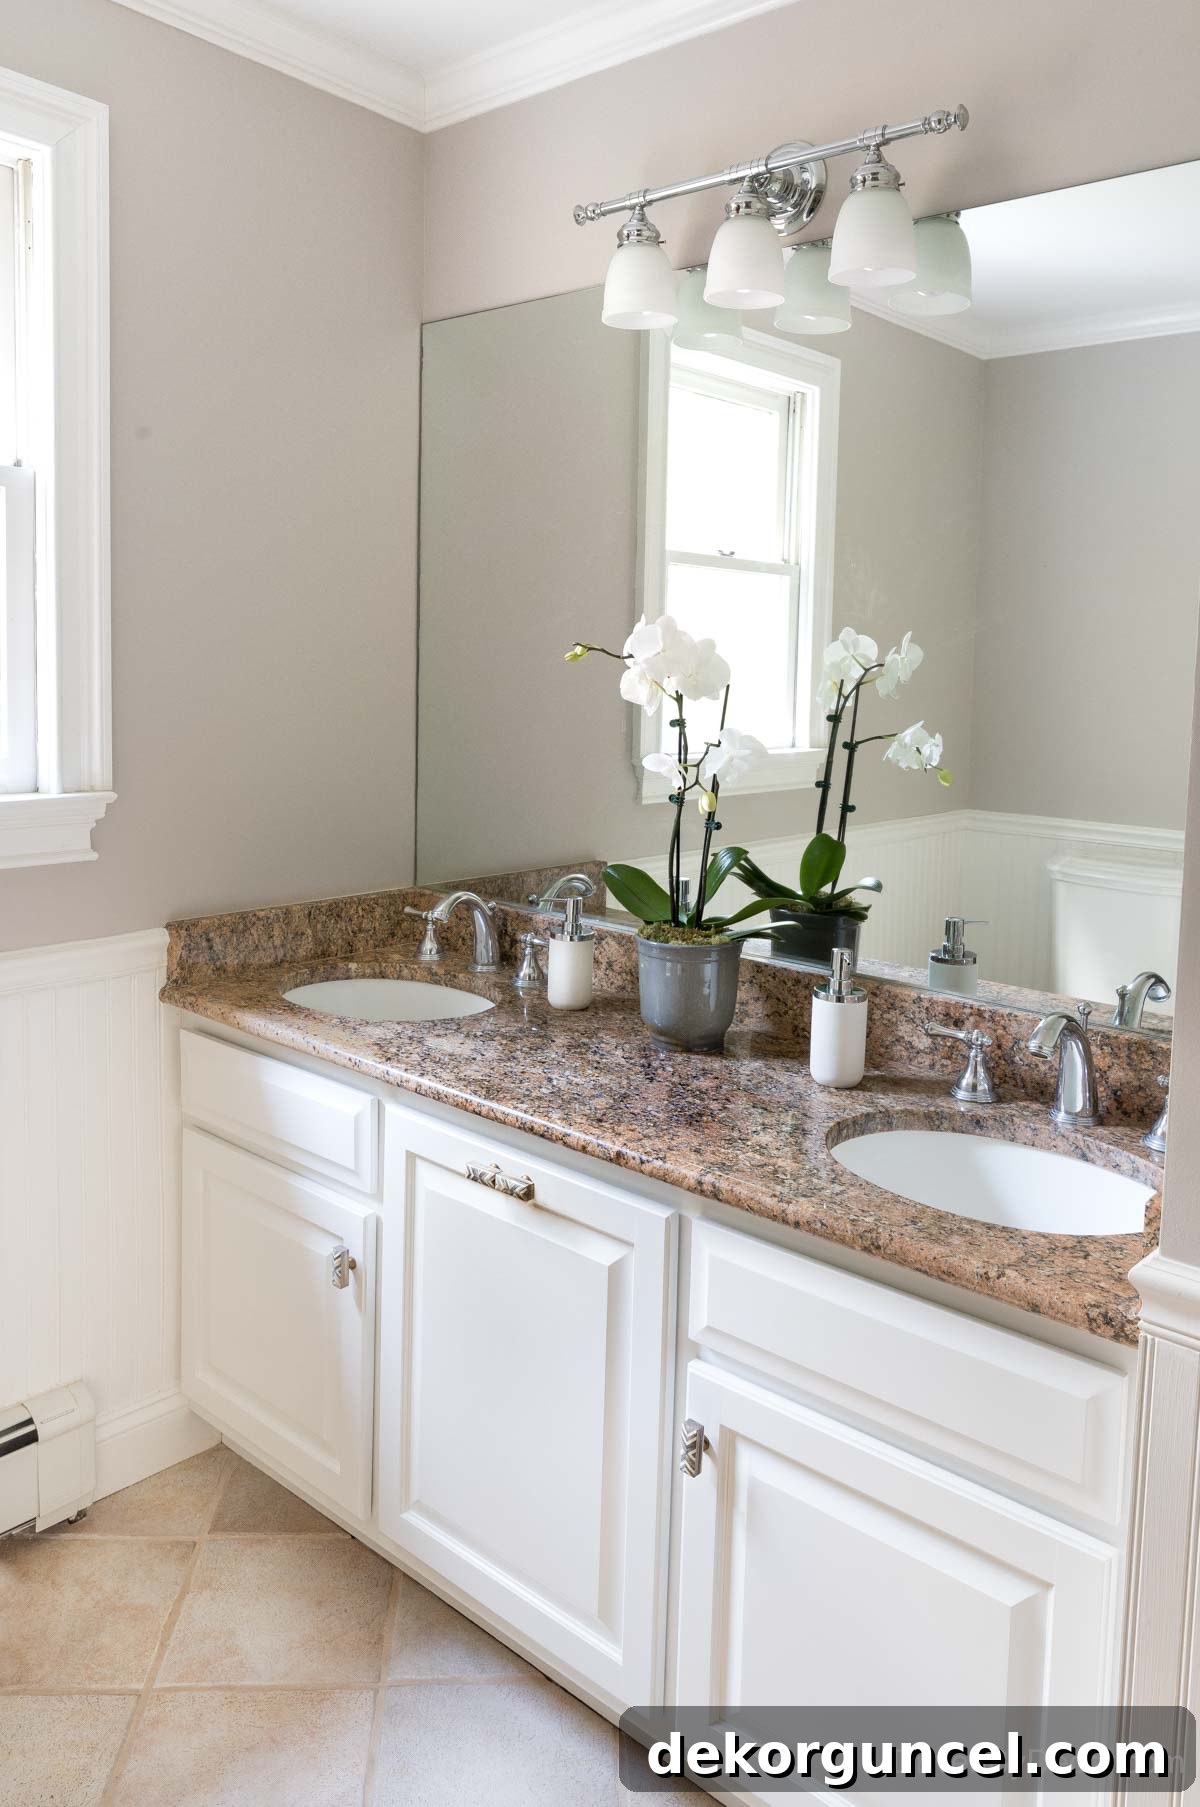
If you’re considering a similar project for your bathroom, I’ve outlined my straightforward, step-by-step painting tutorial in my detailed post about our painted bathroom vanity. It’s a highly recommended DIY for refreshing your space without a major overhaul.
4. Prioritize Your Needs: Ditch What Doesn’t Work (Guilt-Free!)
During the initial planning stages of our extensive kitchen remodel, we tried diligently to incorporate the brick fireplace located in the corner of the kitchen. This fireplace was an original feature of our home, and despite its infrequent use, we appreciated its unique character. The thought of removing it filled us with a sense of guilt, feeling as though we were sacrificing a piece of history.
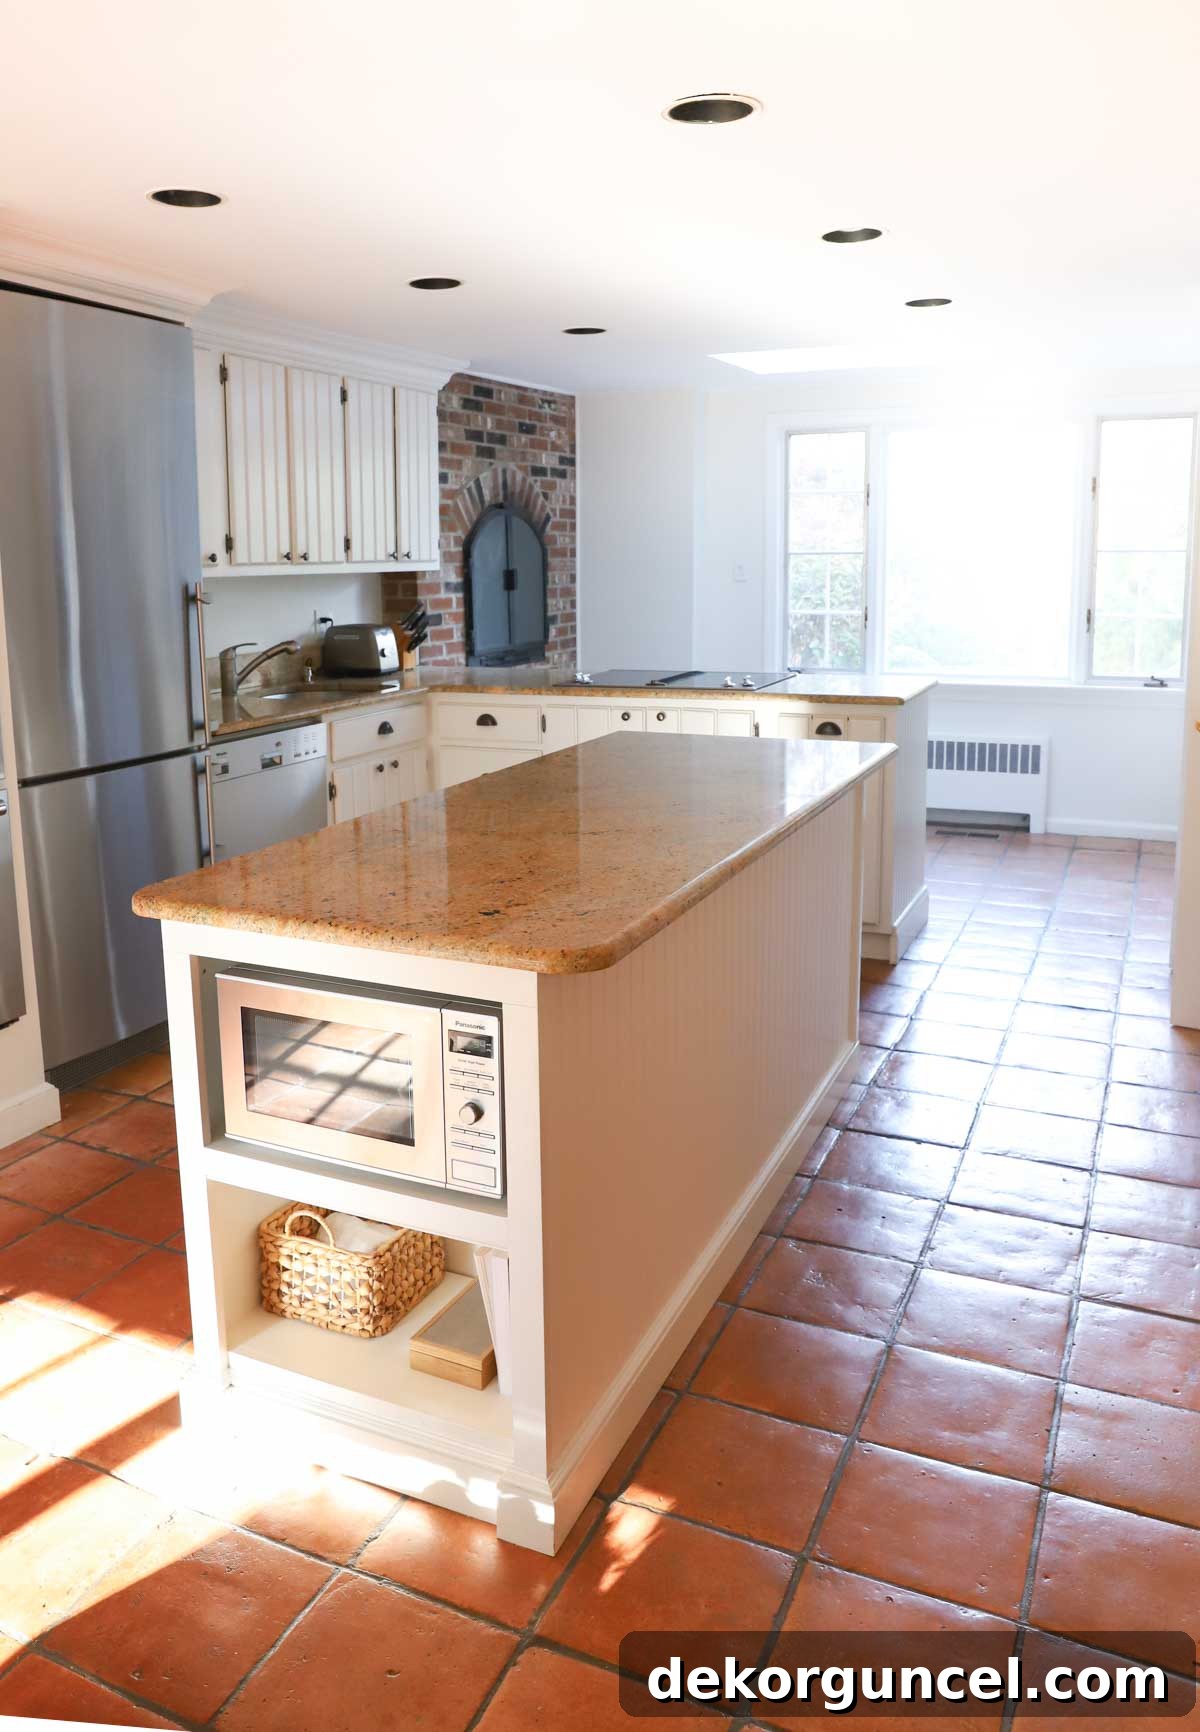
However, it became clear that retaining the fireplace would necessitate significant compromises in our kitchen’s design, particularly preventing the cabinets from wrapping around the entire front wall. After much deliberation, we made the difficult decision to remove it. Initially, the guilt was palpable, but it quickly faded as the kitchen remodel progressed and our new vision began to materialize. We realized we had undoubtedly made the right choice.
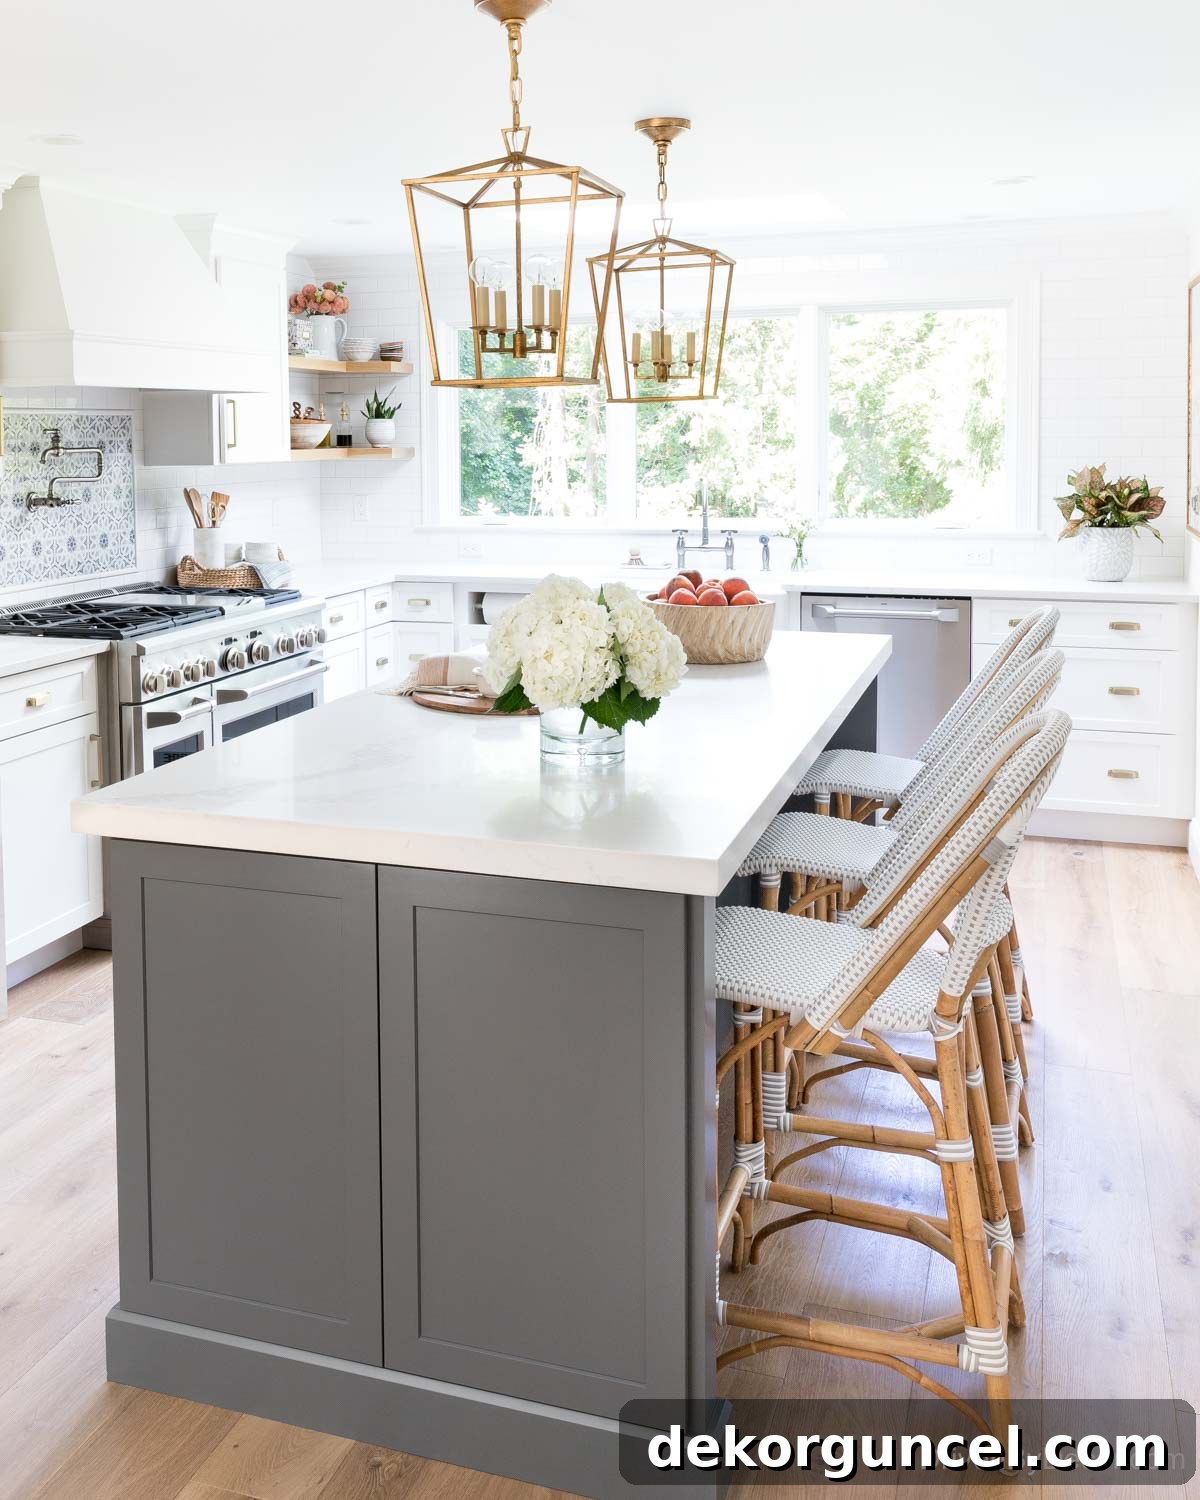
Key Kitchen Elements: Elegant lantern pendants over island (gilded iron finish) | Comfortable rattan counter stools (fog color) | Durable and stylish flooring
We traded a fireplace, which saw use only a few times a year, for a kitchen that offered significantly enhanced functionality and aesthetic appeal, a space we joyfully utilized every single day.
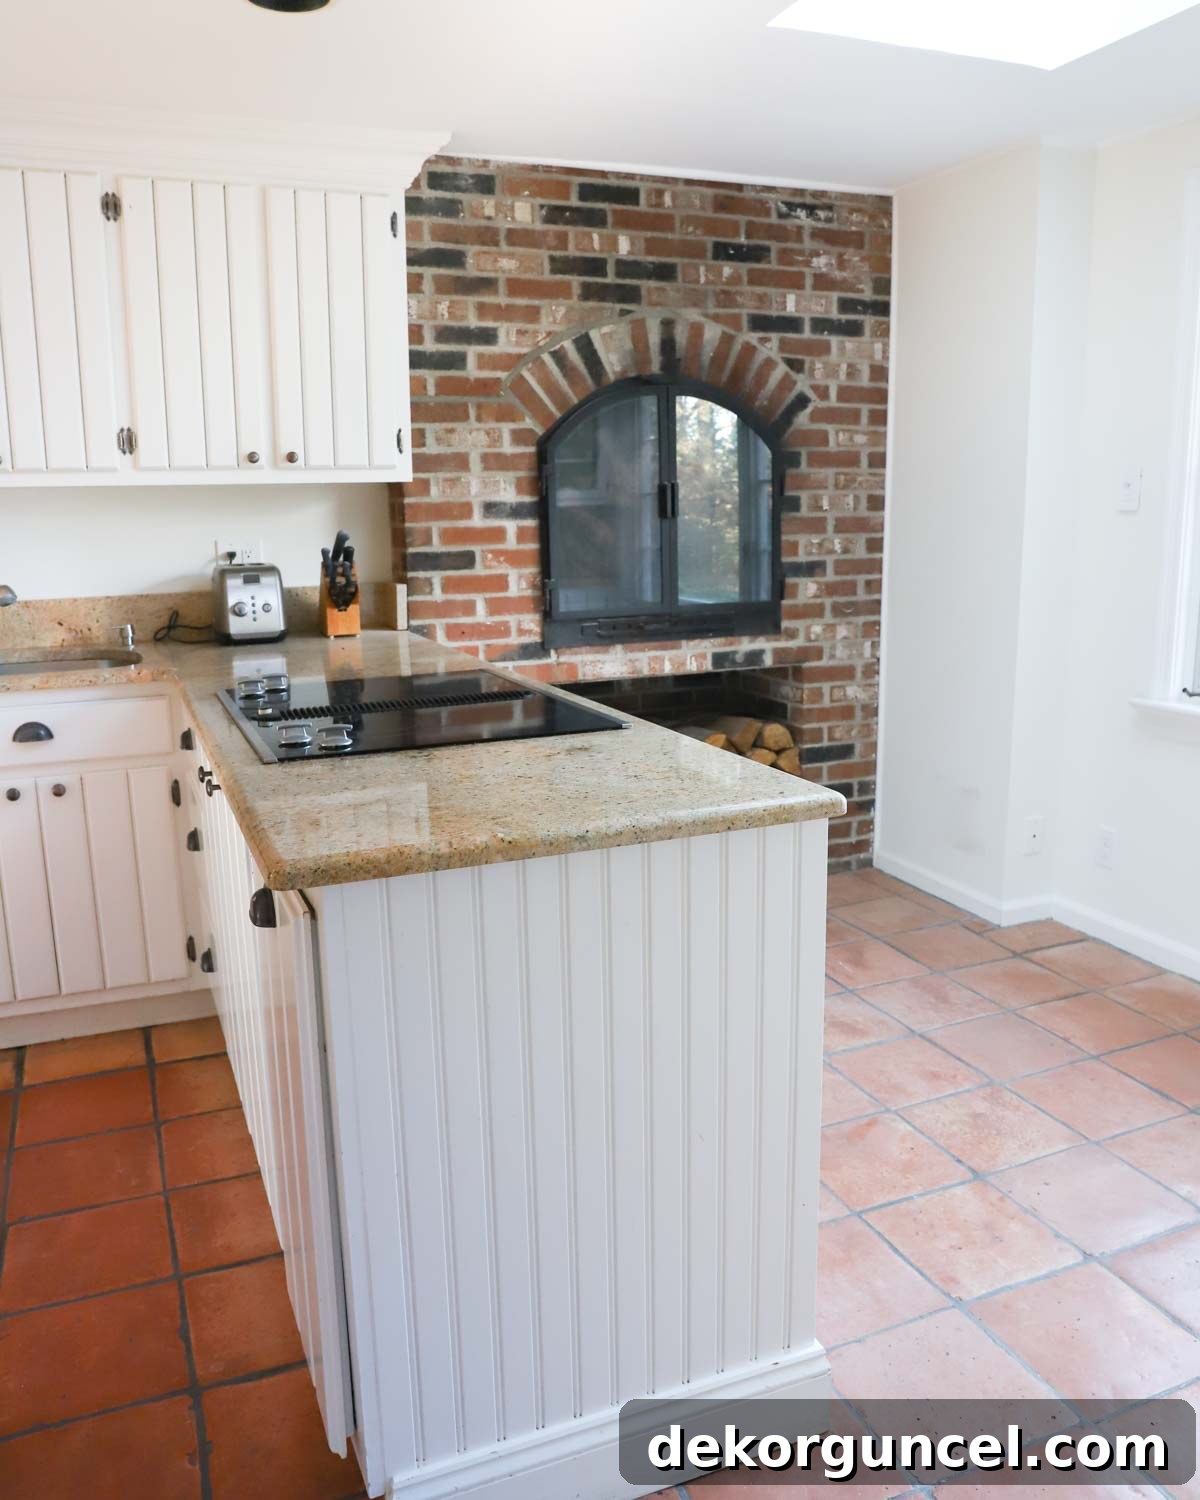
This experience underscored a crucial lesson: when undertaking a home remodel, always prioritize what truly works for YOU and your family, rather than making decisions driven by guilt or external opinions.
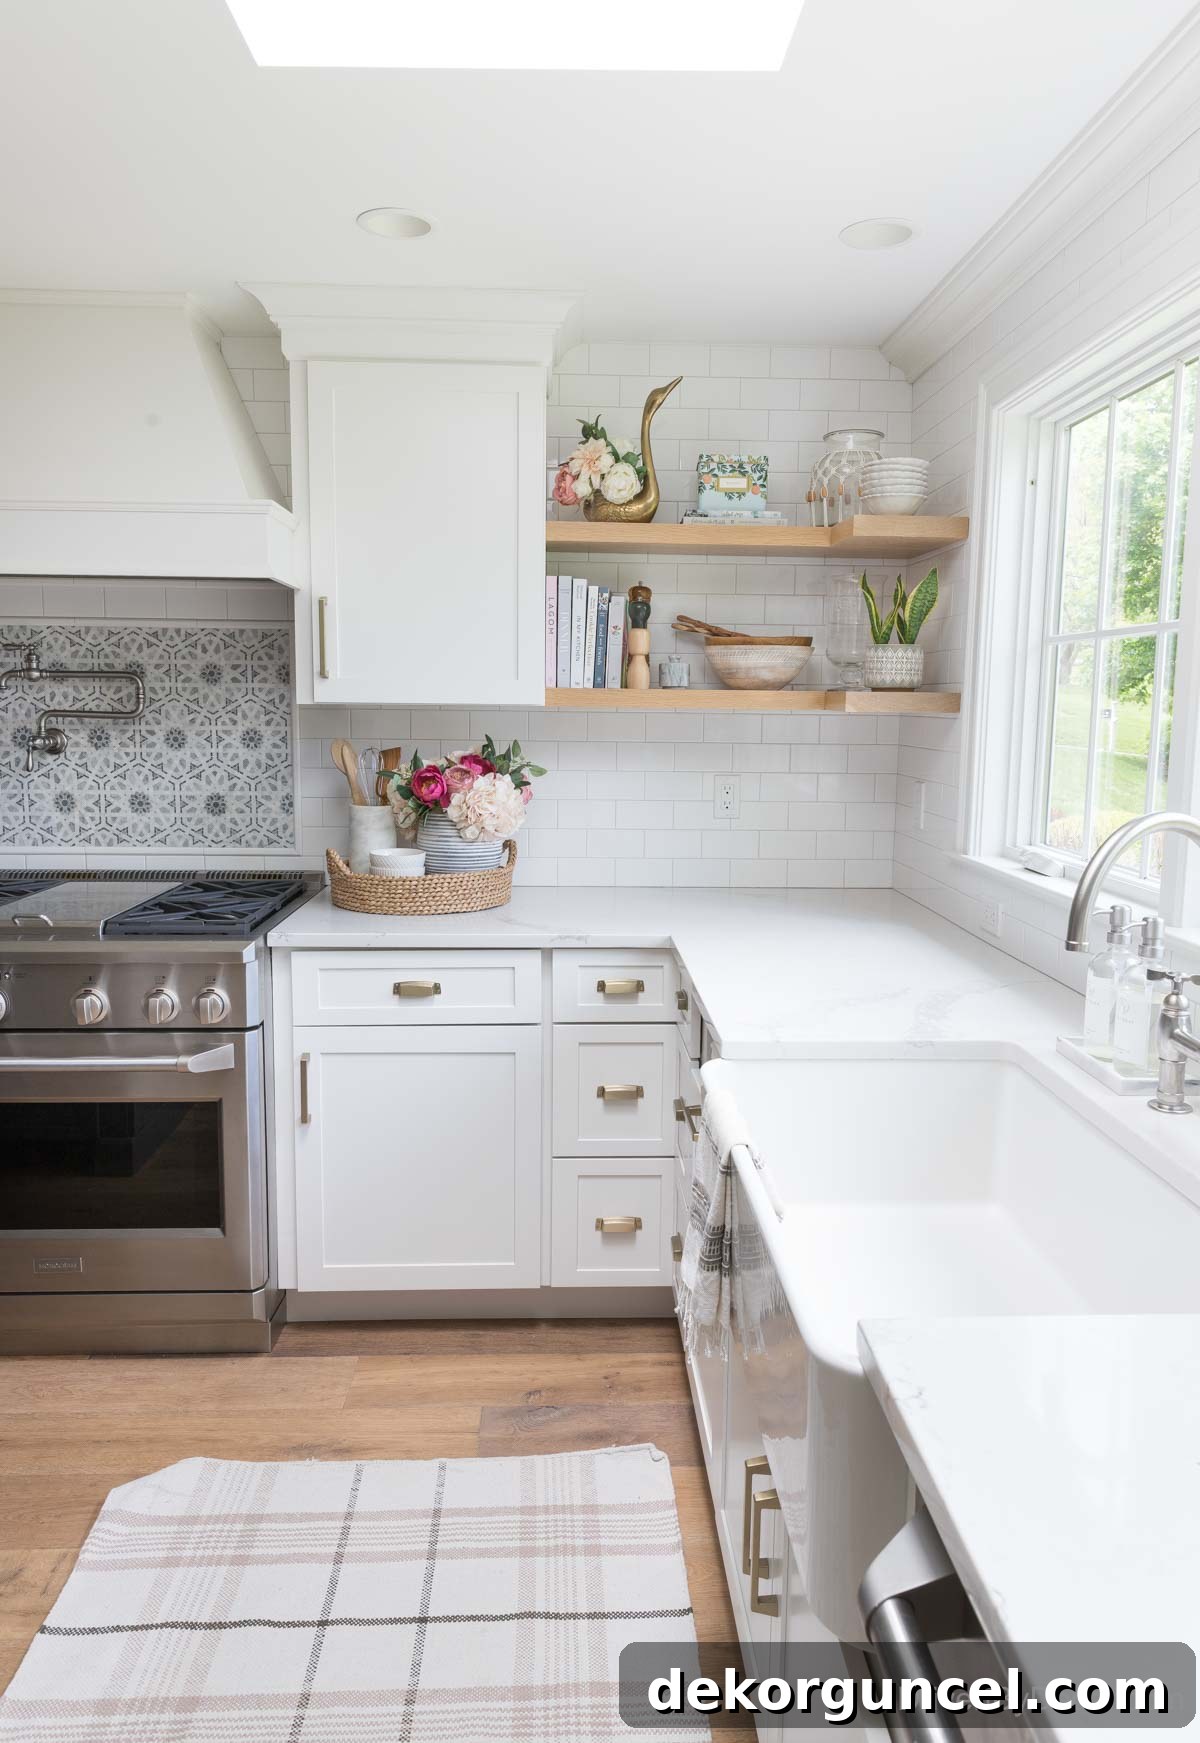
Additional Kitchen Details: Stunning backsplash mosaic tile | Convenient Pot Filler (vibrant stainless) | Classic cabinet cup pulls | Modern cabinet pulls (golden champagne finish) | Decorative round braided tray | Elegant marble & wood utensil holder | Guide for DIY floating corner shelves | Charming brass swan planter | Stylish floral recipe tin | High-quality kitchen sink | Practical glass pump bottles | Tray for pump bottles | Elegant black & white hand towel
For more visuals and in-depth information about our kitchen’s journey, be sure to check out our kitchen remodel before & after feature, and also explore my helpful kitchen cabinet storage and organization ideas.
5. Maximize Space and Style with Custom Built-In Pieces
When embarking on a renovation project in a compact area, one of the most effective strategies is to design and incorporate a custom built-in piece that optimizes every inch of available space. Our kitchen’s eat-in area was inherently small and presented an additional challenge with baseboard heating running along its longest wall. Consequently, even a modest table, positioned as close to the wall as possible, still encroached more than desired upon our sliding glass doors, making the space feel cramped and inefficient.
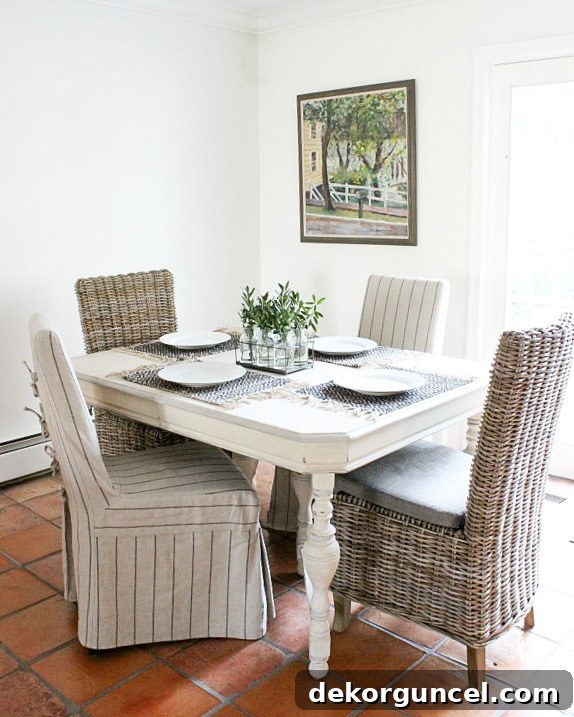
To ingeniously resolve this spatial dilemma, I designed a custom built-in banquette. This clever solution allowed the seating to be placed flush against the wall, not only saving a considerable amount of floor space but also enabling us to accommodate a larger dining table. The result was a far more functional, inviting, and aesthetically pleasing eat-in area that felt expansive and comfortable.
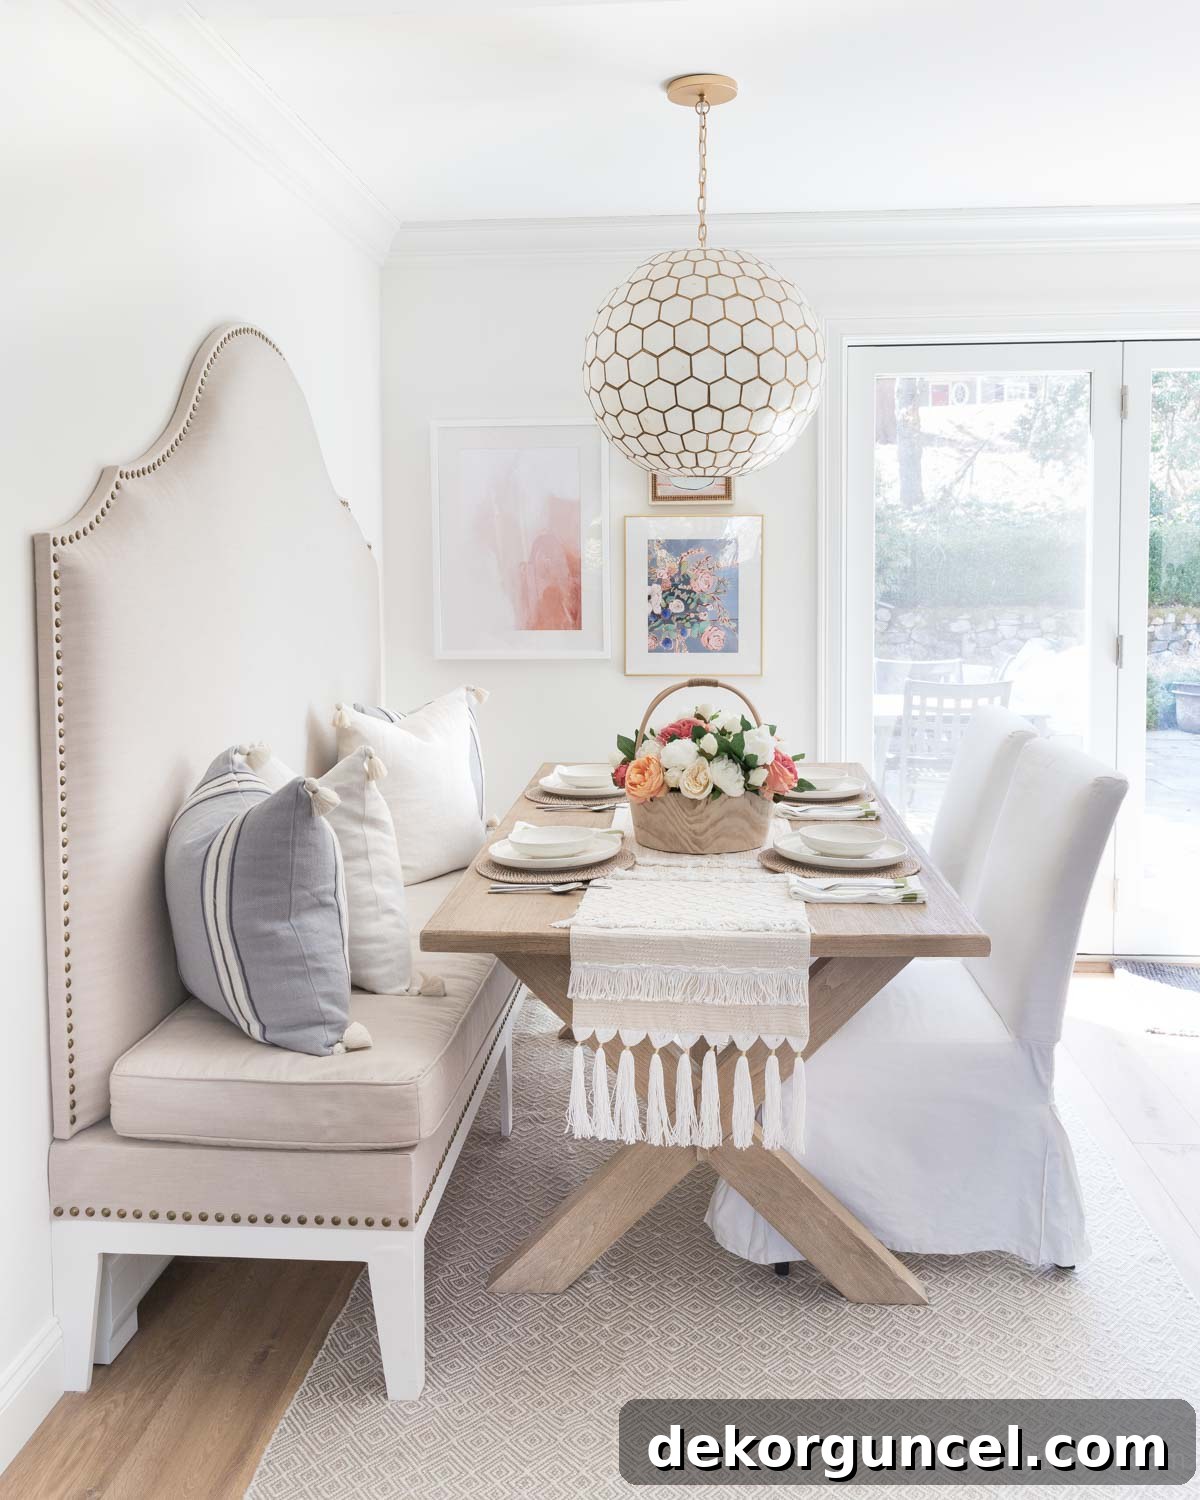
Kitchen Eat-in Design Elements: Stylish dining table | Elegant Capiz pendant light (22.5″) | Modern geometric gray rug | Large blush abstract framed art | Charming blue floral framed art | Delicate pink floral framed art | Comfortable slipcovered dining chairs (similar) | Table runner: no longer available
An additional benefit of crafting our own built-in piece was the freedom to select the perfect fabric. I opted for {this incredibly practical indoor/outdoor Sunbrella fabric}, which proved exceptionally easy to clean, making spills a minor concern. For a comprehensive overview, including step-by-step instructions, explore my post on our DIY upholstered kitchen banquette with nailhead trim.
6. Enhance Laundry Room Functionality with a Washer & Dryer Countertop
The transformation of our laundry room stands out as one of my most satisfying home renovation projects, primarily because we managed to significantly boost the functionality of the existing space without expanding its footprint. A highlight of this remodel, and a surprisingly simple one, was the installation of a beautiful butcher block countertop directly above the washer and dryer.
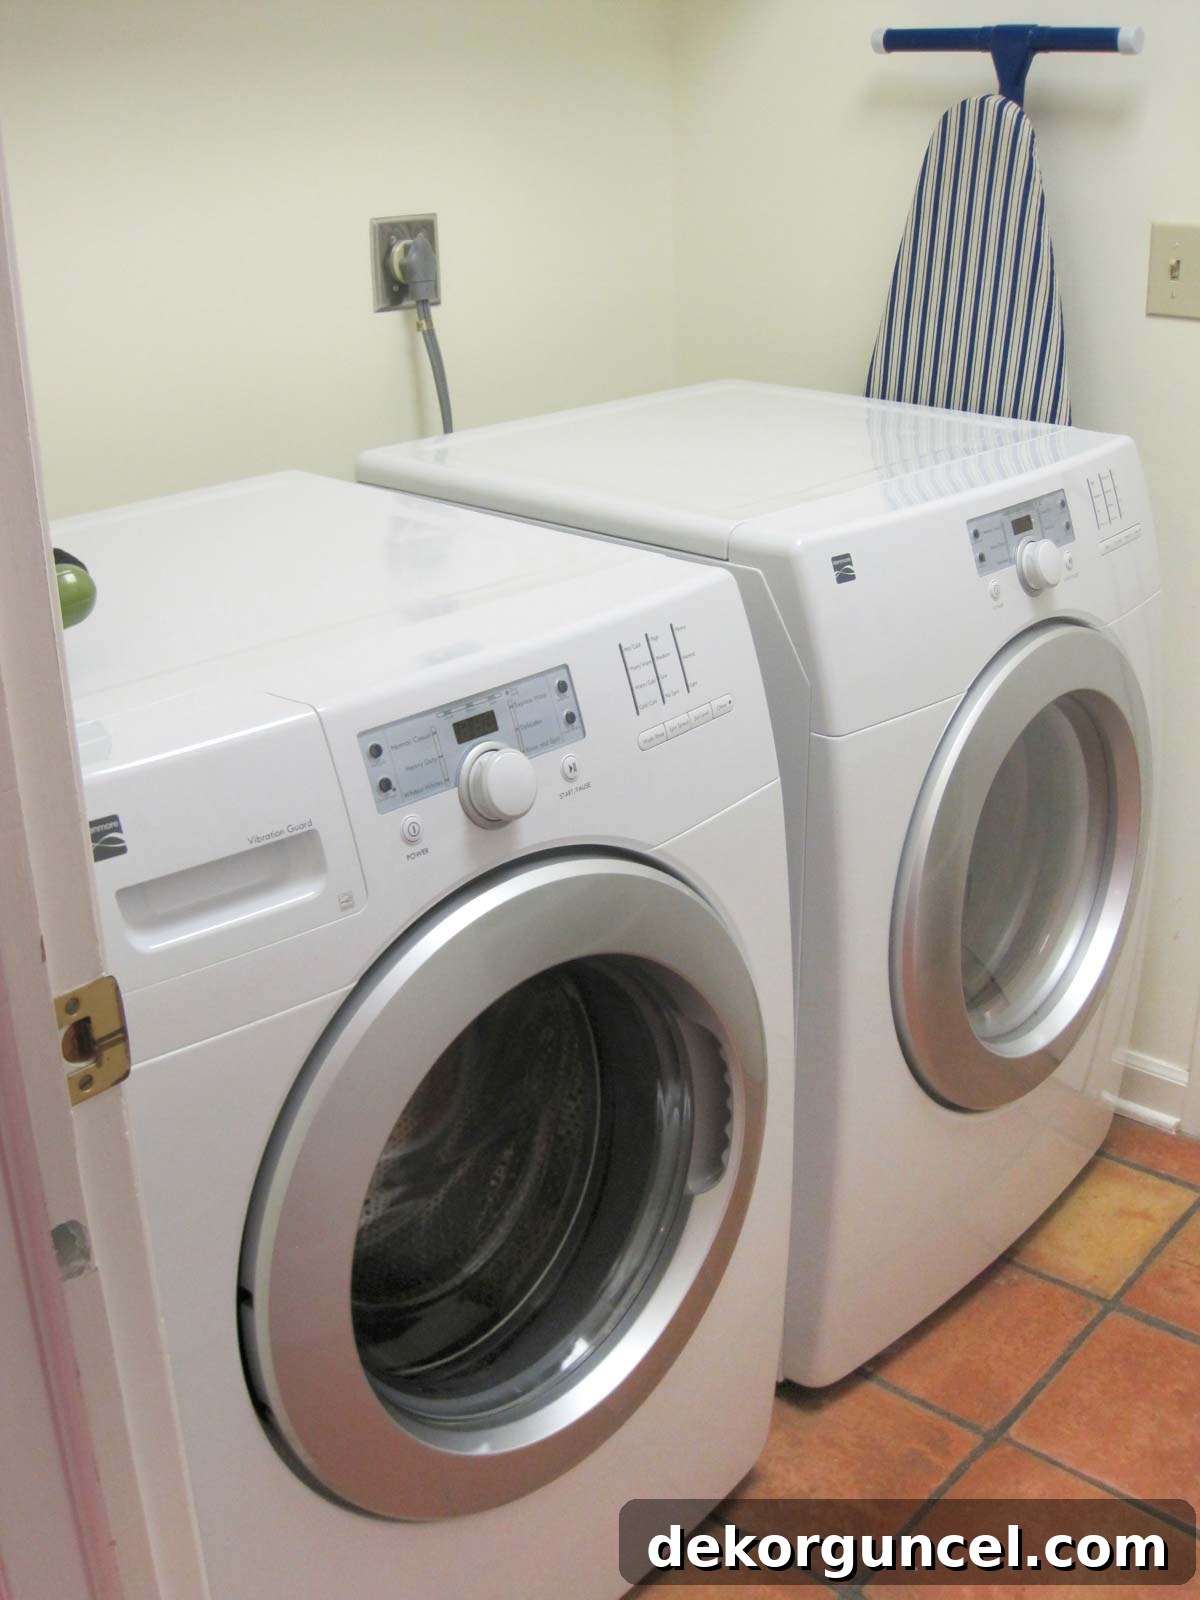
The addition of this expansive surface space proved to be incredibly advantageous. It provided an ideal area for organizing laundry baskets, neatly stacking clean clothes, and most importantly, offered a dedicated and comfortable zone for folding laundry straight out of the dryer. This simple yet effective modification made our laundry routine much more efficient and enjoyable.
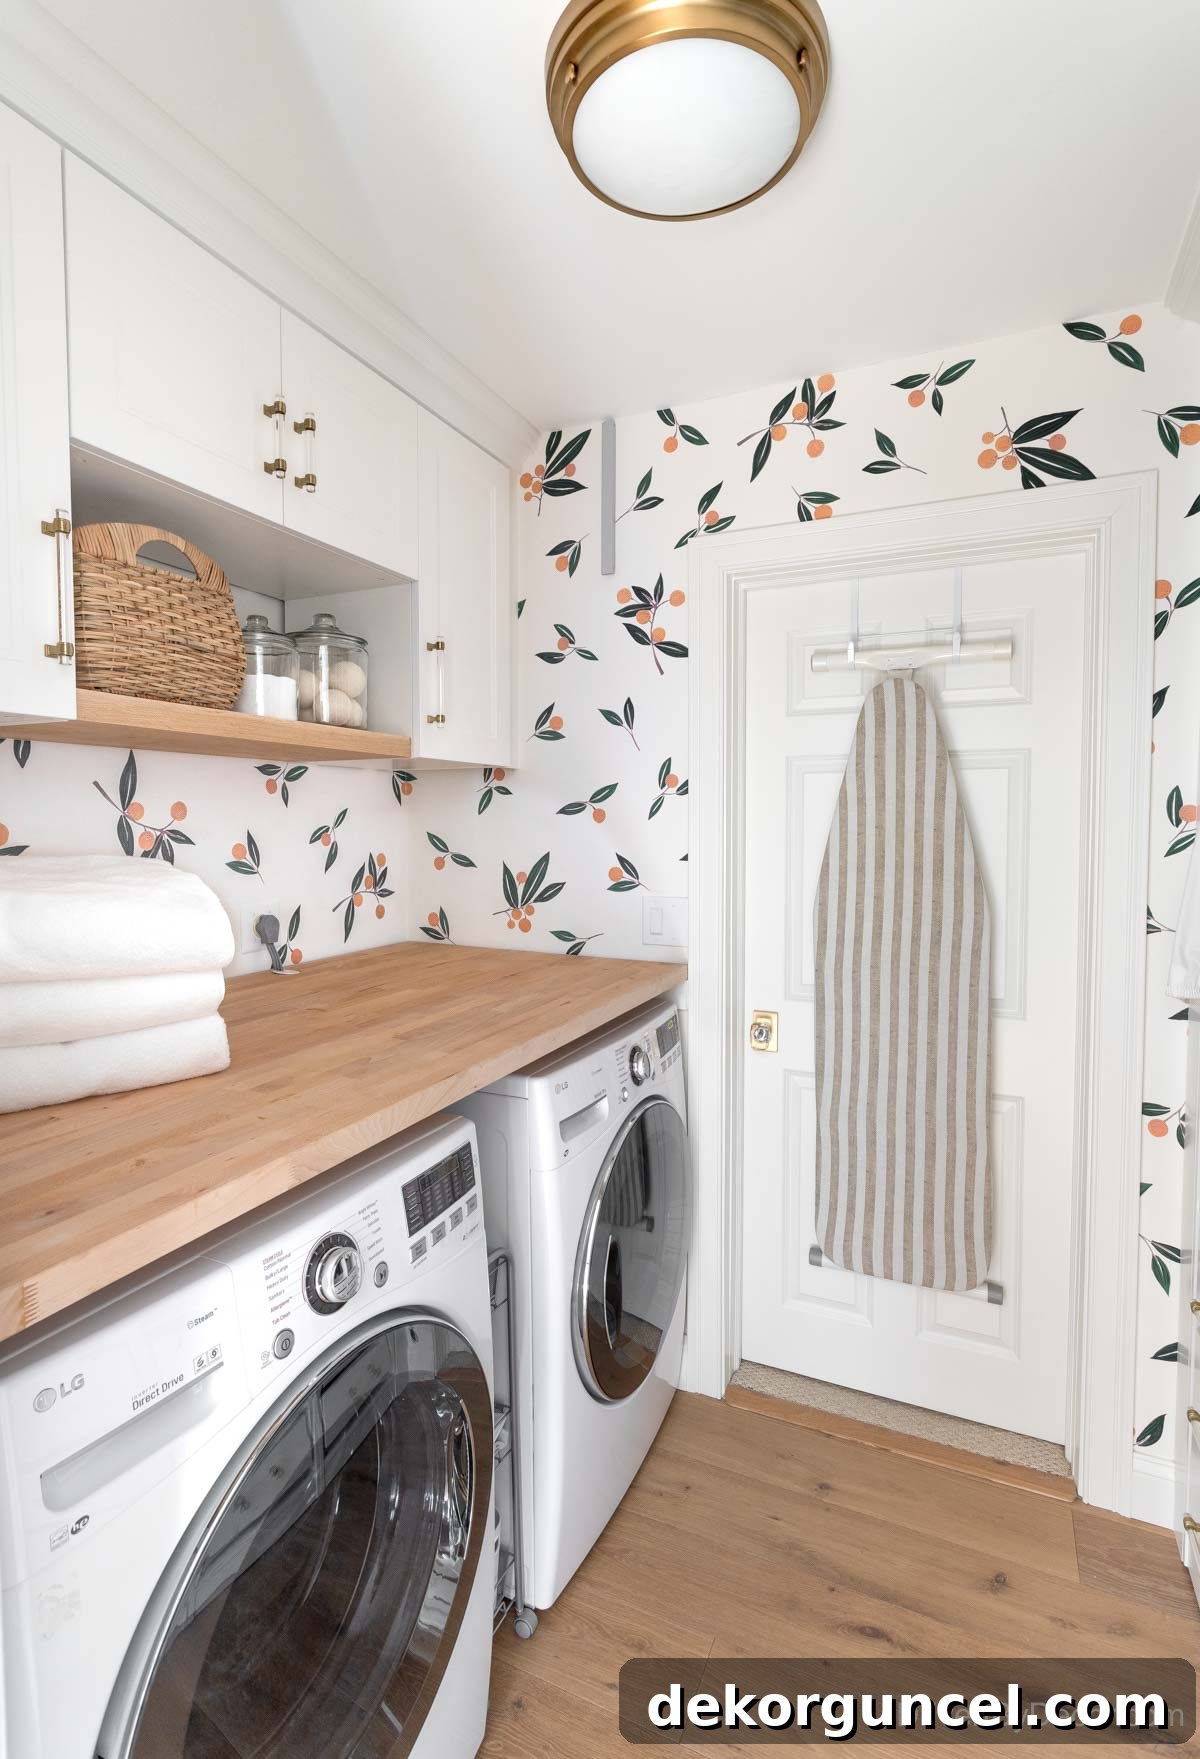
Laundry Room Design Elements: Vibrant tangerine wall decals | Durable butcher block counter (similar style) | Modern ceiling light fixture | Elegant brass & acrylic cabinet pulls (Golden Champagne finish) | Functional glass storage jar | IKEA Laundry room cabinet details
While I originally sourced our butcher block from IKEA, their solid wood options may have changed since then. However, you can discover similar high-quality butcher block countertops {here}. For a comprehensive look at this project, including insights into the cabinets we installed above our washer & dryer, refer to my detailed post on our IKEA laundry room cabinets.
7. Build a Functional Mudroom Nook with IKEA PAX Wardrobes
If your home’s closets are lacking in sufficient storage space, IKEA offers remarkably clever and versatile solutions for creating dedicated storage areas, even where none previously existed. In our laundry room, directly opposite the washer and dryer, there was an awkward nook with shallow shelving. This space, as utilized by the previous homeowners, was a rather uninspired repository for a miscellaneous collection of kitchen bakeware and shoes.
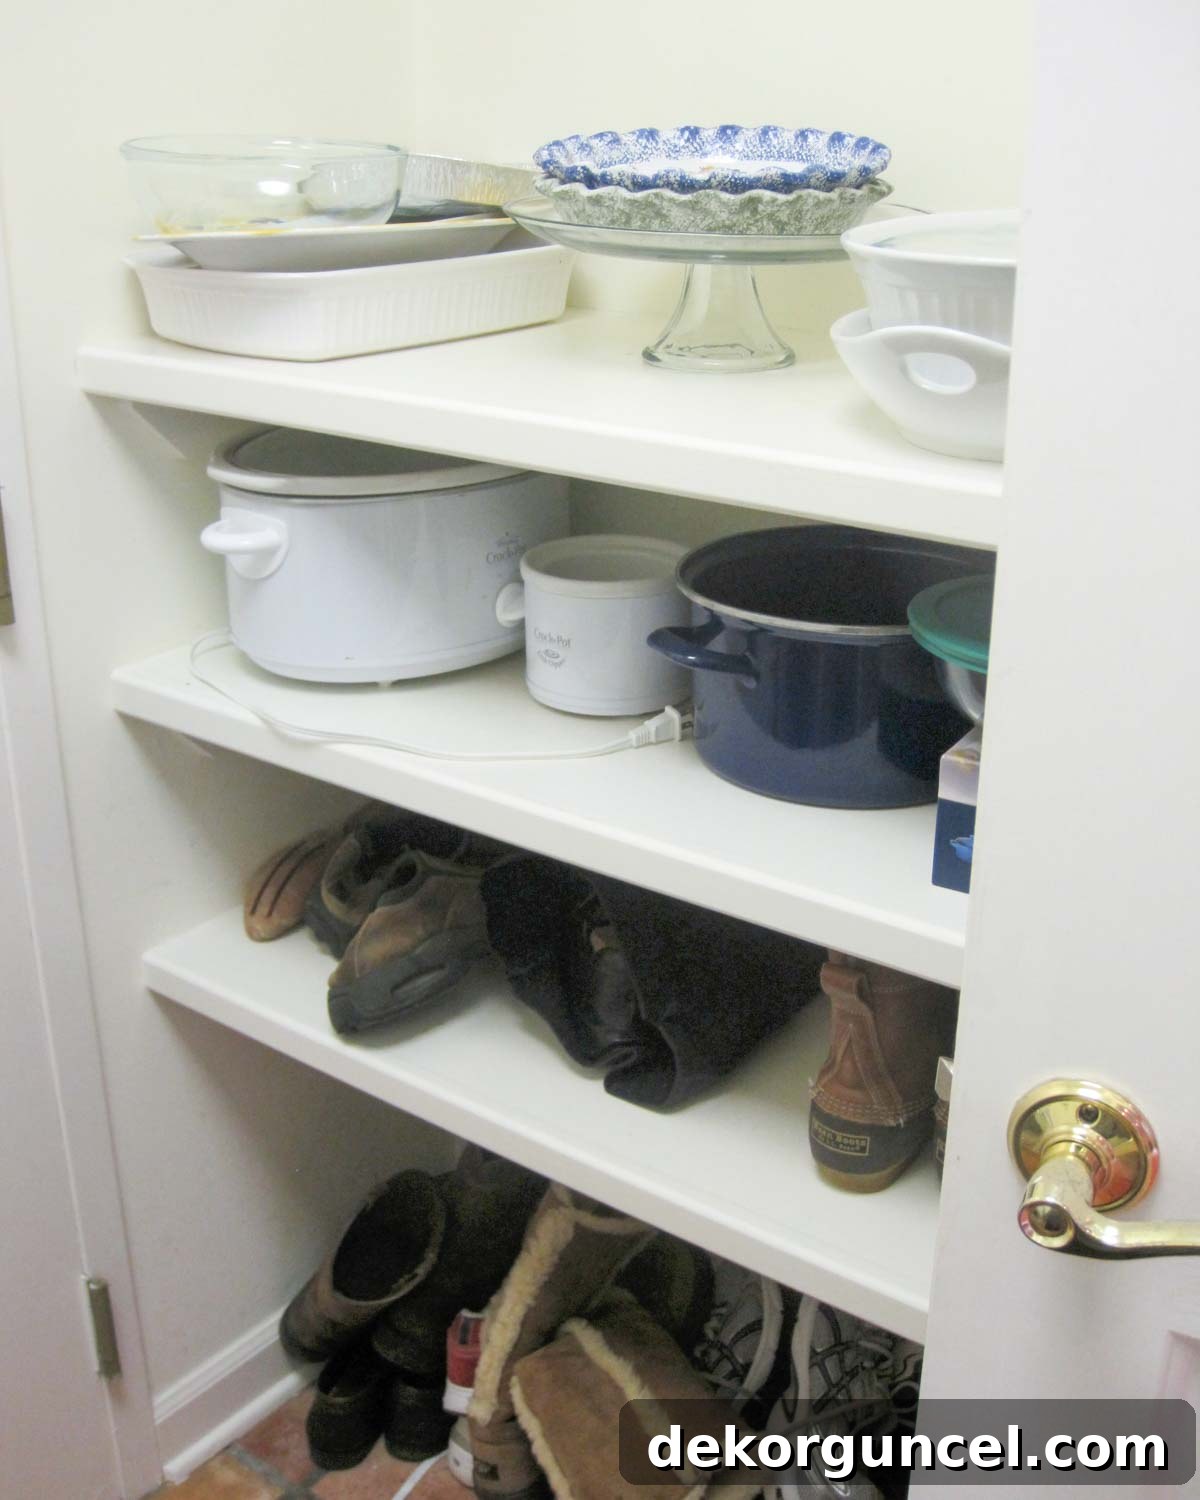
Given our house lacked a proper hall closet or any designated area for hanging and storing coats, I seized the opportunity to transform this underutilized nook into a highly functional mudroom. Despite its seemingly shallow depth of only about 16 inches – which might typically be considered insufficient for coats – IKEA’s innovative PAX system provided ingenious solutions for maximizing small spaces. By custom-fitting the PAX system to perfectly leverage every available inch of the nook, we successfully created an impressive amount of organized storage for coats, shoes (cleverly stored in drawers beneath the coats), and winter accessories like scarves and gloves (neatly tucked away in baskets above the coats). This transformation proved that even the most awkward spaces can be reimagined into practical and stylish storage solutions.
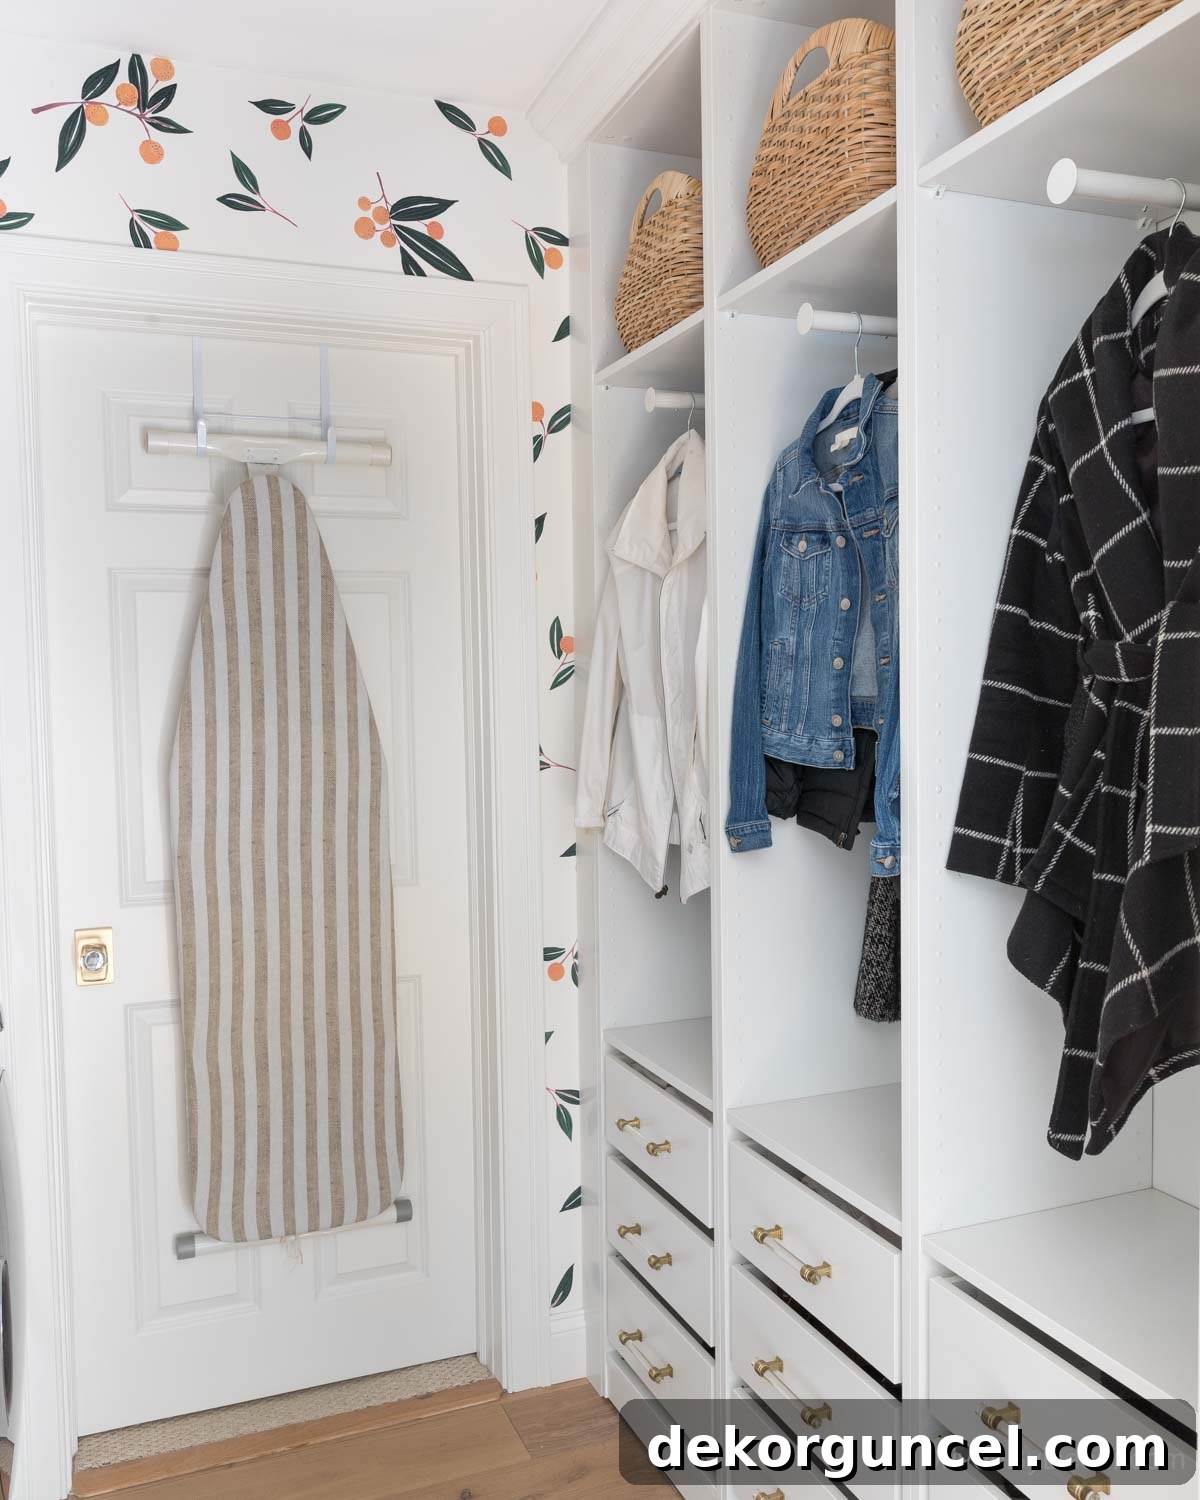
Mudroom and Laundry Room Essentials: IKEA PAX Coat & shoe storage details | Elegant brass & acrylic cabinet pulls (Golden Champagne finish)
I’ve meticulously detailed the specific IKEA components we utilized to craft our efficient coat and shoe storage space in my dedicated article about our IKEA PAX mudroom. Furthermore, IKEA offers a plethora of versatile solutions for constructing freestanding closets with doors, requiring no existing nook, which you can explore further {here}.
8. Upgrade to Functionality: Replace Pedestal Sinks with Vanities
While pedestal sinks can be acceptable in a small powder room or hall bath (though personally, I’d still lean towards a vanity even there for added convenience), in any other bathroom, they are a design element that often hinders practicality. Upon purchasing our home, we found pedestal sinks not only in our hall bathroom but also in the master bathroom and guest room. Attempting to apply makeup, brush teeth, or simply manage everyday toiletries with only a minimal rim around the sink is undeniably challenging and far from enjoyable. The pedestal sink in our guest bathroom was consequently among the very first items on our renovation hit list to be replaced.
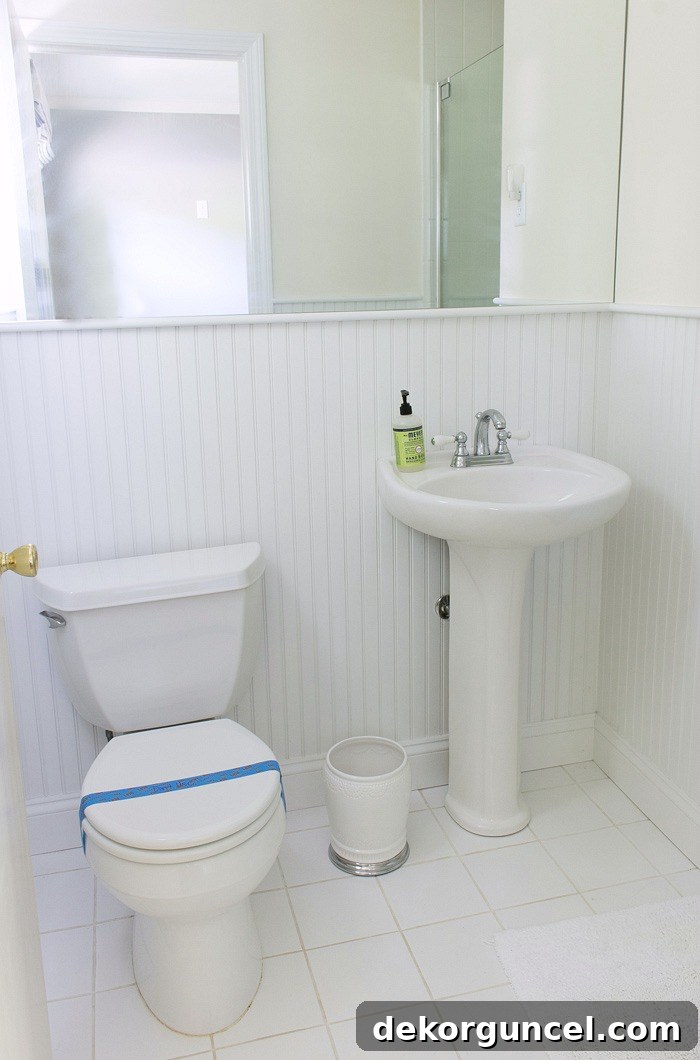
I replaced it with a 24″ freestanding vanity, similar to {this one}. This single change dramatically increased both countertop space and provided much-needed drawer storage for toiletries, instantly elevating the bathroom’s utility and aesthetic appeal. This seemingly minor upgrade transformed the guest bathroom into a far more functional and visually appealing space, offering guests the convenience and comfort they deserve.
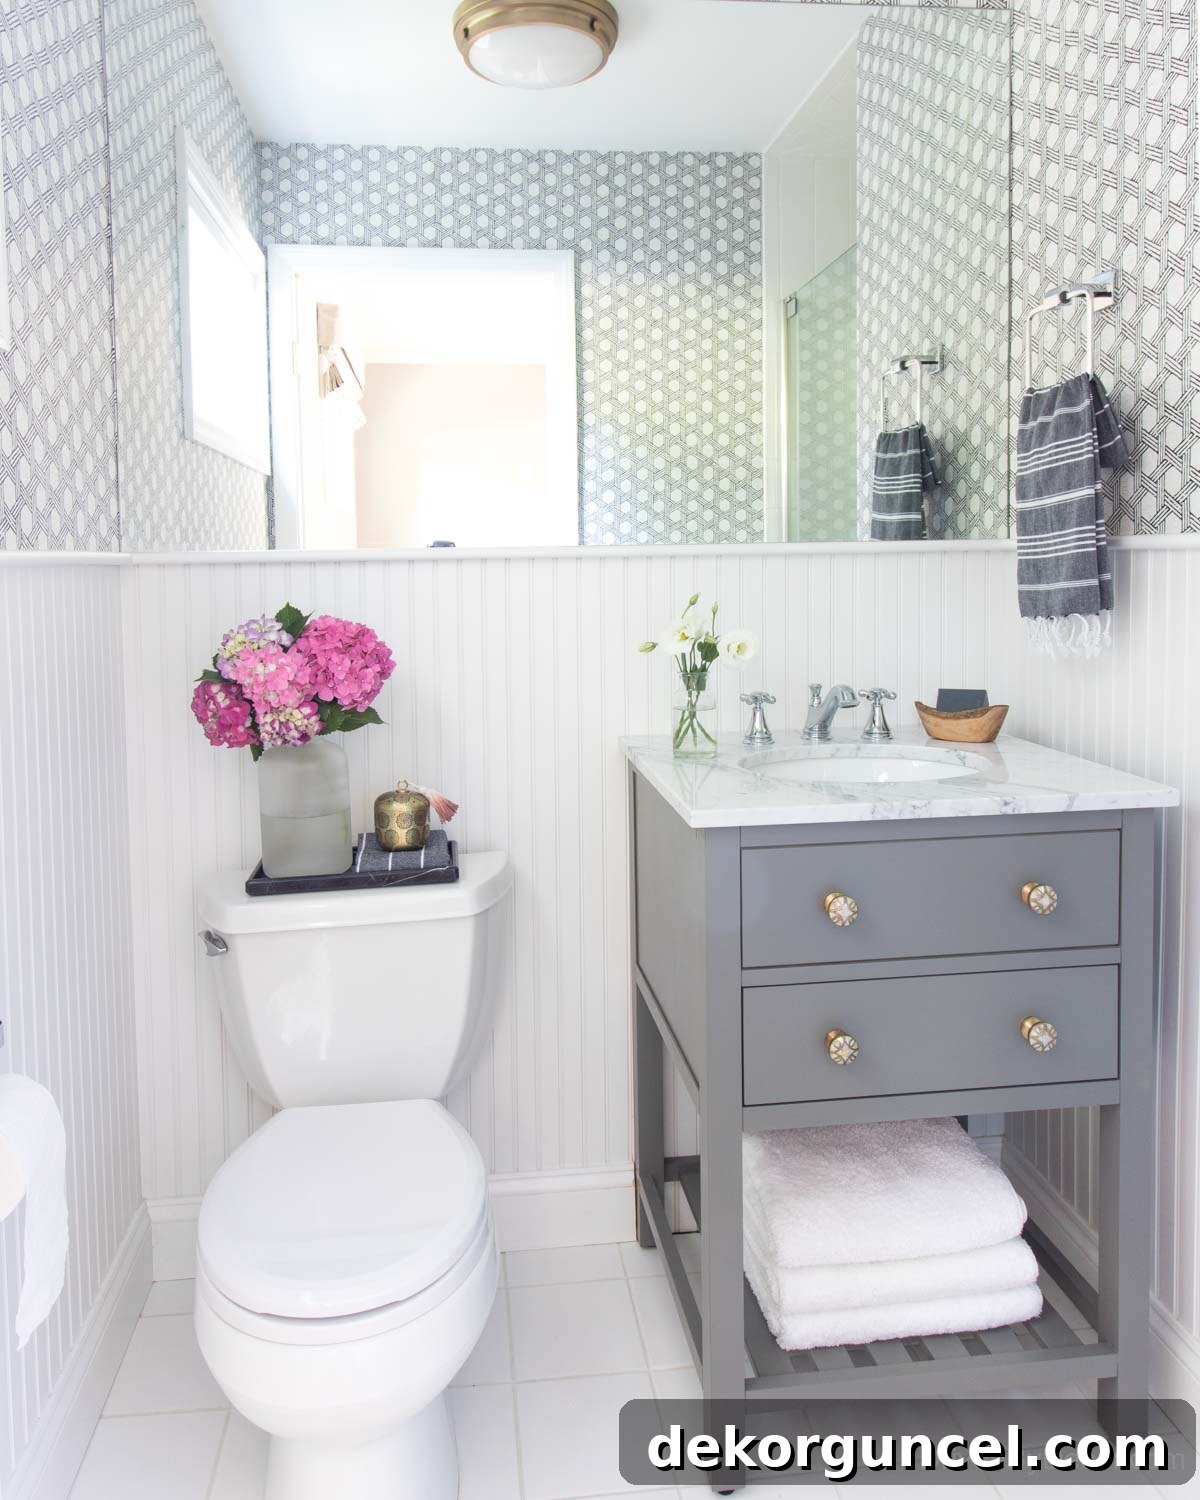
Guest Bathroom Design Elements: Elegant vanity faucet | Chic faucet handles | Sleek chrome towel ring | Plush white towels under vanity | Compact 24″ vanity (similar styles) | Refined brass and pearl vanity knobs | Wallpaper: currently unavailable | Modern brass flush mount light
The transformation was not only aesthetically pleasing but also significantly enhanced the functionality for our guests. For a deeper look into the “before” and “after” visuals of this space, be sure to explore my comprehensive post on guest bathroom ideas and a stunning small bathroom remodel.
9. Conceal and Charm: Dress Up Textured Walls with Shiplap
Upon moving into our home, the master bedroom walls presented a significant challenge. They featured a highly textured, light blue faux-finished plaster, riddled with numerous large cracks. Anyone who has ever faced the daunting task of skim coating and sanding entire rooms to smooth out heavily textured or cracked walls – especially plaster ones – can attest to it being an incredibly arduous and thankless job.
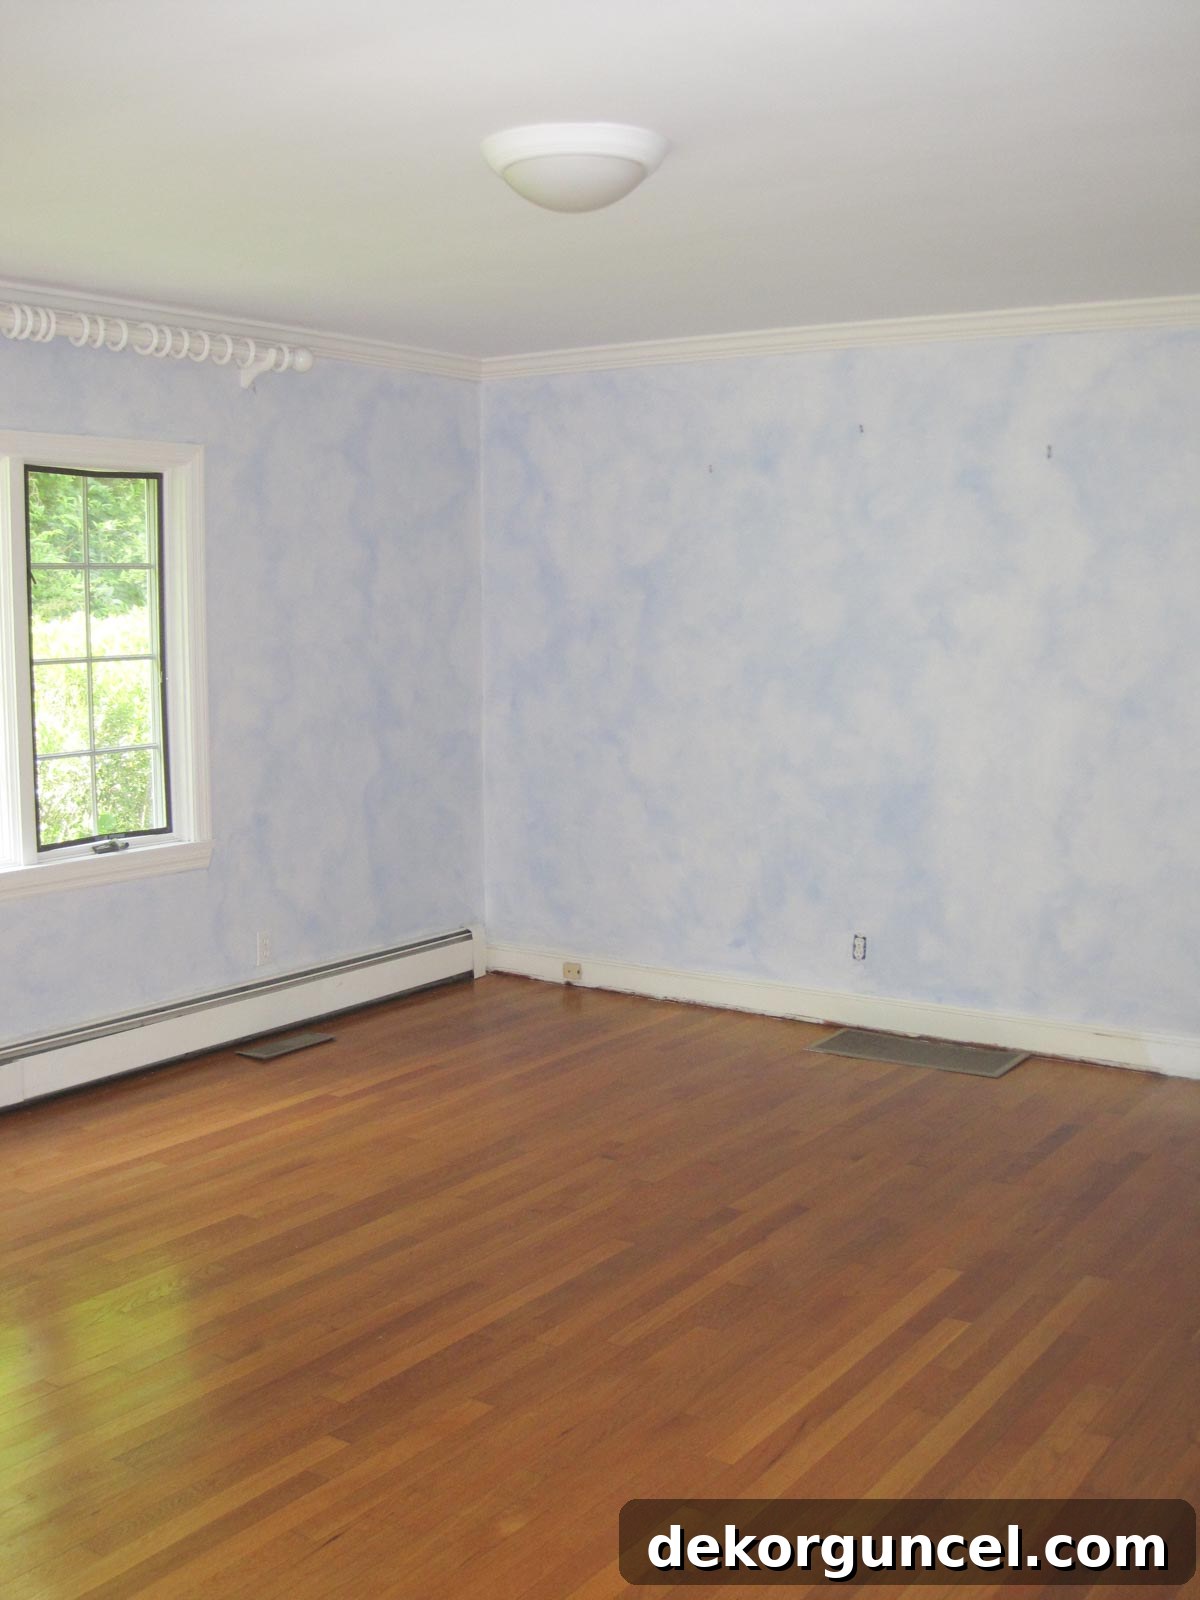
Rather than undertaking that painstaking process, I opted for a much more appealing and efficient solution: installing shiplap. This proved to be a win-win strategy, as it effectively covered those badly damaged walls while simultaneously elevating the room’s style quotient and introducing a charming, coastal-inspired aesthetic.
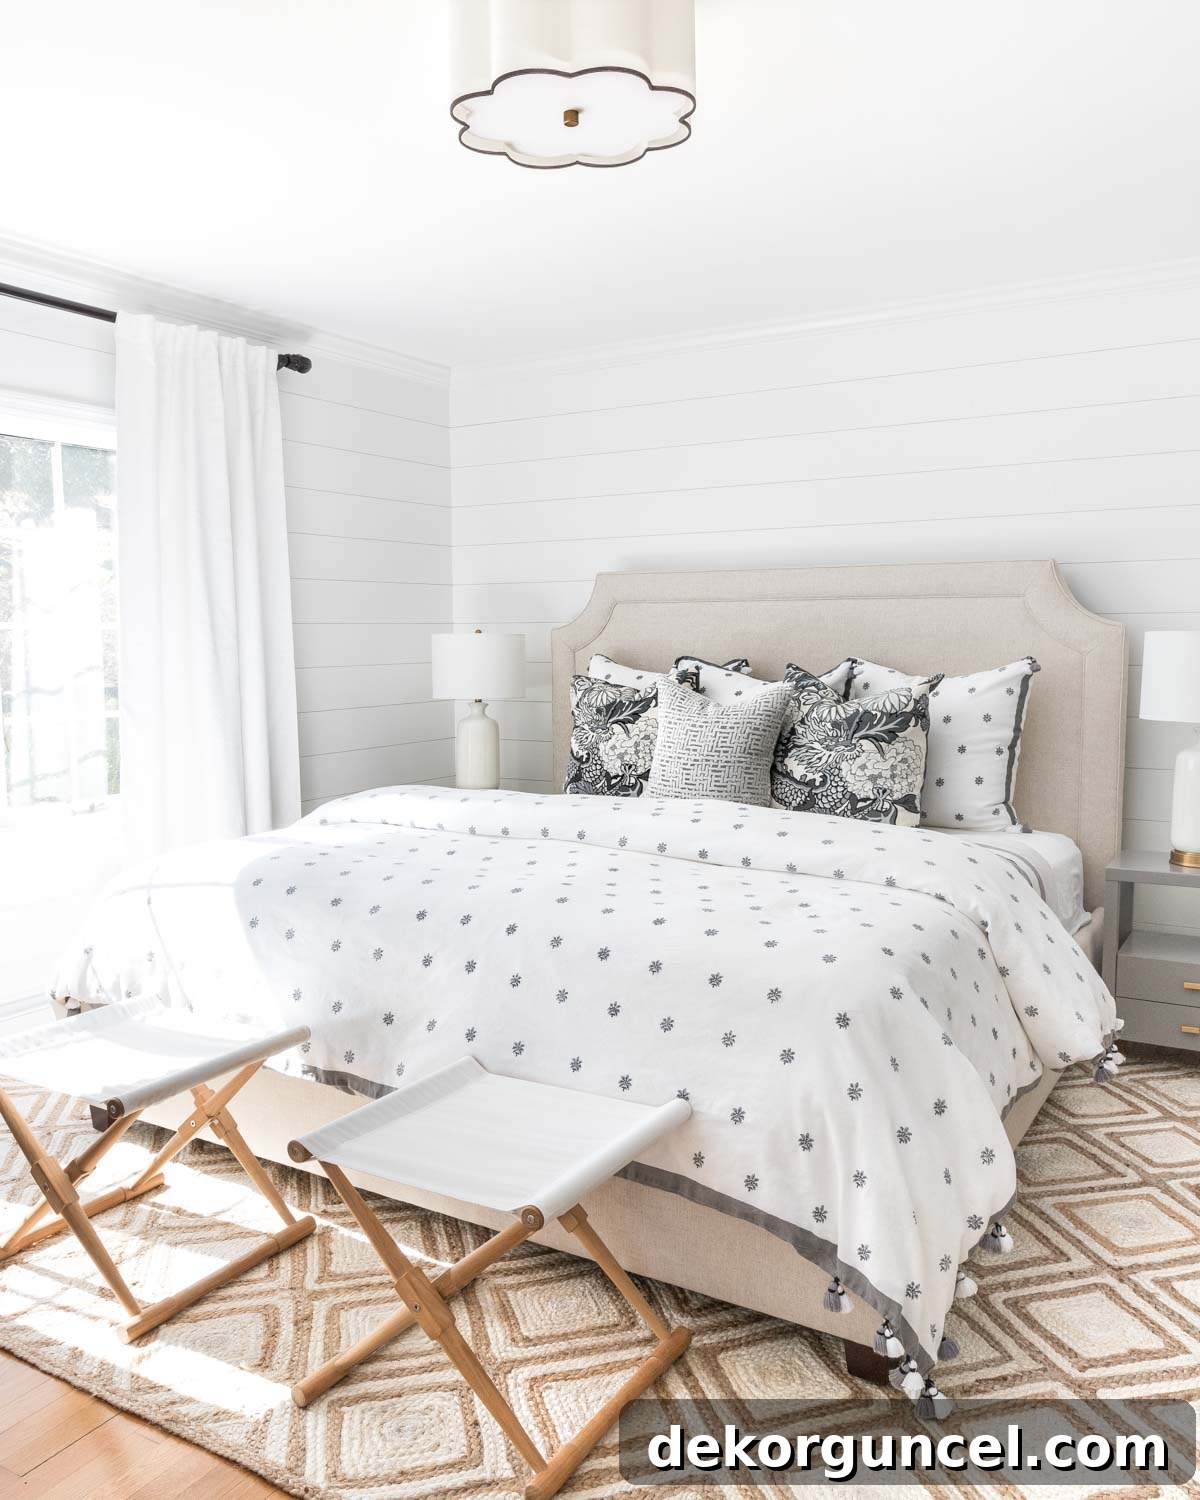
Master Bedroom Furnishings & Decor: Elegant upholstered bed (similar style) | Chic gray nightstands | Versatile camp stools (similar) | Classic white table lamps (similar options) | Decorative scalloped flushmount light | Gray & white duvet: no longer available | Striking gray & white dragon/floral pillows | Cozy quilt (Flagstone color) | Luxurious drapes | Textured diamond jute rug
For this project, I opted for a clever faux shiplap technique, using thin wood strips that seamlessly butted up against the existing molding. This allowed us to avoid the extensive work of removing and reinstalling all the room’s trim (crown molding, baseboards, and doorway molding) that true wood shiplap would typically require. You can find all the details on installing our faux DIY shiplap walls in my dedicated post. While shiplapping over our textured, cracked walls certainly served a dual purpose, its aesthetic appeal means you don’t need imperfect walls to consider this stylish update – I absolutely adore the look!
10. Bid Farewell to Bifold Doors for Enhanced Accessibility and Style
Alongside my strong aversion to pedestal sinks, I’d readily add bifold closet doors to my list of pet peeves. It genuinely frustrates me how much valuable room they consume when folded back, rendering a significant portion of the closet difficult to access. Furthermore, they are often prone to creaking and can be cumbersome to open and close smoothly. In our master bedroom, the original closet was a continuous space, spanning over eight feet in length. However, it was fitted with two bifold doors and a wall segment in the middle, which effectively made a substantial section of our closet virtually inaccessible. Compounding the issue, it was impossible to have both the left bifold door open and the main bedroom door open simultaneously, creating a constant bottleneck.
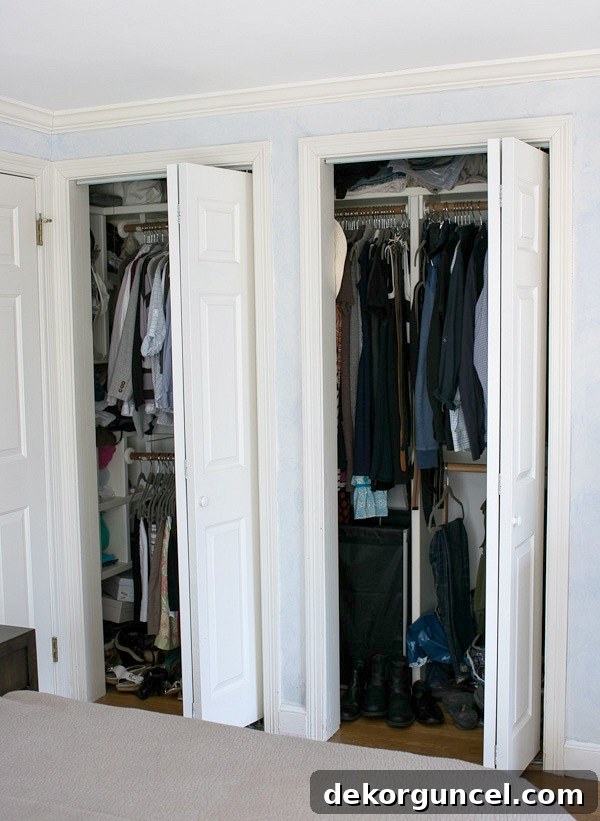
After our contractor confirmed that the central wall segment was not load-bearing, we proceeded with its removal, along with the bifold doors. The opening was then reframed to create one expansive, uninterrupted space. In place of traditional doors, I installed a long, thin rod and hung lightweight curtains, which added a soft, elegant touch. Inside the closet, we enhanced the organization with sleek acrylic rods and adorned the back wall with {this beautiful wallpaper}, transforming it into a luxurious and highly functional storage area.
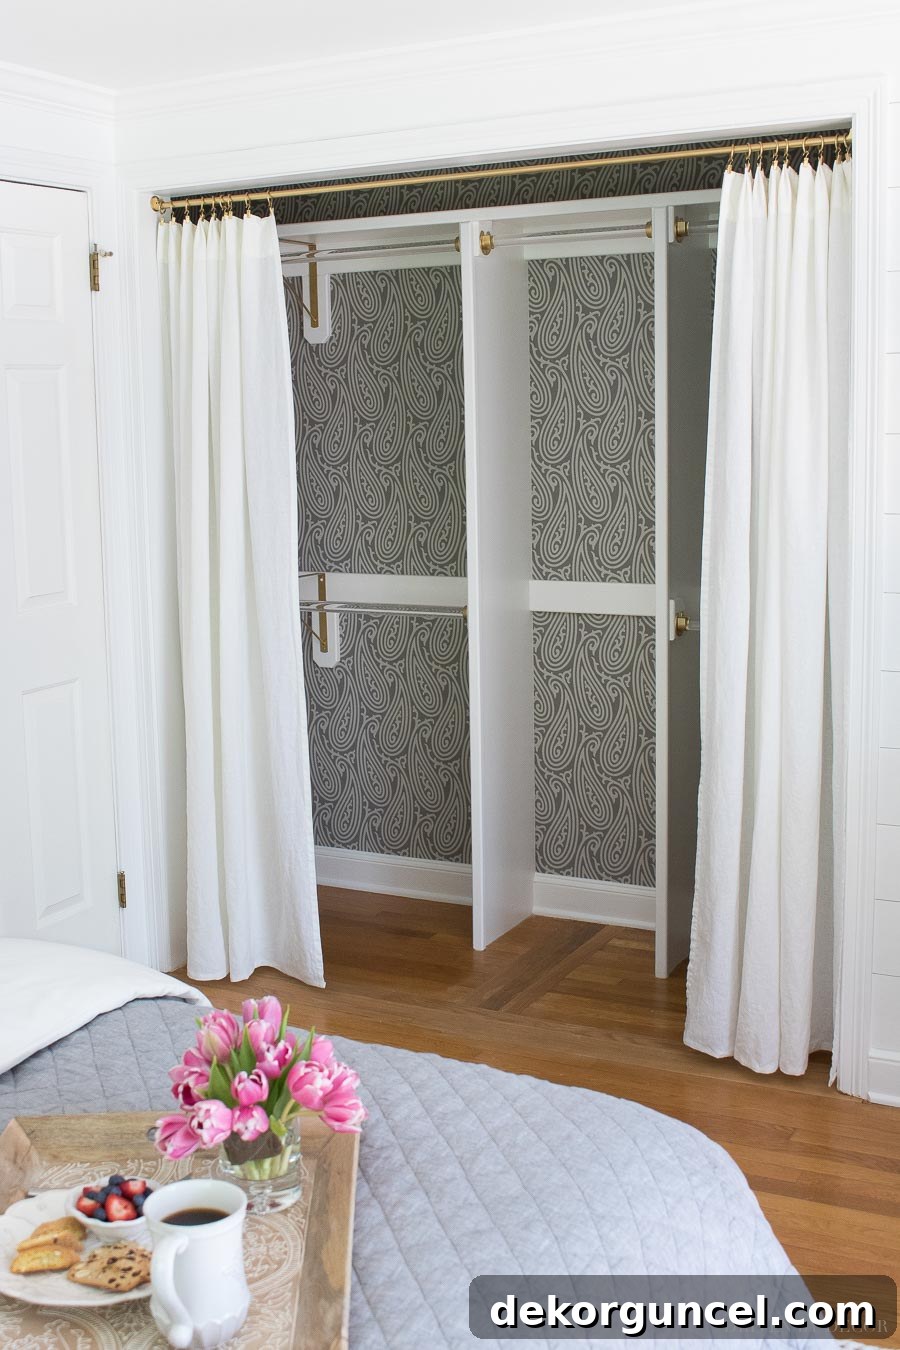
I understand that closet curtains might not appeal to everyone (and honestly, I was initially hesitant myself, unsure if I’d truly embrace them). However, I ultimately fell in love with both the aesthetic and the enhanced functionality of our new closet system. You can discover the specific product sources and delve deeper into the decision to use curtains instead of closet doors, along with other inspiring ideas for revitalizing your closet spaces, in my comprehensive post on creative closet door ideas.
11. Implement Stylish and Practical Storage with Floating Shelves
Our master bathroom holds a special place as the one room in our home that I had the unique opportunity to design entirely from scratch, given it was a new addition. However, we were working within strict maximum width and length constraints for the new space, which turned the design process into a bit of a jigsaw puzzle, trying to optimally place every element. The space situated between our shower and the far wall of the bathroom proved particularly tricky to conceptualize a purpose for. That is, until the idea of incorporating floating shelves emerged – they ultimately became the perfect solution for both storage and aesthetic appeal.
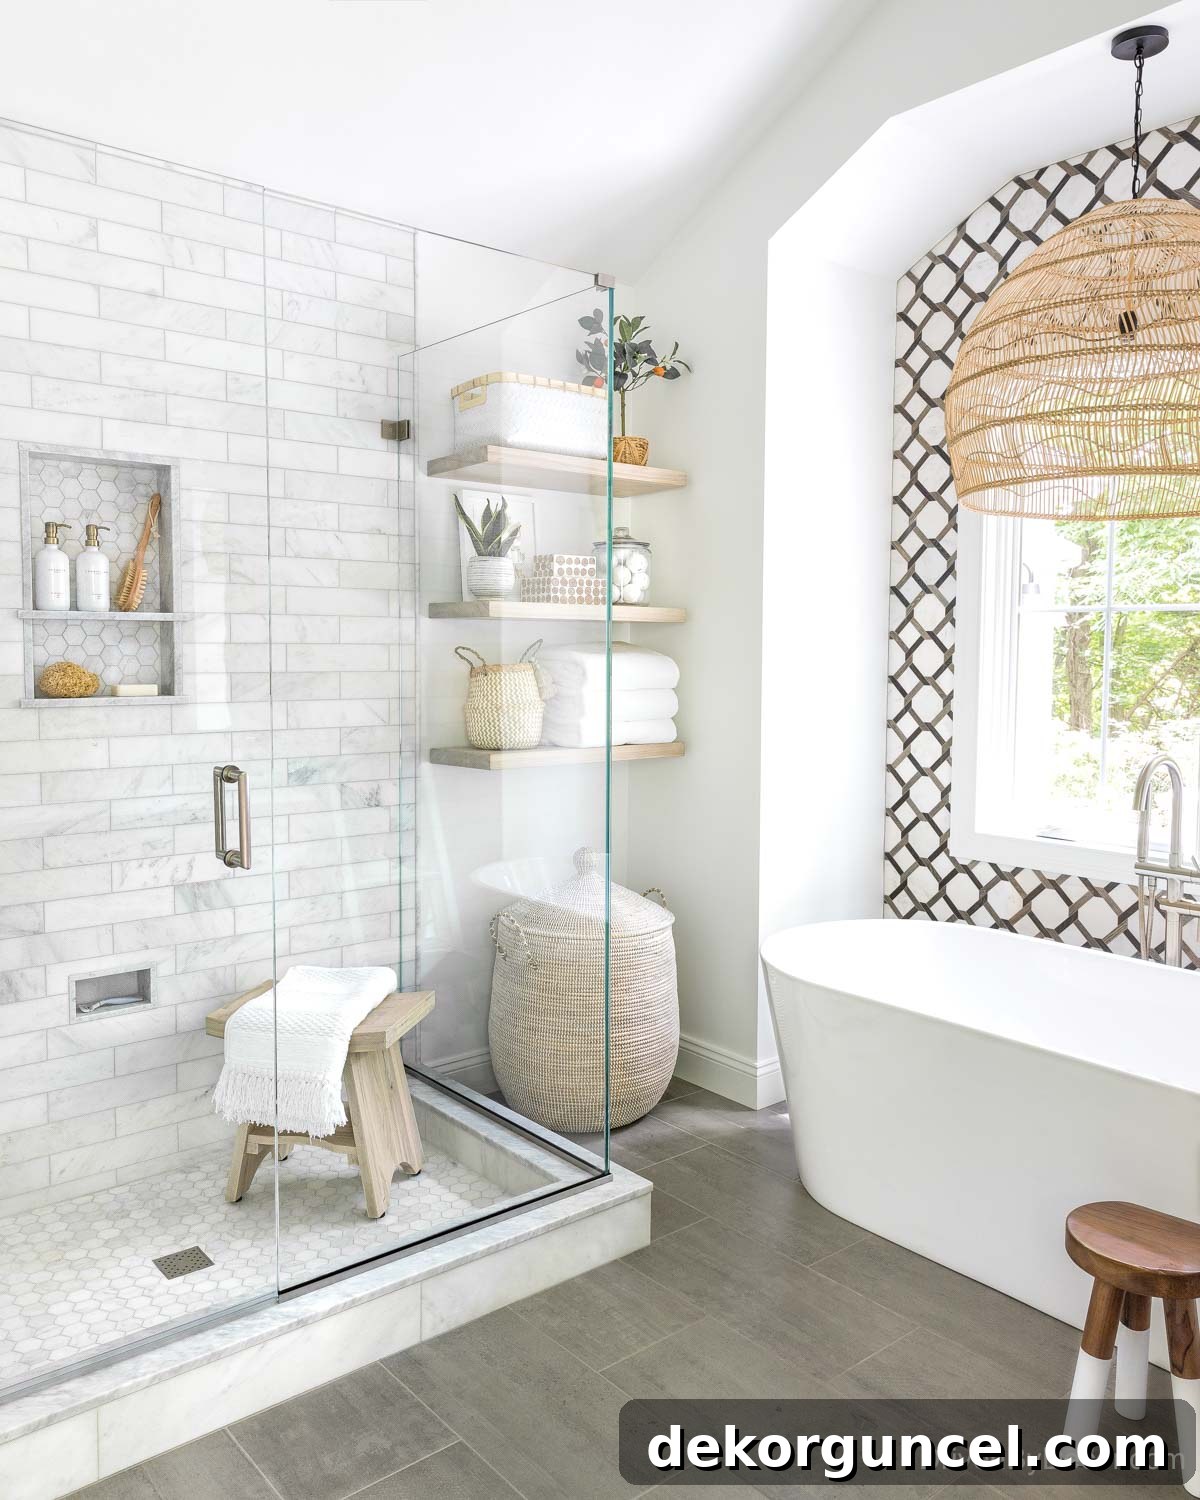
Master Bathroom Details – Shower & Tub: Convenient pump bottles (16 oz white/gold) | Practical shower stool | Tub: Luxurious freestanding bathtub | Stylish dipped leg stool
At first glance, it might appear that our floating shelves serve primarily as decorative displays. However, they are ingeniously utilized for practical storage: we keep extra rolls of toilet paper neatly tucked away in the top woven basket, fresh washcloths in the lower basket, an array of bath bombs elegantly presented in a glass jar, hair accessories cleverly organized in stacked boxes, and a stack of clean, plush towels readily accessible. This demonstrates how easily functional storage can be integrated into a beautiful display.
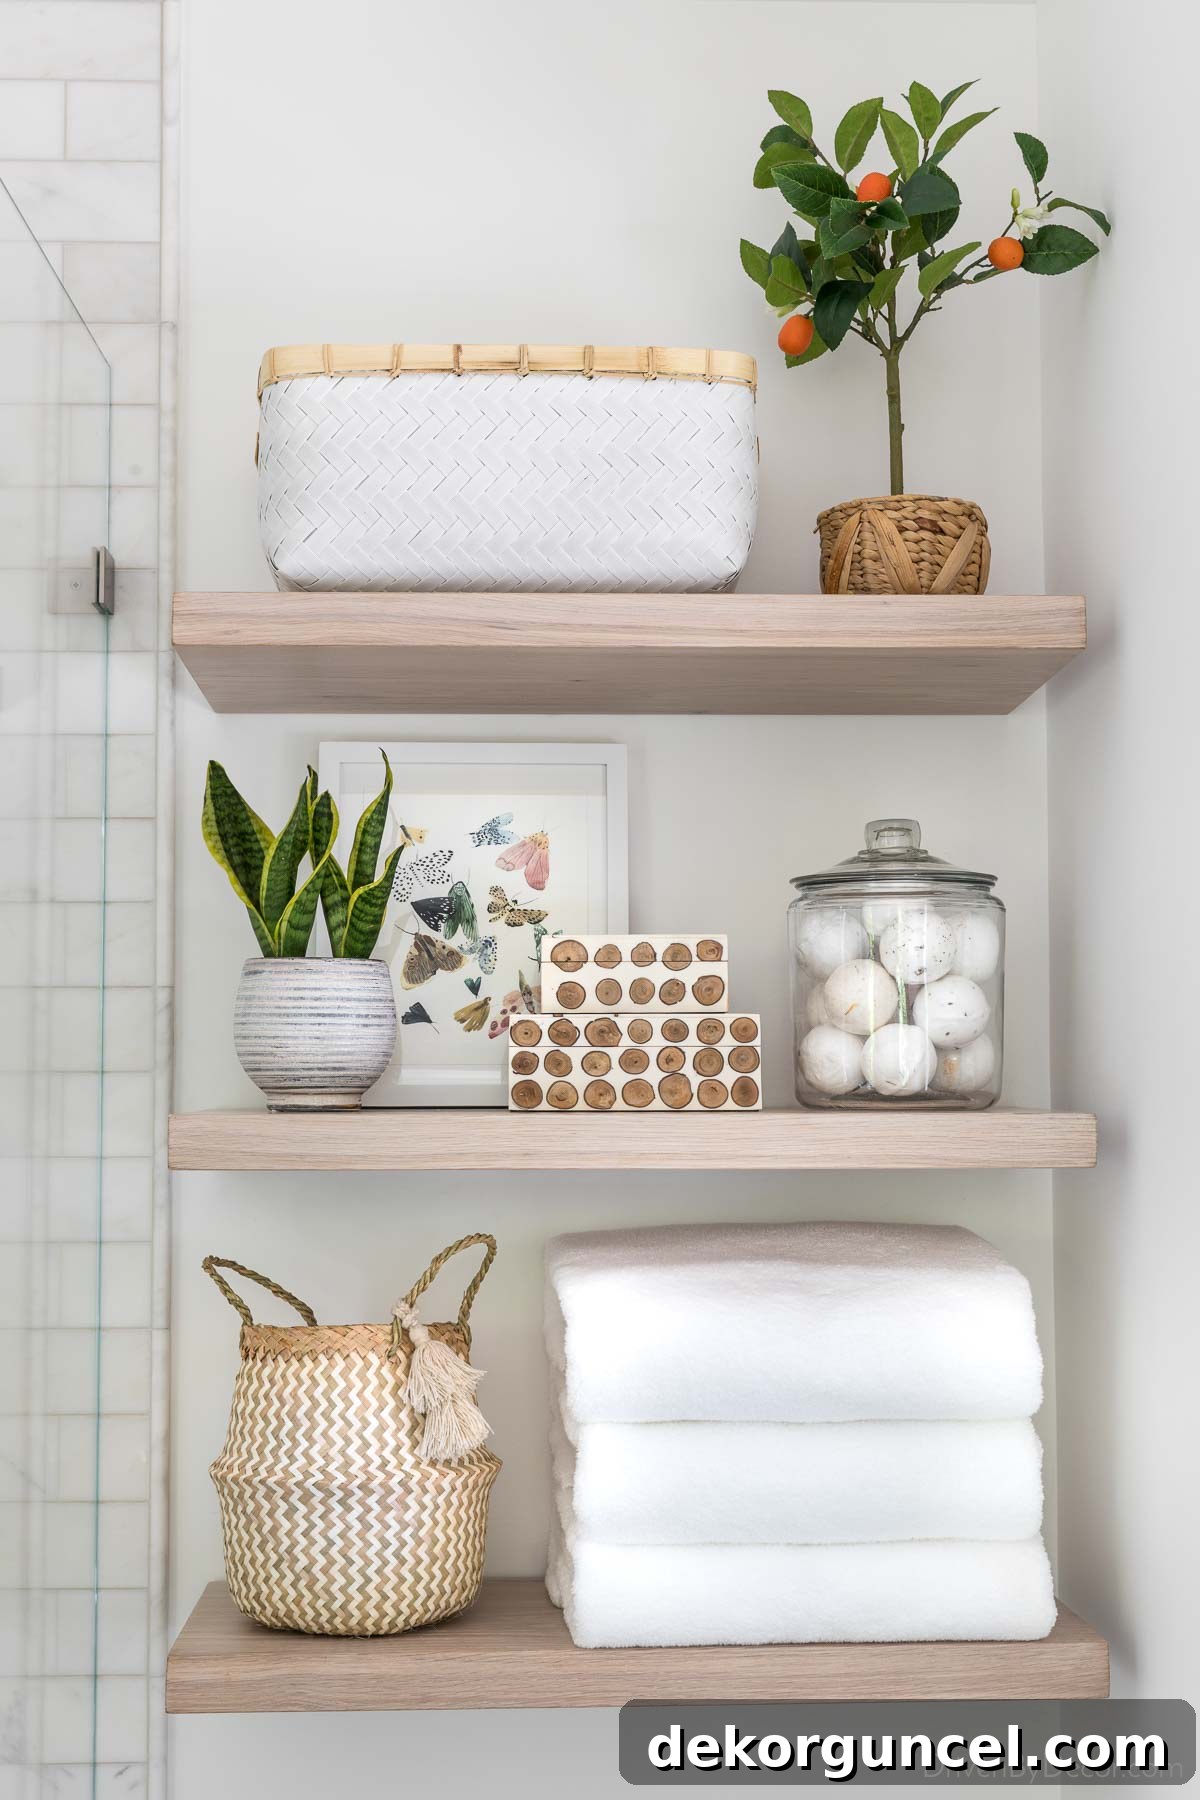
Shelf and Accessory Sources: Stylish floating shelves | White woven basket (medium size) | Vibrant colorful moth art print | Large glass canister (1 gallon capacity) | Indulgent bath bombs | Elegant belly basket (similar option) | Our favorite luxurious bath towels | Spacious lidded basket for hamper (positioned under shelves) | Other accessories: currently unavailable
I’ve dedicated an entire post to the specifics of these shelves, including details on our chosen style, installation methods, and ideal spacing on the wall, which you can find in my article on our bathroom floating shelves. If you haven’t yet explored the full details of our master bathroom transformation, I encourage you to check out our complete bathroom remodel before & after reveal and my insightful post on 10 master bathroom remodel ideas.
12. Reimagine Your Fireplace: A Dramatic Refresh with New Tile
Our living room, the largest space in our Connecticut home, naturally had its grand fireplace as the undisputed focal point. However, despite its prominent position, the existing tile around the fireplace didn’t align with our personal aesthetic, feeling somewhat outdated and uninspired.
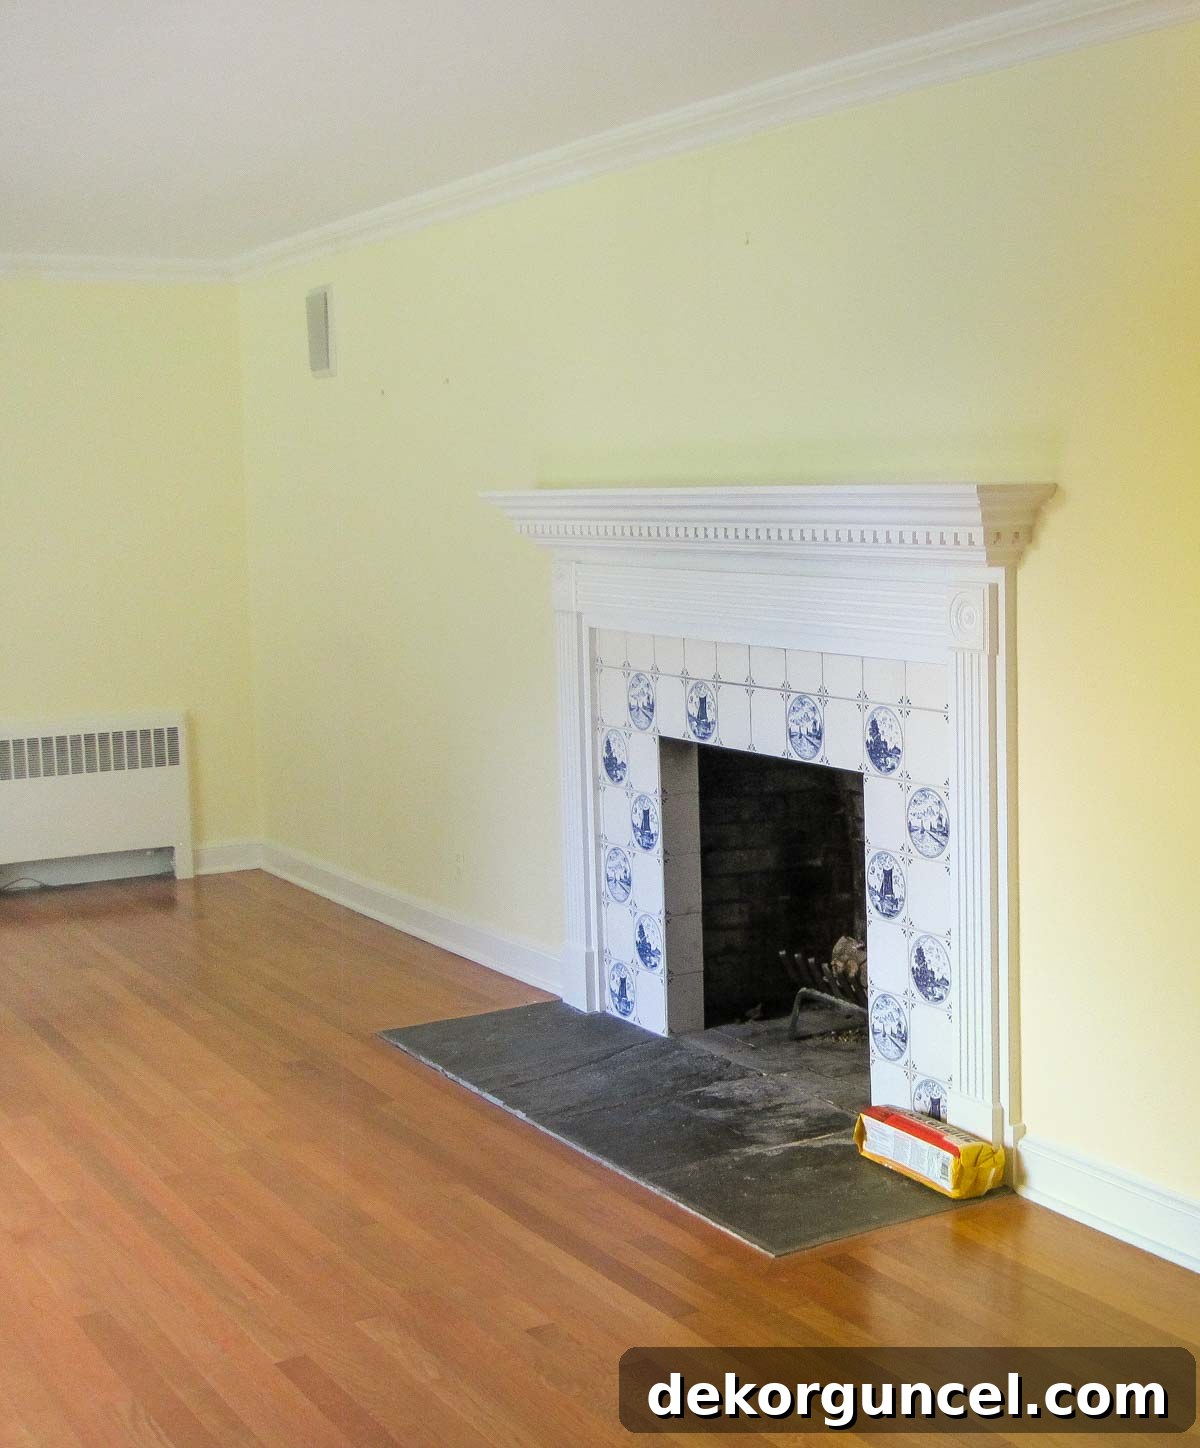
To breathe new life into the room, we undertook a significant transformation. Alongside painting the walls a fresh, modern hue, I decided to have the fireplace re-tiled. Furthermore, we replaced the ornate wood fireplace surround with a sleeker, more dimensional design that better suited our contemporary taste. The collective impact of these changes was astonishing – the room was utterly transformed and hardly recognizable!
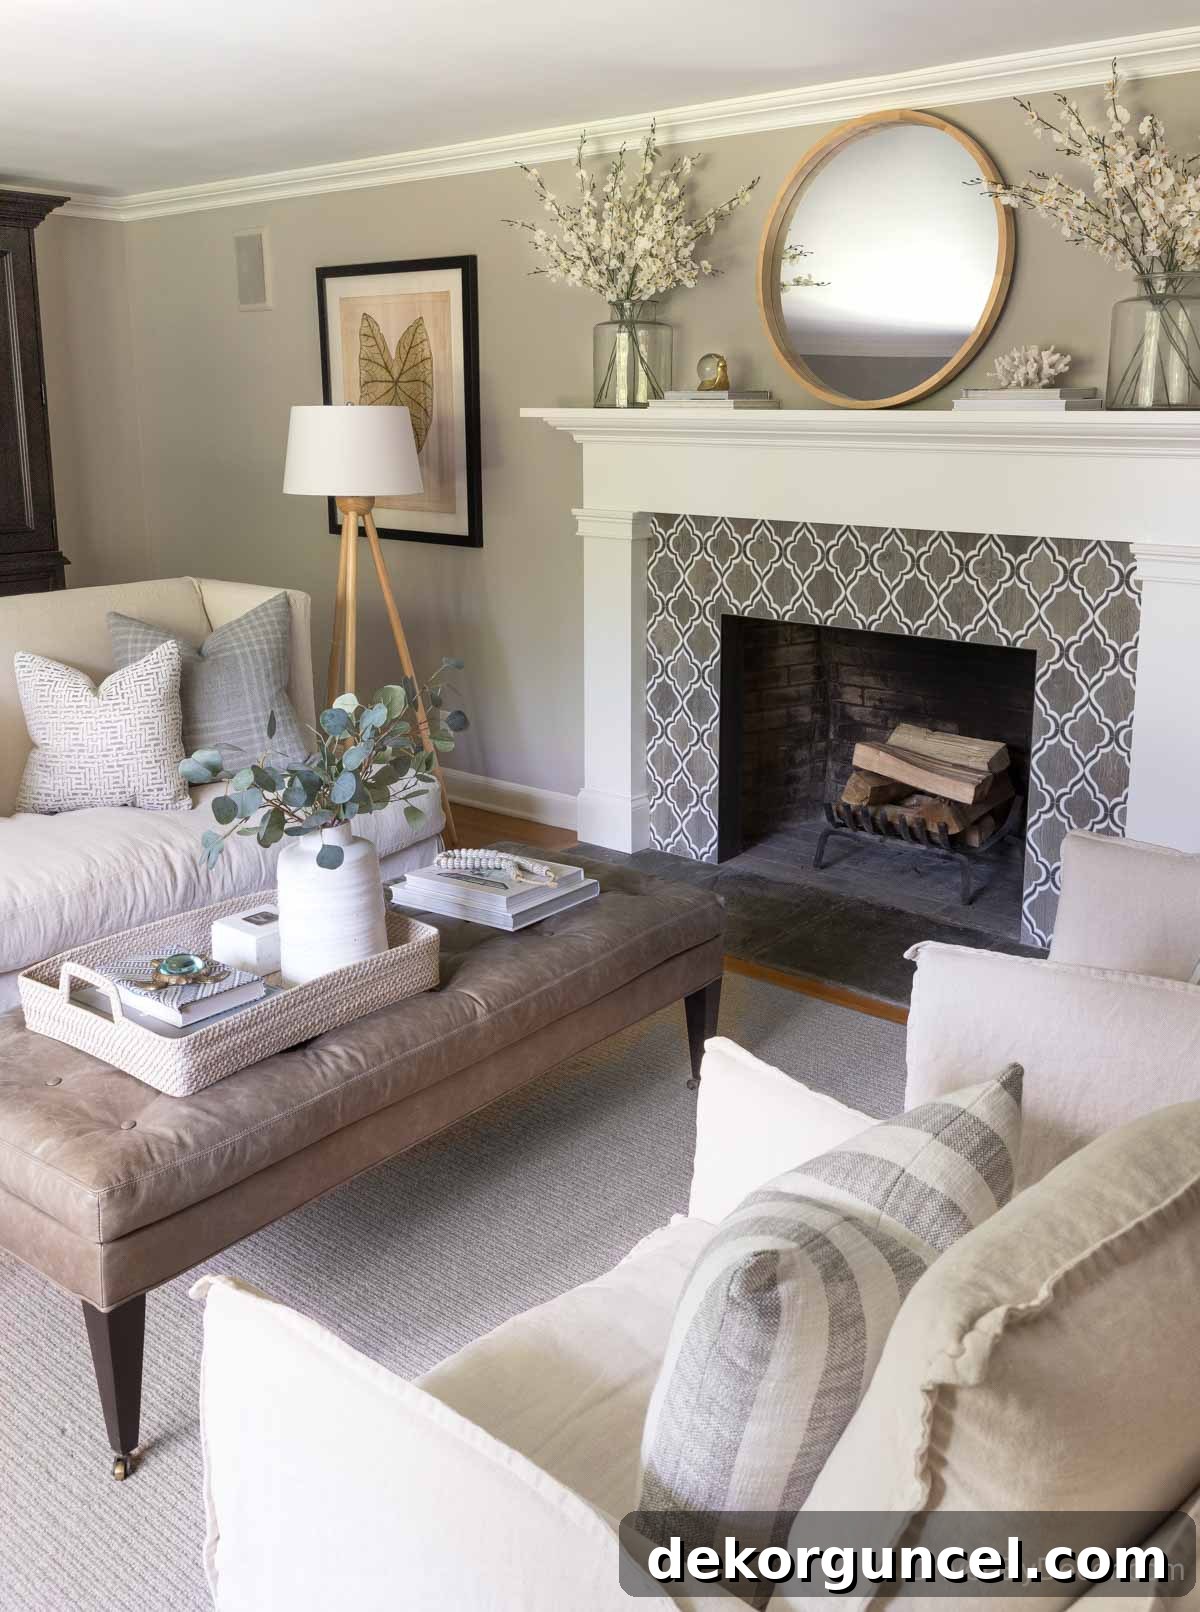
Living Room Decor & Furnishings: Loveseat & ottoman (custom order from Lee Industries) | Comfortable linen swivel chairs | Elegant wood floor lamp | Striking round mirror over fireplace | Realistic faux flowers in mantel vases
Considering the relatively small amount of tile required, a fireplace is an excellent place to splurge on a higher-end tile that might be too expensive for larger tiling projects. Where feasible, retaining your existing fireplace hearth, as we did, can significantly help in managing costs. For more photographs of our fireplace and living room, along with details on the paint color, explore my post on Sherwin Williams Anew Gray (the exquisite paint color used on our living room walls).
13. Illuminate Your Space with Captivating Statement Lighting
When we first acquired our house, the overhead lighting in our family room was limited to utilitarian track lighting, unceremoniously mounted on large beams that traversed the entire room. This setup, with its dated design, did little to enhance the room’s ambiance or highlight its architectural features.
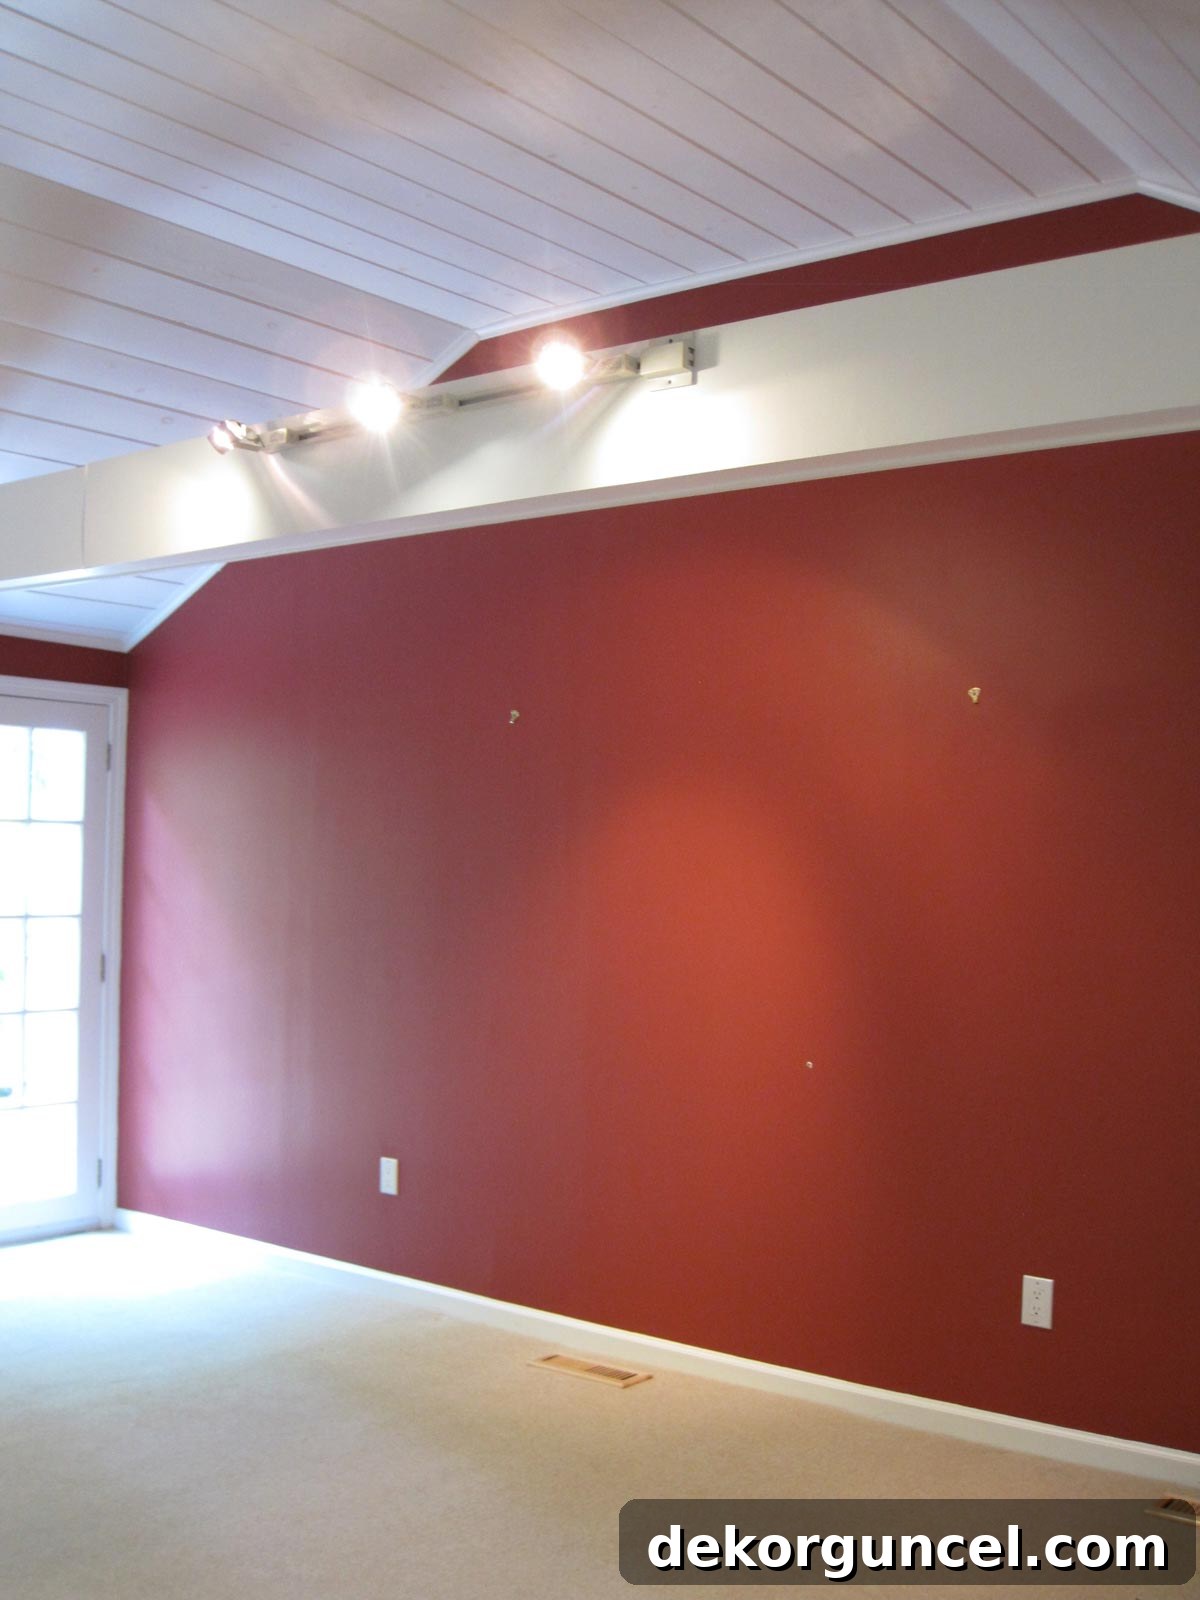
The prominent beams, beyond being visually unappealing and somewhat dilapidated, paradoxically made the ceilings feel much lower than they actually were. Our comprehensive renovation involved removing both the beams and the old lighting system. We then painted the entire space a bright, unifying white, and hired an electrician to run new wiring. This crucial step allowed us to install {this magnificent two-tier chandelier}, which instantly became the room’s breathtaking centerpiece and a true statement piece.
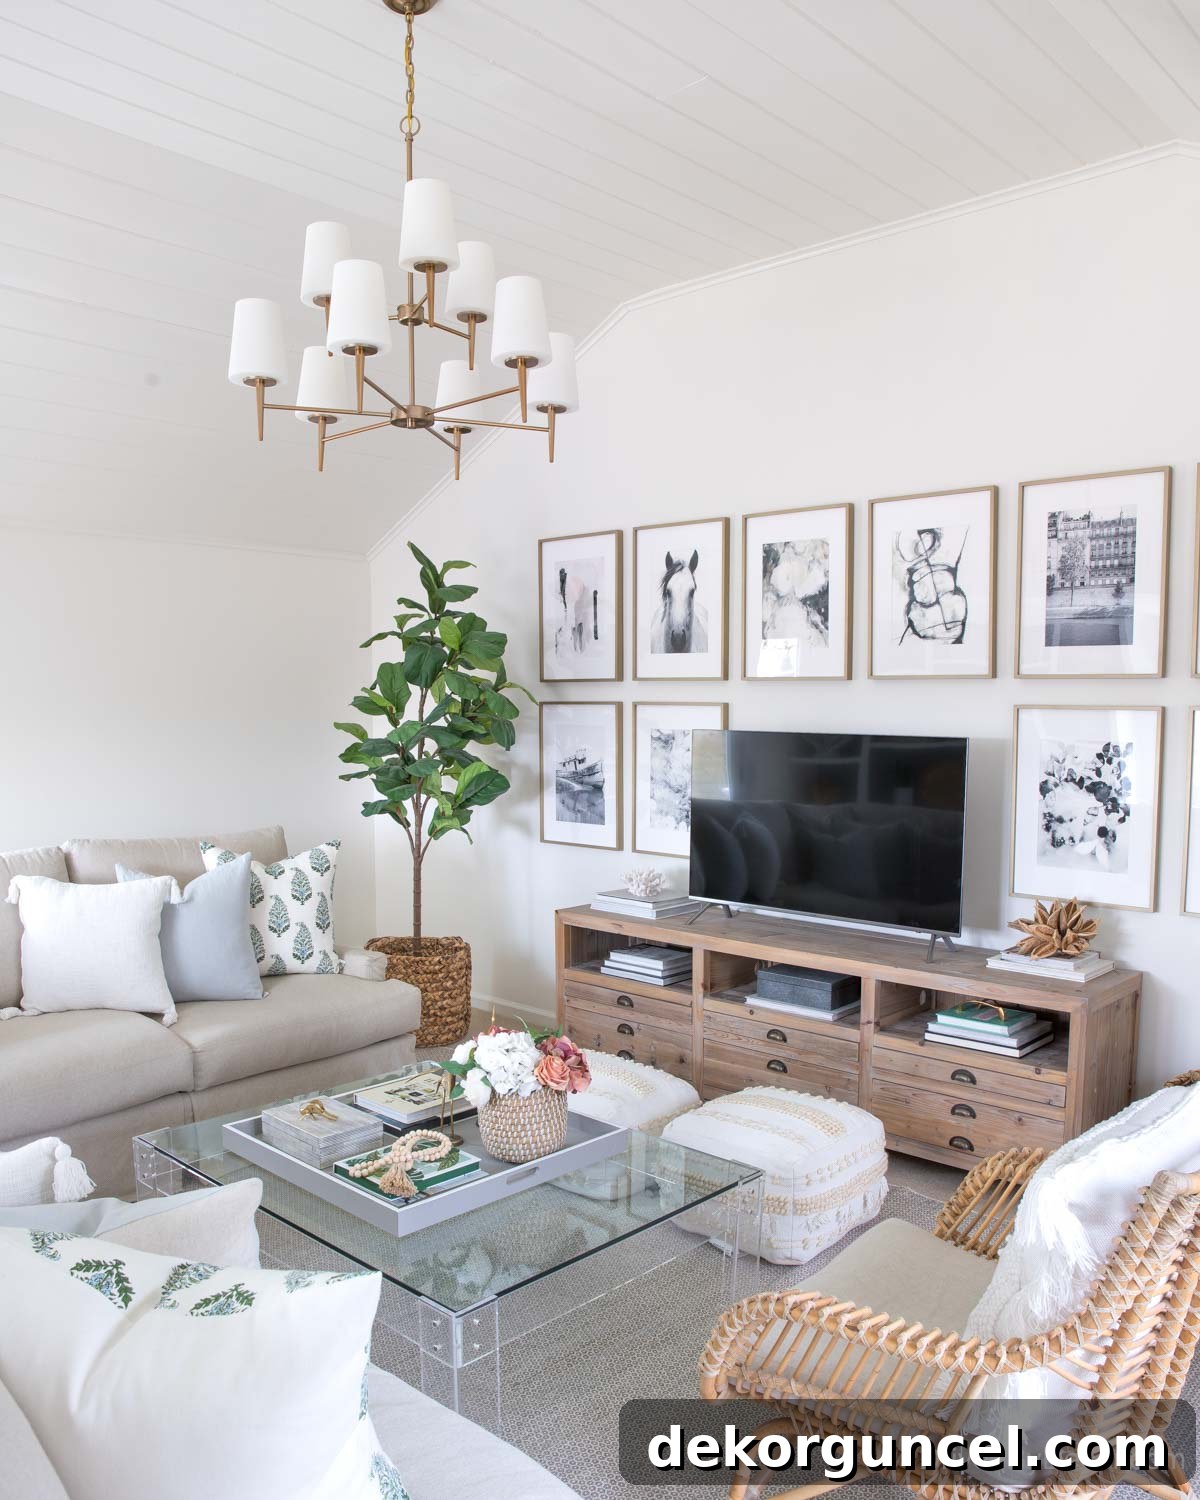
Family Room Decor & Accessories: Stylish TV console (similar option) | Lush faux fiddle leaf fig tree | Comfortable area rug | Striking art prints (detailed in {this post}) | Modern acrylic coffee table (similar) | Large coffee table tray (28″ square) | Textured neutral poufs | Chic rattan chair
The transformation brought by the new lighting was absolutely incredible, making all the difference in the room’s ambiance and perceived height! Another instance where I embraced the power of statement lighting was above the tub in our master bathroom, where I chose {this captivating oversized rattan pendant}, which truly rendered the space uniquely special and inviting.
14. Budget-Friendly Floor Revival: The Magic of Painted Tile Floors
Not every impactful home remodeling project needs to be a budget-breaker! Our hall bathroom, which also housed a tub/shower combination, was an excellent example. It originally featured custom-cut blue carpet laid over decidedly unattractive red tiles. The combination was far from desirable.
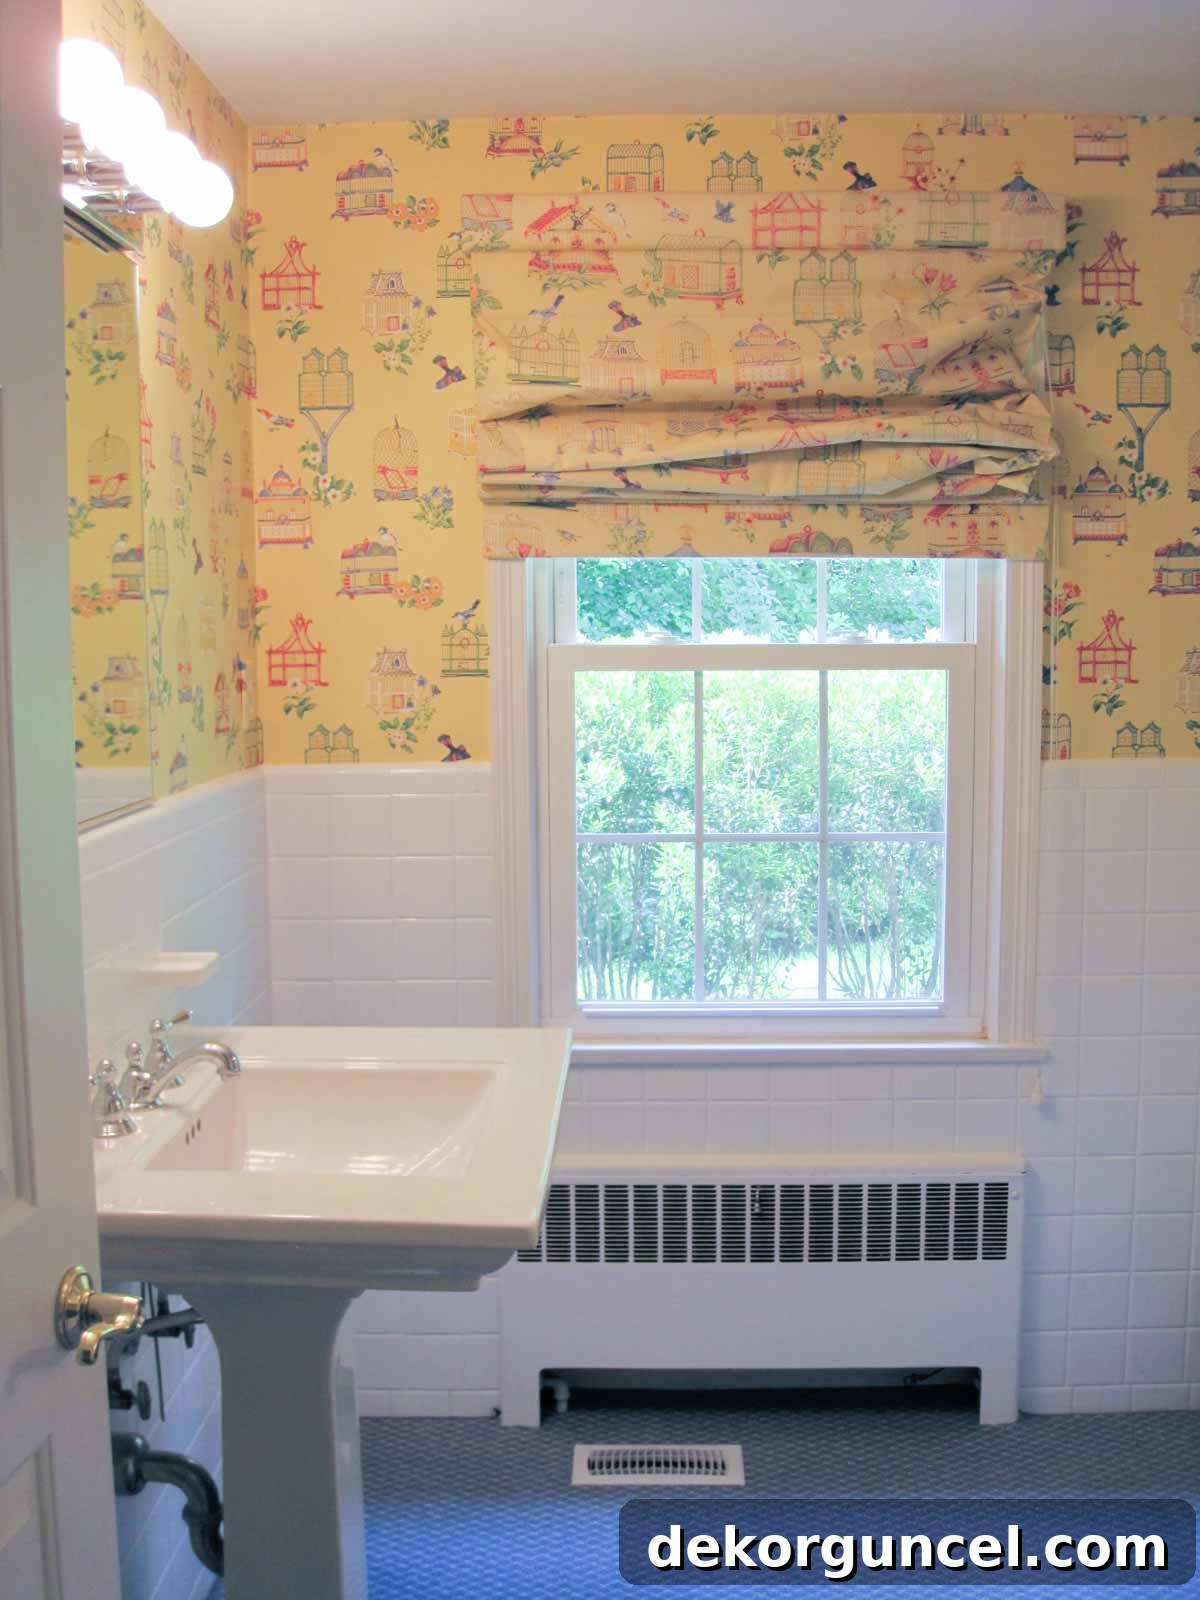
The idea of carpet in a bathroom was simply unbearable for me, but the red tile floors underneath were, to put it mildly, quite horrific. As a temporary measure, I decided to try painting the tiles. Little did I know that this “temporary” solution would not only look incredibly good but also hold up so exceptionally well that it evolved into a long-term, highly durable flooring solution. This project truly demonstrated the transformative power of paint as a cost-effective renovation tool.
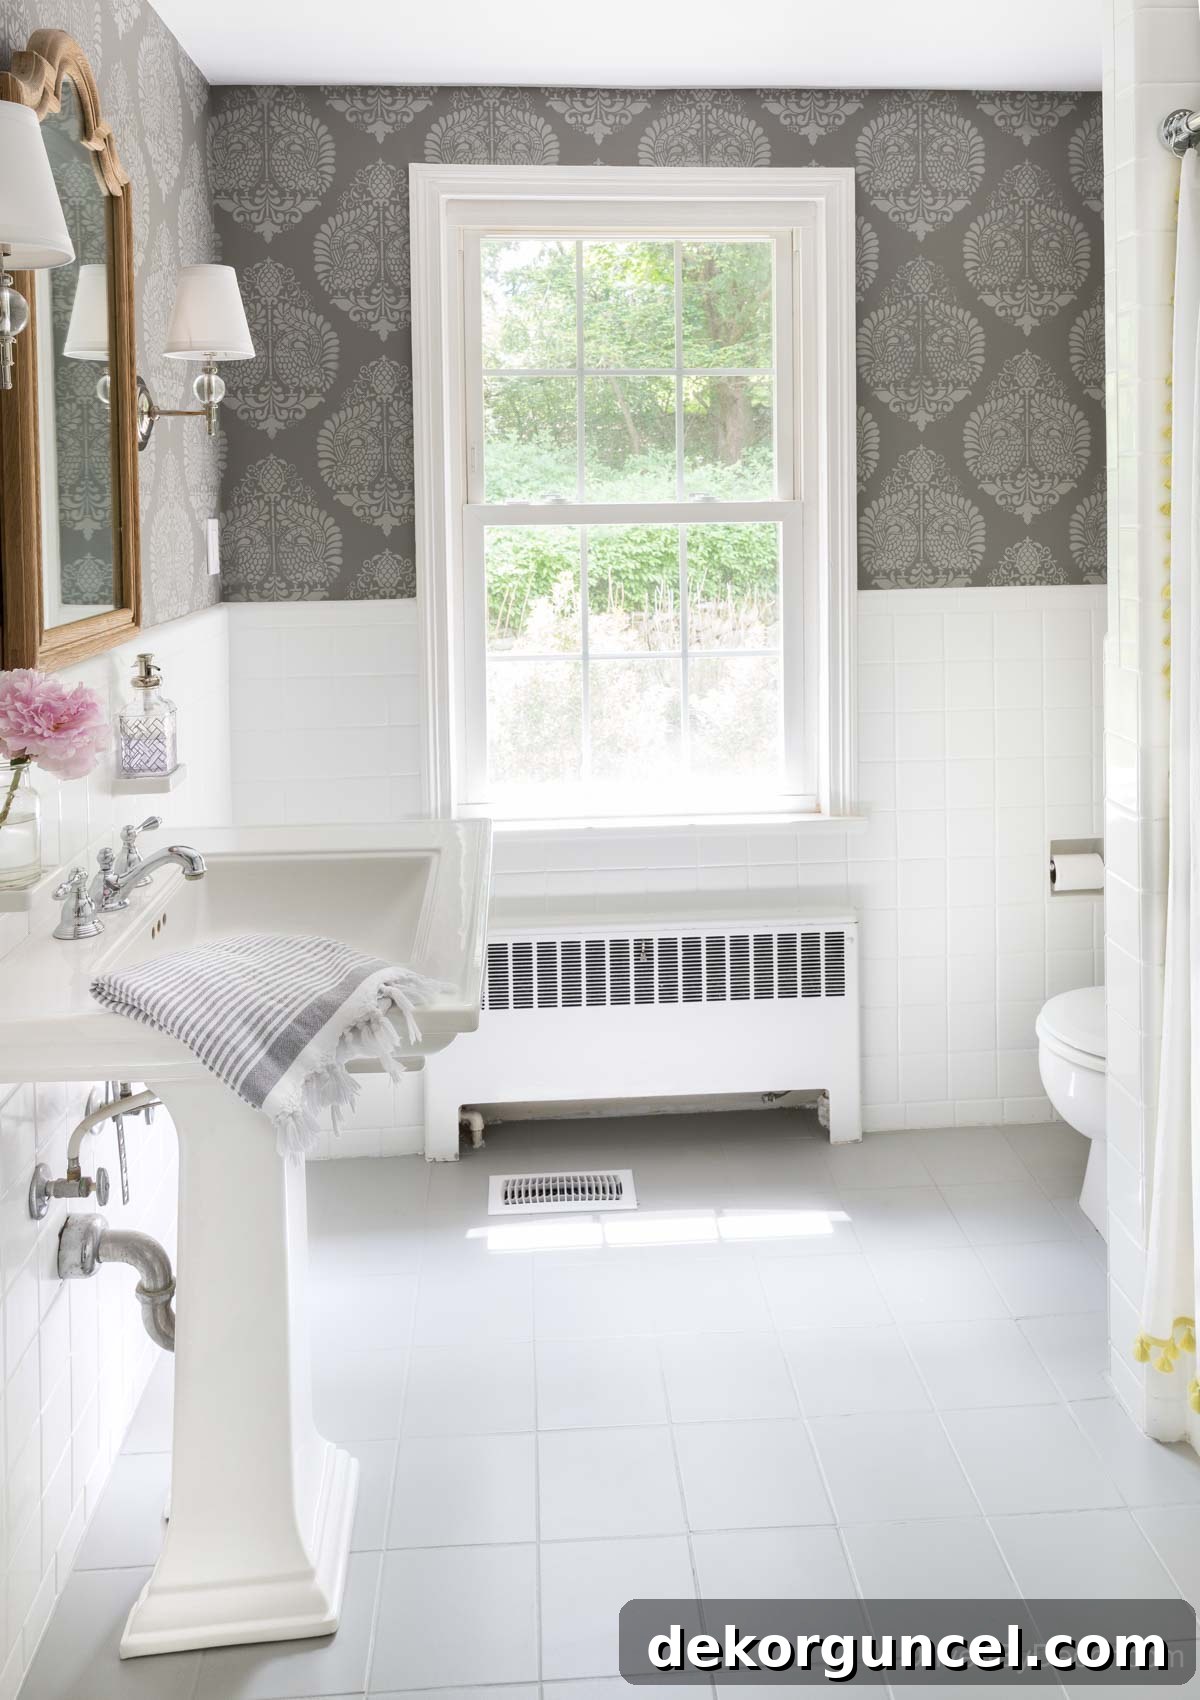
Powder Room Design Details: Intricate Annapakshi Indian Damask Wall Stencil (11.25″ x 15.5″) | Elegant wood mirror (similar style) | Classic pedestal sink | Stylish sconces (Polished Nickel finish) | Sophisticated gray striped towel
You can find the complete step-by-step tutorial for this project in my detailed post on how to successfully paint a tile floor. Additionally, discover all the specifics on how I achieved our bathroom wall transformation on a budget in my guide on how to effectively stencil a wall, proving that stunning results don’t always require a hefty investment.
15. The Unsung Heroes: Don’t Overlook Your Interior Doors
Worn, builder-grade door hardware is an instant tell-tale sign that instantly dates a home’s interior. The simple act of updating your interior door hardware and hinges, coupled with giving your doors a fresh coat of paint, can make a far more significant impact than you might initially imagine. With each room renovation we undertook in our home, we consistently treated the door to a fresh paint application and swapped out the hardware for {these exquisite crystal & satin brass knobs}.
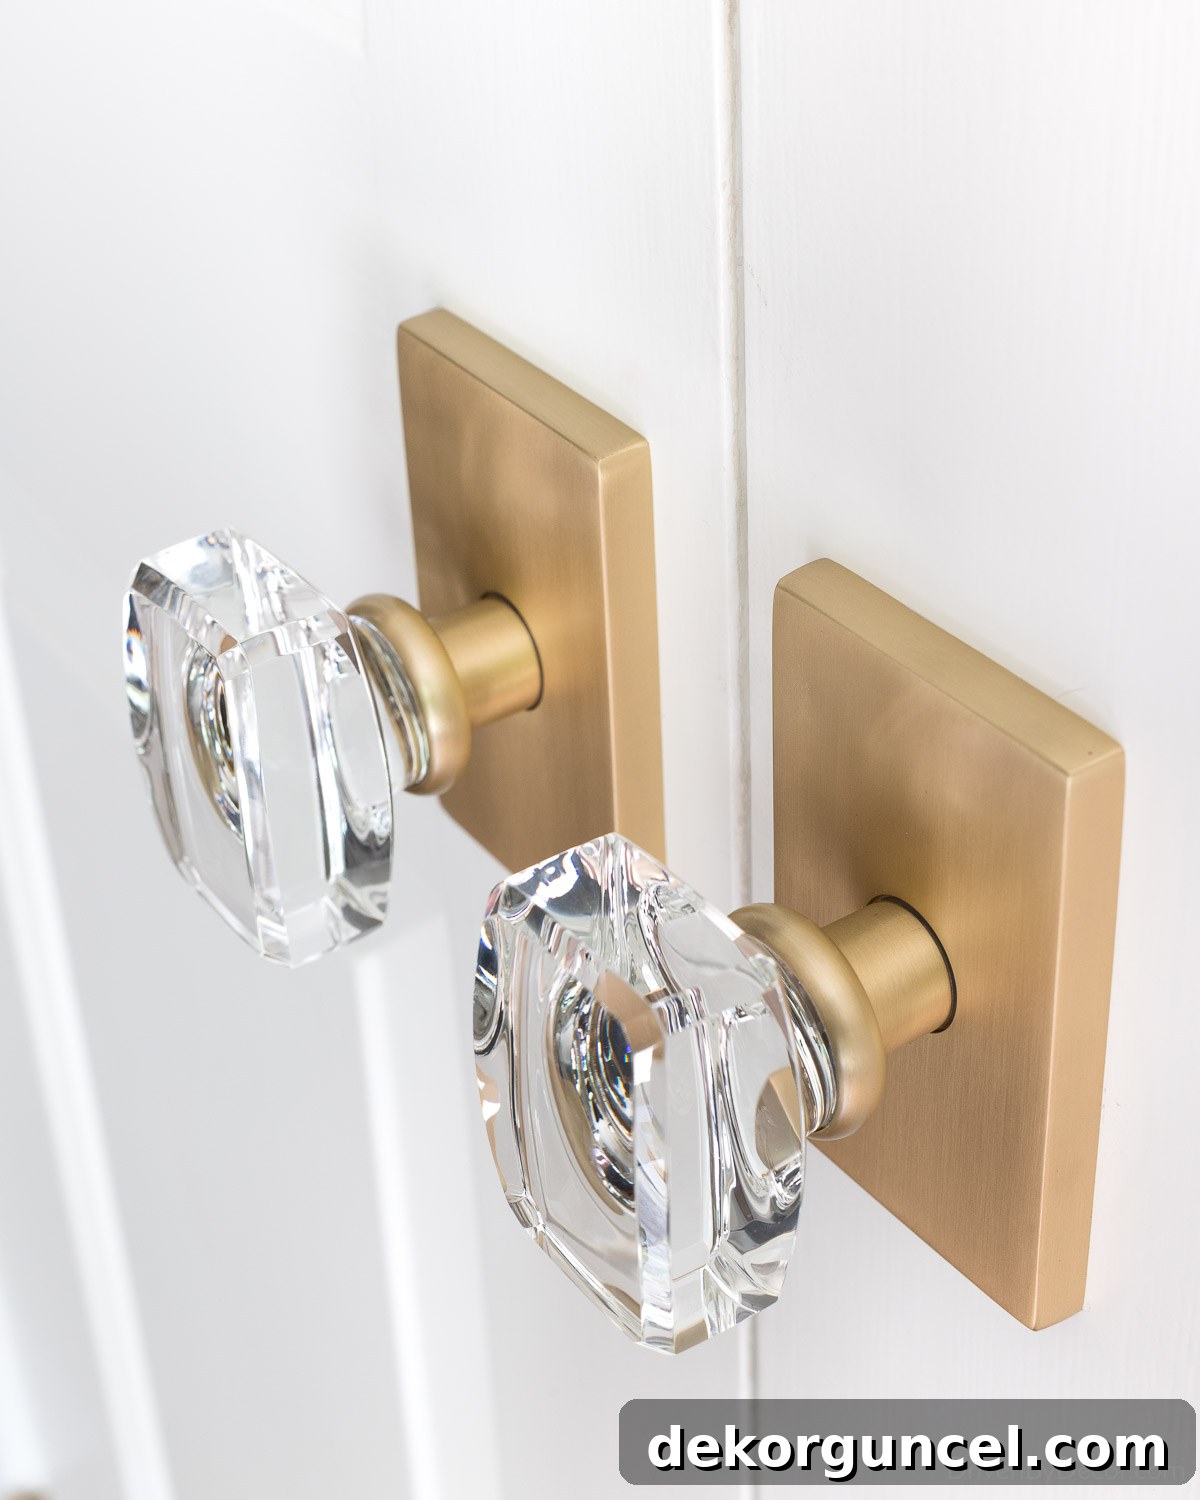
Over time, we meticulously replaced every door knob and hinge on our first floor. To manage costs effectively, we opted to retain the original style on our second floor, which thankfully featured a brass finish that coordinated reasonably well with our new selections. I also decided to refresh the paint color on the interior side of our two entry doors (our front door and the door leading to the garage) to Benjamin Moore Charcoal Slate. I absolutely adored the sophisticated combination of this deep, rich color with our newly installed, gleaming knobs.
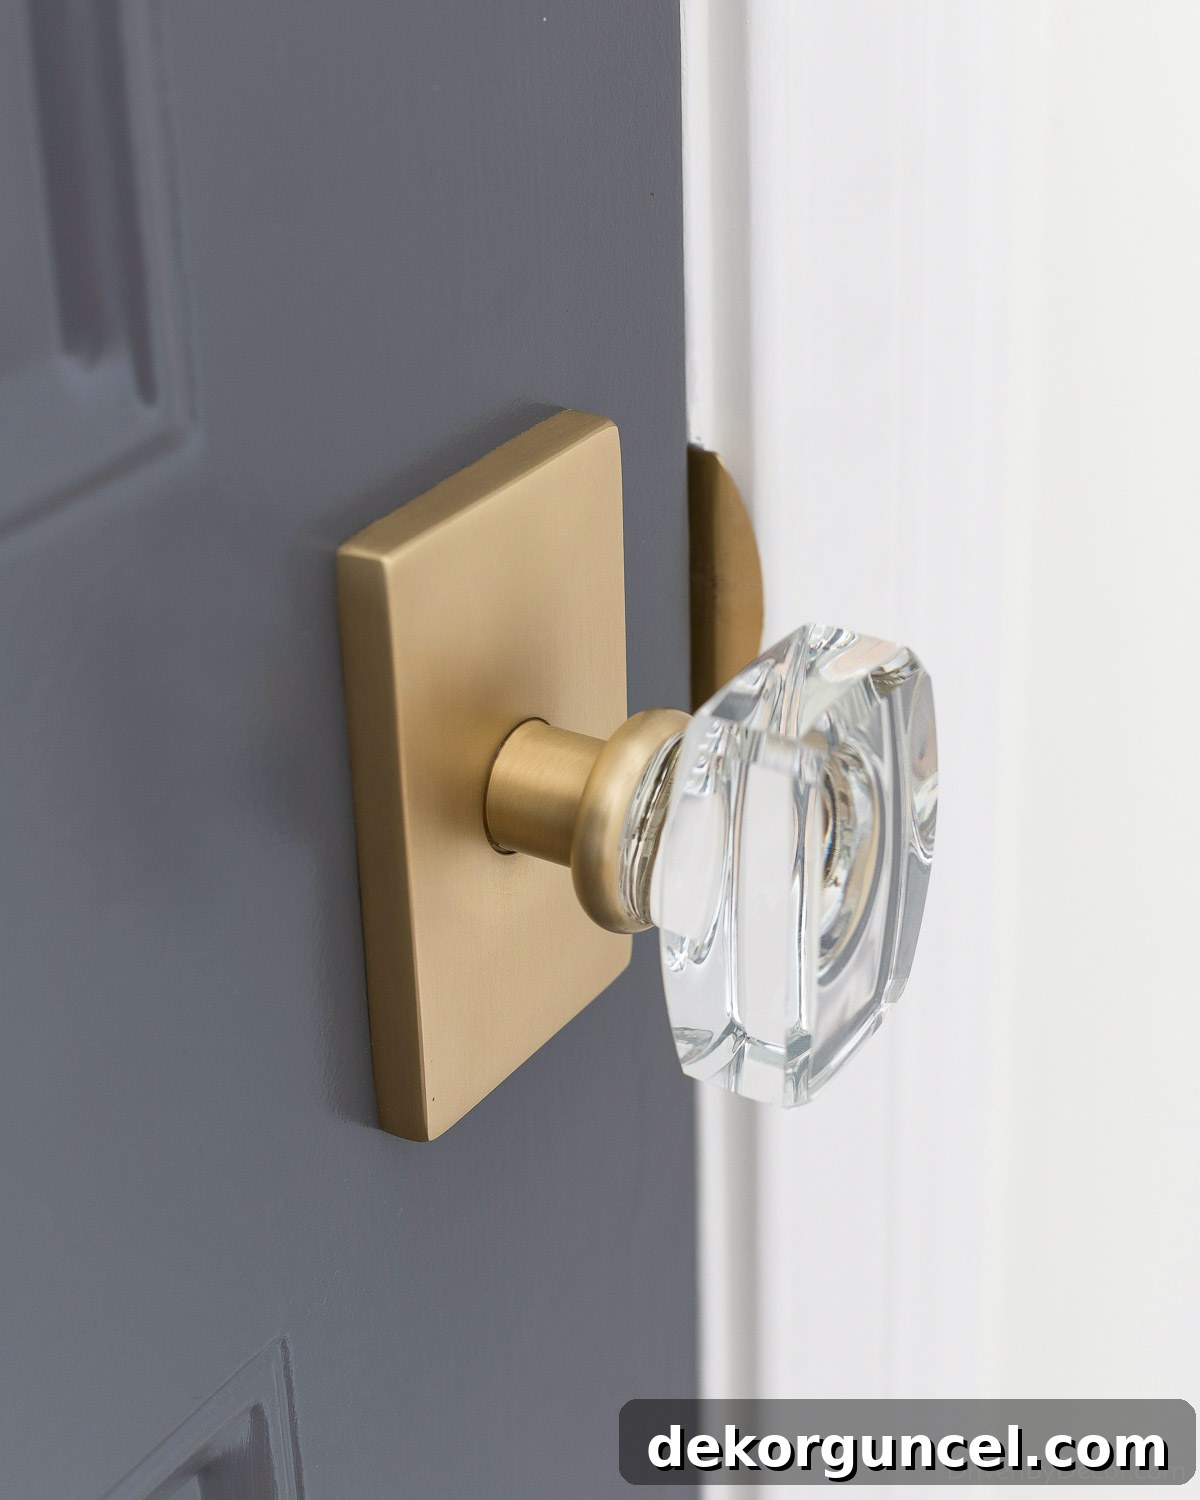
If you’ve never ventured into painting a door before, you’ll find it’s a surprisingly easy and rewarding DIY project! My comprehensive post on how to paint an interior door like a pro provides all the essential details and techniques you need to achieve a flawless finish, including my favorite paint color recommendations for doors, ranging from classic whites to bold, impactful hues.
And with that, this detailed exploration of transformative home remodeling ideas comes to a close! I regularly update my collection of favorite finds, so be sure to visit my Shop page {here} to discover the latest curated selections and inspiration for your next home project!
