
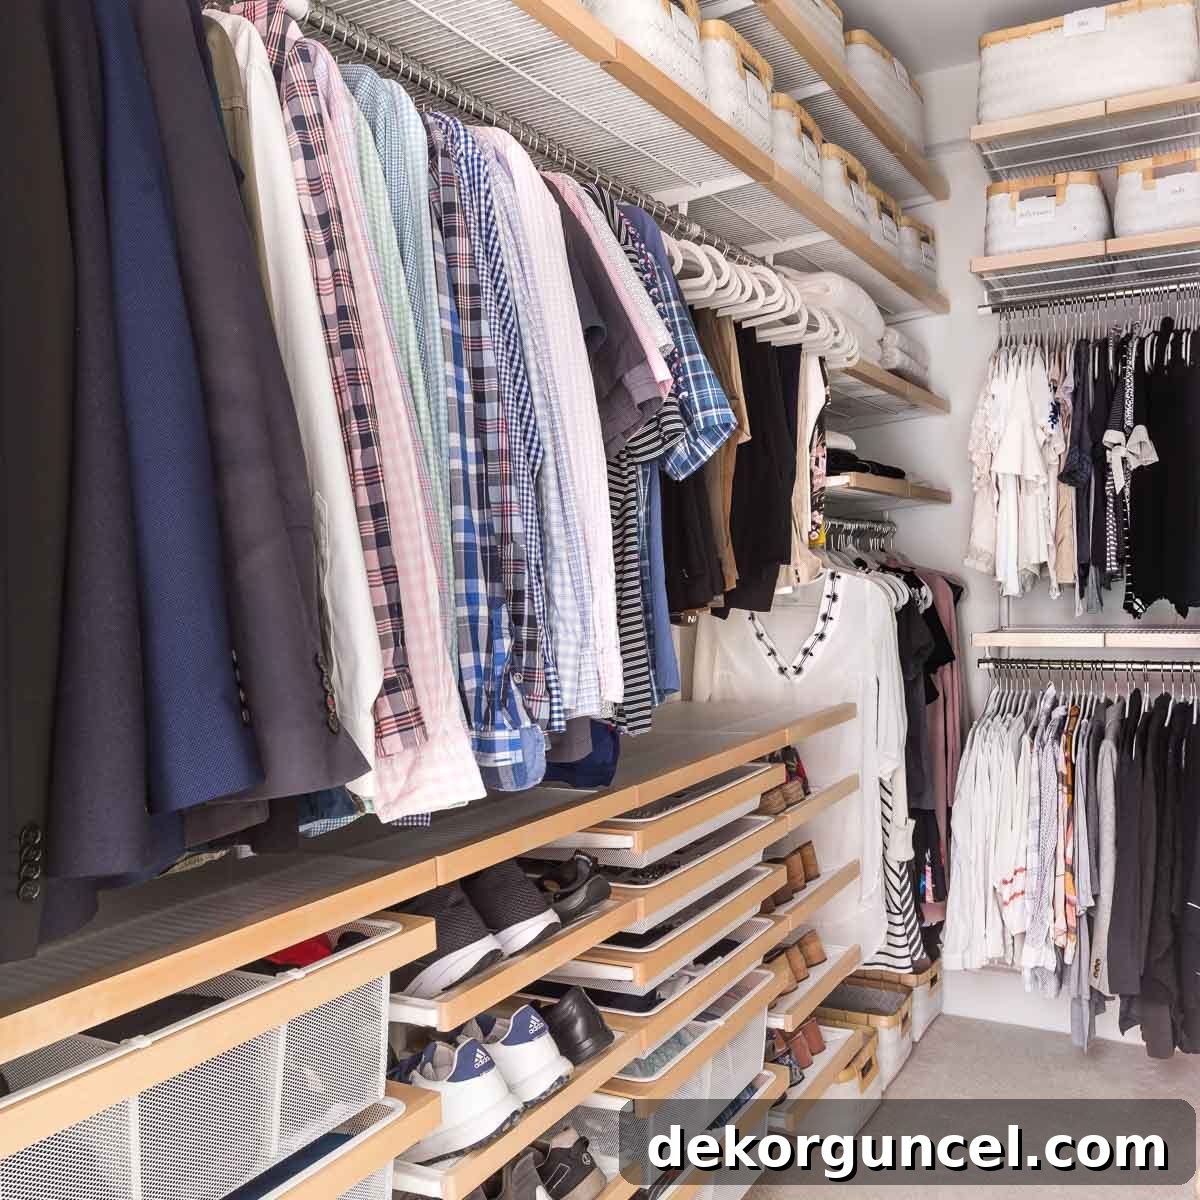
Transform Your Closet: An In-depth Review of Elfa and IKEA PAX Systems
Embarking on a journey to create the perfect organized closet can be both exciting and daunting. Having previously navigated this path during a bathroom addition (which also included a spacious closet) in our Connecticut home, where we successfully installed an IKEA PAX closet system that we absolutely adored, I was already familiar with the transformative power of a well-designed storage solution. That experience set a high bar for our current home.
Fast forward a few years, and we found ourselves in a new residence with a primary closet desperately in need of a significant overhaul. While it was generously sized and held immense potential, the existing setup was inefficient and offered a lot of wasted space. Initially, the closet featured a single long wall with a basic rod for hanging clothes, complemented by some awkwardly placed corner shelves that proved too small to be genuinely functional. This suboptimal configuration meant that much of the closet’s capacity remained untapped, leading to clutter and disorganization.
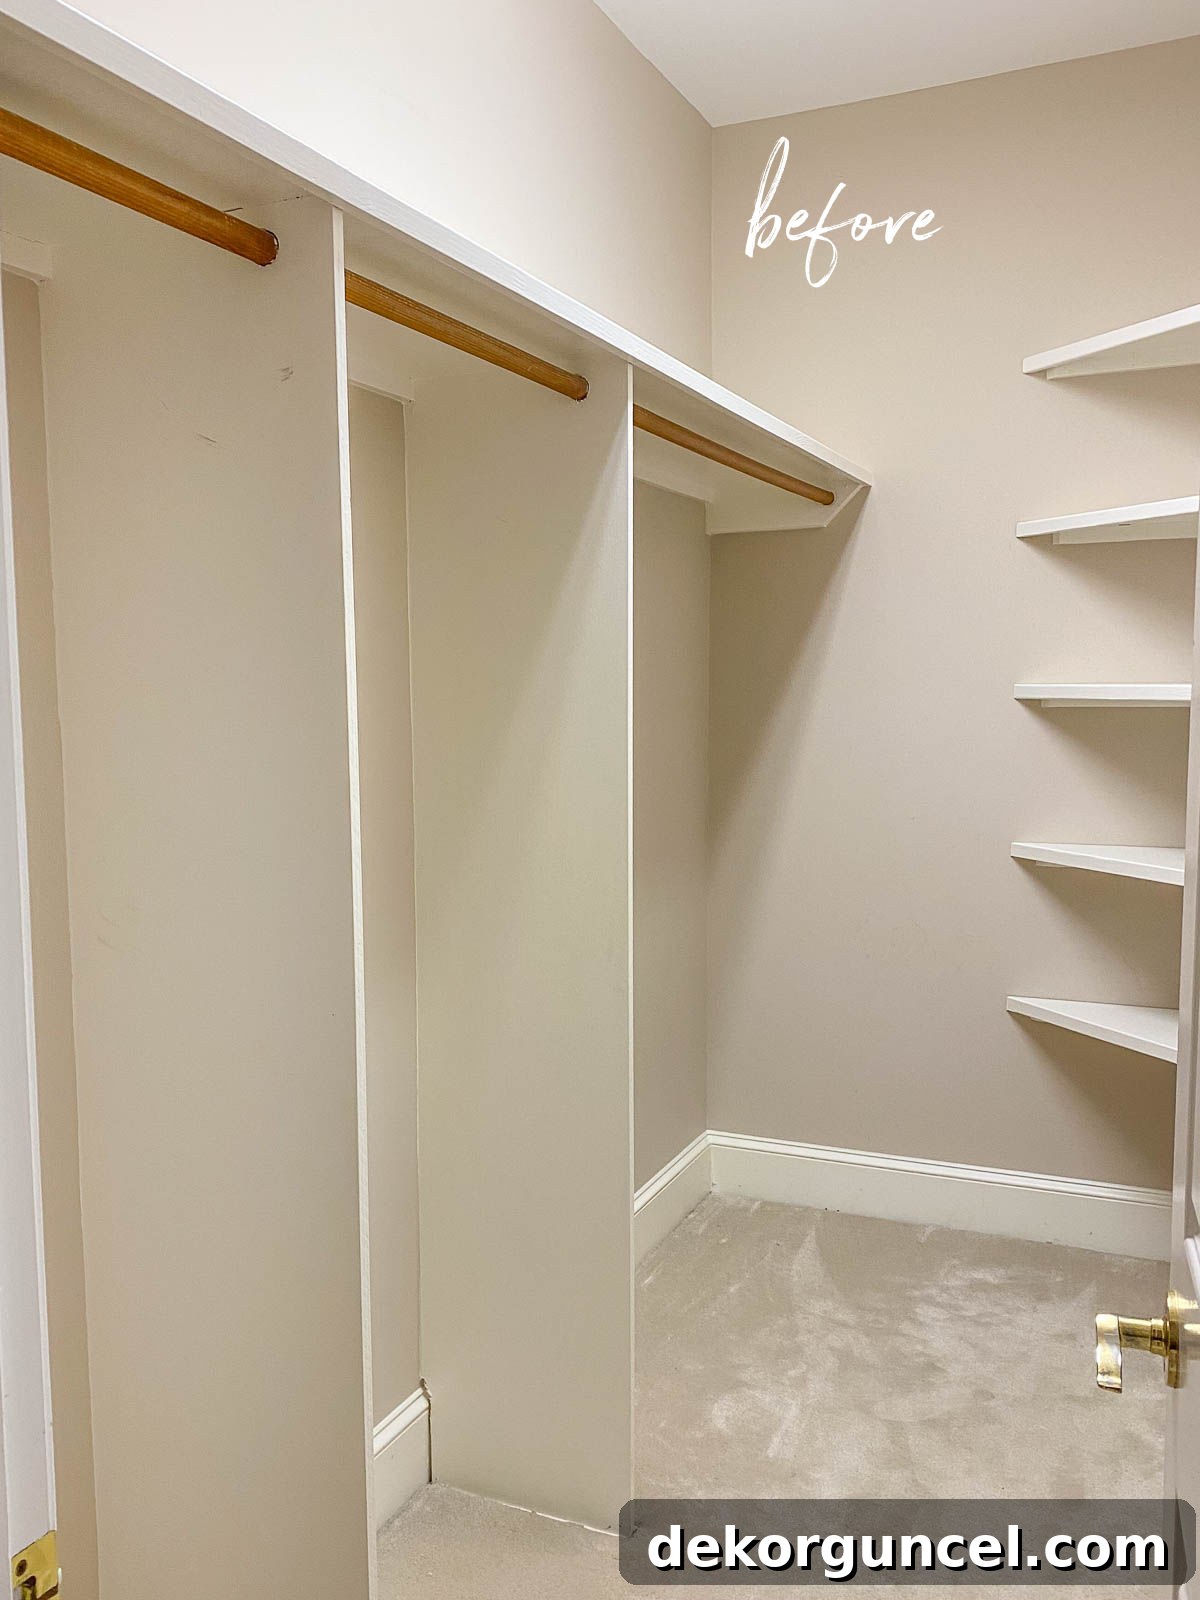
My primary objective for this particular closet remodel was to meticulously maximize every inch of its impressive 9-foot height. This meant incorporating ample upper storage for seldom-used items, creating versatile tiered hanging spaces for various garment lengths, and integrating dedicated compartments for shoes and jewelry. After thoroughly researching and evaluating several prominent closet systems available on the market, we ultimately concluded that The Container Store’s Elfa closet system presented the most suitable and flexible solution for our specific needs and spatial constraints.
The transformation was truly astounding! The sheer volume of additional storage space we managed to integrate into our primary closet is quite remarkable, turning a previously chaotic area into a highly organized and aesthetically pleasing sanctuary:
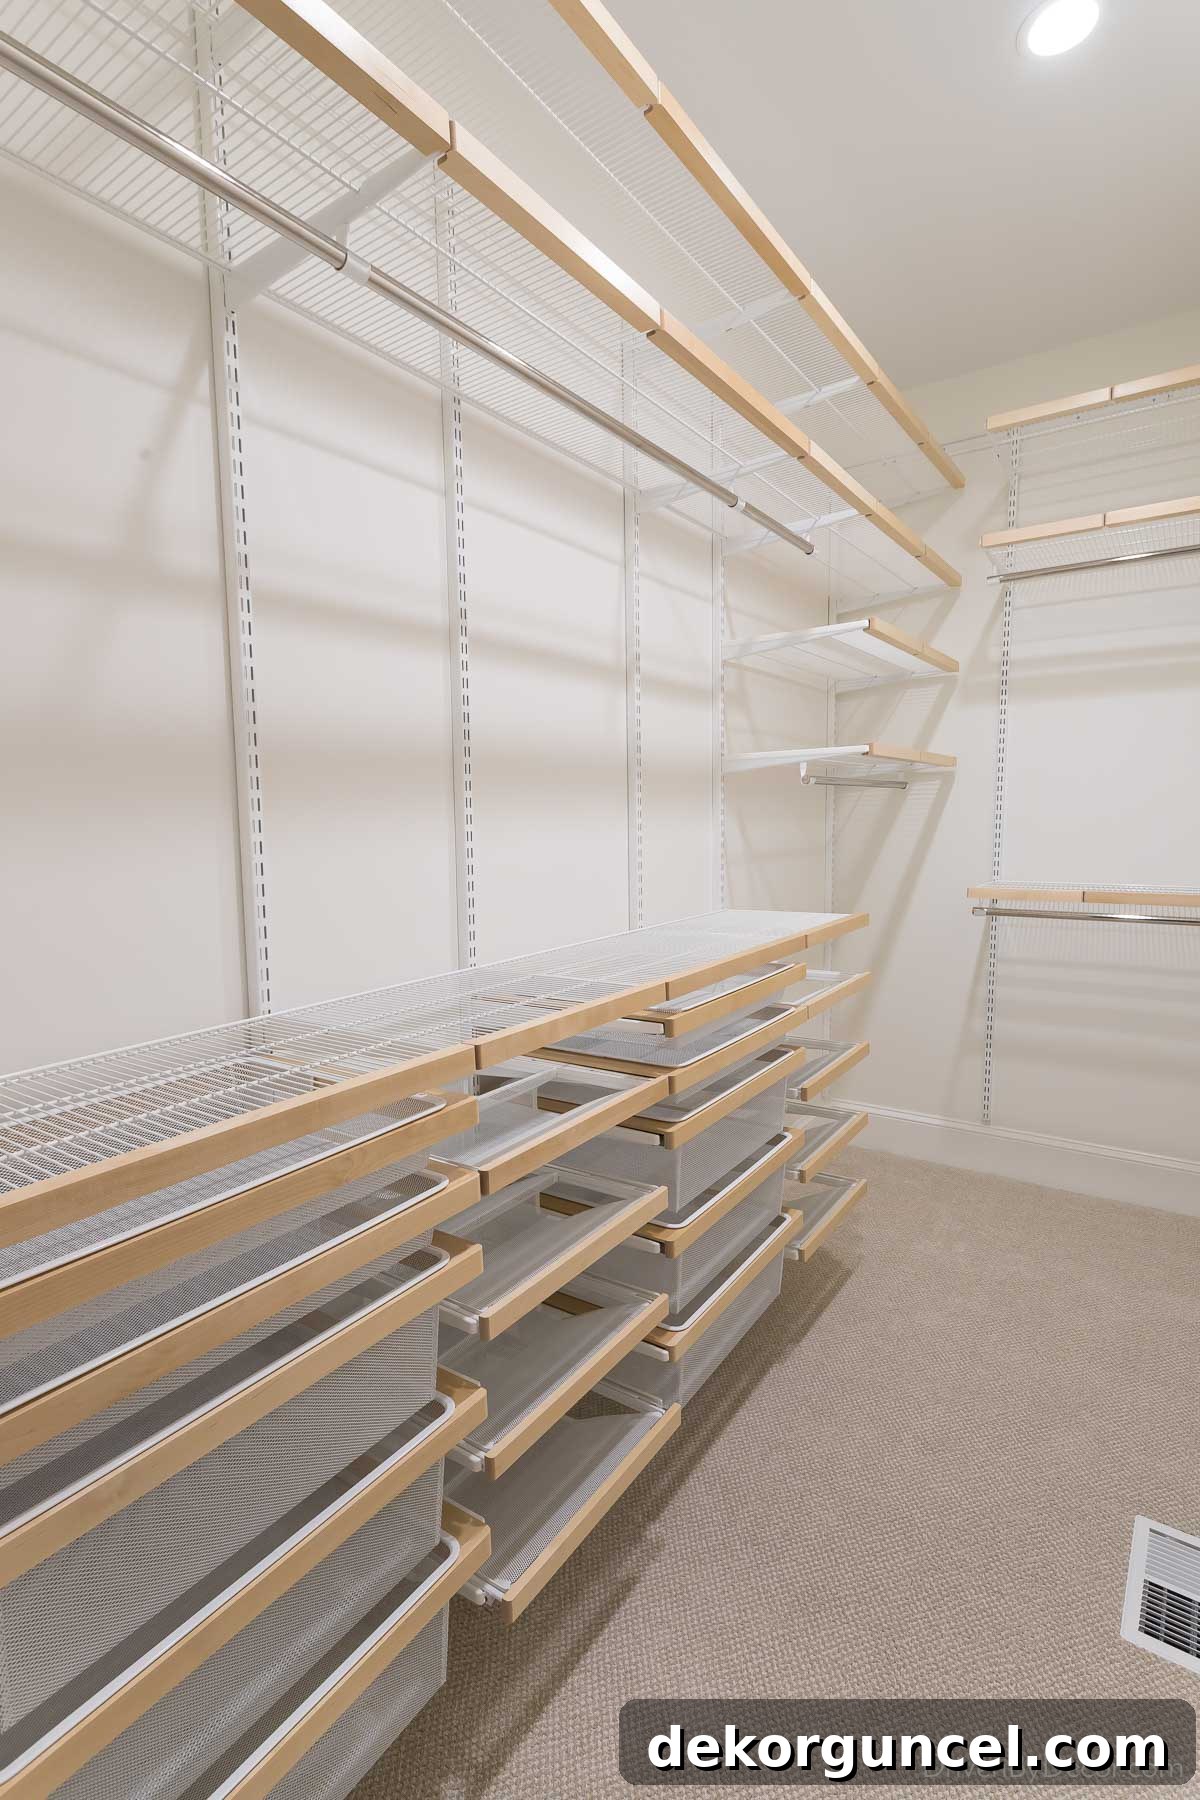
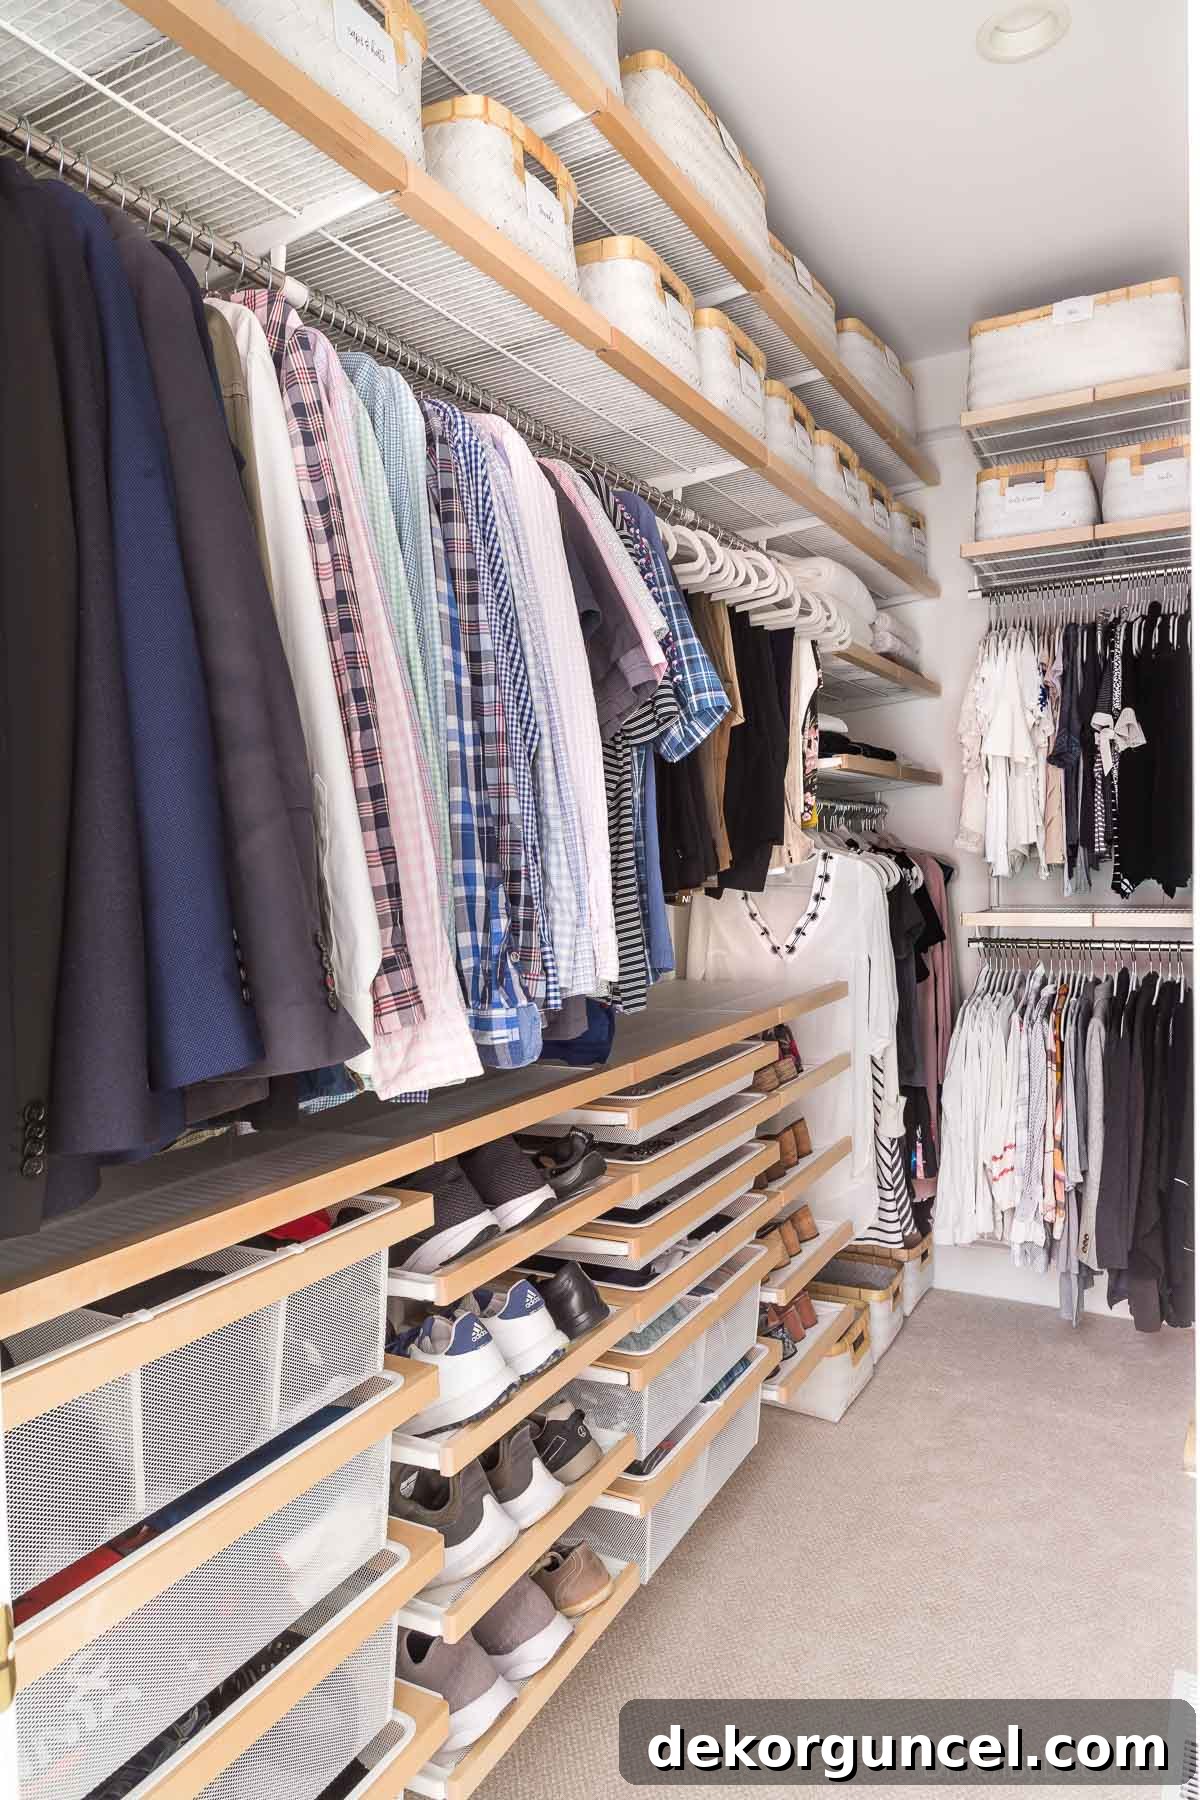
In this comprehensive guide, I will take you step-by-step through the entire process of designing and installing an Elfa closet system. I’ll share my candid insights on its advantages and disadvantages, provide detailed cost breakdowns, and help you determine if the Elfa system aligns with your home organization goals. Furthermore, I will offer an in-depth comparison to the IKEA PAX system we previously utilized, explaining the key factors that influenced our decision to opt for Elfa this time around, ensuring you have all the information needed to make an informed choice for your next closet makeover.
Elfa Closet System Design: Crafting Your Perfect Storage Solution
Designing your ideal Elfa closet system is made remarkably accessible through The Container Store’s diverse range of planning options. For those who enjoy a hands-on approach, a powerful online closet design tool is available. After inputting your precise closet measurements, this intuitive tool allows you to virtually construct your system, customizing it to meet your exact storage requirements while simultaneously providing a real-time total cost estimate. This feature is particularly valuable for visualizing your space and managing your budget effectively.
While the DIY online design tool is incredibly user-friendly and offers significant autonomy, professional assistance is readily available should you require it. The Container Store provides expert closet designers who can guide you through the process. You can conveniently schedule a virtual appointment with a closet designer here, allowing you to collaborate from the comfort of your home, or opt for an in-store appointment here for a more personalized, face-to-face consultation.
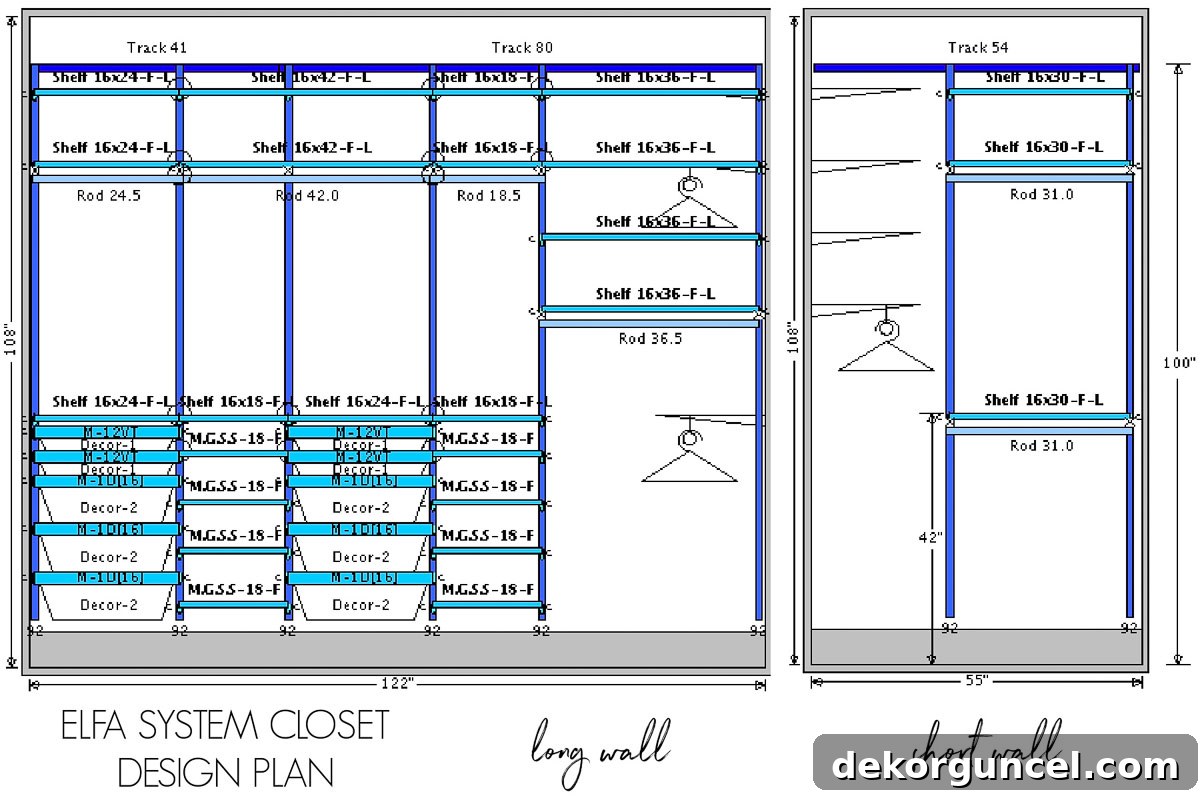
Given my familiarity with the Elfa system and the two-hour drive to the nearest store, I chose to work with a closet designer, Jenna from the Raleigh store (who was fantastic!), entirely online. This remote collaboration proved incredibly efficient. I simply provided her with my closet’s exact dimensions and articulated my specific storage preferences—such as the desired amount of drawer space, the balance between long and short hanging areas, and other functional needs. Based on this information, Jenna quickly developed a comprehensive and detailed plan.
She presented me with multiple renderings of our proposed closet layout, which included an overhead view for spatial understanding, a clear diagram illustrating the design for each individual wall, providing a thorough visual representation of the proposed system:
Accompanying these technical drawings was a realistic visual rendering, offering a clear preview of the completed closet’s aesthetic and functional layout:
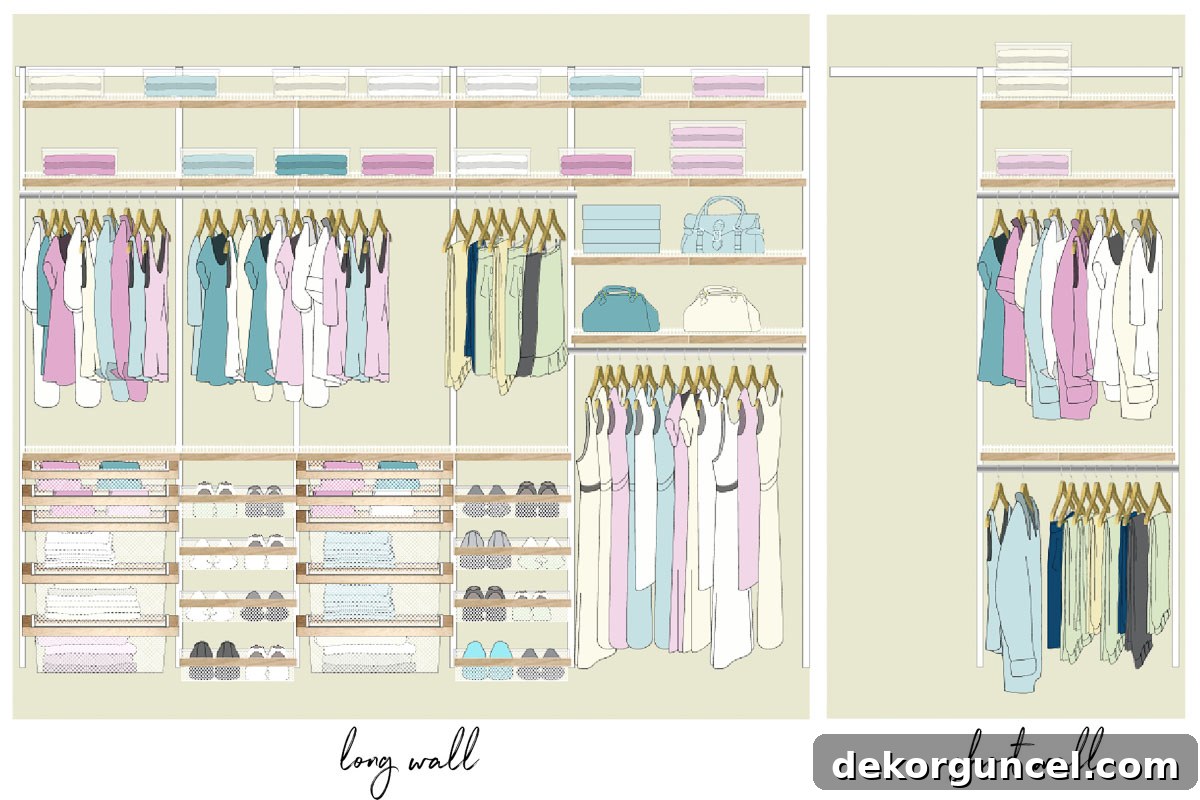
We engaged in several rounds of email exchanges, meticulously tweaking the design until it perfectly matched my vision. Once the design was finalized, purchasing our Elfa system was remarkably straightforward. Jenna provided an “add to cart” button that automatically populated my online shopping cart with all the necessary Elfa components to bring our customized plan to life. This streamlined process eliminated the risk of forgetting essential parts.
Customers have flexible options for receiving their Elfa components: in-store pickup, direct shipping, or local delivery (if within a store’s delivery radius). We chose curbside pick-up once all items were in stock, and the experience was seamless. We simply pulled into a designated curbside spot, called the store to announce our arrival, and the staff efficiently loaded everything into our car. This convenience made the acquisition phase completely stress-free.
Elfa Closet Installation: A DIY Guide to Building Your Custom Storage
To optimize our budget, we opted to undertake the installation of our Elfa system ourselves, a decision largely influenced by The Container Store’s professional installation estimate, which was quite substantial (more details on the overall cost of our Elfa system will follow). The fundamental brilliance of the Elfa system lies in its design: only the top track requires physical attachment to the closet wall. Every other component, from shelves to drawers, simply hangs securely from this central track. This ingenious engineering means that once the top track is firmly in place, the remainder of the installation process is remarkably tool-free and straightforward.
Securing the top track was a critical two-person task, which my husband Jeff and I tackled together. This initial phase involved careful measurement and drilling, taking approximately two hours to complete due to a specific challenge we encountered (which I will elaborate on shortly). However, once this foundational track was meticulously installed, I was able to effortlessly complete the rest of the closet system on my own, which took an additional four to five hours. This highlights the modular and user-friendly nature of the Elfa system, empowering DIY enthusiasts to achieve professional-looking results.
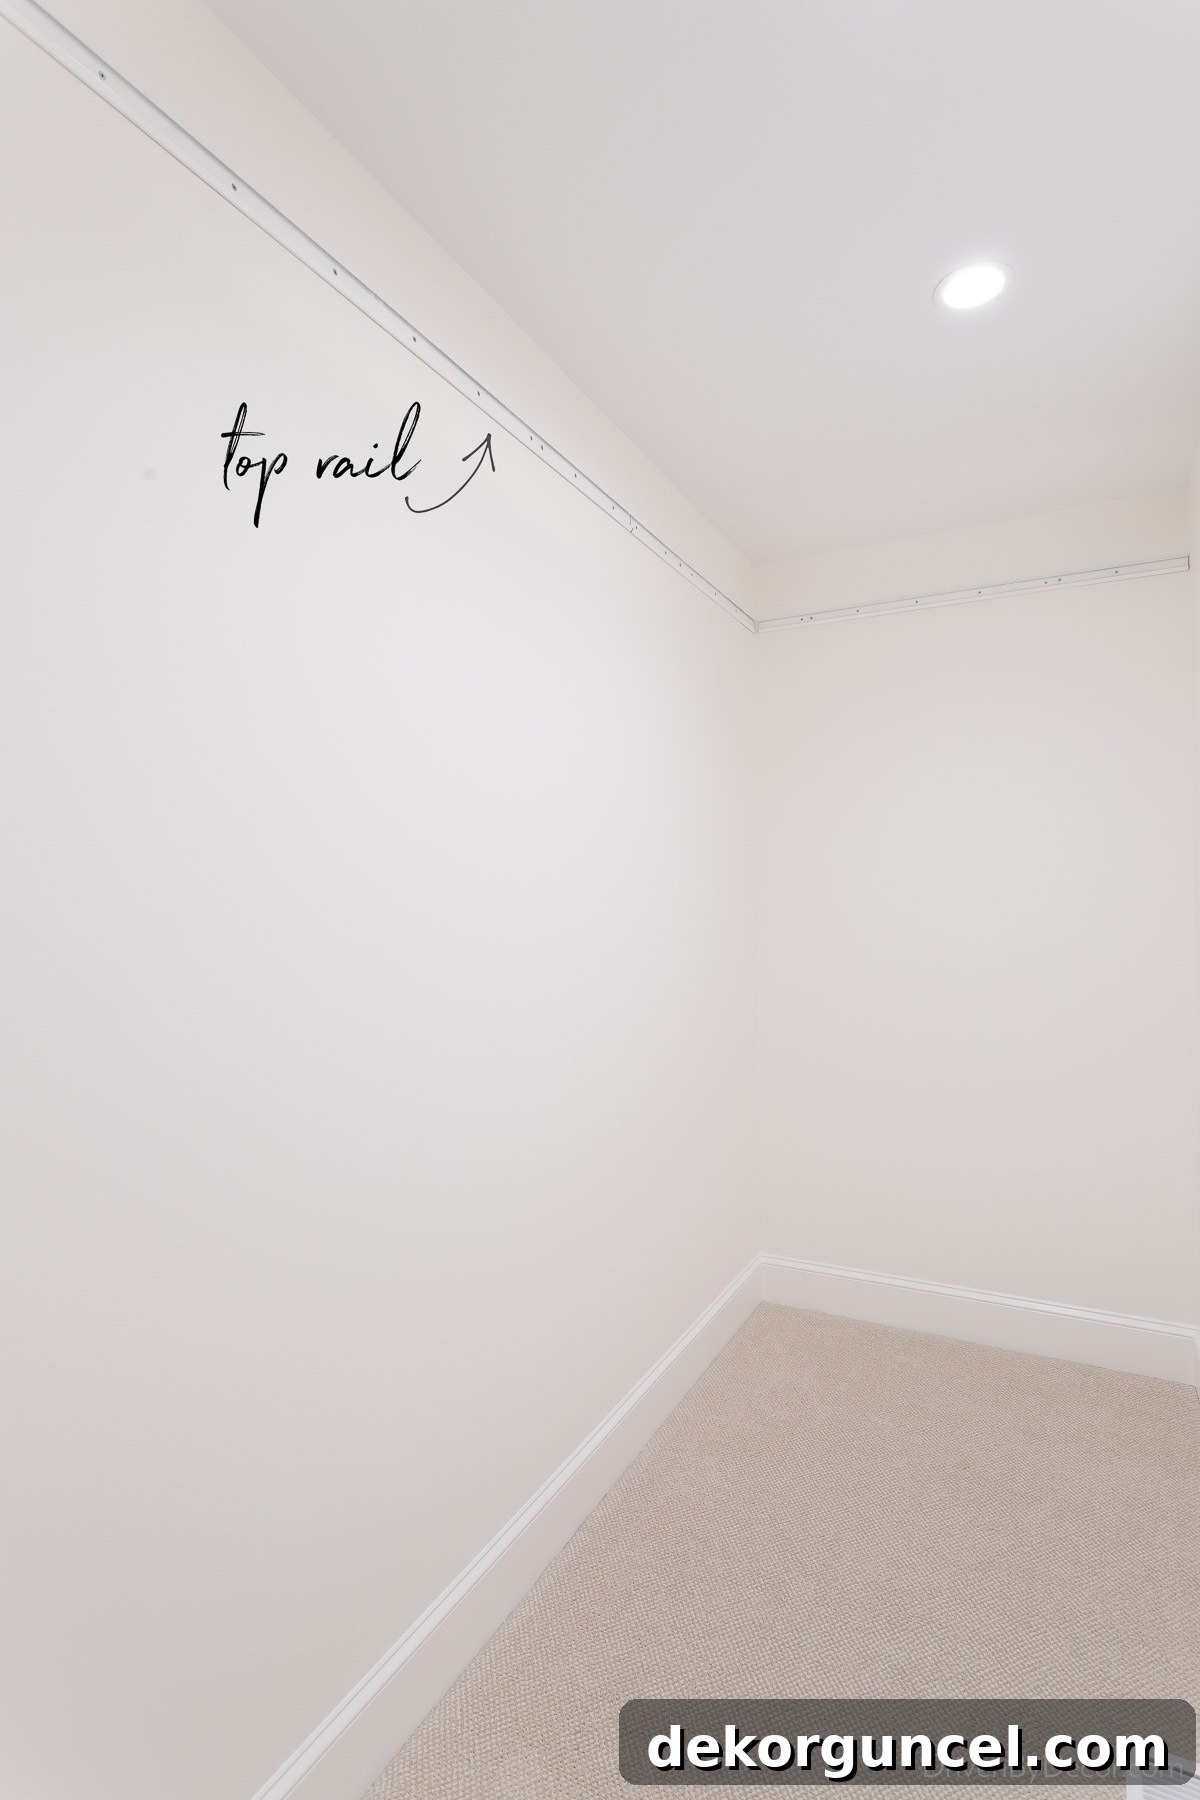
The only significant hurdle we encountered during the entire installation was ensuring the top track was robustly secured to the wall. A unique aspect of ordering your Elfa system for DIY installation is that all tracks and vertical standards are conveniently pre-cut to your closet’s exact dimensions. While this is generally a huge advantage, it presented a minor issue in our case. The top track is designed to be anchored to the wall using drywall anchors or screws into studs, via pre-drilled holes spaced every 8 inches along its length. The common problem, however, is that wall studs are typically spaced every 16 inches. With a pre-cut track, you’re likely to either hit all studs or all drywall, and unfortunately for us, we hit all drywall.
Considering that the *entire* weight of the fully loaded Elfa system ultimately hangs from this single top track, its security is paramount. We simply weren’t comfortable relying solely on drywall anchors, especially since the ones provided weren’t the highest quality, without any screws firmly embedded in wall studs. Our solution, which I must emphasize was our own initiative and not a recommendation from The Container Store, involved using a metal drill bit to create additional holes through the top track. This allowed us to secure each section of the track into at least two studs, significantly enhancing its stability and our peace of mind. This small modification added to our installation time but was crucial for the long-term integrity of the system.
Moving forward, I plan to request that The Container Store does not pre-cut our top tracks for future Elfa projects. This way, we can custom-cut the track ourselves on-site, ensuring that the pre-drilled holes align perfectly with our closet studs, much like how professional installers approach the task. This minor adjustment can save considerable time and effort during installation.
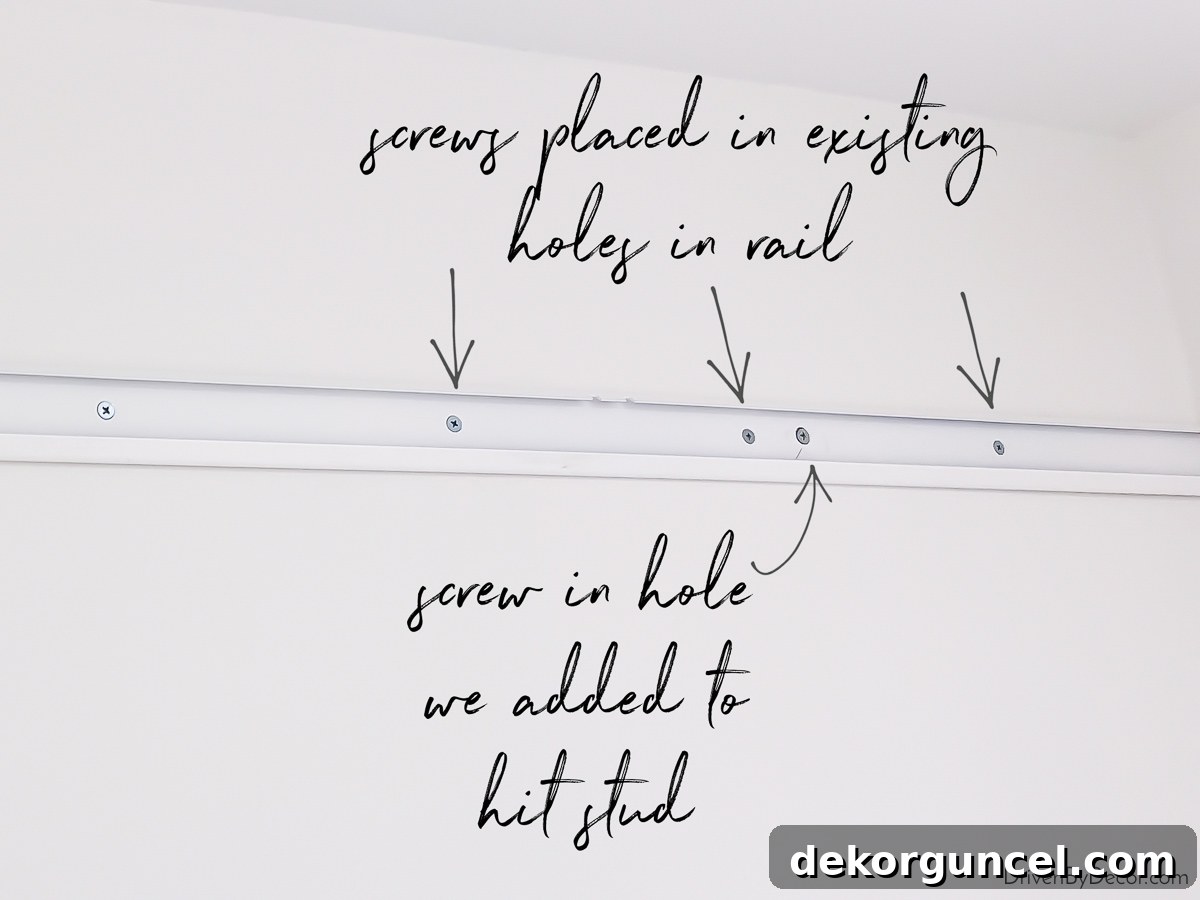
Note: The design of the Elfa system’s top track has since undergone some changes, though its core function remains fairly similar. I recently installed a smaller Elfa closet system using the updated design, which you can explore further in my post on these closet organization ideas.
Aside from the initial challenge of securely fastening the top track, the rest of the Elfa installation was remarkably straightforward, guided by a series of helpful online video tutorials that visually demonstrated each step. Once the top track was securely in place, the next step involved hanging all the vertical “standards” from it. These standards simply hook into the top track, providing the framework for your closet’s organization.
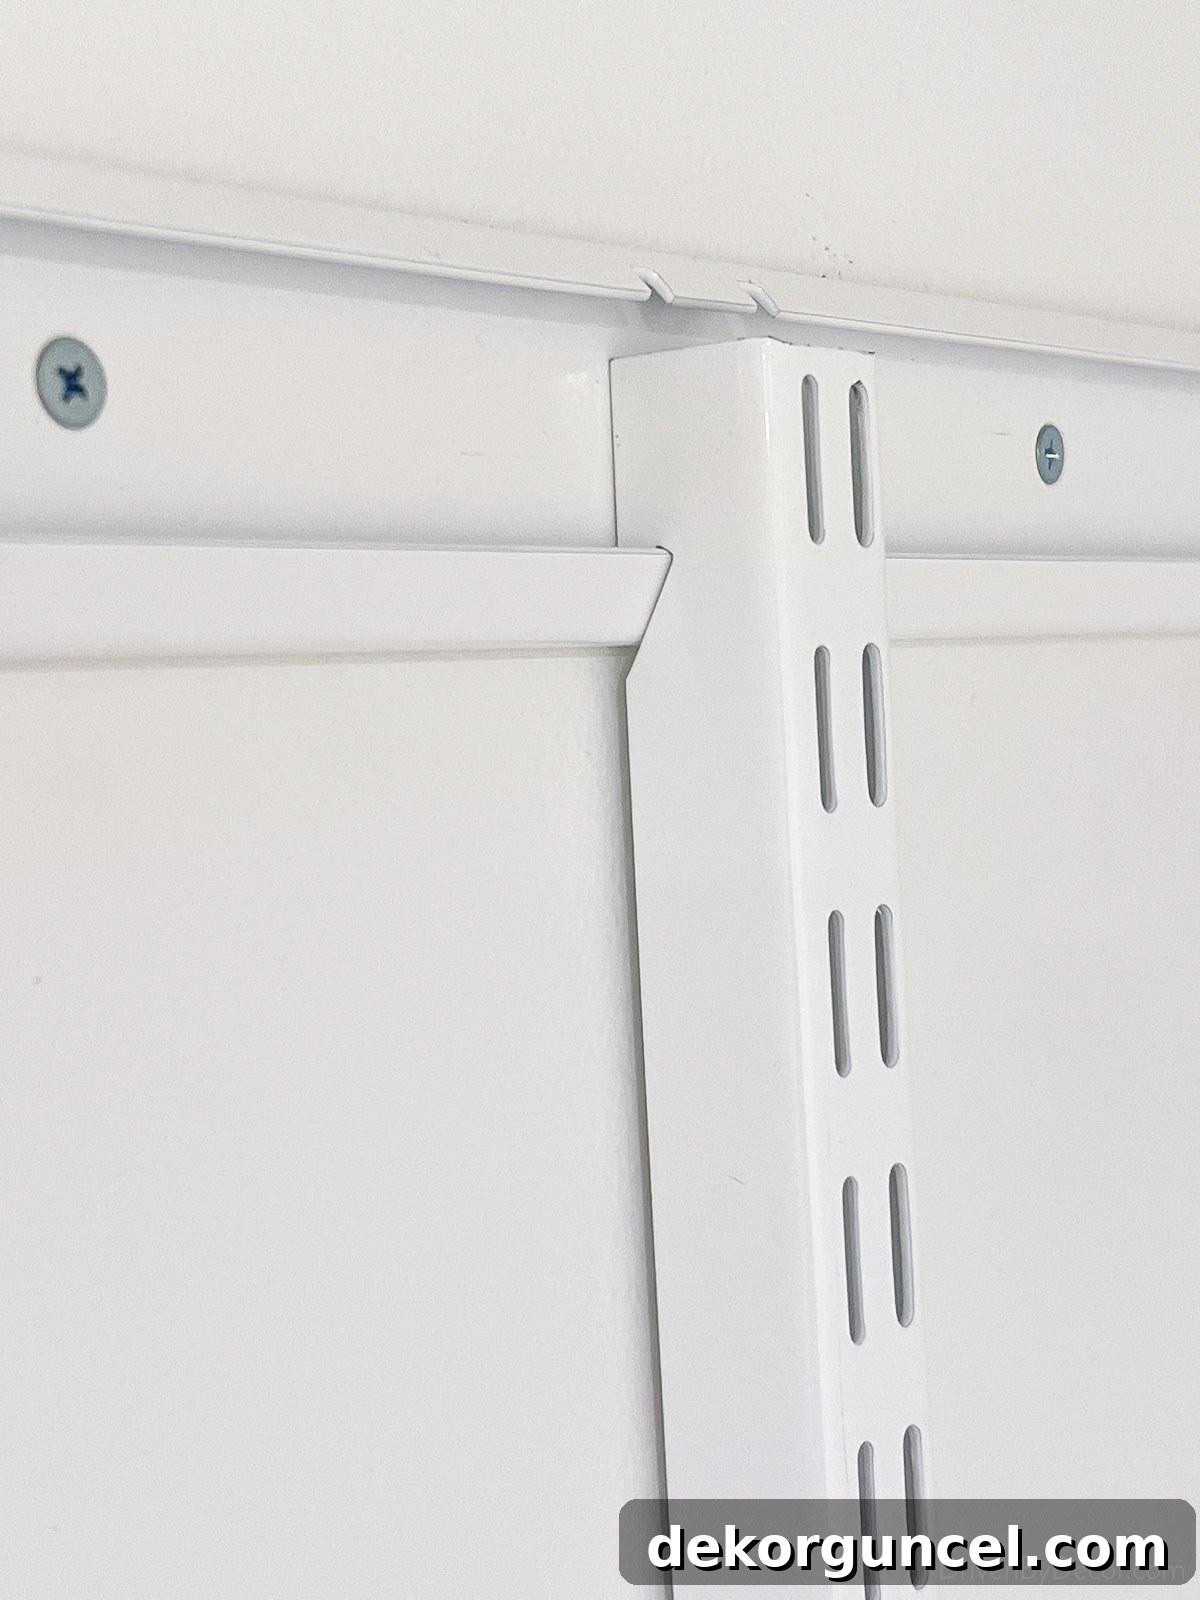
Following the vertical standards, the next component to install was the brackets, which attach to the standards according to your finalized design plan. These brackets are essential as they will support your shelves, drawers, and hanging rods.
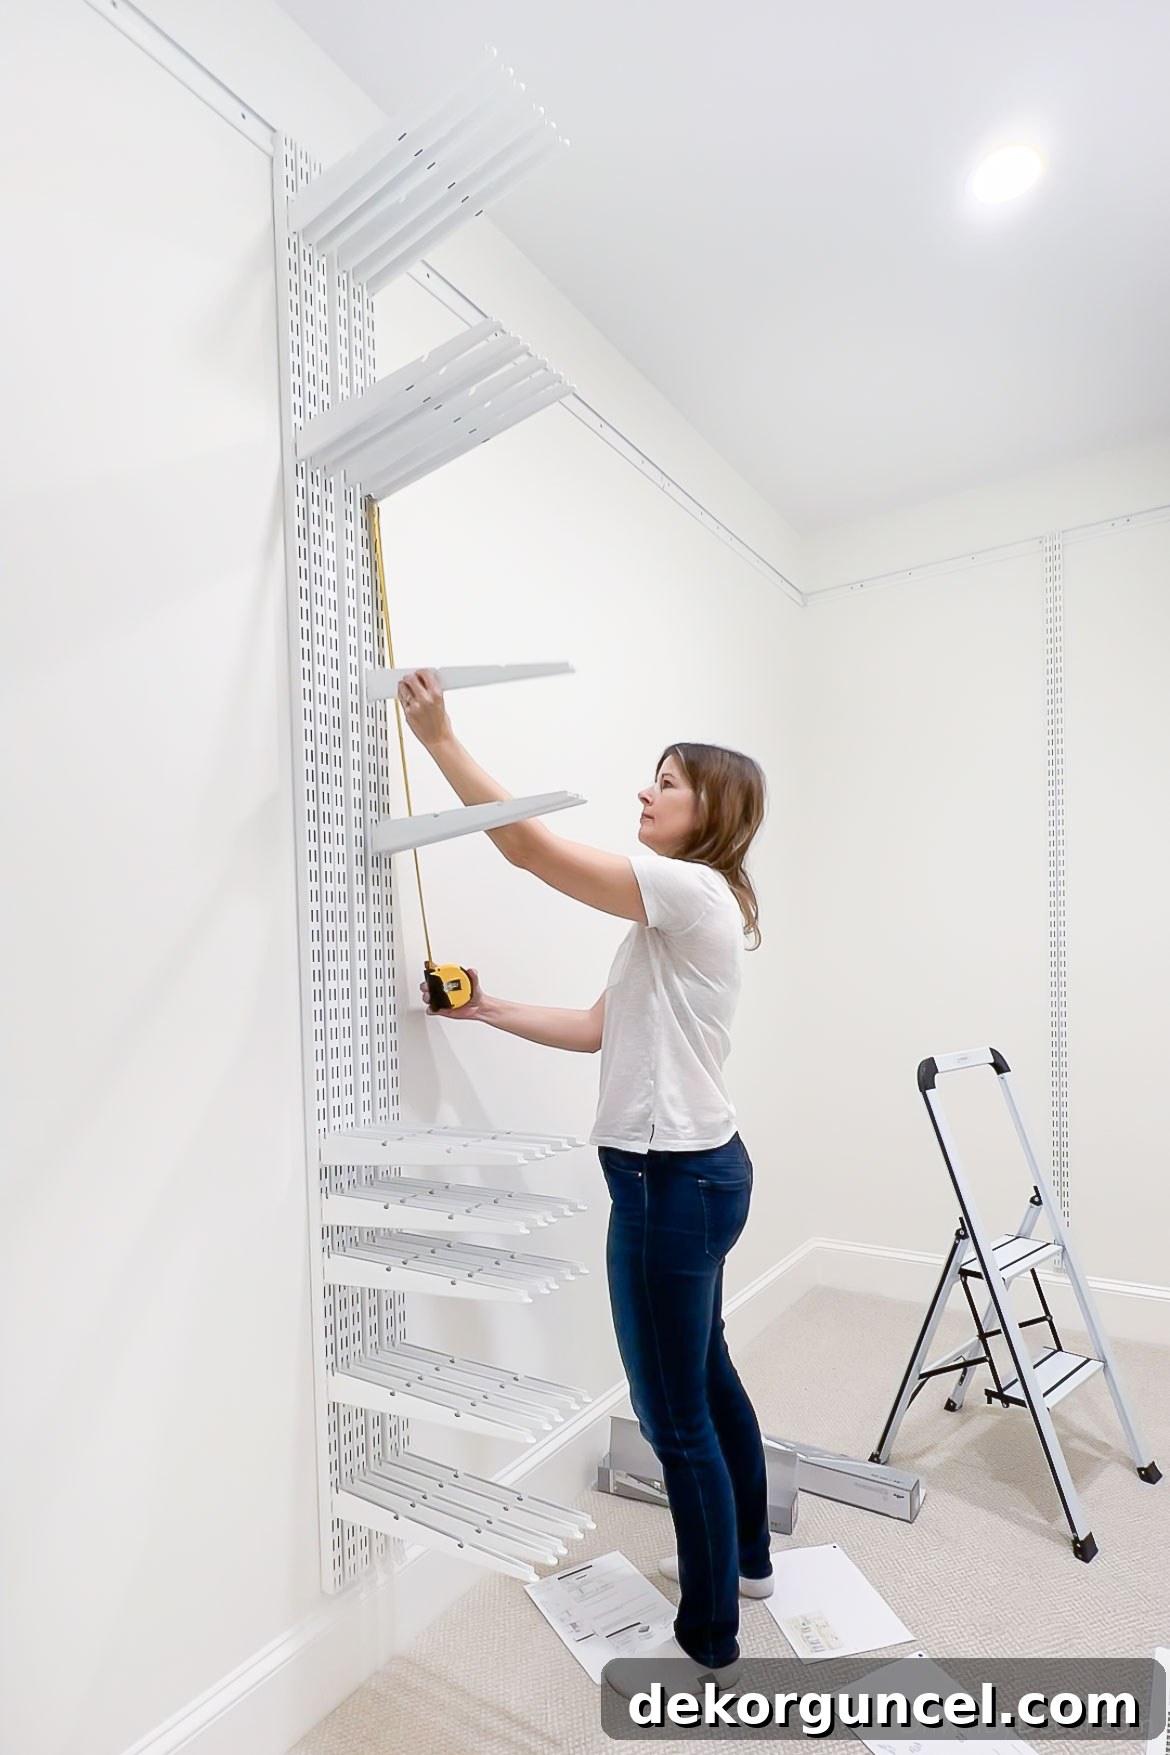
Once the brackets were in place, the next crucial step was to precisely space them out along the wall, strictly adhering to the measurements outlined in your design plan. This process is greatly simplified by the inclusion of cardboard spacing strips, which are conveniently provided with your Elfa closet system supplies. These strips ensure consistent and accurate placement, which is vital for the overall functionality and aesthetics of your closet.
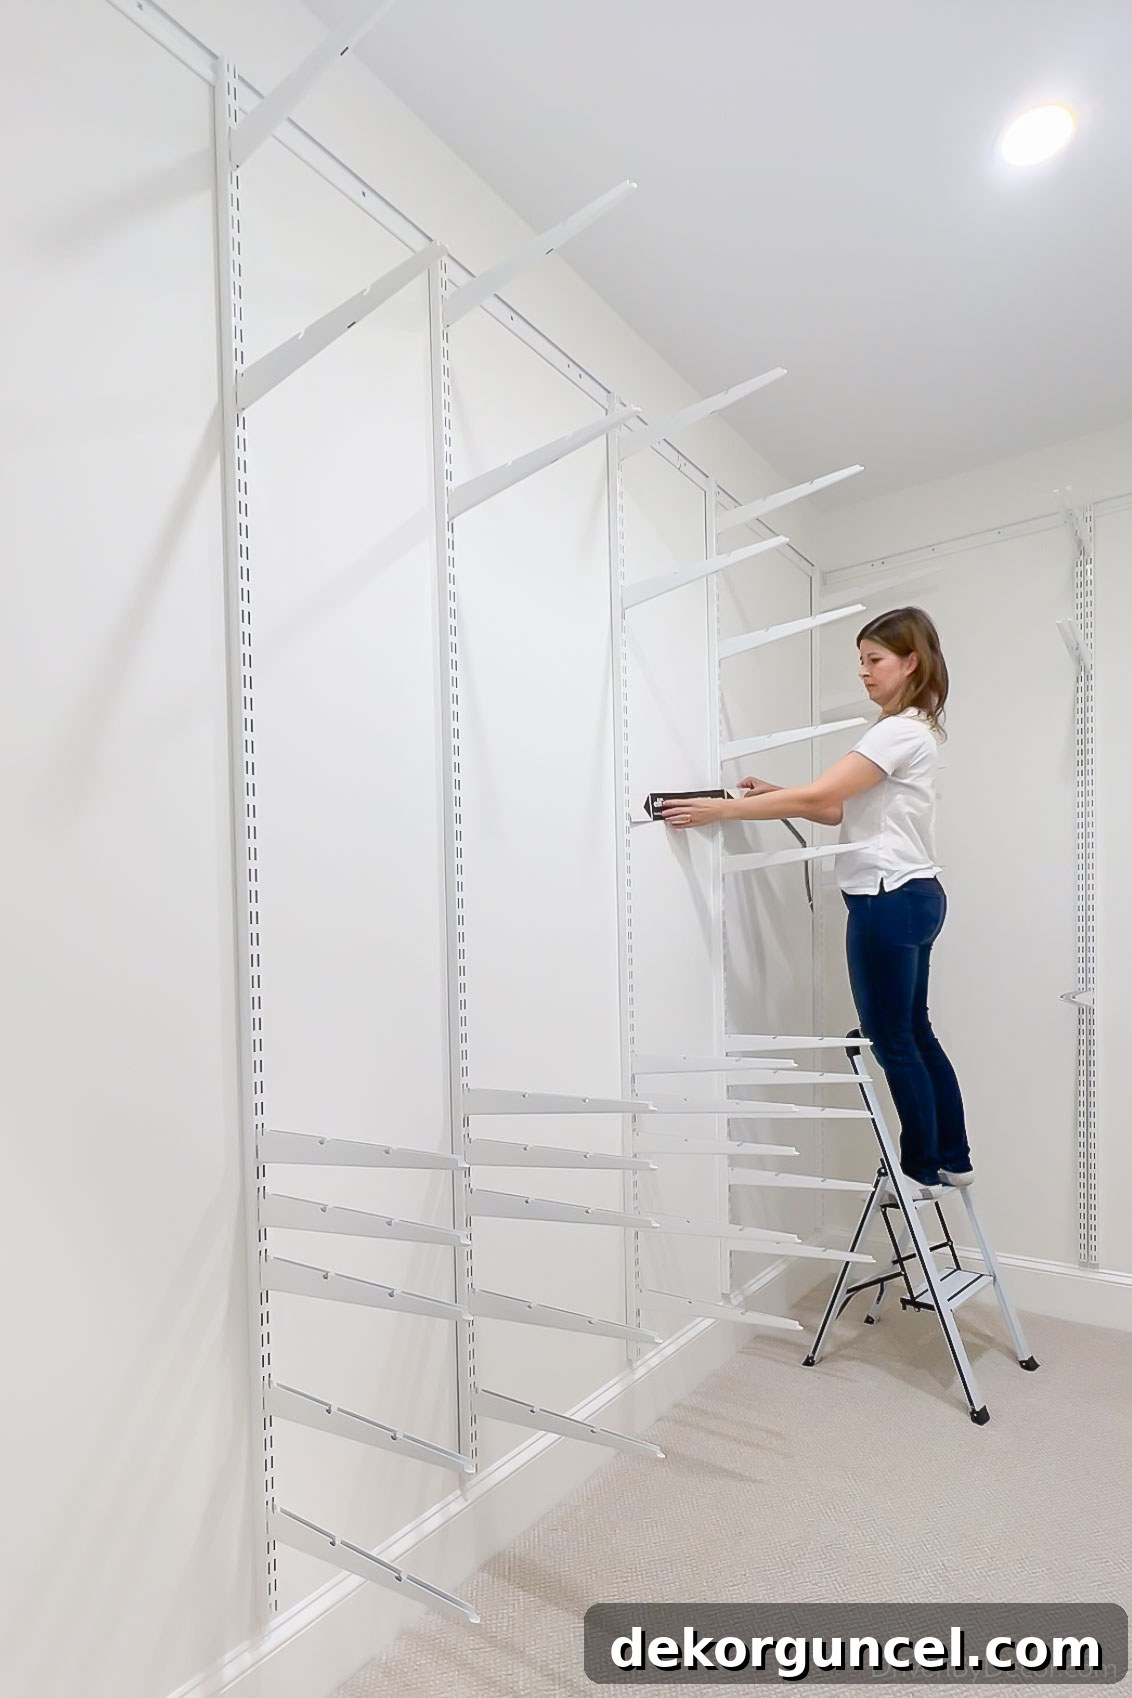
With the framework established, I proceeded to attach the shelves securely onto the installed brackets, bringing the horizontal storage components to life:
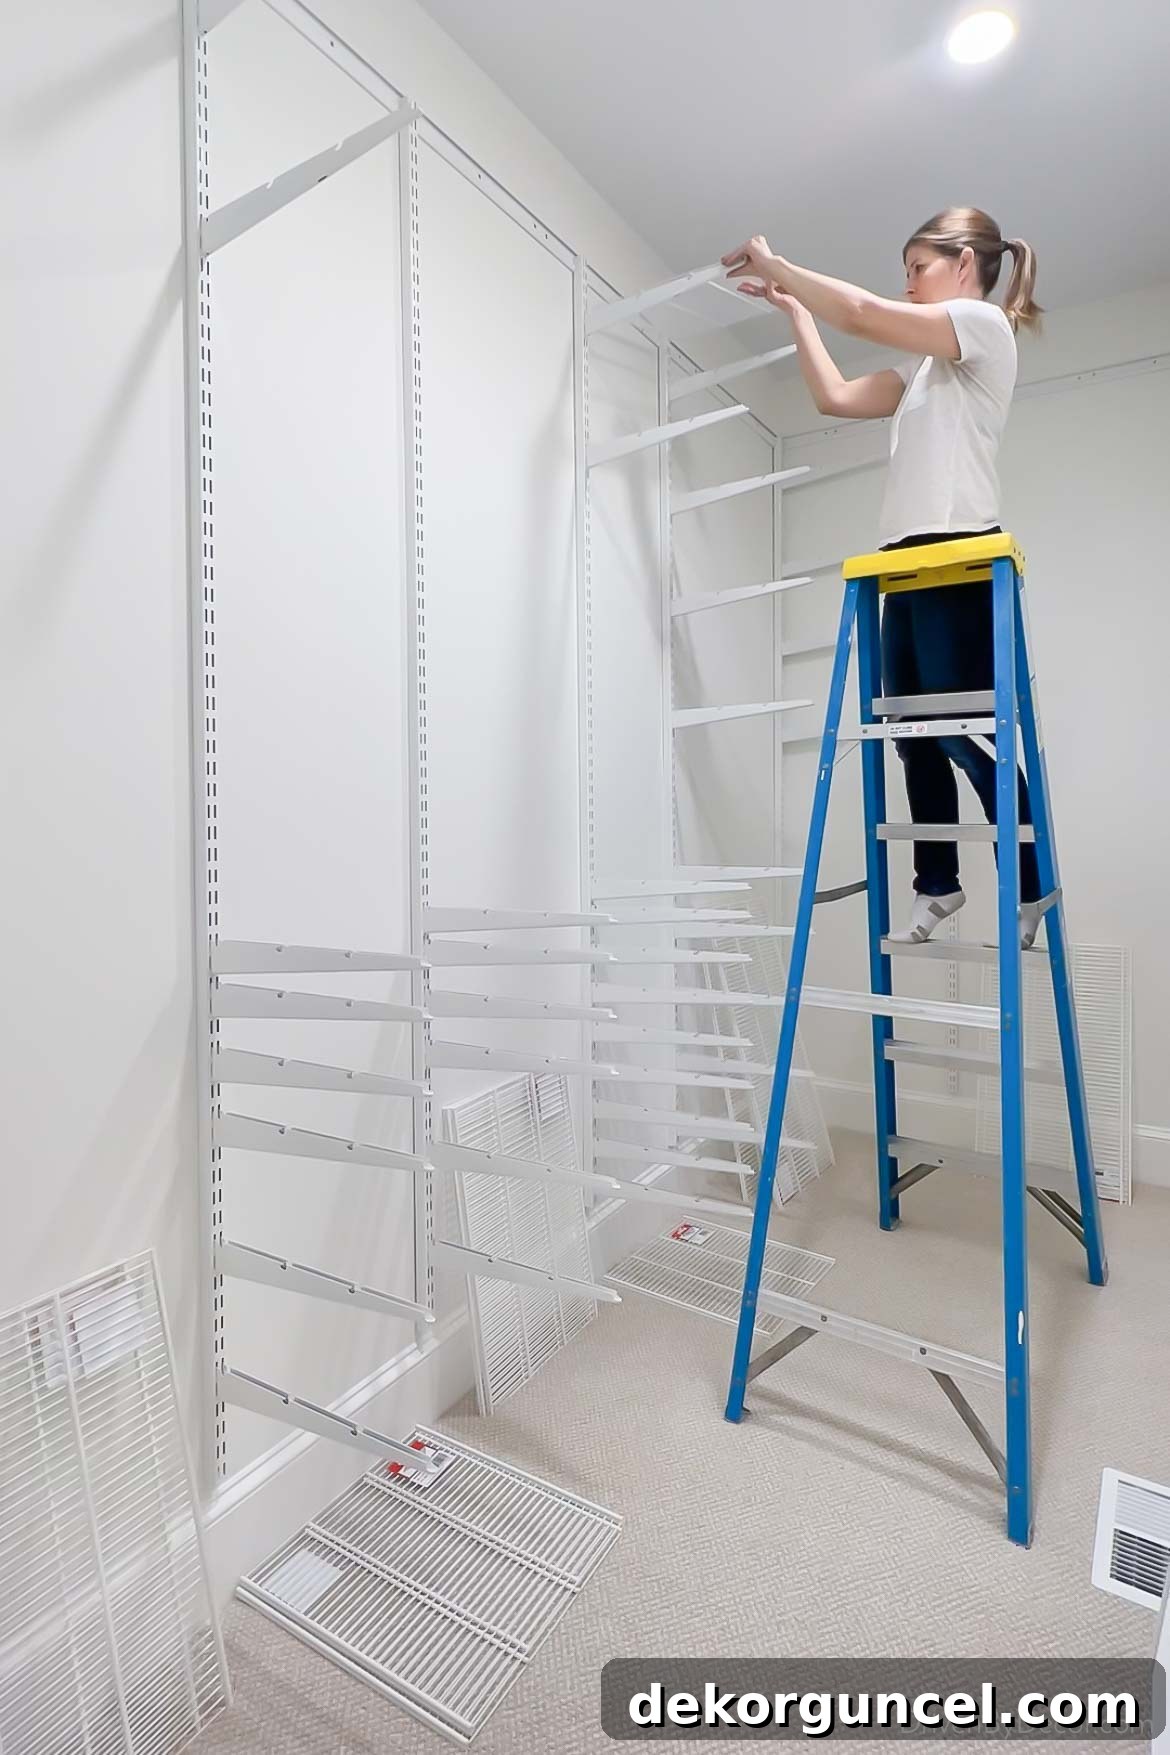
Following the shelves, the drawer tracks were then meticulously attached to their respective brackets, preparing the system for the integration of drawers:
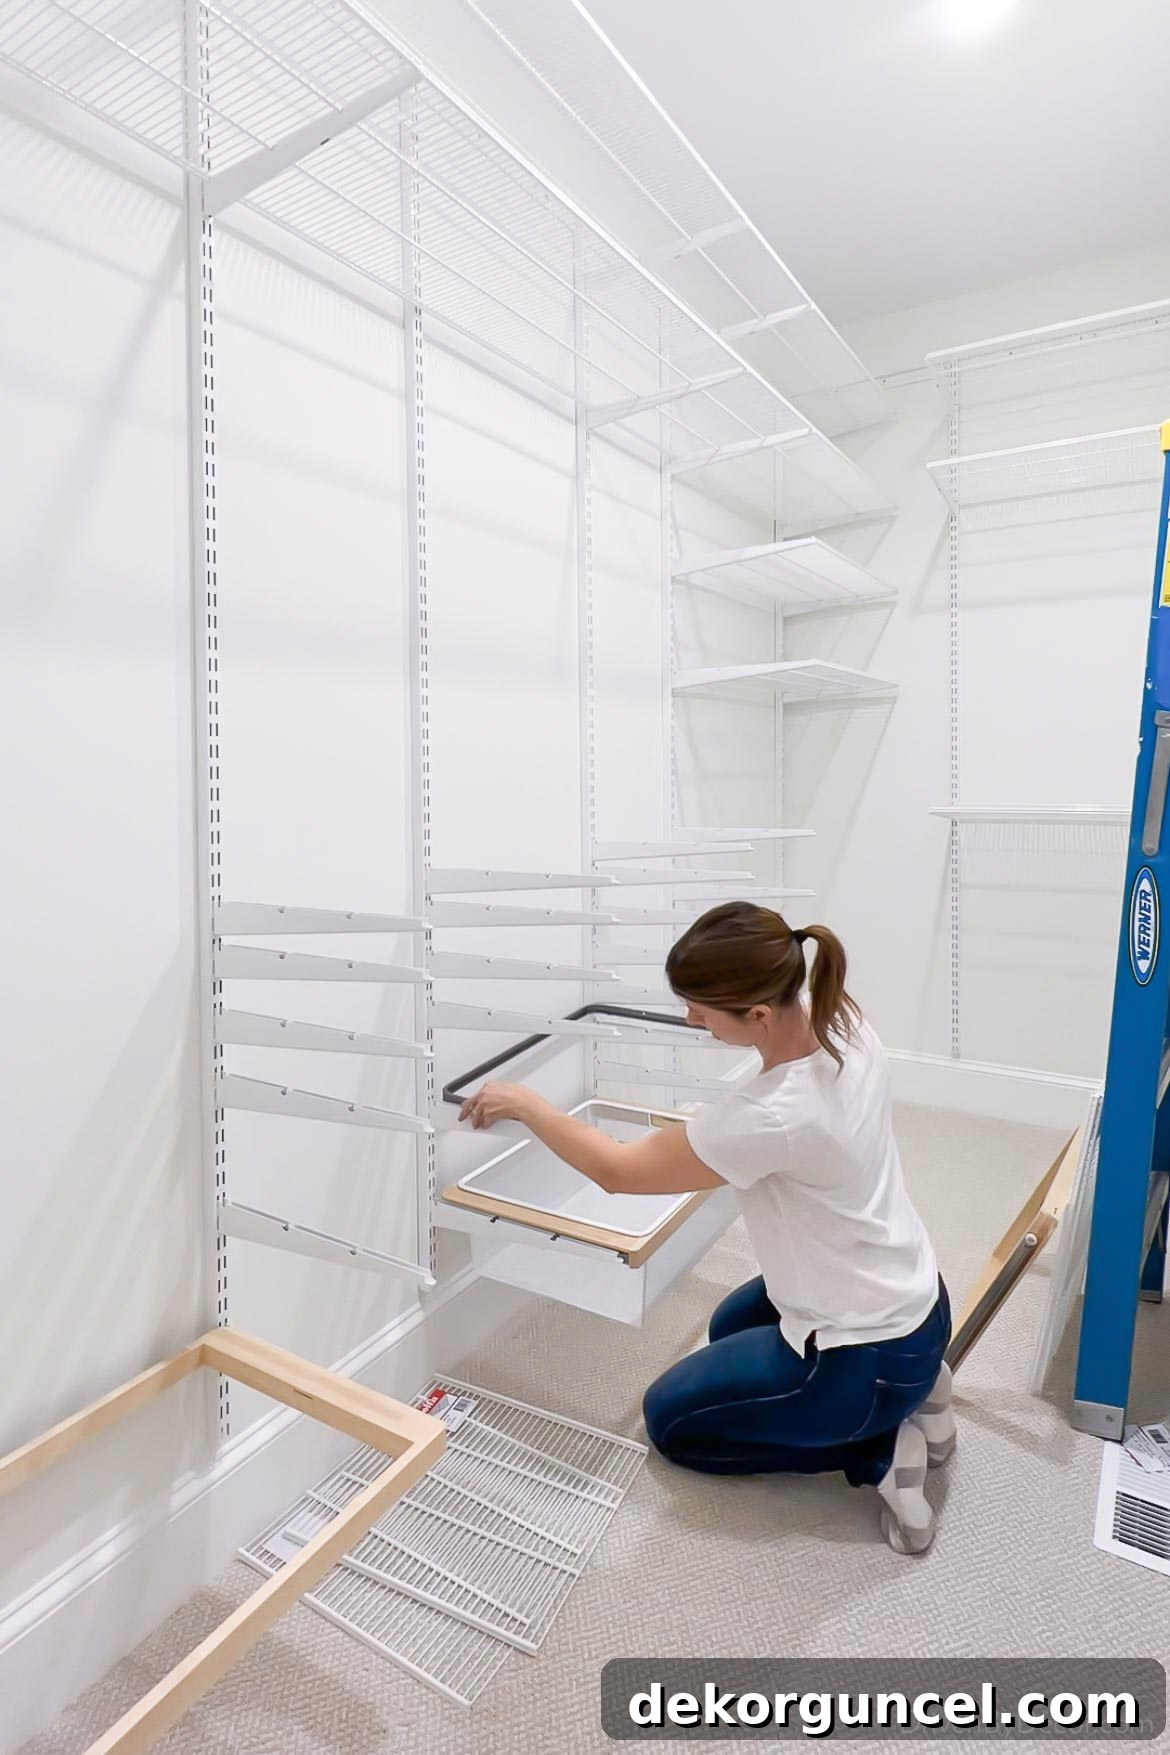
Next, I installed the hanging rods, which are designed to seamlessly integrate into the system, offering essential space for clothes:
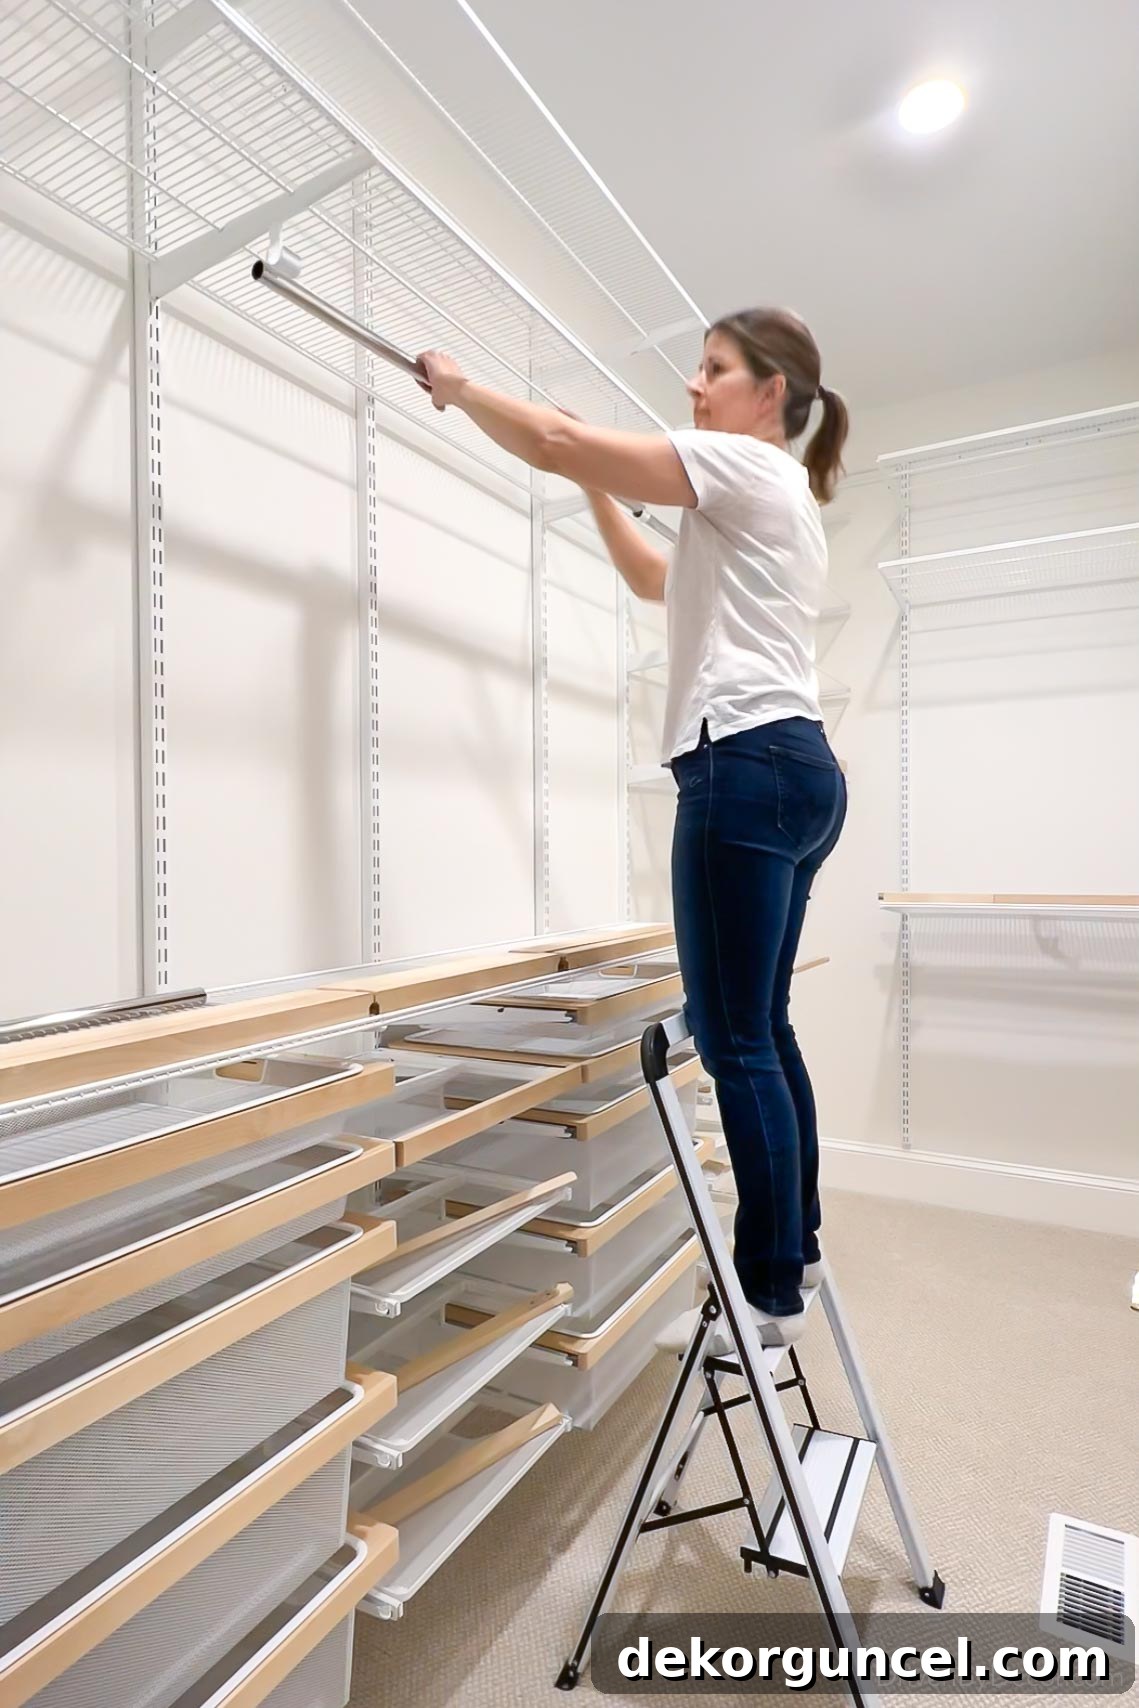
These rods ingeniously nestle into specially designed hooks that are attached to the underside of the Elfa brackets, ensuring a secure and stable hanging solution:
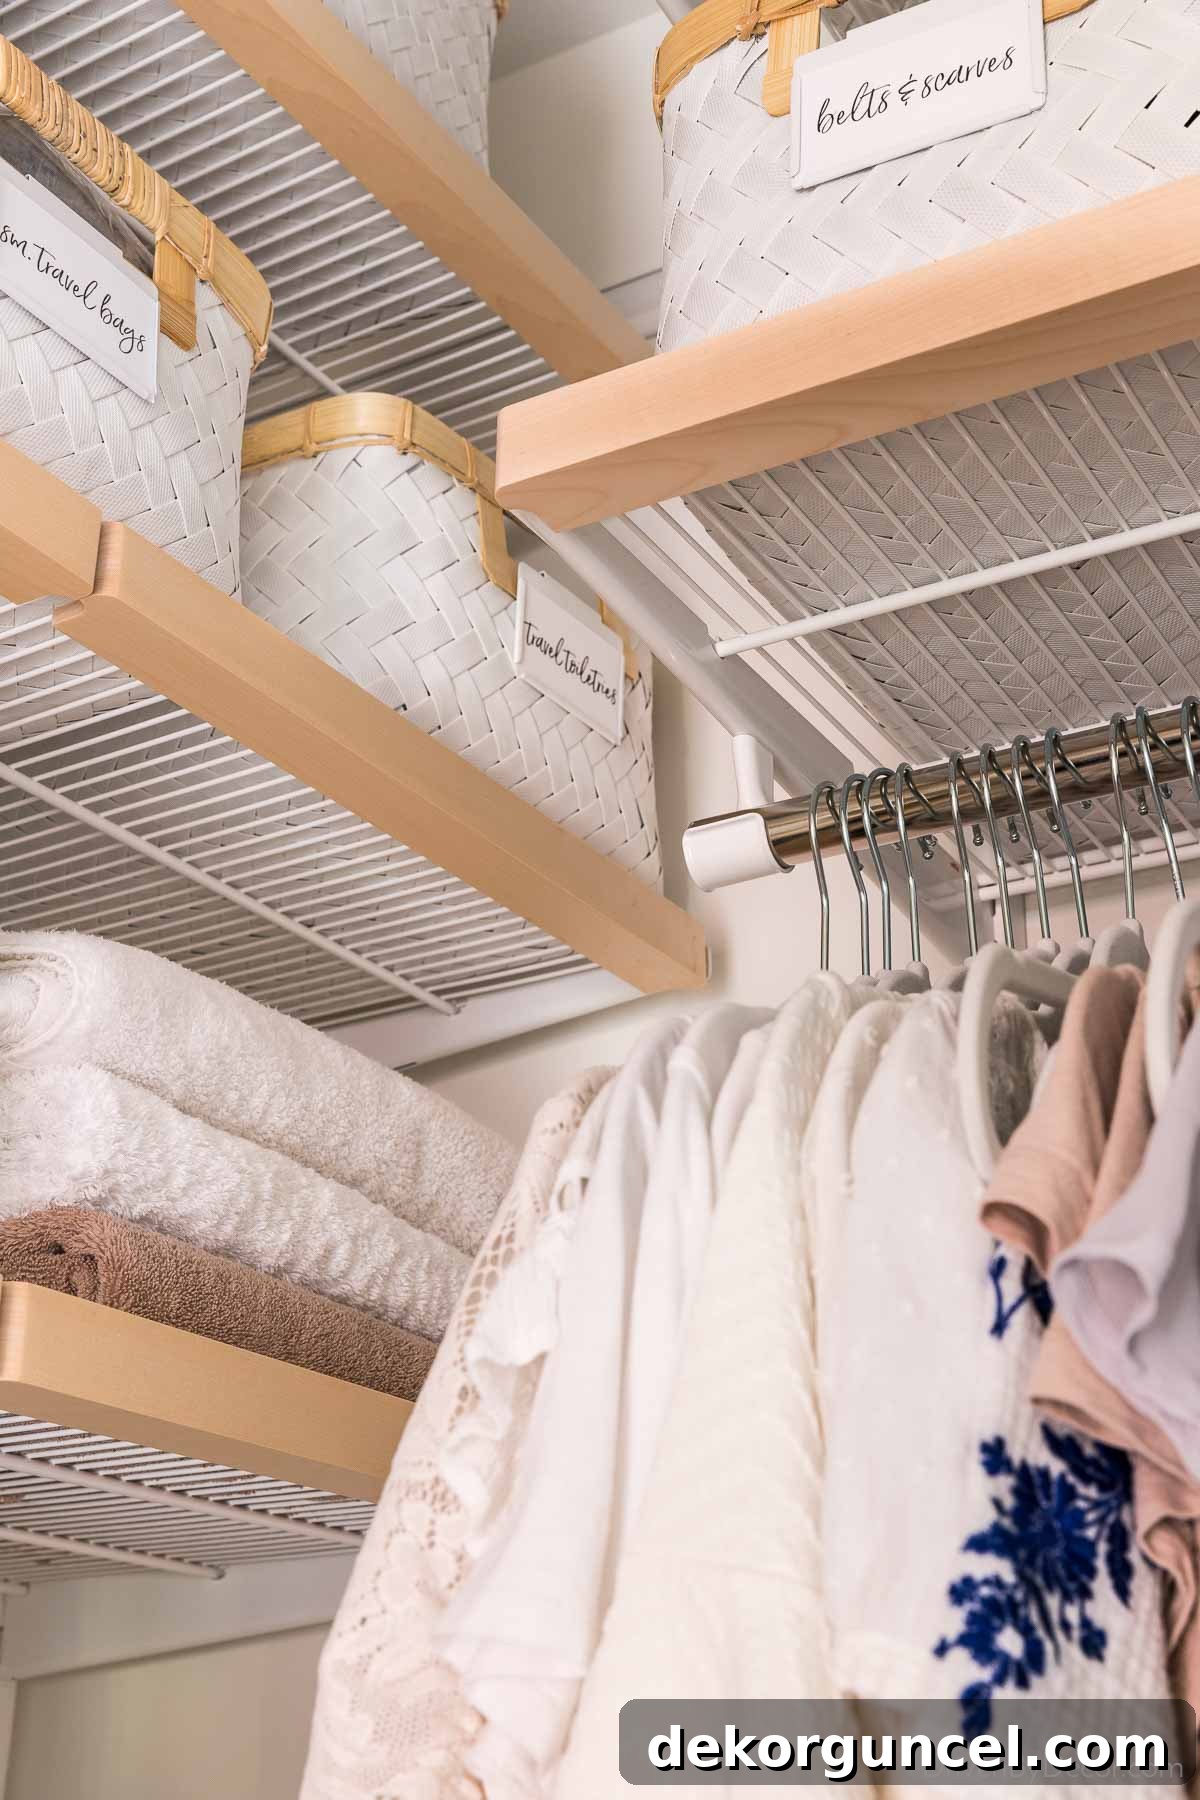
For those opting for a basic Elfa Classic system without additional enhancements, the installation would largely be complete at this stage. However, my design plan incorporated several Elfa Decor pieces, specifically the elegant light wood fronts, which required an additional step. I carefully clipped these birch “fascia” elements onto the fronts of both the shelves and the drawer frames, instantly elevating the system’s aesthetic appeal and providing a more refined, built-in look.
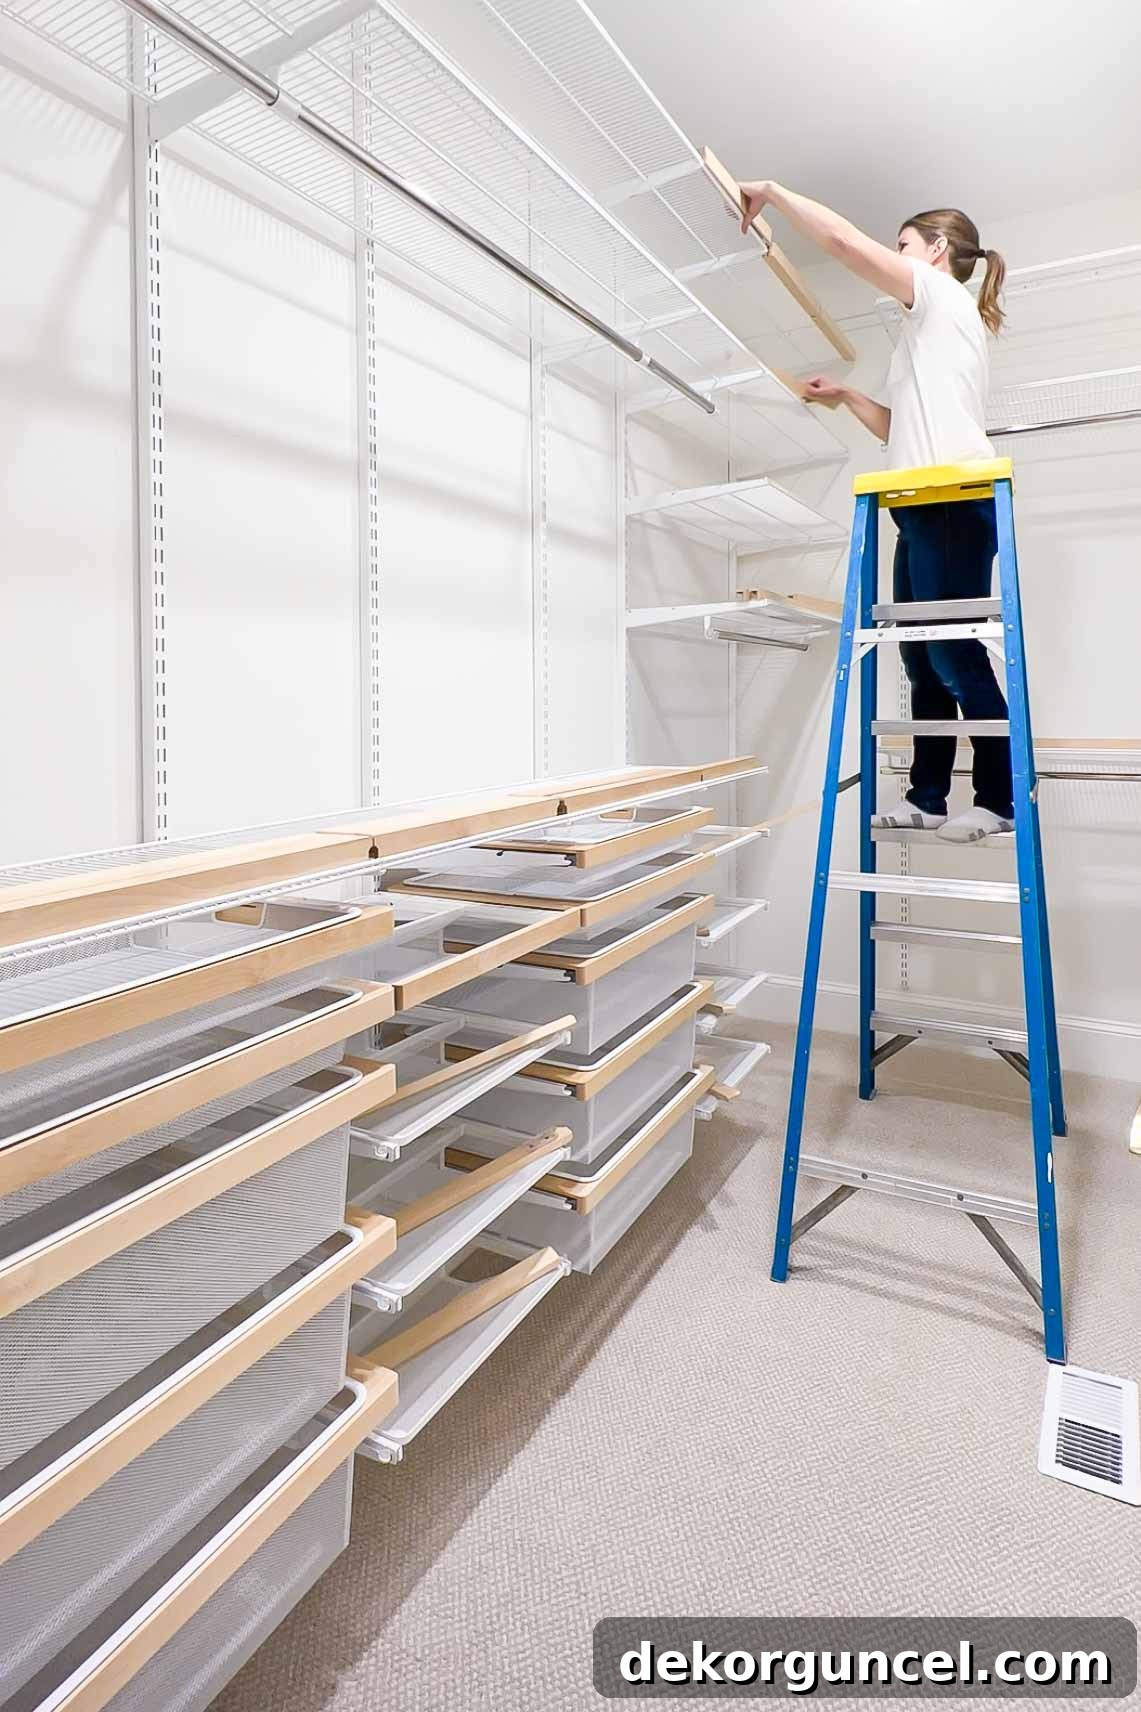
Finally, it was time to integrate any specific accessories included in my custom design plan. This involved adding specialized accessory trays, crucial drawer dividers for optimal organization, ensuring every item has its designated spot:
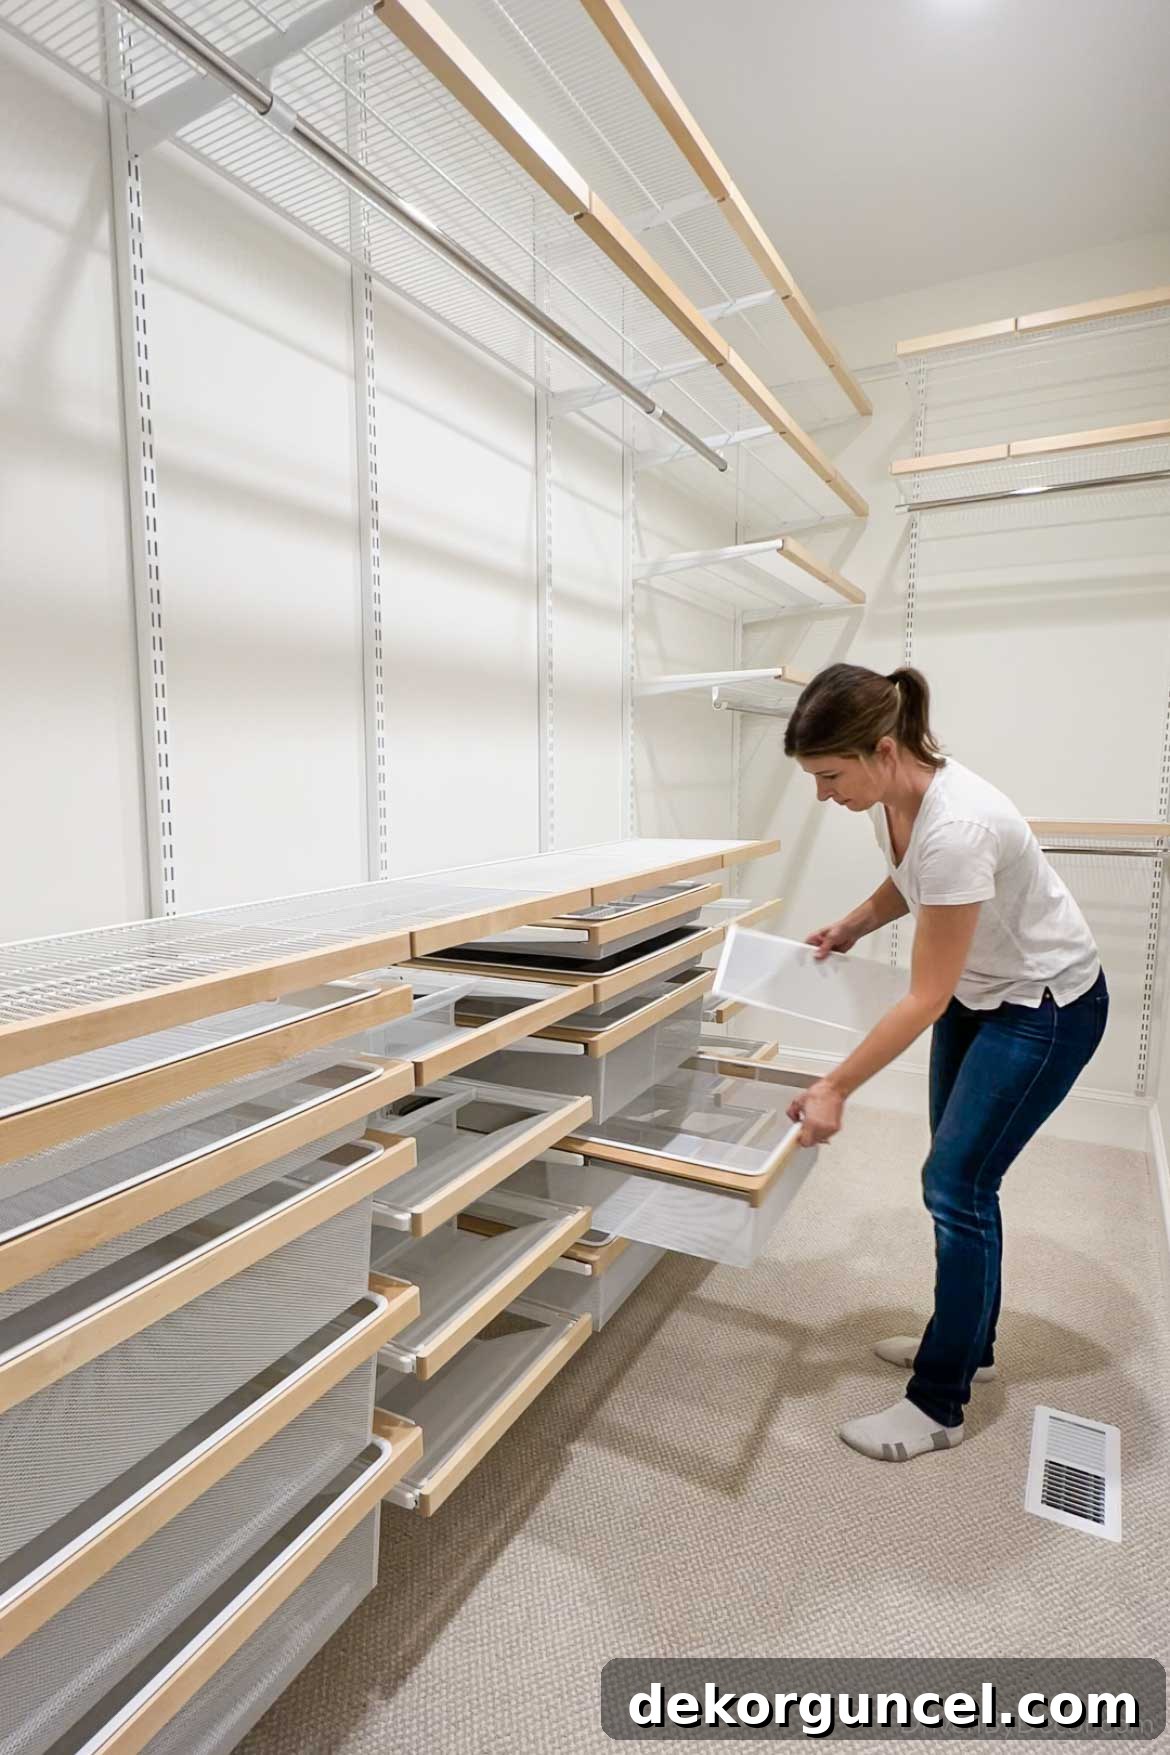
And for a clean, finished look, the shelf liners were carefully placed:
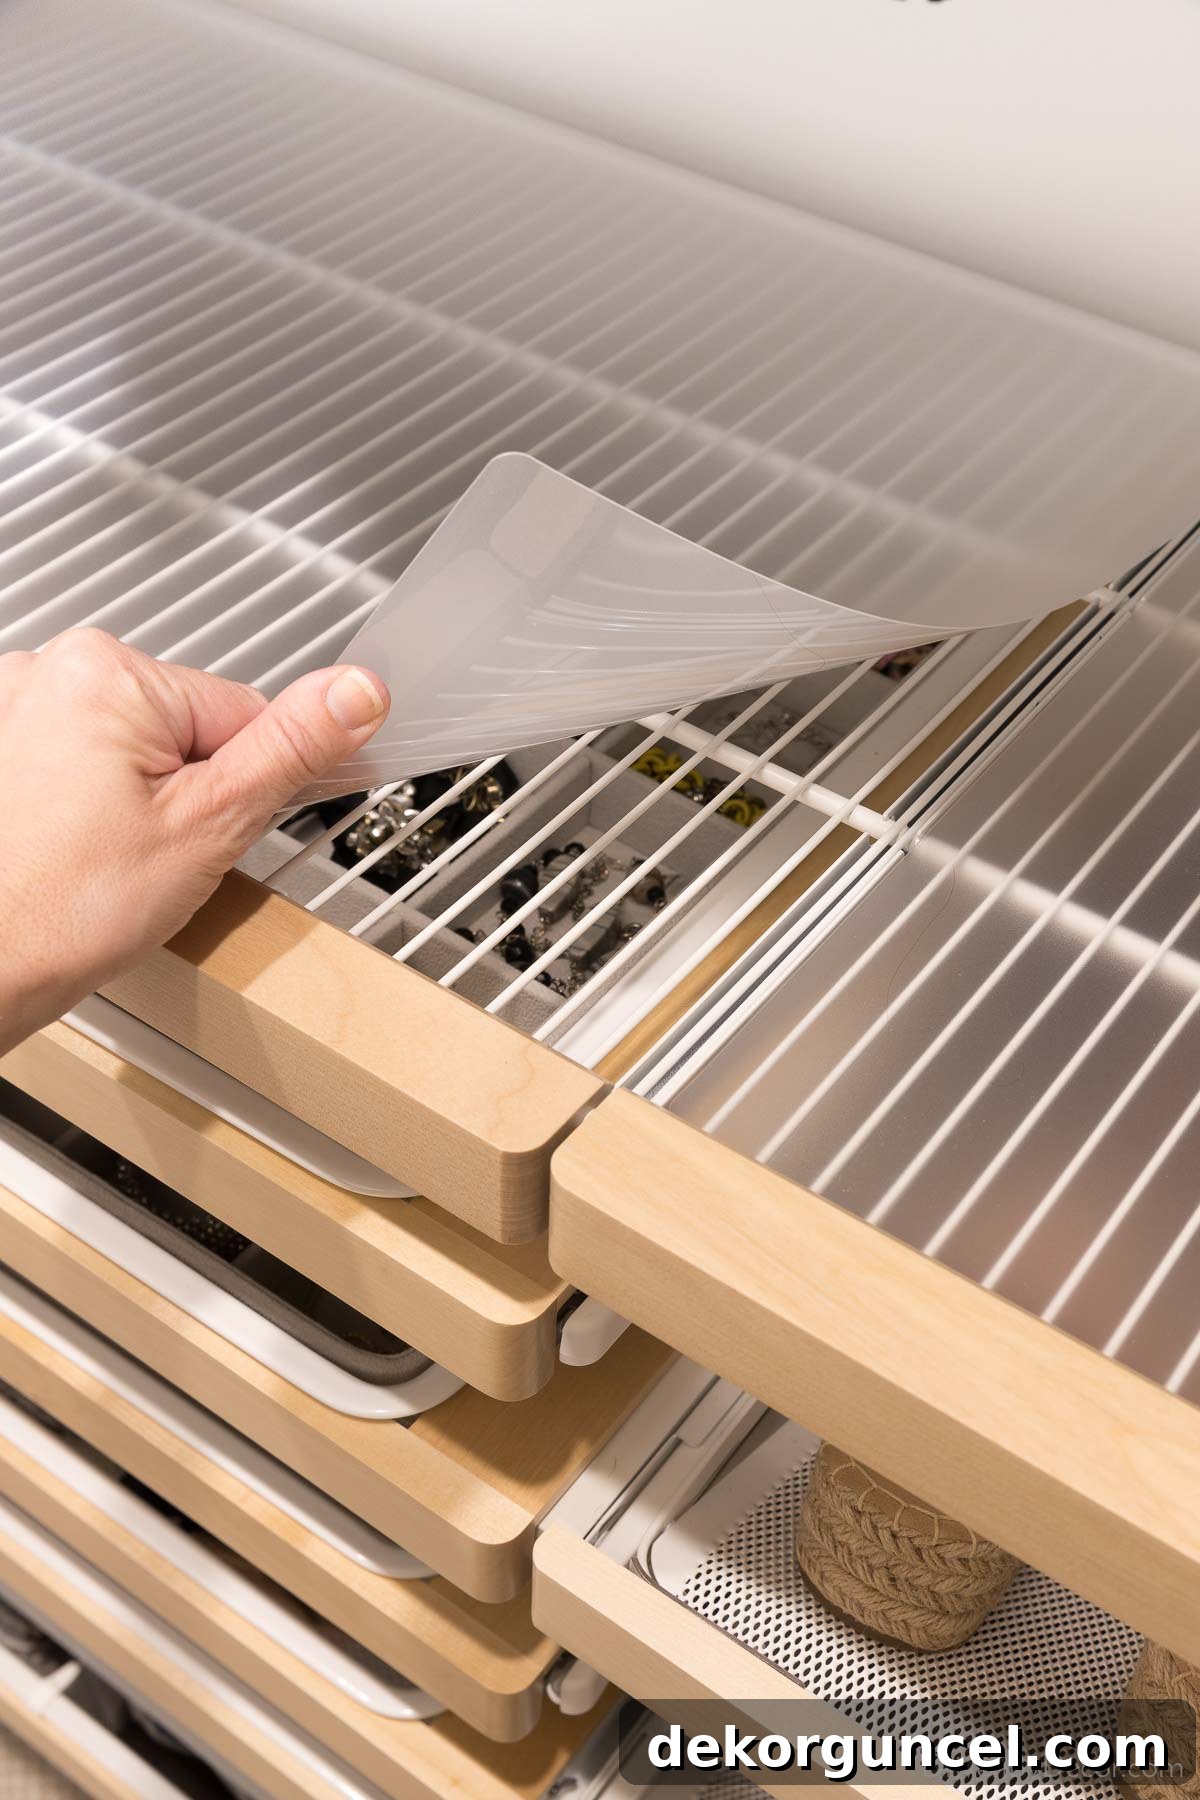
Once all the shelves and drawers were meticulously adjusted to their final desired heights, I added the finishing touches to our Elfa system. This included snapping on this top track cover, which elegantly conceals the screws in the track, providing a seamless and polished look. Additionally, I installed these strips, designed to cover the unused holes in the vertical standards. It’s worth noting that these hole-covering strips were not initially included in my design plan, so I placed a separate order to have them shipped to me, ensuring every detail contributed to a pristine finish.
And with those final, thoughtful additions, the installation was officially complete!
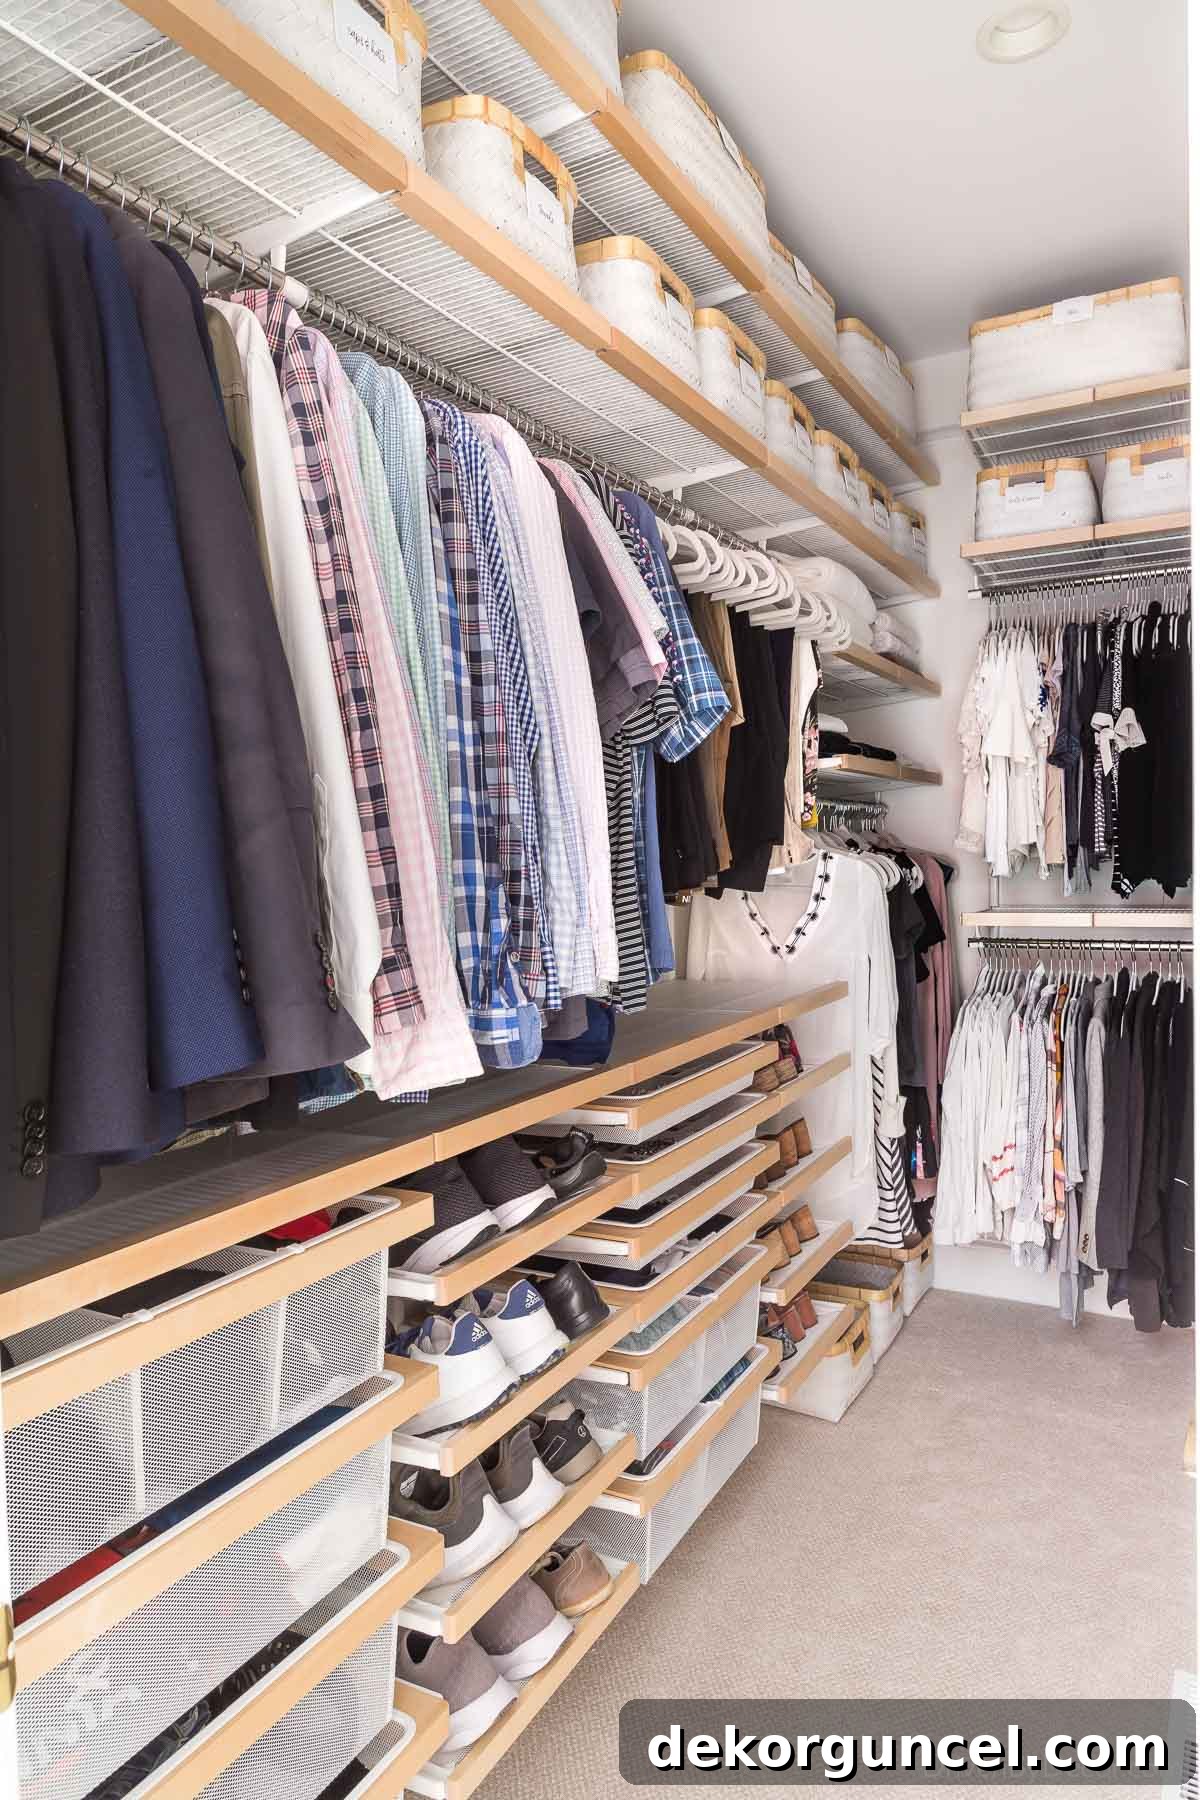
We are absolutely thrilled with the outcome, especially after enduring months of using rolling hanging racks in our bathroom while awaiting its completion. The transformation has brought a sense of order and elegance to our daily routine that we deeply appreciate.
Elfa Classic vs. Elfa Decor: Understanding Your Style and Budget Options
Earlier, I briefly touched upon the Elfa Decor line, and it’s important to clarify the distinct differences between it and the more fundamental Elfa Classic system. The “Elfa Classic” system represents The Container Store’s most budget-friendly and foundational closet solution. It provides a robust, highly functional base, available in a choice of three neutral colors: white, platinum, or graphite. To illustrate, if you were to remove all the birch wood elements from my newly installed closet design, what would remain is essentially an Elfa Classic system, specifically in a crisp white finish. This core system is renowned for its durability and adaptability, offering excellent organizational capabilities without the premium aesthetic upgrades.
The “Elfa Decor” line, conversely, comprises a range of additional components and finishes designed to be integrated with an Elfa Classic system, elevating its appearance to a more refined, custom-built look. In our primary closet, for example, the birch Elfa Decor elements we strategically incorporated include birch “fascia” pieces, which are decorative fronts for the shelves and shoe pull-outs, and matching birch drawer frames. These additions significantly enhance the visual warmth and sophistication of the entire closet, transforming a purely functional system into a stylish feature.
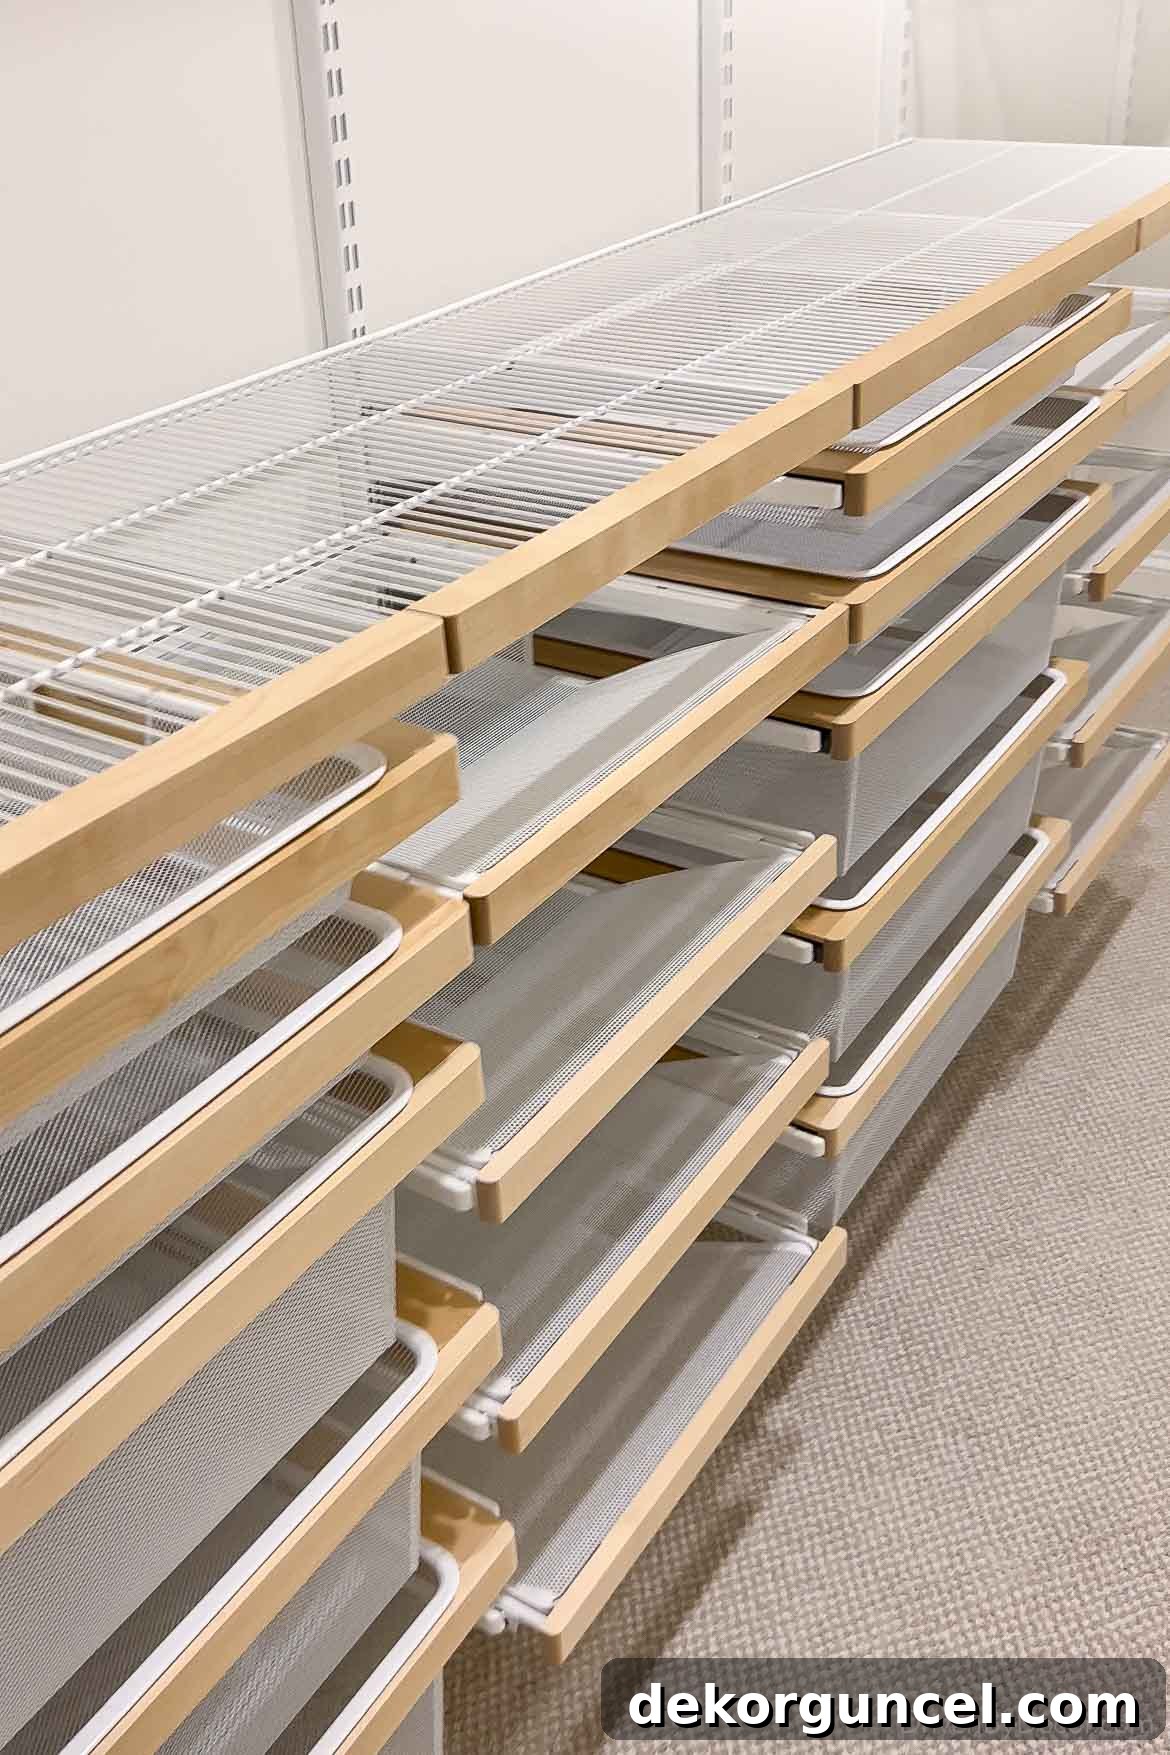
While we appreciated the aesthetic enhancements of Elfa Decor, we made a conscious decision to forego some of the more elaborate options, such as fully birch Elfa Decor shelves (which would replace the ventilated white shelves entirely with solid birch) and drawer frames that completely cover the front of the drawers. The reason for this choice was primarily cost-related; the price of Elfa Decor components can add up quite rapidly, and we aimed to strike a balance between aesthetics and budget. Although we selected birch for its natural warmth, Elfa Decor components are also available in other appealing finishes, including gray, white, and walnut, offering further customization possibilities to match various interior styles.
For those aspiring to an even more luxurious and fully integrated custom closet appearance beyond what Elfa Decor offers, The Container Store presents two higher-end lines: Avera and Laren. You can explore these premium options {here}. These systems feature sophisticated upgrades such as integrated back panels, elegant LED lighting solutions, and a wider selection of premium materials and finish options. Naturally, these enhanced features come with a proportionally higher price tag, catering to clients seeking the ultimate in custom closet luxury and design.
Elfa Closet Cost: A Detailed Breakdown of Investment
The total investment for an Elfa closet system is, understandably, highly variable and contingent upon several key factors. These include the overall dimensions of your closet space, the specific components you choose to incorporate (such as shelves, drawers, and hanging rods), and whether you opt to upgrade with any of the premium Elfa Decor elements. To help you gauge potential expenses, {this page displaying various Elfa solutions} offers valuable estimated price ranges for closets comparable in size to your own, providing a useful starting point for your budget planning.
For our expansive walk-in closet, which measures 122 inches along one wall and 55 inches on the other, and includes all the chosen Elfa Decor pieces, the full retail price of our system amounted to $3987. Fortunately, we capitalized on a 20% off sale that The Container Store was running, which brought our final price down significantly to $3189. Had we decided to stick with the basic Elfa Classic system, omitting all the Elfa Decor birch components, the cost would have been substantially less, with an approximate retail price of $2750 and a sale price of around $2200. This stark difference highlights the impact of aesthetic upgrades on the overall project cost.
It’s important to note that these figures do not encompass the cost of the storage baskets within my closet. These were items I already owned, repurposed from the closet in our previous home. For reference, they are the medium and large-sized Hampton bins, which are available at The Container Store {here}. Integrating existing accessories can be a smart way to manage your budget and achieve a cohesive look.
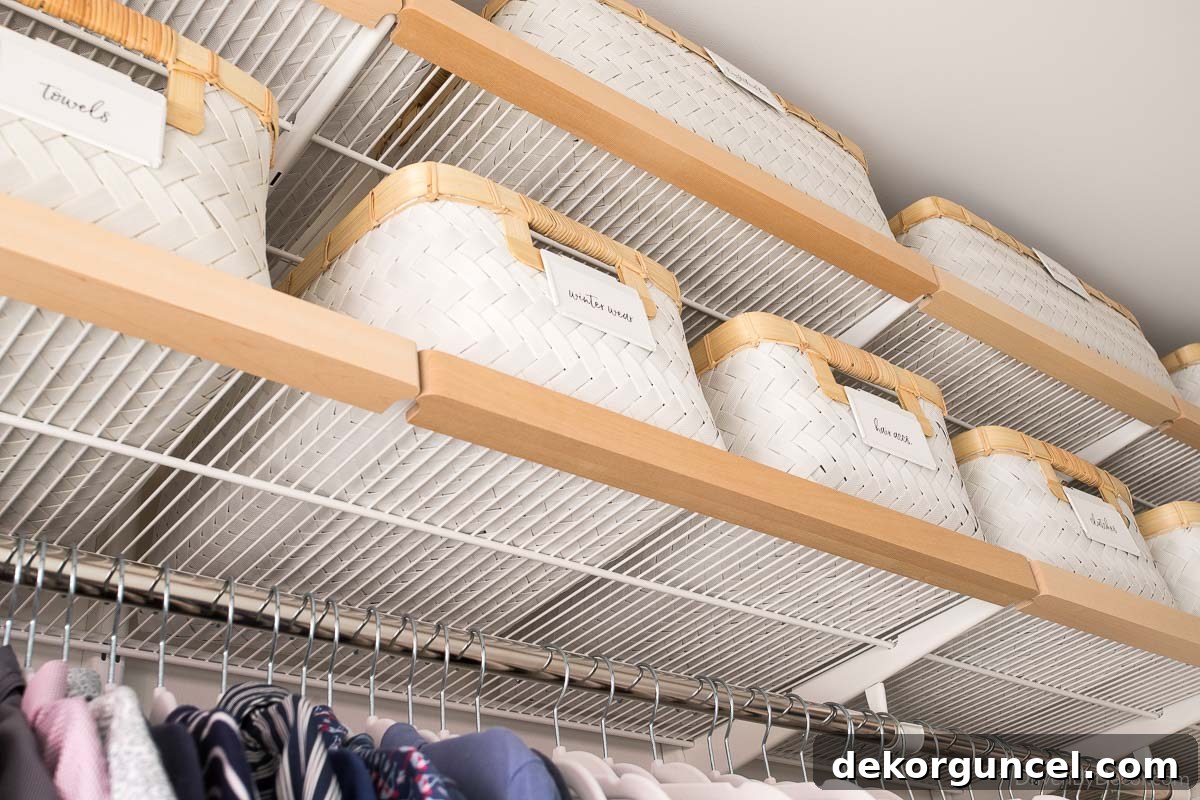
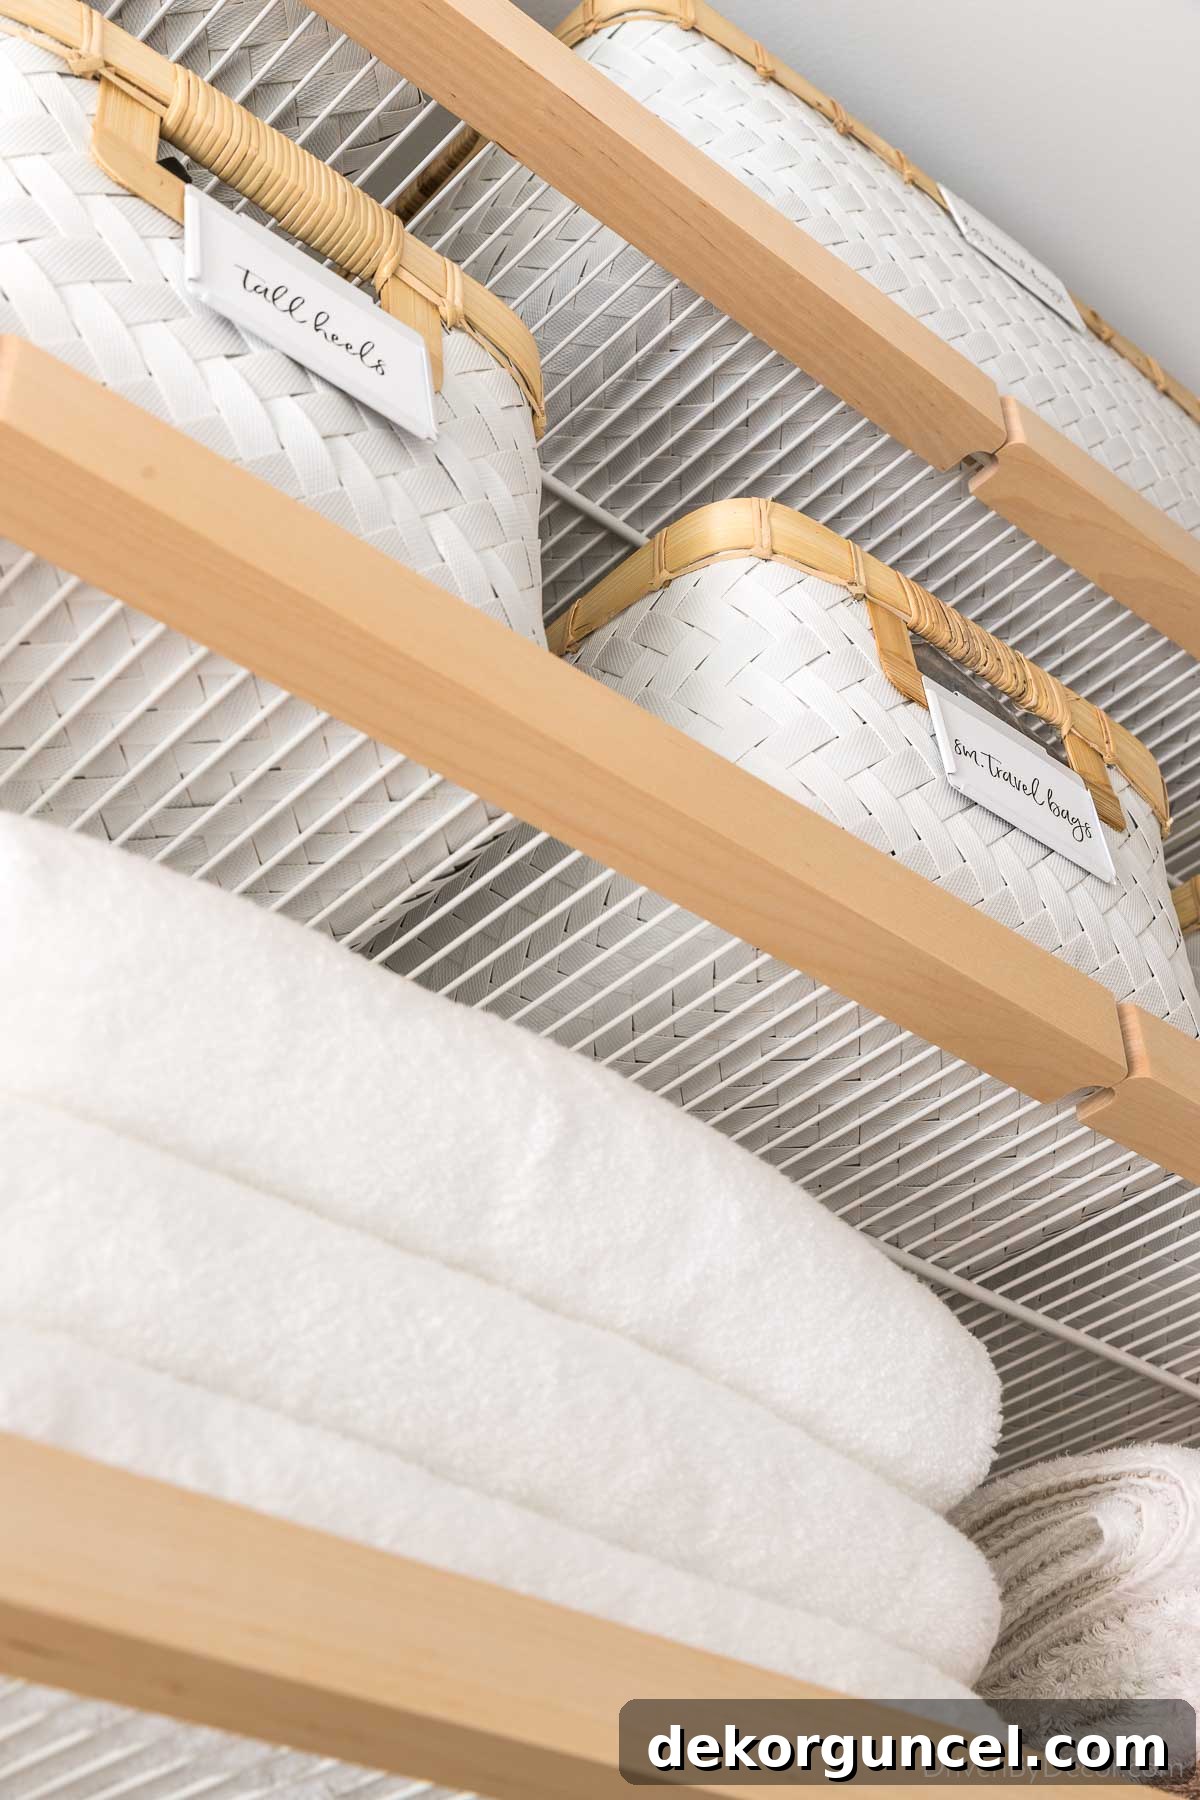
Beyond the cost of the Elfa components themselves, professional installation fees represent an additional and often significant expense, which is precisely why we elected to handle the DIY installation. The quoted cost for professional installation services for our master closet was a substantial $1110. It’s possible that our estimate was on the higher side due to our considerable distance—two hours—from the nearest Container Store, which likely factored into travel costs for the installers. This considerable saving was a major motivator for our DIY approach.
The Container Store’s installation service is, however, a full-service affair, offering considerable value for those who prefer not to undertake the physical work. Their professional installers not only custom-cut your Elfa system components on-site to ensure a perfect fit, but they also typically include services such as the removal of a specified amount of existing shelving, patching the old holes in the walls, and even painting over them before meticulously installing the new Elfa system. This comprehensive approach transforms a potentially messy and labor-intensive project into a seamless, hands-off experience. It’s undoubtedly an excellent option if it aligns with your budget and you’re not inclined towards DIY projects, providing a truly hassle-free closet upgrade.
Elfa Closet System vs. IKEA PAX System: A Comprehensive Comparison
As previously mentioned, in our former home, we undertook an extensive bathroom remodel that incorporated a spacious walk-in closet featuring IKEA’s PAX system. This experience provided us with valuable firsthand insight into a different approach to closet organization. You can view the full transformation and details of our previous bathroom remodel, including the PAX closet, in a dedicated post.
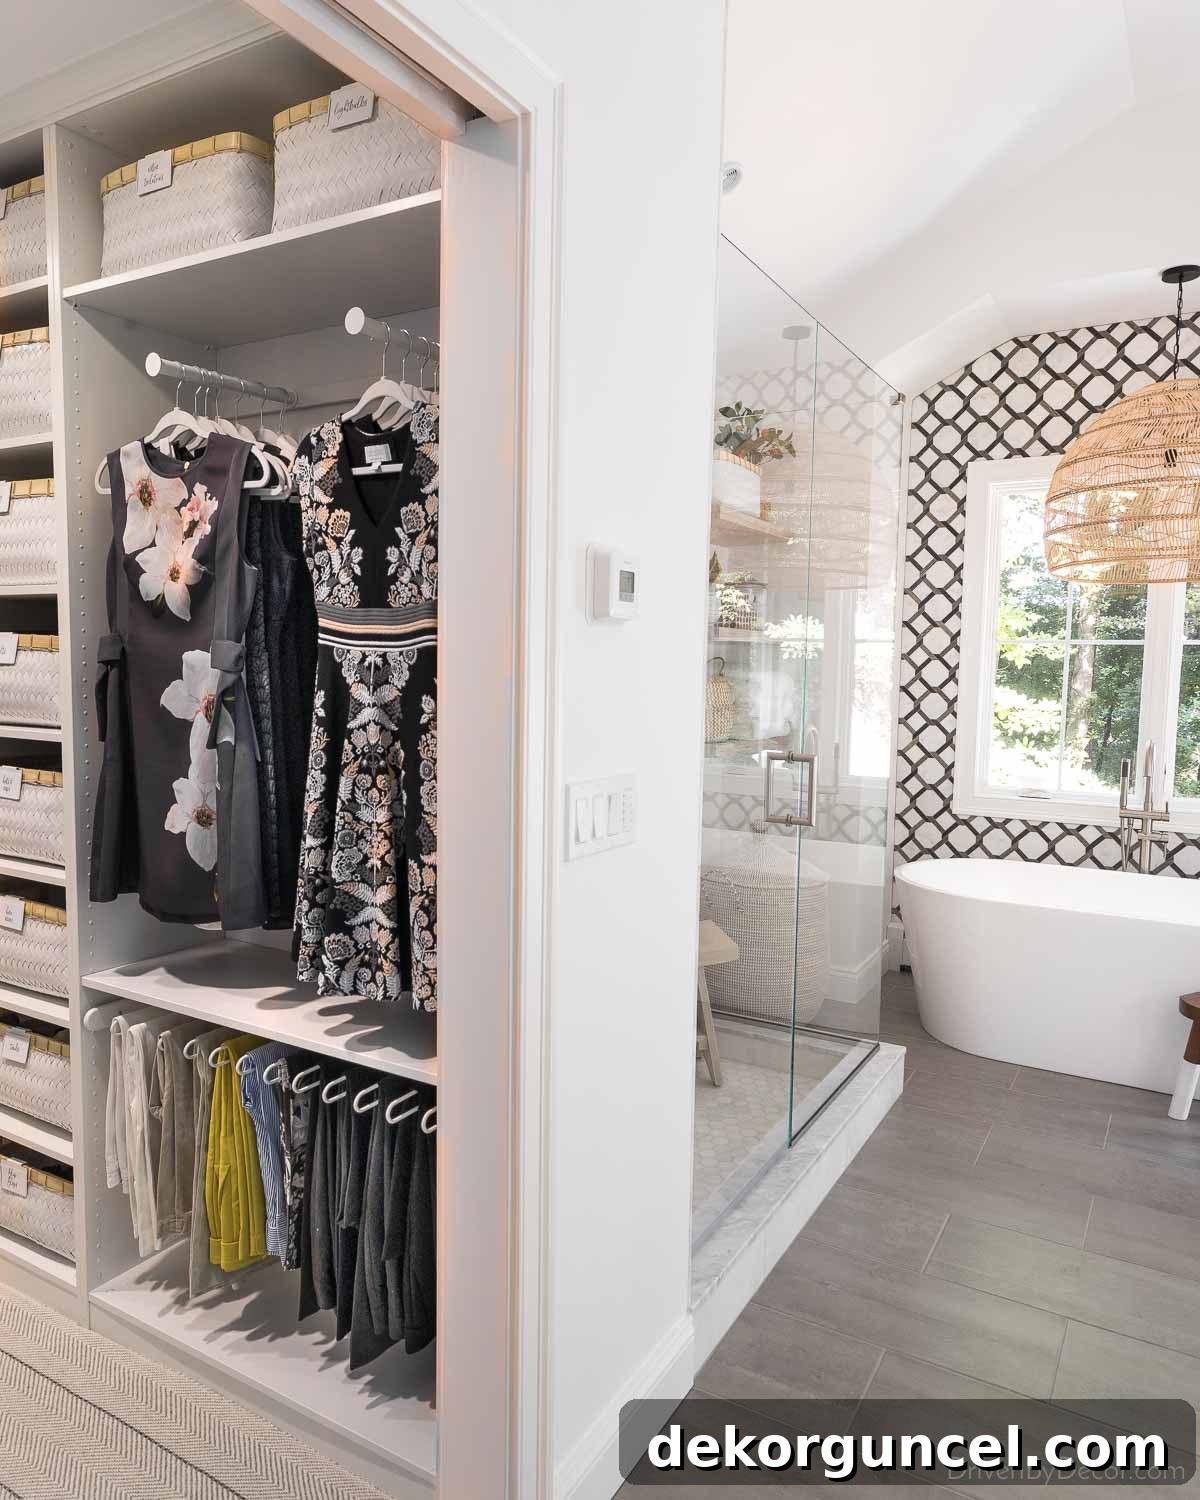
We absolutely adored our previous closet! For a complete and immersive tour, be sure to check out our detailed review of the IKEA PAX closet system.
Having now personally designed, installed, and extensively used both IKEA’s PAX system and The Container Store’s Elfa system, I am uniquely positioned to offer an unbiased, comparative analysis of these two popular closet solutions. The honest truth is that neither system is inherently “better” than the other; the optimal choice depends entirely on your specific needs, aesthetic preferences, budget, and, critically, the precise dimensions and layout of your closet space. Below, I’ll outline the key advantages and disadvantages I’ve observed when directly comparing the two systems, helping you determine which might be the best fit for your home organization project.
The IKEA PAX System: Structure, Design, and Considerations
In contrast to Elfa closets, which operate on a versatile track-and-bracket system, the IKEA PAX system is built around a series of freestanding wardrobe frames. These frames are essentially tall, modular boxes that are designed to be lined up side-by-side to create a continuous storage unit. A progress photo from our old house’s closet perfectly illustrates this, showing how one entire side of our closet was constructed from three individual PAX wardrobe frames meticulously attached to one another in a cohesive line, forming a robust foundation for the internal components.
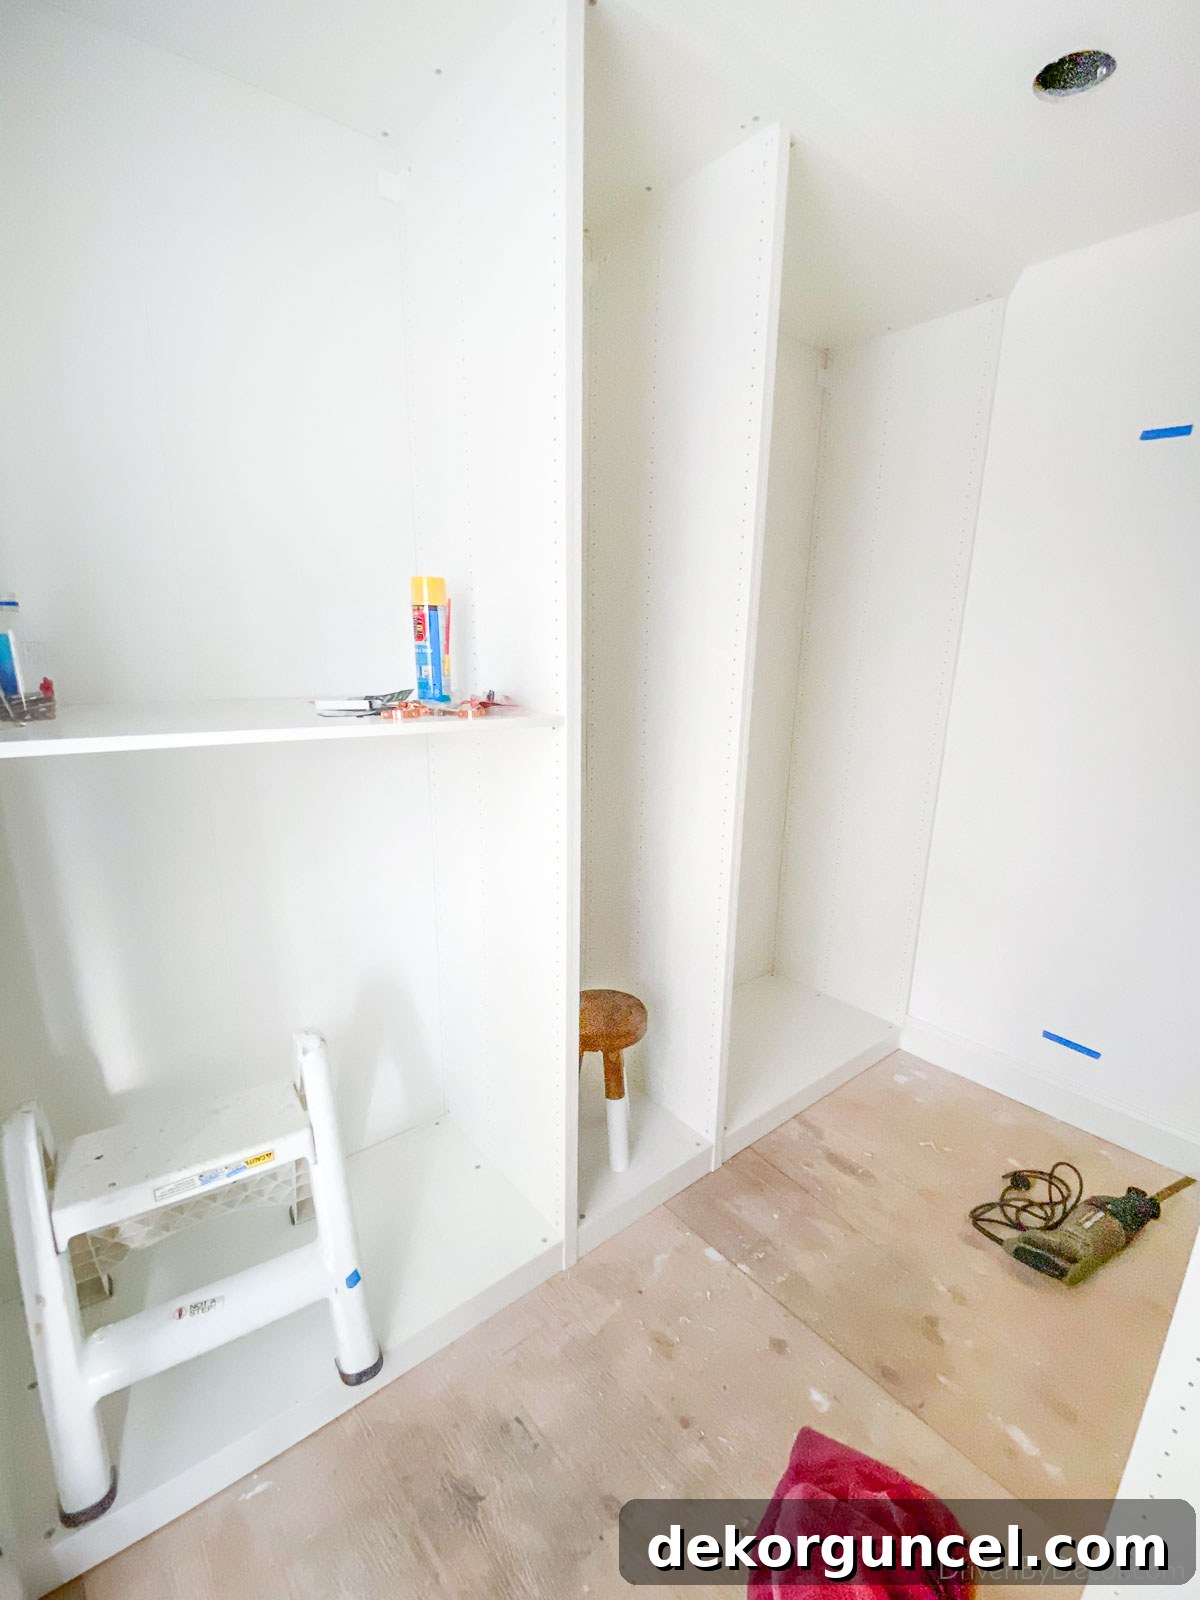
Once the frames are assembled, the interior of each can be fully customized with a wide array of IKEA KOMPLEMENT accessories, including various types of drawers, shelves, and hanging rails, allowing for a personalized storage solution. The same side of the closet, once finished and fully accessorized, presented a beautifully organized and functional space, demonstrating the system’s adaptability:
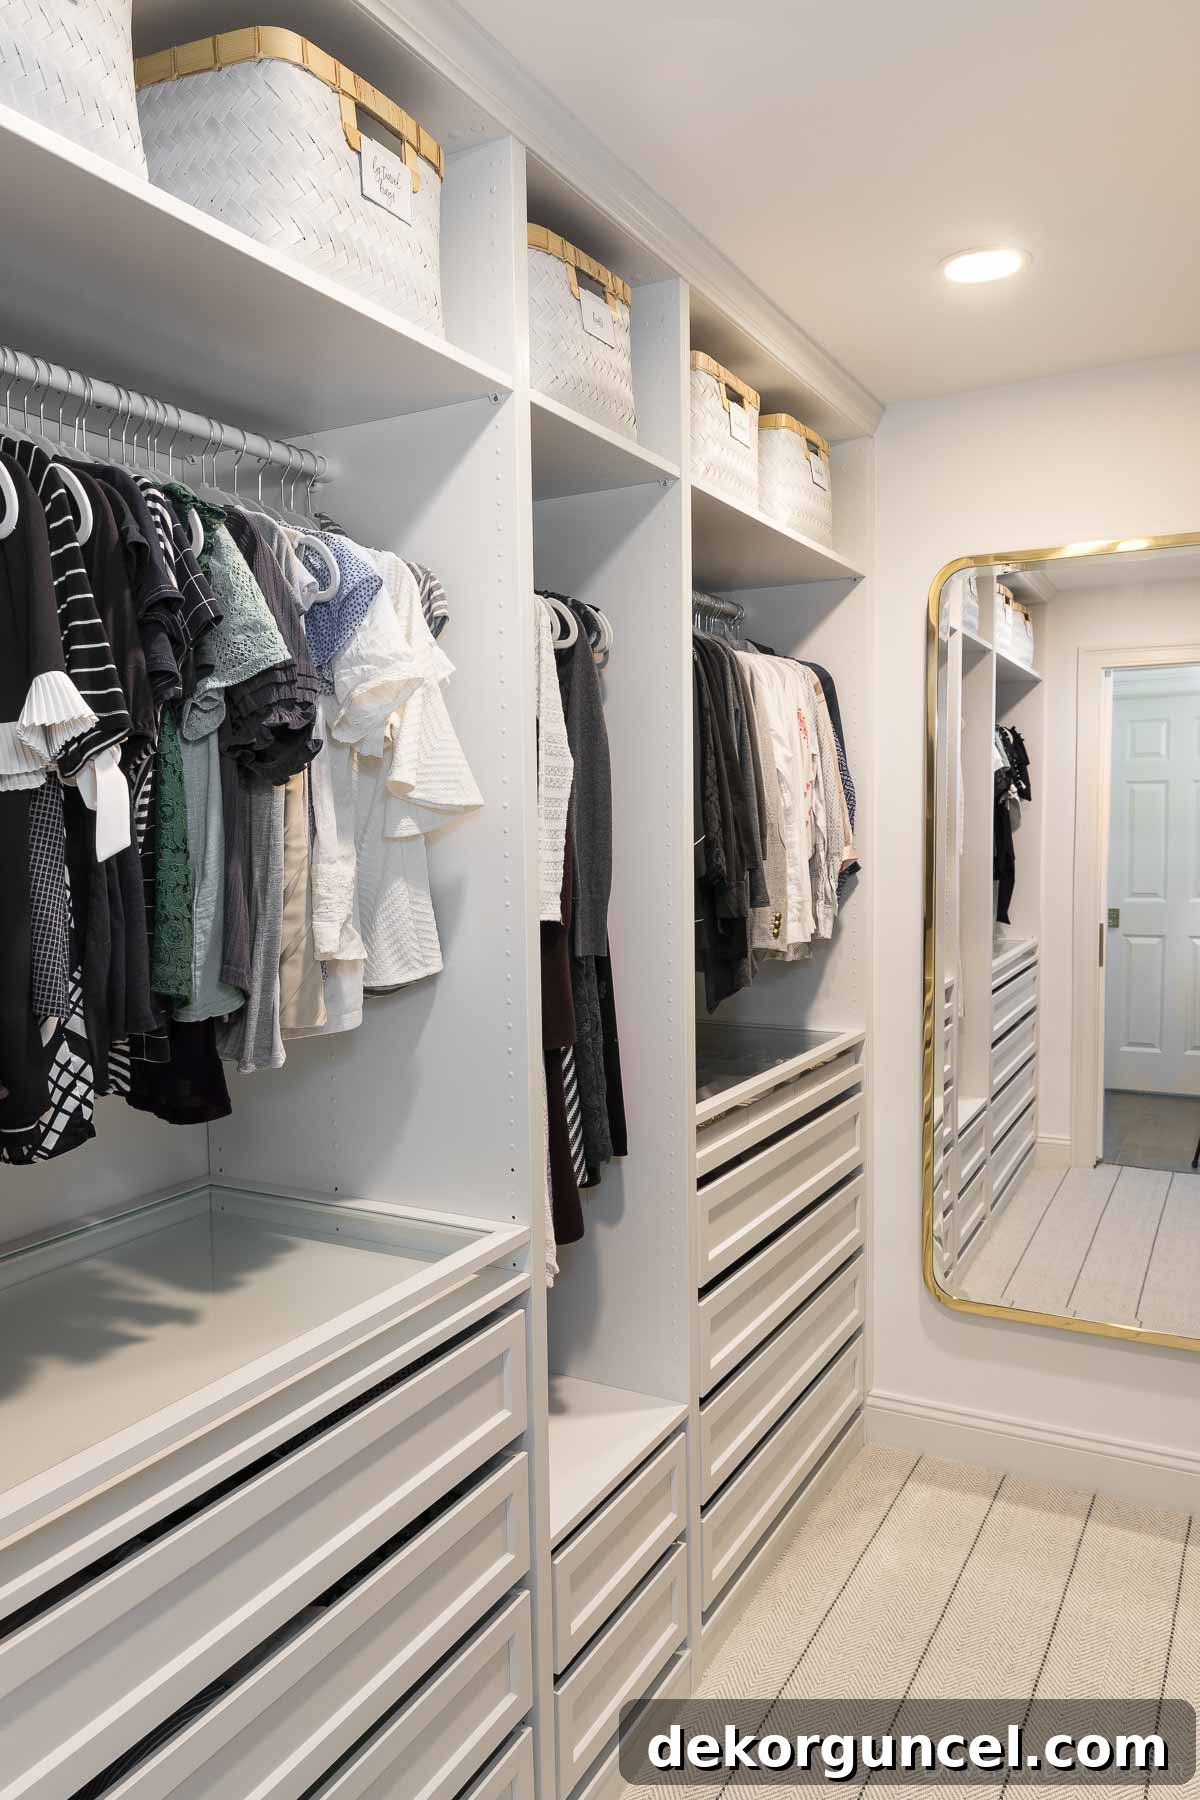
A crucial consideration for the PAX system is its limited depth options; there are typically only two standard depths available for the frames. This was a significant factor in our decision to choose the Elfa system for our current home. The long wall of our new closet was a few inches shallower than the standard depth of the PAX frames we desired to use. This dimensional incompatibility meant that if we had proceeded with PAX, the end frame would have unacceptably overlapped our closet door molding, compromising both aesthetics and functionality. Therefore, precise measurements and careful planning are essential when considering the PAX system to ensure it fits seamlessly into your space without causing such conflicts.
When directly comparing the IKEA PAX system to Elfa, one of PAX’s most significant advantages is its more accessible price point. It generally presents a less expensive option than the Elfa system, making it an attractive choice for budget-conscious homeowners. However, this cost saving comes with a trade-off: a considerable amount of “sweat equity” is required. Assembling all the PAX wardrobe frames, constructing the numerous drawers, and then meticulously installing them into your closet demands a significantly greater time commitment and more physical effort compared to the relatively quicker and simpler installation process of an Elfa system.
There’s also a notable difference in the design planning experience. IKEA provides an online closet planning tool that empowers you to design your PAX closet yourself, and store associates are available for assistance. However, much of the design heavy lifting falls on the customer. As an “organizing geek,” I personally enjoyed the process of designing my own PAX closet, but I recognize that many individuals lack the time or mental energy for such an undertaking. I also admit to making multiple trips to IKEA to acquire parts I hadn’t initially realized were needed. In contrast, The Container Store offers a full-service design experience, where a professional designer ensures you get everything required in a “one and done” approach, simplifying the entire procurement process.
While personal preference certainly plays a role, I find another significant advantage of the PAX system to be the superior design of its drawers. The KOMPLEMENT drawers, integral to the PAX system, are available in three distinct widths, with the largest offering an impressive 39 inches of usable space. Furthermore, a highly appreciated feature is their soft-close slides, which add a touch of luxury and quiet operation to your closet experience.
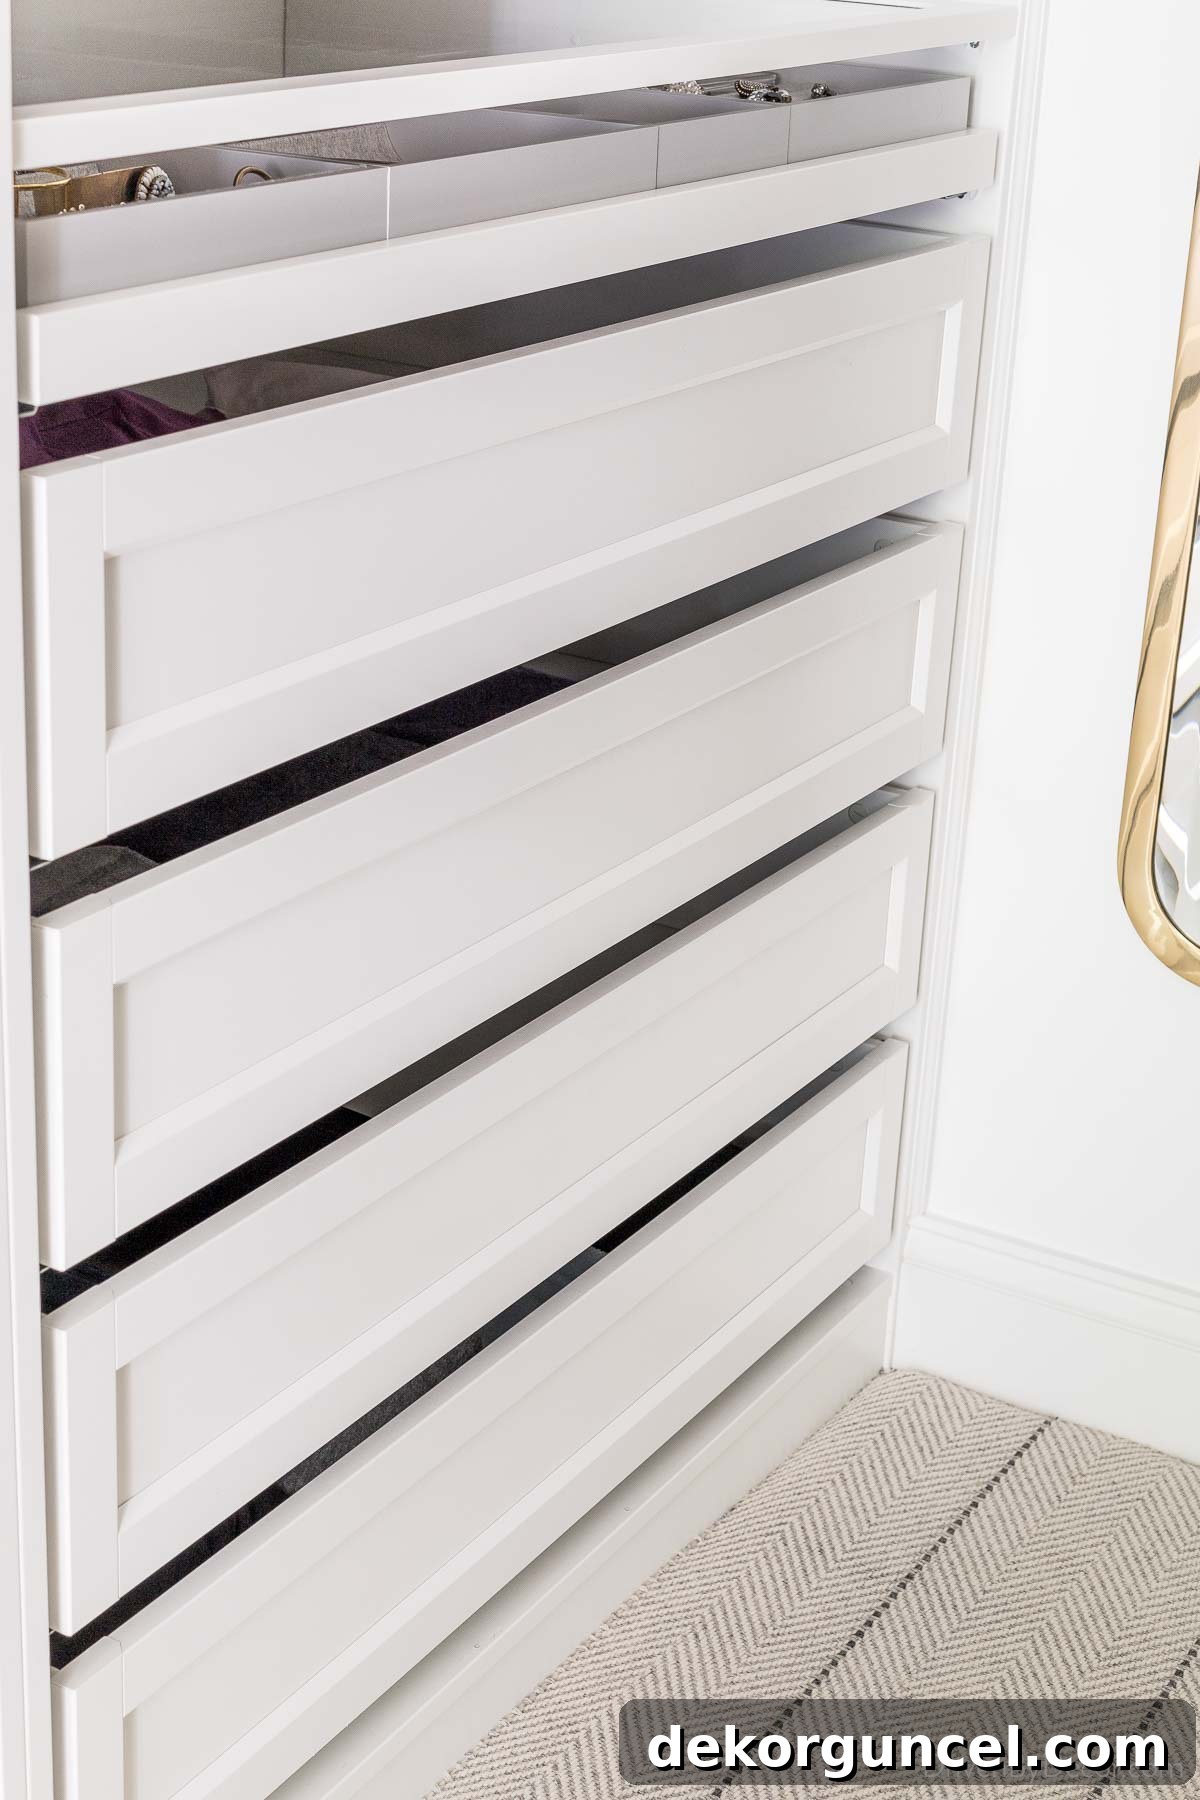
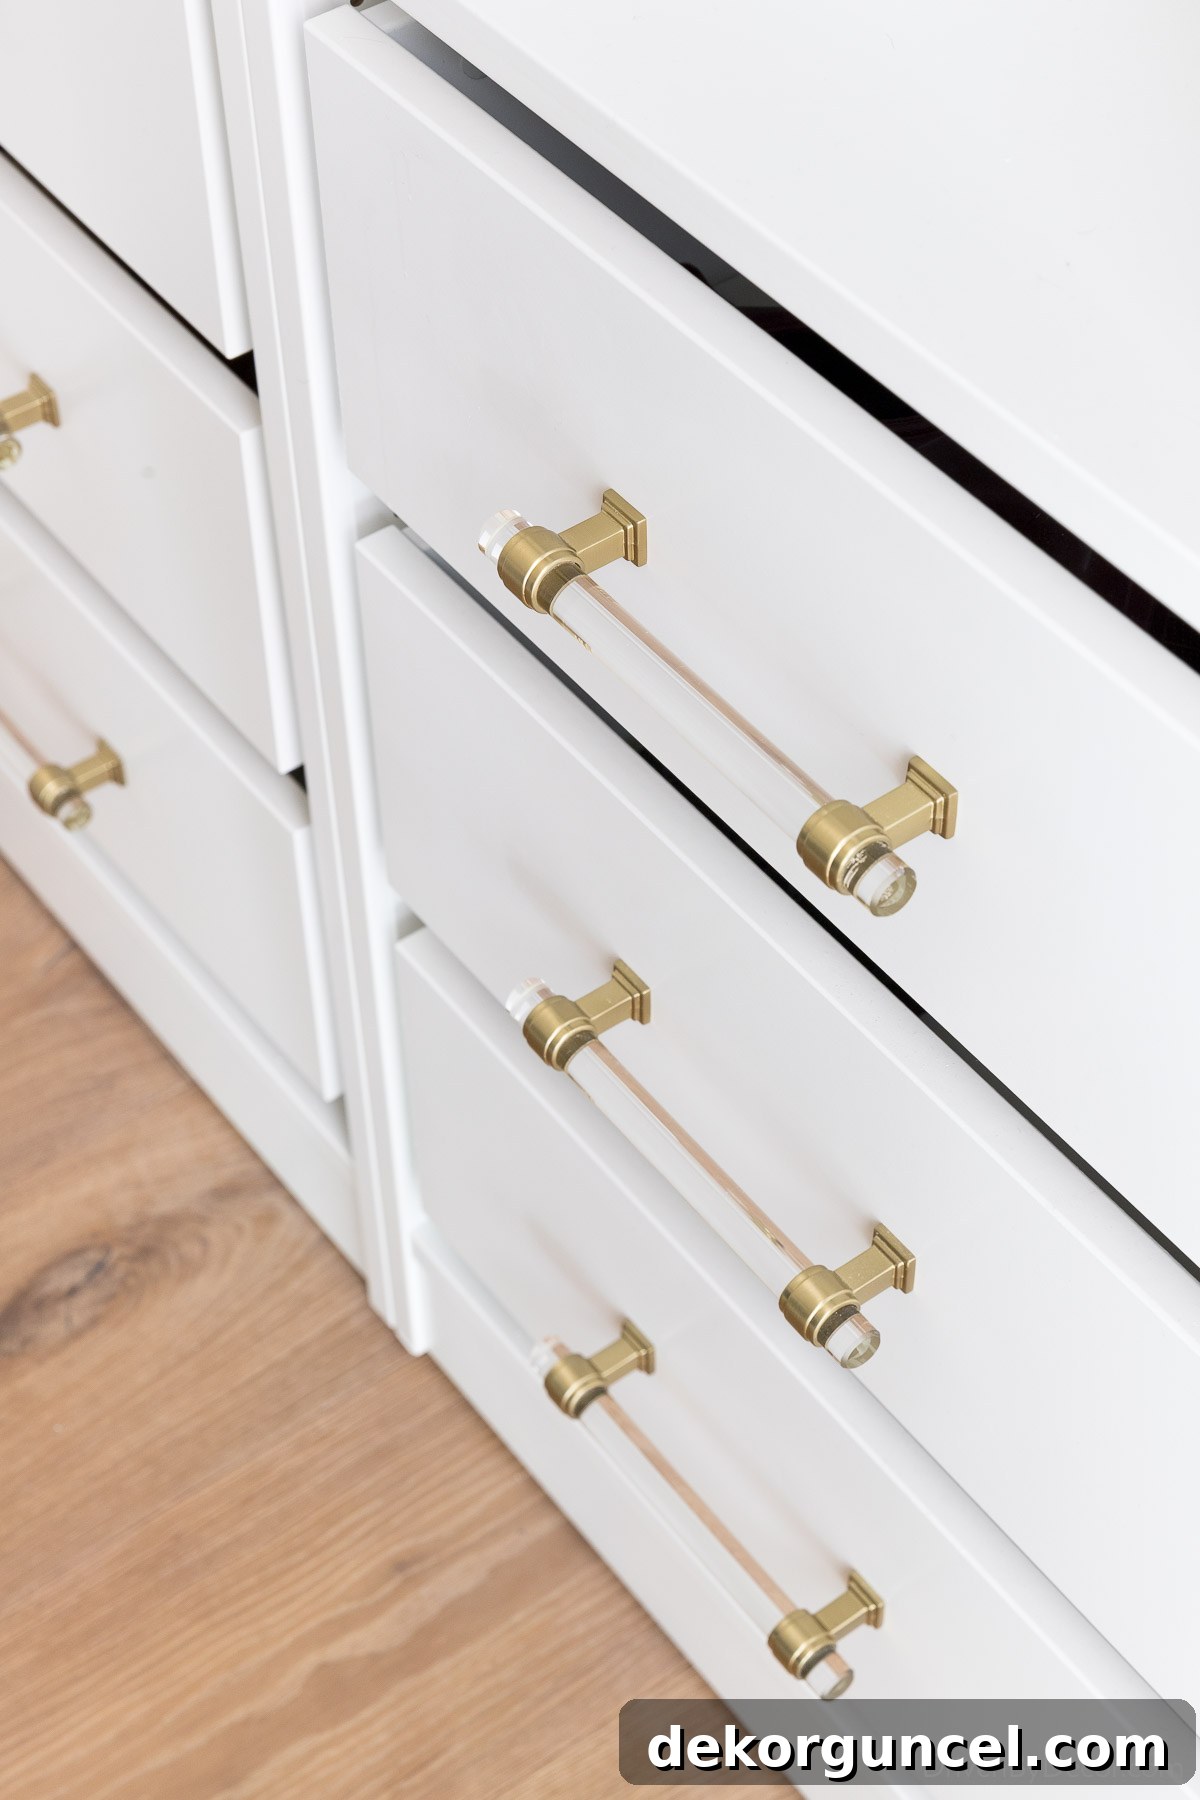
Beyond their functionality, PAX drawers offer excellent customization options for their fronts. You can select from a few different drawer front designs, and even further personalize them with your own choice of hardware. For instance, I used {these chic acrylic pulls} to elevate the look of the drawers in the PAX system I installed in the laundry room of our previous house, demonstrating how easily you can tailor the aesthetics to your unique style.
Another aspect where I favor PAX is the design of its drawers; they are solid, meaning any internal disarray remains out of sight. This contrasts with Elfa drawers, which typically feature a metal mesh construction. While functional, the mesh design exposes the contents, potentially detracting from a tidy appearance if not perfectly organized.
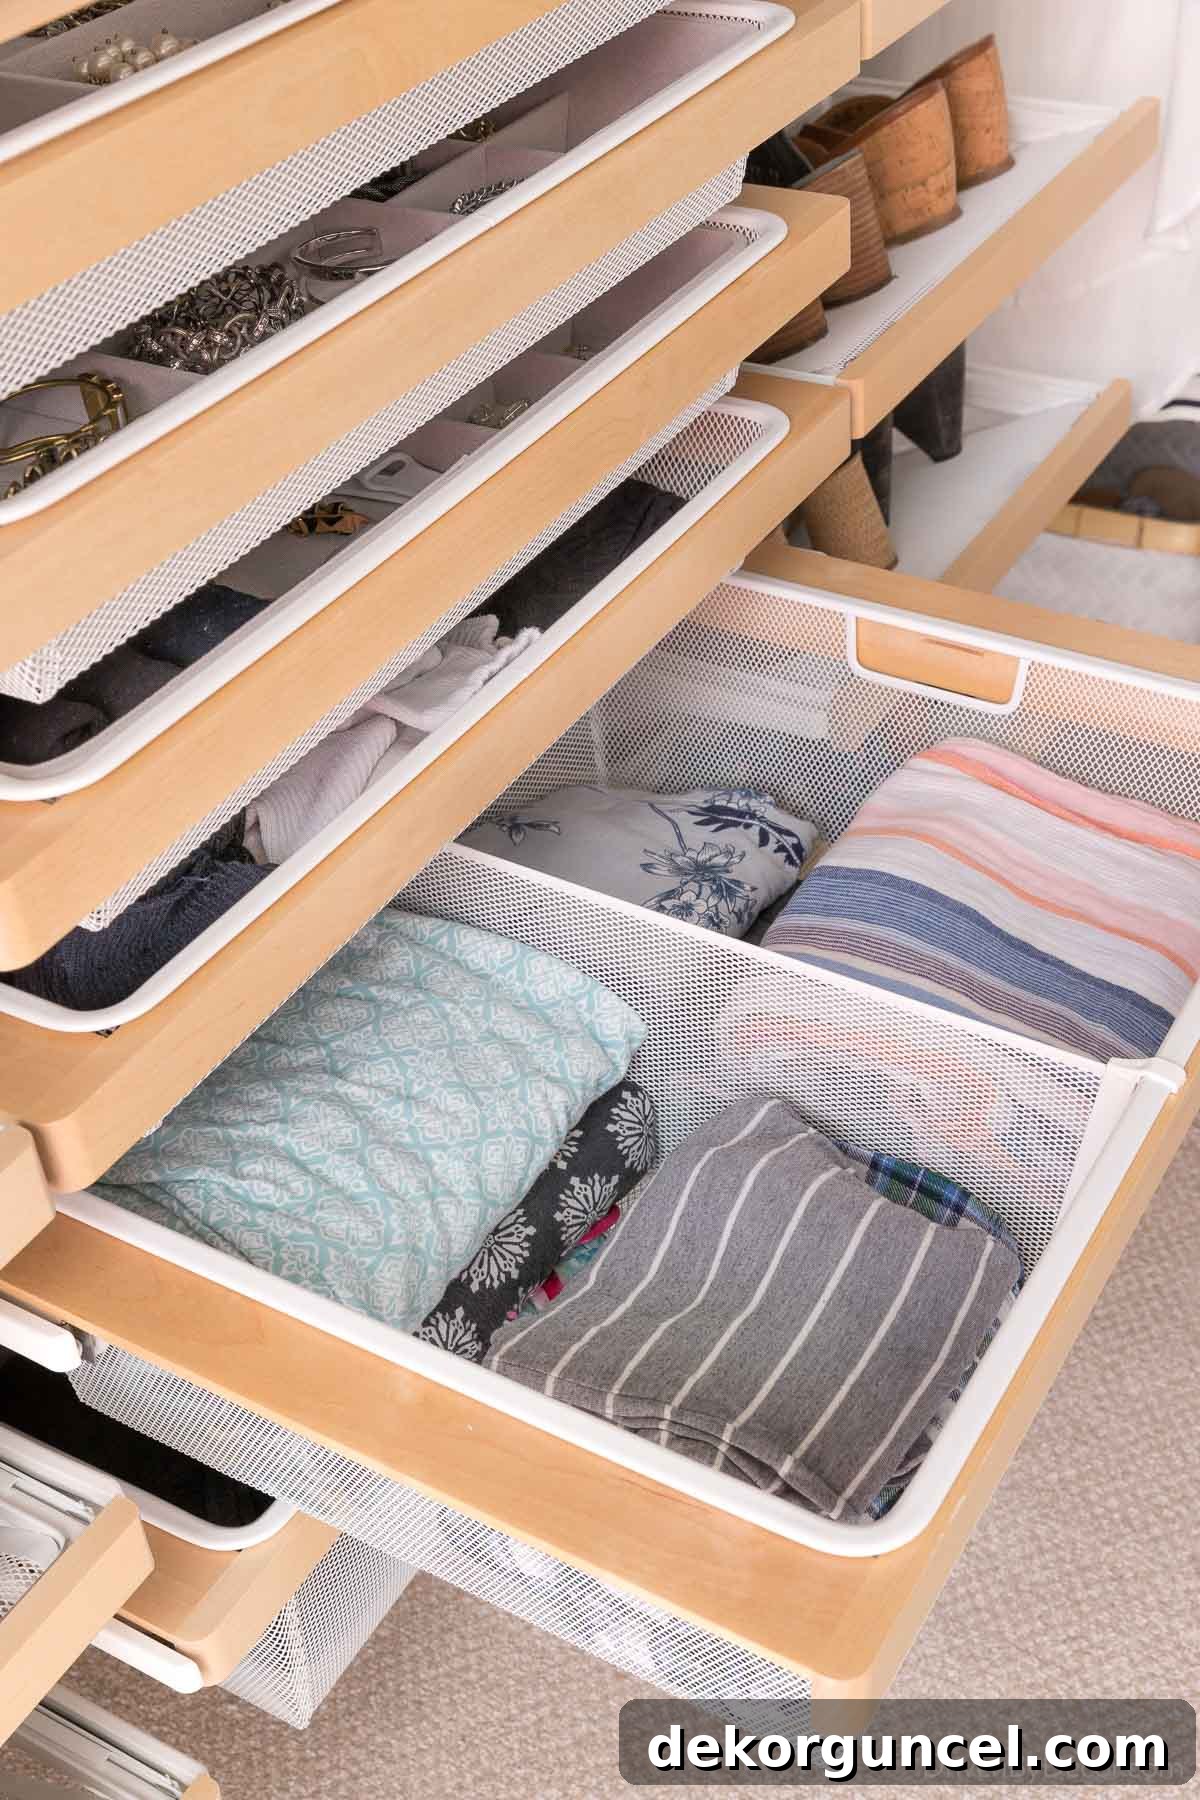
Furthermore, I prefer the squared-off sides of PAX drawers, which facilitate neater stacking of clothes. Elfa drawers, by comparison, feature angled sides, making it slightly more challenging to achieve a perfectly folded and stacked garment arrangement. This seemingly small detail can impact overall organization and visual order within the drawer.
An additional feature of the PAX system, which can be either an advantage or a disadvantage depending on your closet’s specific layout, is that the wardrobe frames include solid back panels. The positive aspect of this design is that if your closet walls are marred by unsightly wallpaper, an unflattering paint color, or numerous nicks and scratches, the PAX wardrobe frames will effectively cover these imperfections. This eliminates the need for extensive wall preparation or repainting in the areas where the frames are placed. Conversely, this solid back can become a negative if your closet has essential wall outlets or floor vents that the wardrobe frames would obstruct, requiring careful planning or modifications to accommodate them.
Finally, and perhaps most crucially for achieving a sophisticated aesthetic, I believe that a meticulously planned and correctly installed IKEA PAX closet system can achieve a higher-end, more “built-in” look than a standard Elfa system. This is particularly true when thoughtful finishing touches are added, such as crown molding seamlessly integrated across the top of the wardrobe frames, which can make the system appear fully custom and architectural.
The Elfa System: Unparalleled Flexibility and Space Maximization
One of the most compelling advantages of the Elfa system is its incredible flexibility and adaptability. Because the only permanently fixed component is the top track, all other elements—shelves, drawers, and hanging rods—can be effortlessly rearranged, added, or removed. This modularity means the system can evolve with your needs. For example, if you initially install an Elfa system in a baby’s closet, optimizing it for infant clothing and supplies, years later, you can easily adjust the heights of clothing rods, integrate new drawers, or eliminate components to suit the changing needs of a growing child. This “grow-with-you” capability ensures long-term utility and value, making it an excellent investment for dynamic living spaces.
This exact reason was a primary driver behind our decision to select the Elfa system for our current closet. Our long-term vision includes adding a smaller, dedicated second closet for Jeff, allowing me to fully claim this larger space for my personal use. When that time comes, the inherent flexibility of the Elfa system will enable me to seamlessly rearrange the layout of its components to perfectly align with my individual storage requirements, ensuring maximum efficiency and organization without needing to purchase an entirely new system.
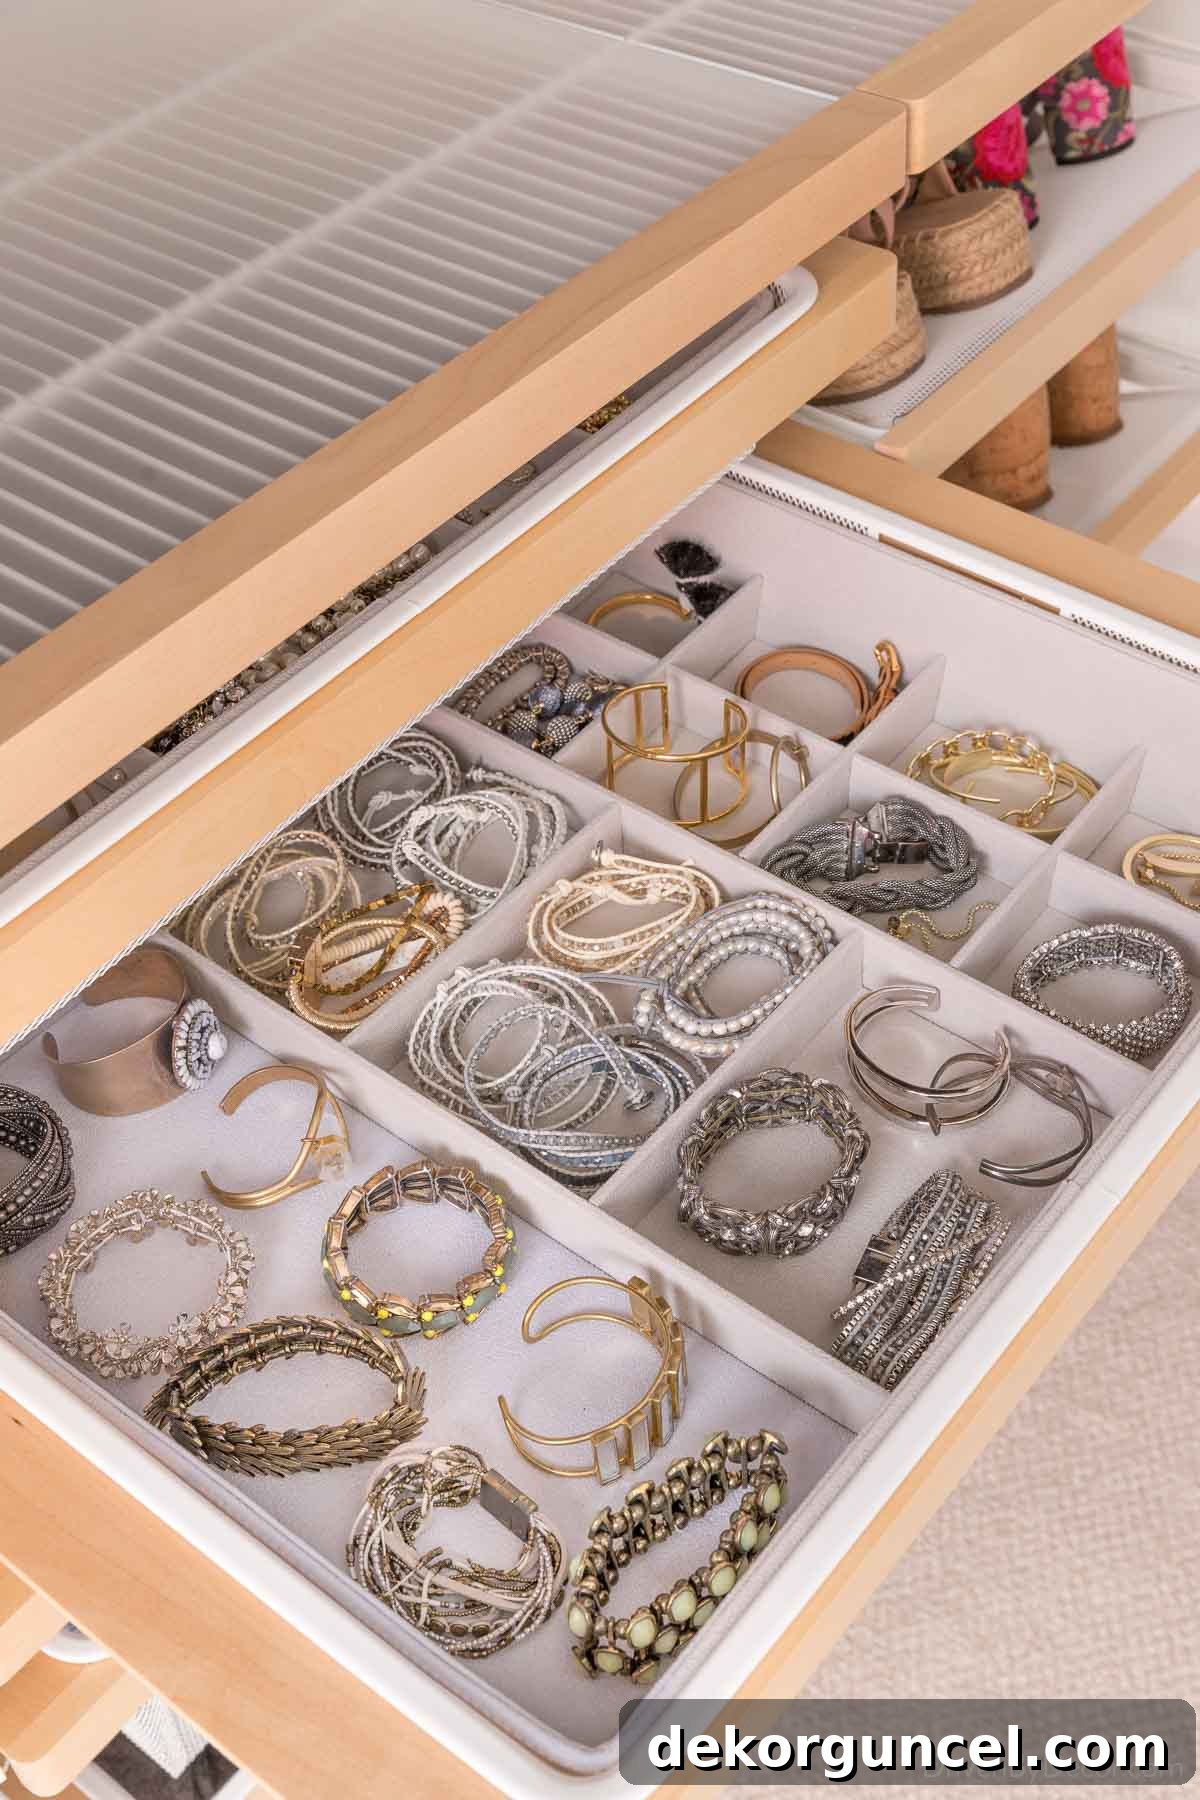
Both the Elfa and PAX systems offer an impressive array of drawer accessory options, allowing for highly specialized organization. For my jewelry collection, I utilized three of {these accessory trays} within my Elfa drawers—one designated for earrings, another for bracelets, and a third for necklaces. This custom configuration proved exceptionally effective, keeping everything beautifully organized and easily accessible.
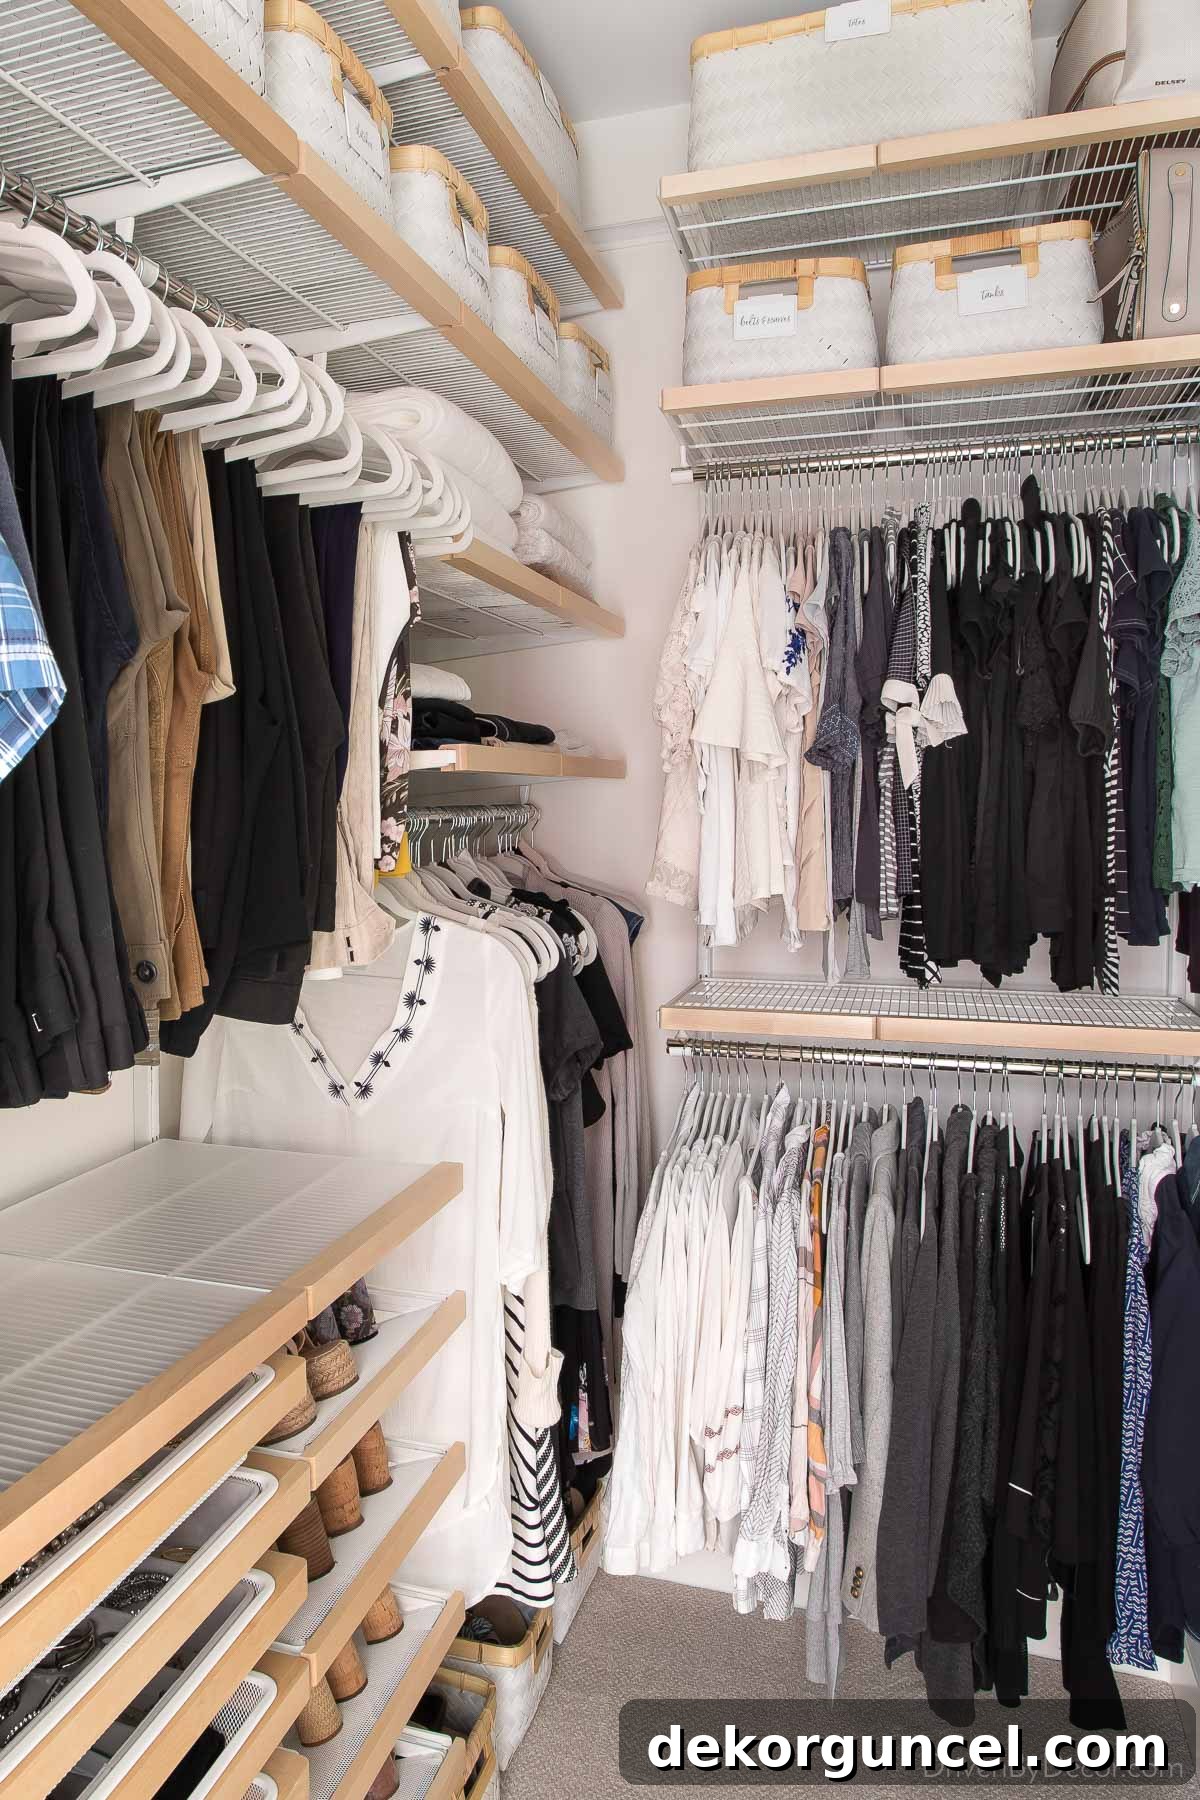
Another significant advantage of the Elfa system is its unparalleled ability to fully utilize the entire vertical height of your closet. As previously noted, the PAX system relies on a series of wardrobe frames, which are only available in two standard height options: 6 feet 7 inches and 7 feet 9 inches. Consequently, if your closet boasts ceilings over 8 feet tall and you wish to leverage all available vertical space for storage, you would typically need to incorporate custom shelving units above the PAX wardrobes, adding complexity and cost. The Elfa system, by contrast, can be precisely tailored to accommodate *any* ceiling height, whether remarkably short or impressively tall, ensuring no valuable vertical space is wasted. The fact that our current closet features generous 9-foot ceilings and our strong desire to maximize this height was a decisive factor in our choice of Elfa this time around, allowing us to build up rather than out, optimizing our storage potential.
Similarly, Elfa allows for the complete utilization of your closet’s entire width. This contrasts sharply with the PAX system, where wardrobe frames come in only three fixed widths. With PAX, you must combine these specific widths to approximate the dimensions of your closet. Unless you happen to have a perfectly sized closet or are building a new space specifically to fit PAX wardrobes, you may end up with awkward gaps or wasted space at the ends. Moreover, the PAX system lacks an effective solution for designing closet corners, often leading to dead space. The Elfa system, however, excels in this area, offering intelligent components specifically designed to maximize corner storage, ensuring every inch is functional.
One final, practical advantage of the Elfa system, particularly when installing it in an existing closet, is that it typically does not require the removal of your existing baseboards. The vertical standards of the Elfa system can be custom-cut to end just above the baseboard, allowing them to sit flush against the wall without obstruction. With the PAX system, to ensure the wardrobe frames sit perfectly flat against the wall, you generally need to either remove the baseboards entirely or install spacers at the top of the wardrobes where they attach to the wall. These spacers match the width of the baseboards, pushing the top of the wardrobe away from the wall to keep the unit fully upright. This small detail can significantly simplify the installation process and reduce potential drywall repair work.
Both the Elfa and PAX systems offer several distinct options for shoe storage, catering to various preferences and footwear collections. For our new Elfa closet, we chose {these mesh gliding shoe shelves}. My experience with them, however, has been a mix of positive and negative aspects.
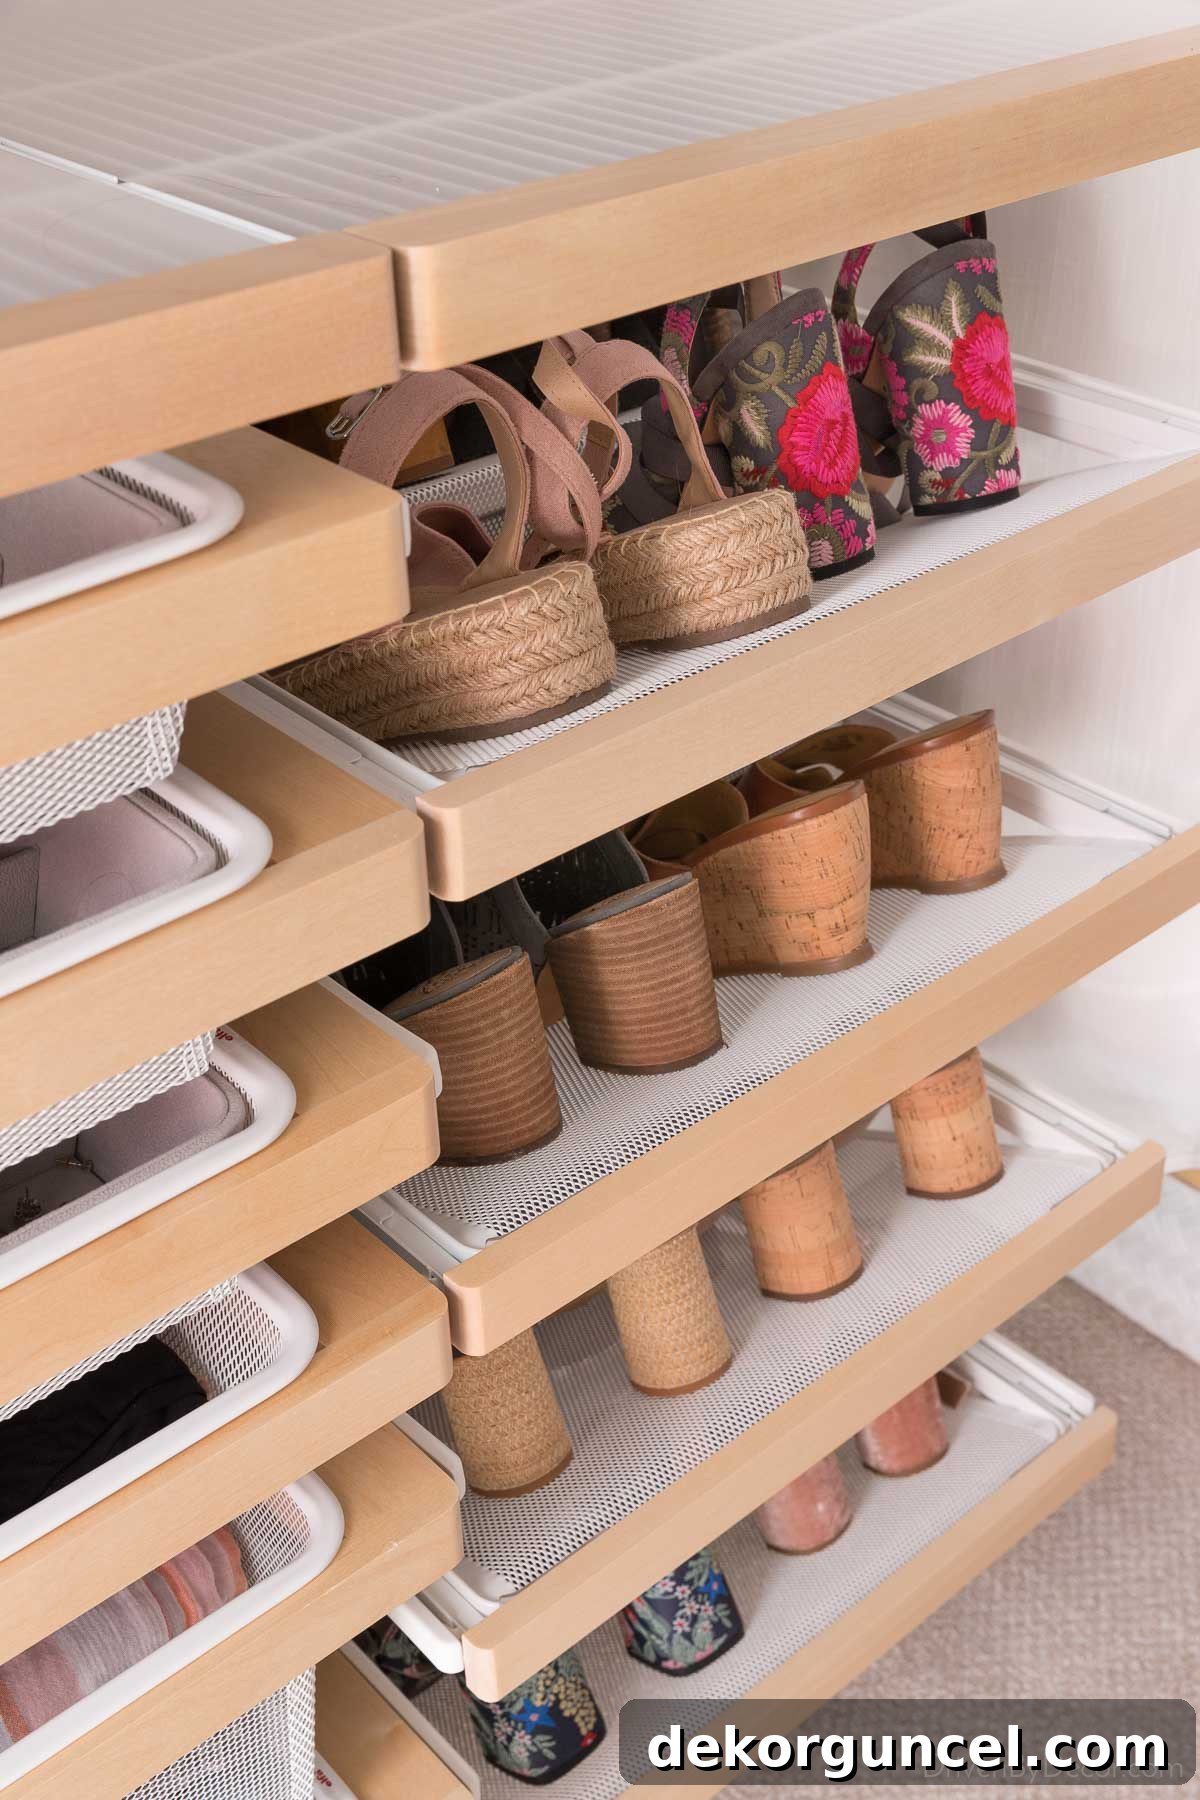
I absolutely love the ease with which you can access your shoes; a simple pull-out motion brings your footwear right to you, eliminating the need to rummage around:
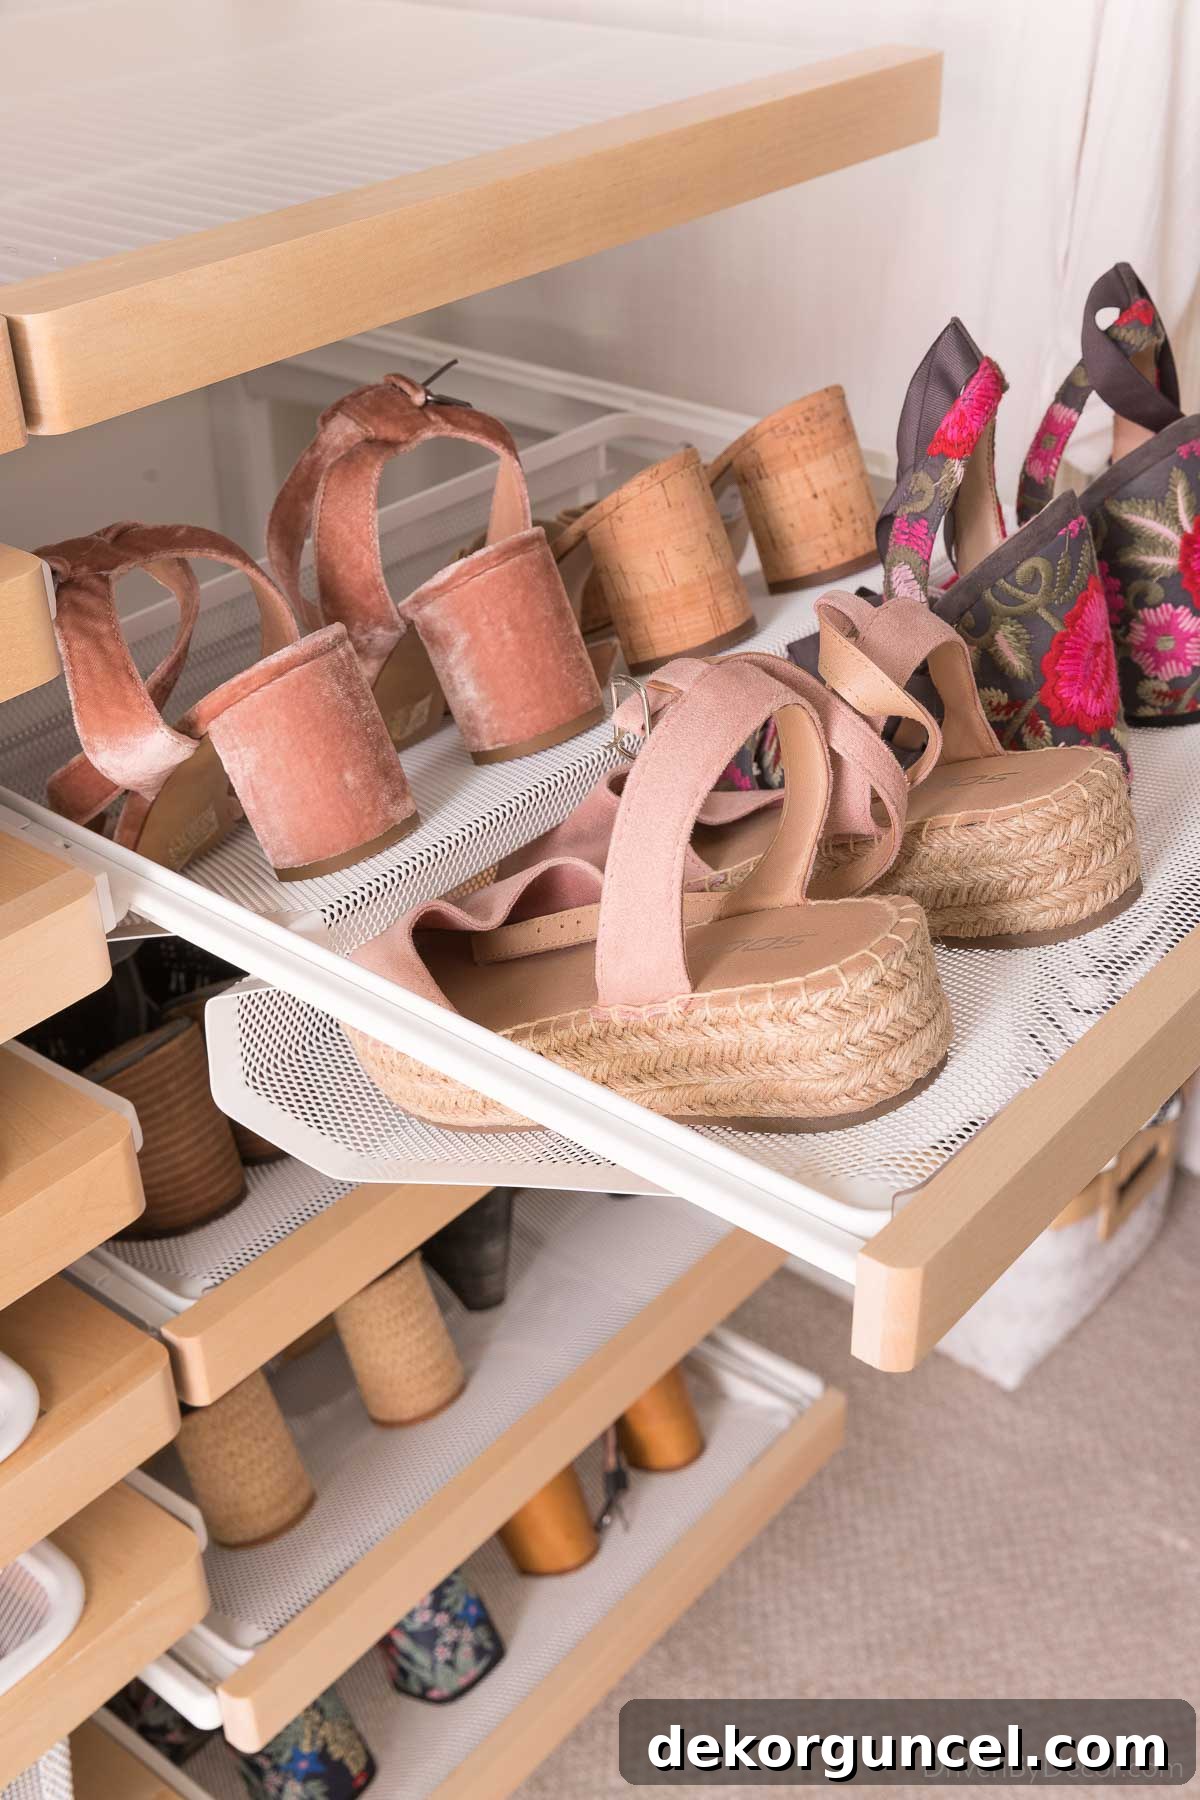
However, a noticeable drawback is that with our current shelf spacing, I’m unable to store some of my taller heeled shoes because they catch on the shelf above. While removing one of the shoe shelves and increasing the spacing between the remaining ones would solve this issue, it feels like a considerable amount of space to dedicate to a relatively small number of shoes. Additionally, while each 24-inch shelf comfortably accommodates four pairs of my shoes, it only fits three pairs of Jeff’s larger shoes, which is another practical consideration:
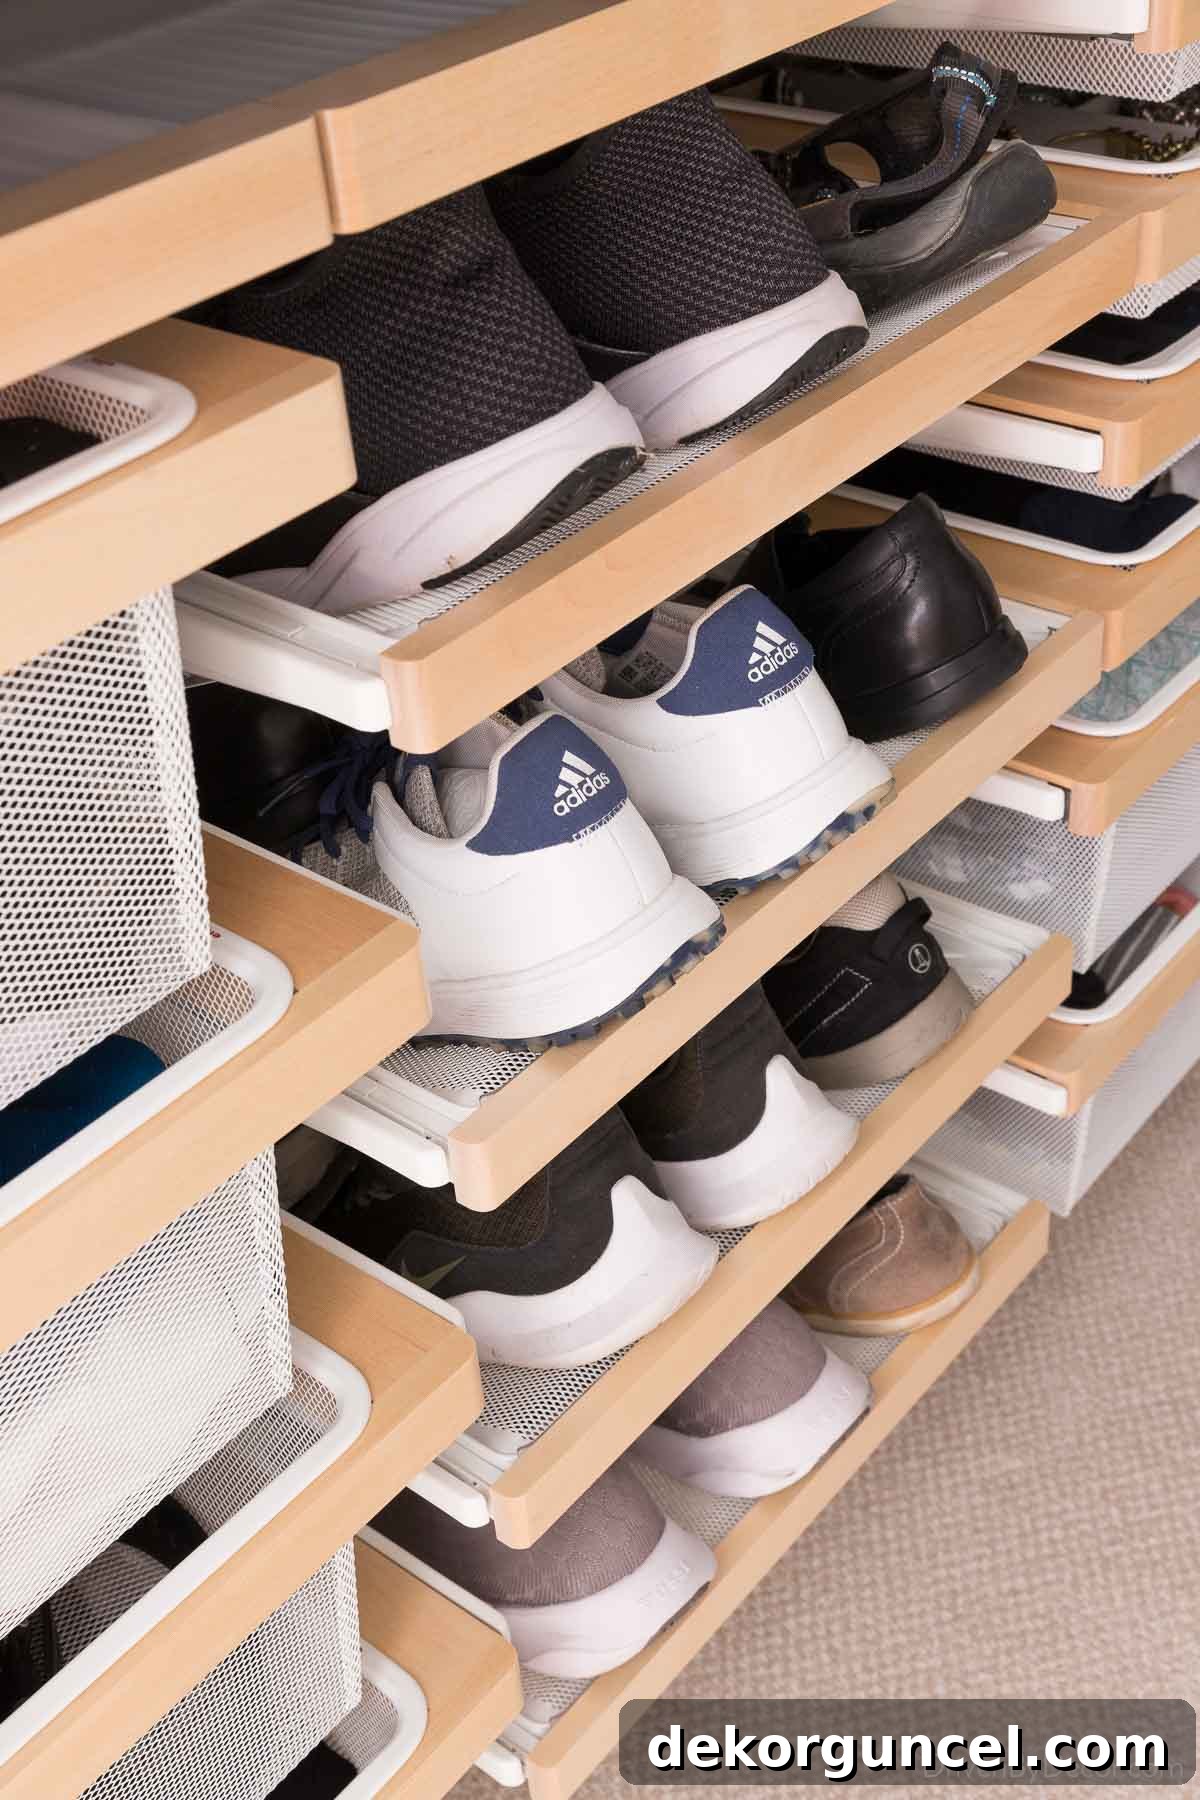
Alternatively, you can utilize Elfa’s more versatile simple gliding shelves for shoe storage, which often allows for greater space maximization and flexibility. And for those wondering about the whereabouts of the rest of my shoe collection, I keep the pairs I use most frequently on these dedicated shoe shelves, while the remainder are neatly stored in three floor baskets positioned beneath our long-hanging clothes, maintaining a tidy and efficient system.
And with that, my comprehensive Elfa closet reveal and comparison post is complete! I sincerely hope this in-depth review has provided you with valuable insights into both the Elfa and IKEA PAX closet systems, empowering you to make the best decision for your home organization needs. If you have any further questions that I haven’t addressed in this article, please don’t hesitate to leave them in the comments section below—I’m always happy to help!
For a different perspective on the Elfa system in a utilitarian setting, I invite you to explore my post on garage organization, detailing our experience installing an Elfa system in the garage of our old house:
Interestingly, a significant portion of that garage system was moved with us to our current home. We’ve since ordered some new Elfa components to expand upon it and are finally getting our garage here whipped into shape. I look forward to sharing more about that exciting transformation with you all very soon!
Seeking even more inspiration to declutter and organize your living spaces? Be sure to check out my post featuring 20 fantastic home organization ideas that can revitalize any room!
Thanks for stopping by and enjoy the rest of your weekend,
