
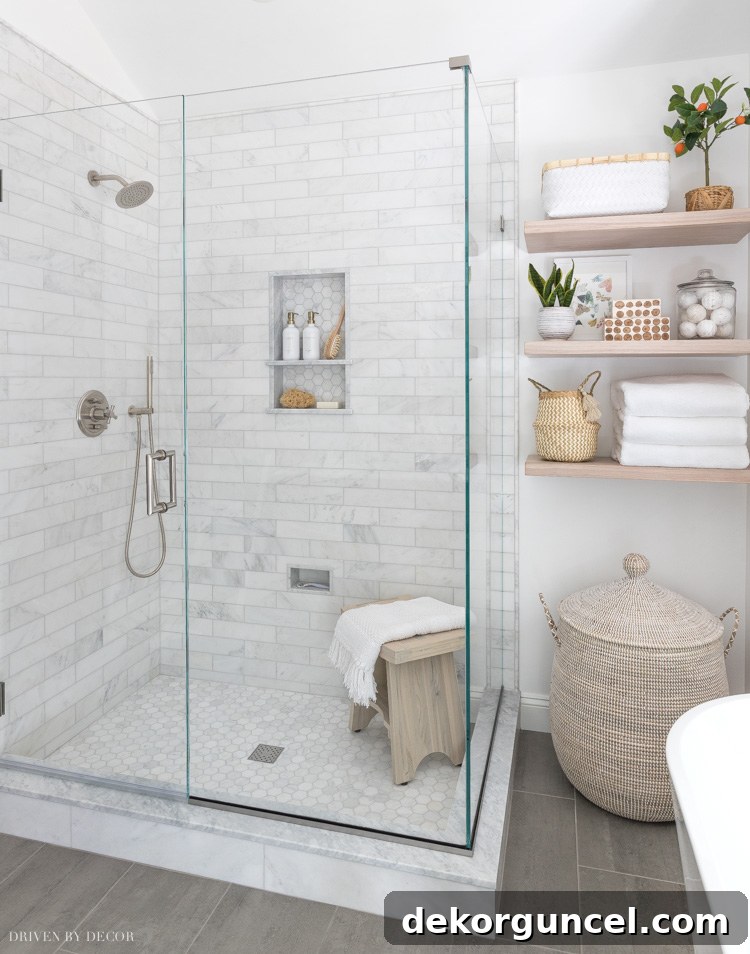
Unlock the secrets to choosing the perfect glass shower enclosure for your bathroom remodel, including a detailed cost breakdown and expert insights on which options are truly worth the investment!
A beautifully designed bathroom is incomplete without a stunning shower. After showcasing our master bathroom renovation’s transformation, one feature that consistently captured your interest was our elegant glass shower enclosure. Today, I’m diving deep into all the intricate details, from the specific options I selected and my reasoning behind each choice, to a comprehensive cost analysis. This guide aims to equip you with all the knowledge needed to make informed decisions for your own bathroom sanctuary. (This post may include commissionable links; for more details, please consult my full disclosure statement {here})
Before we delve into the specifics, here’s a glimpse of our frameless glass shower enclosure that sparked so many questions:
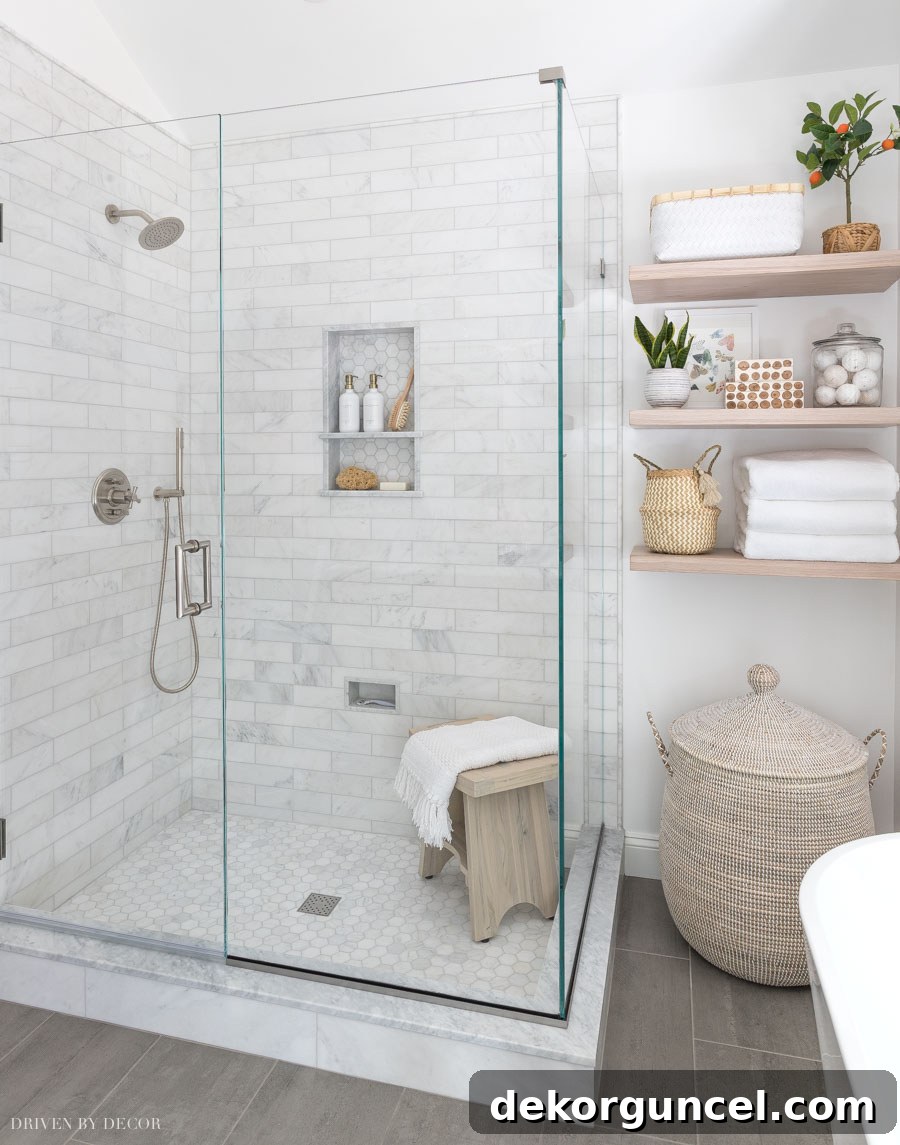
Bathroom Shower Sources: White/Gold Pump Bottles (16 oz) | Natural Body Brush | Sea Sponge | Teak Shower Bench | Large Lidded Hamper Basket | For details and sources on our bathroom floating shelves, please refer to this dedicated post.
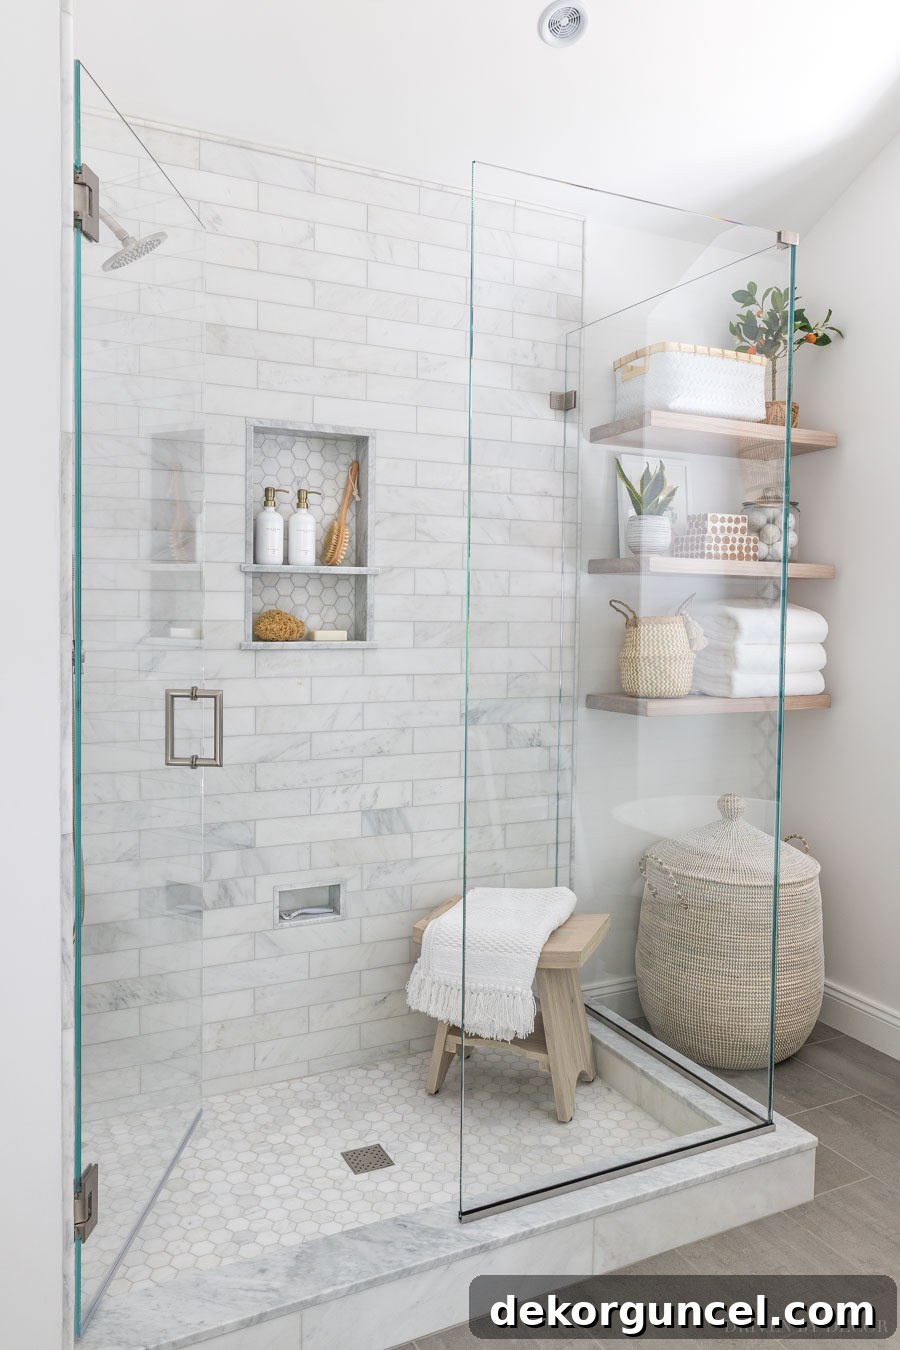
My vision for the shower was one of serene simplicity. I opted for a clean, open design without a built-in shower bench, primarily because I rarely used the bench in our previous shower and preferred the minimalist aesthetic this choice offered. Our chosen frameless glass shower enclosure measures 60 inches long by 37 inches wide, featuring a 28-inch door. The initial cost estimate was certainly a point of consideration – it was higher than I initially anticipated!
The base price I received for the shower enclosure, including professional installation, was approximately $2400. It’s important to note that I obtained multiple bids, and they were all remarkably consistent, indicating a fair market price for my area. However, it’s worth mentioning that construction and renovation costs in Connecticut, where I reside, tend to be higher than in many other parts of the country. This base quote included a frameless unit crafted from standard ⅜-inch tempered glass, brushed nickel wall hinges, a non-mitered door, and a standard 6-inch pull handle. The real complexity, and often the significant cost increase, comes with the array of optional extras. There were numerous decisions to be made, each with its own price tag. I’ll walk you through each option, detailing the additional cost and explaining whether I chose to incorporate it or decided it wasn’t a worthwhile investment for our project.
Frameless Shower Clips vs. U-Channel: A Design and Maintenance Deep Dive
One of the most significant design and practical decisions revolved around how the glass panels would be secured. The choice was between using discrete frameless shower clips at every point where the glass meets the tile or opting for U-channels to support the glass panels, particularly along the bottom. Here’s what a typical shower clip looks like:
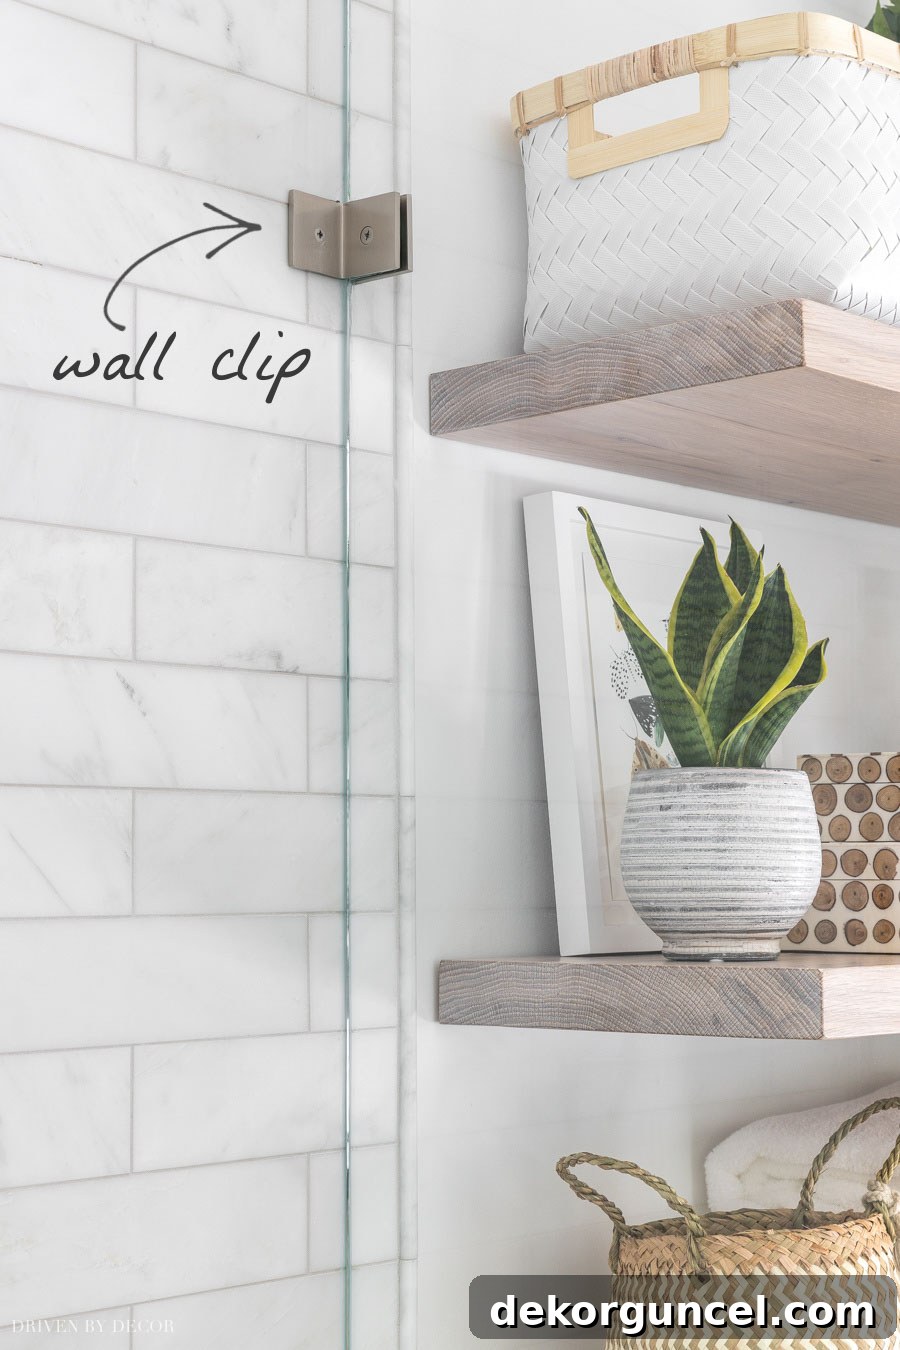
Traditionally, most homeowners gravitate towards an all-clip system for both the sides and bottom of the glass panels. This choice embodies the true essence of “frameless” shower enclosures, where the glass appears to float, supported discreetly by these minimal clips, with no visible channels or framing. However, I took a slightly unconventional path. After careful consideration, I decided to incorporate wall clips along the vertical sides of the glass, but opted for U-channels along the base of the glass panels.
If the term “U-channel” is new to you, it essentially refers to a low-profile, U-shaped metal strip designed to cradle the edge of the glass. The glass panel rests securely within this channel, providing stability and a distinct visual line:
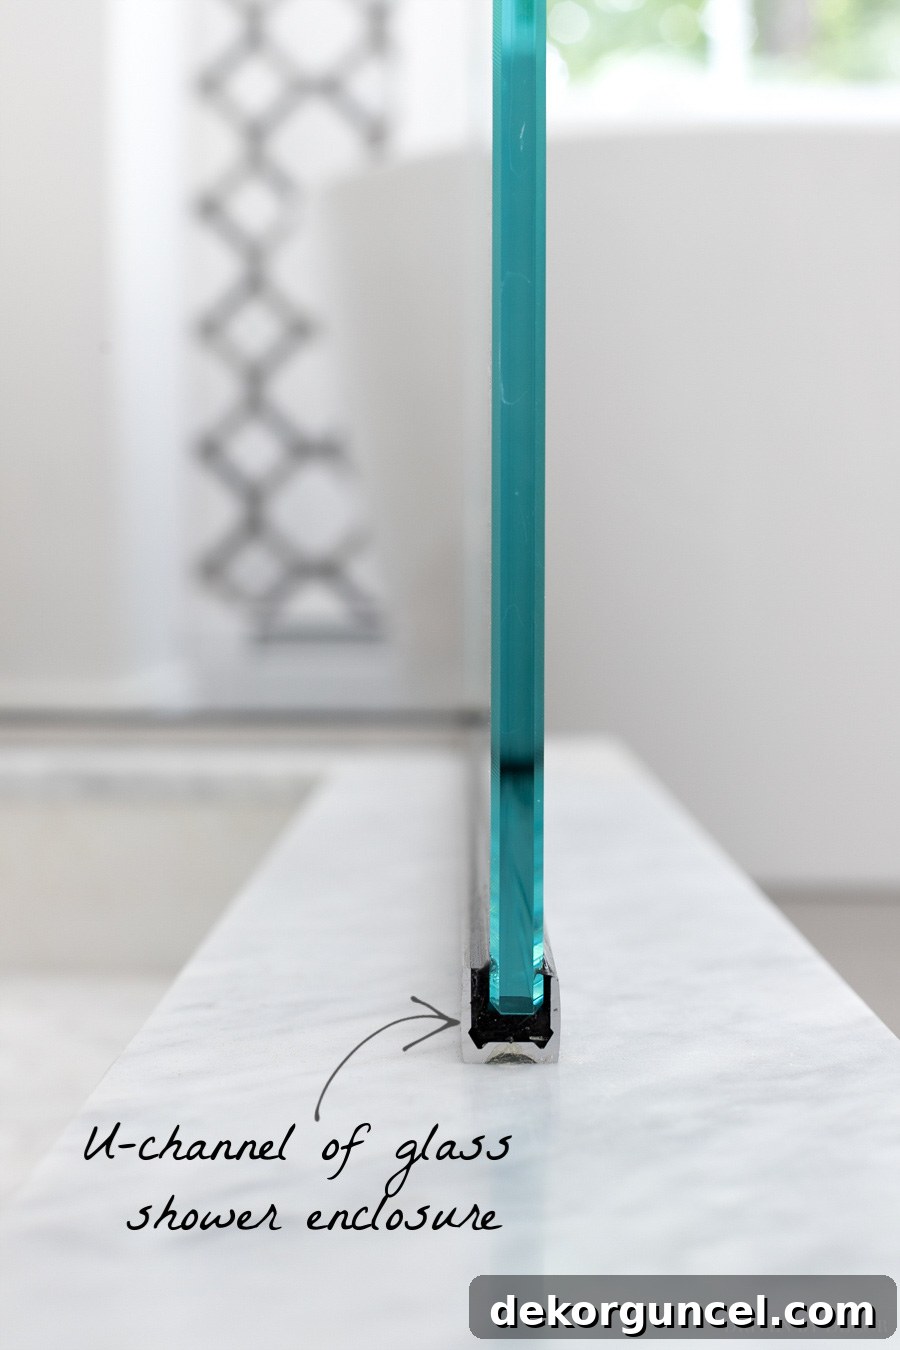
My decision to utilize U-channels was driven by two key factors, blending both practical maintenance considerations and aesthetic preference.
First, from a practical standpoint, when glass shower enclosures rest directly on tile and are sealed with clear caulk, as is the case with an all-clip installation, there’s a common issue: over time, mold and mildew often develop underneath the clear caulk. This subterranean growth is notoriously difficult, if not impossible, to reach and clean without intervention. Consequently, many homeowners find themselves frequently cutting out the mildewed caulk and laboriously re-caulking the seams. This problem is exacerbated with natural stone tiles, like the marble I’ve used, due to their inherently porous nature compared to non-porous porcelain tile (for more insights, see my post on using marble tile in a bathroom). By choosing a U-channel, this recurring mold/mildew problem at the base of the glass is largely circumvented, offering a more hygienic and lower-maintenance solution.
My second reason was purely aesthetic: I genuinely prefer the streamlined and continuous look that the U-channel provides along the bottom edge of the glass, rather than the visual interruption of individual clips:
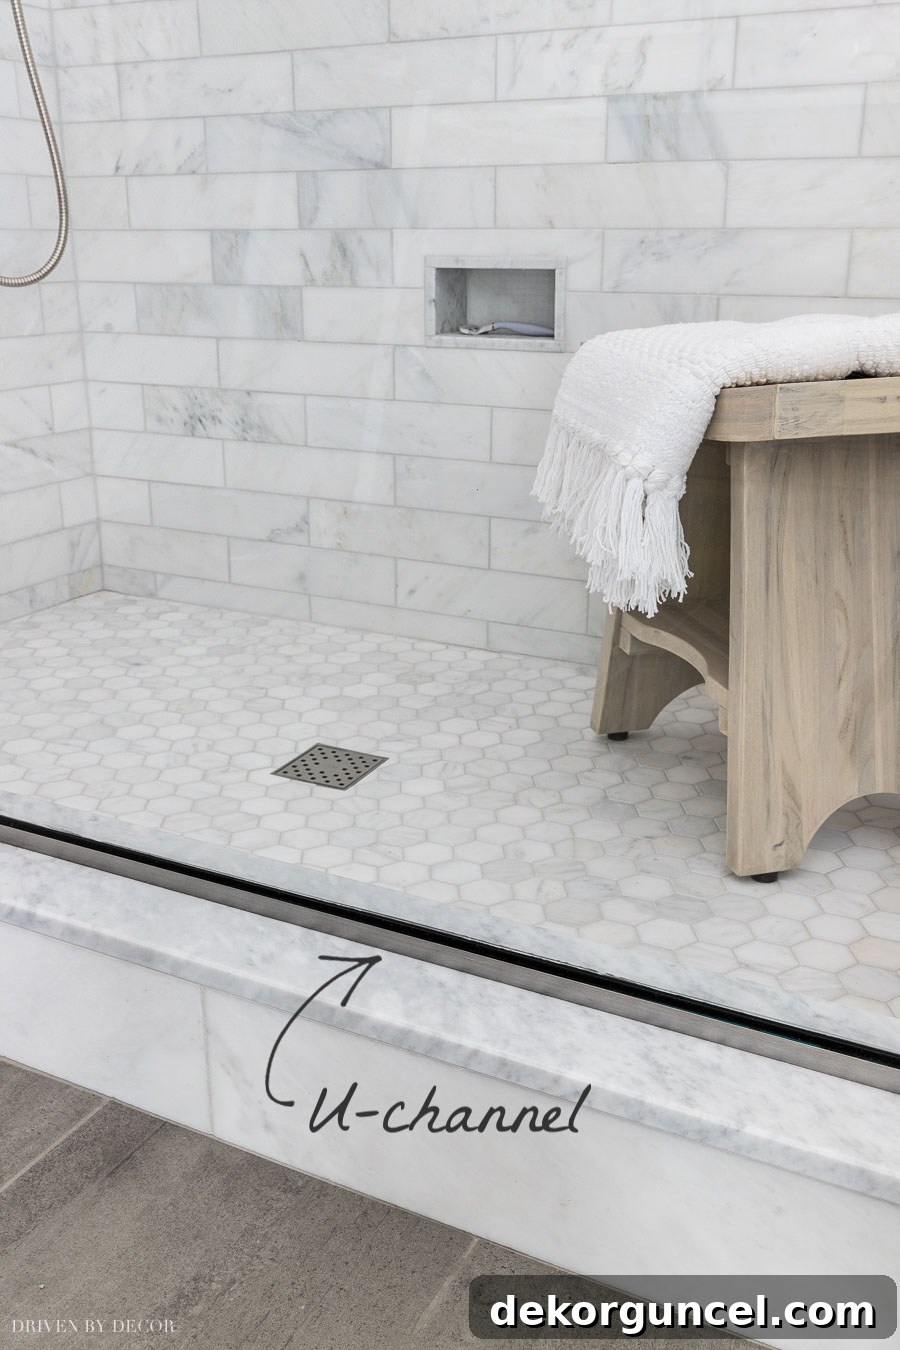
Our overall bathroom design leans towards an updated classic feel rather than an ultra-modern one, and I felt the refined simplicity of the U-channel perfectly aligned with that aesthetic. Regarding cost, some companies might charge approximately $100-$200 less for installations utilizing U-channels compared to clips. This is because the precision required for the glass cut along the bottom edge is slightly less demanding with a U-channel, which offers some forgiveness. However, in my specific quote, the price remained the same regardless of which option I selected.
Glass Treatment to Prevent Water Spots: A Worthwhile Investment?
Another popular add-on option for glass shower enclosures is a specialized glass treatment. This treatment effectively seals the microscopic pores in the glass surface, rendering it significantly more resistant to unsightly water spots, soap scum, and mineral stains. Depending on the manufacturer, this treatment can be applied during the glass fabrication process (factory-applied) or sprayed on as a sealant after production. Its primary benefit is to help maintain the clarity and brilliance of your shower glass over time, preventing it from becoming cloudy or dull.
This option is particularly beneficial if you live in an area with hard water, which is notorious for leaving mineral deposits, or if you admit that your track record for consistently cleaning shower glass isn’t the best. However, the quoted cost for this premium glass treatment was an additional $540 – a substantial increase! After much deliberation, I decided to forgo this option. My strategy was to commit to more diligent regular cleaning to keep our overall shower enclosure cost closer to our initial budget. I am also considering trying out {this spray-on glass treatment}, which offers similar benefits, albeit requiring more frequent reapplication. While I chose to pass, I know many individuals who absolutely swear by the factory-applied glass treatment, citing how dramatically it simplifies the maintenance of their shower. It remains to be seen if this is a decision I might eventually regret, but for now, the cost saving was prioritized.
Regular Glass vs. Low Iron Glass: Achieving True Clarity
One detail often overlooked until pointed out is the subtle tint present in standard shower glass. Due to its inherent thickness and iron content, conventional glass typically exhibits a faint greenish hue. For those striving for absolute pristine clarity, an upgrade to “low iron glass” is available. This specialized glass is manufactured with a significantly reduced iron content, resulting in a product that is exceptionally clear, virtually free of any greenish tint. It’s known by various names such as ultra-clear glass, opti-white glass, or Starphire glass, among others. Beyond its transparency when viewed directly, the edges of low-iron glass also present a different appearance; instead of the characteristic green edge of standard glass, it displays a more subtle bluish tint:
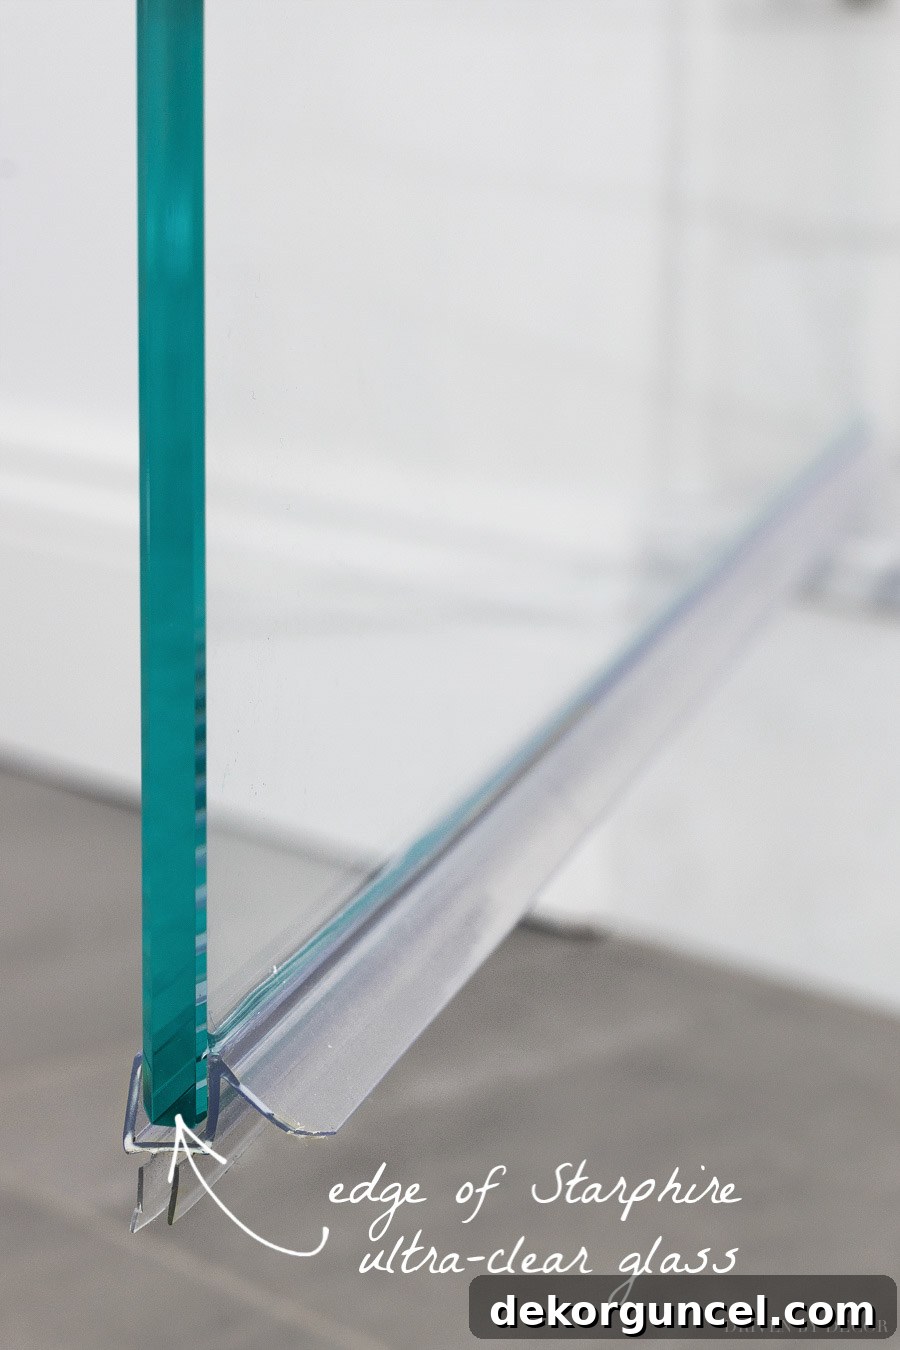
This particular decision sparked considerable internal debate, primarily due to its significant cost – I was quoted an additional $648 for this upgrade. After extensive research and gathering numerous opinions, the consensus I found was that if your bathroom features darker tiles or a more vibrant color scheme, the subtle green tint of regular glass might not be noticeable enough to justify the extra expense. However, if your bathroom boasts white or very light-colored tiles, as mine does, the difference becomes quite perceptible, and the green tint can subtly alter the perceived color of your beautiful tilework. For me, preserving the true color of my carefully selected white shower tile was paramount. As much as it pained me to incur another substantial cost, this was the one expensive add-on we decided to invest in. I absolutely adore my shower tile, and I didn’t want a final decision on our bathroom design to detract from the overall aesthetic or leave me feeling dissatisfied with the end result.
And I can unequivocally say, it lived up to its hype! Observing my bathroom tile through the ultra-clear glass of the shower enclosure, and then through the open door, reveals absolutely no perceivable change in color or tone. The clarity is exceptional, allowing the tile to shine in its true glory:
Shower Glass Thickness: ⅜″ vs ½″ – Stability and Aesthetics
When selecting shower glass, thickness is another factor to consider. The industry standard and most commonly used glass thickness for shower enclosures is ⅜ of an inch. However, many suppliers offer an upgrade to ½-inch thick glass, which in our case, would have added another $648 to the total cost. The primary advantage of ½-inch glass is the enhanced stability and robust feel it provides, particularly for larger panels or doors. Additionally, some individuals simply prefer the look and substantial presence of thicker glass, which can convey a sense of higher luxury and durability.
Unless you fall into the category of those who specifically desire the aesthetic of thicker glass (personally, I lean towards the sleeker appearance of thinner glass), the main compelling reasons to choose ½-inch glass relate to structural integrity. This upgrade is highly recommended if you have exceptionally tall glass panels, typically exceeding 80 inches in height, or if your shower door is hinged directly off one of your fixed glass panels rather than being hinged securely to the adjacent wall, as ours is:
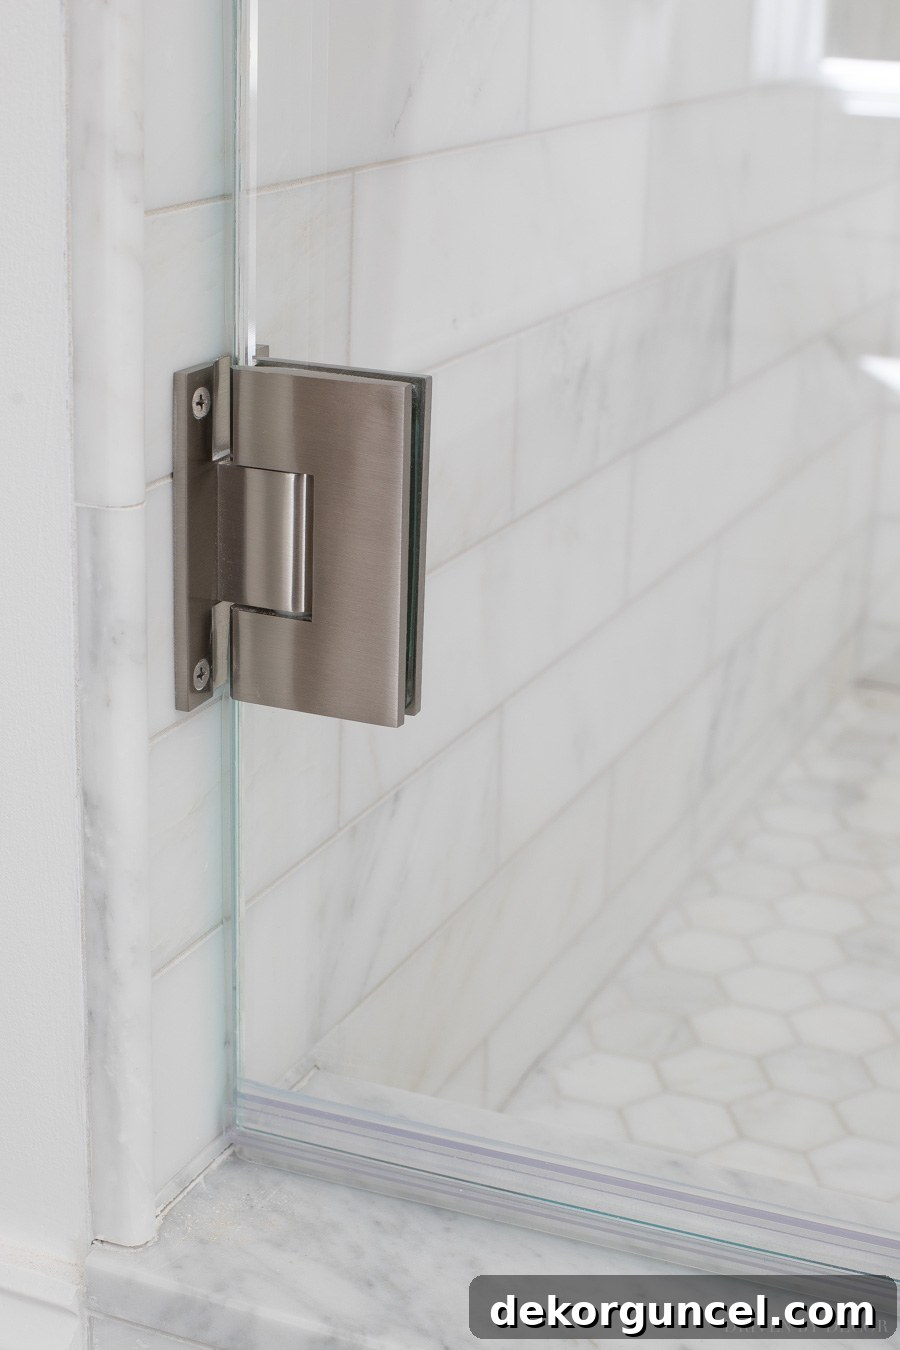
Given that our shower design did not feature exceptionally tall panels or a door hinged off another glass panel, this decision was straightforward for me. We opted to stick with the more economical and perfectly adequate ⅜-inch glass, which suited our needs without compromising safety or aesthetic appeal in our specific configuration.
Decorative Handles: A Touch of Personal Style
While the functionality of a shower door handle is paramount, its design contributes significantly to the overall aesthetic of your shower enclosure. Most shower door companies typically include a standard curved handle, usually on both sides of the glass door, within their basic pricing package. However, the opportunity to upgrade to a different style of handle is almost always available, with pricing varying based on the complexity and material of the design. I wasn’t particularly drawn to the generic standard handle and felt it didn’t quite align with the elevated design of our bathroom. Instead, I chose an upgraded decorative handle that beautifully complemented the intricate tile design on our tub wall, creating a cohesive and sophisticated look:
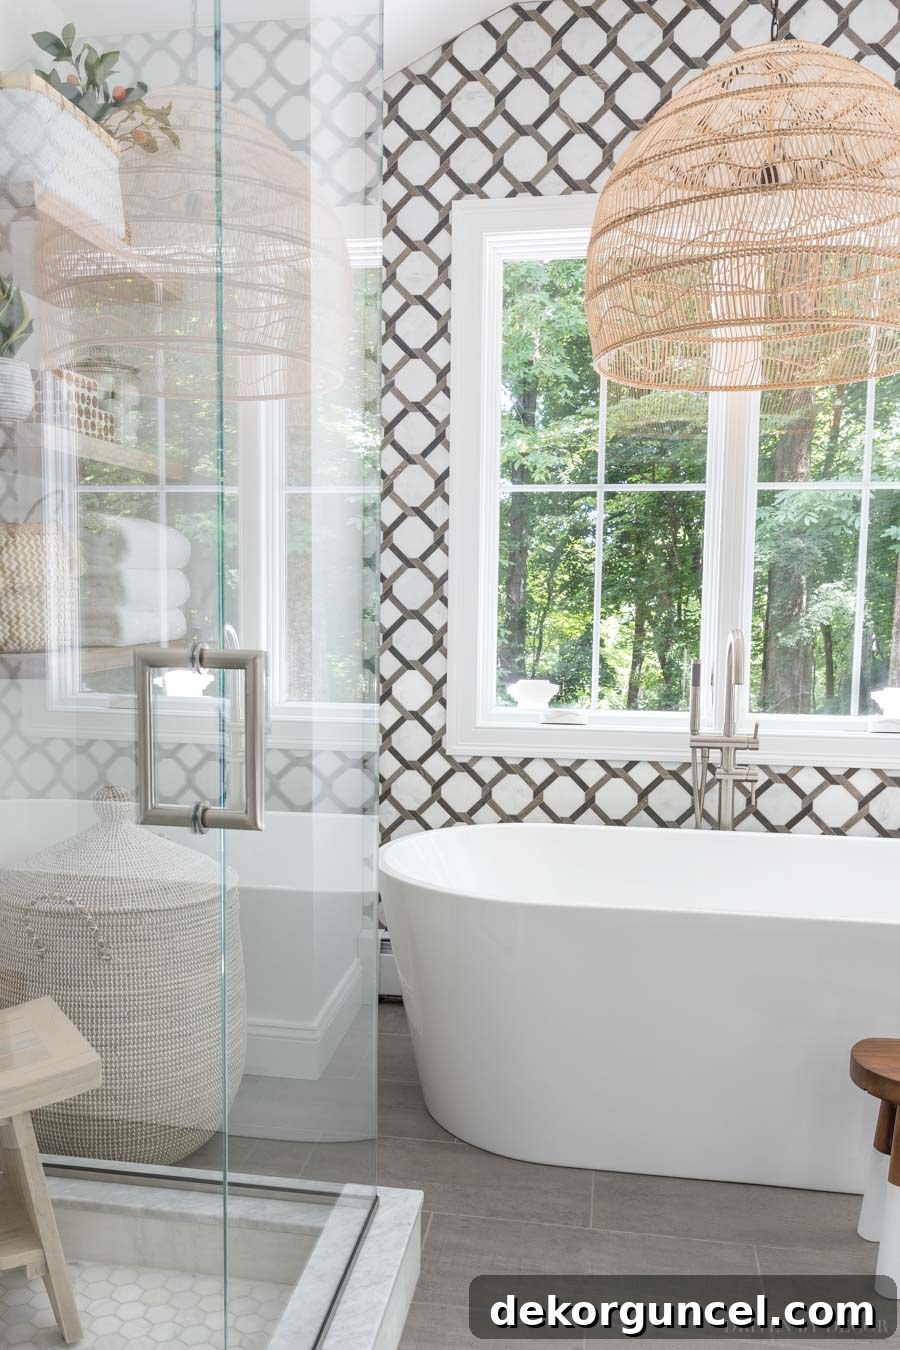
The additional cost for this particular aesthetic upgrade was $200, an investment I considered worthwhile for the personalized touch it added to our shower enclosure.
Robe Hooks or Towel Bar: Integrated Convenience vs. Clean Lines
Many homeowners appreciate the convenience of having towels readily accessible within or immediately outside the shower. To accommodate this, there are several options for integrating towel hanging solutions directly onto the glass shower enclosure. One common choice is a robe hook. I was quoted an additional $125 per hook for this feature. These hooks are typically installed on both sides of the glass – allowing you to hang a fresh towel inside the shower before use, and then hang the wet towel on the exterior side to dry afterward. Another option is to add a towel bar, often designed as an extension of the door handle itself, which can be installed on one or both sides of the door.
My overarching goal for our shower enclosure was to maintain its clean-lined, minimalist aesthetic. Therefore, I opted against incorporating either integrated robe hooks or a towel bar onto the glass. Instead, to provide ample and stylish towel hanging space, I installed {these three elegant robe hooks} on the wall adjacent to our vanity area:
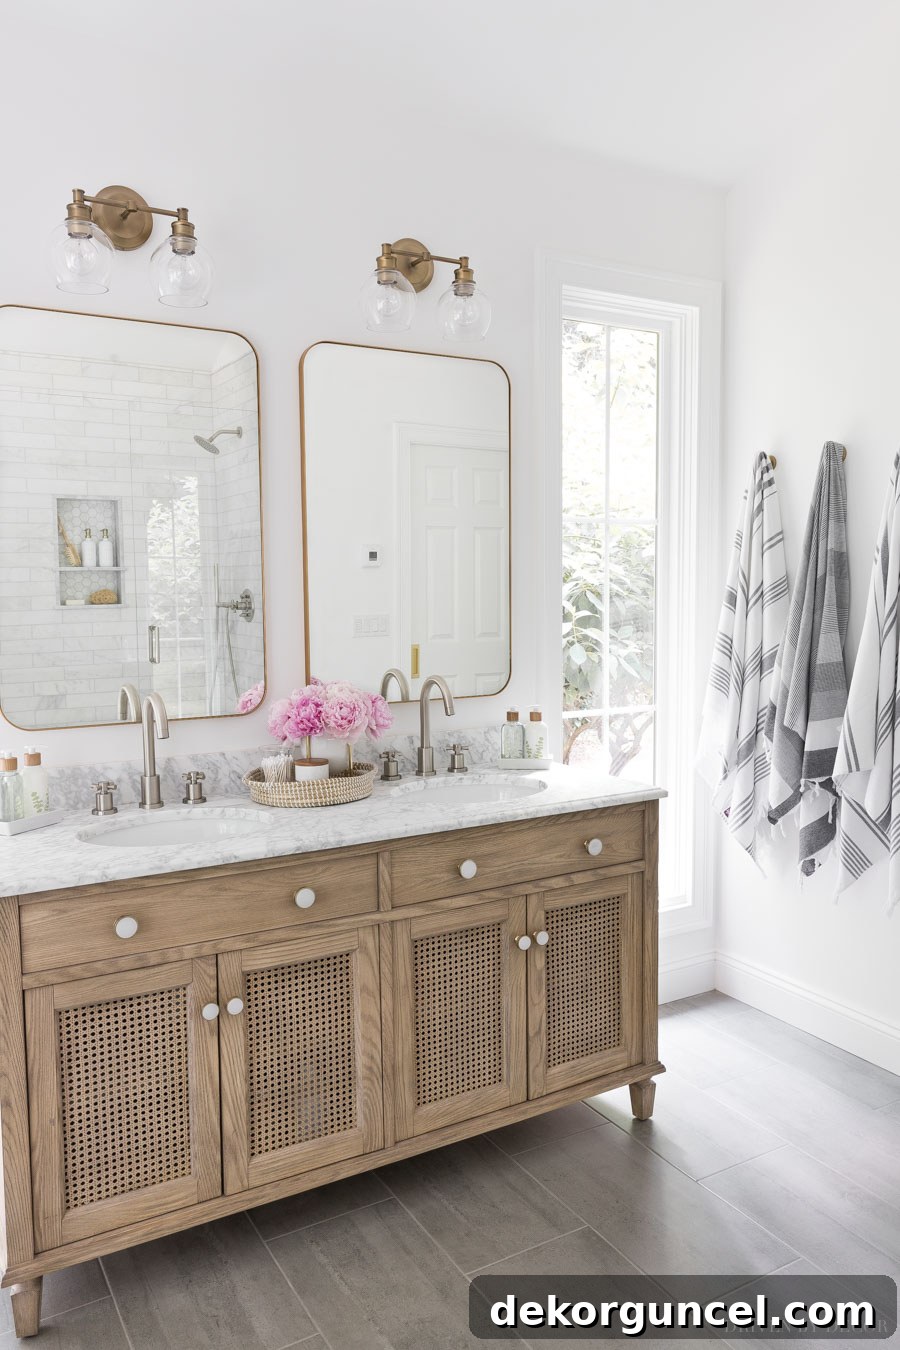
Vanity Area Sources: Wood & Rattan Double Vanity | Elegant Vanity Knobs | Stylish Vanity Lights | Gold Vanity Mirrors | Soap & Lotion Sink Set with Tray | Gray & White Striped Towels
Exploring Additional Shower Enclosure Options
Beyond the major decisions, there were still a few more choices to consider that could impact both functionality and cost:
- Mitered Glass Door: This option, priced at an additional $180, involves a specialized cut on the door’s edge that allows it to open only outwards. The main benefit of a mitered edge is its ability to create an exceptionally tight seal when the door is closed, effectively minimizing the risk of water leaking out of the shower. However, I personally value the flexibility of having our shower door swing both inwards and outwards, finding it more convenient for cleaning and ventilation. Consequently, this was an easy “no thanks” for me. I’m pleased to report that even without the mitered edge, we haven’t experienced any leaking issues since installation.
- Custom Height: I desired our shower enclosure to be slightly taller than the standard height, specifically ensuring it extended above our shower head. This custom adjustment incurred an additional cost of $100, a small investment for a more aesthetically pleasing and functional enclosure.
- Premium Finish for U-channel and Framing Clips: The standard finish for U-channels and framing clips is typically anodized aluminum, which offers a decent appearance. However, an upgrade was available to a brushed nickel finish applied to real brass framing, matching the exact brushed nickel of our wall hinges and handle. This premium option came with a significant price tag of an additional $580. While it would have provided a truly seamless match, I decided to pass on this upgrade, as the standard finish was sufficiently complementary and the cost saving was more appealing for a detail that wouldn’t be overtly prominent.
The Final Tally: Total Cost for Our Glass Shower Enclosure
The journey to selecting and installing a glass shower enclosure can present a wide range of costs, heavily influenced by the choices made regarding extras and upgrades. For our specific project, the total estimated cost for our shower enclosure, including professional installation, initially ranged from $2420 to a high of $5516, depending on how many optional features we decided to incorporate. After careful consideration, starting with our base price of $2420, we added the essential ultra-clear (low iron) glass for true clarity ($648), an upgraded decorative handle for a personalized touch ($200), and the custom height adjustment ($100). This brought our final total cost to $3368. Yes, that’s undeniably an expensive investment!
However, as I previously mentioned, I diligently obtained multiple estimates from various reputable providers, and they were all within a tight 10% range of each other. This consistency gives me confidence that our final cost is a good representation for the Connecticut/NYC metropolitan area, where prices for custom home improvements tend to be on the higher side. It’s crucial for readers to understand that this pricing can vary significantly. Something similar in a different region of the country will likely cost less, sometimes substantially less, highlighting the importance of obtaining local quotes for your specific project.
Phew… we’ve covered a lot of ground! Who would have thought that the process of purchasing and customizing a shower enclosure could be so detailed and complex? I sincerely hope this comprehensive guide provides invaluable assistance to anyone currently navigating a major bathroom renovation or planning one for the future. Understanding these intricate details can truly empower you to make the best decisions for your space and budget. If you’re looking for more inspiration and practical advice on bathroom transformations, you’ll find these related posts incredibly helpful:
Master Bathroom Remodel Ideas: My Ten Favorites!
Essential Bathroom Measurements: A Must-Have Guide
Warmly,
