
Transform Your Dated Ceiling Fan: A Comprehensive Spray Painting Guide for a Modern Home
Is your ceiling fan a relic from another era, complete with shiny brass accents that scream “outdated”? You’re not alone! Many homes feature older ceiling fans that, while functional, detract from a modern aesthetic. While a full replacement can be costly and time-consuming, there’s a surprisingly simple, budget-friendly solution that delivers a dramatic impact: a quick spray paint makeover. In just a few easy steps, you can revitalize your old ceiling fan, making it look brand new and seamlessly integrated into your contemporary home design. Today, we’ll walk you through a detailed, step-by-step guide to painting your ceiling fan, transforming it from a dated fixture into a stylish focal point. Get ready to give your living space an affordable and impressive glow-up! (Note: This post may include commissionable links; for more information, please see our full disclosure statement {here})
Before the Transformation: A Glimpse at the Past
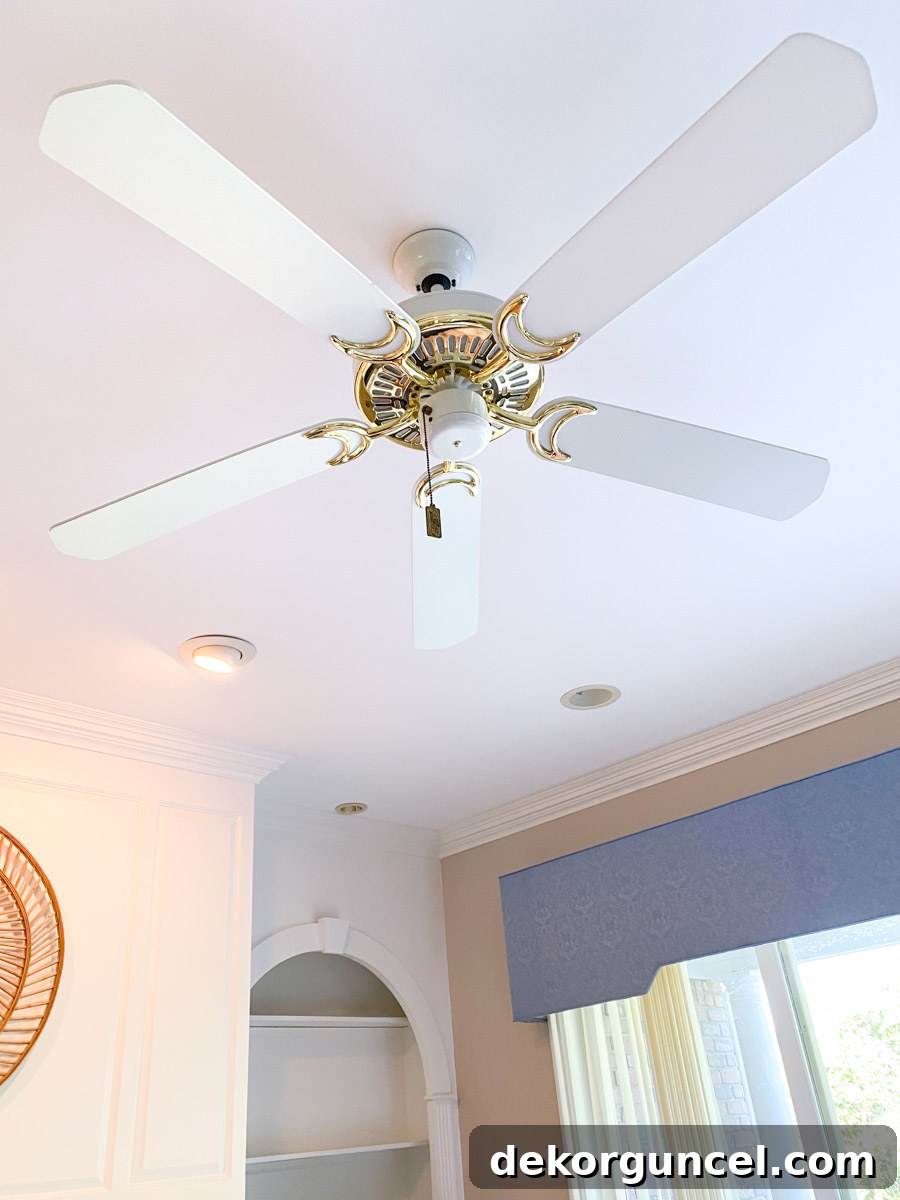
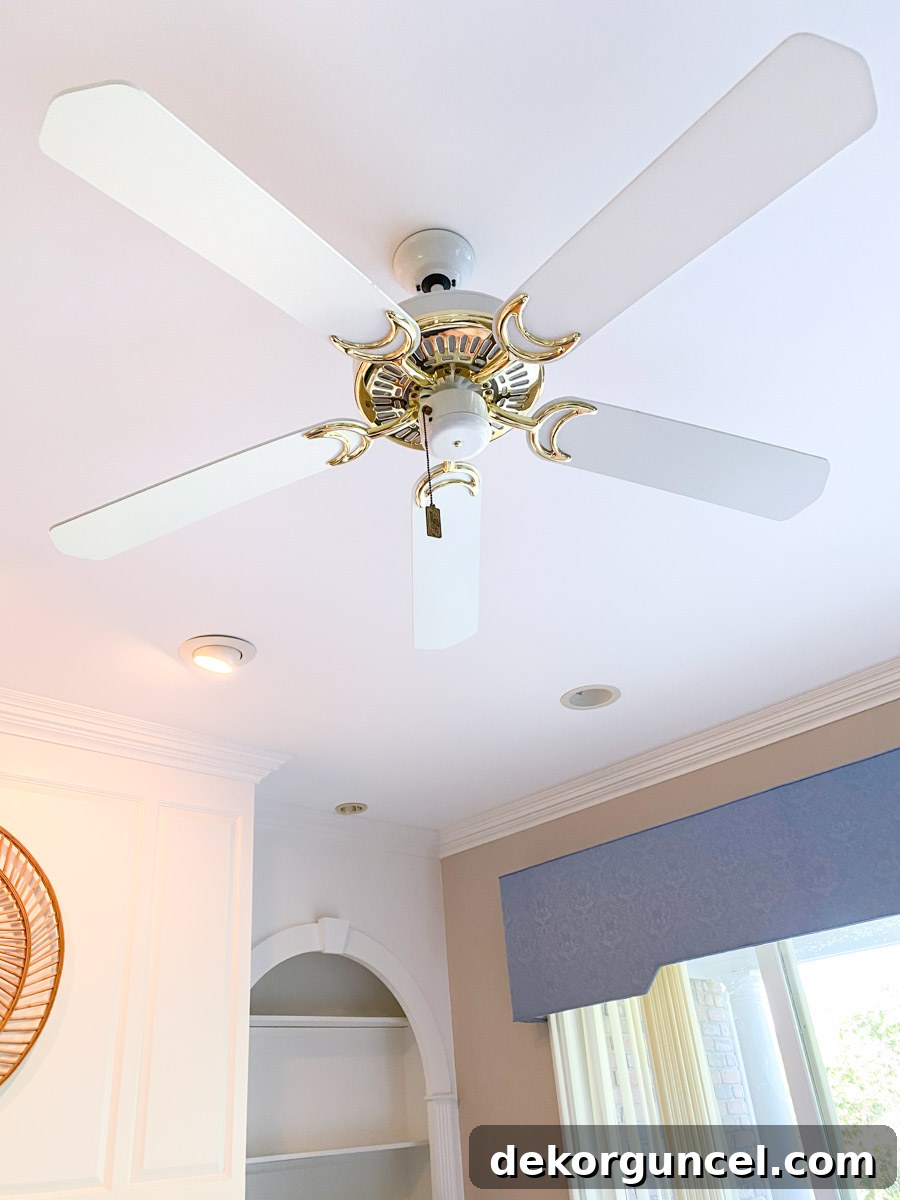
Before we dive into the exciting process, let’s take a moment to appreciate the “before” state. Our family room’s ceiling fan, with its stark white body and prominent brass accents, was a quintessential representation of 1990s decor. While it served its purpose, it certainly wasn’t adding to the room’s overall charm.
Why Choose to Paint Your Ceiling Fan?
Beyond saving money on a full replacement, painting offers several compelling advantages:
- Budget-Friendly: A can or two of spray paint is significantly cheaper than a new ceiling fan.
- Customization: You can choose any color to perfectly match your decor, offering endless design possibilities.
- Eco-Friendly: Repurposing existing items reduces waste.
- Quick & Easy: This project can often be completed in a single weekend, including drying time.
- Dramatic Impact: A small change like updating a fan can dramatically modernize the feel of an entire room.
Essential Tools and Materials for Your Ceiling Fan Makeover
To ensure a smooth and successful project, gather all your supplies before you begin. Having everything on hand will help you stay organized and efficient.
- Screwdrivers: Philips and flathead, suitable for your fan’s screws.
- Breaker Finder or Label: To easily identify the correct circuit breaker.
- 220-Grit Sandpaper: For light scuffing to ensure paint adhesion. Consider a sanding sponge for easier handling of curved surfaces.
- Microfiber Cloths: For wiping down parts.
- Degreaser or All-Purpose Cleaner: To remove grime and oils.
- Protective Gear:
- Safety Glasses: Essential for protecting your eyes from dust and paint particles.
- Respirator Mask: Crucial for protecting your lungs from paint fumes and sanding dust.
- Gloves: To keep your hands clean.
- Spray Paint: Choose a high-quality spray paint designed for metal. A “paint + primer” formula can save a step. Consider a high-heat formula if any part of your fan’s motor housing will be painted, though typically only the decorative elements are done.
- Cardboard or Tarp: To protect your work surface from overspray.
- Styrofoam Block or Small Cardboard Box: Handy for holding screws upright for painting.
- Optional: Spray Can Trigger Handle: Enhances comfort and helps achieve a more even spray.
Step-by-Step Guide: How to Spray Paint Your Ceiling Fan
Phase 1: Safe Disassembly and Preparation
Safety is paramount when working with electrical fixtures. Always begin with proper precautions.
Step 1: Cut Power to the Fan
This is the most critical first step. Locate your home’s electrical panel and identify the circuit breaker that controls power to your ceiling fan. Flip the switch to the “off” position. To double-check, try turning on the fan or the light switch in the room. If it doesn’t work, you’ve successfully cut the power. This ensures there’s no risk of electrical shock during disassembly.
Step 2: Carefully Disassemble the Fan Blades
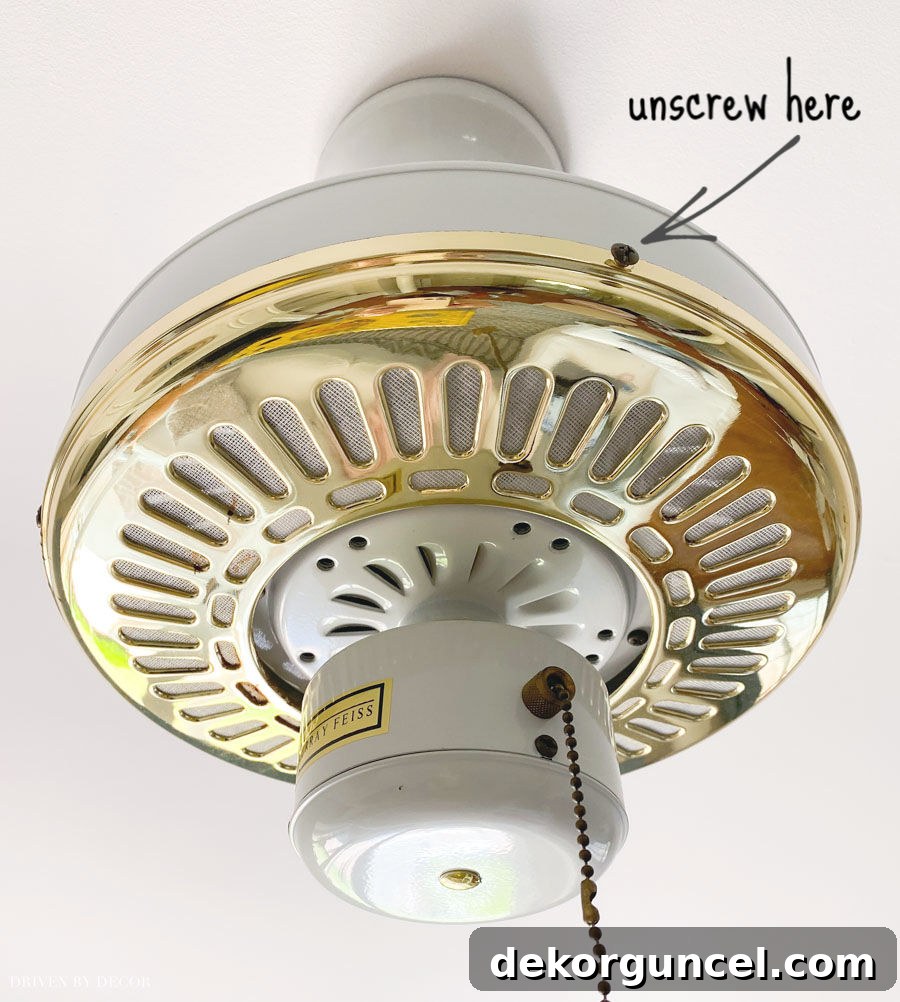
With power safely off, begin disassembling the fan. Start by unscrewing all five (or whatever number your fan has) fan blades from where they connect to the fan’s central motor housing. Typically, these are secured with two or three screws per blade. Once the blades are removed, set them aside. Next, unscrew the brass (or any metallic) pieces that connect the blades to the fan. For my particular fan, this process left just a round brass canopy piece attached to the fan’s base, secured by four screws. Keep all screws organized – perhaps in a small labeled bag or container – to simplify reassembly later.
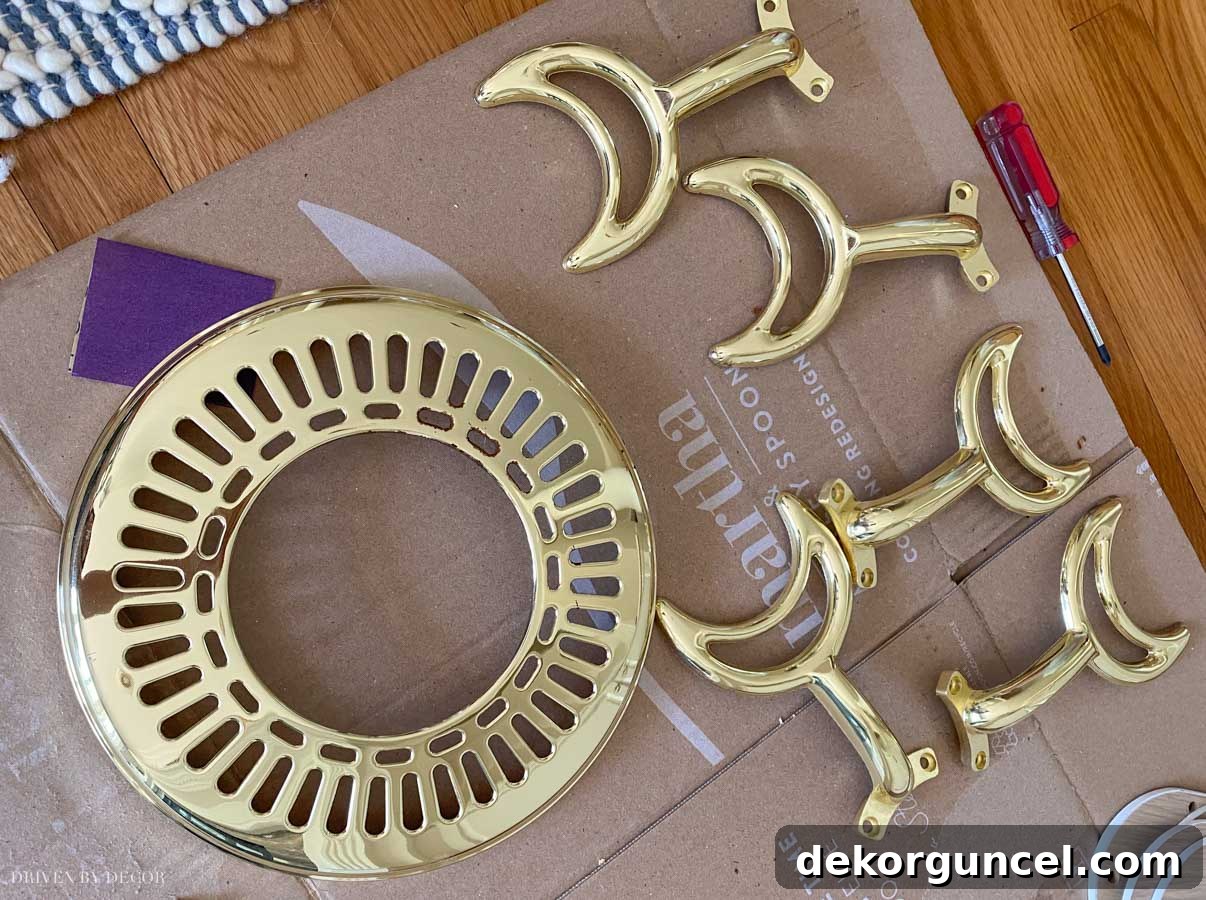
Once disassembled, you’ll have several pieces ready for their transformation. For my project, these were the six brass components that were screaming for a modern, refreshed look.
Step 3: Clean and Sand the Parts
Proper surface preparation is key to a durable and professional-looking paint job. Begin by thoroughly cleaning each piece with a degreaser or all-purpose cleaner to remove any dust, grime, or oily residue that could hinder paint adhesion. Allow the parts to dry completely.
Next, it’s time for a light sanding. Using {220-grit sandpaper}, gently scuff the surface of each brass piece. The goal isn’t to remove the existing finish entirely, but to create tiny abrasions that the new paint can grip onto. This significantly improves paint adhesion and prevents chipping or peeling down the line. Remember to wear appropriate eye, nose, and mouth protection during this step to avoid inhaling dust particles. After sanding, use a damp microfiber cloth to carefully wipe off all sanding dust, ensuring the surfaces are perfectly clean before painting. Let them dry thoroughly.
Phase 2: The Art of Spray Painting
Achieving a smooth, even finish with spray paint requires patience and proper technique.
Step 4: Set Up Your Painting Area
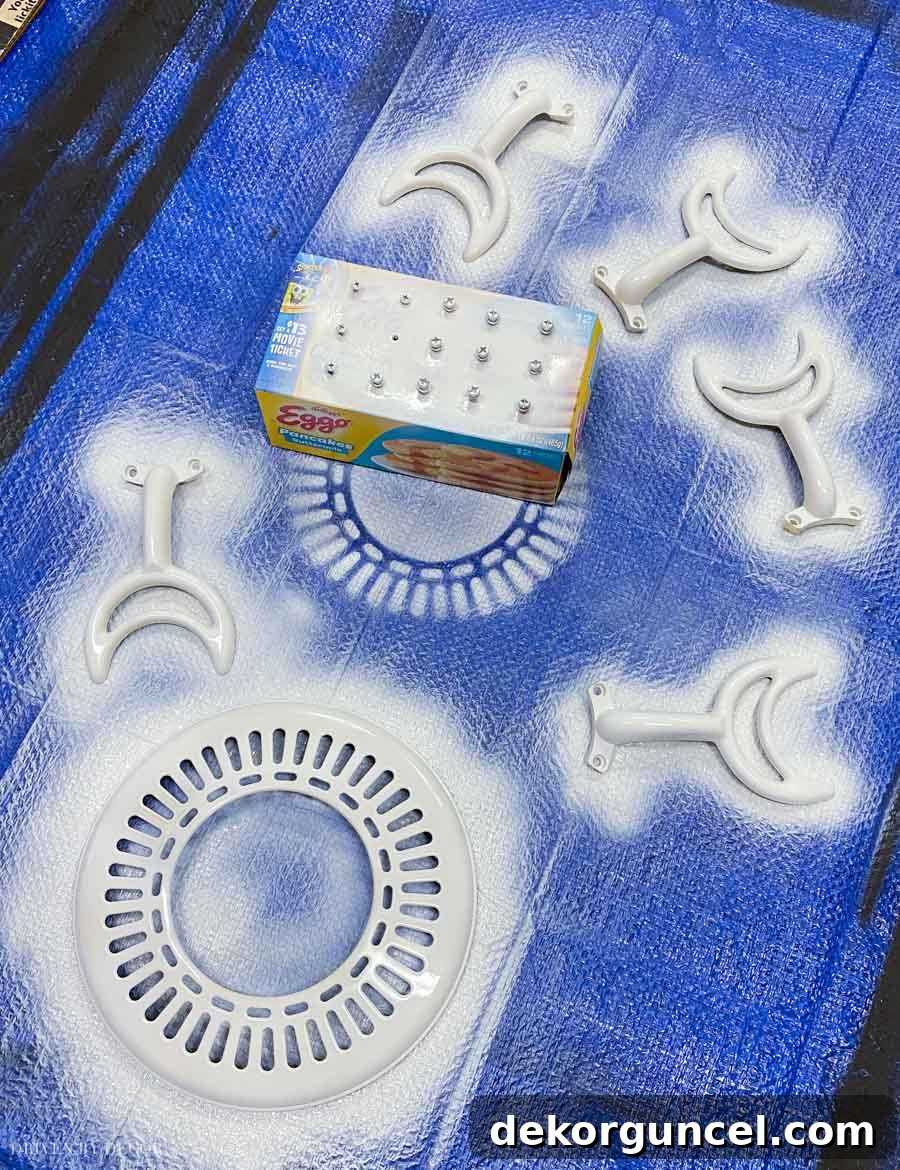
Choose a day with little to no wind outside, as wind can cause overspray and uneven application. Lay down a large piece of cardboard or a tarp in a well-ventilated area to protect your surroundings. Arrange your brass pieces on the protected surface, ensuring they are not touching each other and you have access to all sides that will be painted.
Step 5: Apply Thin, Even Coats of Spray Paint
Before you begin, put on your protective gear (eye protection, respirator mask, gloves). Shake the spray paint can thoroughly for at least one minute to ensure the paint is well mixed. Hold the spray paint can approximately 12-16 inches away from the surface you’re painting. Begin spraying off to one side of the piece, then move the can back and forth in a steady, sweeping motion across the surface. Release the trigger only after you’ve moved past the piece. The key is to apply several thin coats rather than one thick coat, which can lead to drips and an uneven finish. A spray can trigger handle like {this one} can be incredibly helpful for maintaining a consistent spray and reducing finger fatigue.
Step 6: Don’t Forget the Screws!
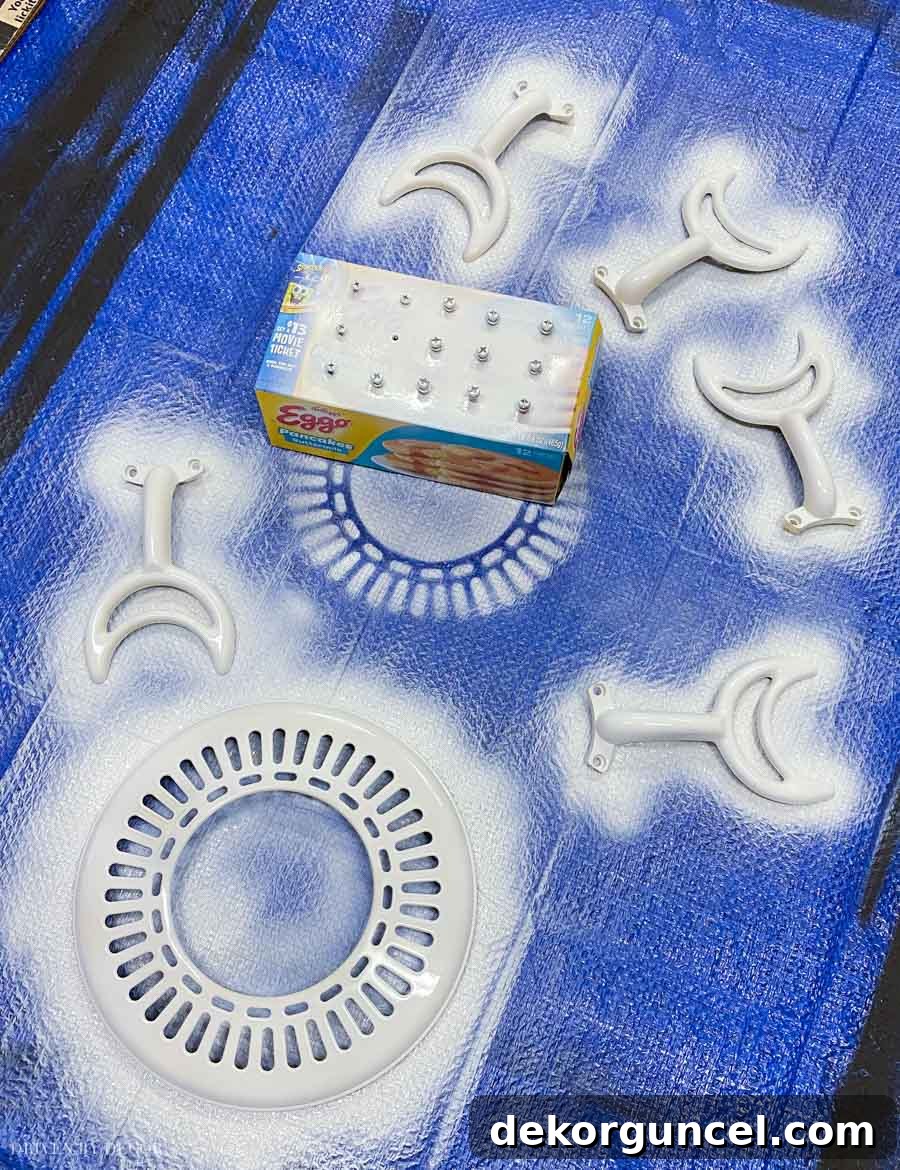
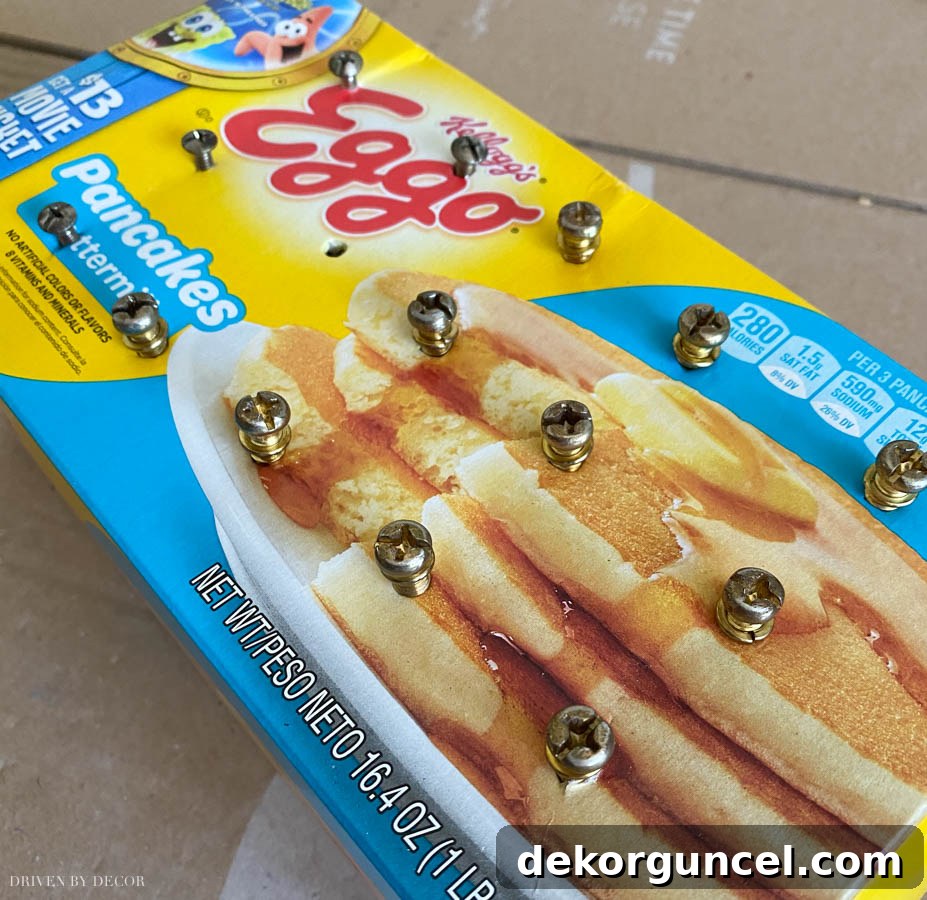
Those small brass screws will also need a fresh coat of paint to match the updated hardware. The easiest way to paint them is to stick them into a piece of styrofoam or a small, empty cardboard box. This allows them to stand upright, making it simple to spray only the screw heads evenly without getting paint on the threaded parts.
Step 7: Choose Your Paint Wisely
For this project, I opted for {this high-heat spray paint} in white. I already had it on hand from painting our recessed light trim, and its “paint + primer” formula meant I could skip a separate priming step, saving time and effort. Its high-heat properties are a bonus for any parts that might experience temperature fluctuations, though for purely decorative fan elements, a standard durable indoor/outdoor spray paint designed for metal would also work well.
Step 8: Apply Multiple Thin Coats and Allow for Drying
Continue to apply 2-3 thin coats of paint to all sides of your fan components that will be visible. Ensure full coverage, paying attention to edges and recessed areas. After each coat, allow the paint to dry to the touch according to the manufacturer’s instructions on the can (usually 10-15 minutes). Rushing this step can lead to drips, smudges, and an uneven finish. Patience is crucial here.
Phase 3: Reassembly and Revelation
Step 9: Thoroughly Dry and Reassemble
Once all coats are applied, let everything thoroughly dry and cure. This usually takes several hours, or even overnight, depending on humidity and paint type. Refer to your spray paint can for specific curing times. It’s better to wait a little longer than to risk damaging your fresh paint job during reassembly. Once fully cured, carefully reassemble the fan components in reverse order of disassembly. Attach the newly painted brass pieces to the fan blades, then attach the blades back to the motor housing. Double-check all connections and ensure screws are tightened securely, but avoid over-tightening which can strip the screws or damage the plastic.
Finally, restore power to the fan by flipping the breaker back on. Your stunning ceiling fan makeover is complete!
Before & After: Witness the Transformation
The difference a simple paint job can make is truly astonishing. Here’s a reminder of the “before,” showcasing its dated charm:
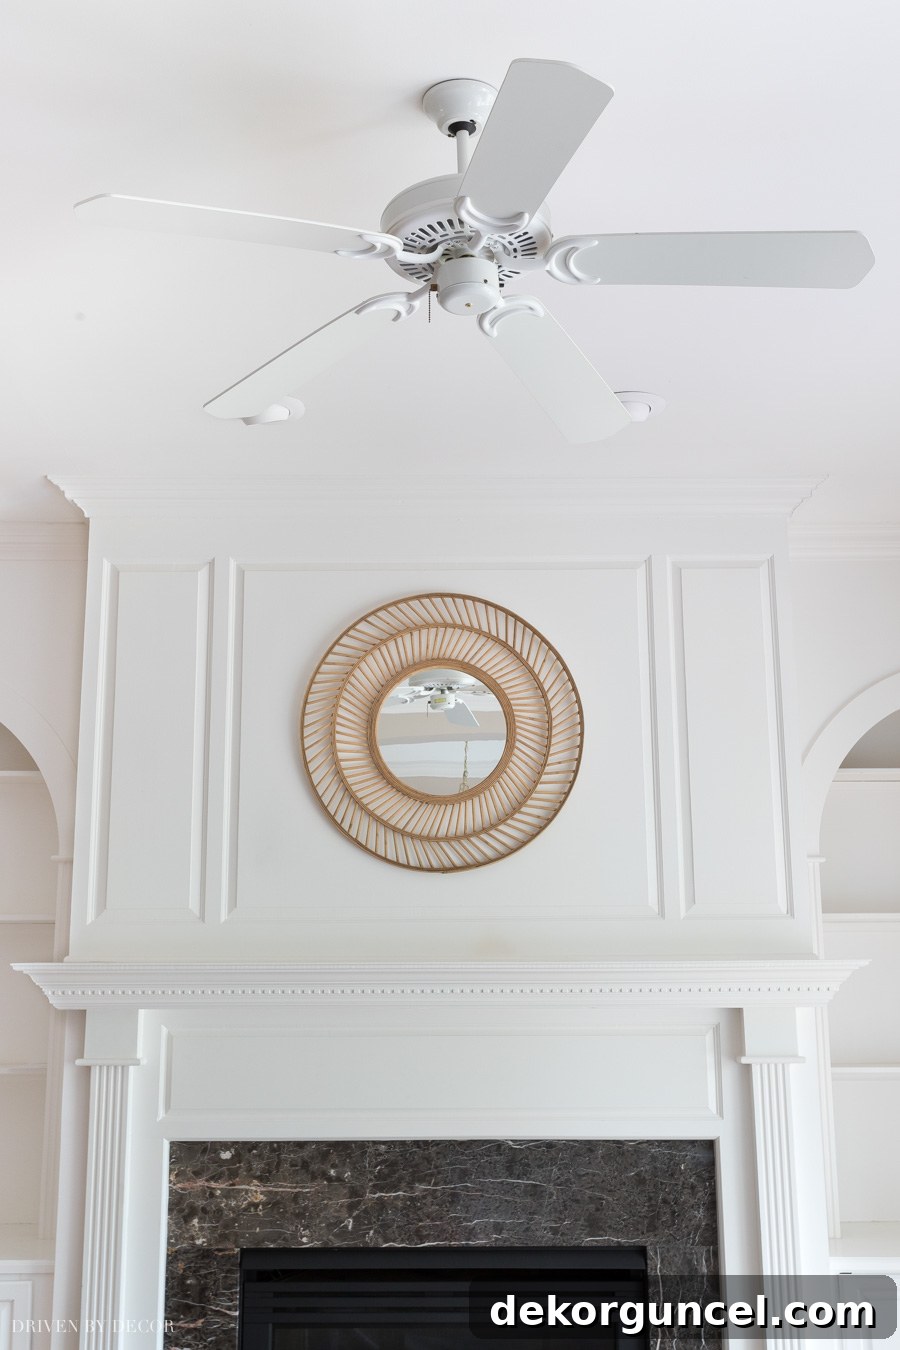
And here’s the dramatic “after,” demonstrating how a fresh coat of white paint can modernize and brighten the entire space:
The Power of a Simple Paint Job
It’s quite the glow-up, isn’t it? This small, inexpensive project had a monumental impact on our family room, instantly updating its look and feel. Updating an old ceiling fan is a fantastic way to refresh your home without breaking the bank or undertaking a major renovation. It’s a testament to the power of paint and a little DIY spirit!
If you enjoyed this spray paint project and are looking for more ways to transform your home on a budget, be sure to check out our other posts on how to paint recessed light trim and how to spray paint a brass fireplace. We love hearing about your DIY successes, so let us know how your ceiling fan project turns out!
