
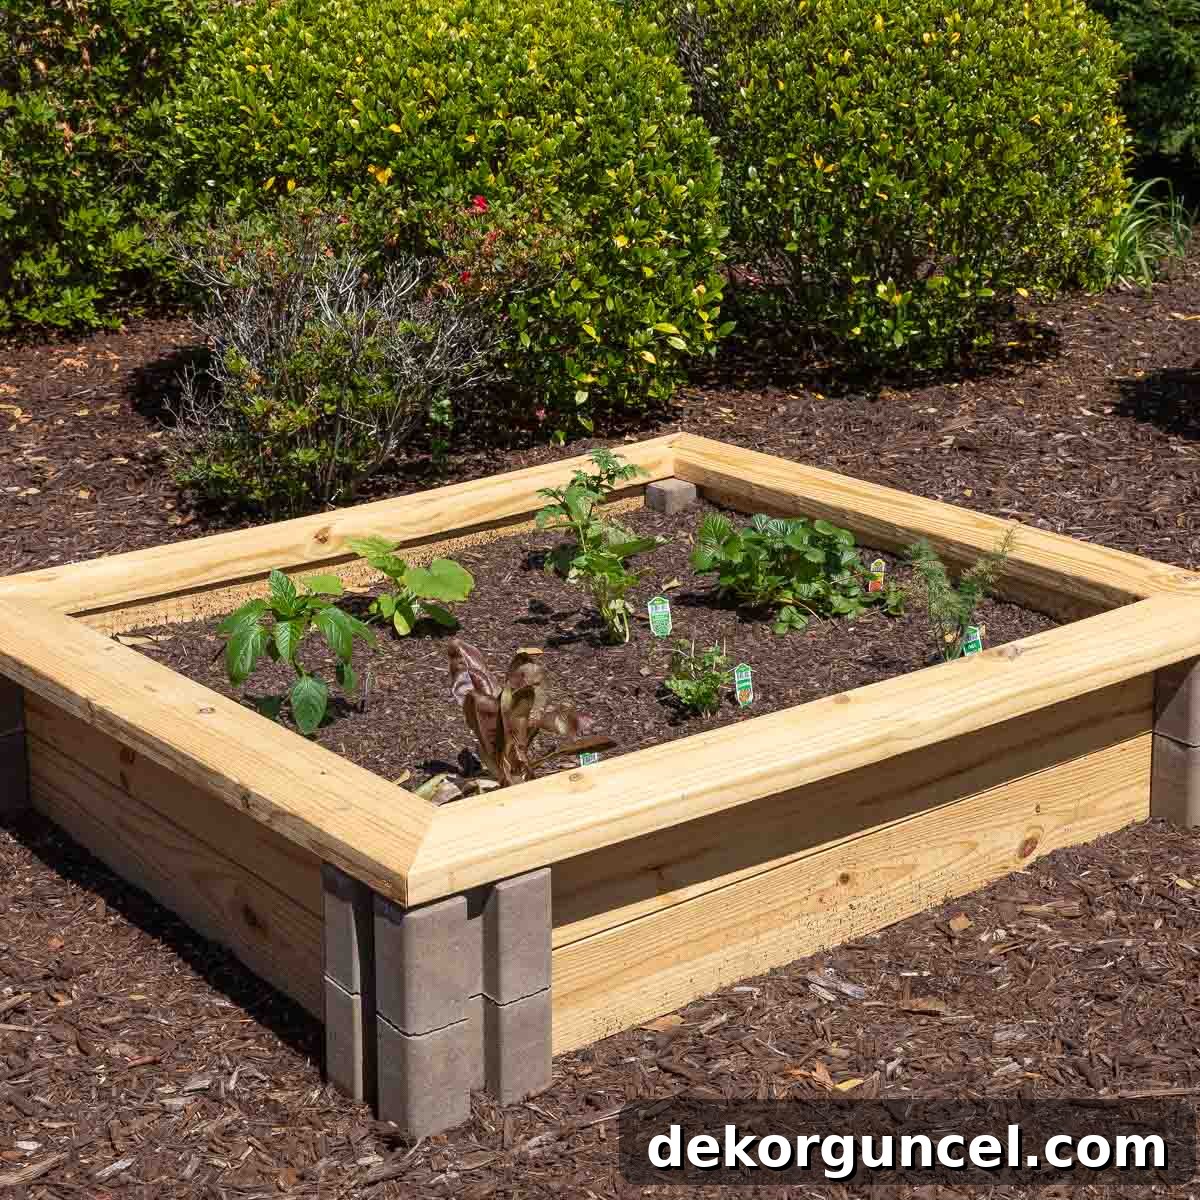
Transform Your Backyard: Affordable & Easy DIY Raised Garden Bed Ideas
Bringing a lush, productive garden to life in your backyard doesn’t have to break the bank. For years, the idea of adding a small raised garden bed to our outdoor space lingered on my to-do list. Our backyard, while beautifully landscaped in most areas, had one particular spot – a large, somewhat awkward bare patch within our side mulch bed – that simply called for a vibrant garden. It was the perfect canvas for cultivating fresh produce and beautiful blooms, and the journey to create it led me to explore a variety of inexpensive raised garden bed options.
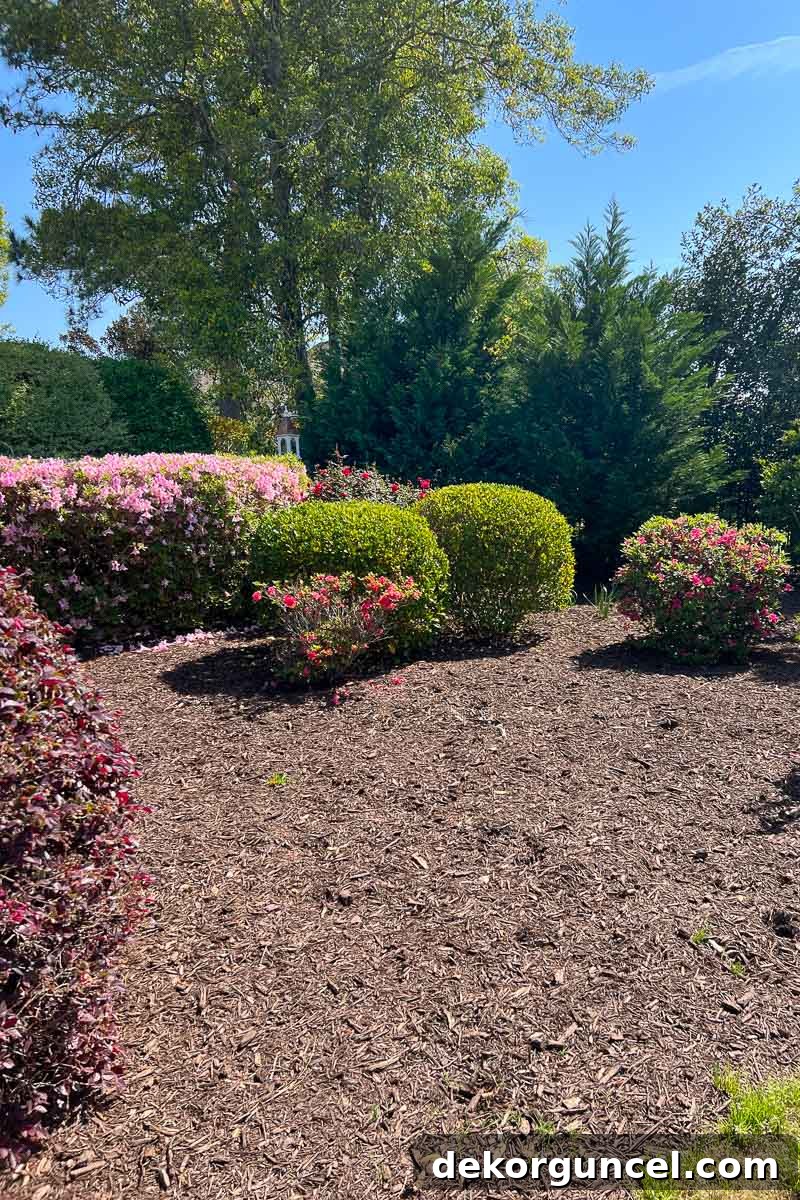
The decision to opt for a raised garden over an in-ground garden was multi-faceted, driven by both practical considerations and a desire for gardening ease. Living in a coastal region, I’m well aware that the natural soil quality can be less than ideal for gardening. Raised beds immediately solve this issue by allowing you to create a perfect soil mix from scratch, tailored to your plants’ specific needs. Beyond superior soil control, raised garden beds offer significantly better drainage compared to traditional gardens, which is crucial for preventing root rot and promoting healthy plant growth. Furthermore, the elevated design makes weed control far simpler and dramatically reduces strain on your back and knees, transforming gardening from a chore into a truly enjoyable activity. An often-overlooked advantage is the ability of raised beds to extend your growing season. The elevated soil warms up earlier in spring and retains warmth longer into fall, allowing for earlier planting and a prolonged harvest. They also provide a natural barrier against some common ground-dwelling pests.
My goal was to embark on this gardening adventure with a manageable, inexpensive raised garden bed, leaving room to expand if my initial seasons proved successful. This approach minimized upfront costs and allowed me to learn and adapt without significant investment. Today, I’m thrilled to share not only the simple, budget-friendly solution I chose but also five other fantastic inexpensive raised garden bed ideas I thoroughly researched. Get ready to be inspired and equipped to create your own flourishing garden, regardless of your budget or space constraints!
1. The Simple & Sturdy Solution: DIY Planter Wall Block Raised Garden
For those seeking a robust, customizable, and remarkably simple raised garden bed, constructing one using planter wall blocks is an absolute game-changer. This method requires minimal tools and can be completed in a fraction of the time, making it perfect for beginners and seasoned gardeners alike. It’s the ideal blend of durability and affordability, allowing you to create a beautiful and functional garden space without extensive construction knowledge or expensive equipment.
Step-by-Step Construction Guide:
1. Site Preparation and Leveling
First and foremost, selecting the right location is paramount. Choose a sunny spot in your yard that receives at least 6-8 hours of direct sunlight daily, especially if you plan to grow most vegetables. Once your ideal location is chosen, the crucial first step is to level the ground where your raised bed will sit. This ensures optimal stability and prevents your bed from shifting, leaning, or developing uneven drainage over time. Use a shovel or rake to remove any high spots and fill in low areas, then compact the soil evenly. A long builder’s level or even a simple carpenter’s level placed on a straight board can help you achieve a perfectly flat foundation. Proper leveling is not just for aesthetics; it’s paramount for the structural integrity and long-lasting stability of your garden bed.
2. Laying the Foundation: Corner Blocks
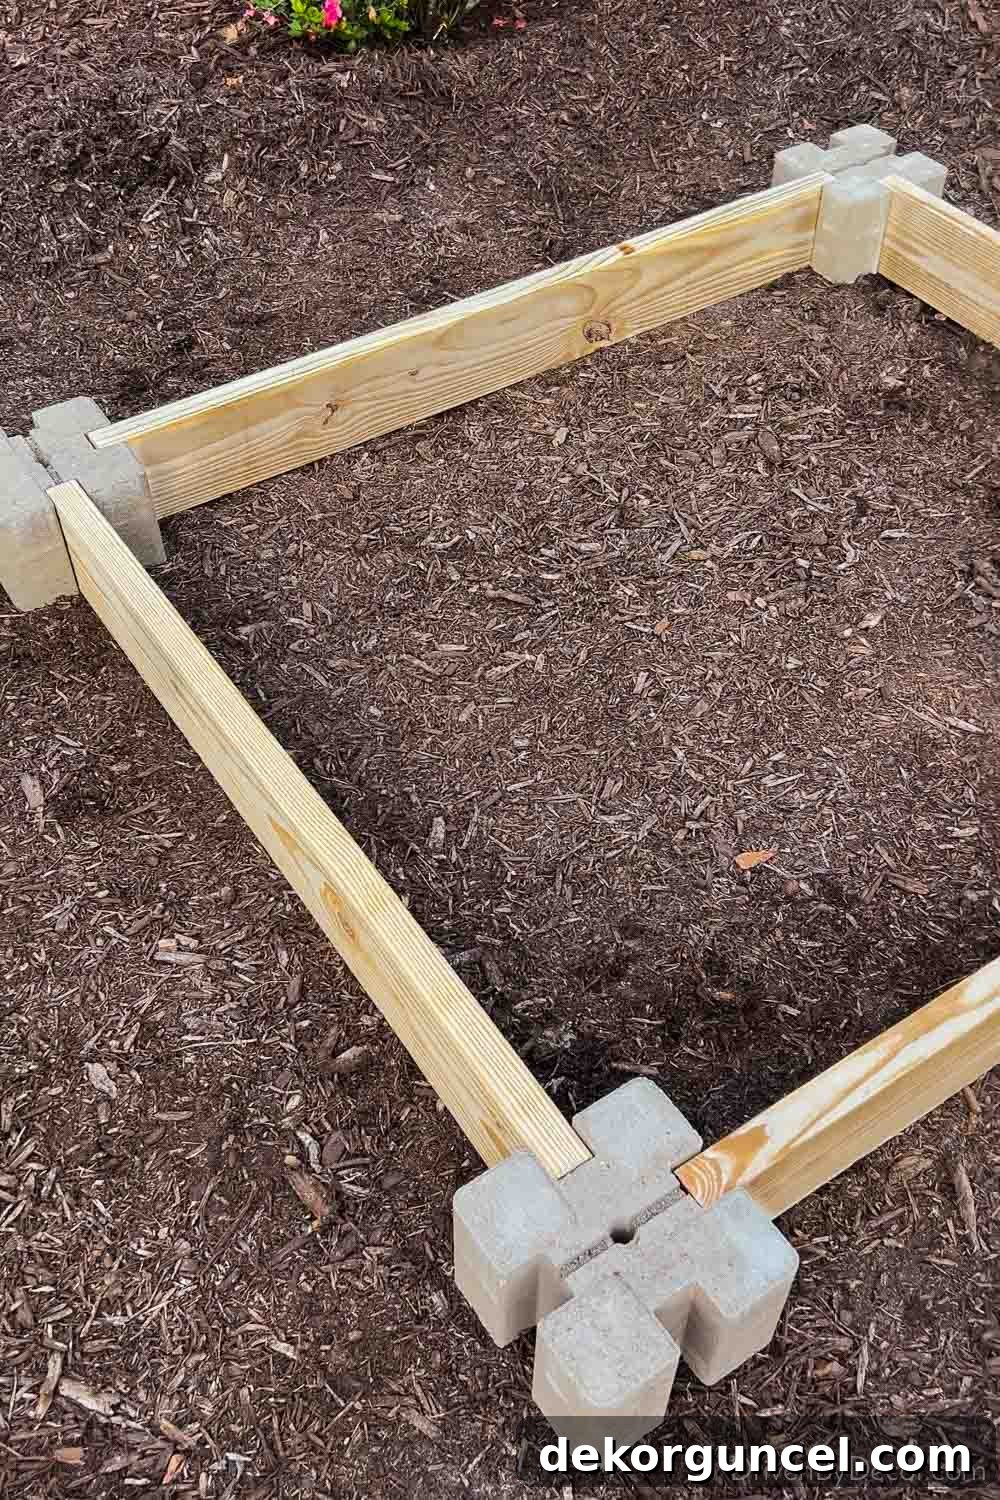
With the ground meticulously leveled, begin by precisely positioning your retaining wall blocks at each of the four corners of your intended garden bed. It’s essential that these blocks are installed with the open, U-shaped channel or hole in the middle facing upwards. These ingeniously designed channels are specifically made to securely hold your lumber in place, forming the core, interlocking structure of your raised bed.
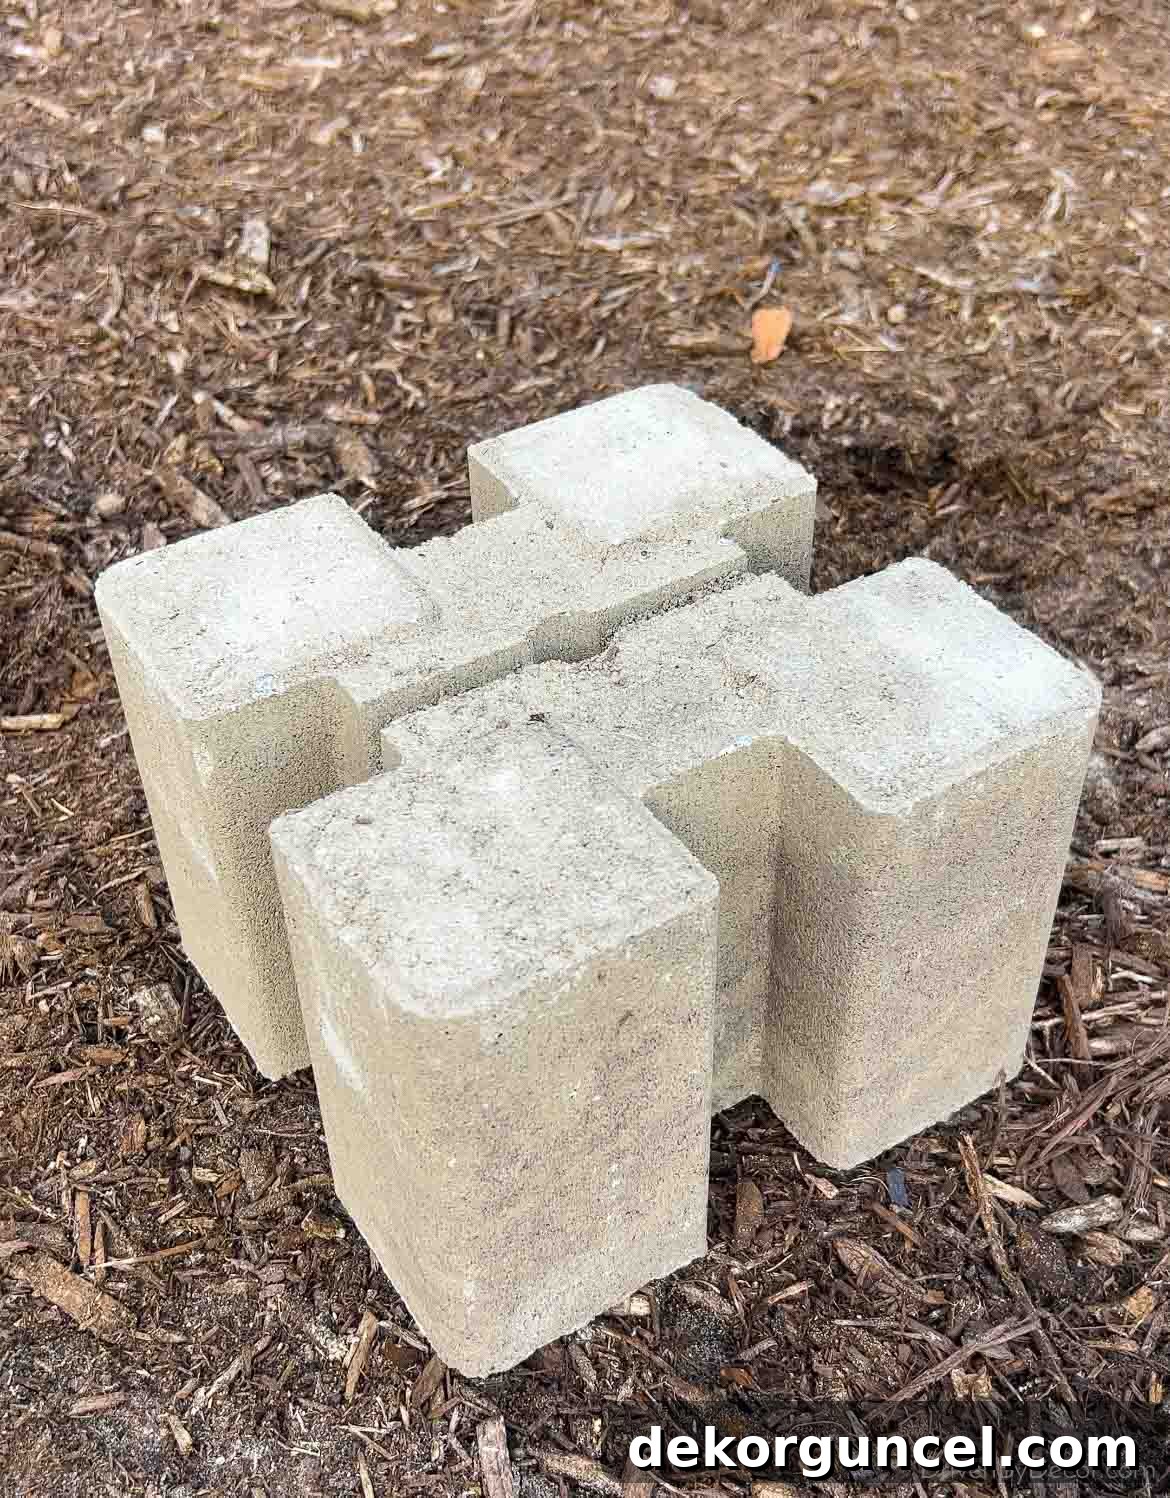
3. Inserting the First Layer of Lumber
Next, carefully slide your 2×6 wood boards, which should be pre-cut to your desired length, into the notches of the corner blocks. These boards will form the first foundational layer of your garden bed. The inherent beauty and practicality of this system lie in its flexibility – you can effortlessly customize the exact dimensions of your bed to perfectly fit your available space by simply adjusting the length of your lumber. This makes it adaptable for small patios or expansive backyards.
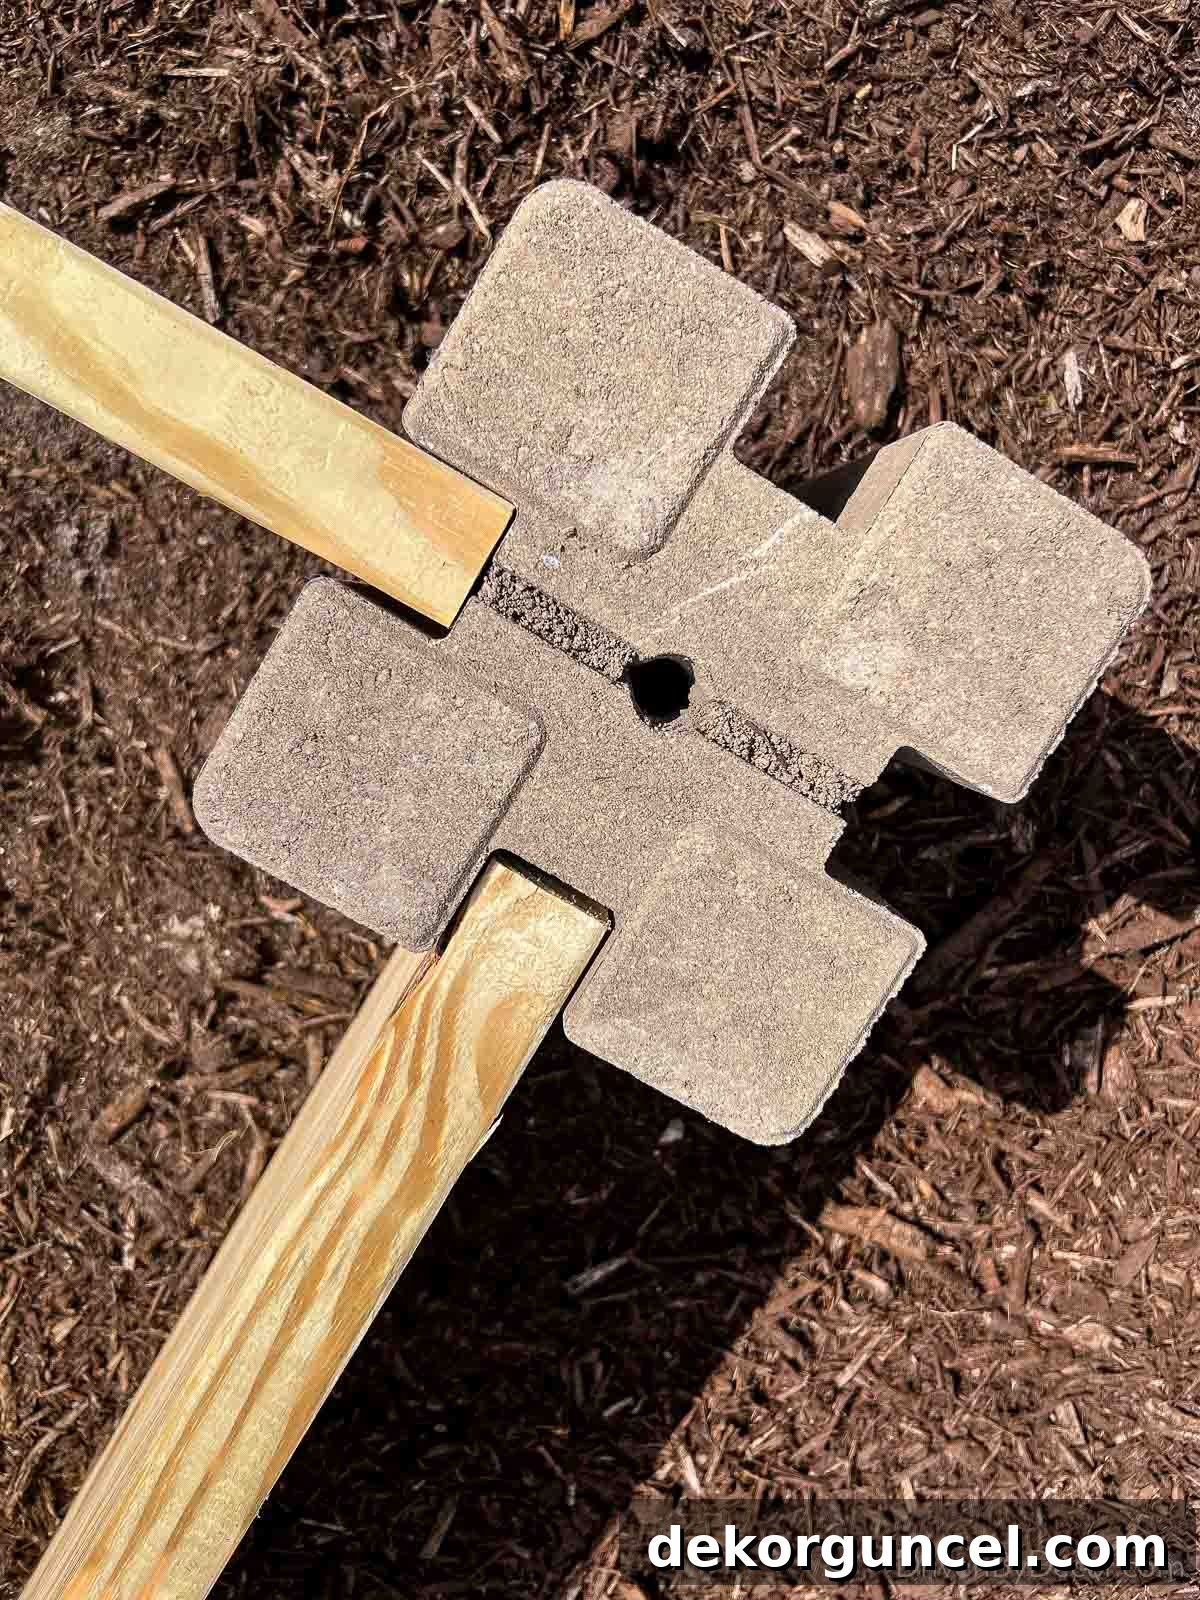
For my particular project, I purchased four 2x6x8 southern yellow pine boards from Lowe’s. Here’s a fantastic, often-overlooked budget-saving tip: many major home improvement stores, including Lowe’s and Home Depot, offer free cutting services for lumber purchases. I took full advantage of this by having each 8-foot board precisely cut into two pieces: one 3.5 feet long for the ends of my bed and one 4.5 feet long for the sides. This precise customization ensures a perfect fit without the need for power tools at home, saving both time and additional equipment costs.
Choosing the Right Wood for Your Raised Bed: Longevity vs. Budget: When it comes to selecting lumber for your raised garden bed, several options are available, each with its own pros and cons. Cedar and redwood are widely considered premium choices due to their natural resistance to rot, decay, and insect infestation, promising a lifespan of 10-15 years or even more. However, their superior qualities come with a significantly higher price tag. Untreated pine, while substantially more affordable, will naturally degrade faster when exposed to moisture and soil, typically lasting 3-5 years. To extend the life of your budget-friendly pine boards without compromising the safety of your edibles, consider treating them with an eco-friendly, non-toxic wood sealer or waterproofer. Products like this Eco-Advance sealer can be easily applied with a garden sprayer, significantly enhancing the wood’s water resistance and overall longevity. Always prioritize non-toxic, food-safe options if you plan to grow vegetables or herbs.
4. Squaring the Bed and Securing with Rebar
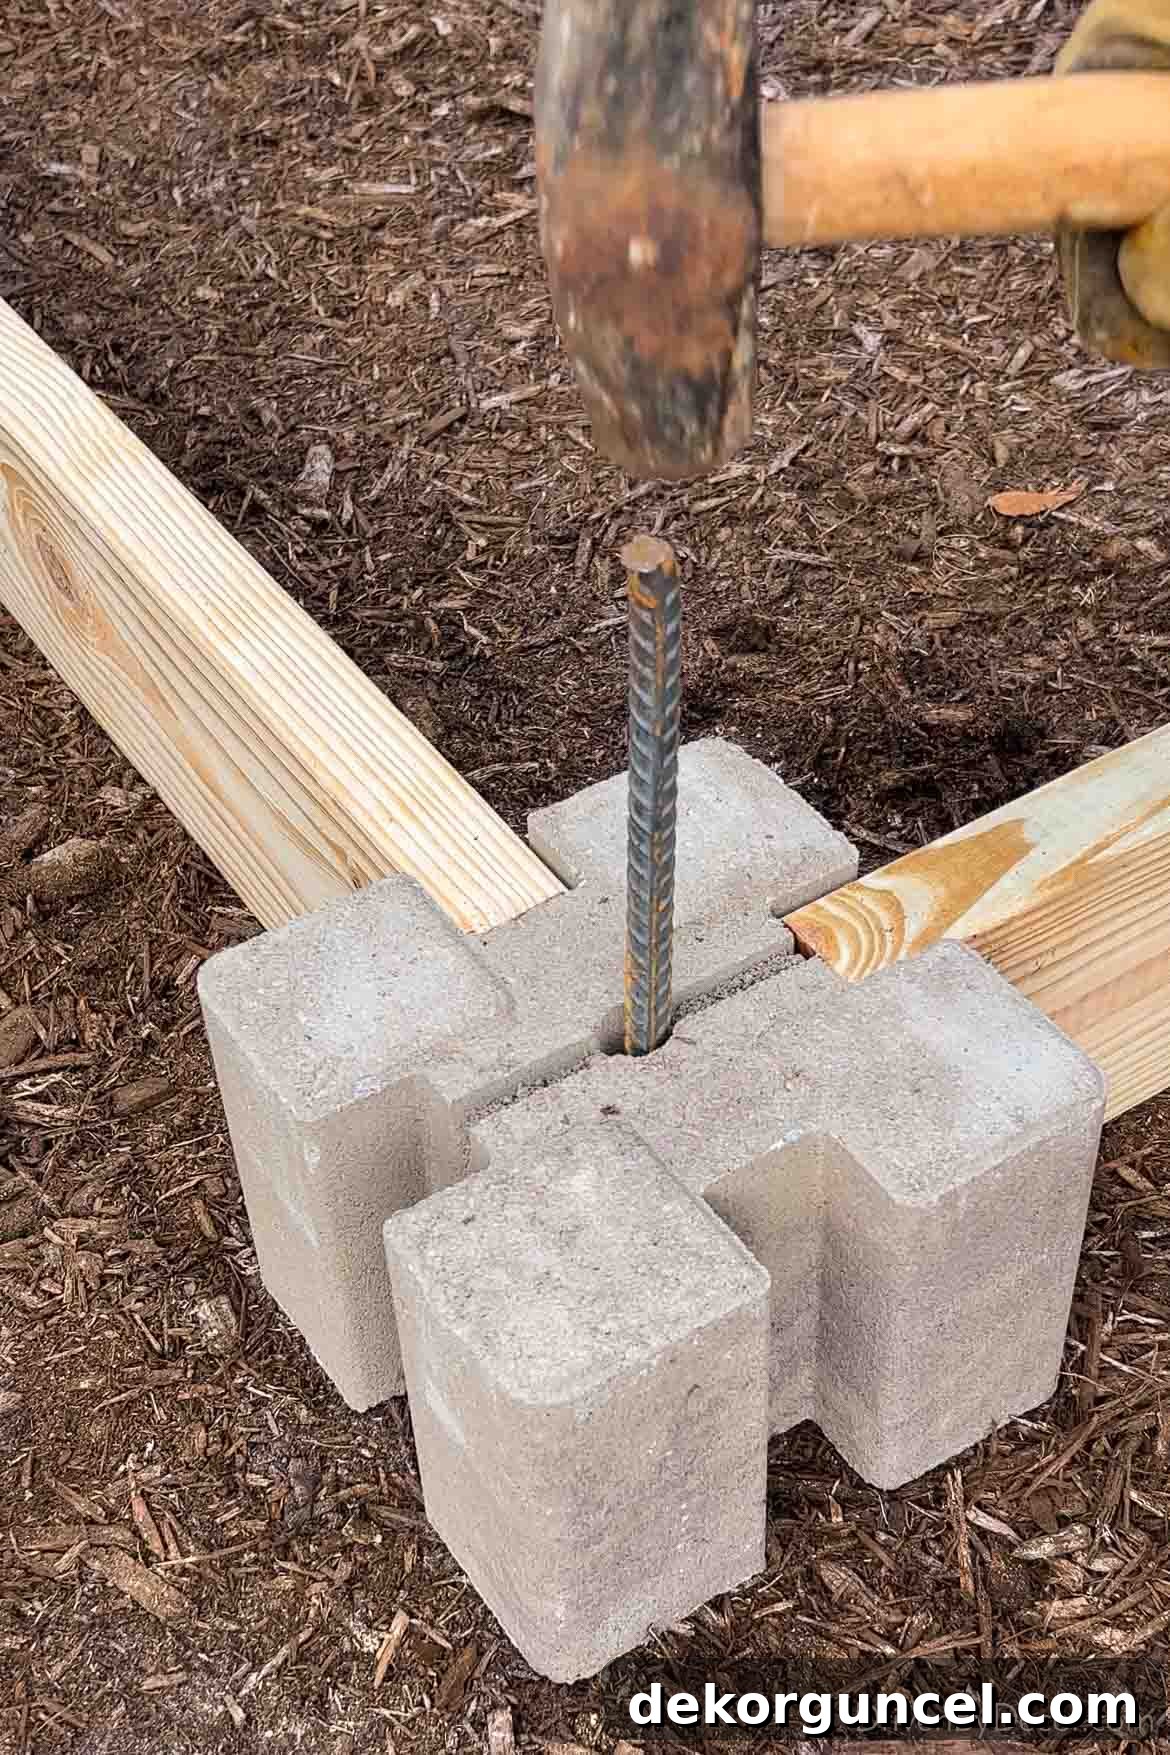
Once your corner blocks and boards are meticulously in place, take a crucial moment to ensure your bed is perfectly square. A simple yet highly effective trick is to measure the two diagonals of the bed from corner to opposing corner; if these measurements are equal, your bed is perfectly square. This step is not just for aesthetics but is critical for the structural integrity and long-term stability of the bed. With the bed precisely squared, it’s time to permanently lock the corner blocks into position. Drive rebar – I personally used durable 18-inch rebar sections – straight through the center hole of each corner block and deep into the ground. Ensure you leave about 4-5 inches of rebar exposed above the block; this protruding section will serve as a crucial guide for your next layer and add significant additional stability.
5. Adding the Second Layer for Depth
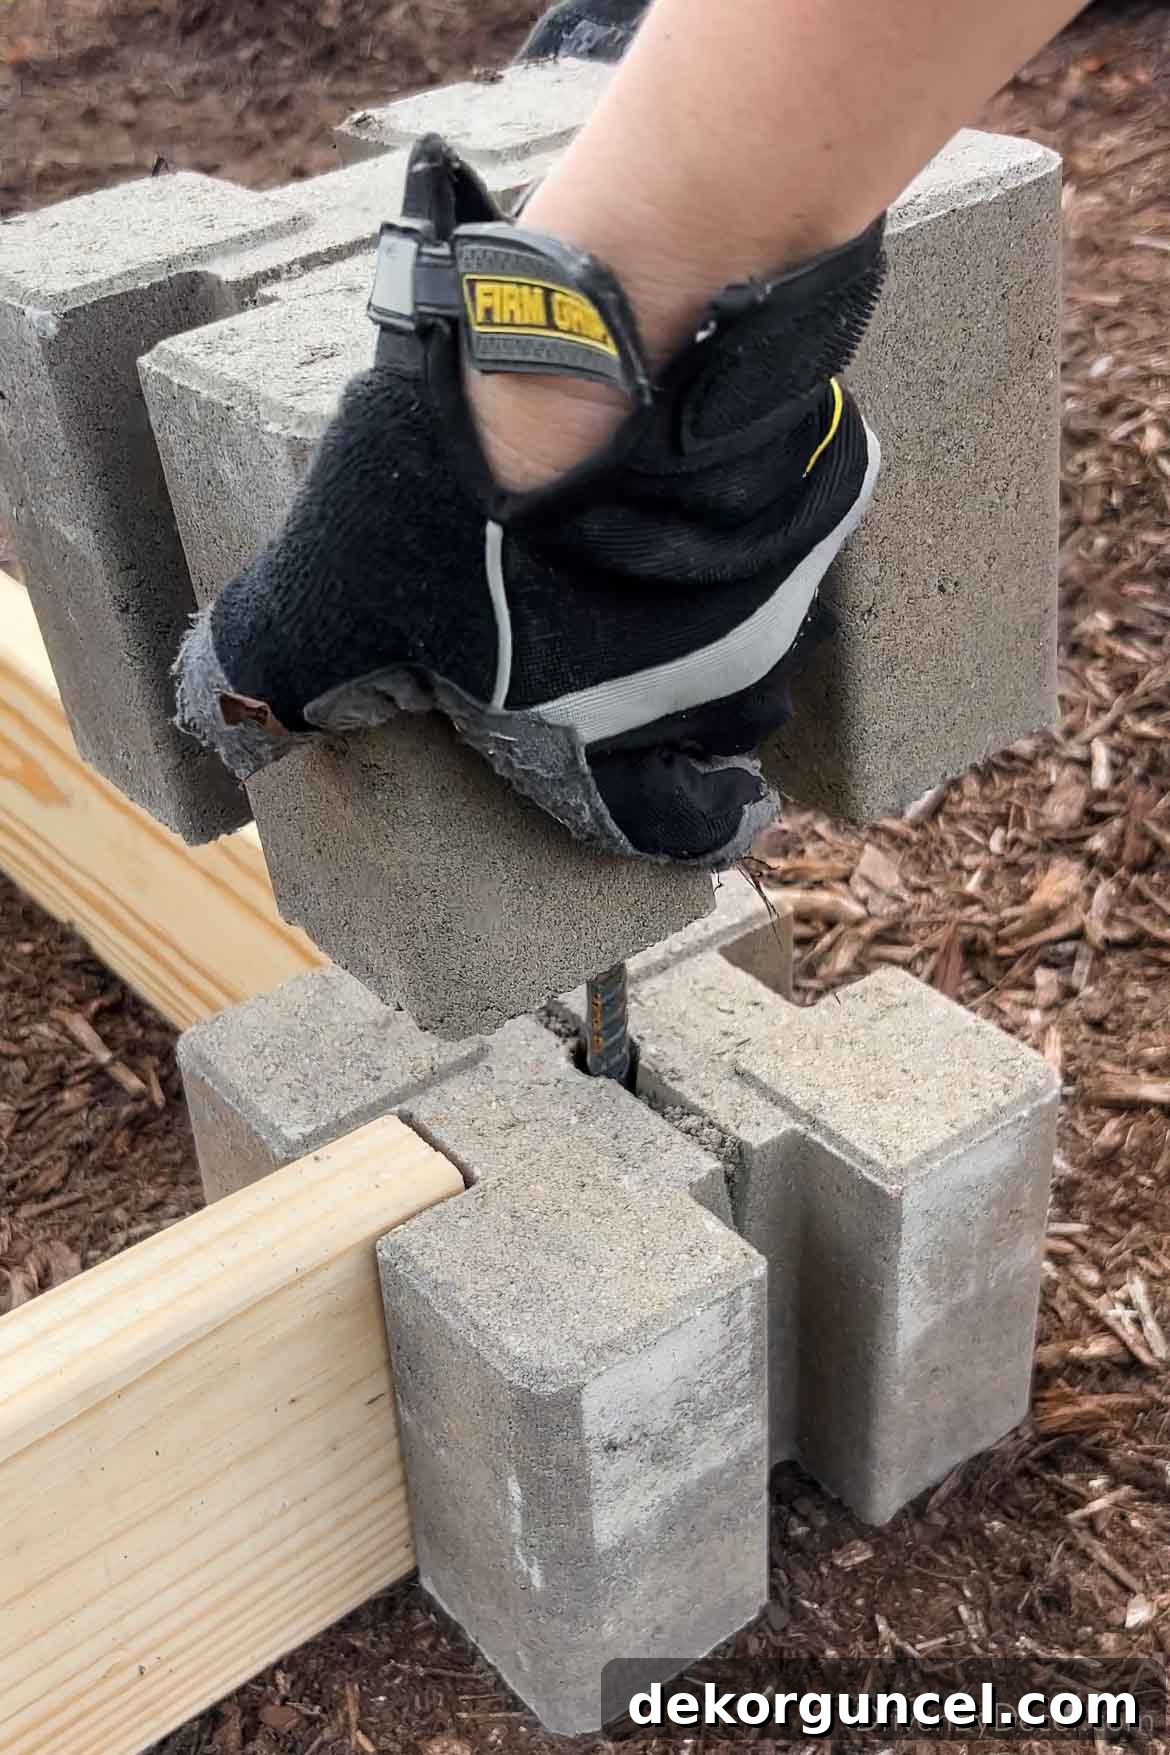
Now, you’re ready to build upwards and add desirable depth to your garden! Place a second layer of identical corner blocks directly on top of the first layer. This time, it’s vital to ensure the open hole in the middle of these upper blocks is facing *downwards*, allowing them to fit snugly and securely over the exposed rebar from the lower layer. This thoughtful design creates a robust, interlocking system without the need for messy mortar or complicated fasteners.
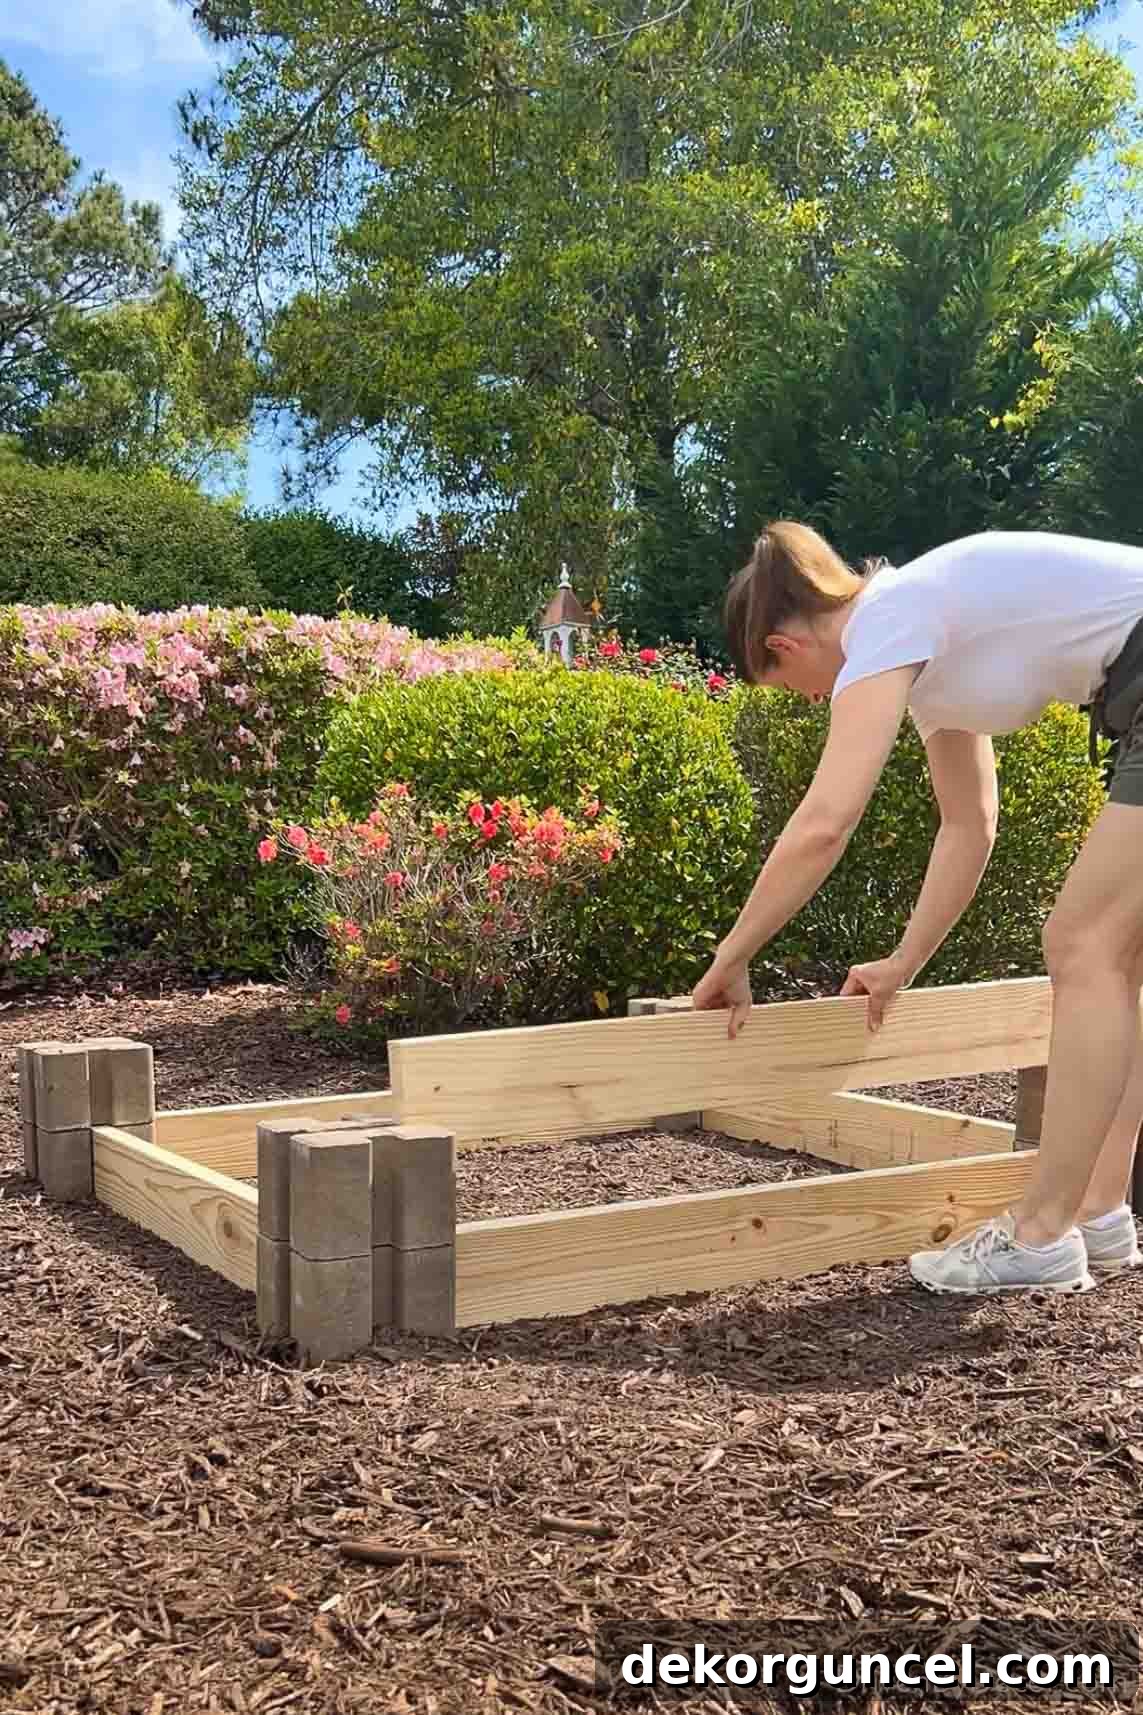
Immediately follow this by adding your second layer of 2×6 boards, carefully sliding them into the channels of the upper blocks just as you did with the initial layer. This step completes the main, two-tier structure of your raised garden bed, providing ample depth for a wide variety of plants, including those with deeper root systems. The entire assembly process, from leveling to the final board, took me less than an hour, primarily because I utilized the convenient pre-cut lumber service from Lowe’s, completely eliminating the need for any power tools. The total cost was incredibly budget-friendly, coming in at under $75 for all 8 blocks, 4 eight-foot pine boards, and 4 pieces of rebar. This makes it an incredibly accessible and affordable DIY project for anyone looking to start gardening without a hefty investment.
6. Optional: Adding a Decorative Wood Cap for a Finished Look
To give my newly built raised bed a more finished, refined, and aesthetically pleasing appeal, I decided to add a decorative wood cap. While you can certainly create a simple cap with straight-cut boards, utilizing a miter saw to precisely miter cut the corners creates a seamless, professional, and sophisticated look that significantly elevates the overall appearance of the bed. This step is entirely optional but highly recommended if you desire a polished finish to your DIY project.
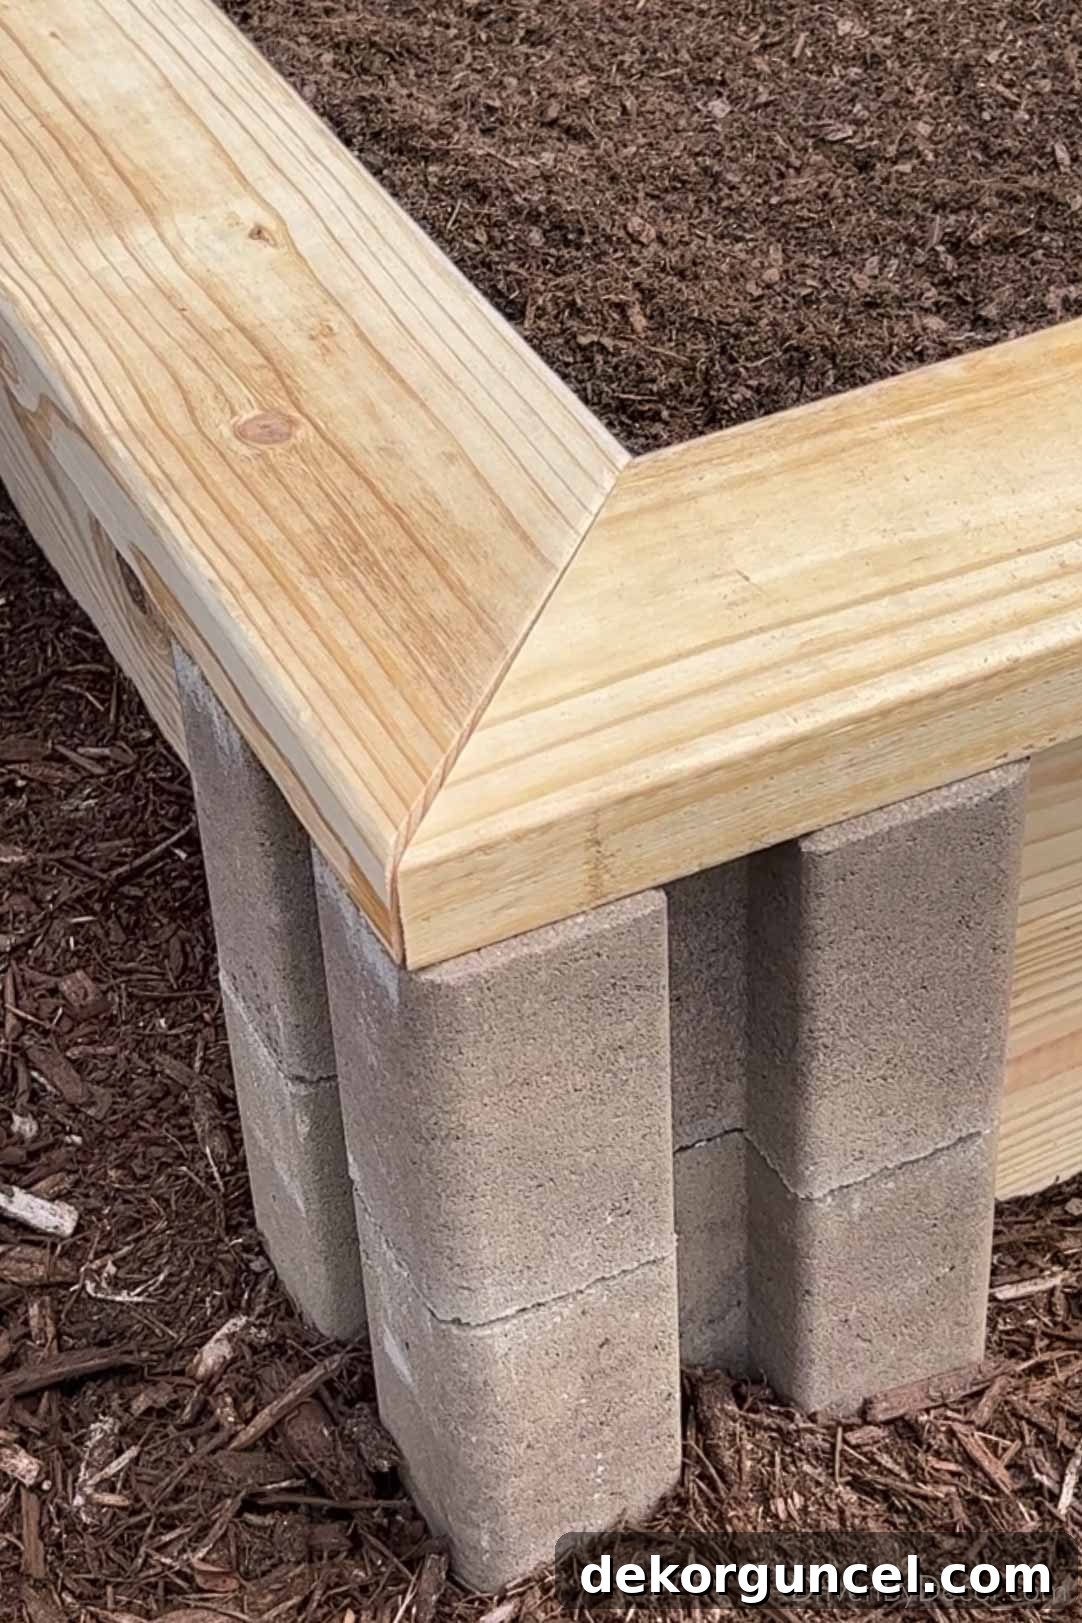
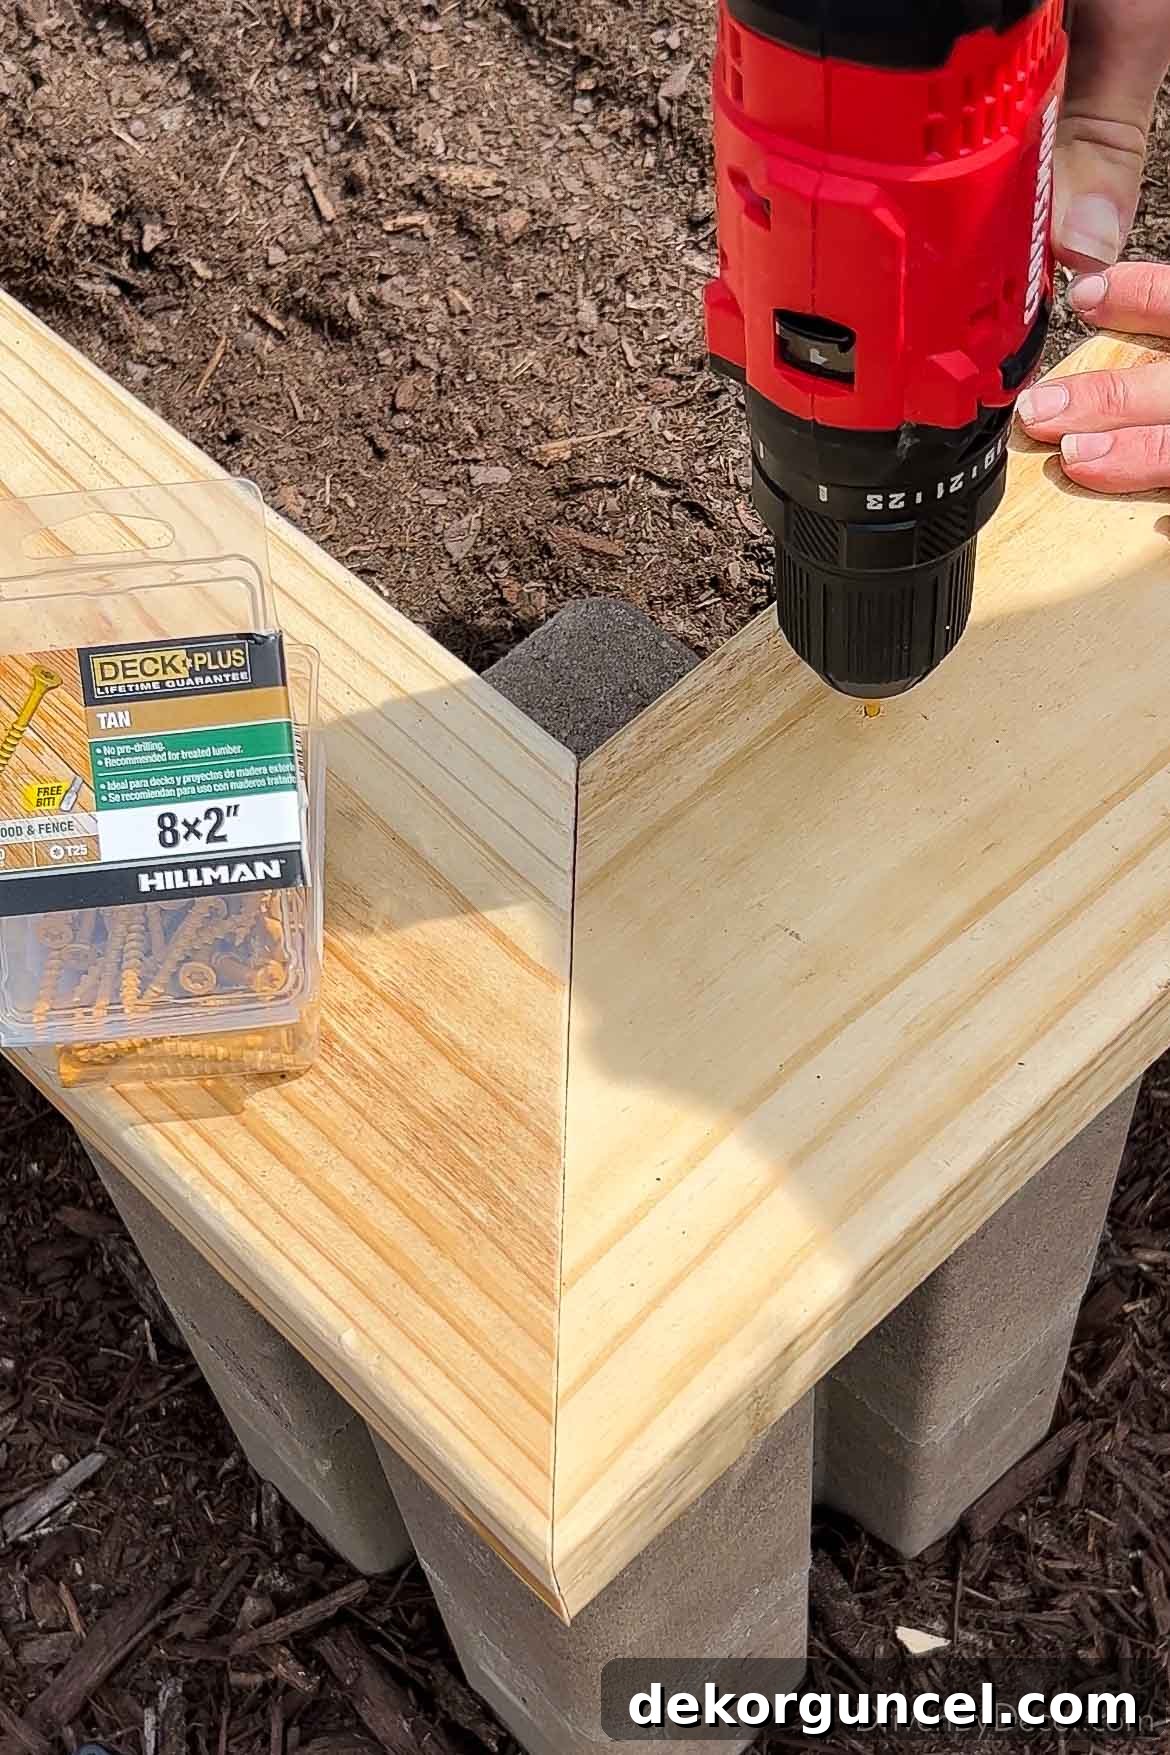
I securely attached the wood cap to the boards beneath using durable deck screws, ensuring a tight and long-lasting connection that will withstand the elements. An additional screw driven through each mitered corner further reinforced the cap, preventing any future movement or separation and maintaining its pristine look.
7. Filling and Planting Your New Garden: The Reward!
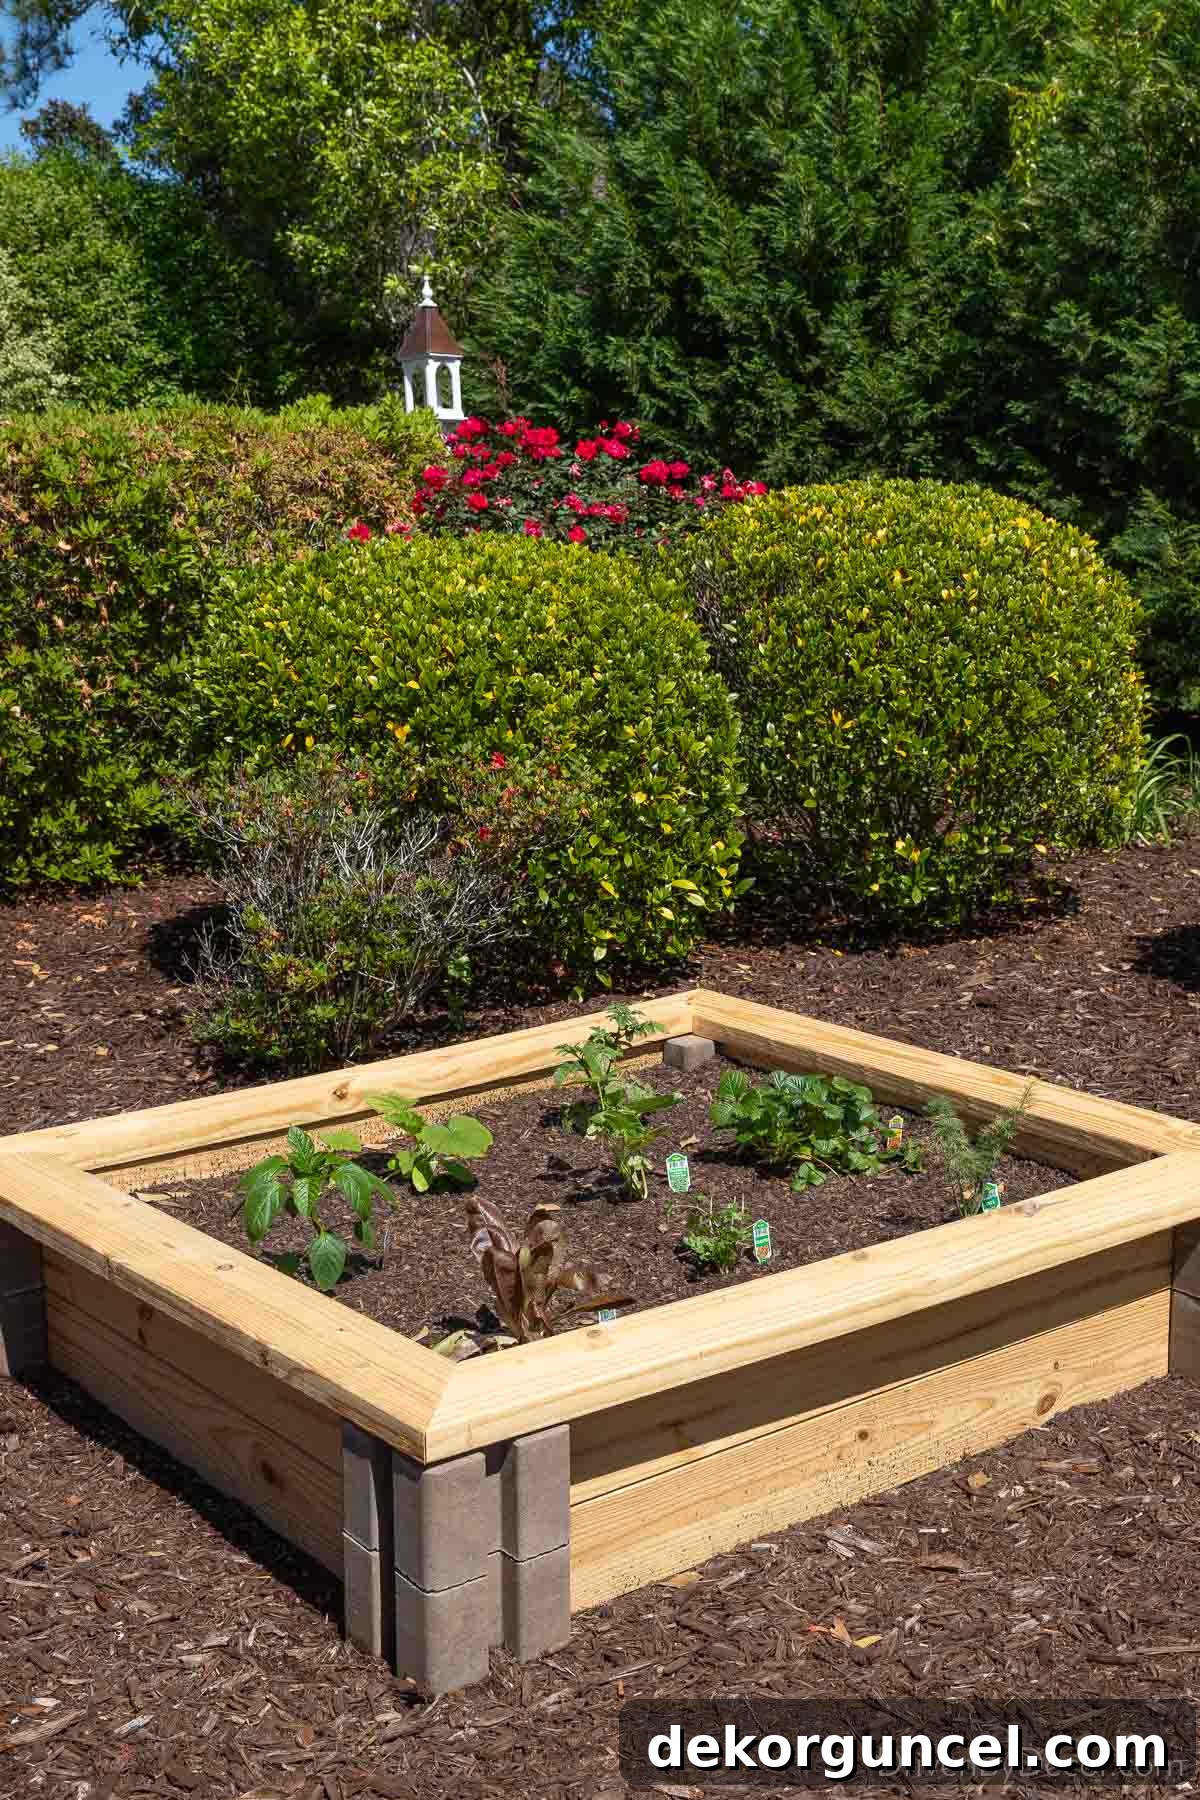
With the structure robustly complete, the most exciting and rewarding part begins: filling your new raised garden with nutrient-rich soil! I opted for this specialized raised bed soil, which is formulated for optimal drainage, aeration, and plant health. To make the filling process more cost-effective and to enhance long-term soil fertility, consider the “lasagna gardening” method. This technique involves layering organic materials like cardboard (weed barrier), straw, wood chips, and compost at the bottom of the bed before adding your premium soil mix on top. This not only reduces the amount of expensive bagged soil needed but also improves drainage, enriches the soil over time as the organic matter decomposes, and creates a thriving ecosystem for beneficial microorganisms.
Once filled, it’s time to unleash your inner gardener and plant! My first harvest in this new bed included a delightful mix of squash, string beans, cherry tomatoes, an assortment of strawberries, crisp lettuce, and various aromatic herbs. The generous depth provided by the two-tier design beautifully accommodates root vegetables and larger plants, allowing them ample space to thrive. I can’t wait to watch everything flourish and enjoy the abundance of fresh, homegrown produce directly from my backyard!
Why Choose the Planter Wall Block Method for Your Raised Bed?
One of the primary reasons I favored this method for creating an inexpensive raised garden bed is its unparalleled customization potential. I was able to build a bed perfectly sized for my specific bare spot, maximizing both utility and aesthetics in my outdoor space. Furthermore, the design inherently allows for incredibly easy future expansion. Should my gardening ambitions grow, I can effortlessly extend the length or width of the bed by simply adding another pair of blocks and wood boards to one or both ends. This modularity is a significant advantage for evolving garden spaces, ensuring your bed can adapt as your needs change.
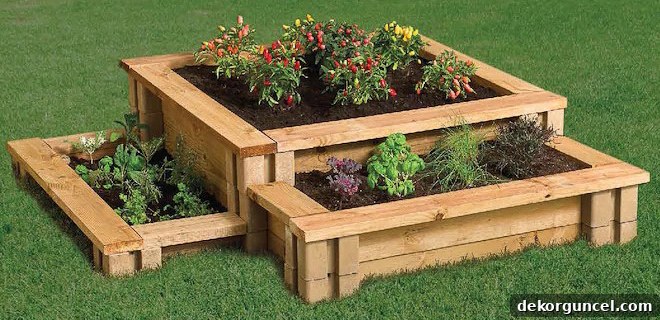
This ingenious system also lends itself beautifully to more ambitious designs. If you possess a larger garden area, you can easily create an elaborate tiered bed, utilizing various heights of blocks to add significant visual interest and distinct growing zones. Imagine a multi-level garden brimming with different plant varieties, from herbs on a lower tier to taller vegetables on an upper one!
While the planter wall block method is an excellent, straightforward, and budget-friendly approach, it’s just one of many ways to achieve an affordable and highly effective raised garden. Let’s delve into some other fantastic inexpensive raised garden bed ideas that caught my eye and might be perfect for your unique gardening needs!
2. Modern & Durable: Galvanized Planters
For those who appreciate a more modern aesthetic combined with unparalleled durability, galvanized steel containers present another excellent option for creating an inexpensive raised garden bed. Their sleek, clean lines and metallic finish can add a contemporary, industrial-chic touch to any garden space, while their robust construction ensures remarkable longevity. They offer a striking contrast to traditional wooden beds, fitting seamlessly into modern landscape designs.
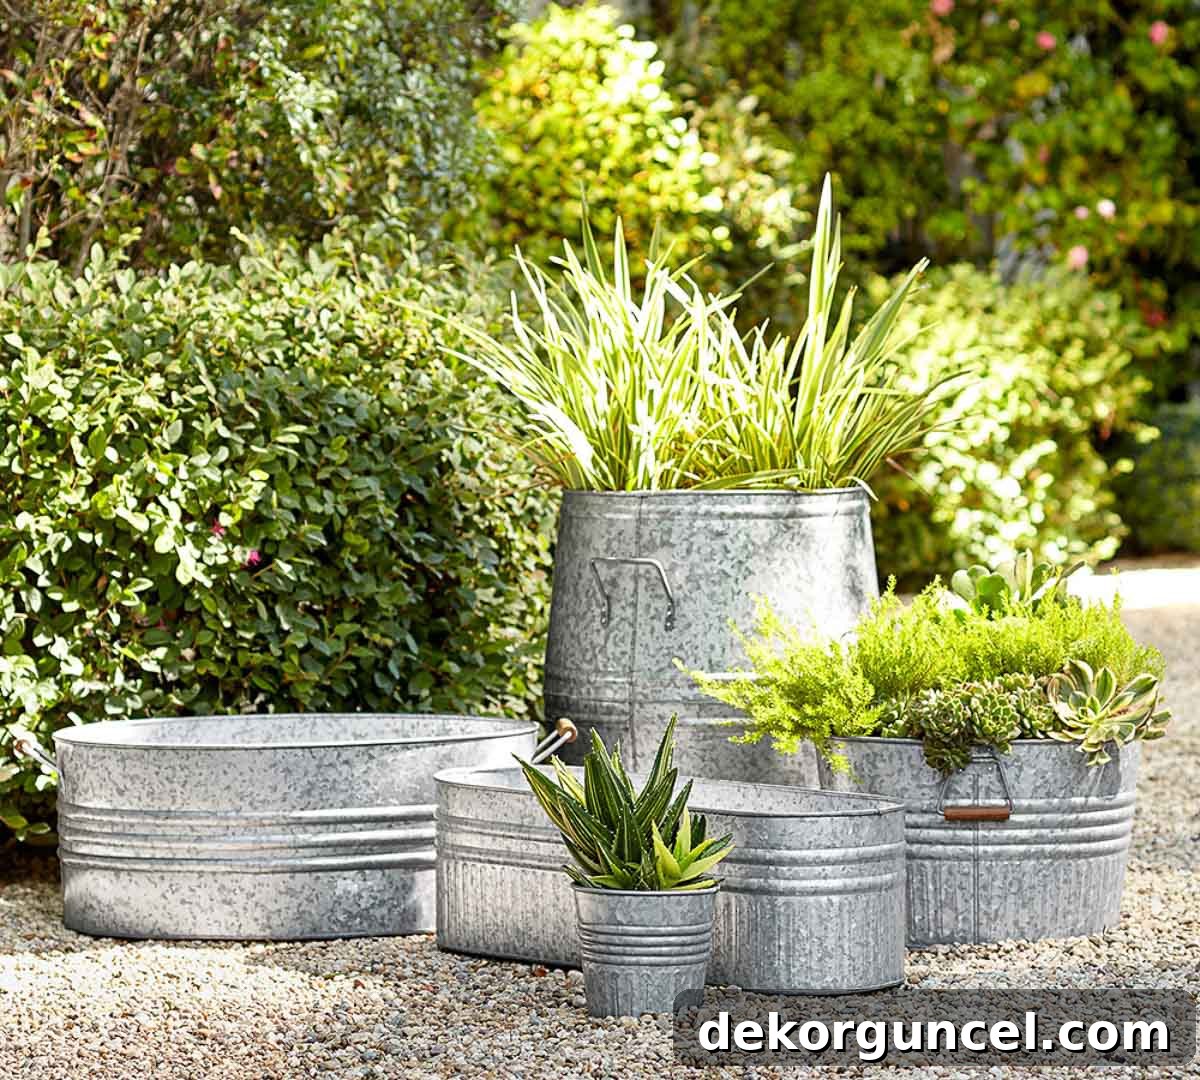
Galvanized planters come in an impressive array of shapes and sizes, offering significant flexibility for various gardening needs and design preferences. You can find simple oval galvanized tubs, which are perfect for smaller herb gardens, decorative floral arrangements, or even a mini-patch of leafy greens, much like this versatile option. These smaller tubs are ideal for adding pockets of greenery to patios or balconies.
Beyond individual tubs, the market also offers impressive oversized galvanized raised garden beds that can be configured in numerous ways to suit larger planting areas. These modular systems, such as these adaptable units, often come in several appealing color options, including classic silver, white, or charcoal, allowing you to create expansive, highly functional, and visually cohesive growing spaces. Their modular nature means you can expand your garden as needed, much like the block system.
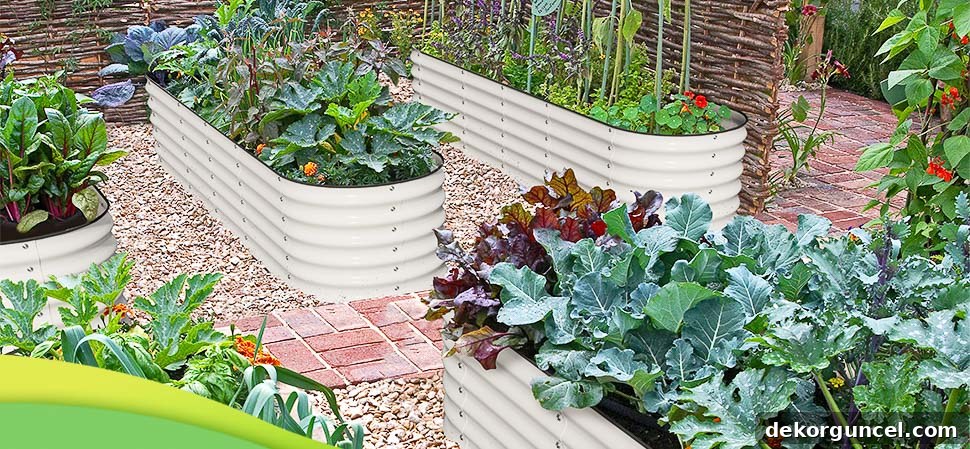
One of the most significant advantages of galvanized planters is their remarkable lifespan and low maintenance. Unlike wood, they won’t rot, warp, or degrade, often lasting 20+ years with minimal upkeep. This makes them an excellent long-term investment, despite a potentially higher initial cost than basic lumber. A crucial consideration for any container garden is drainage. If your chosen galvanized planter has a solid bottom (some of the larger, modular ones might not), it is imperative to drill several drainage holes before filling it with soil. Proper drainage is key to preventing waterlogging, root rot, and ensuring the robust health of your plants. While galvanized steel can absorb and retain heat, potentially warming the soil more quickly (which can be beneficial in cooler climates for extending the growing season), this can be managed by choosing lighter colors or providing some shade during the hottest parts of the day in extremely warm climates.
3. Ergonomic & Accessible: Elevated Wood Planter Boxes
For gardeners prioritizing comfort, accessibility, and an aesthetically pleasing design, elevated wood planter boxes are an ideal solution. These freestanding beds raise the growing area to a comfortable working height, typically between 24 to 36 inches off the ground. This elevation eliminates the need for excessive bending, kneeling, or stooping, transforming gardening into a much more enjoyable and sustainable activity, especially for individuals who are older, have limited mobility, or simply prefer to garden standing up. They promote good posture and reduce physical strain, allowing you to spend more time enjoying your plants.
The concept of incorporating elevated planter boxes into a backyard design is something I genuinely adore, particularly when envisioning a “forever home” garden. They combine exceptional functionality with elegant design, seamlessly integrating into various outdoor aesthetics, from rustic to contemporary. Many affordable options are available on the market, such as this 48-inch elevated cedar planter box, which often retails for under $100. Cedar is a particularly popular and excellent choice for these boxes due to its natural resistance to rot, decay, and insect infestation, ensuring a long-lasting and relatively low-maintenance structure. Other woods like cypress or treated pine can also be used, but cedar offers a superior natural defense.
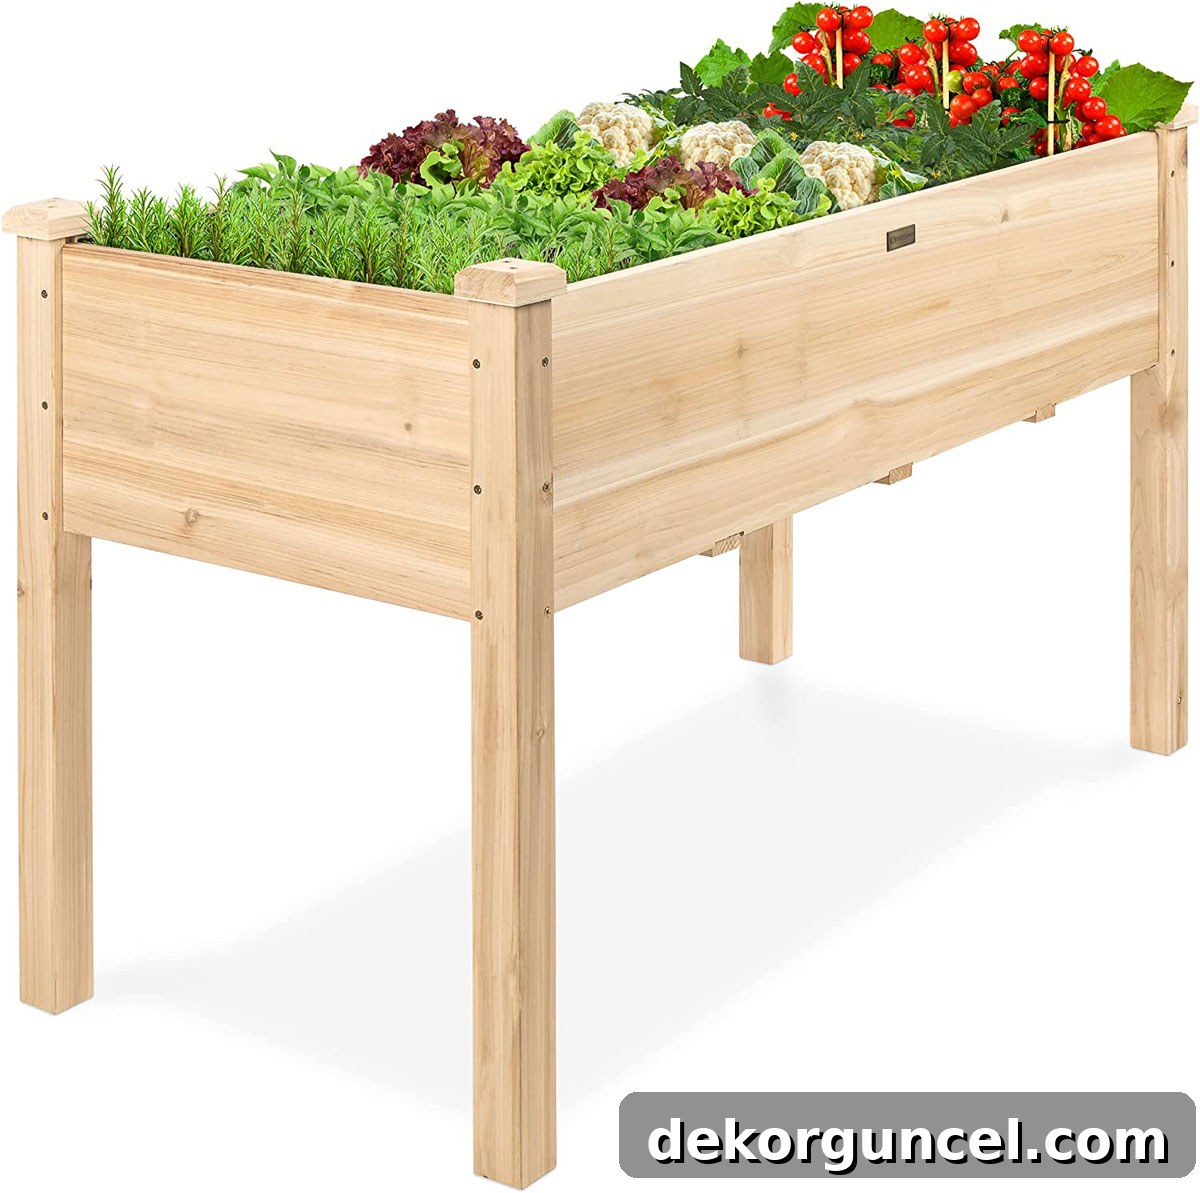
Beyond the undeniable ergonomic benefits, elevated planter boxes offer excellent control over soil quality and drainage, similar to ground-level raised beds. Because they are off the ground, they are also less susceptible to ground-dwelling pests and weeds, further simplifying maintenance. When selecting an elevated box, carefully consider its depth; adequate depth is crucial for healthy root development, especially for vegetables. Always ensure the box has sufficient drainage holes at the bottom to prevent waterlogging. Many designs also cleverly feature a convenient lower shelf, providing perfect storage for gardening tools, watering cans, or extra bags of soil, keeping your gardening essentials close at hand.
4. Maximize Small Spaces: Wall Mounted Hanging Planters
For urban dwellers, those with compact patios, small balconies, or anyone simply looking to add a splash of vertical greenery to their outdoor living space, wall-mounted hanging planters are an ingenious and incredibly space-saving solution for creating an inexpensive raised garden. These systems leverage vertical space, allowing you to cultivate a surprising amount of produce or flowers even when ground space is at a premium. Just a few weeks ago, I successfully transformed a previously unused section of our back porch into a vibrant “plant wall” using these practical hanging planters and these specialized brick hangers, which made the installation process a breeze without any damage to the masonry or complex drilling.
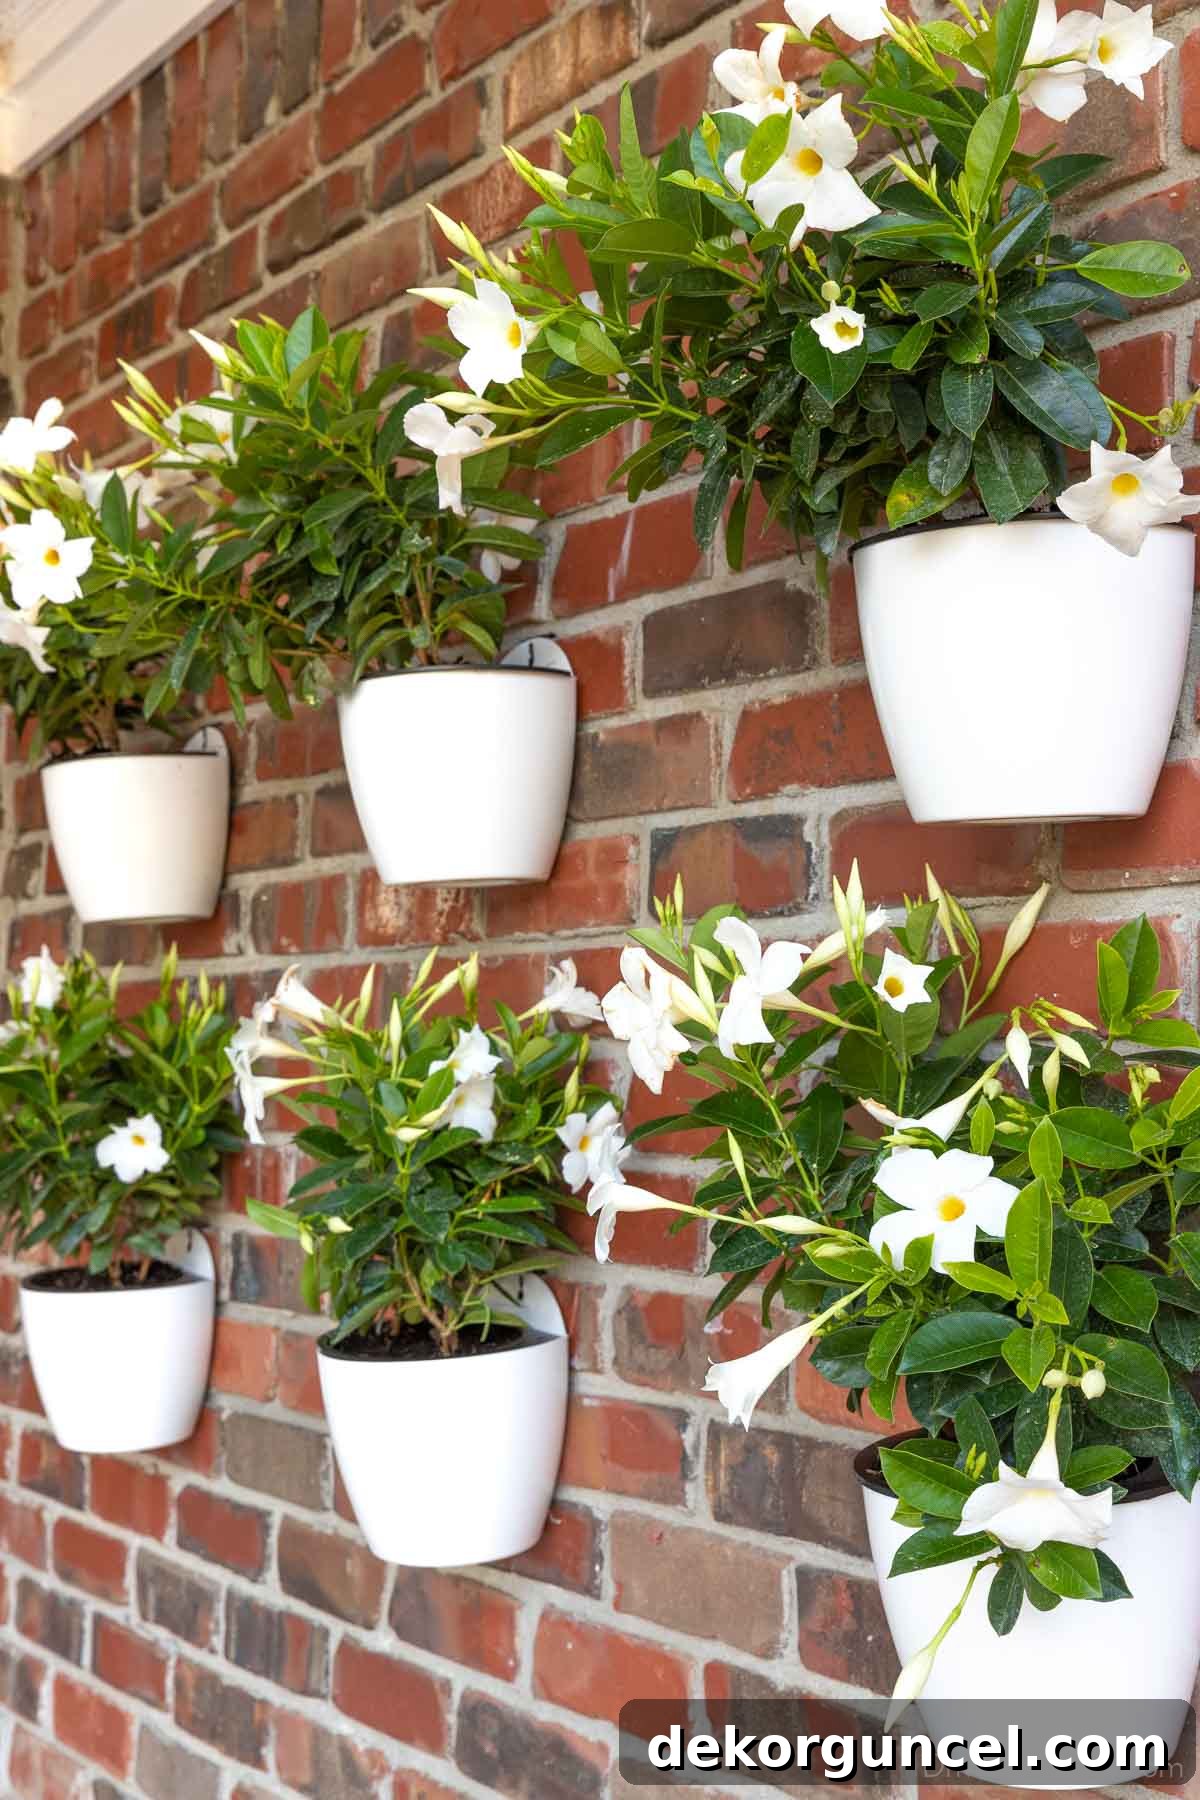
These types of hanging planters are absolutely perfect for cultivating a delightful variety of herbs and vegetables that thrive in shallow containers. Think fast-growing leafy greens like various types of lettuce, spinach, and Swiss chard; quick-maturing radishes; and a wide array of aromatic herbs such as basil, chives, mint, oregano, and thyme. Strawberries also do exceptionally well in hanging planters, allowing their luscious fruits to cascade beautifully while keeping them off the ground and safely away from common pests. This method is arguably the simplest, most direct, and most visually impactful path to an inexpensive raised garden bed, requiring minimal footprint and often just a few basic tools for setup. For more detailed insights into my personal plant wall project and other creative ideas for optimizing your outdoor living area on a budget, be sure to check out my comprehensive post about back porch ideas on a budget.
5. Go Vertical: Tiered Vertical Garden Beds
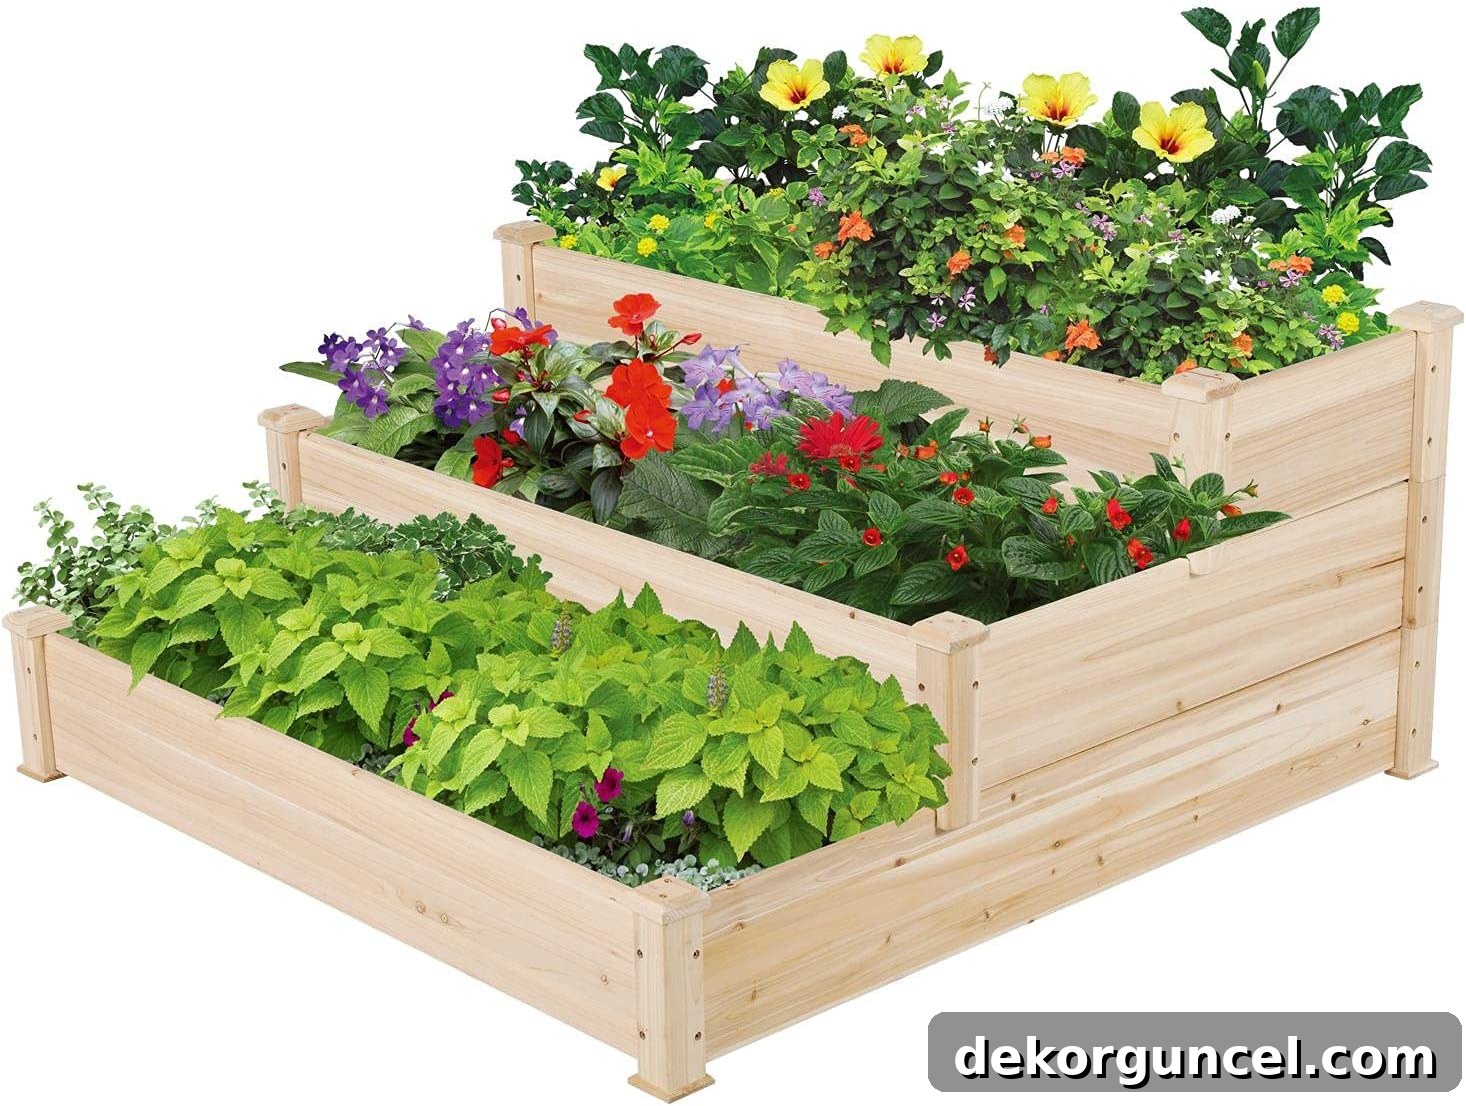
Taking the concept of space-saving gardening a step further, tiered vertical garden beds offer an excellent and highly efficient solution for maximizing growing potential in compact areas. These innovative structures allow you to cultivate multiple plants at different levels, making them ideally suited for balconies, small patios, narrow side yards, or even positioned against a wall in a larger garden. They are a smart and sustainable way to expand your gardening efforts without consuming valuable horizontal ground space, truly transforming how you view your gardening possibilities.
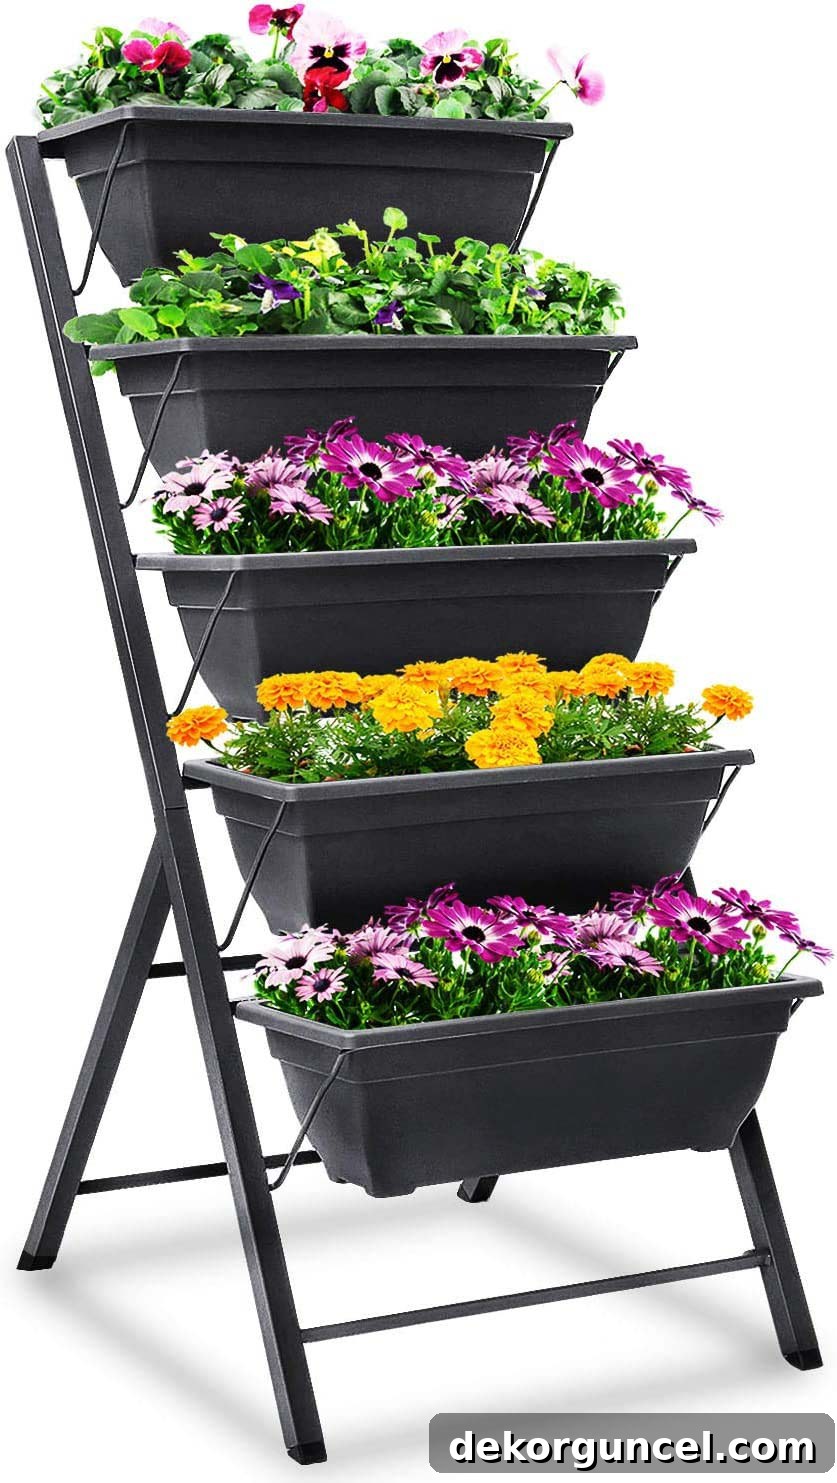
One popular configuration is a tiered vertical garden bed that consists of a series of individual, small beds or planter boxes stacked above each other, such as this charming wooden option. These designs often feature planter boxes of varying sizes or depths, providing remarkable versatility for different plant types and their specific root requirements. You can strategically grow sun-loving herbs on the top tiers, leafy greens in the middle, and perhaps some trailing flowers, shade-tolerant plants, or strawberries on the lower levels. The open design promotes good air circulation, which helps prevent fungal diseases, and the vertical arrangement means less bending and easier access to all your plants for watering, pruning, and harvesting.
Another fantastic space-saving option for vertical gardening includes more compact tiered planters, like this highly efficient system. These are often designed with individual pots or pockets that cleverly stack or slot into a central column, creating a self-contained vertical garden tower. They are particularly well-suited for a variety of plants, including culinary herbs, vibrant succulents, colorful annual flowers, and even some compact vegetable varieties. When selecting a tiered vertical garden, carefully consider the material (common options include wood, durable plastic, or classic terracotta), the overall stability of the structure, and the ease of watering each individual tier to ensure all your plants receive adequate moisture and nutrients. These ingenious systems truly redefine what’s possible in small-space gardening, allowing you to cultivate a lush garden even in the most confined urban environments.
6. Creative & Sustainable: Repurpose, Recycle, Reimagine!
For the truly budget-conscious and creatively inclined gardener, repurposing everyday items into unique and highly functional raised garden beds is a fantastic and sustainable approach. This method not only significantly saves money by utilizing materials that might otherwise go to waste but also adds immense character, charm, and a deeply personalized touch to your outdoor space. The possibilities are vast, limited only by your imagination, a little ingenuity, and a willingness to embrace the unconventional.
Utilizing Leftover Construction Materials: Bricks, Blocks, and Pavers
If you happen to have a surplus of bricks, concrete blocks, or landscaping pavers left over from a previous home improvement or construction project, don’t let them gather dust in a corner of your yard! These robust and readily available materials are absolutely perfect for constructing durable and visually appealing raised garden beds at virtually no additional cost. Simply stack them to your desired height, creating sturdy, insulative walls for your garden. For added stability, especially if building a taller bed, you can use a strong landscaping adhesive or a thin layer of mortar between courses. The modular nature of these materials allows for endless design possibilities, from simple rectangular beds to more intricate patterns and curved shapes. Beyond their affordability, these materials provide excellent insulation for the soil, helping to regulate temperature, and can last for decades with minimal maintenance.
The Unexpected Planter: Repurposing an Old Bathtub
An old freestanding bathtub, often found cheaply or even completely free from demolition sites, scrapyards, or online marketplaces, can be creatively repurposed into an eye-catching and generously sized planter. Its deep basin is naturally perfect for plants with extensive root systems, providing ample space for growth, and its unique, often vintage shape adds a whimsical, nostalgic charm to any garden setting. Before filling, it is absolutely essential to ensure you drill several drainage holes in the bottom of the tub if they don’t already exist; proper drainage is critical. You can elevate it on bricks or blocks for better drainage and easier access. Consider painting the exterior for a vibrant pop of color, or leave it as-is for a charmingly rustic, weathered look. Bathtubs are particularly well-suited for growing root vegetables like carrots and potatoes, large herbs, or even a miniature vegetable patch with a mix of leafy greens and small tomatoes.
Building with Pallets: A DIY Dream (with a Crucial Cautionary Note)
Wooden pallets are an incredibly popular and versatile resource for countless DIY projects, and raised garden beds are certainly no exception. There’s a wealth of online tutorials and creative ideas demonstrating how to safely dismantle pallets and reconstruct them into various raised bed designs, often at a minimal cost. Pallets are widely available, sometimes even for free from local businesses, industrial parks, or construction sites. However, a critical safety consideration when working with pallet wood, especially for growing edibles, is to ensure it is heat-treated (indicated by the stamp “HT”) rather than chemically treated (indicated by the stamp “MB” for Methyl Bromide). Chemically treated pallets can leach harmful substances into your soil, making them unsafe for growing edible plants. Always, always check for the “HT” stamp to ensure your pallet wood is food-safe and non-toxic. Once you have verified safe pallets, they can be easily disassembled, and the planks used to build custom-sized raised beds, adding a rustic, reclaimed, and wonderfully sustainable aesthetic to your garden.
These creative repurposing ideas highlight that with a little ingenuity, resourcefulness, and effort, anyone can create a functional, beautiful, and inexpensive raised garden bed without spending a fortune. Whether you’re a seasoned green thumb or just starting out on your gardening journey, there’s an affordable and effective solution waiting for you.
I hope this comprehensive guide has provided you with the inspiration and practical knowledge you need to embark on your own raised garden bed project. Embrace the process, enjoy the transformation of your space, and savor the rewarding experience of bringing your garden dreams to life, one seed at a time. Happy planting!
