
Is your once-pristine grout now an unsightly mosaic of dirt and discoloration, detracting from the beauty of your floors? You’re not alone. Dirty grout can be one of the most frustrating aspects of home maintenance, making even the cleanest tiles look neglected. But what if we told you that restoring your grout to its original sparkle is not only possible but also achievable with the right techniques and tools? Today, we’re diving deep into the world of grout cleaning, sharing proven strategies to transform your floor tile grout from grimy to gleaming.
We’ve meticulously tested and evaluated the most popular grout cleaning methods available, ranging from powerful commercial solutions to eco-friendly homemade remedies and innovative steam cleaning. Our comprehensive guide will walk you through each method, revealing what truly works, what falls short, and how to achieve results that will make your floors look brand new. Say goodbye to dingy grout lines and hello to beautifully refreshed floors. Let’s embark on this transformative cleaning journey together! (This post includes affiliate links, which help support our content creation; for full disclosure details, please click here)
Mastering Grout Cleaning: Essential Tools & Preparation
Before you embark on the satisfying journey of transforming your dirty grout into sparkling lines, proper preparation is key. Having the right tools not only makes the job easier and more efficient but also ensures your safety throughout the cleaning process. Grout cleaning often involves strong agents and vigorous scrubbing, so equipping yourself with the necessary gear is paramount.
First and foremost, safeguarding your hands is critical. You’ll need a reliable pair of chemical-resistant rubber gloves, such as these heavy-duty options, to protect your skin from potential irritation or chemical burns caused by various cleaning solutions. These gloves provide a crucial barrier, allowing you to handle cleaners with confidence. Equally important is eye protection. Cleaning can lead to splashes or fumes, making these no-fog goggles an indispensable item to shield your eyes from any accidental contact.
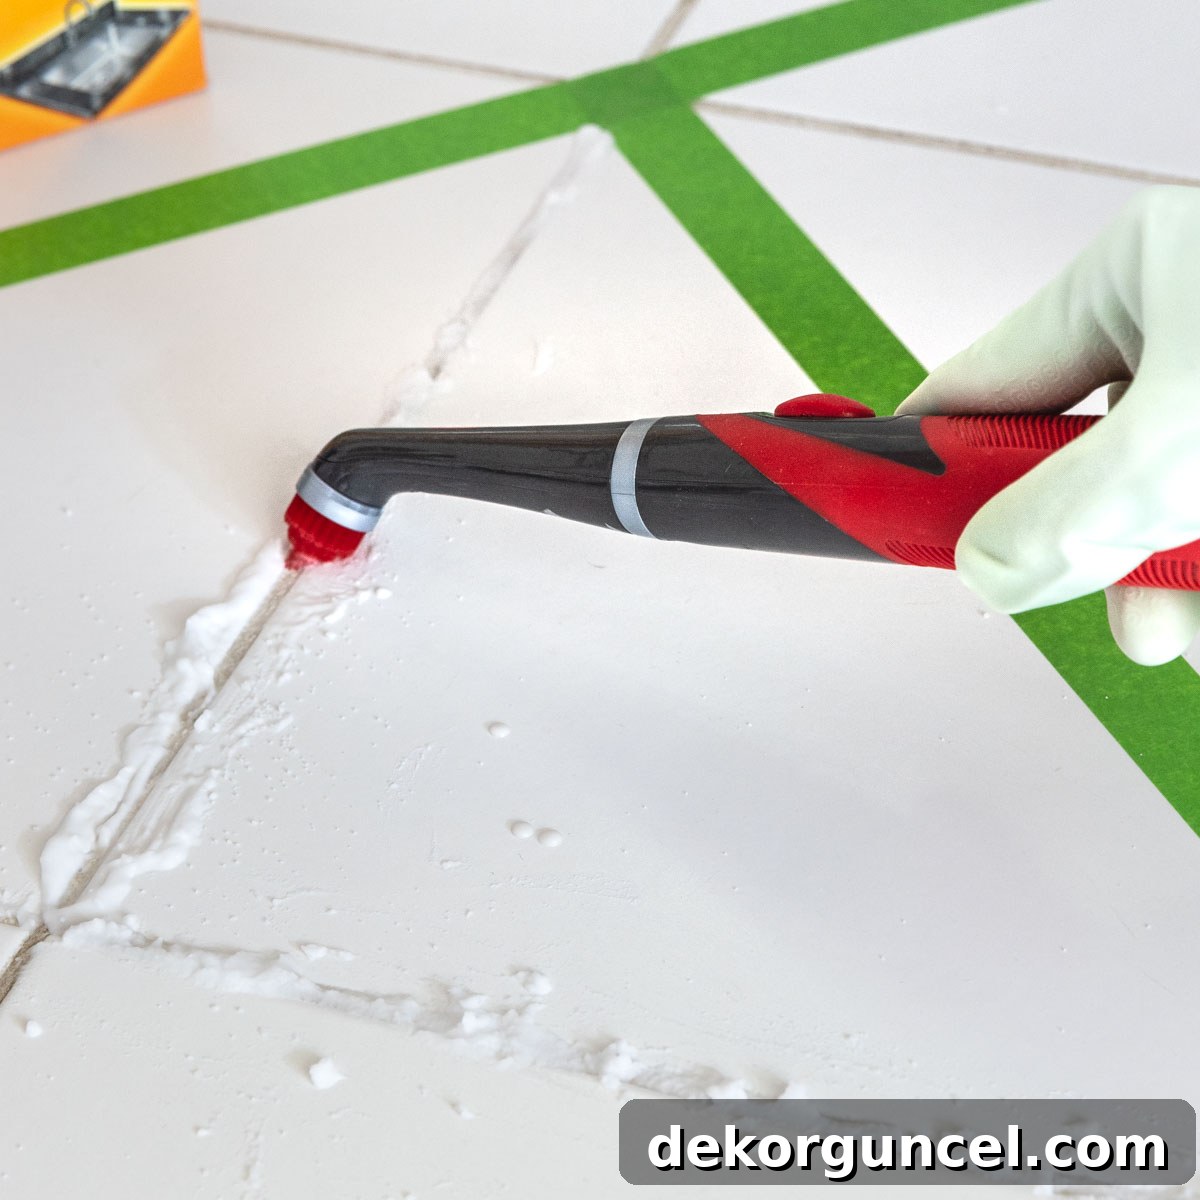
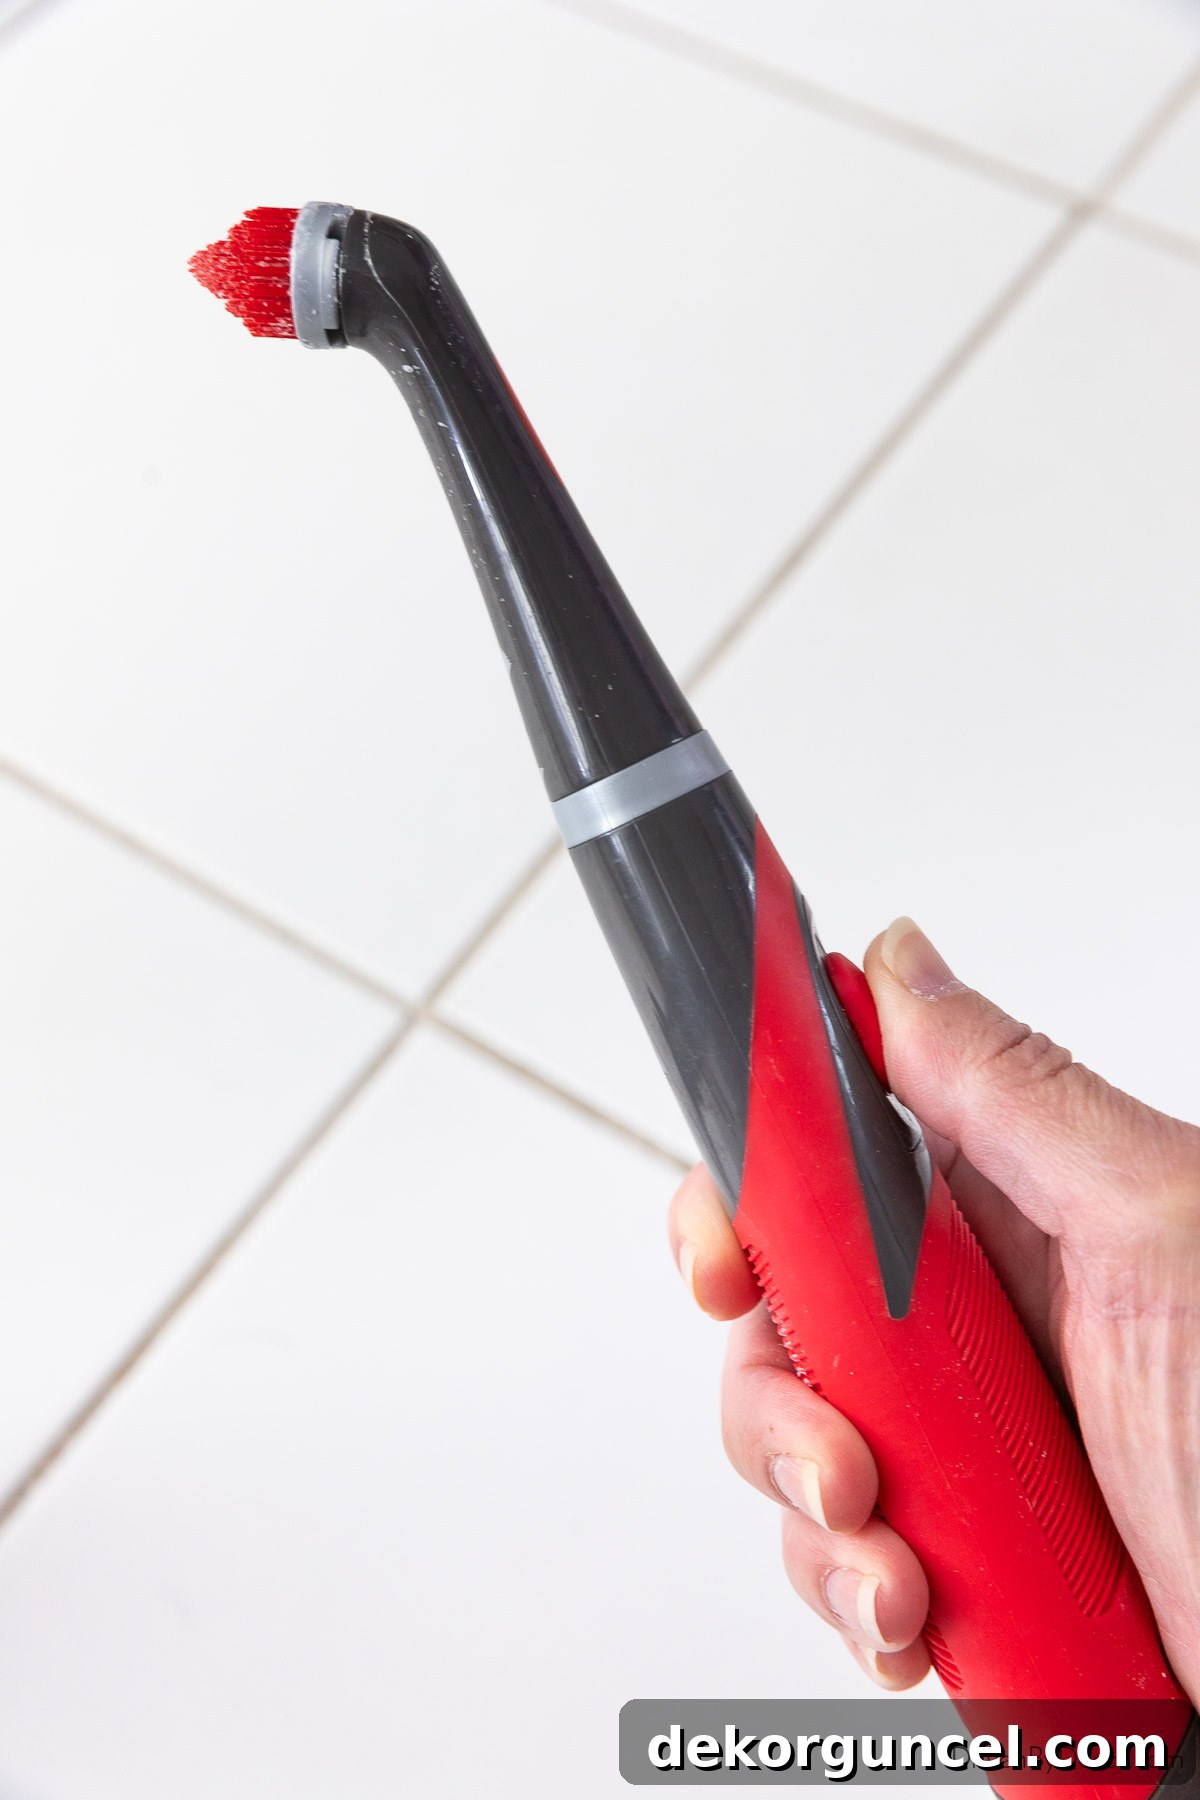
Next on your essential toolkit list is a high-quality grout brush. Forget flimsy brushes that wear out after a single use. For unparalleled efficiency and effectiveness, my absolute favorite is this battery-operated Rubbermaid spin brush. Its powerful spinning action takes the hard work out of scrubbing, allowing the brush to do the heavy lifting for you. This versatile tool comes with a multipurpose scrub head, perfect for tackling grime in small, hard-to-reach areas throughout your home. Crucially, the model I’ve linked also includes a specialized grout scrubber head, designed specifically to penetrate deep into grout lines, making it an absolute game-changer for deep cleaning and restoring even the most stubborn stains.
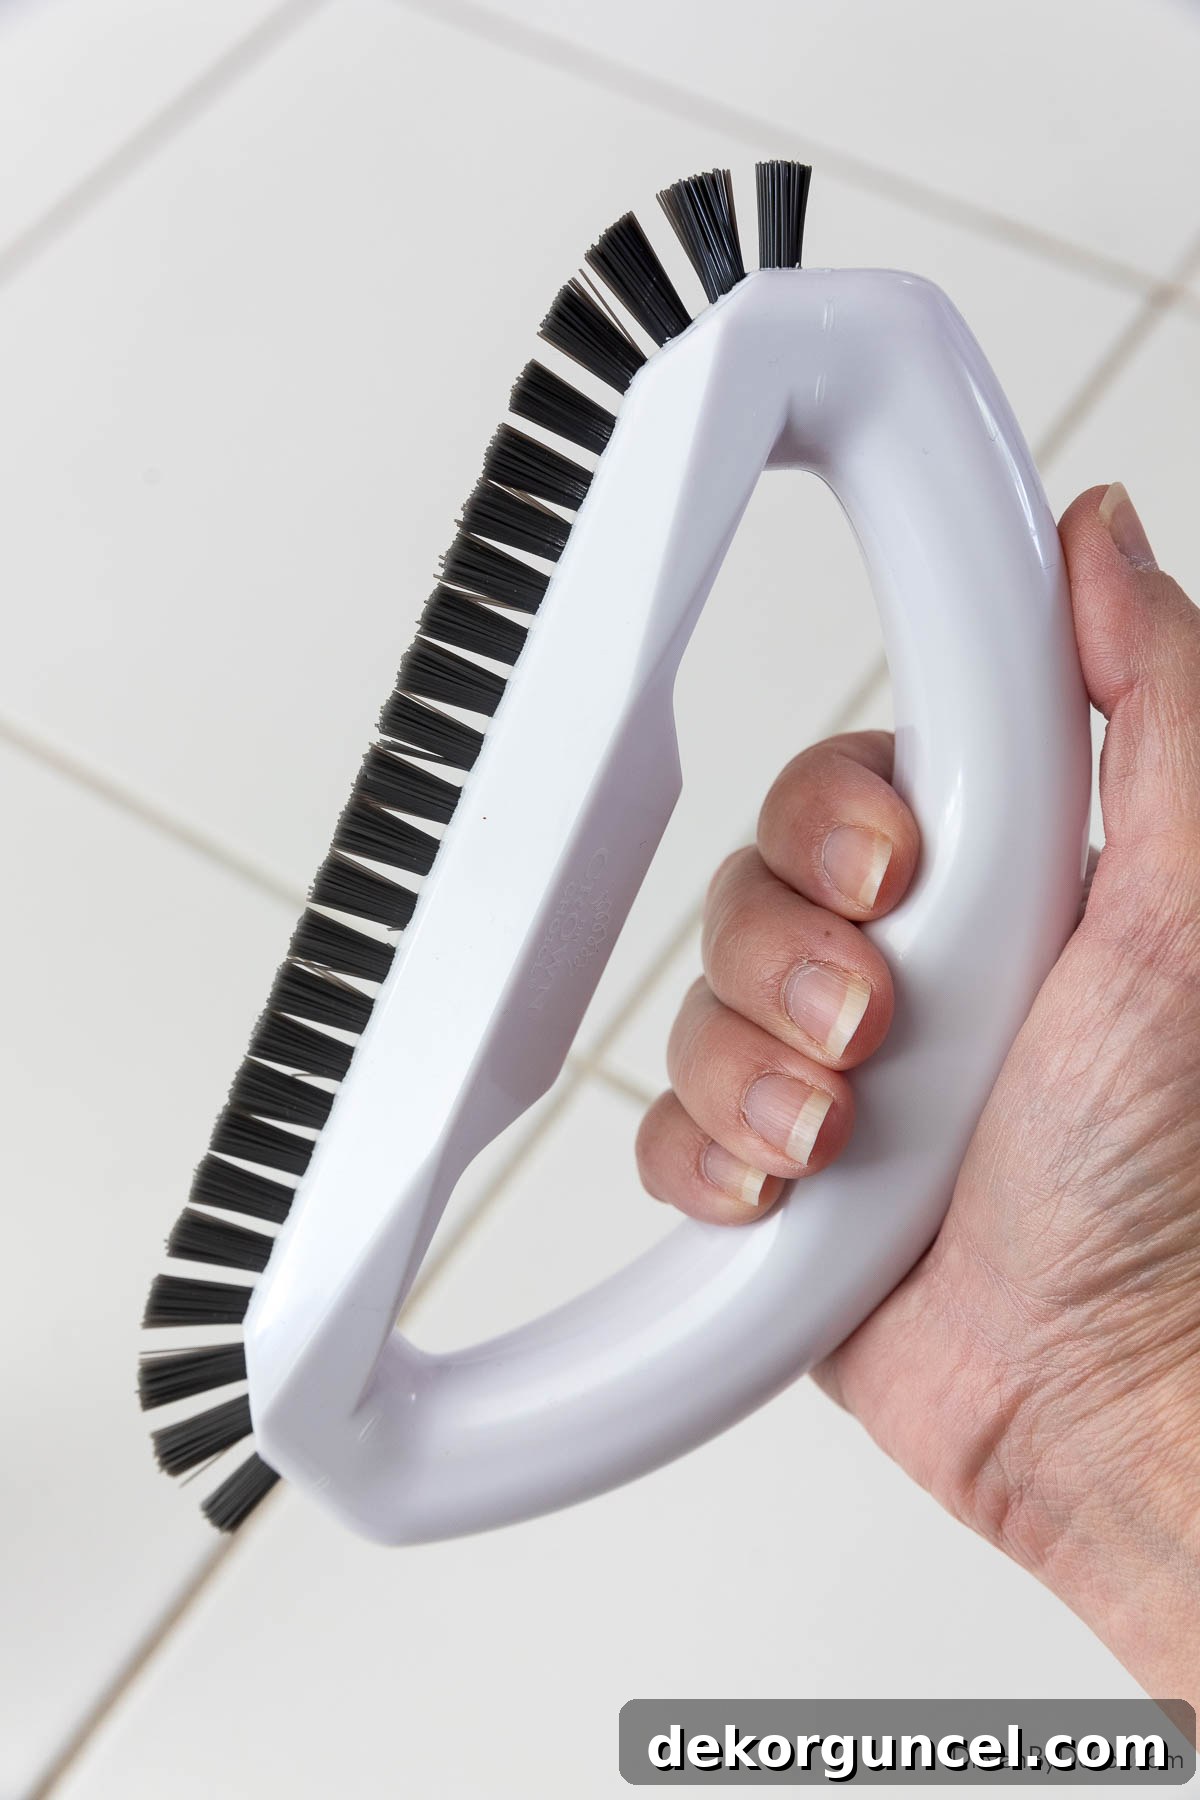
For those times when you’re tackling a larger area of grout or prefer a more traditional approach, this robust grout cleaner brush is an excellent alternative. Its ergonomically designed handle and stiff, angled bristles are expertly crafted to effortlessly reach into corners and along edges, ensuring no grout line is left untouched. This manual brush provides excellent control and leverage, allowing you to apply targeted pressure where it’s needed most, making it ideal for both quick touch-ups and extensive cleaning projects.
Crucial Pre-Cleaning Tip: Always Test First! When introducing any new cleaning method or product, it is absolutely vital to test it on a small, inconspicuous area of your grout and tile before applying it to your entire floor. This precautionary step will help you determine if the cleaner causes any discoloration, etching, or damage to your grout or surrounding tiles. Wait a few hours, or even a full day, to observe the results before proceeding. This simple test can save you from potential headaches and costly repairs, ensuring your grout cleaning efforts yield beautiful, safe results.
For more essential tools that make deep cleaning every corner of your home a breeze, be sure to check out my detailed post on the best deep cleaning tools – they are definite must-haves for any serious cleaner!
Discovering the Ultimate Grout Cleaners: Our Top Picks
Navigating the vast array of grout cleaning products and homemade concoctions can be overwhelming. To simplify your search, we’ve put countless hours into testing and evaluating a variety of solutions, meticulously detailing their application, effectiveness, and what to do once your grout is sparkling clean. Below, we present the crème de la crème – the top performers that delivered exceptional results in our rigorous tests. These are the quick answers you need to get started on your grout restoration journey:
Best Overall Bottled Grout Cleaner: Zep Grout Cleaner & Brightener – This powerhouse impressed us with its remarkable stain-lifting capabilities and minimal scrubbing required, making it ideal for deeply embedded dirt.
Best Effective Homemade Grout Cleaner: A potent yet gentle blend of Baking soda + hydrogen peroxide + a touch of mild dish soap. This natural solution is incredibly effective, cost-efficient, and free from harsh chemicals. Continue reading for the precise formula and application instructions!
Best Specialty Cleaner for Marble/Natural Stone Grout: Granite Gold Grout Cleaner – Specially formulated to be safe and non-abrasive for delicate natural stone surfaces, ensuring a pristine clean without damage.
What NOT to Use: Avoiding Common Grout Cleaning Mistakes
While knowing which products work best is essential, understanding what to avoid is equally, if not more, critical for preserving the integrity and longevity of your grout. Improper cleaning agents can cause irreversible damage, leading to weakened grout lines, discoloration, or even etching of your surrounding tiles. Steering clear of these common pitfalls will save you time, money, and frustration in the long run.
First, a crucial warning: Grout that is unsealed or already in poor condition should never be routinely cleaned with highly acidic products or chlorine bleach. These aggressive chemicals, while seemingly effective in the short term, can corrode and degrade the cementitious binder in your grout over time, leading to crumbling, erosion, and a porous surface that attracts even more dirt. This category of harmful cleaners includes many household staples often mistakenly recommended, such as toilet bowl cleaner (despite what viral social media trends might suggest – truly, don’t believe everything you see on TikTok!), certain harsh commercial grout cleaners, and even popular household white vinegar.
White vinegar, a darling of natural cleaning enthusiasts, is a diluted acetic acid. While it can tackle some stains, its acidic nature makes it unsuitable for regular use on cement-based grout. It slowly eats away at the grout, weakening it and making it more susceptible to future staining. Save the vinegar for other cleaning tasks, but keep it far away from your grout lines, especially if they are unsealed.
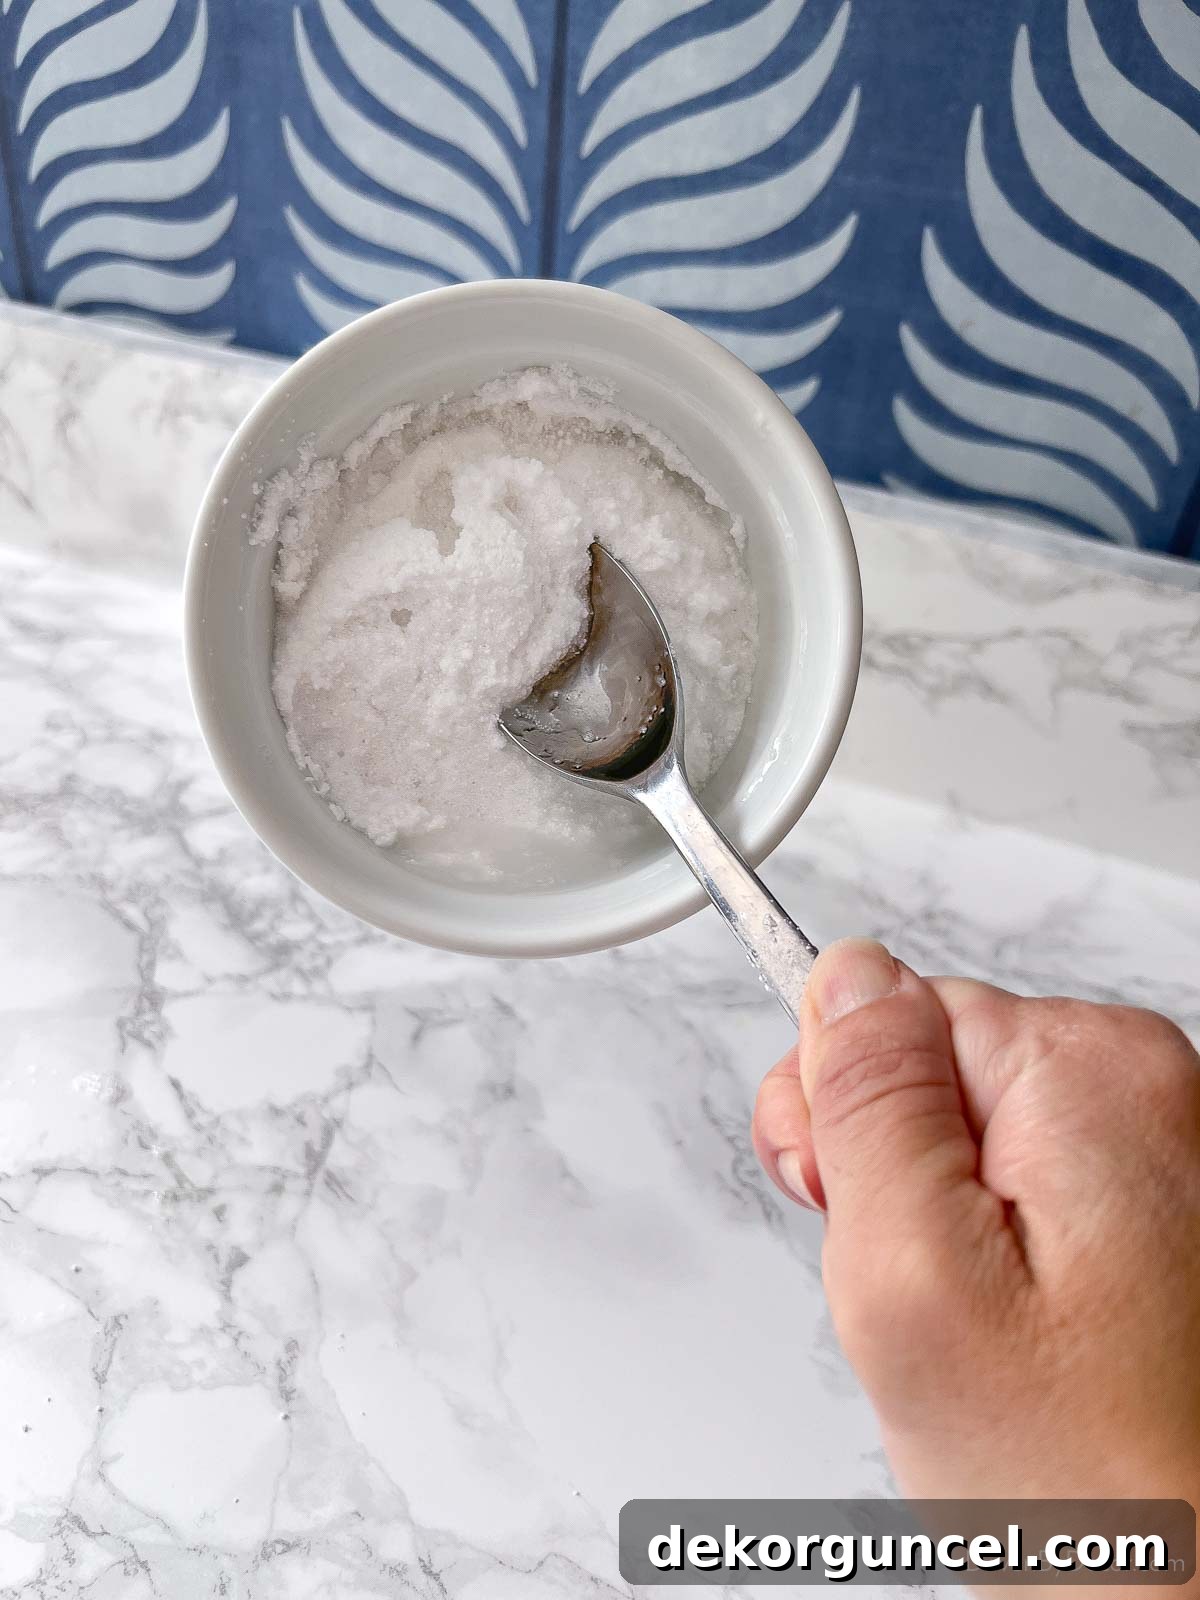
Another product I specifically advise against, following my own extensive testing, is using a paste made from OxiClean and water directly on your grout. I was keen to test oxygenated bleach as it’s often marketed as a gentler alternative to chlorine bleach. I carefully followed the grout cleaning instructions provided on the packaging, creating a paste as directed. However, the results were far from ideal. The paste dried incredibly quickly, forming stubborn clumps and adhering so firmly to the grout in places that I had to resort to using the scraper side of a small brush to painstakingly chip it off. This unexpected outcome made the cleaning process far more laborious than necessary.
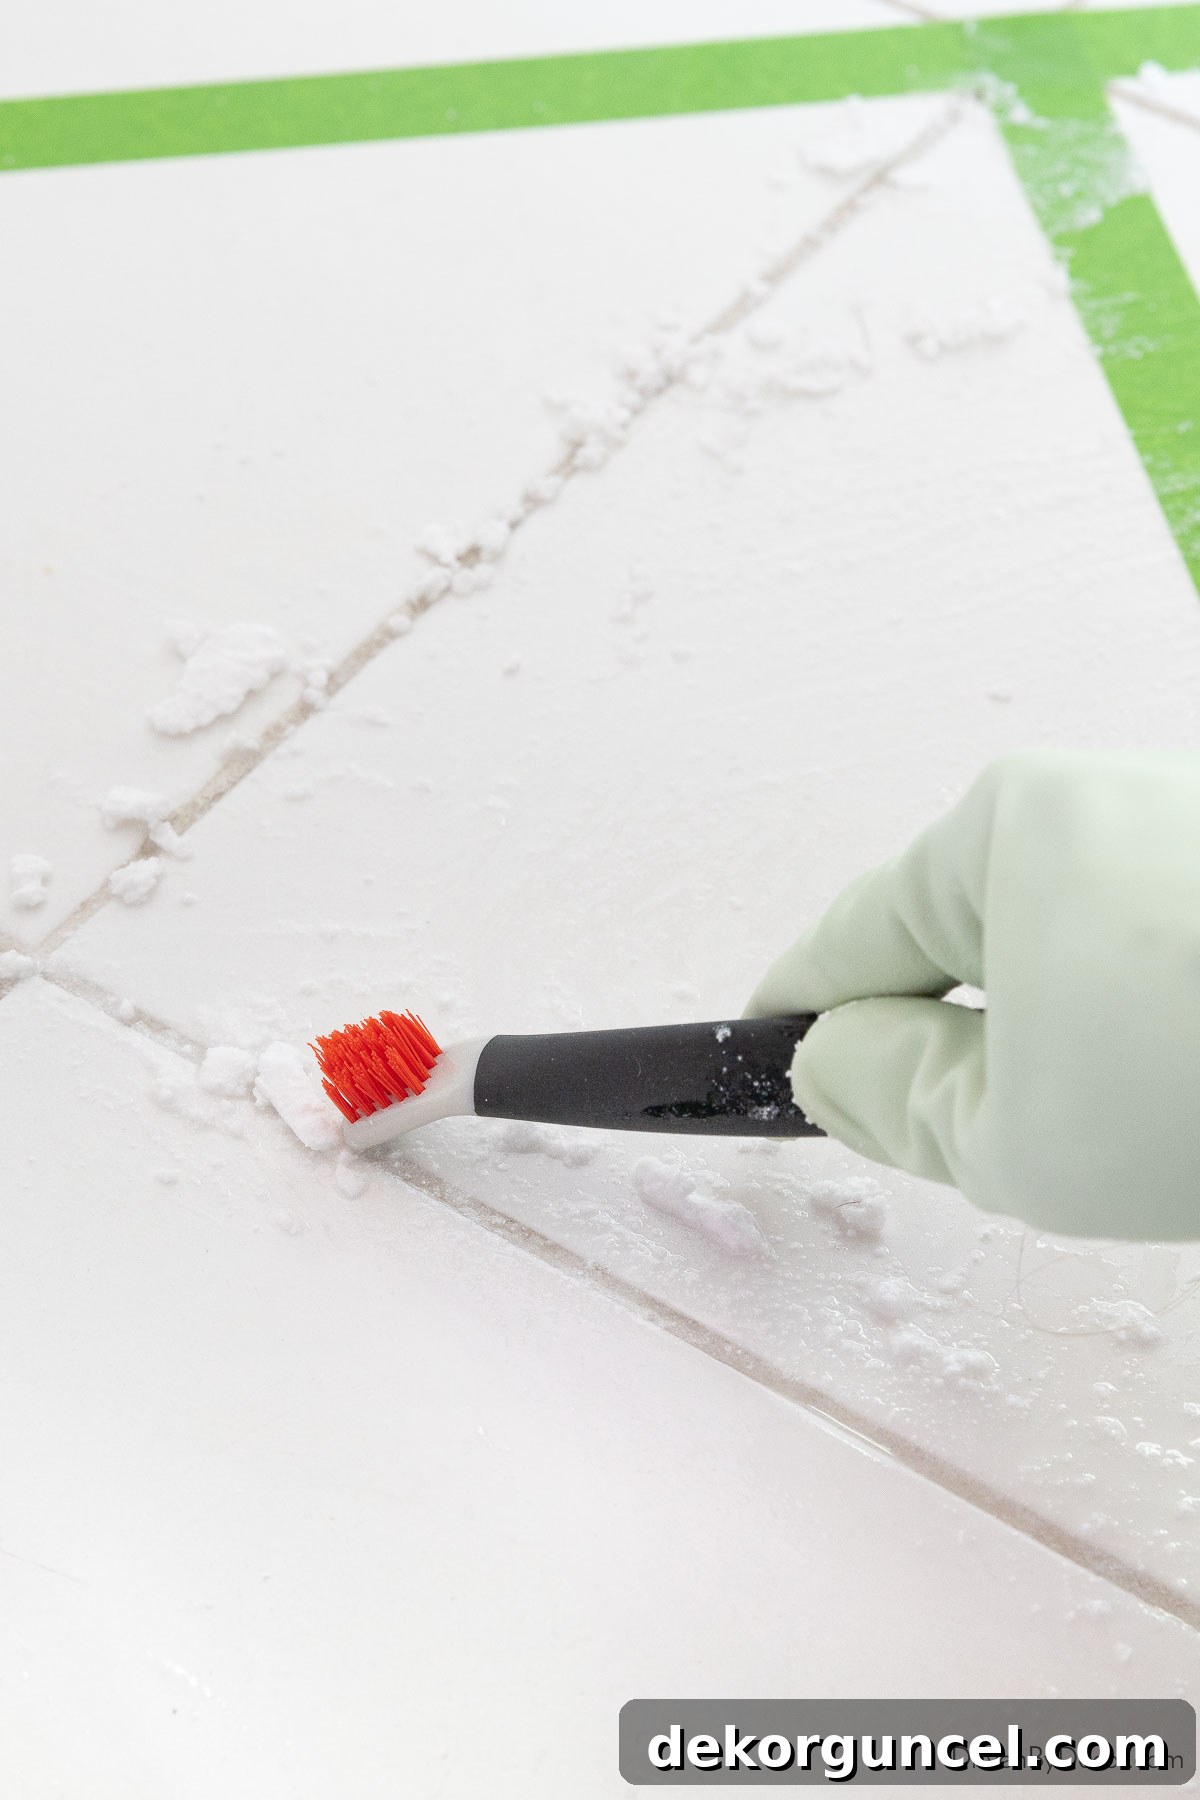
The extent of this hardening became even clearer when I attempted to rinse out the bowl containing the leftover OxiClean paste. My spoon was practically cemented to the bottom, having dried to a rock-hard consistency. This experience demonstrated that while oxygenated bleach might have its uses, its application as a paste directly on grout creates more problems than it solves, making removal a significant challenge.
Let’s also address specific considerations for cleaning grout around natural stone tiles, such as marble, travertine, or limestone. If your flooring features these delicate materials, you must exercise extreme caution. You should NEVER use any acidic cleaners or bleach on grout surrounding natural stone, not even for a single, one-time application. These harsh chemicals can etch, dull, and permanently damage the beautiful, porous surface of your natural stone tiles, leaving irreversible marks. Furthermore, you must also be meticulous about avoiding anything abrasive. Natural stone is considerably softer and more prone to scratching than ceramic or porcelain tiles. Abrasive brushes or cleaning powders can mar the surface, diminishing its natural luster. Later in this post, I’ll share more precise recommendations for what you CAN safely use on grout adjacent to natural stone.
Now that you’re fully equipped with the right tools and have a clear understanding of what cleaning agents to avoid, it’s time to prepare your floors. Begin by thoroughly sweeping or vacuuming your entire floor to remove any loose dirt, dust, hair, and debris. This crucial preliminary step prevents you from simply spreading dirt around when you start applying liquid cleaners. Once your floor is cleared of superficial grime, we’re ready to tackle that deeply embedded grout!
Our Comprehensive Grout Cleaner Testing Methodology
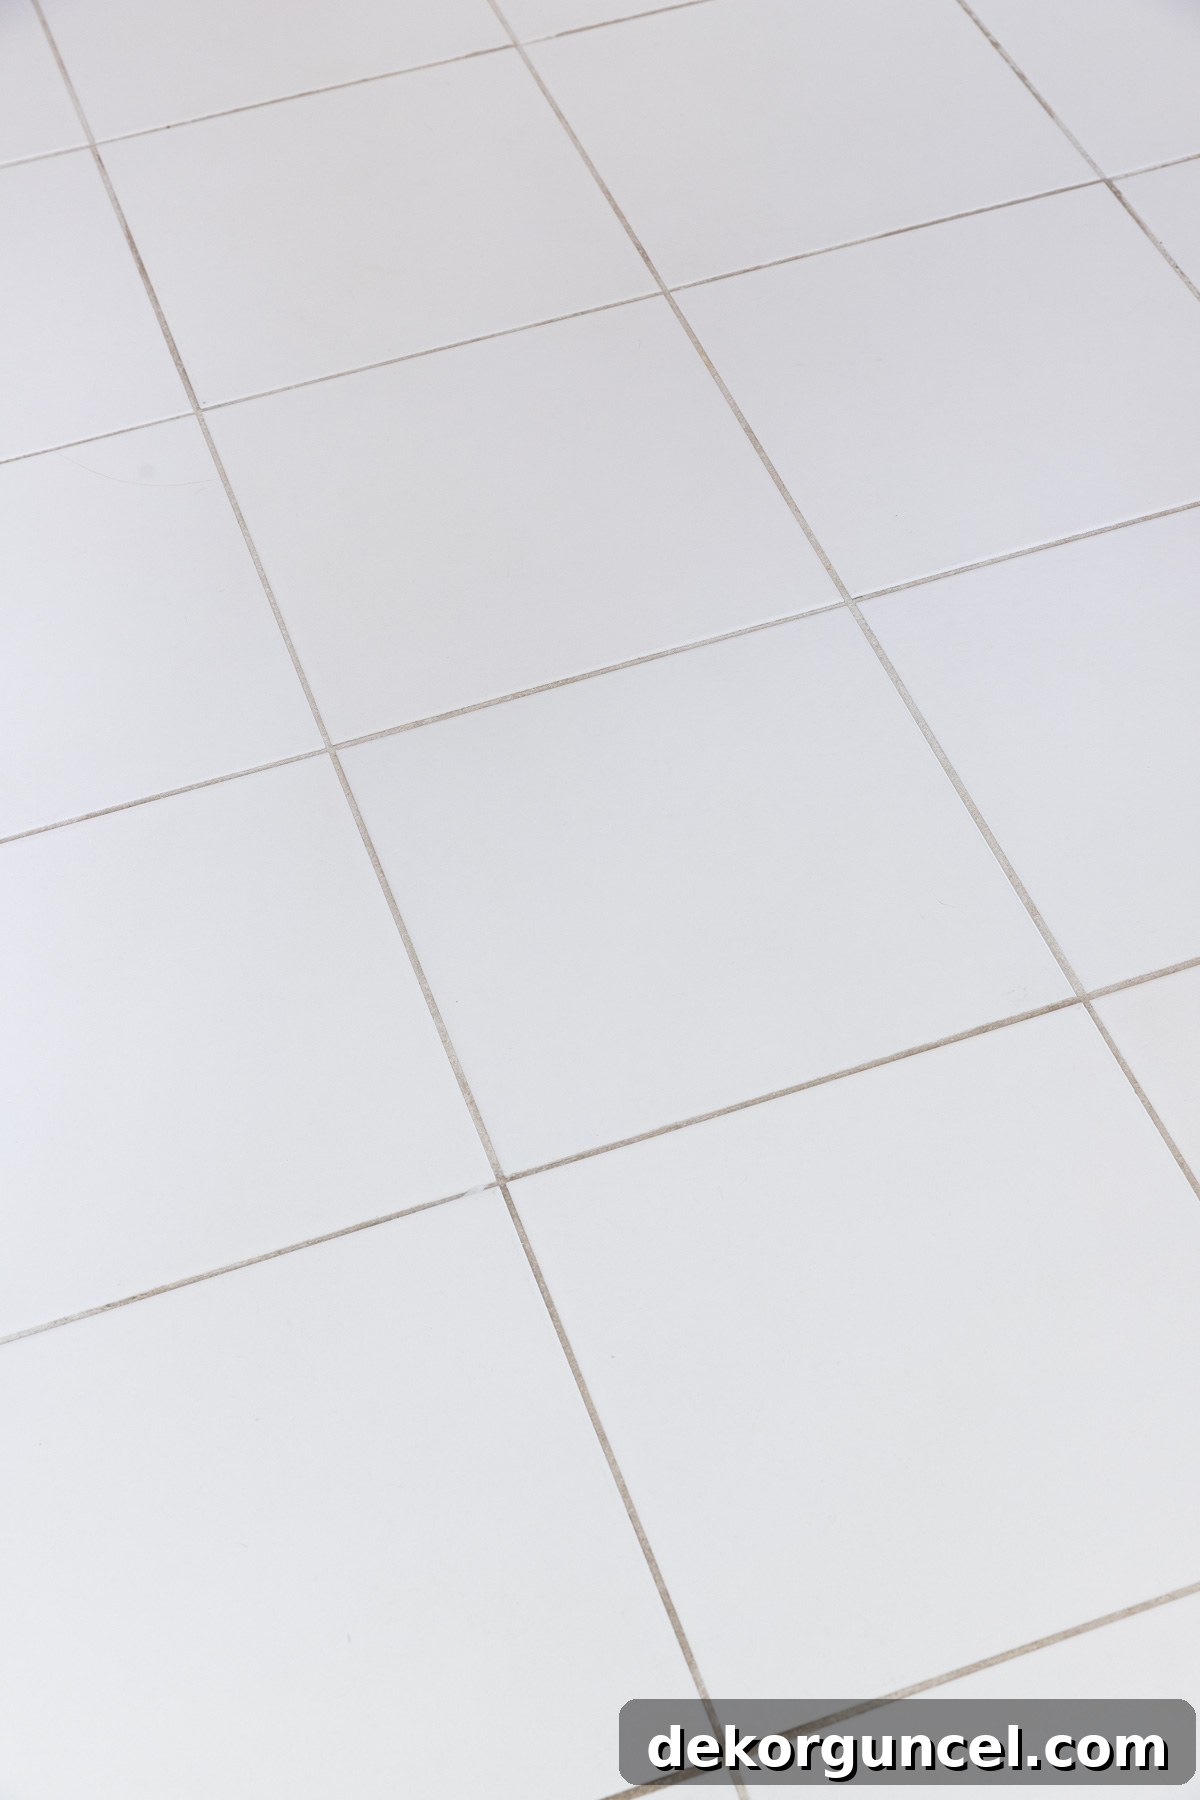
To provide you with the most accurate and reliable recommendations, I undertook a rigorous testing process, evaluating various grout cleaning methods under real-world conditions. My testing ground was the notoriously stained grout around the floor tiles in our primary bathroom – a space that, much to my initial dismay, came with our house. This grout had never been deep cleaned since we moved in, primarily because we knew a full remodel of this area was on the horizon. This meant the grout had accumulated years of grime, offering an excellent challenge for each cleaning method. While I suspected the original grout color might have been white, its current state of deep discoloration made it difficult to be certain.
Method 1: Unveiling the Power of Bottled Grout Cleaners
In my quest to identify the most effective bottled grout cleaner, I conducted extensive research, poring over countless online reviews and gathering invaluable insights from thousands of our dedicated Driven by Decor Instagram followers. This collective wisdom pointed overwhelmingly towards three top-rated and highly recommended commercial products. After putting each to the test, one clearly emerged as the undisputed champion: Zep Grout Cleaner & Brightener. This exceptional cleaner is formulated to deliver powerful results on both white and colored grout, targeting and dissolving stubborn stains without requiring aggressive scrubbing.
Zep Grout Cleaner & Brightener presents as a clear, liquid solution that is deceptively potent. The application process is straightforward: simply pour a small amount directly onto your grout lines, ensuring good ventilation in the area. Its low viscosity allows it to penetrate quickly and deeply into the porous grout, breaking down years of accumulated dirt and grime.
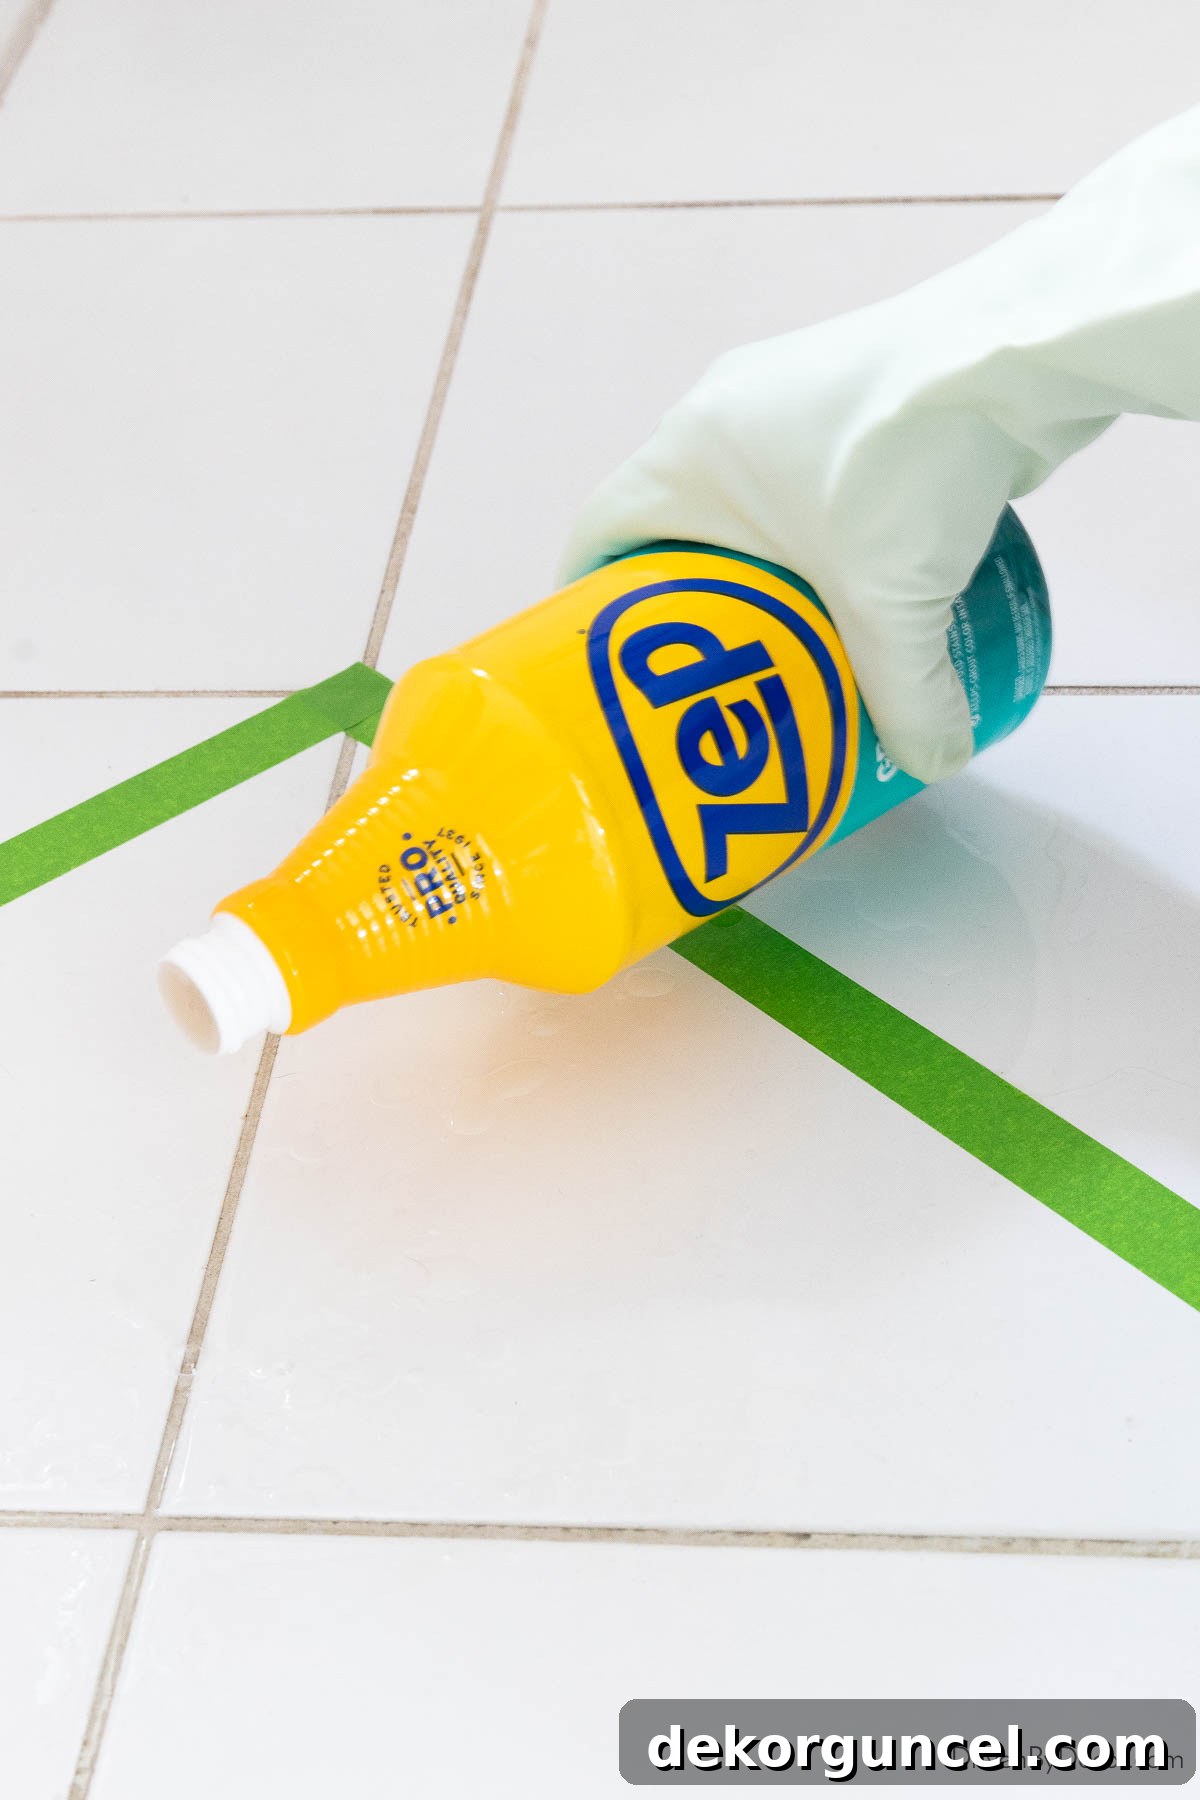
Once applied, allow the solution to sit for a brief period, typically 2-3 minutes, to allow it to work its magic. Following this brief dwell time, a light scrub with your chosen grout brush is usually all that’s needed to dislodge the loosened dirt. Finally, rinse the treated area thoroughly with clean water to remove any lingering cleaner and suspended grime. For best results, use a damp sponge or mop, frequently rinsing it in a bucket of fresh water until all residue is gone.
Pros & Cons of Zep Grout Cleaner
Zep Grout Cleaner & Brightener truly lived up to its stellar reputation, performing like a champ in my tests! It effortlessly cleaned my heavily stained grout, restoring it to an incredibly bright finish with surprisingly minimal scrubbing effort. The most satisfying revelation was discovering that my grout, hidden beneath layers of dirt, was indeed originally white – a testament to Zep’s powerful cleaning capabilities.
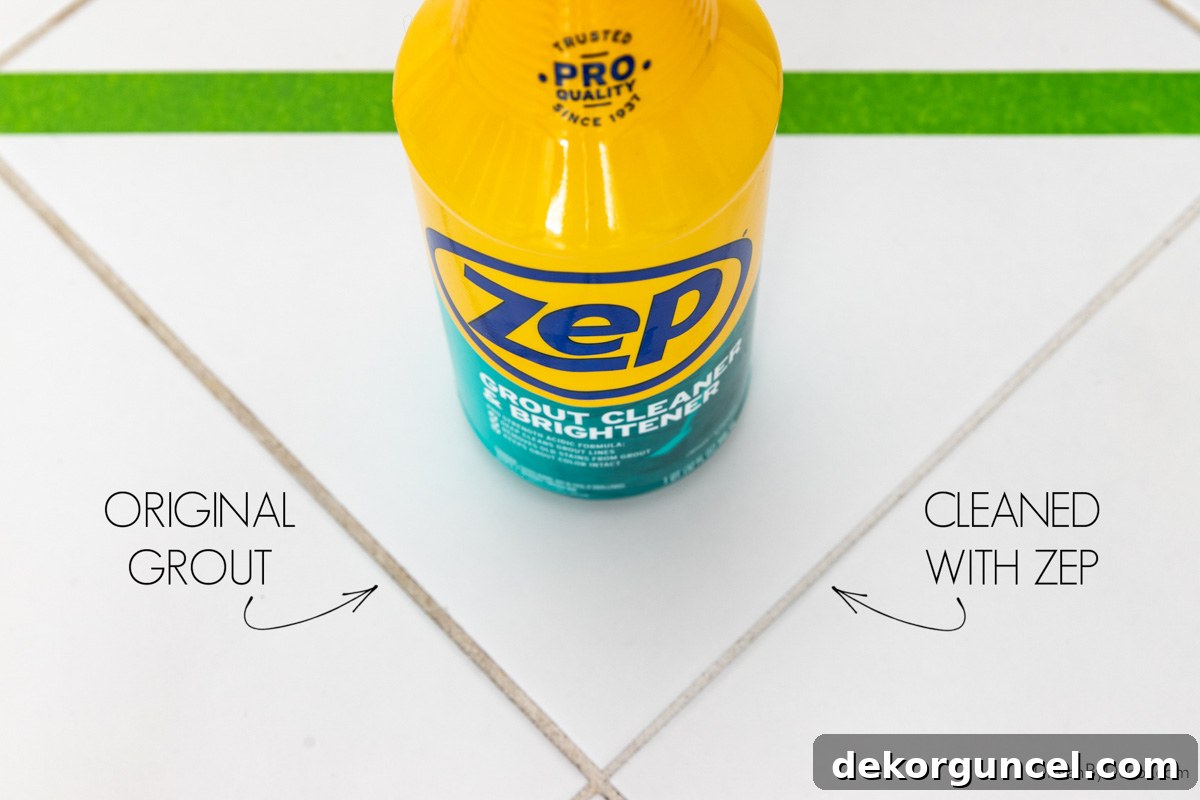
However, Zep Grout Cleaner & Brightener does come with a few considerations. Being a clear, watery liquid, its application on vertical surfaces like shower wall tile would be problematic. It tends to run down the wall quickly, making it difficult for the product to “stick” and penetrate the grout lines effectively. Additionally, the product is sold in a pour-top bottle rather than a spray bottle. While this is fine for floor grout, it makes precise application challenging and virtually impossible for wall grout without significant mess or waste. It’s also important to note that Zep is an acidic cleaner. As highlighted earlier, the repeated use of acidic cleaners can gradually corrode and weaken cement-based grout over time. Therefore, if you have deeply stained grout like mine, Zep Grout Cleaner & Brightener is an outstanding choice for an initial, powerful deep clean to restore its original color. Once your grout is beautifully revitalized, I strongly recommend maintaining its pristine condition with milder cleaning methods, such as the baking soda paste or steam cleaner options discussed later, to ensure its long-term integrity.
Method 2: The Efficacy of Homemade Grout Cleaners
For those seeking a more natural, cost-effective, and chemical-free approach to grout cleaning, homemade solutions often prove to be surprisingly powerful. Many effective concoctions can be whipped up using simple ingredients commonly found in most kitchens, offering an excellent alternative to commercial products. The primary advantages of homemade cleaners include their affordability, the absence of harsh chemical fumes, and the ability to control the ingredients you’re using in your home.
Among the various combinations I experimented with, the most effective and impressive homemade grout cleaner was a blend of baking soda, hydrogen peroxide, and a small amount of liquid dish detergent. Each ingredient plays a crucial role in this powerful synergy:
- Baking Soda: Acts as a mild abrasive, gently scrubbing away surface dirt and grime without scratching your tile or damaging the grout. Its alkaline nature also helps to neutralize odors.
- Hydrogen Peroxide: A natural bleach and disinfectant, hydrogen peroxide effectively cleans and brightens grout lines by breaking down stains and killing mildew spores. It’s a gentler oxidizer than chlorine bleach, making it safer for many surfaces.
- Mild Dish Detergent: Works as a surfactant, cutting through any greasy residues and helping the other ingredients penetrate and lift dirt more effectively.
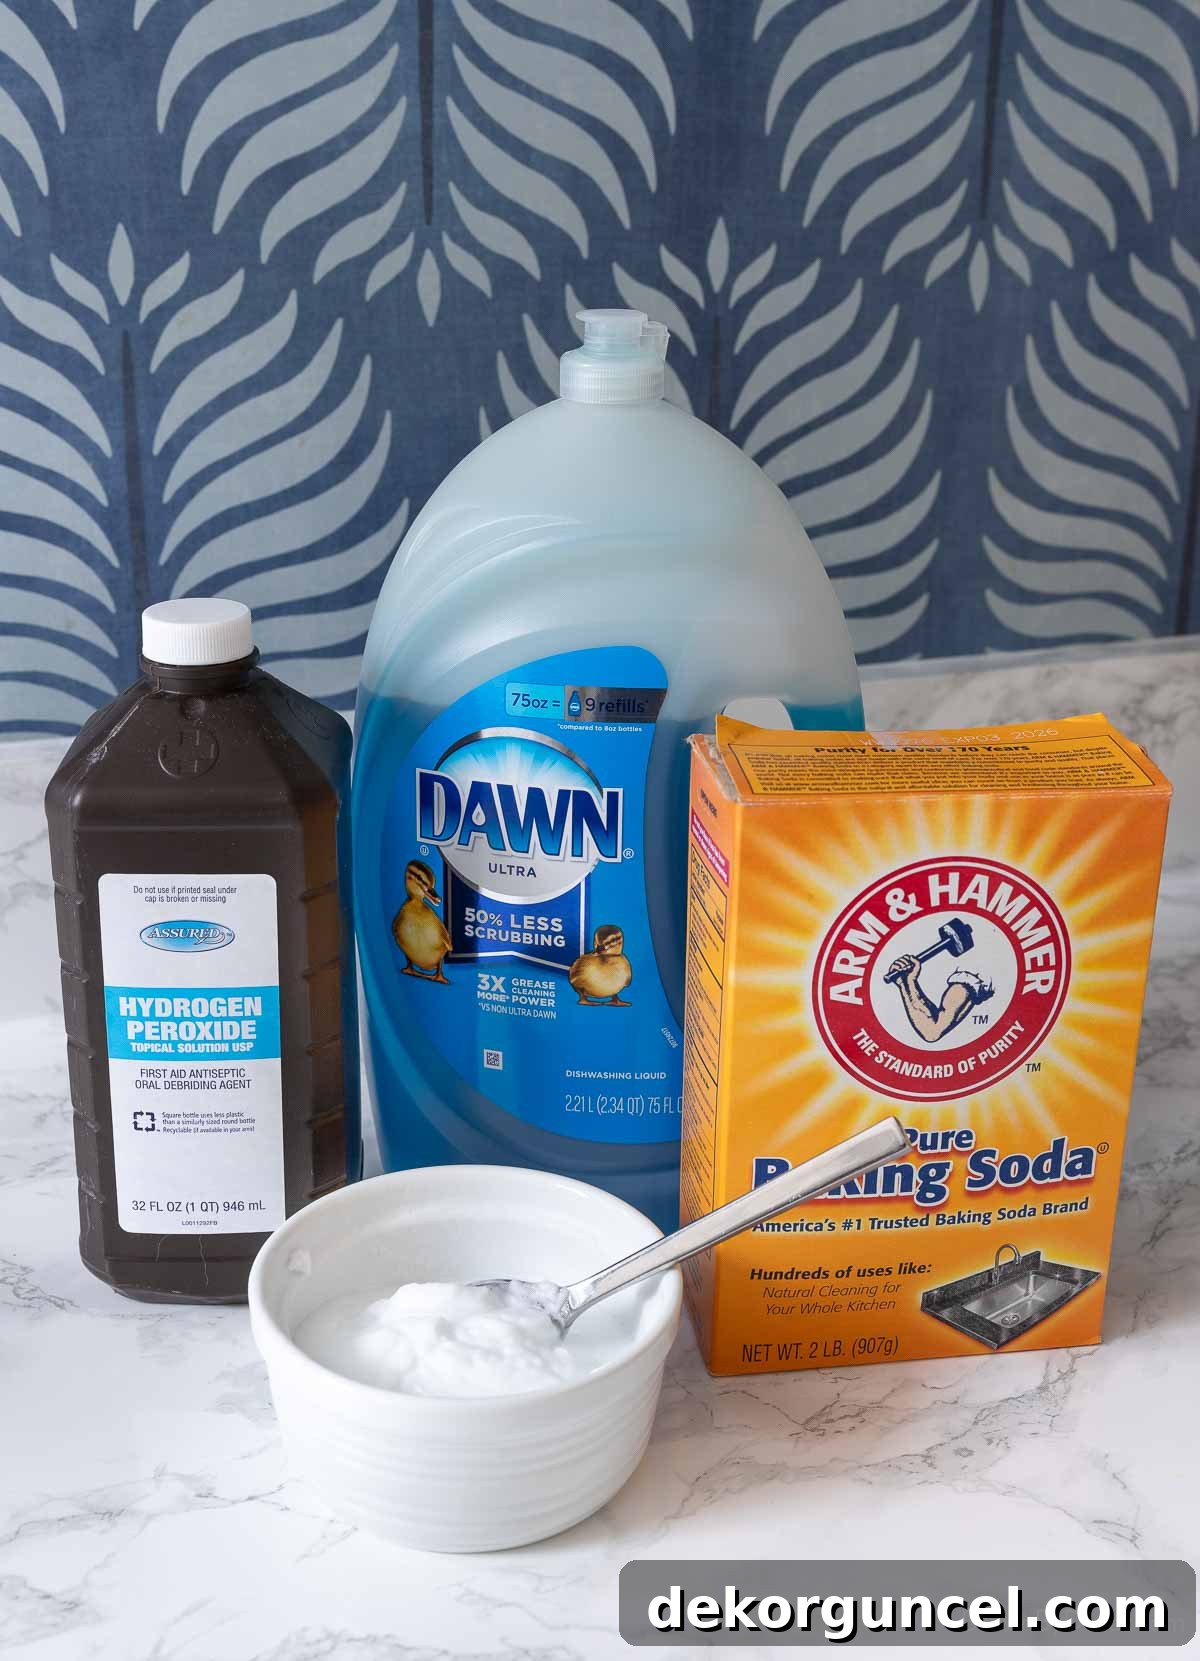
A commonly recommended formula involves two parts baking soda to one part hydrogen peroxide, with just a small squeeze of liquid dish soap. However, based on my testing, I personally found that using a slightly reduced amount of hydrogen peroxide results in a thicker, more manageable paste. Aim for a consistency similar to toothpaste, which makes it easier to apply precisely to the grout lines without it running off, ensuring maximum contact and cleaning power.
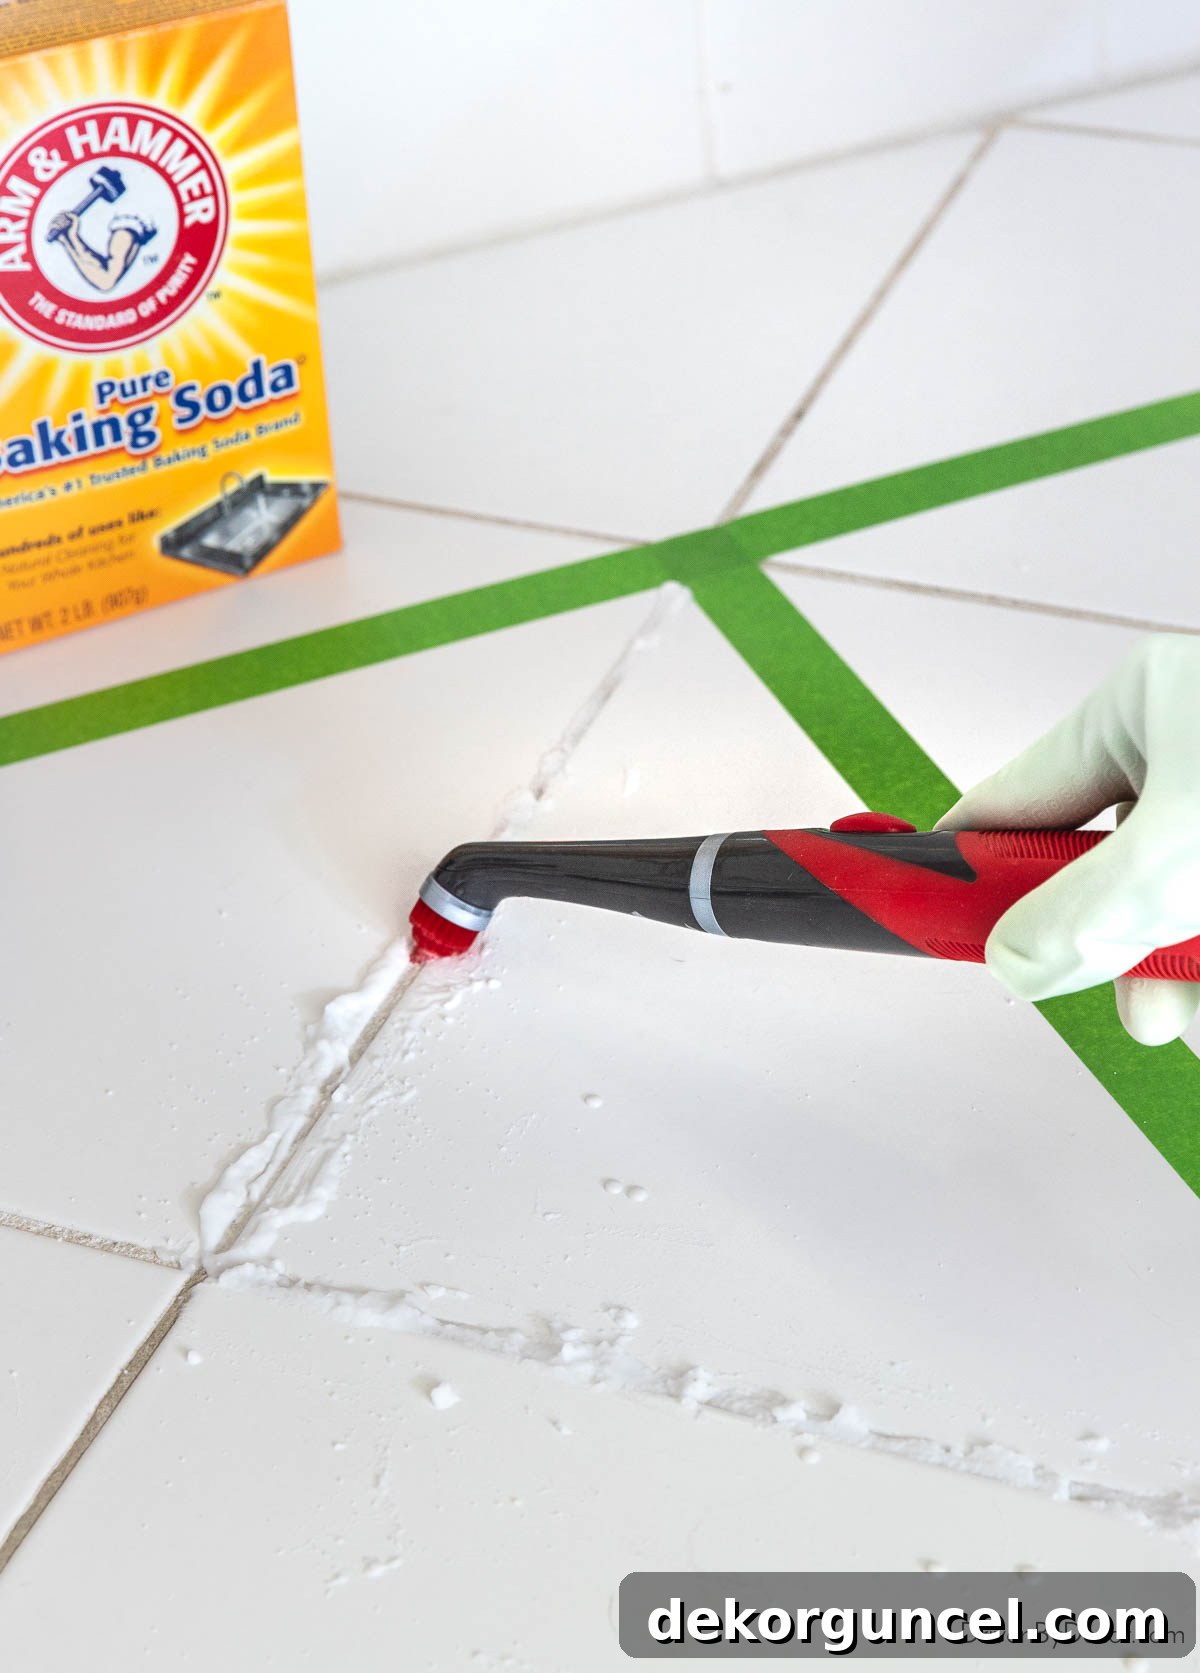
To prepare your homemade cleaner, simply mix the three ingredients in a small bowl until a thick, spreadable paste is formed. Once ready, generously apply the paste directly onto your grout lines. Allow it to sit and penetrate the grout for approximately five to ten minutes, giving the active ingredients time to break down the embedded dirt and stains. After the dwell time, take your grout brush and vigorously scrub the lines, working the paste into the pores of the grout to effectively break up and loosen accumulated dirt and grime. You’ll often see the dirt lifting right before your eyes as you scrub.
Once you’ve finished scrubbing and the grout appears clean, it’s time to rinse. Use a clean sponge and a bucket of warm water to thoroughly wipe away all traces of the paste and the loosened dirt. It’s important to rinse multiple times, changing the water frequently, to ensure no residue is left behind, which could attract new dirt. Your grout will be left looking remarkably clean and bright.
Pros & Cons of Baking Soda Paste
I was genuinely surprised by the exceptional performance of this homemade baking soda paste method! It delivered results that were on par with, if not equal to, the effectiveness of the Zep commercial cleaner. My grout was thoroughly cleaned and brightened, restoring it to an almost brand-new appearance.
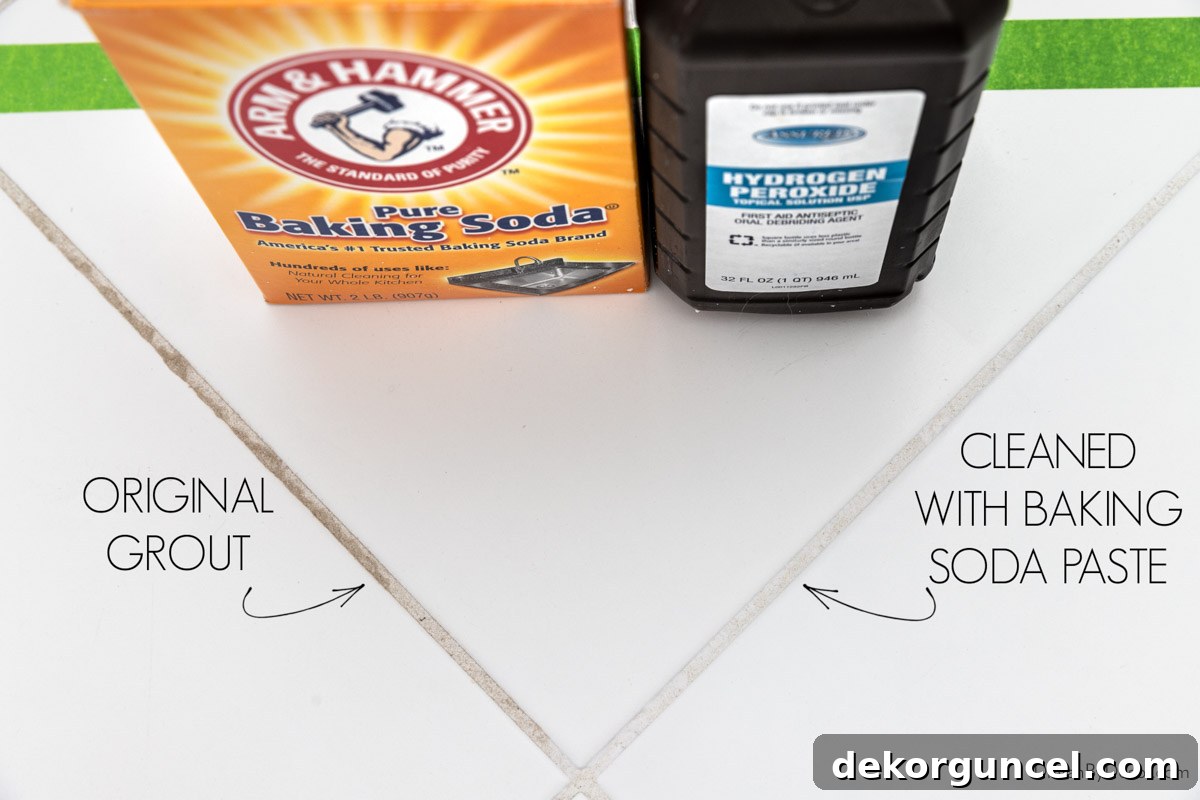
The primary difference I noted was that the baking soda paste required slightly more scrubbing effort compared to the Zep cleaner to achieve the same level of cleanliness. However, this minor trade-off is well worth it, considering the significant advantages: it’s a far more natural and eco-friendly cleaning solution, utilizing ingredients you likely already have on hand. It’s also gentle enough for regular maintenance cleaning without the concerns of harsh chemical degradation that come with stronger acidic cleaners, making it an excellent choice for consistent upkeep of your revitalized grout.
Method 3: Specialized Care for Marble-Safe Grout Cleaner
Cleaning grout that surrounds natural stone tiles, such as marble, requires a distinctly different approach than cleaning ceramic or porcelain tile grout. These delicate surfaces are highly susceptible to damage from acidic or abrasive cleaners, making the choice of cleaning agent critical. Having personally experienced maintaining a marble tile shower, I can attest that the absolute key to keeping it pristine is consistent, proactive cleaning rather than waiting for grout to become heavily stained. After every shower, for instance, taking just 1-2 minutes to squeegee the walls and floor (I highly recommend this effective squeegee) and give the tile a quick wipe-down with a soft towel makes an immense difference. This small habit is incredibly valuable for preserving both your grout and your precious natural stone tiles in excellent condition.
When it’s time for a more thorough clean, you must select a cleaner that is mild, non-abrasive, and, most importantly, pH-balanced. For grout that isn’t heavily stained, a simple solution of mild dish soap (such as this soap I regularly use) mixed with warm water is often sufficient. This gentle approach cleans without stripping or damaging the stone’s surface. However, if your grout is on the dirtier side and requires a bit more power, there are several excellent bottled sprays specifically formulated to be safe for natural stone. Among the top-rated options, I found this Granite Gold Grout Cleaner to deliver the most impressive results without compromising the marble.
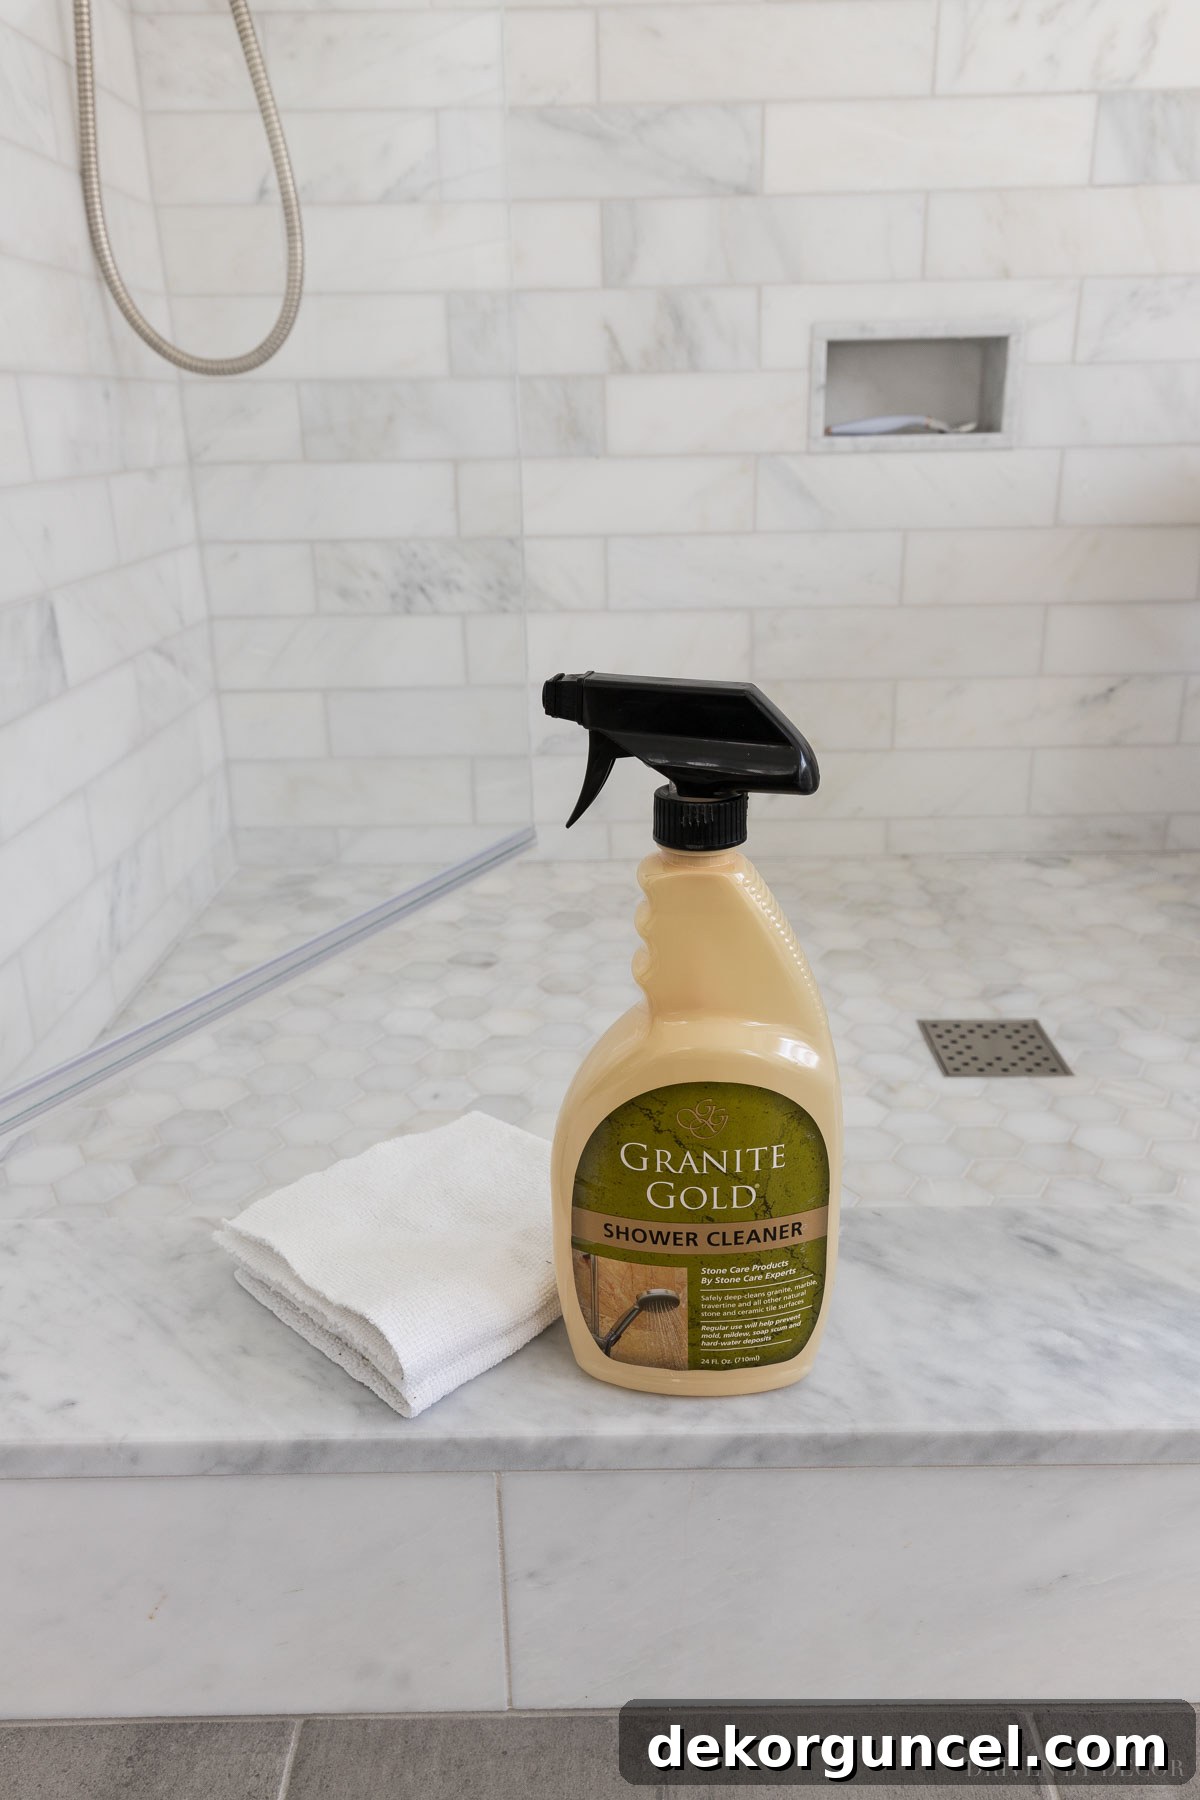
Beyond grout, for cleaning the actual marble surfaces themselves, I am also a big fan of this specialized shower cleaner from the same trusted brand. It ensures that your luxurious marble retains its natural beauty and shine, free from streaks or damage.
Method 4: The Chemical-Free Power of Steam Cleaning for Grout
In my comprehensive quest for effective grout cleaning methods, I was particularly eager to test steam cleaning. Not only is it renowned as a natural, chemical-free way to clean, but it also offers the significant advantage of sanitization. The high temperature of steam is incredibly effective at killing bacteria, mold, and mildew, making it an excellent choice for bathrooms and kitchens where hygiene is paramount. For my test, I utilized this reliable Bissell steam cleaner, paired with a specialized grout brush attachment. This attachment is ingeniously designed to scrub and agitate the grout lines simultaneously while the steam is being applied, maximizing its cleaning efficiency.
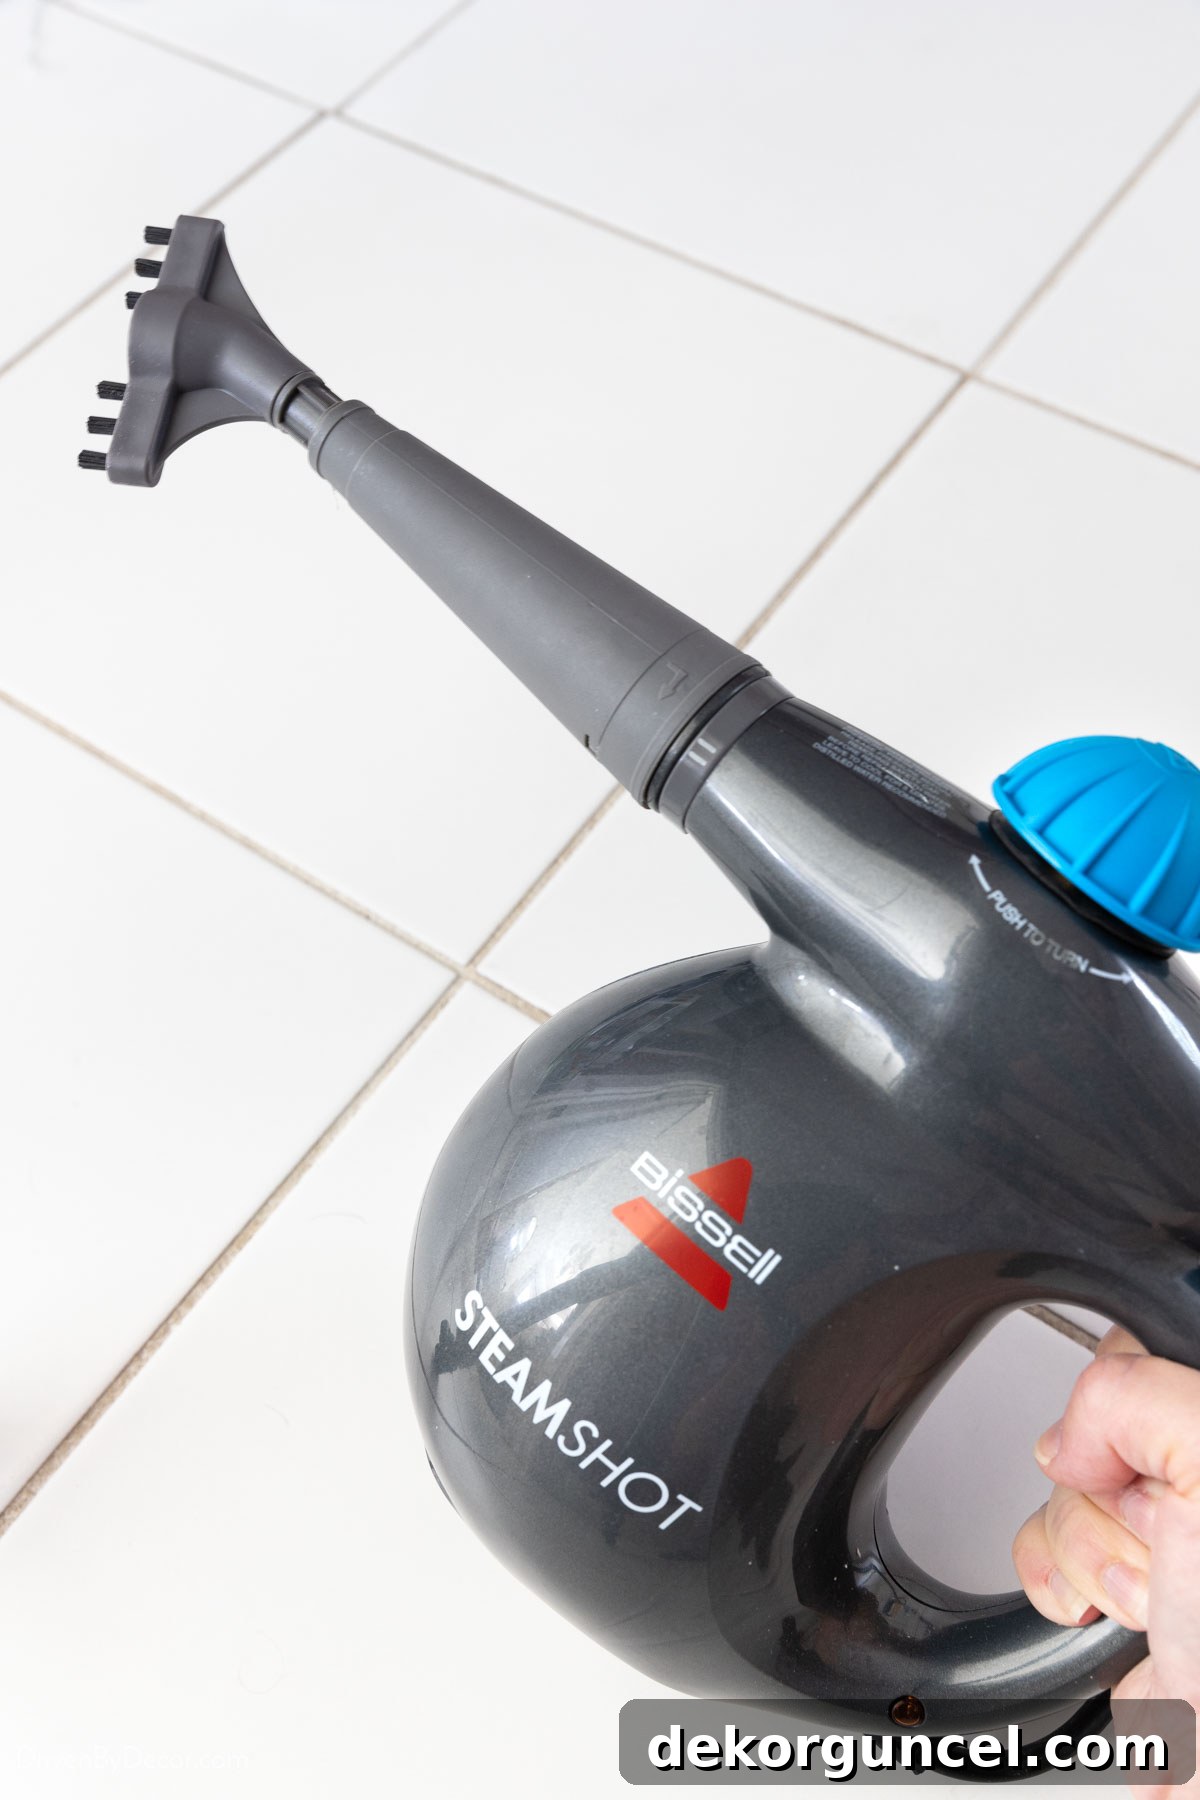
The operation of the steam cleaner is remarkably simple. You just add distilled water to the top reservoir, securely close the cap, and allow a few moments for the water to heat up to steam temperature. Once the device indicates it’s ready, you guide the concentrated nozzle slowly along your grout lines, allowing the powerful jet of steam to loosen and lift away embedded dirt and grime. The brush attachment simultaneously agitates the loosened debris, making it easier to wipe away.
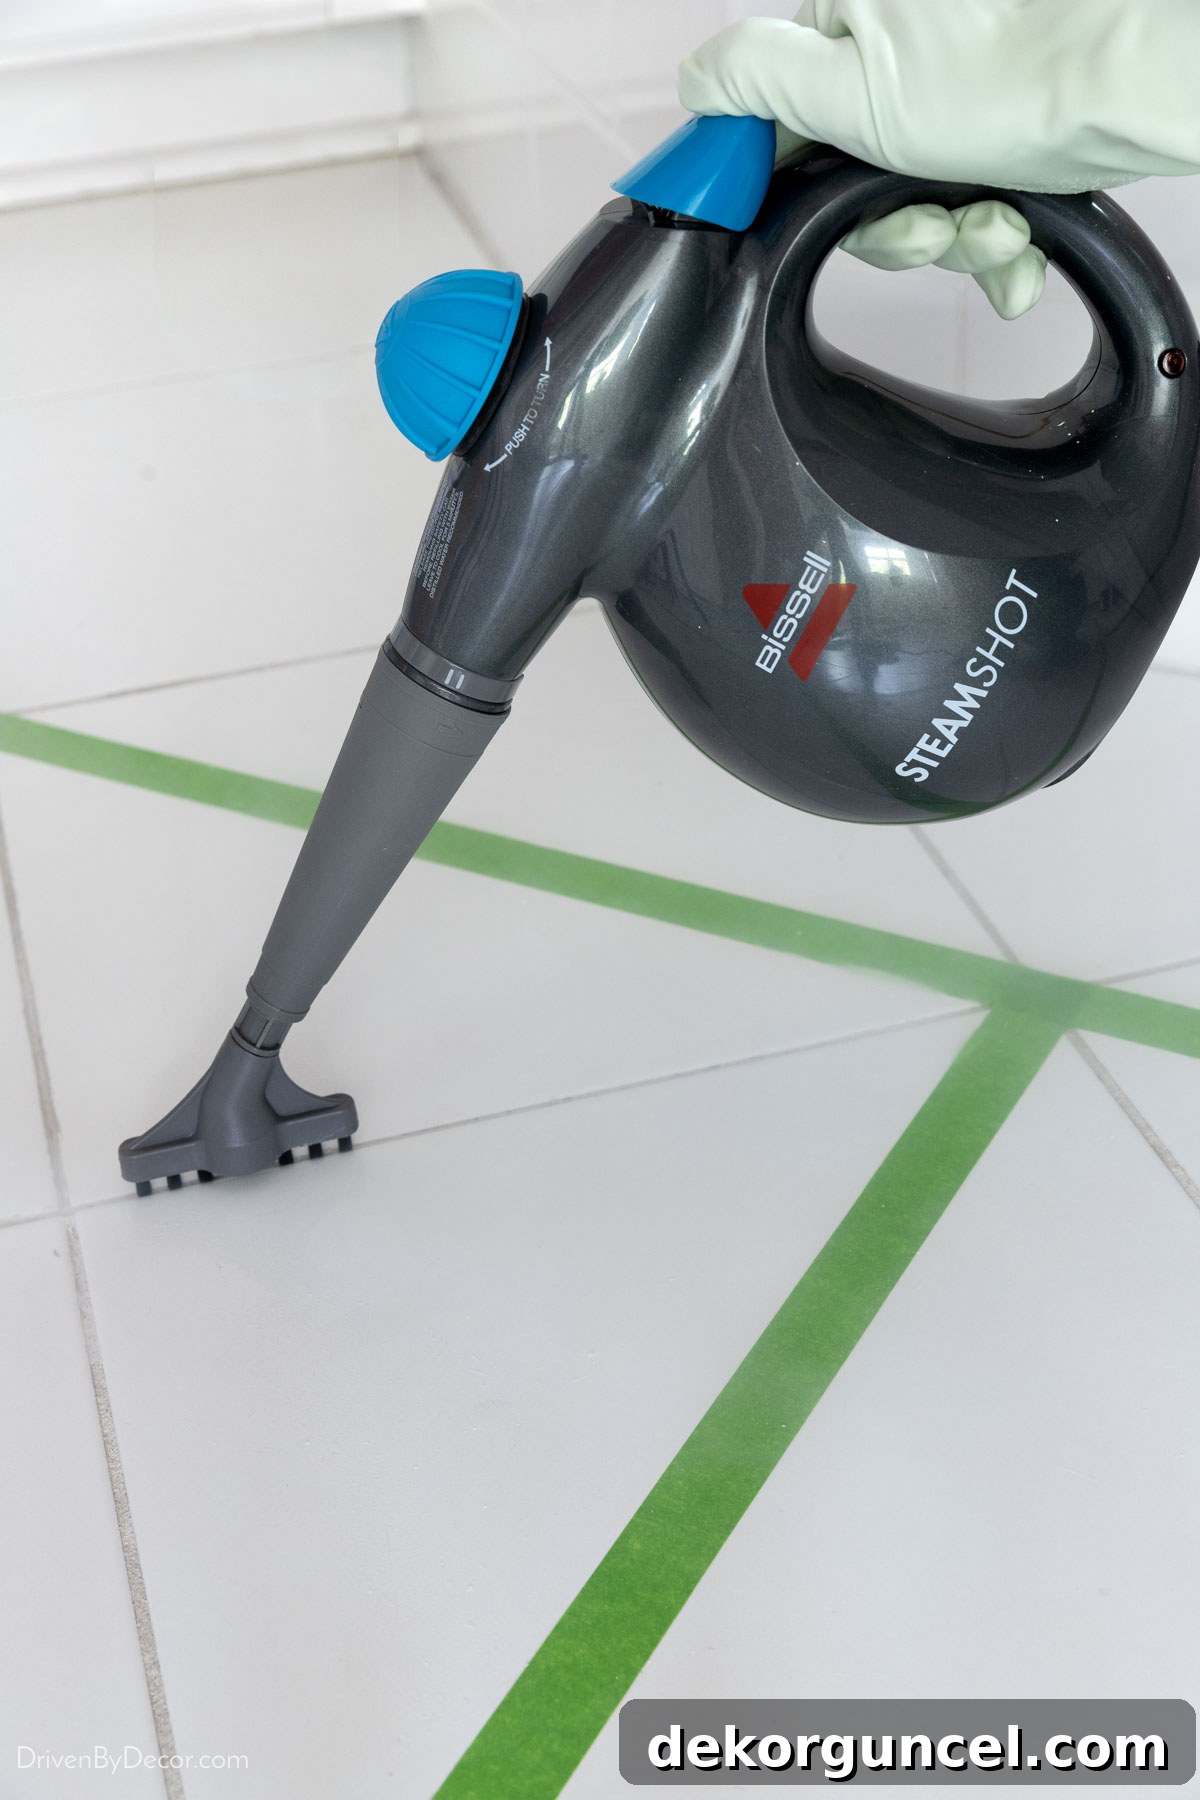
I found that steam cleaning required very little physical effort, as the combination of heat and pressure effectively lifted dirt and grime from the grout. While it cleaned well and visibly improved the grout’s appearance, I noted that it didn’t quite achieve the same deep-cleaning intensity or brightening effect as the Zep commercial cleaner or the baking soda paste, especially for deeply embedded and aged stains. For maintenance or moderately dirty grout, it’s highly effective.
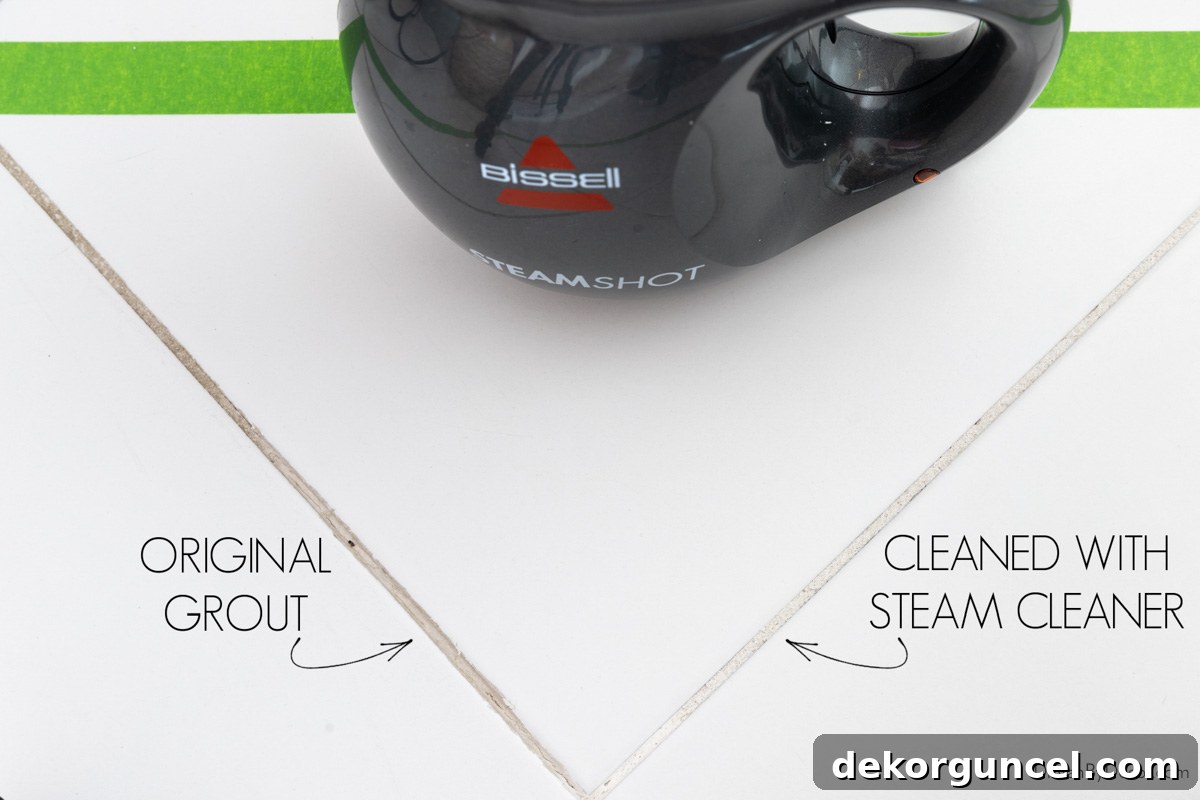
One of the biggest advantages of steam cleaning is its speed. It’s often the quickest method for cleaning large areas of tile, making it ideal for regular upkeep and maintaining cleanliness without a significant time commitment. Another massive plus is that it is an entirely chemical-free method, using only water to create powerful steam. This makes it an incredibly safe and eco-friendly option for those who prefer to avoid harsh cleaning agents, especially in homes with children or pets. Furthermore, the versatility of the Bissell SteamShot extends far beyond grout; I personally love mine for cleaning SO MANY THINGS around the house, from sanitizing countertops to refreshing upholstery.
Revitalizing Grout: The Magic of Grout Colorant
What if, despite all your diligent cleaning efforts and the powerful methods we’ve discussed, your grout still doesn’t quite return to its original, pristine color? Perhaps it’s too old, too deeply stained, or simply discolored beyond what cleaning can fix. In such cases, grout colorant is the ultimate solution! Grout colorant is not just a cosmetic fix; it’s a way to completely renew the look of your floors, giving them a fresh, uniform appearance, and often adds an extra layer of protection.
There are two primary types of grout colorants you can use to achieve this transformation:
- Bottled Grout Paint and Sealant: Products like this popular grout refresh colorant provide a durable, long-lasting finish that not only changes the color of your grout but also seals and protects it from future stains. Application typically involves using a small toothbrush or a fine paintbrush to carefully apply the liquid directly onto the grout lines. This method allows for precise control and excellent coverage, ensuring a professional-looking result.
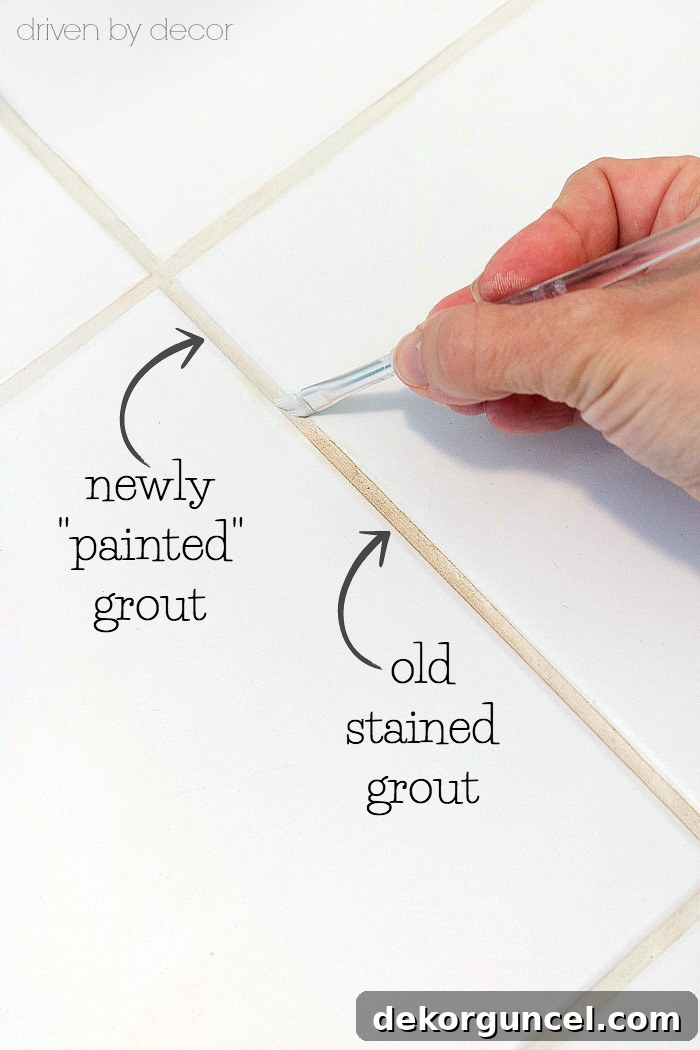
- Grout Pen: For a simpler, more user-friendly approach, a grout pen, such as this convenient grout restorer pen, works much like a paint pen. It allows for quick and easy application directly onto the grout lines, making it perfect for smaller areas, touch-ups, or for those who prefer a less involved process. While often less durable than bottled paint-and-sealant options, grout pens are excellent for a quick refresh and brightening.
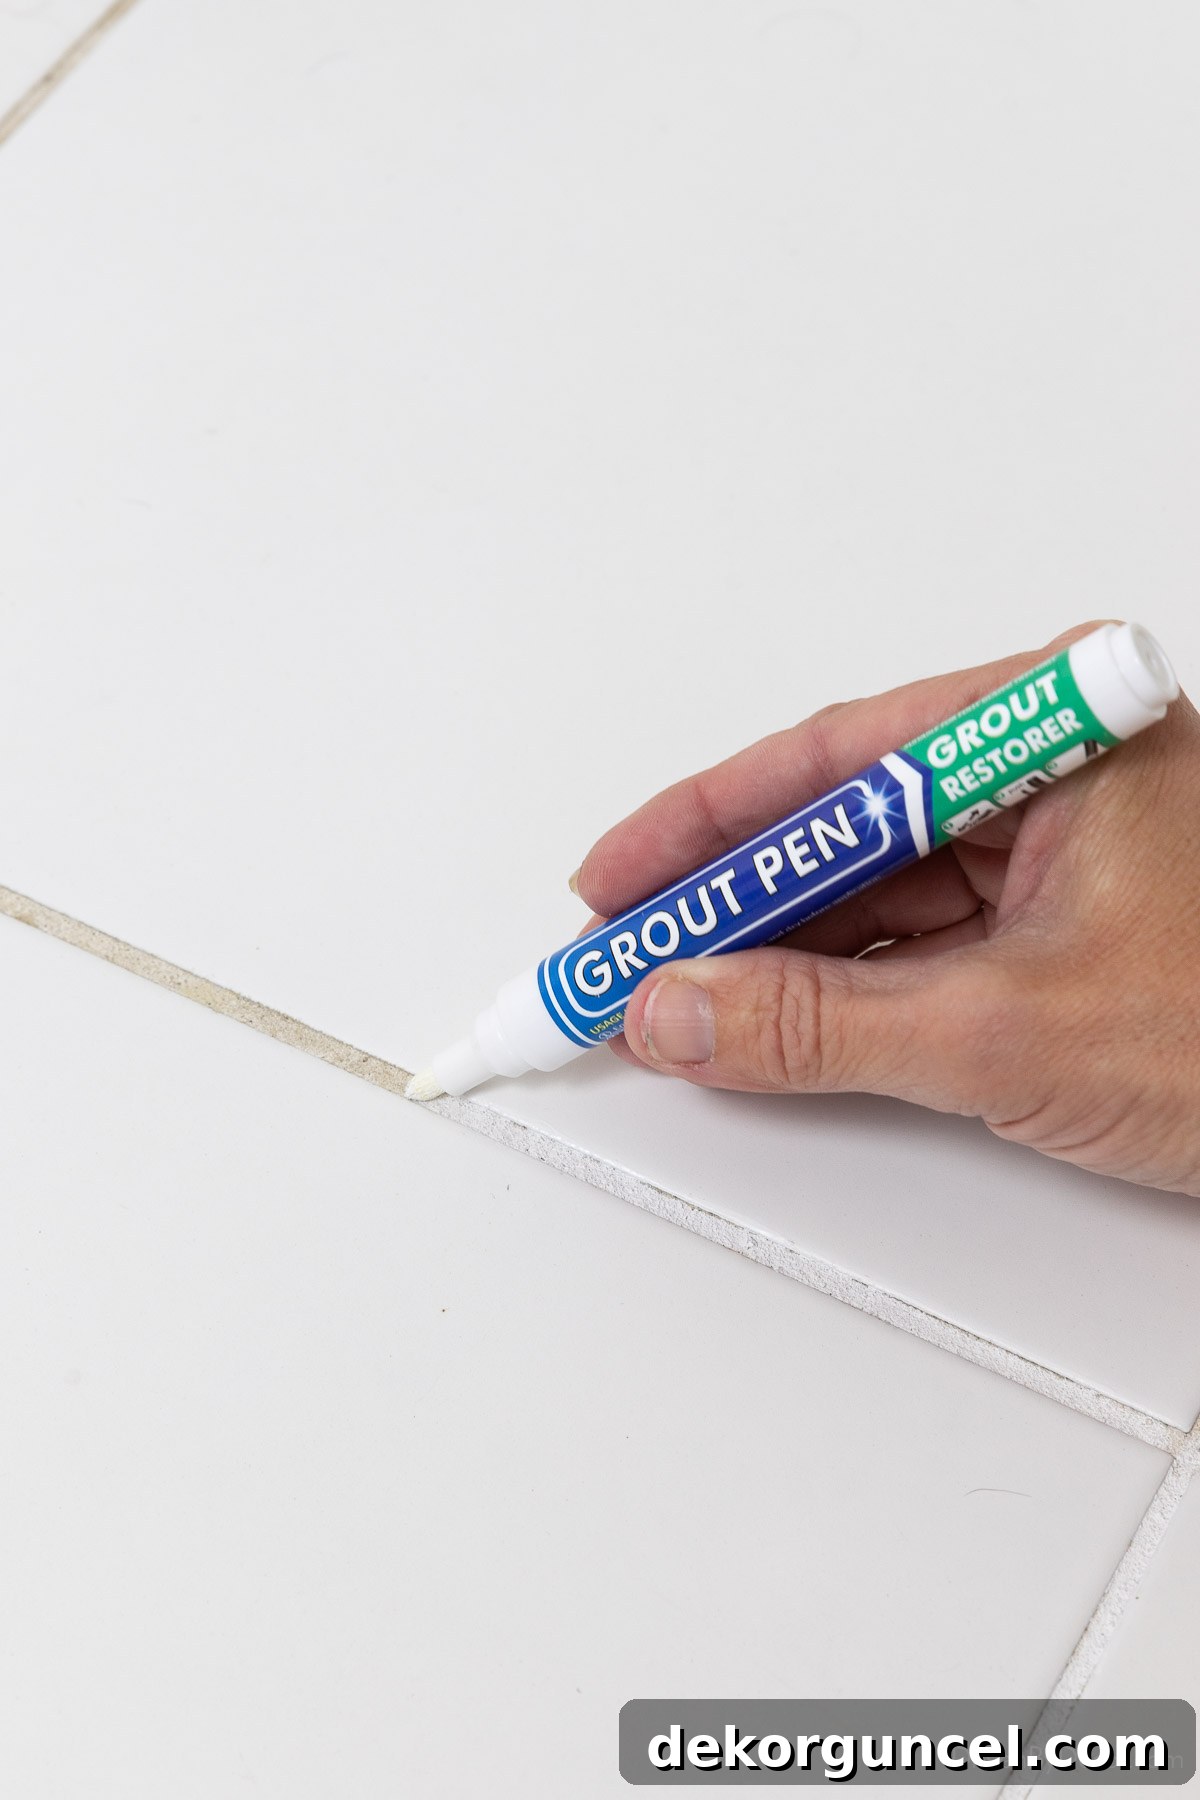
Regardless of the type you choose, grout colorant can dramatically improve the aesthetics of your tiled floors, making them look significantly cleaner and more modern. For a deeper dive into the process and more detailed tips on application, be sure to consult my dedicated post on how to whiten grout, where I share all the secrets to a flawless finish.
The Final Step: Protecting Your Investment with Grout Sealing
Once your grout lines are sparkling clean and beautifully restored, the journey isn’t quite over. The most crucial final step to ensure their long-term cleanliness and protect your investment is to apply a high-quality grout sealer. Grout, by its very nature, is a porous material. This porosity makes it highly susceptible to absorbing liquids, dirt, grease, and grime, leading to stubborn stains and discoloration over time. A good sealer acts as an invisible protective barrier, preventing these unwanted elements from penetrating the grout and causing unsightly damage.
Before applying any sealer, it’s absolutely essential to ensure that your grout is not only immaculately clean but also completely and thoroughly dry. Any moisture trapped beneath the sealer can lead to a cloudy appearance or compromise the sealer’s effectiveness. Once your grout is prepared, carefully follow the manufacturer’s instructions for your chosen sealer regarding application technique and, crucially, allow sufficient time for the sealer to fully cure. This curing period is vital for the sealer to achieve its maximum protective capabilities.
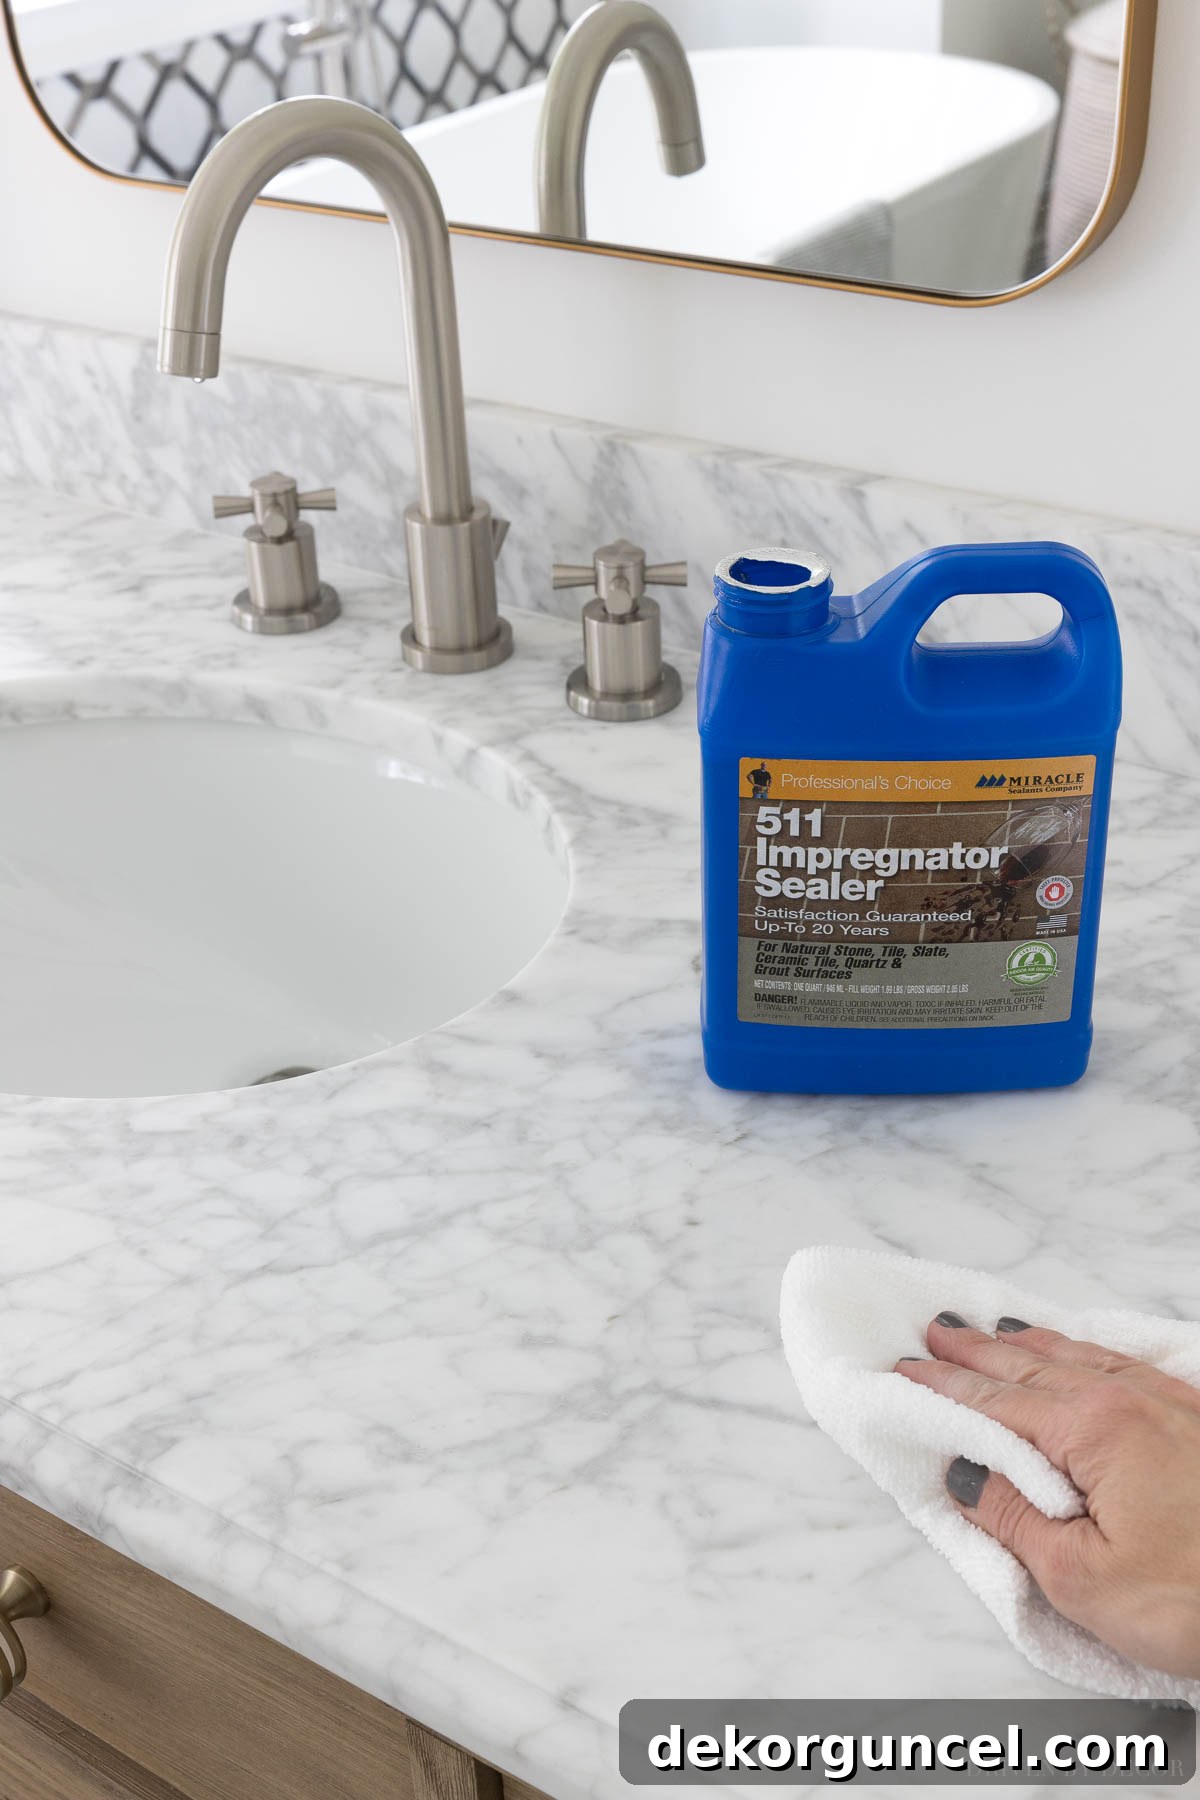
For years, I’ve consistently relied on this impregnator sealer, a recommendation I initially received from my professional tile installers. Impregnator sealers are superior because they penetrate deep below the surface of the grout, creating a protective shield throughout the material without forming a film on top. This “breathable” quality is incredibly important, as it allows any trapped moisture to escape, preventing mildew growth and discoloration from within. This particular sealer is fantastic for protecting both sanded grout and natural stone, offering versatile protection. The application is surprisingly simple: you merely wipe it on, allow it to dwell for 3-5 minutes to ensure deep penetration, and then carefully wipe off any excess with a clean, dry cloth to prevent residue buildup.
The frequency of resealing depends on several factors, including the type of grout, the traffic in the area, and the type of sealer used. As a general guideline, for high-traffic areas like entryways, kitchens, or frequently used bathrooms, it’s typically recommended to reseal your grout every 6 months. For lower-traffic areas, you might be able to extend the period to 1-2 years between resealing applications, but always monitor your grout for signs of wear or diminished water repellency.
When it comes to unsanded grout, there’s a bit of a debate in the tiling community. Some experts argue that unsanded grout is less porous and therefore doesn’t strictly require sealing. However, others still recommend it for added protection against stains, especially in wet areas. I have personally used this same 511 impregnator sealer on my unsanded grout in the past with good results, after first performing a discreet test patch to ensure it didn’t alter the color or appearance. While it worked well for me, please note that this sealer is not specifically indicated for unsanded grout on the bottle, so proceeding with a test patch and at your own discretion is advised.
And with that, we conclude our in-depth exploration of how to clean floor tile grout and keep it looking pristine! This has been a comprehensive guide, covering everything from essential tools and effective cleaning methods to crucial preventative measures like sealing. I sincerely hope you found this detailed information helpful and empowering. Armed with these techniques and insights, you’re now well-equipped to tackle even the toughest grout stains and maintain beautifully clean floors throughout your home. I’d love to hear how my recommendations work out for you the next time you embark on a grout cleaning project. Happy cleaning, and may your floors shine brightly!
