
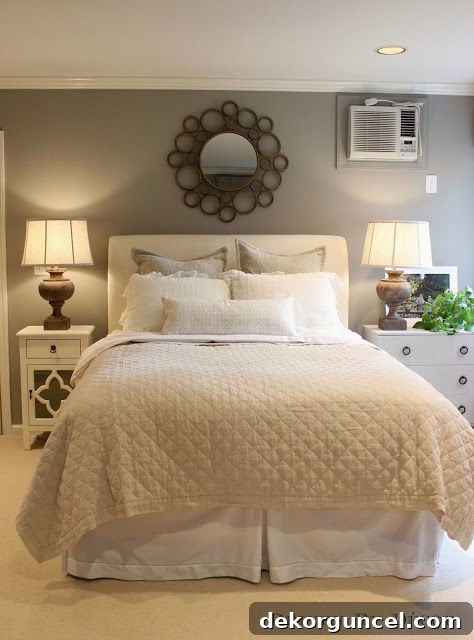
Welcome to the heart of my home decor journey, where a simple IKEA chest transforms into a captivating statement piece! Your incredibly kind comments on my recent guest room makeover truly made my day, and I’m thrilled to share the detailed process behind my favorite addition: a custom, fabric-covered chest that now perfectly complements the room’s aesthetic.
Nestled gracefully to the right of the bed, this DIY chest isn’t just a piece of furniture; it’s a testament to the power of personalization and a touch of creative ingenuity. It’s proof that with a clear vision and a bit of effort, you can turn an off-the-shelf item into something truly unique and reflective of your style.
Would you believe that this elegant chest started its life looking like this?
Your DIY Journey Starts Here: What You’ll Need
Materials:
- Fabric of your choice (a 60″ x 104″ tablecloth is often sufficient for a chest this size, offering great value)
- Strong adhesive spray (such as {Super 77 Adhesive Spray})
- Mod Podge (for sealing edges)
- Wood filler, wax crayon, or putty (to fill existing holes)
- New drawer pulls/handles (like {these elegant ring pulls})
- Primer and paint for chest legs (e.g., {Rustoleum Paint & Primer})
Tools:
- Measuring tape
- Sharp fabric scissors
- Iron (preferably with a steam function)
- Painter’s tape
- Drill with appropriate bits
- Small paintbrush
- Drop cloth or protective sheeting
- Paper plate (for adhesive)
- Skewers or similar thin tool (for widening holes)
Step-by-Step Tutorial: Crafting Your Custom Fabric Chest
1. Selecting Your Signature Fabric
2. Unboxing and Prepping Your IKEA TRYSIL
Next, carefully unpack all the components of your TRYSIL chest. Before you even think about assembly, take some time to familiarize yourself with each piece. Reference the IKEA assembly instructions to accurately identify which piece is the side, top, bottom, drawer front, etc. This is a critical organizational step that will save you immense time and confusion later.
Once identified, use small pieces of painter’s tape to label the side of each piece that will eventually face the inside of the chest once assembled. On the tape, clearly write the name of the piece (e.g., “Left Side,” “Drawer Front 1,” “Top”). This labeling system is invaluable, especially since you’ll be covering the visible surfaces.
3. Precision Cutting: Fabric for Each Piece
With your pieces labeled, it’s time to prepare your fabric. Measure each visible surface of the chest – the drawer fronts, sides, top, and bottom. To these dimensions, add an extra 6-8 inches on each side. This generous allowance is crucial for several reasons: it accounts for potential fabric fraying, provides ample material for wrapping around the edges of the wood pieces, and gives you flexibility for adjustments. You can always trim excess fabric later if needed.
Carefully cut out pieces of fabric according to these enlarged measurements. A single 60″ x 104″ tablecloth typically provides enough fabric for all the necessary pieces, provided you plan your layout strategically to minimize waste. A key tip: do not use the factory-hemmed edges of the tablecloth. These edges are often too thick and can create an uneven finish; cut them off and discard them for a cleaner look.
4. Smooth Operator: Ironing Your Fabric
This step is often overlooked but is absolutely vital for a professional finish: ironing. Take the time to thoroughly steam iron your fabric pieces. Pay close attention to removing all fold marks, creases, and wrinkles. A perfectly smooth fabric surface is essential for achieving a seamless, high-quality upholstered look. Any wrinkles left at this stage will be permanently trapped under the adhesive, detracting from your final result.
5. Drawer Front Foundation: Filling and Drilling
Before adhering any fabric, you need to prepare the drawer fronts for their new hardware. Each drawer front comes with two pre-drilled holes for the original handles. Since you’ll be installing new pulls in different locations, you’ll need to fill these existing holes. Use wood filler, wax, or putty to completely obscure them. I found a Minwax pencil worked perfectly for this task, offering a clean, smooth fill.
Once the filler is dry and sanded flush, determine the precise location for your new pulls. Carefully measure and mark the spots where you want the new holes. To prevent the laminate from flaking off the wood surface when drilling, apply a piece of painter’s tape over your marked spot before drilling. This provides a clean surface for your drill bit and ensures a crisp hole. Precision here is key for perfectly aligned hardware.
6. The Art of Adhesion: Attaching Fabric to Surfaces
7. Flawless Edges: Wrapping and Securing
Once the main fabric surface is adhered, it’s time to wrap the fabric around the edges of each wood piece. Rather than trying to spray adhesive directly onto these narrow edges (which can be messy and imprecise), I found it much easier to spray a small amount of adhesive onto a paper plate. Then, use a small paintbrush to apply the adhesive directly to the edges of the wood. This method offers far greater control, preventing excess glue from seeping onto the visible fabric.
Be aware that spray adhesive dries very quickly, especially when applied thinly. You’ll need to work in small sections, continually spraying more adhesive onto your paper plate and then wrapping and pressing the fabric down firmly onto the edges as you go. Apply steady pressure to ensure a strong bond and a crisp, clean edge.
A Special Note for Side Pieces:
8. The Unseen Finish: Attaching Fabric to the Back
**This step is absolutely critical!** If you cover any of the pre-drilled assembly holes with fabric, you will face significant difficulty – or even impossibility – in correctly assembling your chest. Once you’ve made all necessary precise cuts, use the same technique you applied for the edges: spray adhesive onto a paper plate and use a small paintbrush to apply it to the back perimeter of the wood piece, pressing the fabric down firmly.
9. Mastering Corners for a Professional Look
10. Sealing the Deal: Preventing Fraying
11. The Grand Assembly: Bringing It All Together
After the chest frame is assembled, it’s time to install your beautiful new drawer pulls. I opted for {these elegant ring pulls} which add a touch of sophisticated charm:
Then, carefully insert the screw for your pull through the pre-drilled hole in the drawer and through the opening you created in the fabric with the skewer. Here’s a crucial tip to prevent fabric damage: **turn the pull itself (the decorative handle), NOT the screw, to tighten it onto the drawer front.** Turning the screw directly can cause it to twist and pull at the fabric threads, potentially creating an unsightly run or tear. (Unfortunately, this is a lesson I learned the hard way!)
12. Final Flourishes: Painting the Legs
To tie the entire look together, I wanted the chest’s legs to perfectly complement the new hardware. Before attaching them to the chest, I sprayed them with {this Rustoleum Paint & Primer} in a metallic finish that matched my chosen pulls. This small detail makes a significant difference, elevating the entire piece to a custom-designed level.
And just like that, you’re done!
So, what do you think of this IKEA TRYSIL hack? It’s a fantastic way to add character and custom style to your home without breaking the bank. If you have any questions about the process, don’t hesitate to reach out via email or leave a comment below. I’d love to hear from you and see your own DIY furniture transformations! Enjoy your weekend, and happy crafting!