
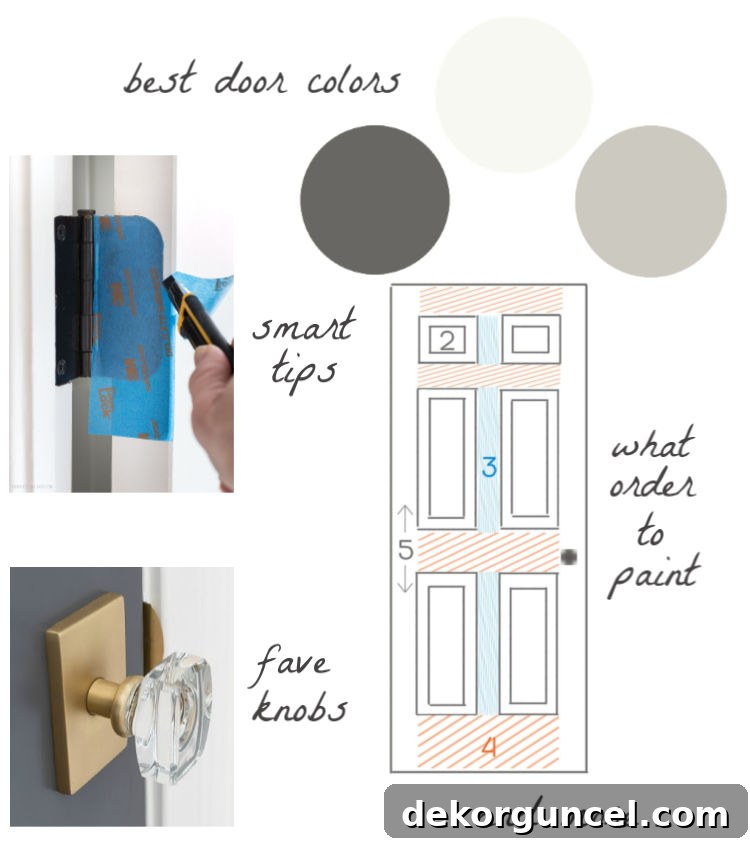
How to Paint Interior Doors Like a Pro: A Comprehensive Guide to a Flawless Finish
Are your interior doors looking tired, yellowed, or simply outdated? A fresh coat of paint can dramatically transform the look and feel of your home, breathing new life into every room without the cost of full door replacement. If you’ve ever wondered how to achieve that coveted professional finish on your interior doors, you’re in the right place. This comprehensive guide will walk you through every step, from choosing the perfect shade to applying the final coat, ensuring your doors look like they were painted by an expert. Forget the frustration of drips, brush marks, and uneven coverage – with these proven techniques, painting your interior doors will be a breeze, yielding results you’ll be proud to show off. Get ready to elevate your home’s aesthetic with a simple, yet impactful, DIY project!
Having tackled numerous home renovations, especially in older properties with doors that have seen better days, I’ve learned invaluable lessons. The difference a new coat of paint makes is astounding, particularly when paired with updated hardware. Over the years, I’ve gathered tips from professional painters, experimented with various tools, and refined my methods to perfect the art of door painting. What you’ll find here isn’t just a basic tutorial; it’s a collection of insider secrets, including the optimal painting order for paneled doors, that will help you achieve a smooth, durable, and truly professional-looking finish. Let’s dive in! (Note: This post may contain affiliate links, meaning I may earn a small commission if you make a purchase through them, at no extra cost to you.)
1. Choose the Perfect Interior Door Paint Color and Finish
Selecting the right paint color and finish is the foundational step to any successful door painting project. The choice can significantly impact the overall ambiance of your space, so it’s worth taking your time. While white remains a timeless and popular choice, don’t shy away from exploring other hues that can add character and depth to your home.
White Doors: Timeless Elegance
If your goal is a classic, bright, and cohesive look, opting for white doors that match your existing trim is often the best strategy. This creates a seamless flow throughout your home, making spaces feel larger and more unified. When matching trim, it’s crucial to use the same paint color and finish for consistency. Some universally loved white paint colors that work beautifully on both trim and doors include Benjamin Moore’s Cloud White and Benjamin Moore Simply White. These shades offer a clean, crisp, yet inviting aesthetic that complements a wide range of decor styles. For the finish, semi-gloss or satin are typically recommended for doors. Semi-gloss provides a durable, easy-to-clean surface with a subtle sheen that reflects light beautifully, while satin offers a slightly softer look with good durability. Both finishes are excellent for resisting scuffs and fingerprints, making them ideal for high-traffic areas like doors.
Beyond White: Adding Character with Color
For those looking to make a bolder statement or introduce an element of surprise, painting interior doors in colors other than white can be incredibly effective. Dark black or sophisticated gray doors, for instance, offer a contemporary and chic appeal, adding architectural interest and a touch of drama to an otherwise neutral space. In a previous home, I transformed the kitchen-to-garage door with Benjamin Moore Charcoal Slate, a deep gray, and absolutely adored the sophisticated contrast it provided.
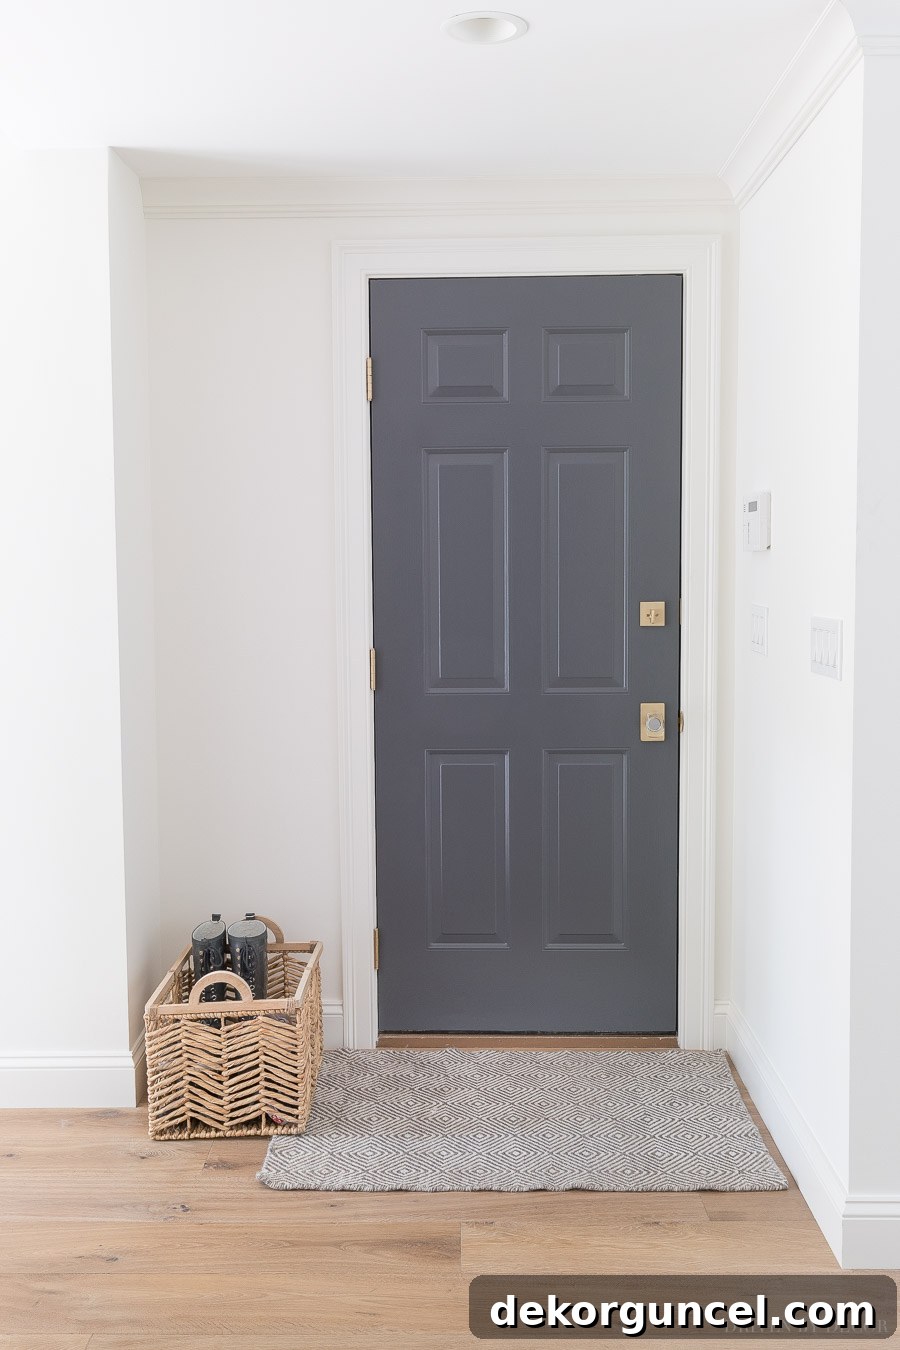
Consider the overall color palette of your home and how a colored door might enhance it. A deep navy can evoke a sense of calm and sophistication, while a rich forest green might bring an element of nature indoors. Even a muted, earthy tone can add a unique warmth. While the possibilities for front door colors are endless, for interior doors, maintaining a sense of harmony with your existing decor is key. However, if you’re feeling adventurous, a strategically placed accent door can be a stunning focal point. Always remember to test paint swatches on a discreet area of your door or on a large board to see how the color appears in different lighting conditions throughout the day before committing.
Here are some of my top paint color recommendations for interior doors, ranging from classic whites to versatile grays:
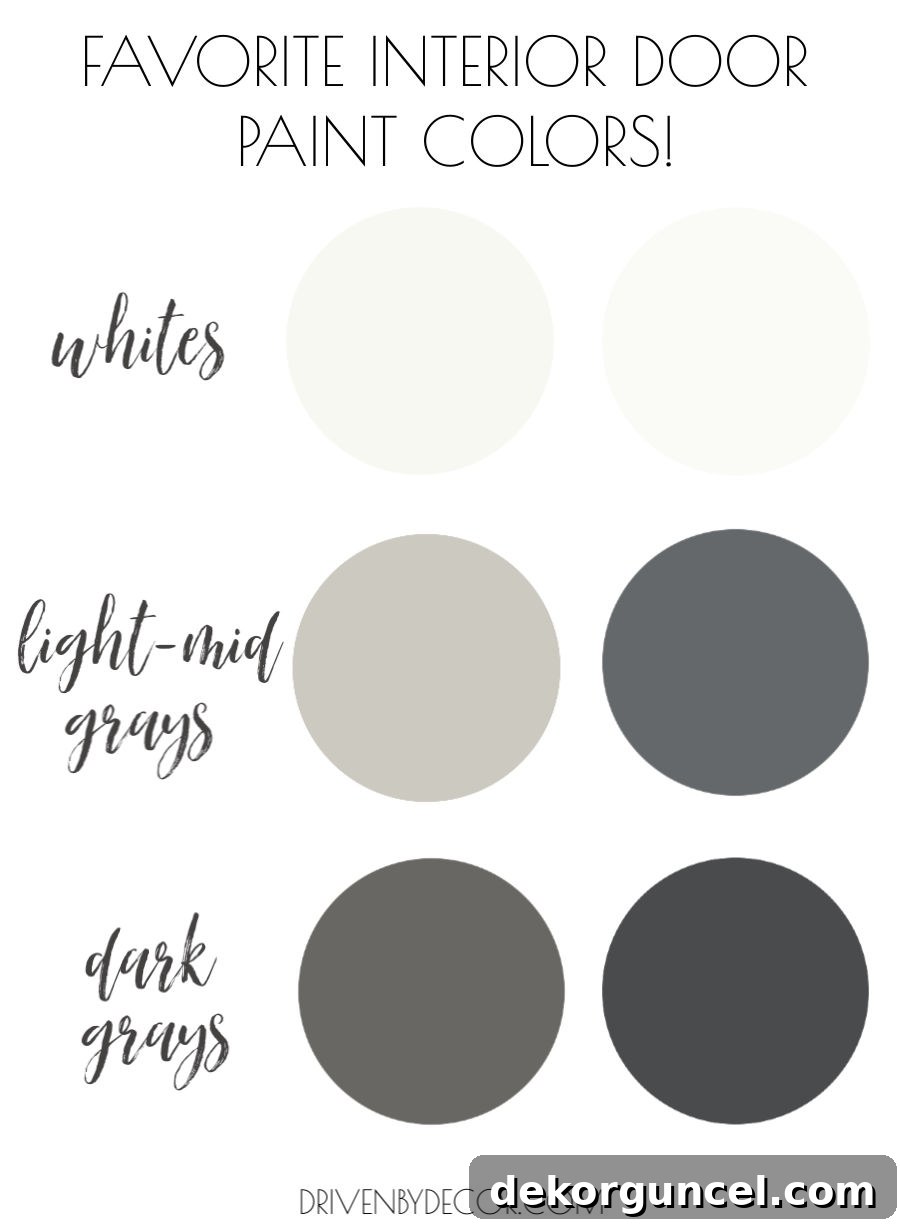
Whites: Benjamin Moore Dove White | Benjamin Moore Simply White
Light – Mid-Tone Grays: Sherwin-Williams Repose Gray | Benjamin Moore Charcoal Slate
Dark Grays: Benjamin Moore Kendall Charcoal | Benjamin Moore Wrought Iron
2. Gather Your Essential Door Painting Tools and Supplies
The success of any painting project hinges significantly on the quality of your tools and materials. Skimping on supplies can lead to frustrating results and a less-than-professional finish. Investing in the right gear will not only make the job easier but also ensure a smooth, durable, and beautiful outcome. Here’s a detailed look at what you’ll need to effectively paint your interior doors:
- Quality Paint: Beyond color, choose a high-quality paint formulated for trim and doors. These paints are often more durable, resist chipping, and offer excellent leveling properties, minimizing brush and roller marks. Benjamin Moore Advance is a personal favorite due to its superior finish and self-leveling capabilities.
- Wood Filler and Putty Knife: Essential for older doors with imperfections. A good quality wood filler, like this one, that doesn’t dry out quickly in the container is a game-changer for filling nicks, dents, and small holes. The putty knife helps apply it smoothly.
- Sandpaper: You’ll need a variety of grits.
- 150-grit sandpaper: For initial sanding, smoothing out wood filler, and removing any significant surface imperfections.
- 220-grit sandpaper: For light sanding before priming and after the first coat of primer to create a smooth base.
- 320-grit sandpaper: For very light sanding between paint coats to ensure maximum adhesion and a silky-smooth finish.
- Tack Cloth: A must-have for picking up all the fine dust particles after sanding. Using a tack cloth ensures a perfectly clean surface for paint adhesion, preventing a gritty finish.
- Drop Cloths: To protect your floors and surrounding areas from paint splatters. Canvas drop cloths (like these washable ones) are durable and reusable, offering better traction than plastic sheets, though plastic is also an option for quick jobs.
- Painter’s Tape: High-quality painter’s tape, such as FrogTape or ScotchBlue, is crucial for masking off hinges, doorknobs (if not removed), and any areas you don’t want painted. Its clean removal helps create crisp lines.
- Retractable Razor or Utility Knife: For precisely cutting painter’s tape around intricate areas like hinges, ensuring a sharp, clean edge. This type of razor is invaluable for precision work.
- Paintbrush: A good quality angled brush is indispensable for cutting in around panels and edges. My favorite 2″ angled brush works equally well with both oil and latex paints, providing excellent control and smooth application.
- Paint Rollers and Handle: For efficient and smooth application on flat surfaces.
- 4″ woven rollers with ¼″ nap: Excellent for a smooth finish and efficient paint transfer, ideal for most flat door surfaces.
- 4″ foam rollers: Also provide a very smooth finish, often preferred for paints that level well, and help minimize texture. Both types work well, so choose based on personal preference and paint type.
- Roller handle for 4″ rollers + mini roller tray: A comfortable handle and a small tray are essential for working with these mini rollers.
- Screwdriver: For removing door hardware.
- Cleaning Supplies: Degreaser or a mild soap solution and sponges/rags for thorough cleaning.
- Sawhorses (Optional but Recommended): For painting doors horizontally, allowing for easier access and minimizing drips.
3. Meticulous Door Preparation: The Key to a Flawless Finish
Often overlooked, thorough preparation is arguably the most critical step in achieving a professional-looking paint job. Skipping or rushing this stage can lead to poor adhesion, uneven finishes, and a project that won’t stand the test of time. Take your time with prep, and your painted doors will thank you.
To Remove or Not to Remove?
You have two main options for painting your doors: keeping them in place or removing them and painting them on sawhorses. Each method has its pros and cons:
- Painting in Place: This is quicker as it avoids the hassle of removing and rehanging doors. However, it requires careful masking of hinges and hardware, and drips are more likely to occur on vertical surfaces. You’ll also need to manage paint on the door frame/jamb.
- Removing the Door: Painting on sawhorses provides a horizontal surface, virtually eliminating drips and allowing for easier, more even paint application. This method is ideal for achieving the smoothest finish, especially for paneled doors. The downside is the extra effort of removal, reinstallation, and finding space for the doors to dry. For best results, I highly recommend this approach if feasible.
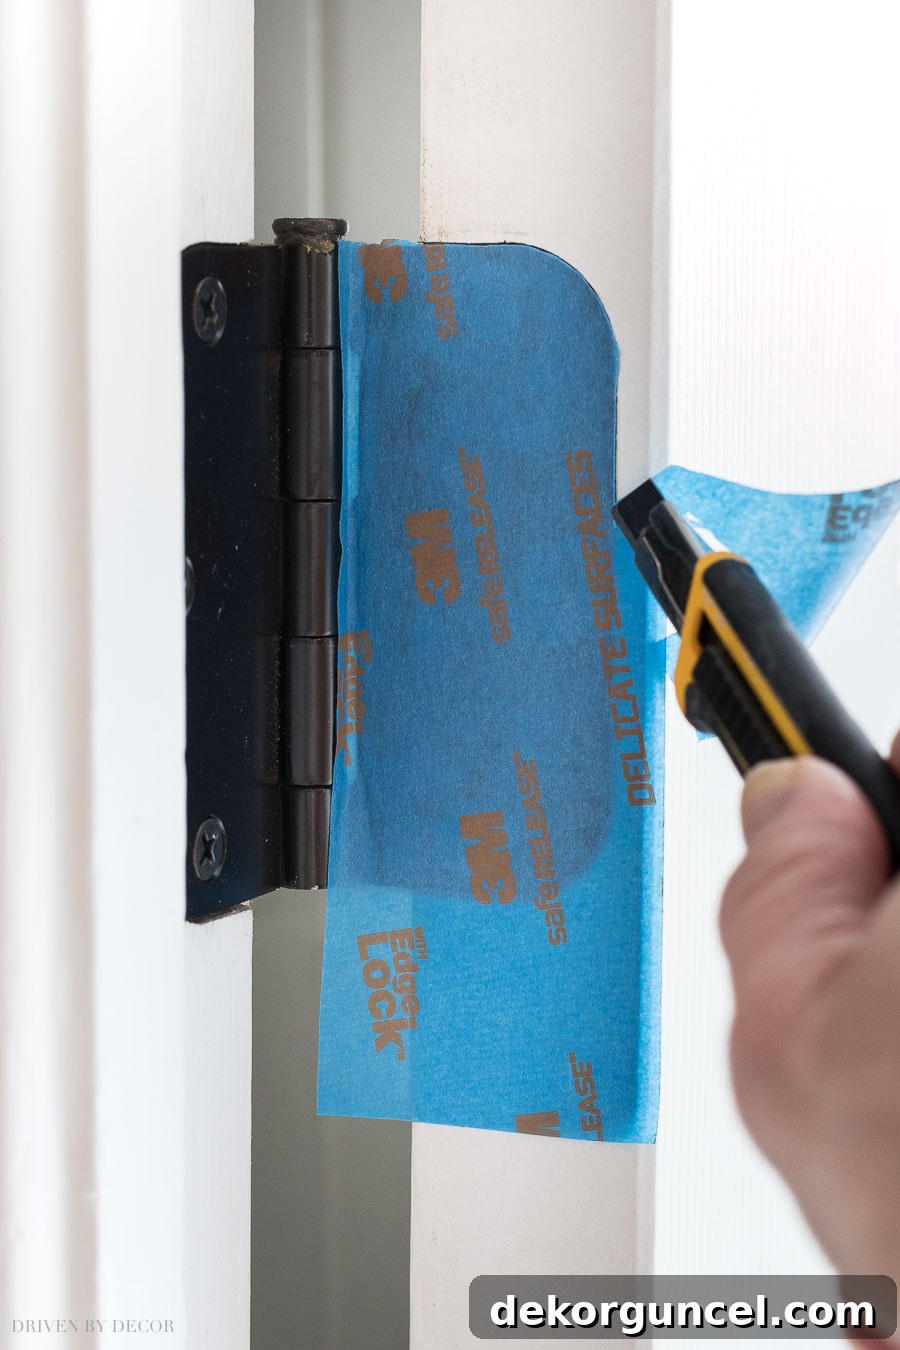
Regardless of your chosen method, removing doorknobs and any other hardware (like kick plates or decorative trim) is always recommended. It’s far easier and yields cleaner results than trying to meticulously tape around them. If you absolutely must leave the knobs and hinges on, meticulously cover them with high-quality painter’s tape. For hinges, use a utility knife to gently trace the outside edge of the hinge, cutting the tape for a perfect fit.
Clean, Repair, and Sand
- Clean Thoroughly: Doors, especially those in older homes, accumulate dirt, grease, and grime. Use a degreaser or a mild soap and water solution to clean both sides of the door. Rinse well with clean water and allow the door to dry completely. A clean surface ensures proper paint adhesion.
- Repair Imperfections: For older doors with gouges, dents, or chips, this is the time to make repairs. Apply wood filler with a putty knife, ensuring it’s slightly proud of the surface. Allow it to dry completely according to manufacturer instructions.
- Initial Sanding: Once the filler is dry, sand the patched areas smooth with 150-grit sandpaper. Then, lightly sand the entire door surface with 220-grit sandpaper. This step creates a uniform profile and provides “tooth” for the primer and paint to adhere to. If your door was previously painted before the 1980s, there’s a possibility of lead-based paint. If this is a concern, use a lead paint test kit. If lead paint is present, avoid dry sanding without proper precautions, such as wet sanding or professional lead abatement, to prevent releasing harmful dust.
- Remove Dust: After sanding, thoroughly remove all sanding dust. First, use a vacuum cleaner with a brush attachment or a damp cloth to get the majority. Then, go over the entire door with a tack cloth to pick up any remaining fine dust particles. A perfectly dust-free surface is crucial for a smooth paint finish.
To Prime or Not to Prime? Understanding Your Primer Needs
Priming is an essential step in many painting projects, but it’s not always necessary. Knowing when to prime can save you time and ensure optimal results:
- You MUST prime if:
- You are working with a new, unprimed, or raw wood door. Primer seals the wood and prevents the paint from soaking in unevenly.
- You are painting a door previously finished with oil-based paint using a standard latex paint. Latex paint won’t adhere properly to oil-based paint without a bonding primer. To check if your door is oil or latex, dab rubbing alcohol on a rag (a dark rag works best for white paint). If paint transfers to the rag, it’s latex; if not, it’s oil-based.
- You are making a drastic color change (e.g., from dark to light) or covering stains. A good primer will block stains and provide a consistent base color for your topcoats.
- You DON’T need to prime if:
- You are working with new, pre-primed doors.
- You are using latex paint over a door previously painted with latex paint, and the surface is in good condition.
- You are using a self-priming paint or a high-quality paint like Benjamin Moore Advance over a previously painted door (whether latex or oil-based). Benjamin Moore Advance is specially formulated to adhere to various surfaces without a separate primer and is excellent for achieving a smooth, brush-mark-free finish.
If priming is necessary, apply the primer in the same methodical order as you would the paint (as described in the next section), focusing on thin, even coats. Allow adequate drying time before proceeding.
4. Painting Paneled Doors Like a Pro: The Order Matters
Now for the exciting part – painting! While some experienced DIYers can achieve great results with just a brush, combining a high-quality brush with a small roller is often the most efficient way to achieve a smooth, professional finish quickly. The secret to painting paneled doors, especially common 6-panel designs, lies in applying paint in a specific sequence. This method prevents drips, ensures even coverage, and allows you to work “wet-on-wet” for seamless blending.
For a standard 6-panel door, follow this step-by-step order:
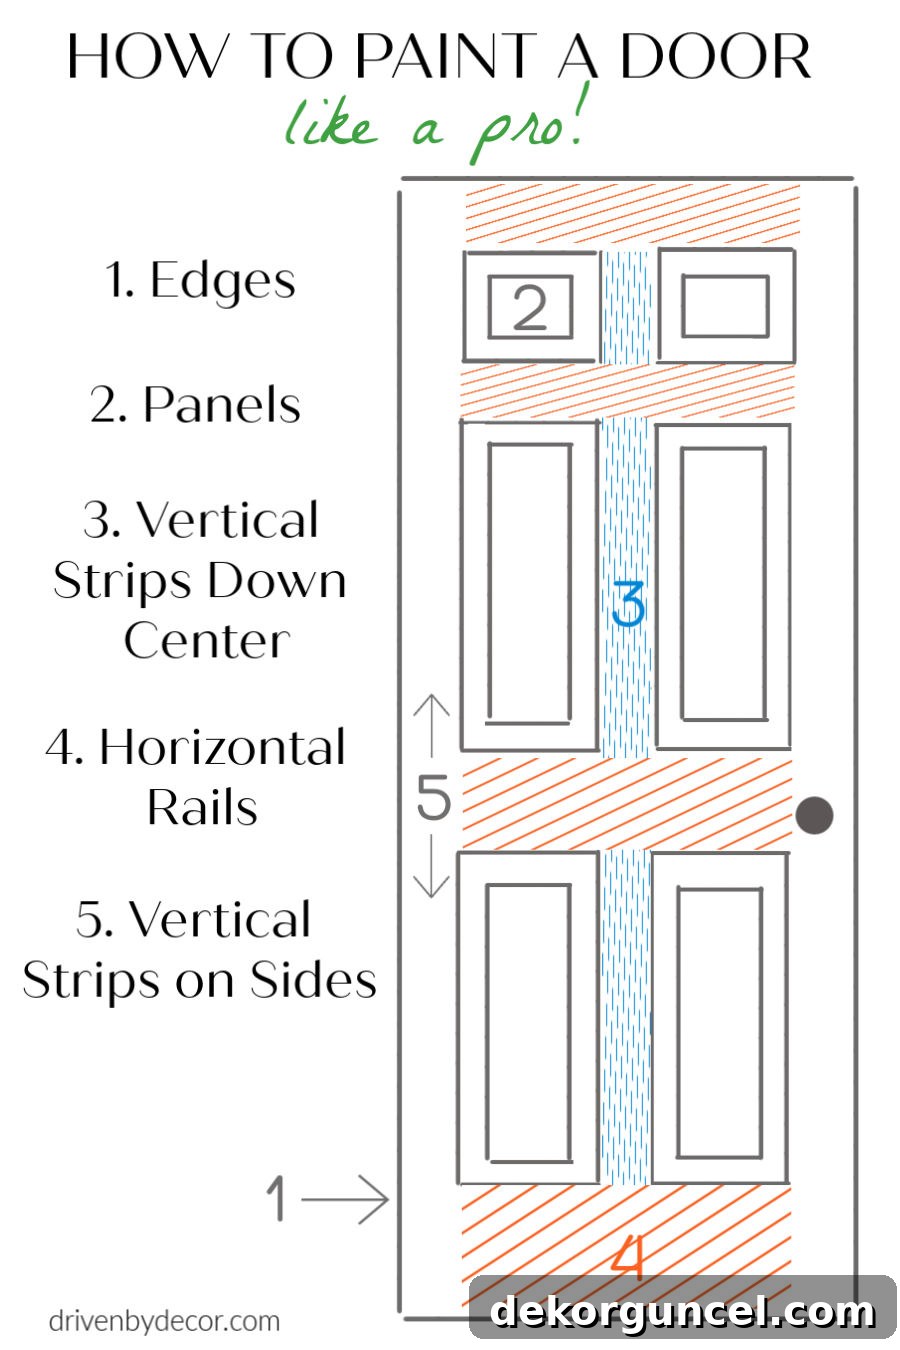
1. Start with the Edges: Begin by painting the edges (or “bevels”) of the door panels. Use your 1 ½″ or 2″ angled paintbrush for precision in these recessed areas. Apply paint evenly, ensuring you get into all the corners without overloading the brush. This allows you to work out from these areas before the paint starts to set.
2. Paint the Door Panels: Move on to the panels themselves. First, use your paintbrush to paint the recessed molding areas around each panel. Make sure to “feather” the edges of your brush strokes, meaning you should lighten your touch as you reach the flat surfaces of the panel. This prevents harsh brush marks. Immediately after brushing the molding, use your 4″ roller to paint the flat surfaces in the middle of each panel. Roll in the direction of the wood grain (typically vertical for panels) to achieve a smooth, even texture.
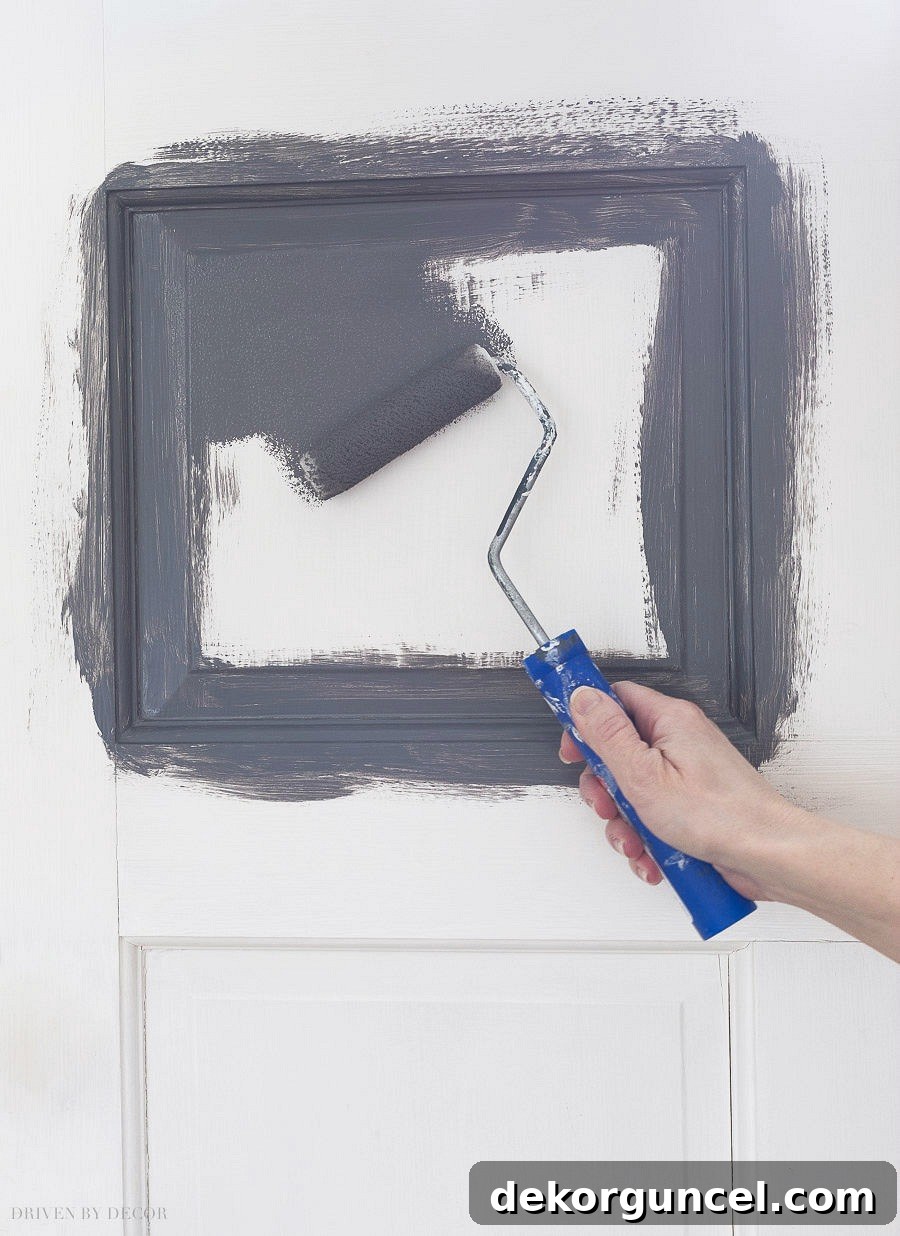
Pro Tip: Work on one panel at a time, completing both the brushed molding and rolled flat surface before moving to the next. This ensures you’re always working with wet paint, which helps eliminate lap marks.
3. Paint the Vertical Stiles (Center): Next, paint the three vertical strips (called stiles) running down the center of the door. Use your 4″ roller, applying even pressure and rolling from top to bottom. Overlap your strokes slightly to ensure full coverage.
4. Paint the Horizontal Rails: Now, tackle the four horizontal strips (called rails) that divide the panels. Again, use your 4″ roller, rolling horizontally across the door. Work from one end to the other, maintaining consistent pressure.
5. Paint the Vertical Stiles (Sides): Finally, complete the door by painting the two vertical strips on the far sides of the door. Use your 4″ roller, rolling from top to bottom, feathering into any previously painted areas to create a seamless finish. This order ensures that any drips or overlaps from painting the recessed areas are smoothed out by subsequent rolling on the flat surfaces.
General Painting Tips for All Doors:
- Thin Coats are Key: Always apply two to three thin, even coats of paint rather than one thick coat. Thin coats dry faster, adhere better, and are less prone to drips and brush marks.
- Maintain a Wet Edge: Always try to work towards an unpainted area or into a freshly painted “wet edge.” This helps eliminate lap marks and creates a smoother finish.
- Avoid Overworking the Paint: Once paint has started to dry, resist the urge to go back over it with your brush or roller. This can pull up partially dried paint, leading to texture and visible marks.
- Check for Drips: Immediately after painting each section, inspect for drips, especially along the edges and recessed areas. Use your brush to gently smooth them out before the paint sets.
5. Sand, Recoat, and Reinstall for a Flawless Finish
Once the first coat of paint is applied, your journey to a perfectly painted door isn’t over. The steps of sanding between coats and applying a second (or even third) coat are what truly elevate a good paint job to a professional one. This process ensures maximum durability, a silky-smooth feel, and a rich, even color.
Drying and Intercoat Sanding
After completing the first coat of paint, allow it to dry completely according to the manufacturer’s instructions. Drying times can vary significantly based on the type of paint, humidity, and temperature. For paints like Benjamin Moore Advance, note that the recoat time is often longer than typical latex paints (sometimes 16-24 hours), but this longer wait is well worth it for the superior finish and hardness it provides. Always prioritize full dry time to prevent lifting or marring the first coat.
Once the first coat is dry, perform a quick, very light sanding over the entire door surface using 320-grit sandpaper. The goal here isn’t to remove paint but to gently abrade the surface, knocking down any tiny imperfections, dust nibs, or slight textures that may have appeared. This micro-sanding creates a fine “tooth” that the subsequent coat of paint can grip onto, ensuring excellent adhesion and a smoother final appearance. After sanding, meticulously remove all sanding residue with a tack cloth. This step is critical; any remaining dust will become embedded in your next paint layer.
Applying the Second Coat and Beyond
With the surface perfectly prepared, apply your second coat of paint following the exact same methodical order you used for the first coat (panels, then stiles, then rails). Aim for thin, even coats, maintaining a wet edge to avoid lap marks. If you’re painting a very light color over a dark base, or vice-versa, a third coat might be necessary to achieve full, opaque coverage. Always sand lightly and clean with a tack cloth between each subsequent coat.
Finishing Touches and Reinstallation
If you removed your doors and painted them on sawhorses, remember to allow the first side to dry for at least 24 hours (or as per paint instructions for full hardness) before carefully flipping the door over to paint the second side. To prevent the newly painted door from sticking to the sawhorses or picking up unwanted texture, cover your sawhorses with a smooth, lint-free cloth or a fresh drop cloth. Ensure the cloth has no pattern or texture that could imprint onto your wet paint.
Once your final coat on both sides is completely dry and cured (which can take several days for full hardness, even if dry to the touch), you’re ready to rehang your doors. Carefully reinstall your door hardware – doorknobs, hinges, and any other decorative elements. This is also the perfect time to consider upgrading your hardware for an extra touch of elegance. The transformation from worn-out to wonderfully renewed will be striking!
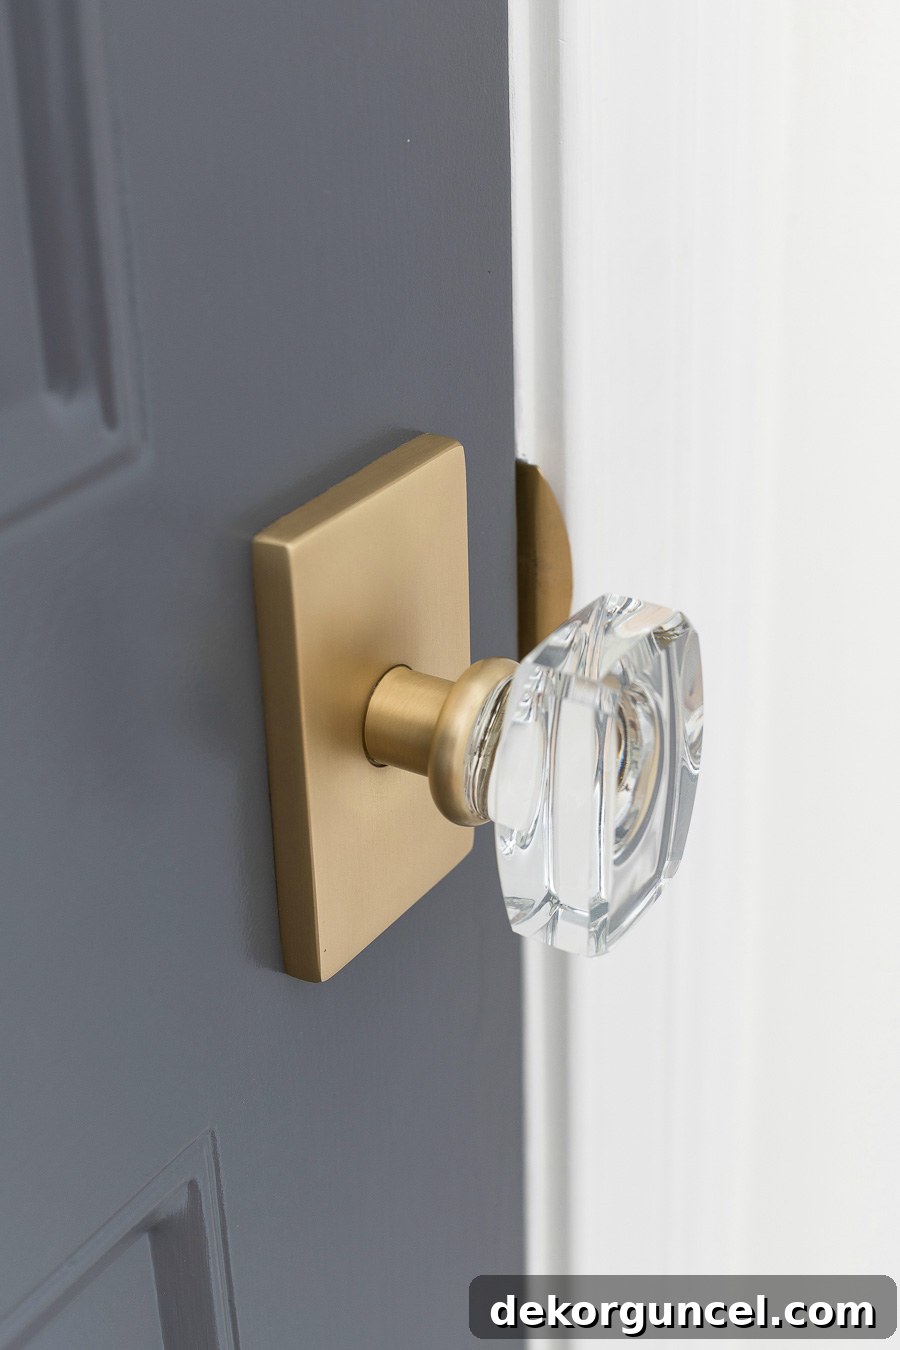
Our beautiful brass and crystal door hardware can be found {here}.
While painting doors might not always be the most glamorous DIY project, the impact it has on the overall aesthetic of your home is undeniable. By following these detailed, step-by-step instructions, you’ll be able to achieve a professional-quality finish that will make your doors look brand new and elevate your entire living space. Remember, patience and proper preparation are your best friends in this endeavor.
I hope these tips and tricks have provided you with the confidence and knowledge needed for your next door painting project. Don’t hesitate to reach out if you have any questions or need further clarification. Happy painting!
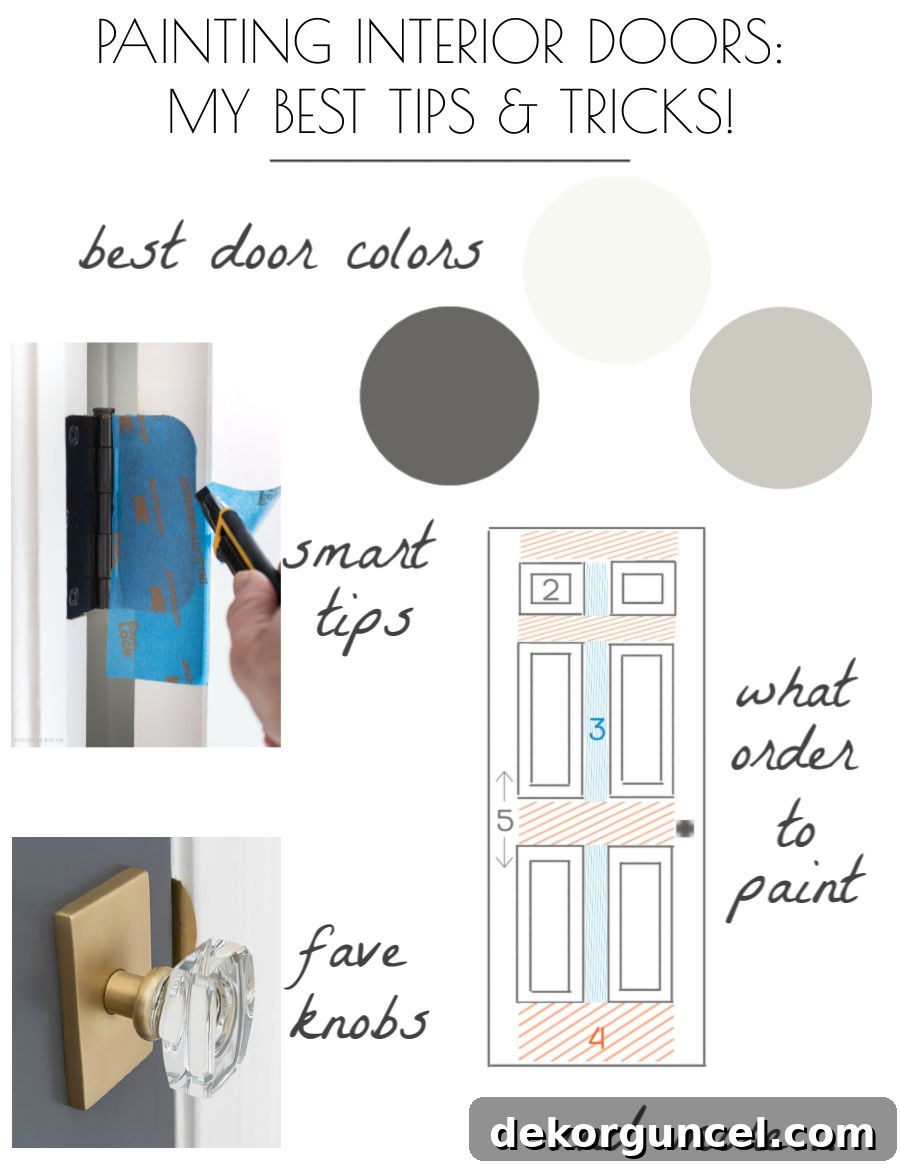
And if you found this guide helpful and want to easily reference it in the future, be sure to Pin the image below to your favorite home improvement board!
XO,
