
Update: Our master bathroom renovation is complete! Dive into all the stunning details and see the finished space in my master bathroom reveal post {here}!
Embarking on a significant home improvement project, like a master bathroom addition, always presents a unique blend of excitement and unexpected challenges. We’ve finally reached the exhilarating home stretch of our master bathroom transformation, a journey that has been far more involved than anticipated. The sheer volume of decisions, from foundational elements to the tiniest aesthetic details, coupled with the time commitment, truly surprised me. While there have certainly been a few bumps along the road, witnessing the final touches come together fills me with immense satisfaction. I’m absolutely thrilled with how our vision is materializing and can’t wait to share every detail of this incredible renovation with you. Ready to explore the design and progress? (Please note: this post contains affiliate links; for full disclosure information, click {here}.)
Crafting the Vision: Our Master Bathroom Design Plan
Let’s kick things off by revealing the latest iteration of my design plan for this luxurious new space. This comprehensive vision board guided many of our decisions, ensuring a cohesive and elegant aesthetic throughout the master bathroom.
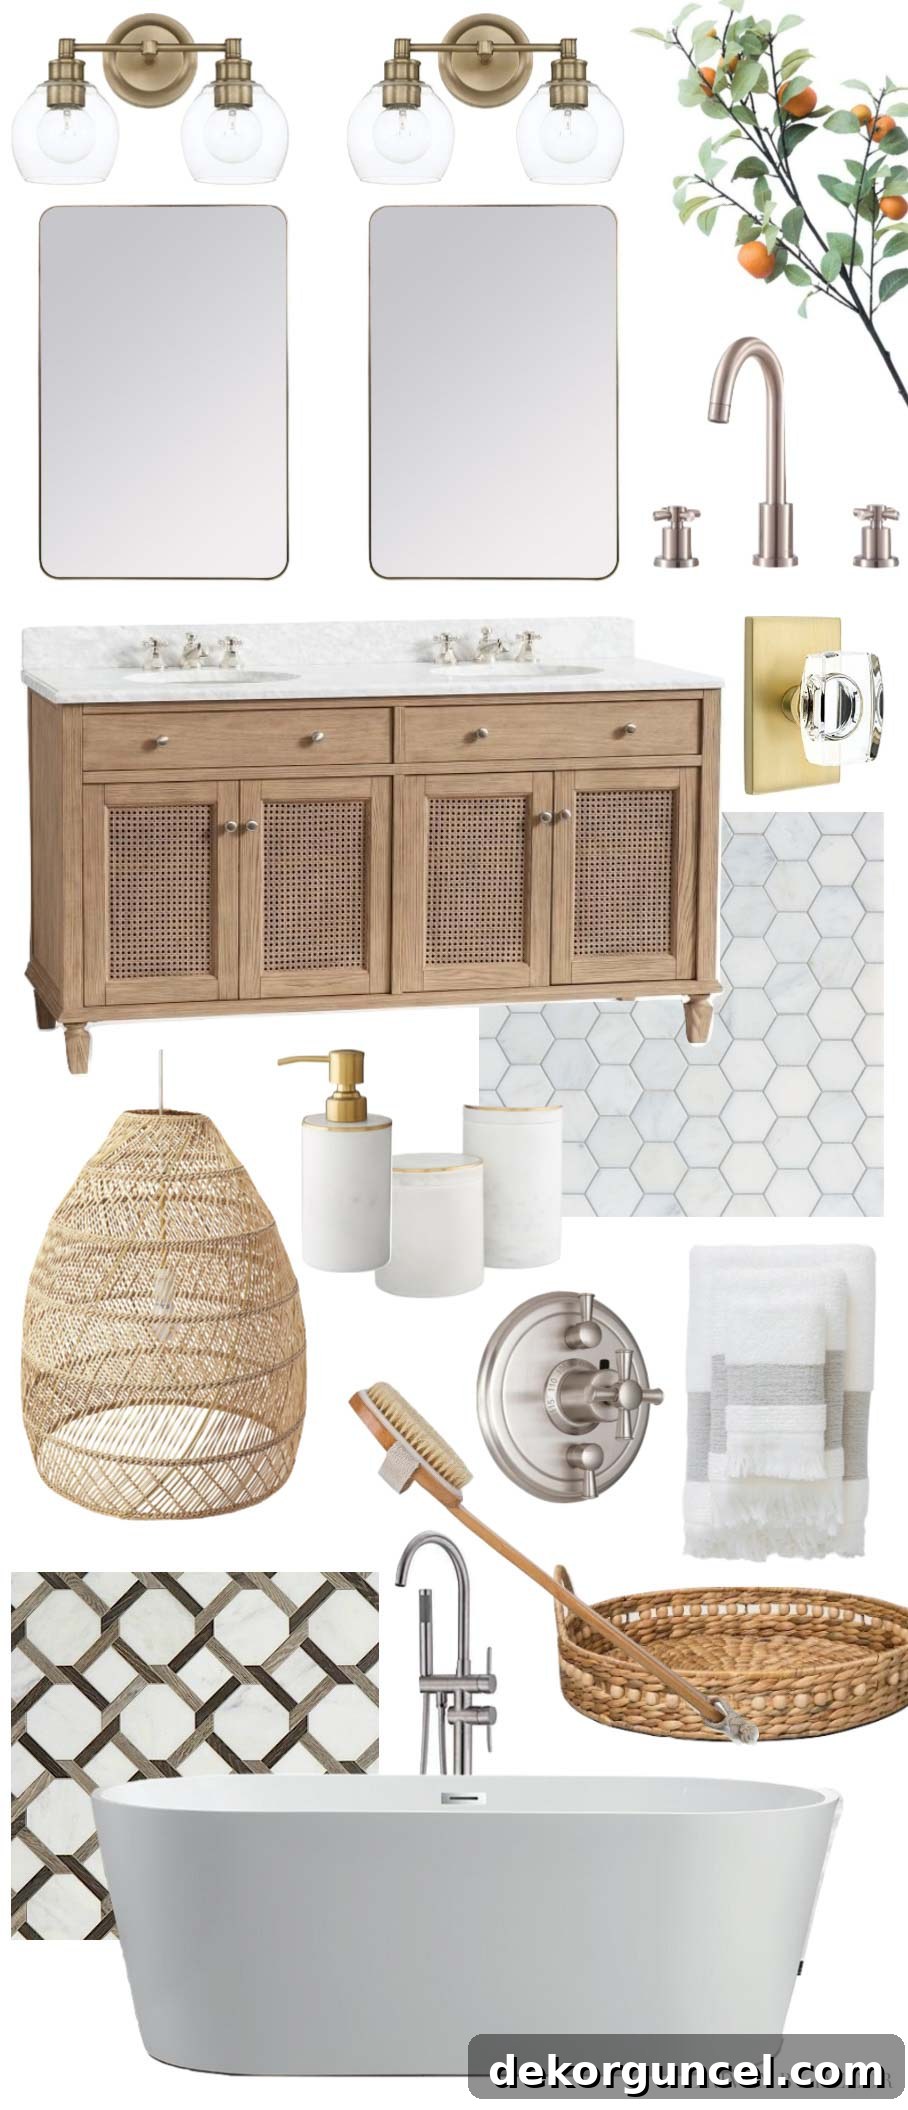
Click below to explore the sources that inspired our dream bathroom:
Elegant 2-Light Vanity Sconces | Sophisticated Curved Mirrors | Stylish Double Vanity Unit | Lifelike Faux Tangerine Branch | Contemporary Faucet Design | Crystal & Brass Door Knob | Luxurious Marble Hexagon Shower Floor Tile | Chic Marble & Brass Canisters | Elegant Marble & Brass Soap Dispenser | Textured Woven Pendant Light | Cross-Handled Shower Valve Trim | Plush Bath Towels | Distinctive Accent Tile | Invigorating Bath Brush | Similar Round Woven Tray | Stylish Tub Filler | Contemporary Bathtub
From Framing to Flawless Finishes: The Renovation Journey
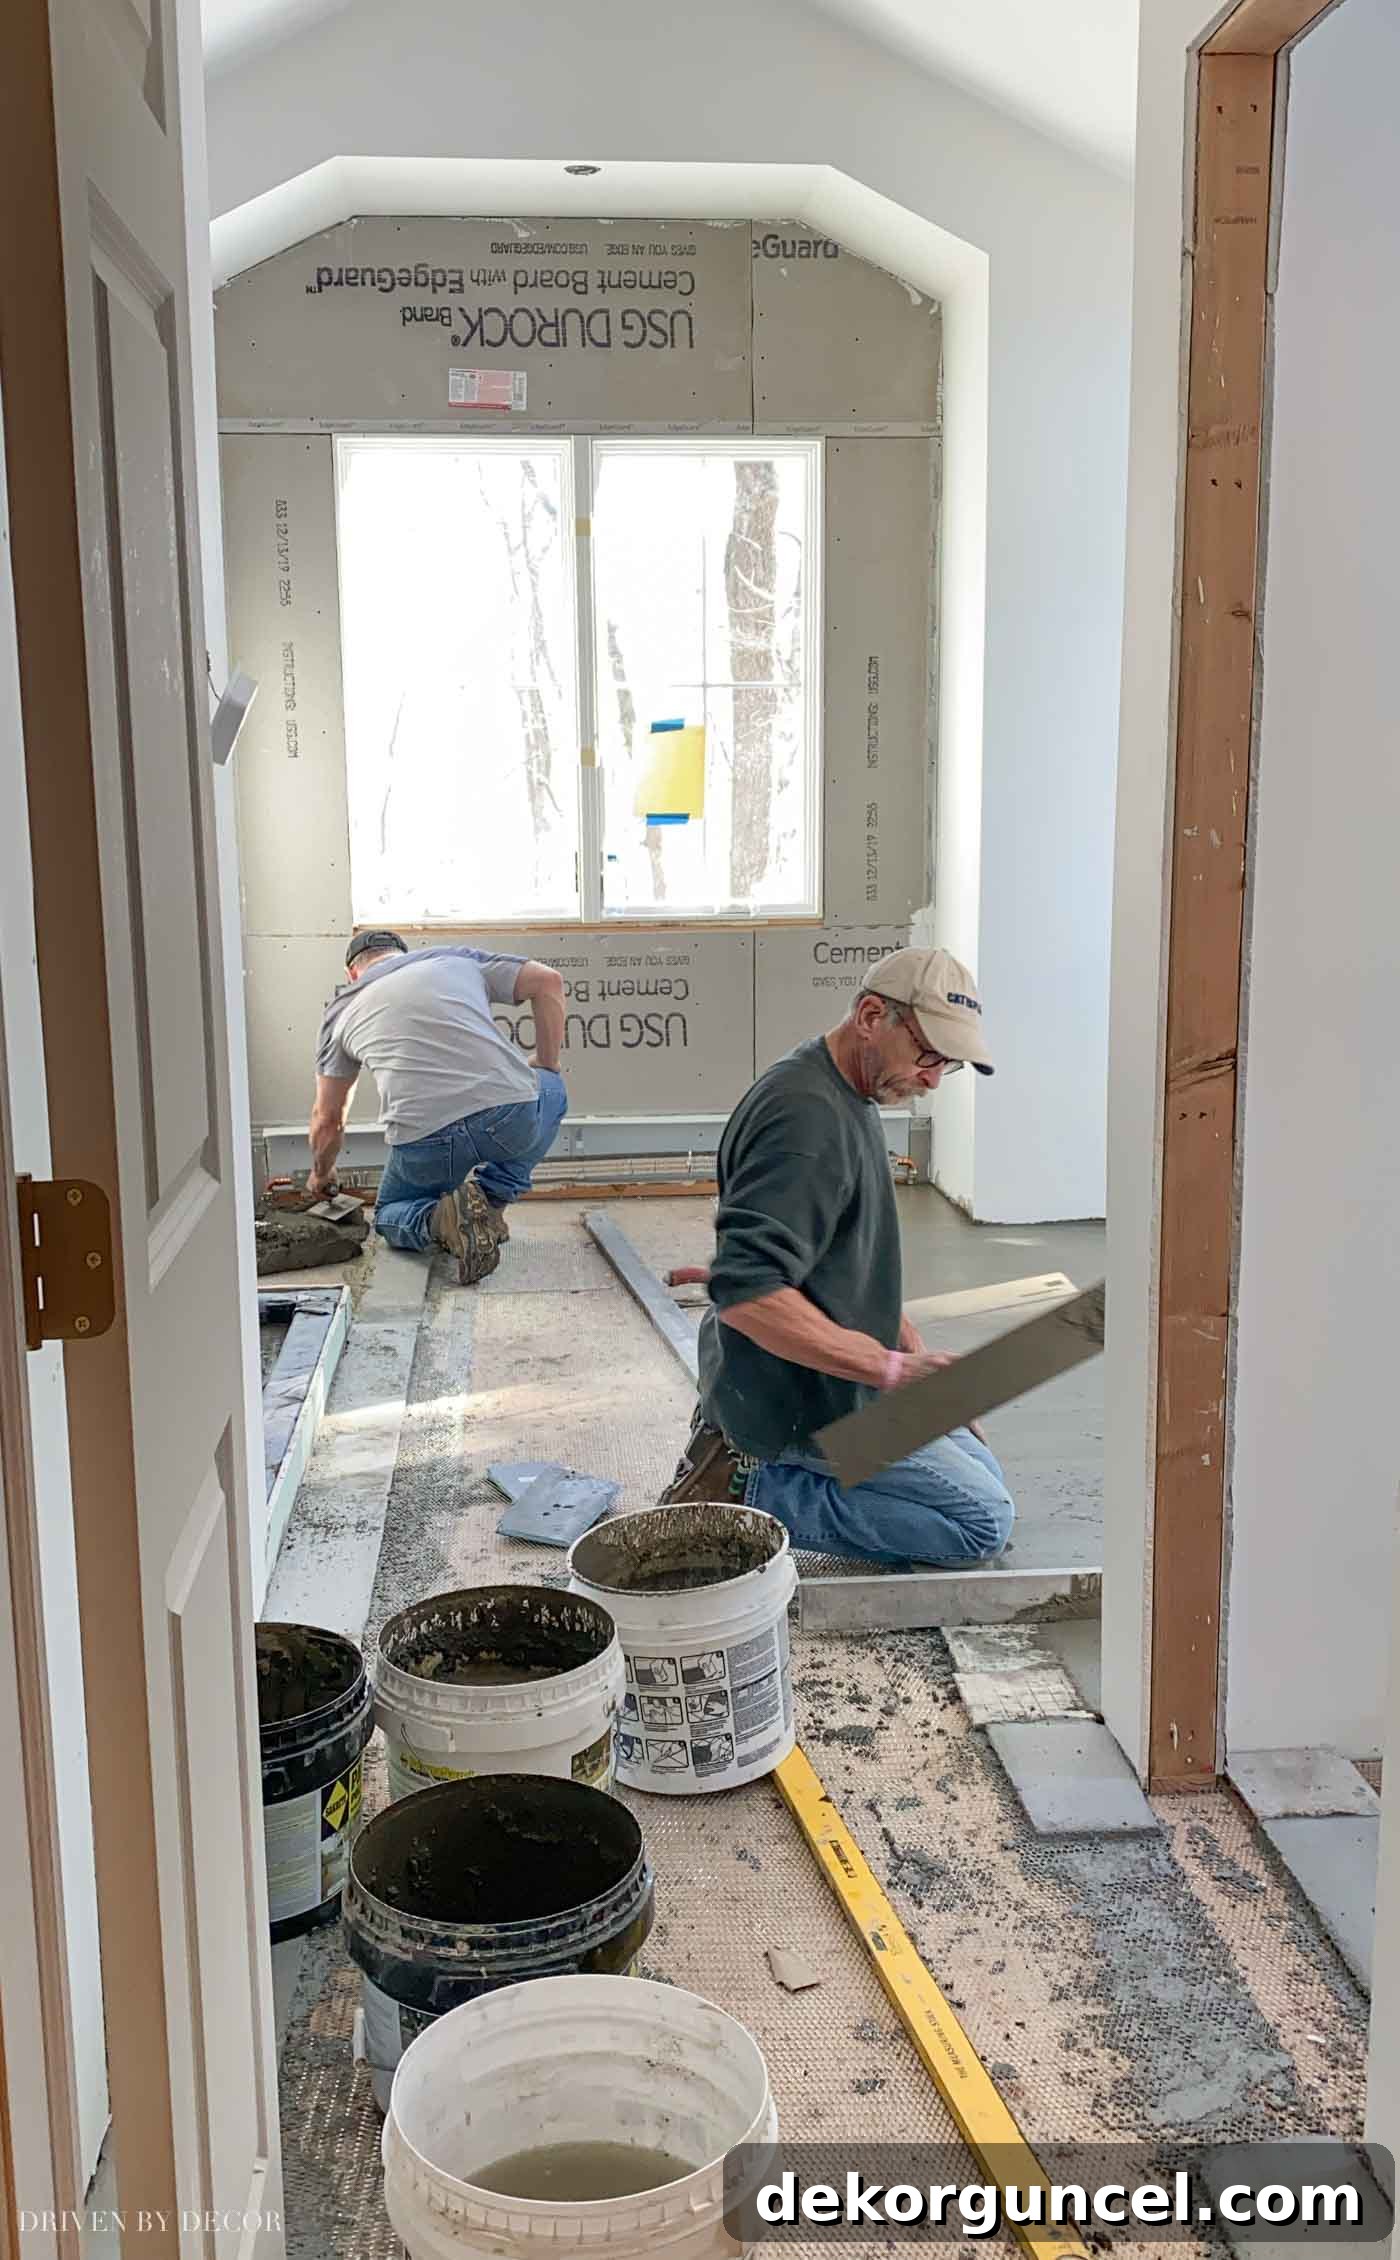
When I last updated you on this master bathroom renovation, we had just completed the framing stage – a period rich in structural progress but decidedly lacking in visual appeal. Since then, our bathroom has undergone significant transformation. The space was expertly insulated using spray foam, ensuring optimal energy efficiency and sound dampening. Following insulation, the drywall was installed and primed, creating a smooth canvas for the next exciting phase: tiling. I must admit, I never fully appreciated the extensive and often messy preparation involved in tiling work until experiencing it firsthand:
The Art of Tile Selection: Floor, Accent, and Shower Decisions
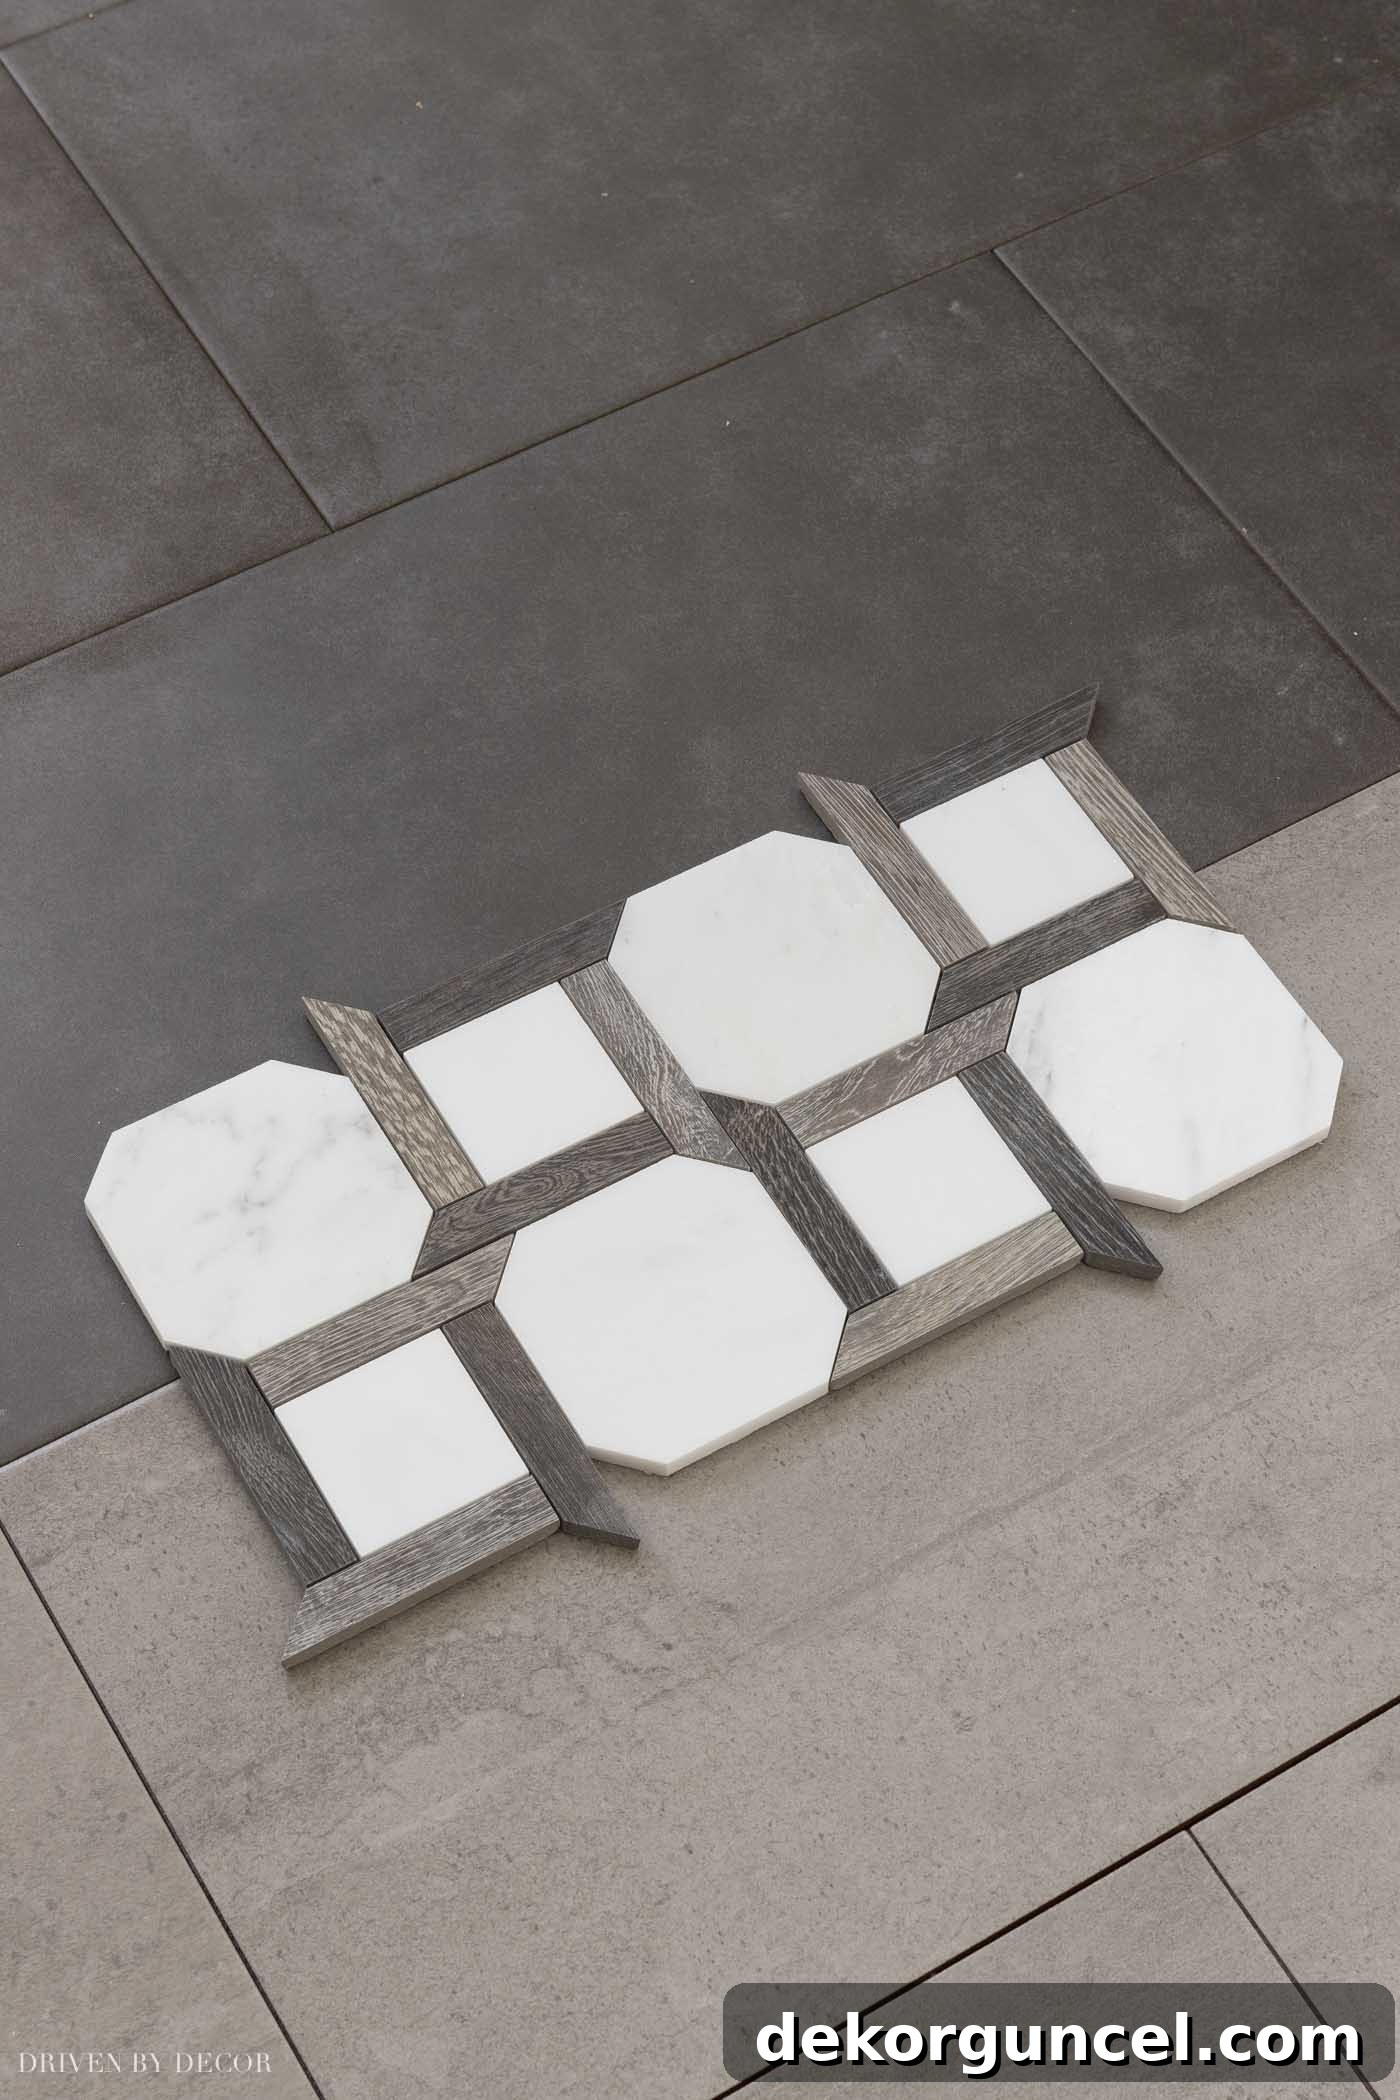
Choosing the perfect tiles for a master bathroom is a foundational decision that profoundly impacts the overall aesthetic. While I had fallen in love with my accent wall tile early in the process, selecting the ideal floor and shower tiles proved to be a more challenging endeavor. For the main bathroom floor, my goal was a large-scale, neutral tile that would harmoniously bridge the colors of both the accent wall and the shower area. After much deliberation, I narrowed it down to two strong contenders:
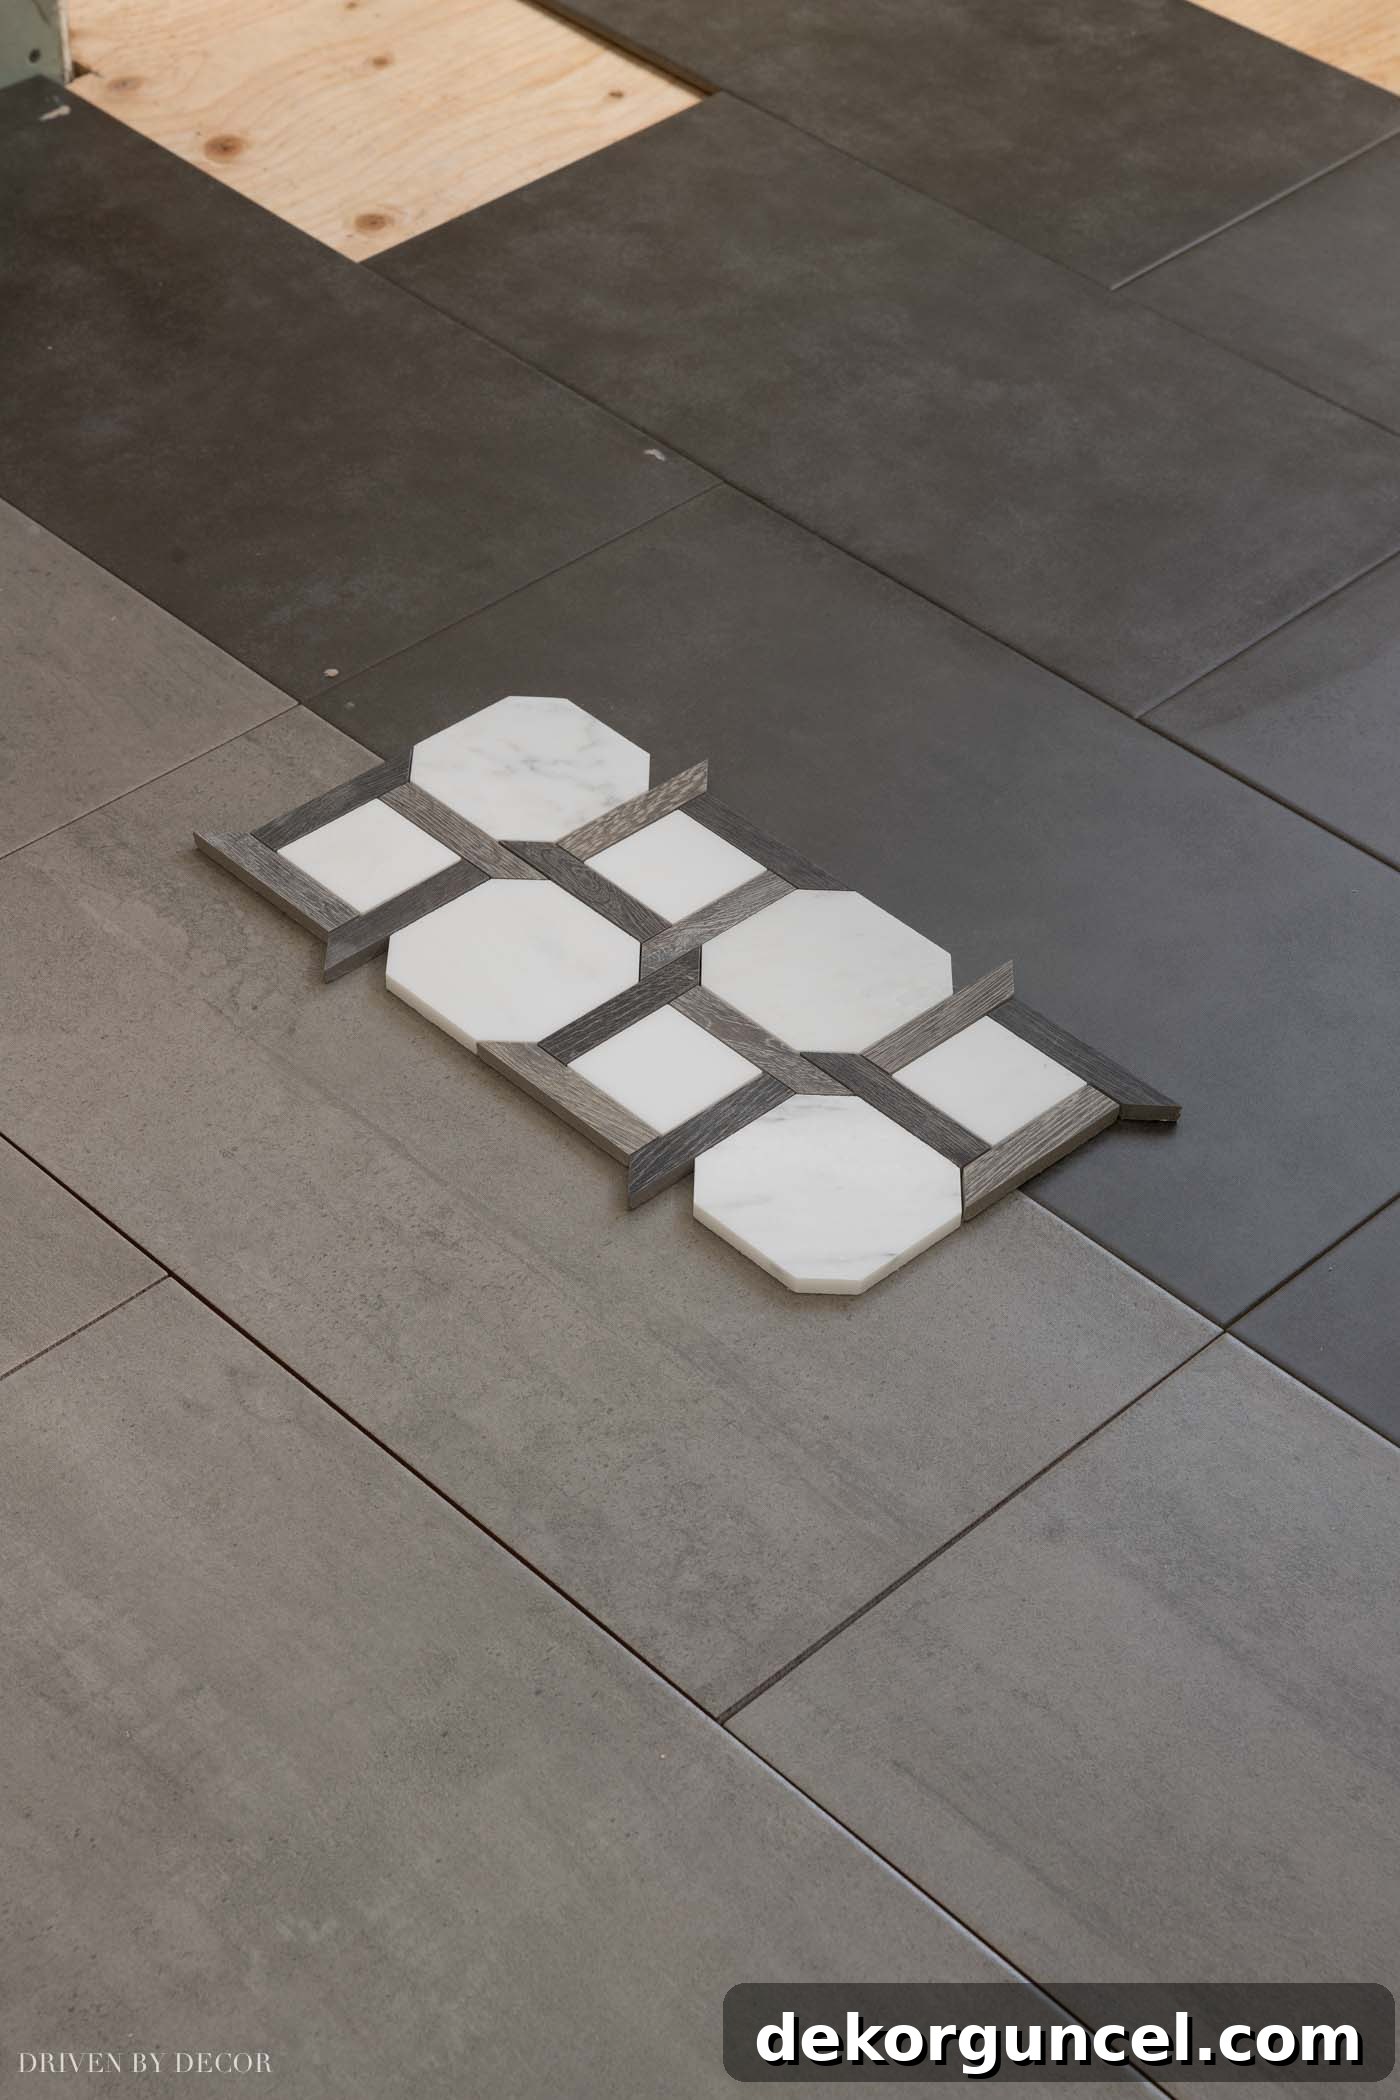
The first option, a striking matte black tile, beautifully echoed the darker tones present in my chosen accent tile. The second, a sophisticated concrete gray ceramic tile, offered a lighter, more ethereal quality. Both options presented compelling arguments, but ultimately, the concrete gray tile won out. This particular gray possesses wonderfully warm greige undertones, distinguishing it from a true, cold concrete shade. While the stark contrast of the black tile against the accent wall and crisp white walls was undeniably appealing, I grew concerned that it might visually shrink the space and make the entire room feel too dark. Furthermore, a practical consideration heavily influenced my decision: the black tile would undoubtedly highlight every single speck of dust or debris. During a test run, simply walking back and forth over a few dark tiles laid on the floor left a visible trail of white dust – a cleaning nightmare I was keen to avoid! The concrete gray provides the perfect balance of sophistication and practicality, creating a serene and inviting foundation for the room.
The Comfort of Heated Floors
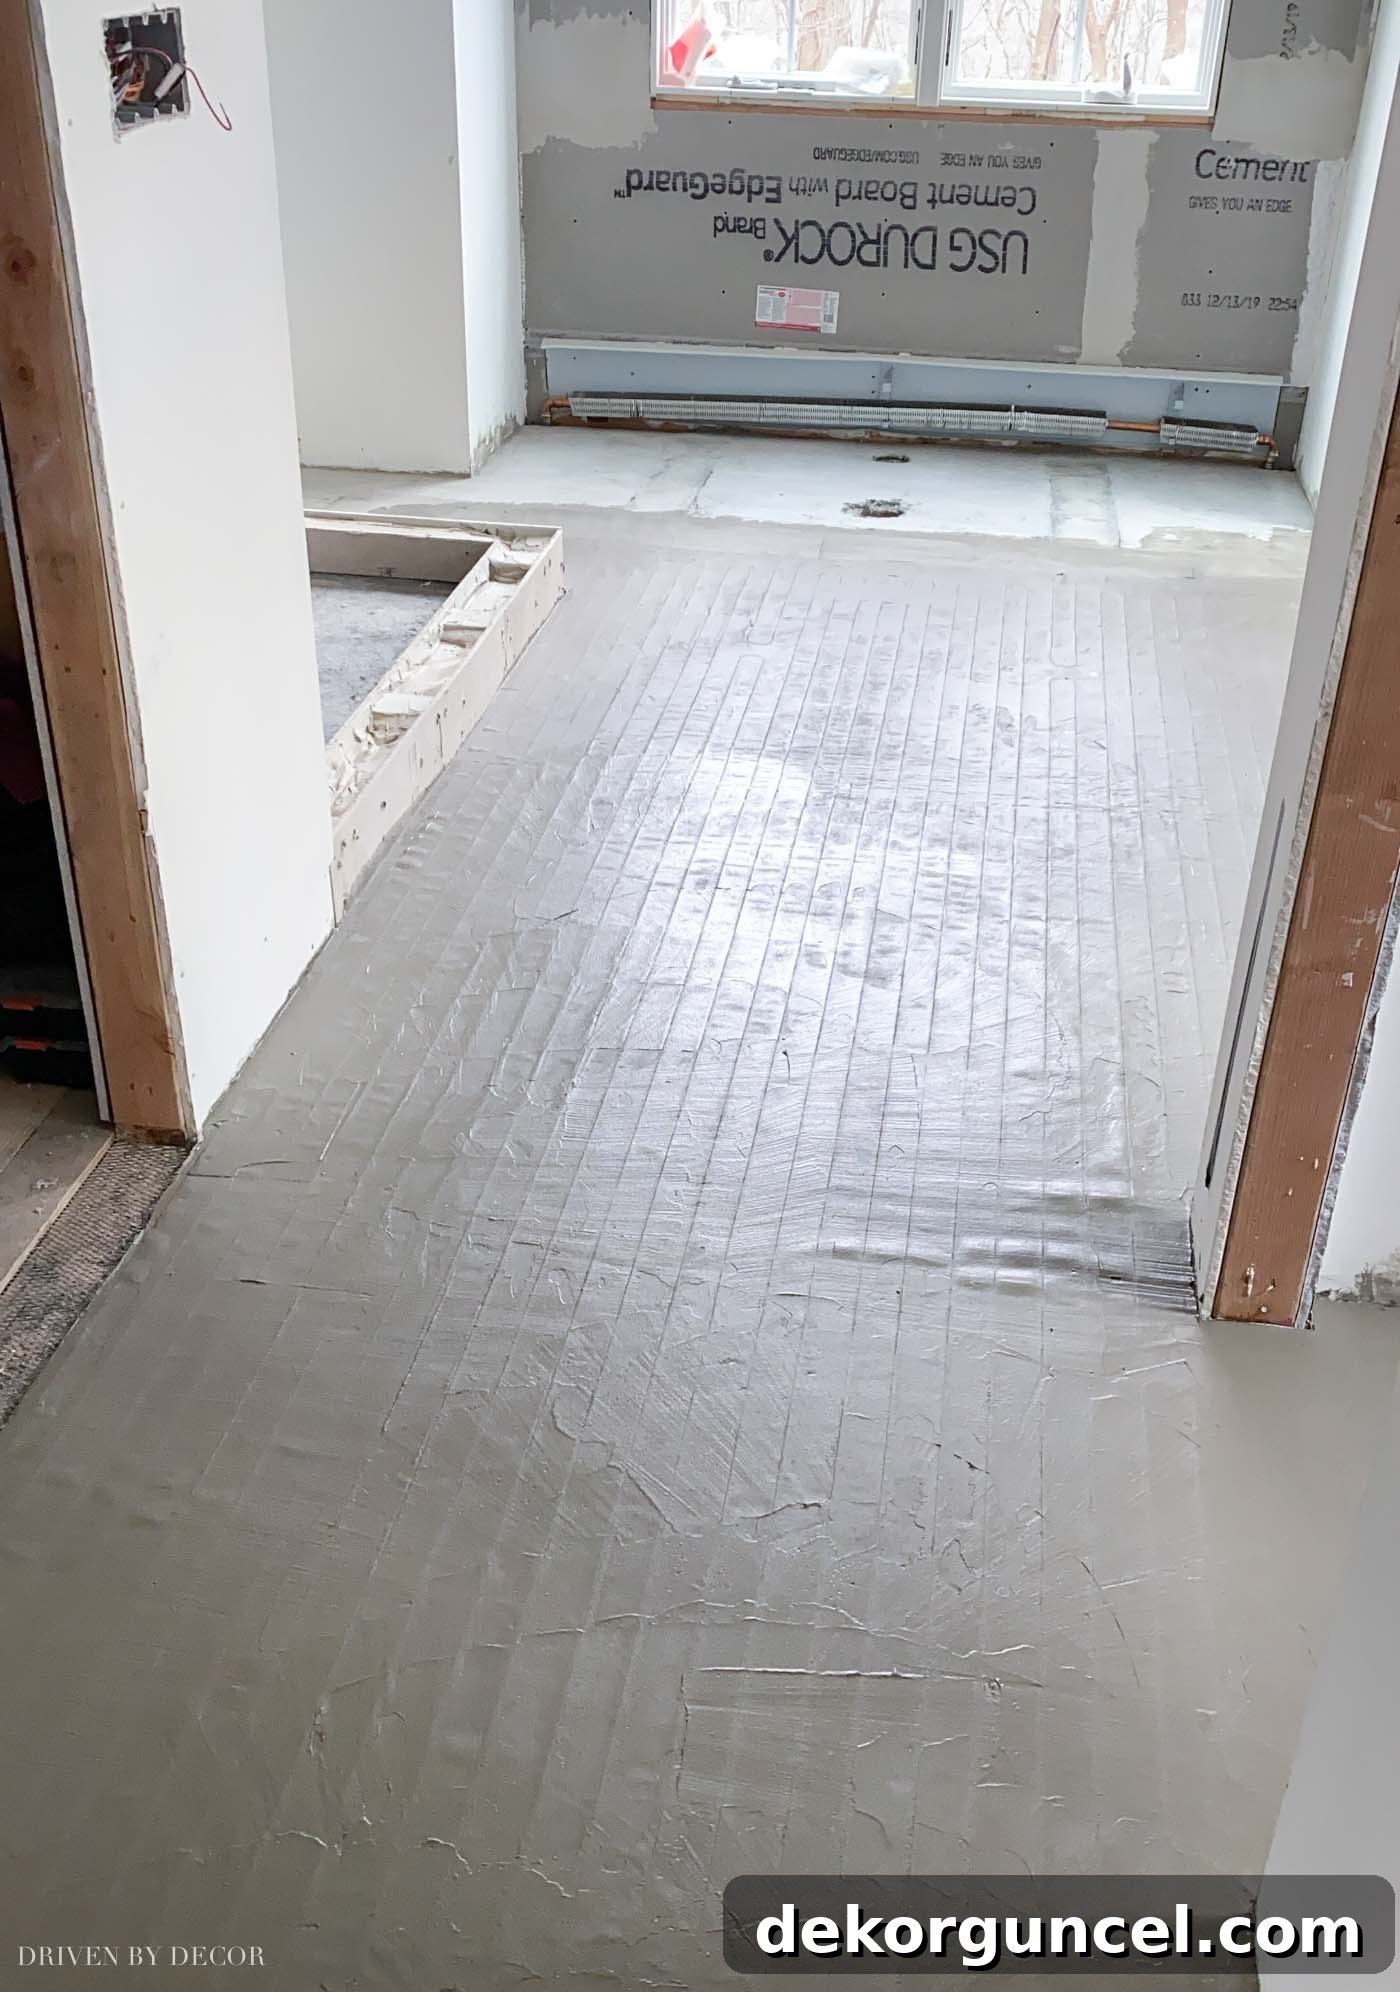
Before the installation of the floor tile commenced, a luxurious addition was integrated into our master bathroom design: a Nuheat floor heating mat. This innovative system promises to transform our bathroom experience, especially during the chilly Connecticut winters. The thought of stepping onto a warm tile floor on a cold morning is incredibly exciting – it’s definitely one of the features I’m most enthusiastic about in our new space. Here’s a glimpse of the floor after the mat was installed; those subtle lines you see are the heating cables, cleverly concealed beneath what will soon be our beautiful tile:
Introducing the Accent Wall
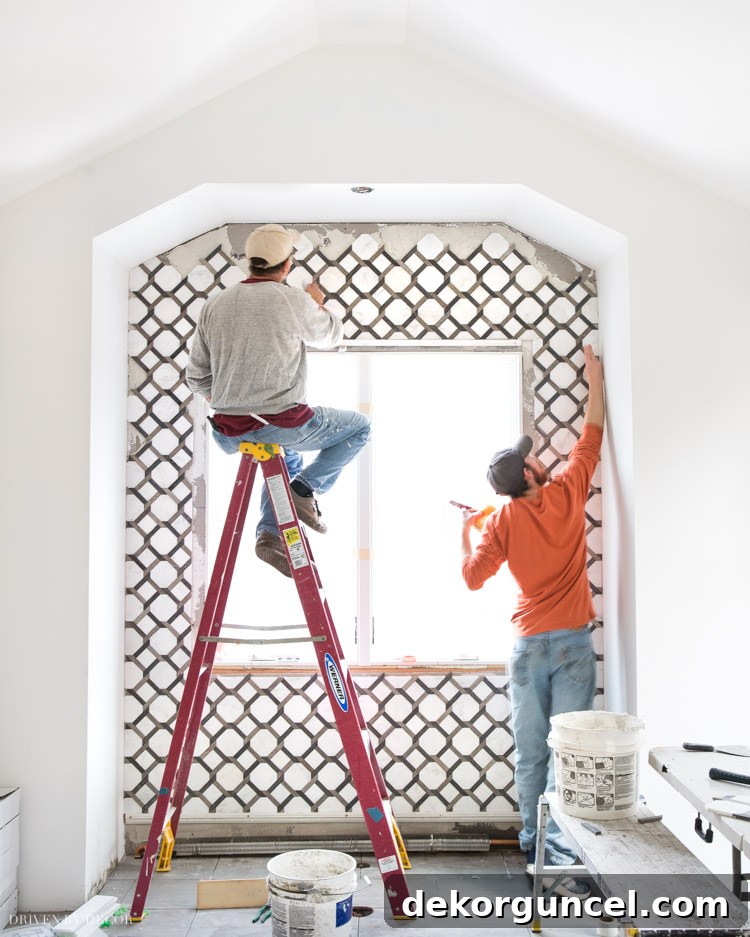
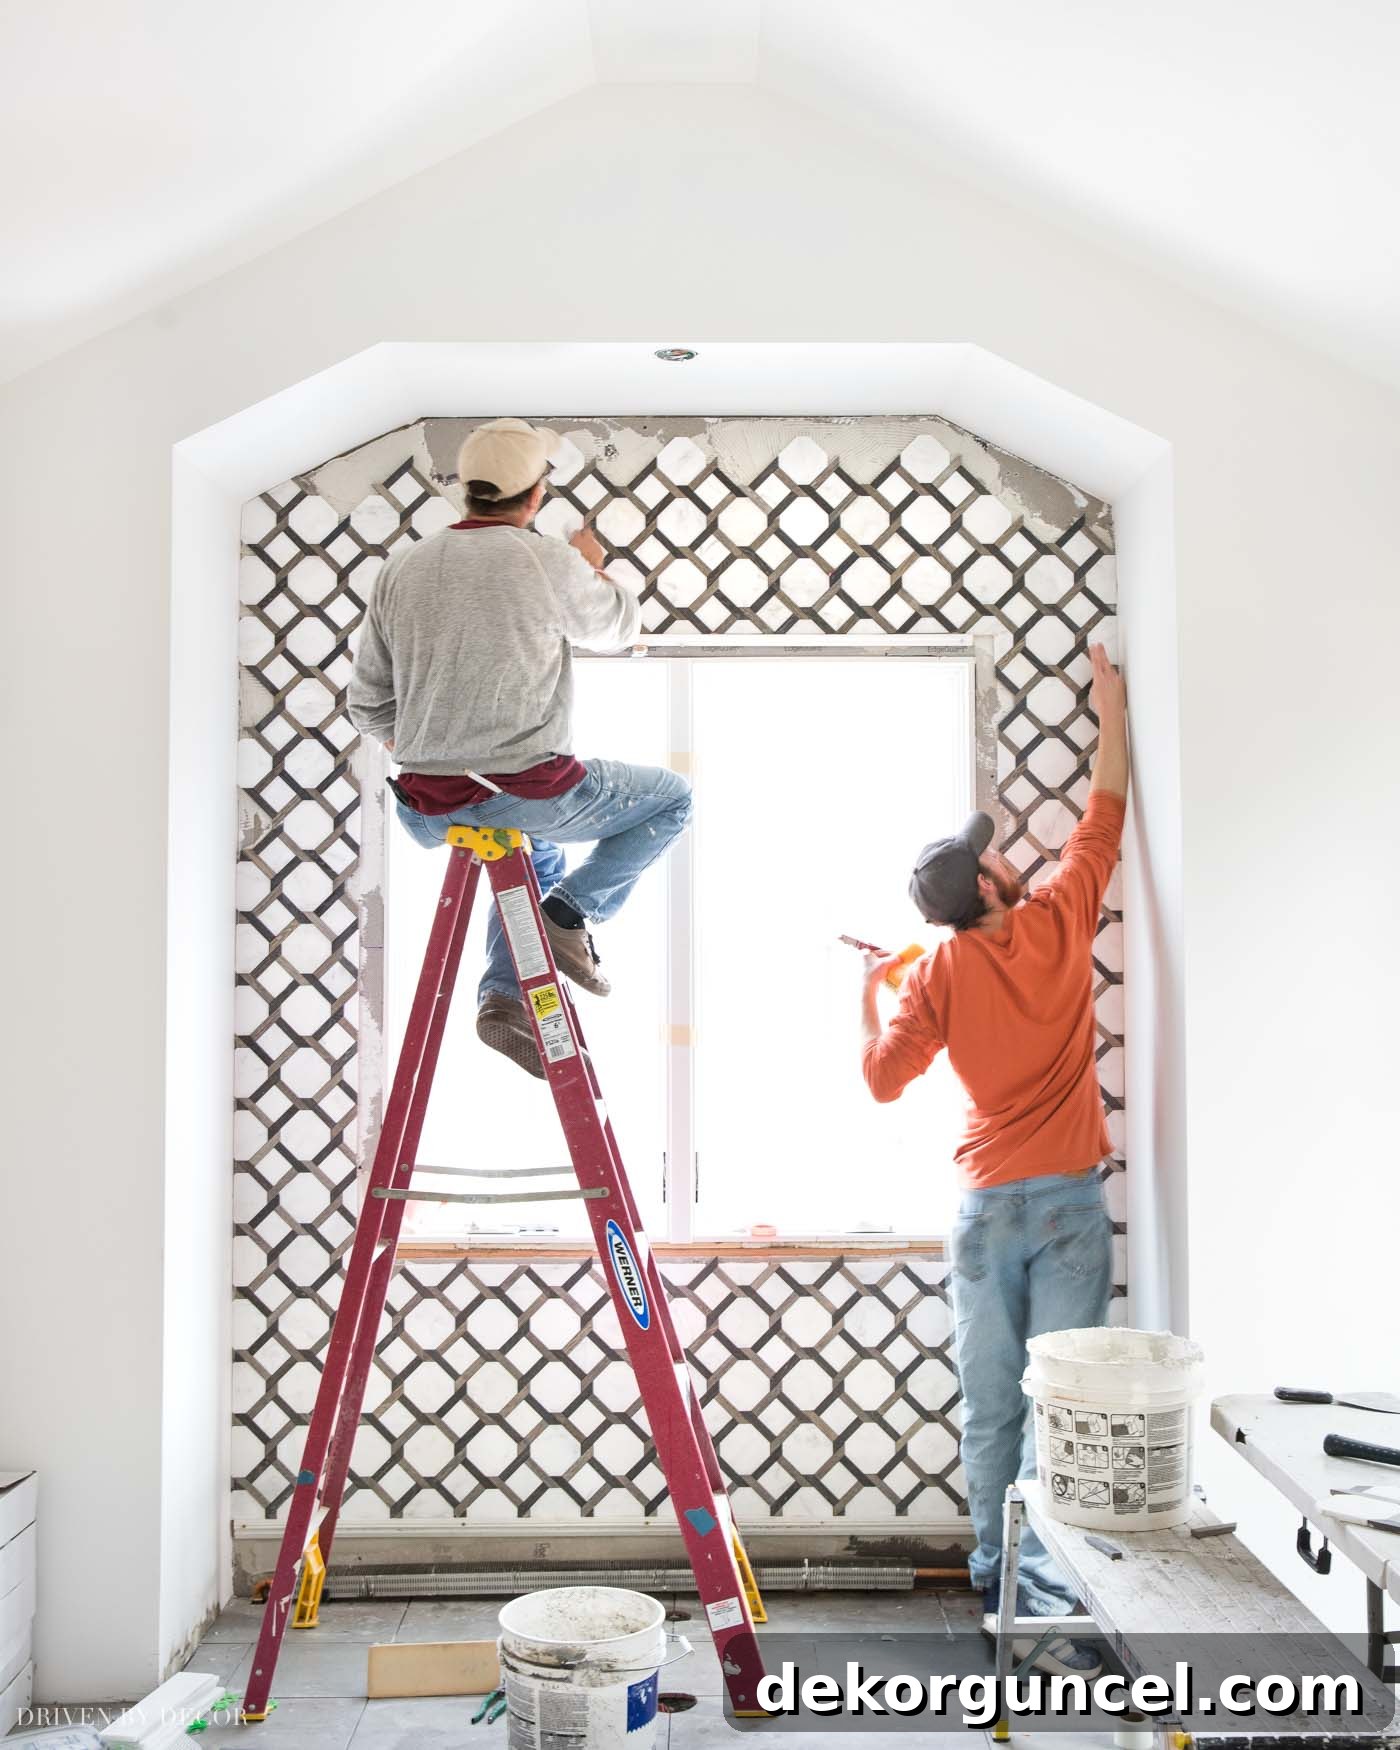
Next in line for installation was the captivating accent wall, thoughtfully positioned within the serene nook where our freestanding bathtub will ultimately reside. My initial admiration for this particular Rattan tile from Walker Zanger quickly escalated to absolute obsession once it graced the wall. Its unique texture and pattern are simply perfect for the space, creating a focal point that is both elegant and understated. Witnessing the in-progress installation last week only solidified my love for this exquisite choice:
Sophisticated Shower Tiling and Functional Niches
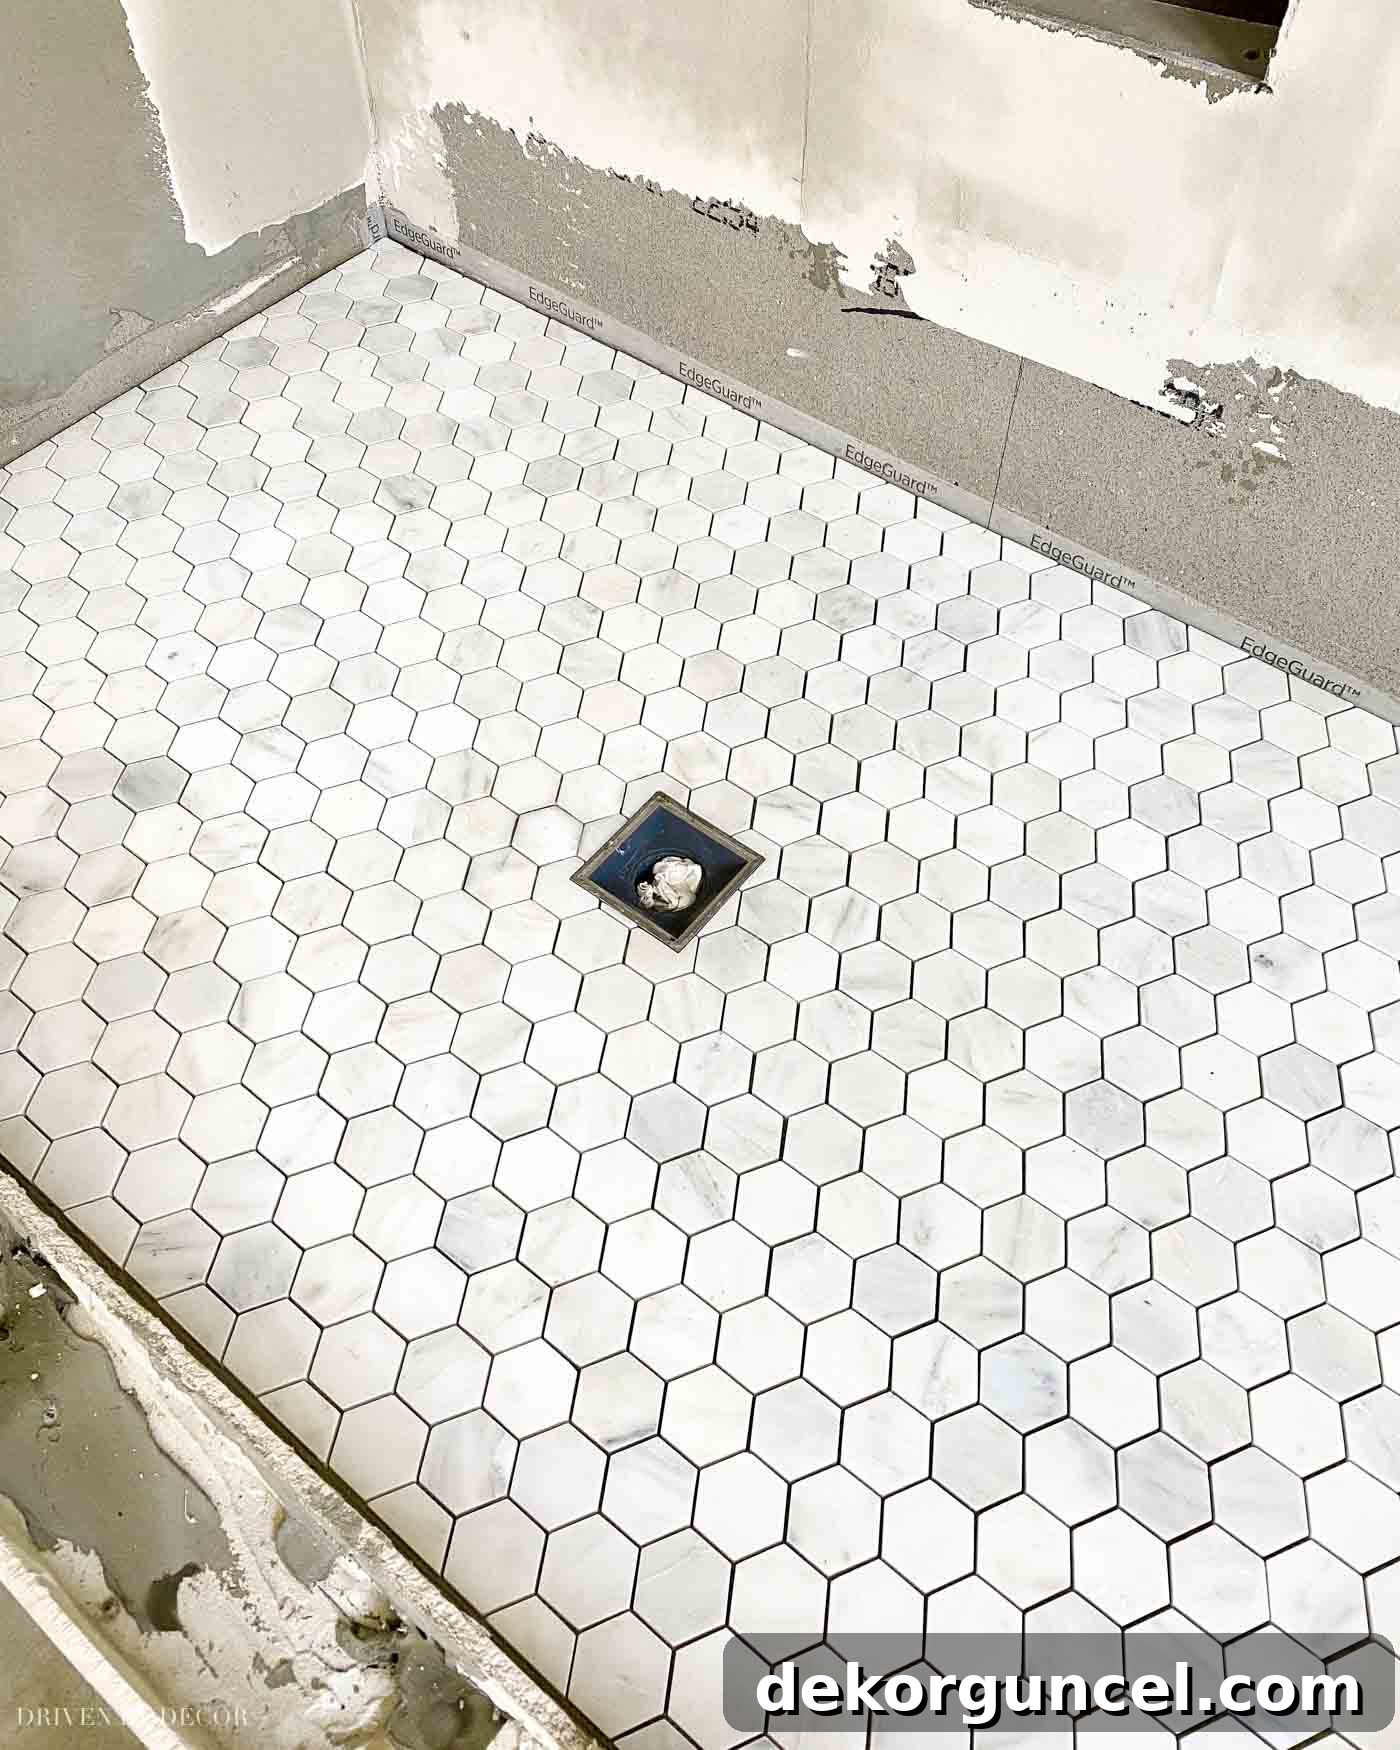
The shower tiling phase has also been completed, bringing another layer of sophistication to the master bathroom. For the shower floor, I selected Bianco Bello 2″ hexagon tile, also a generous offering from Walker Zanger. The intricate hexagonal pattern provides a subtle yet luxurious texture underfoot, and I couldn’t be happier with its appearance. This particular photo captures it beautifully just before grouting:
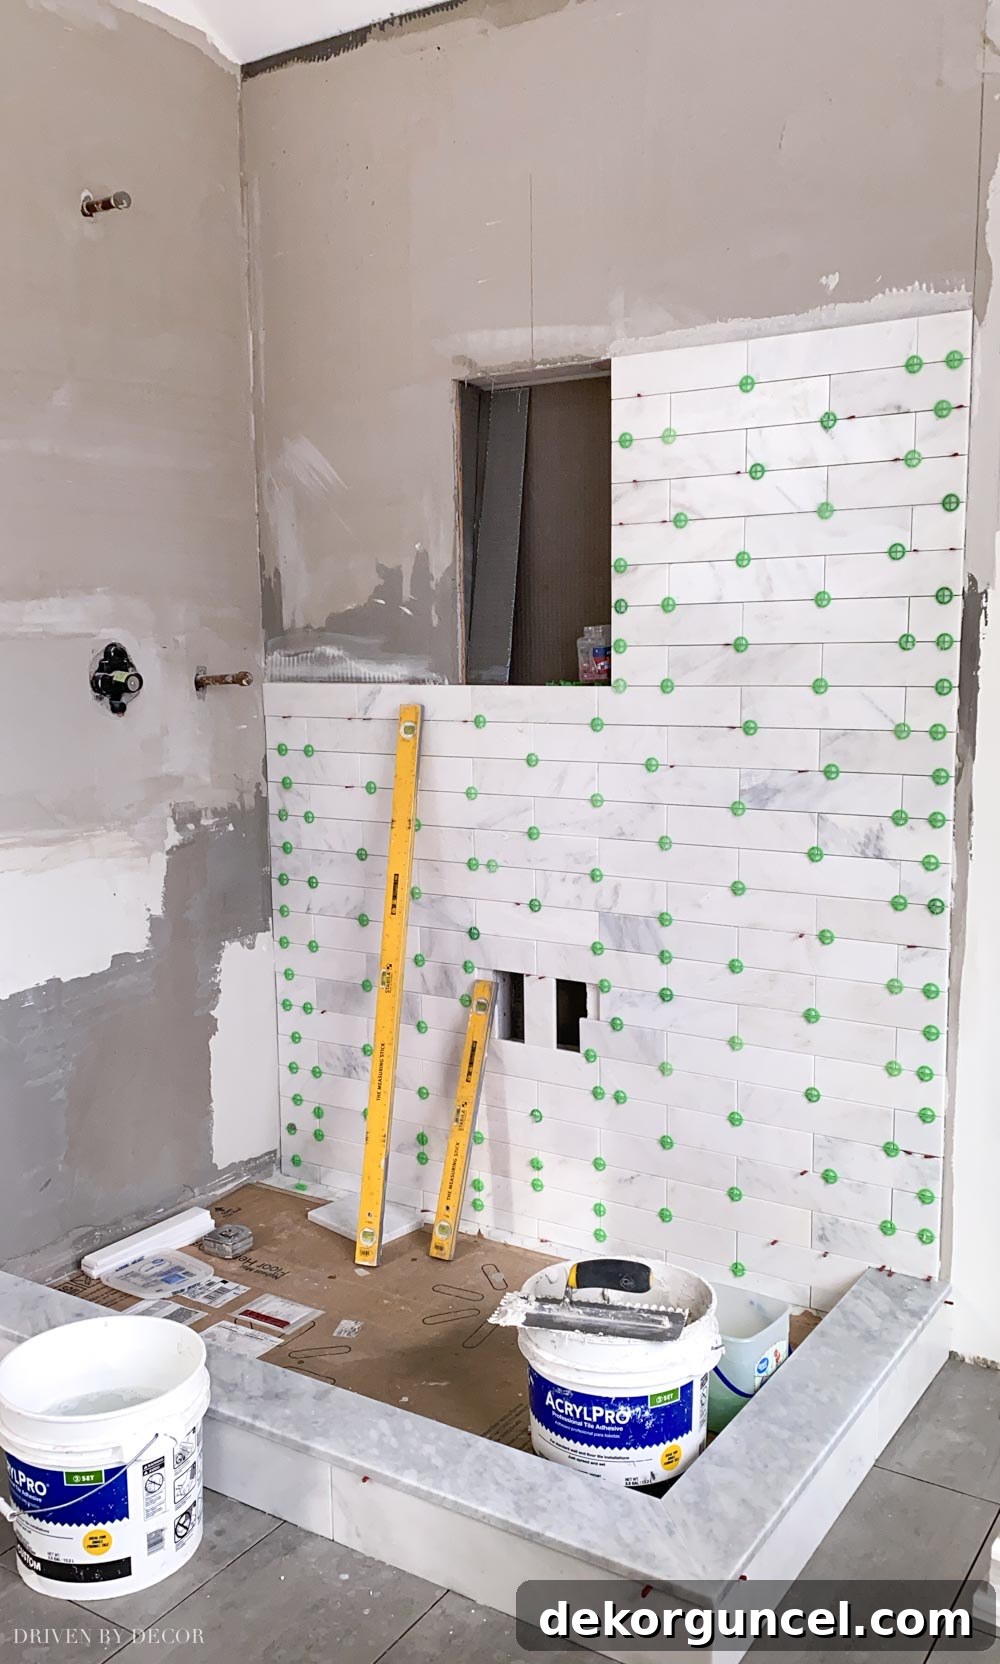
The walls of the shower are adorned with the complementary Bianco Bello field tile in a versatile 3″ x 12″ size. I departed for a weekend trip shortly after the shower wall tiling commenced, and this image reflects the progress at that point. (A quick note for those familiar with tiling: the AcrylPro buckets seen in the image were merely being used to hold water and thinset, not as the actual adhesive for the shower tile). The natural variation in color inherent to marble is something I deeply appreciate, adding depth and character to the shower space. My decision to opt for honed marble over a polished finish has proven to be an excellent one, offering a soft, matte look that feels both contemporary and timeless.
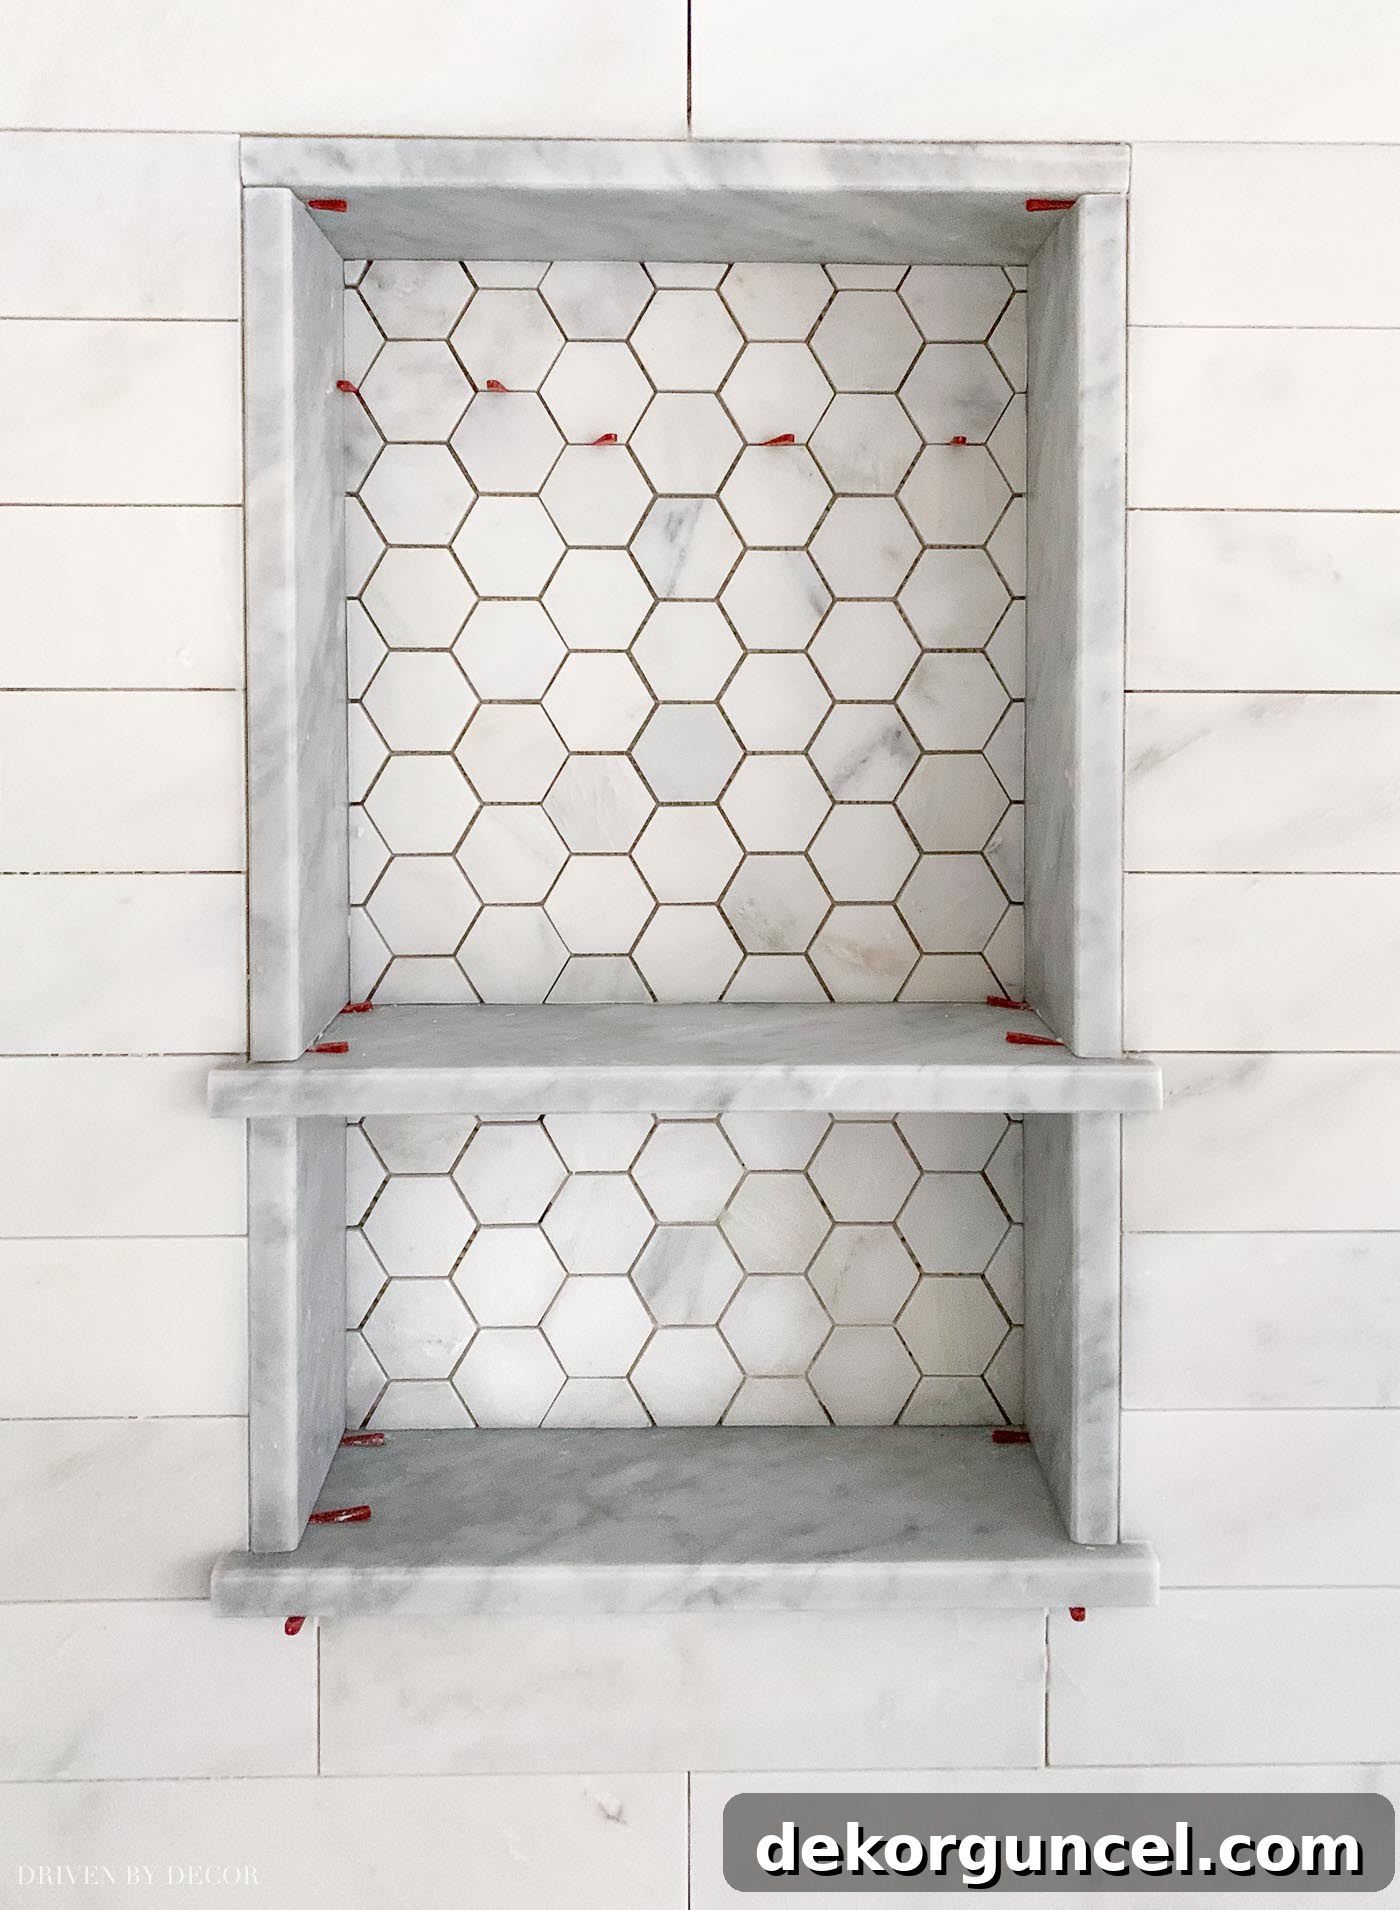
During my absence, the dedicated team completed the tiling of the shower and, importantly, the custom shower niches. My husband, Jeff, who held down the fort at home, thoughtfully texted me these fantastic pictures of our two newly finished niches – and I absolutely adore them! The primary niche, perfectly sized to accommodate shampoo bottles and other essentials, features the beautiful hexagon tile on its back wall, mirroring the shower floor for a touch of cohesive design:
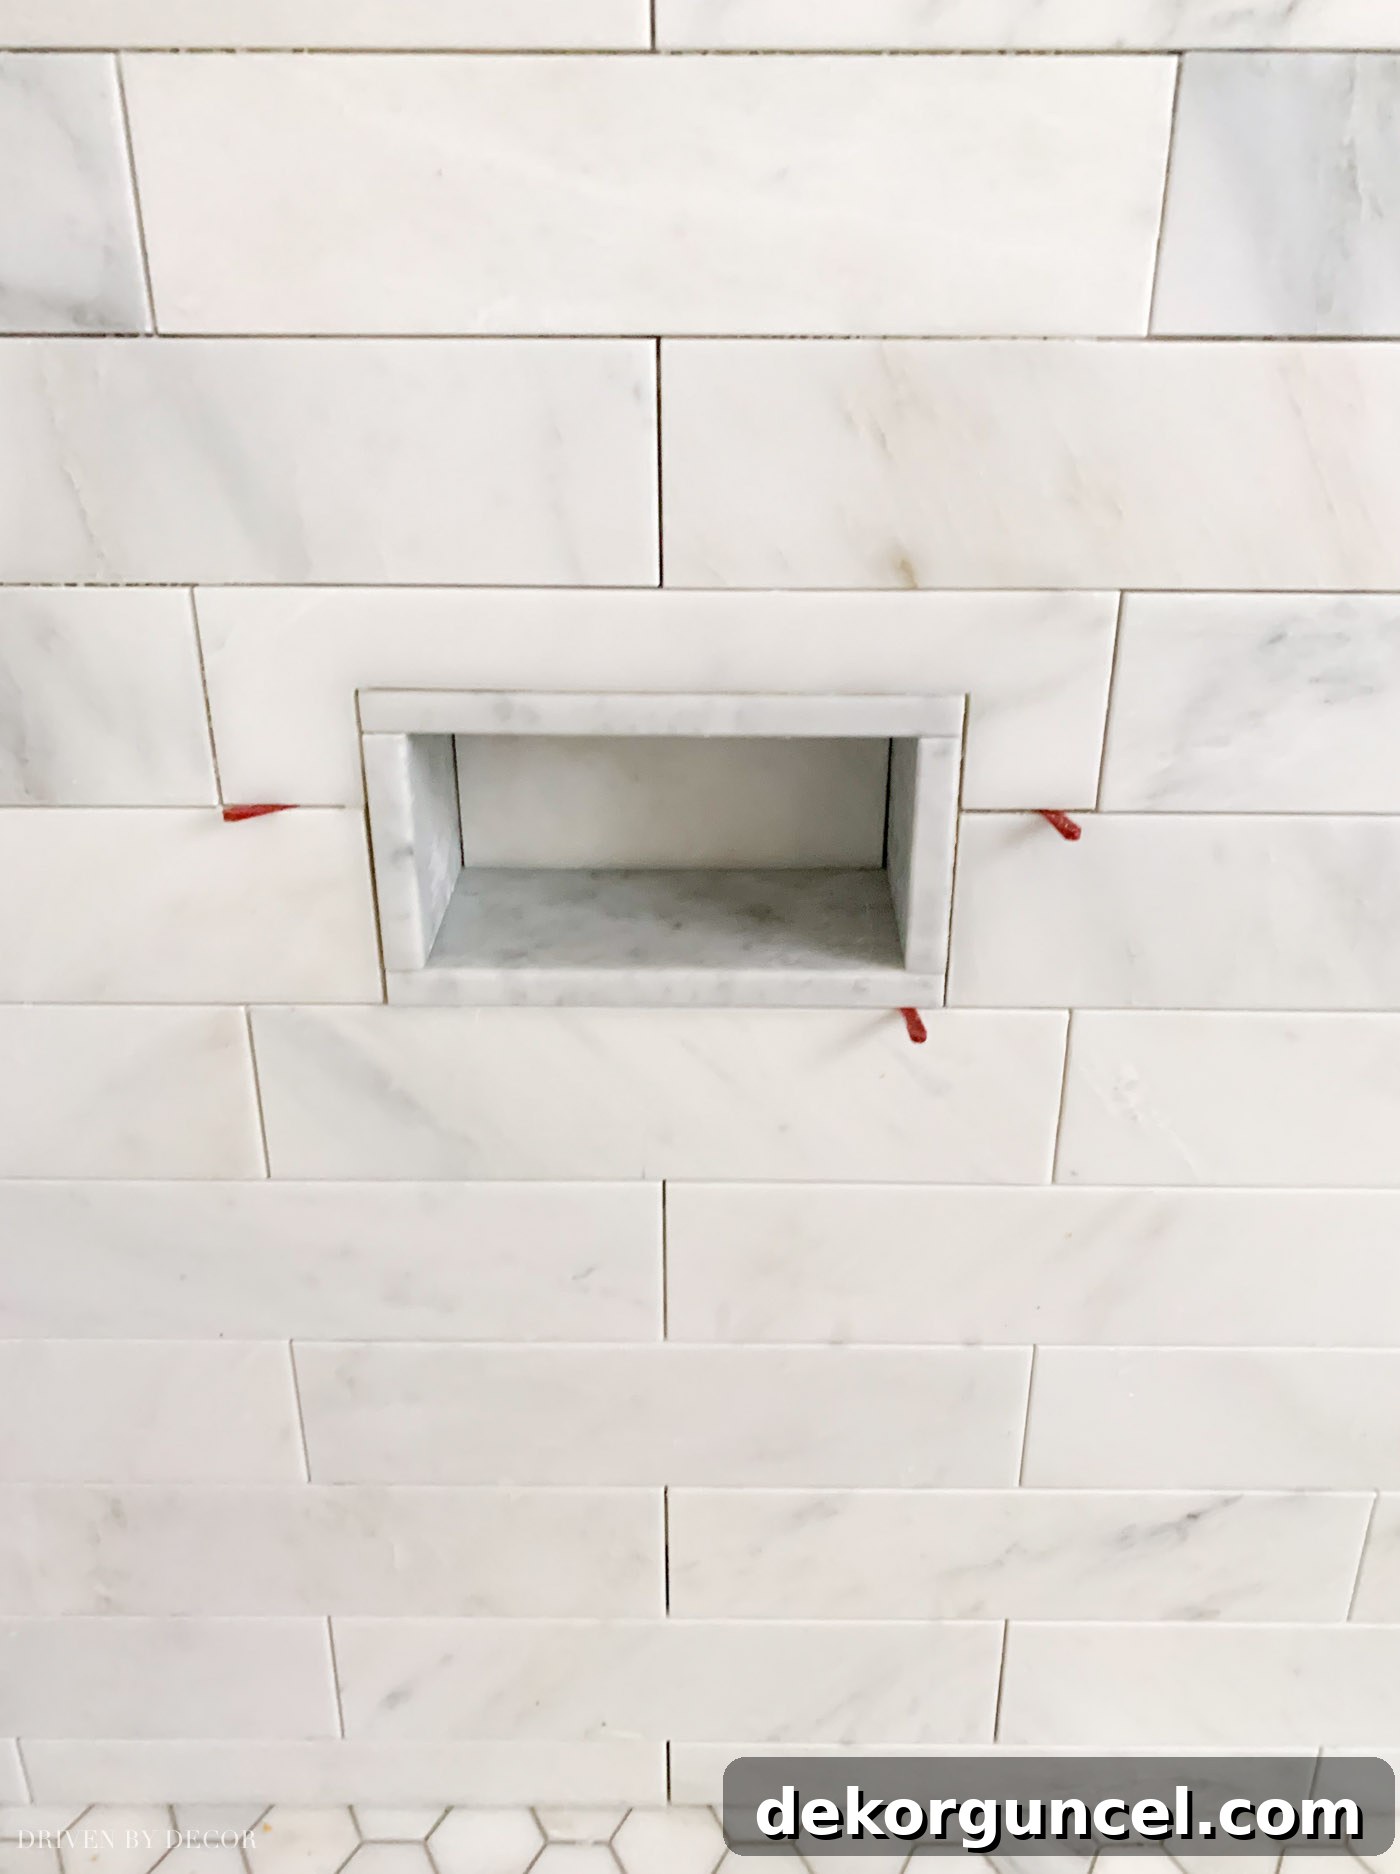
Below the main niche, a smaller, strategically placed niche serves a wonderfully practical purpose. I specifically requested its addition as a comfortable footrest, perfect for shaving, given that we opted against installing a traditional bench seat in our shower. This thoughtful detail enhances both the functionality and luxury of the shower experience.
The Exciting Final Touches: Fixtures and Furnishings
With all the tiling now grouted and scheduled for sealing today, we are poised to transition into the exciting final stages of our master bathroom renovation: painting, and the installation of the vanity, shower frame, lighting, and all the other beautiful accoutrements. Here’s a closer look at my plans for furnishing and outfitting this exquisite space. For our double vanity, I selected this stunning piece, featuring a charming weathered wood finish complemented by elegant caned detailing on the cabinet doors. This choice brings a touch of natural warmth and texture to the bathroom.
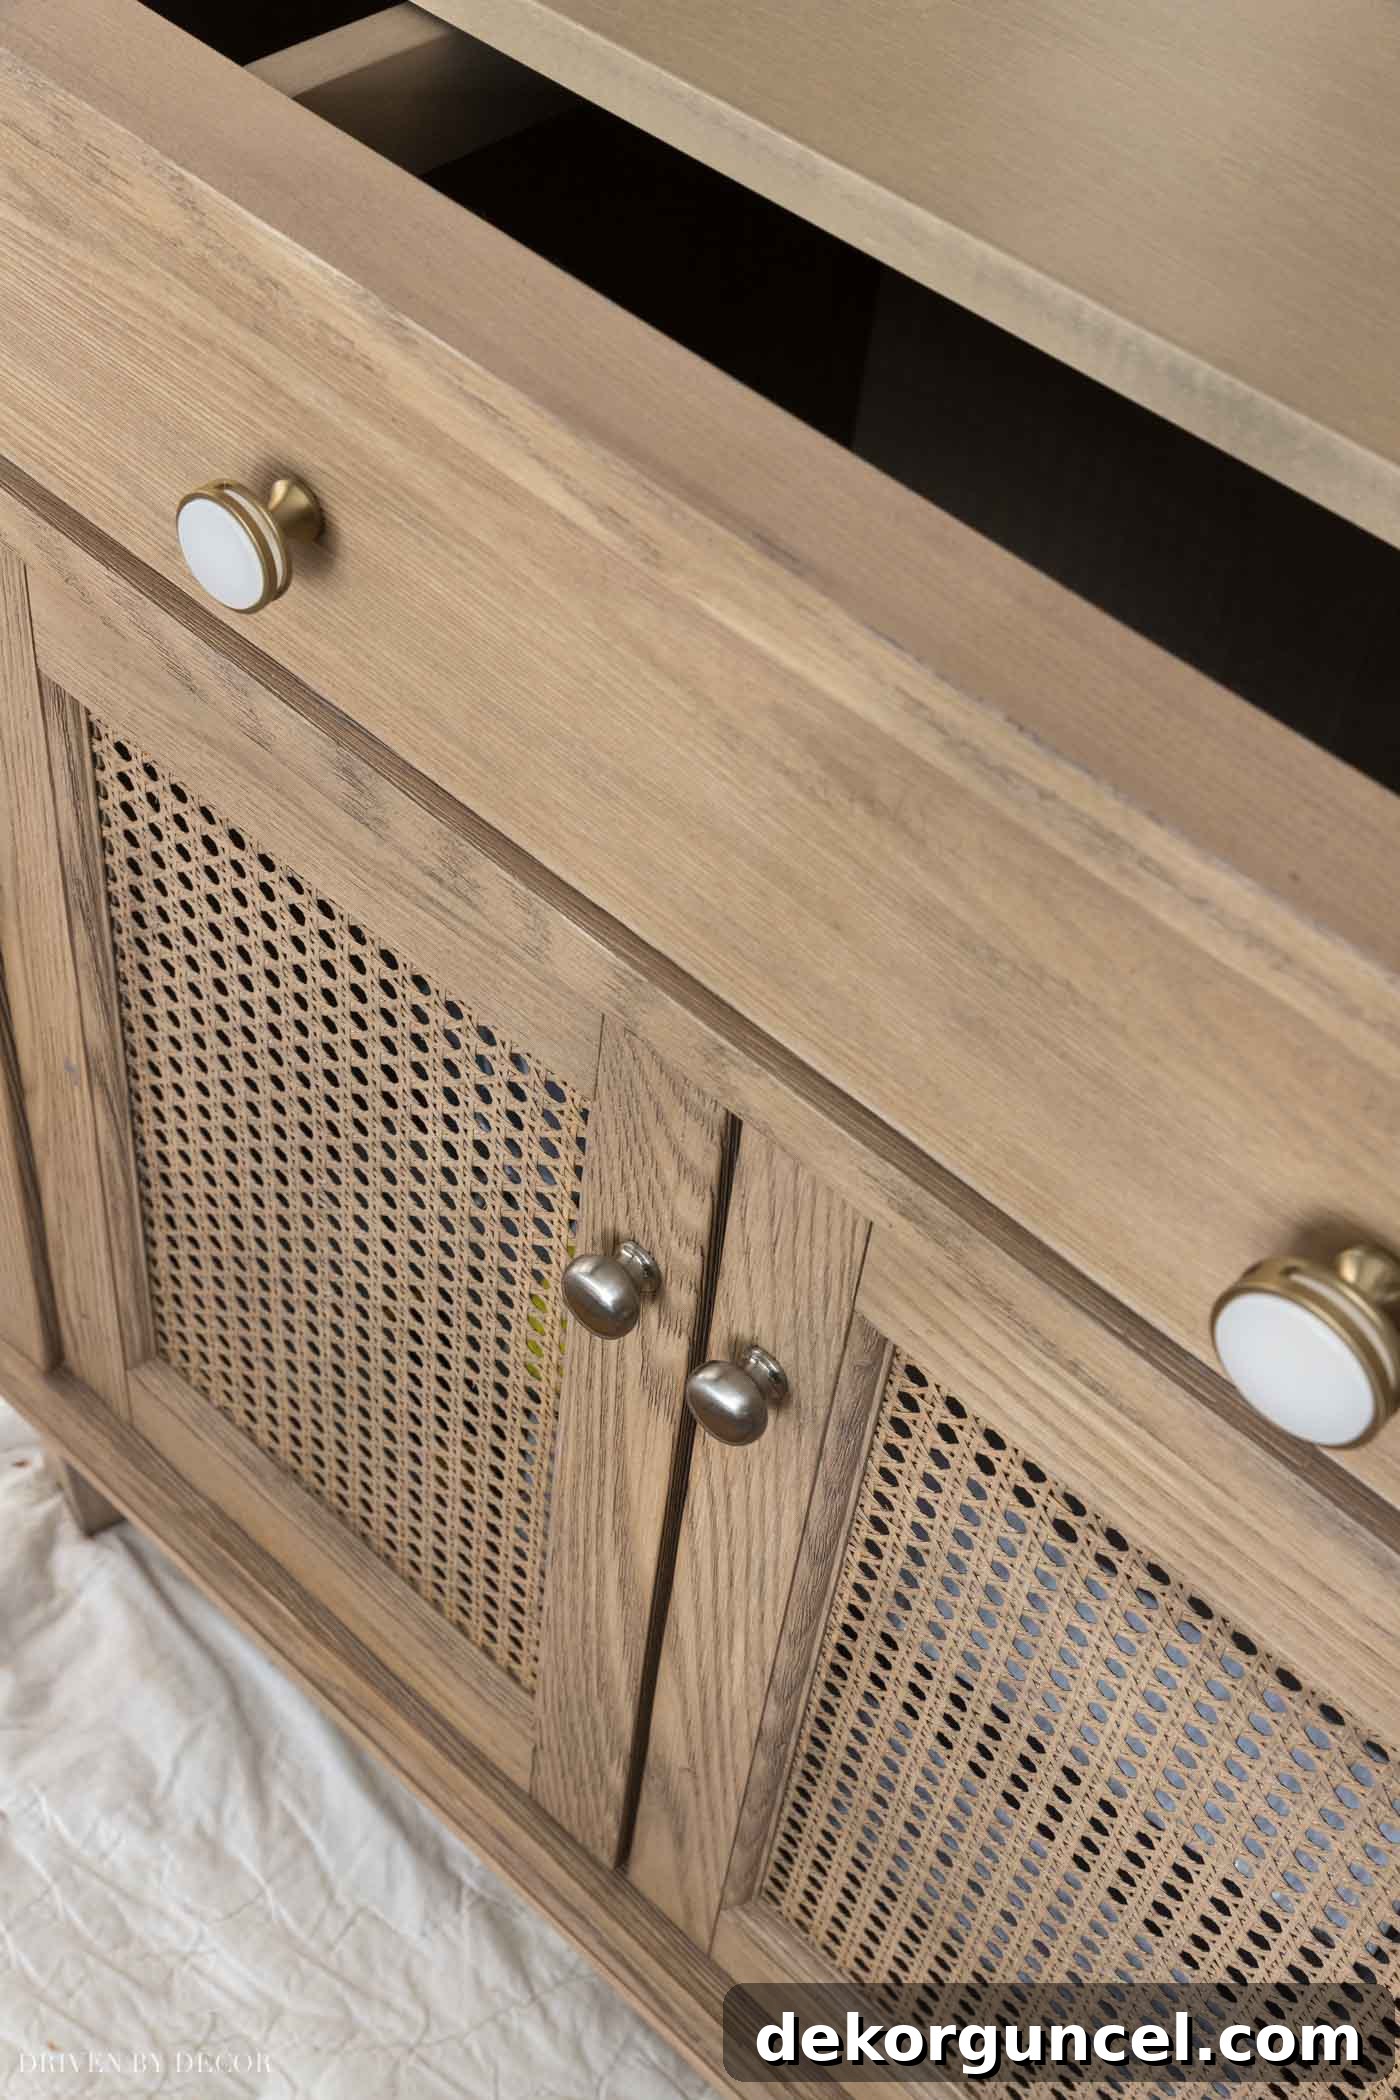
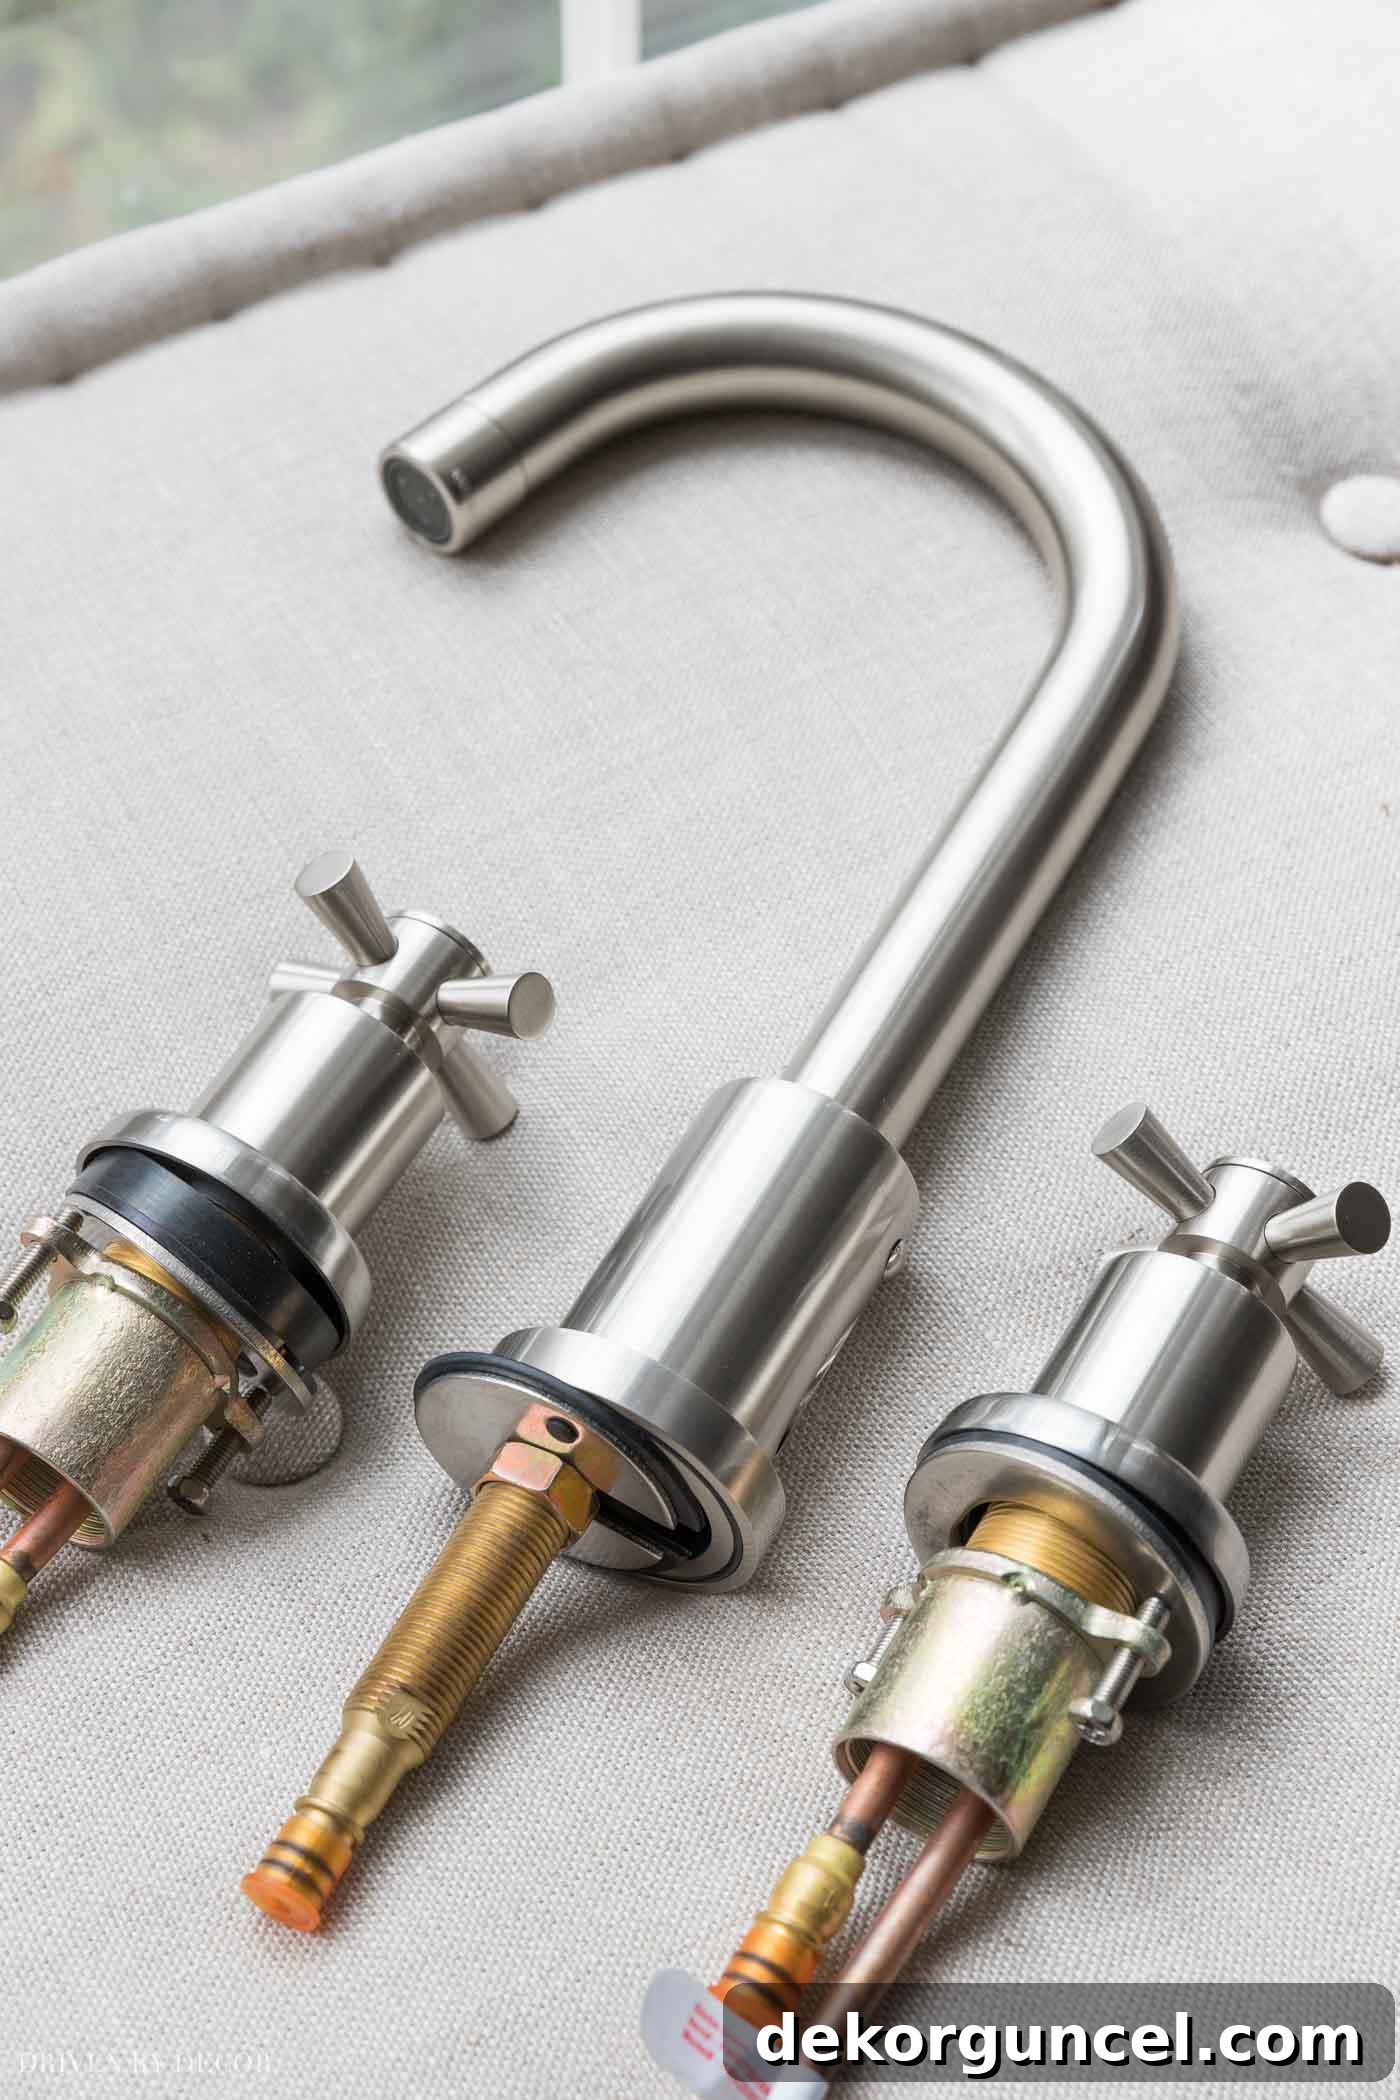
While the vanity itself is gorgeous, the standard knobs it comes with felt a bit underwhelming. I’m currently exploring various hardware options to elevate its look, including some chic frosted acrylic knobs, though a final decision is still pending. Our faucets are going to be these exquisite cross-handled brushed nickel beauties, which perfectly blend classic elegance with a touch of modern flair.
Maintaining a cohesive design language, my shower hardware beautifully echoes the distinctive cross handles of our vanity faucets. I specifically chose this shower valve trim in a sophisticated Satin Nickel finish, ensuring a harmonious flow throughout the space:
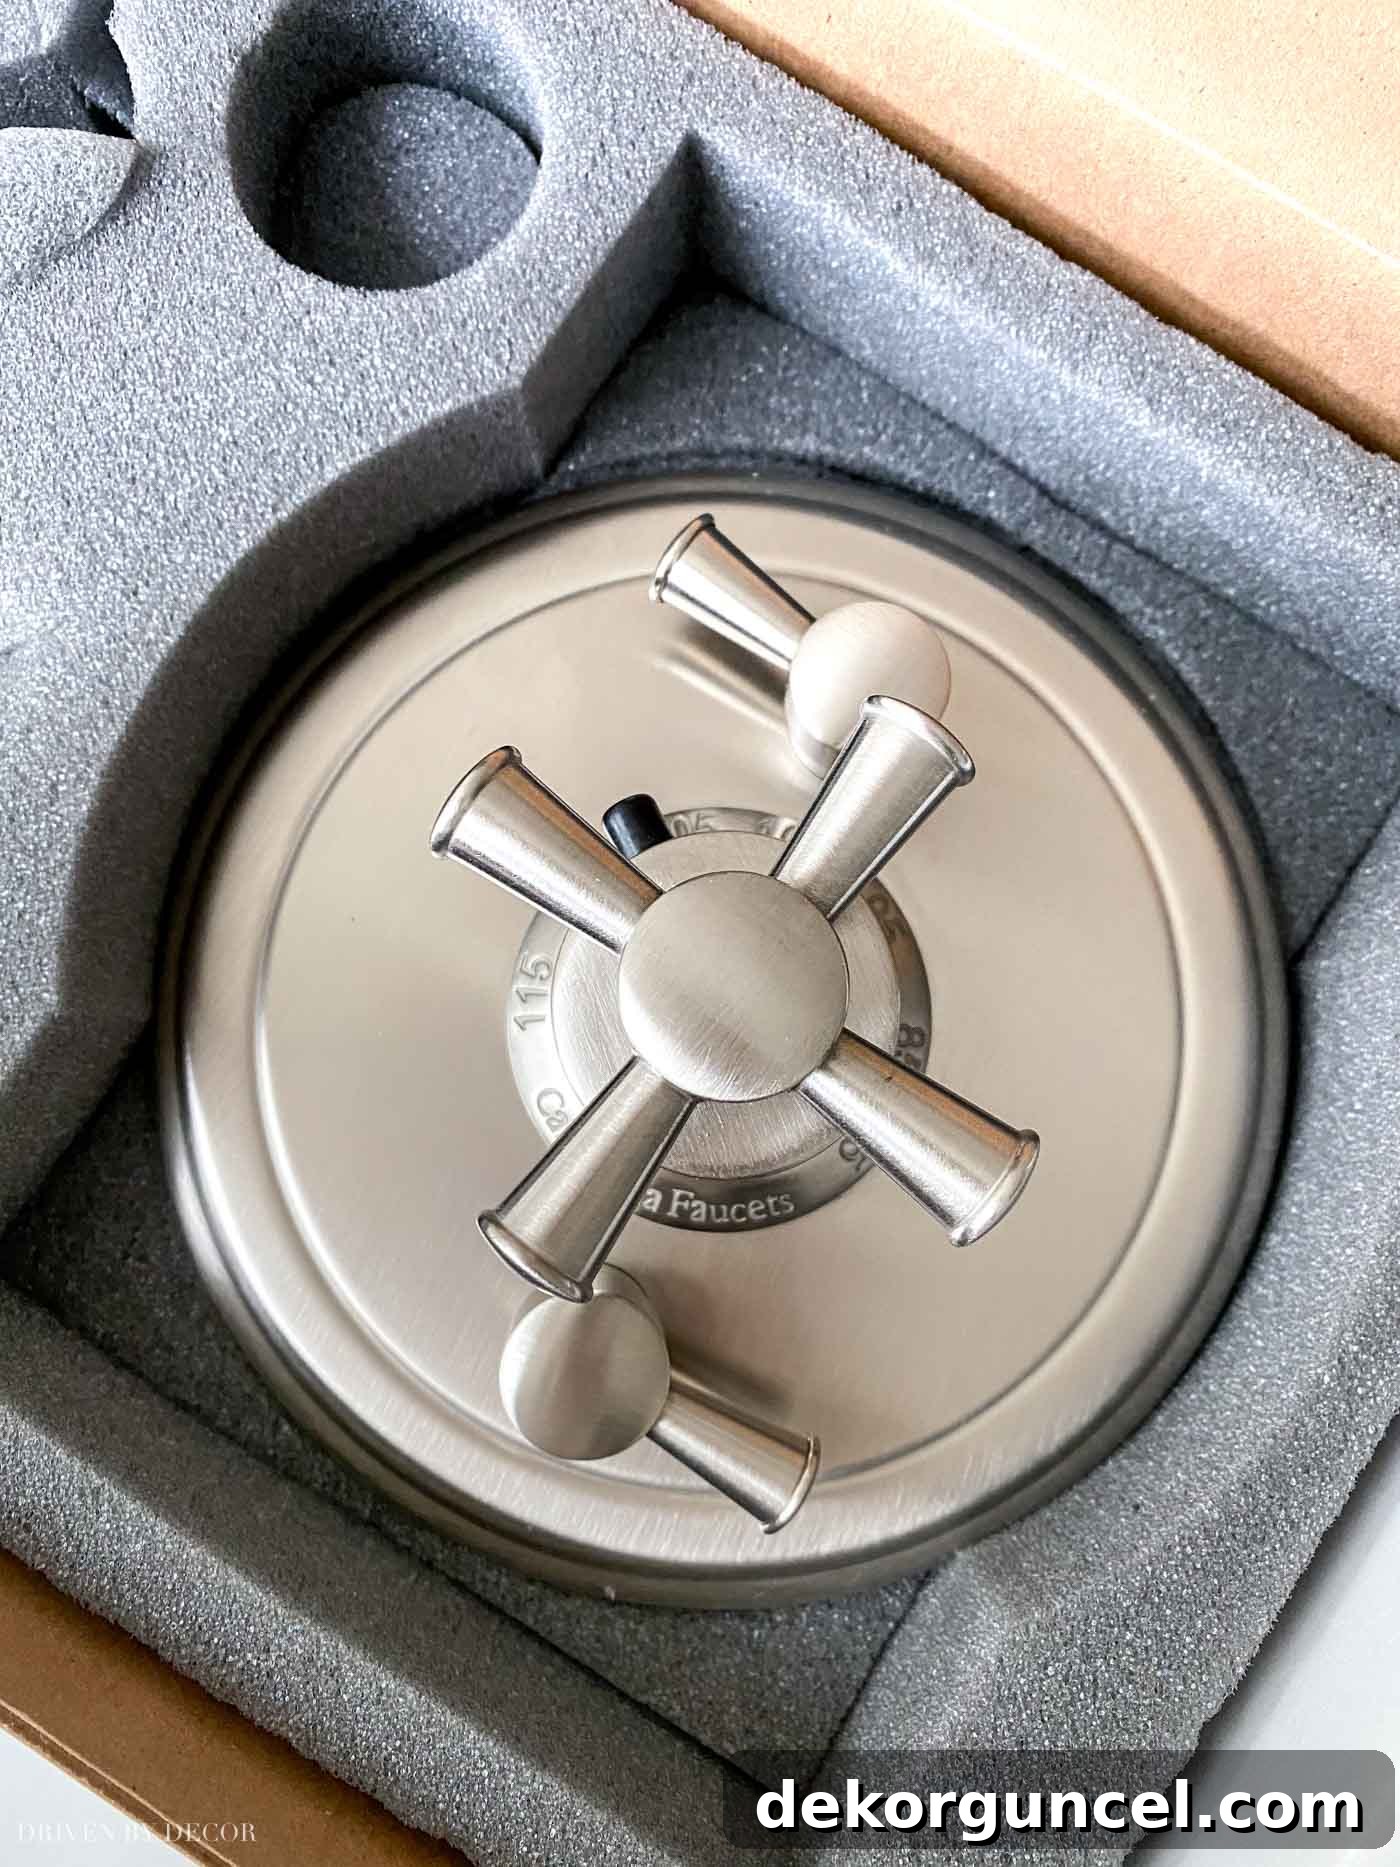
Complementing the trim, I’ve selected a sleek, thin shower head, a practical yet elegant handshower for added convenience, and a high-quality shower drain to complete the ensemble.
Mirrors and Lighting: Reflecting Style and Ambiance
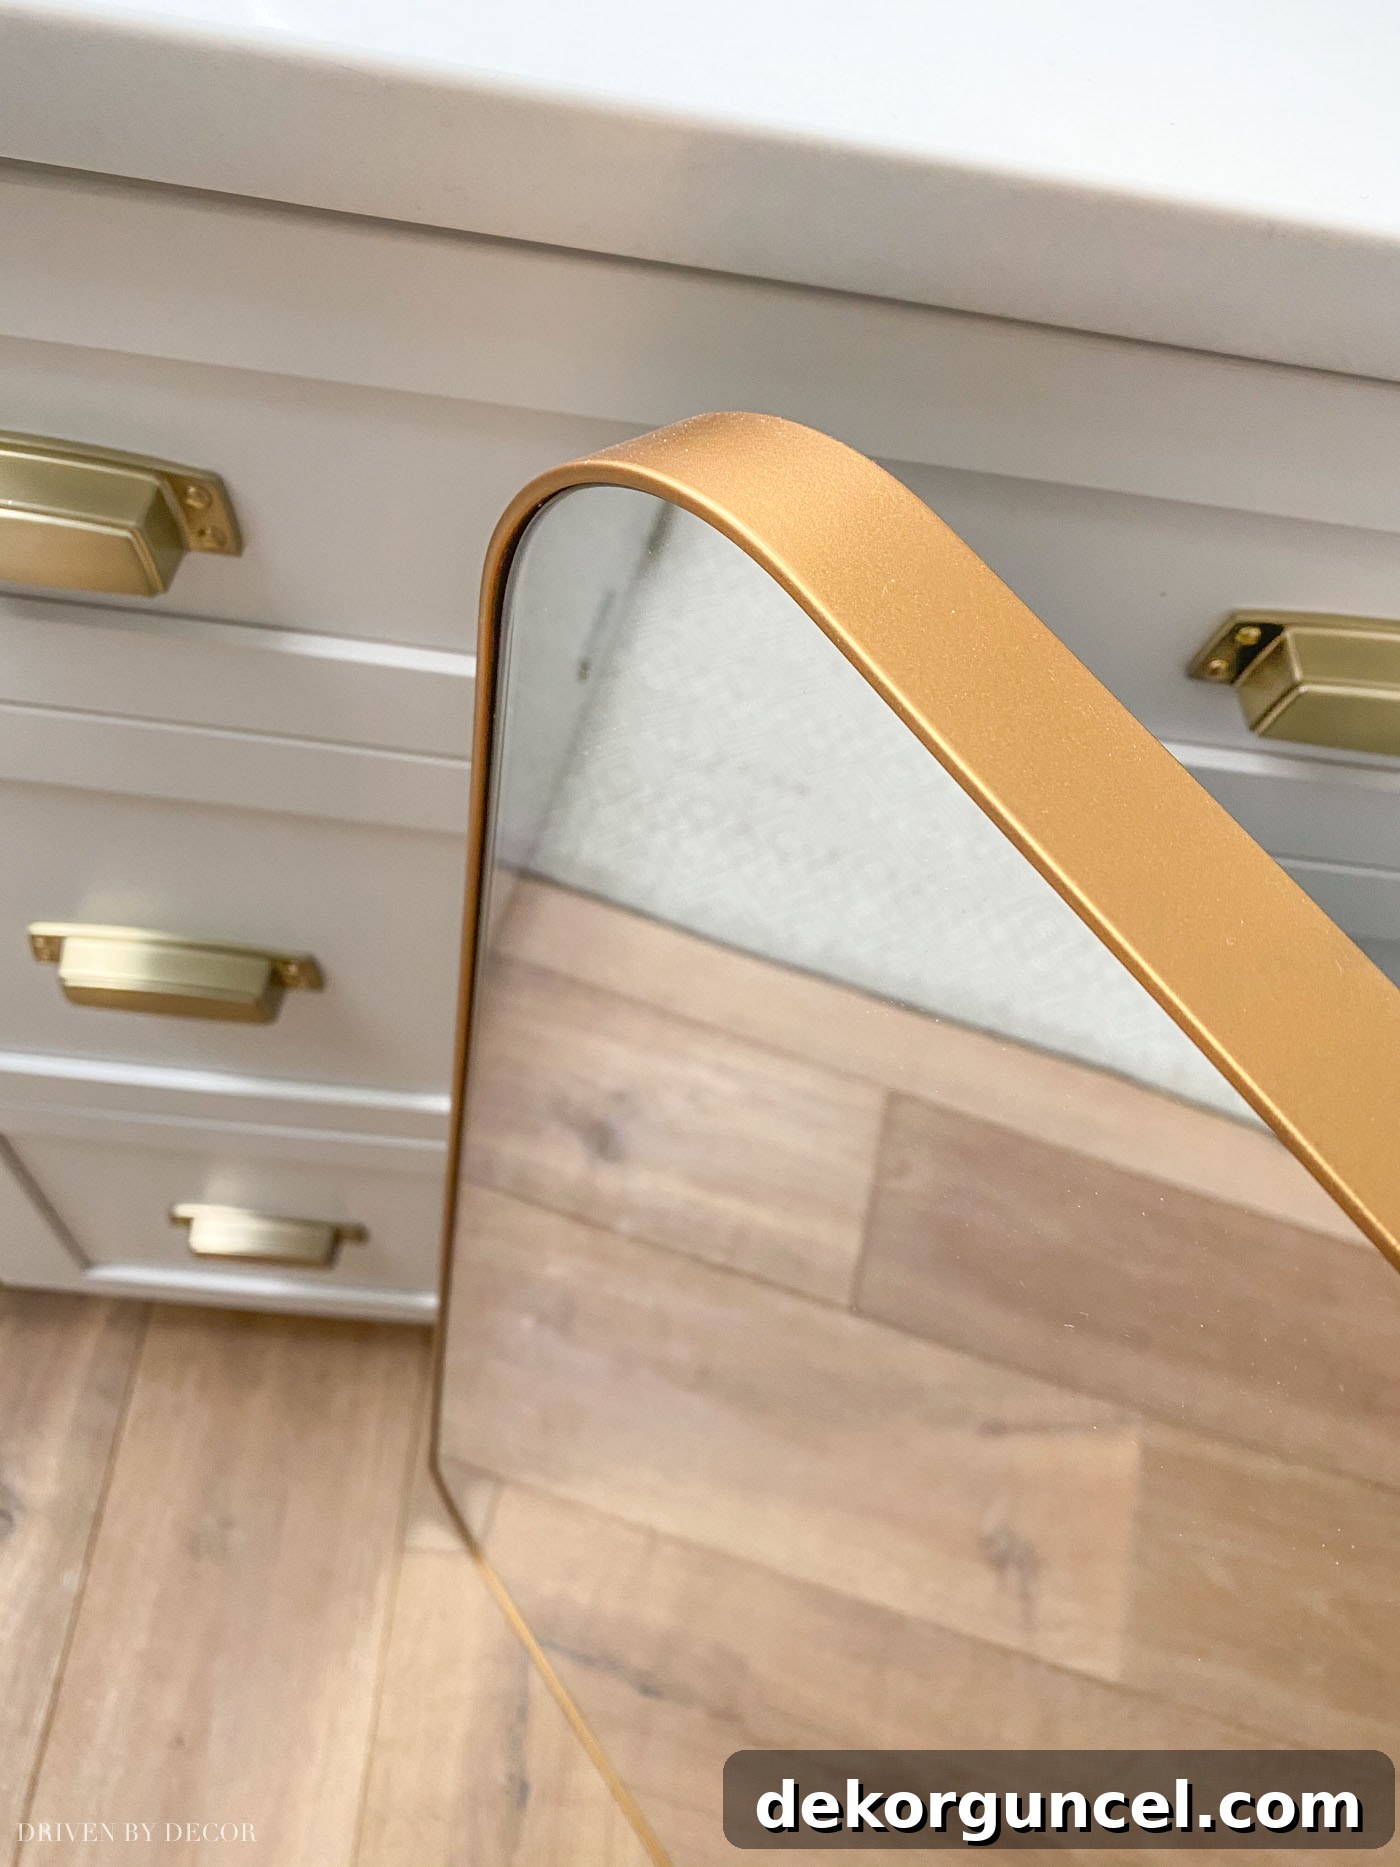
Above our double vanity, I’ve chosen to install two of these exquisitely designed rectangular mirrors, each featuring gracefully curved edges. This subtle design detail softens the lines of the vanity area and adds a touch of modern sophistication.
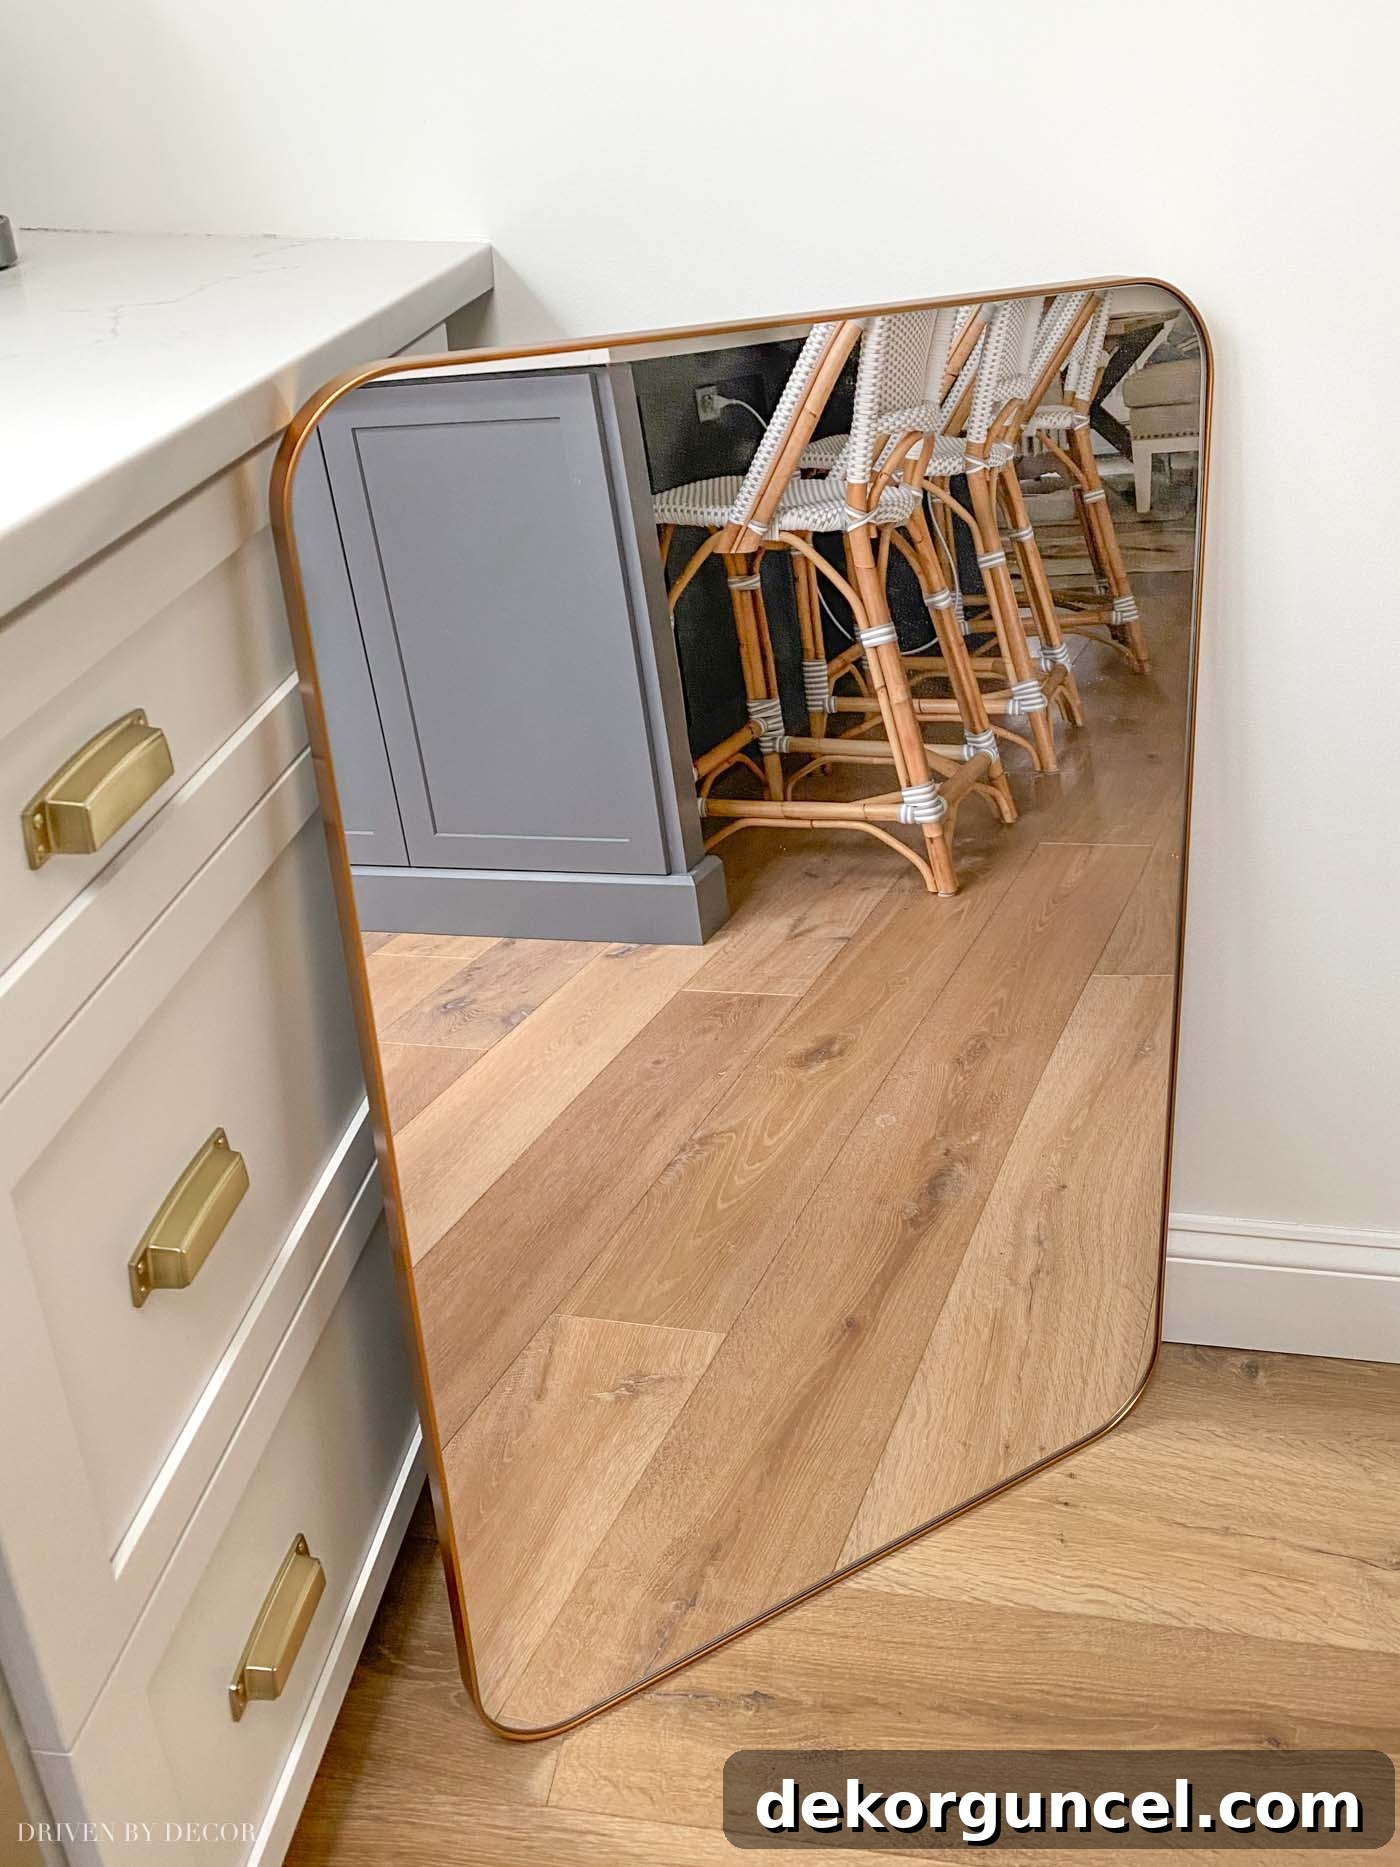
These versatile mirrors are available in several finish options. Embracing my love for mixing metal finishes to create a dynamic and curated look, I ultimately decided to go with the elegant gold finish, which will introduce a warm, luxurious glow to the space.
For the vanity lighting, my plan is to install these charming globe light sconces directly above each mirror. Their classic, spherical design will provide ample, diffused light, perfect for daily routines, while also contributing to the overall aesthetic appeal of the vanity area.
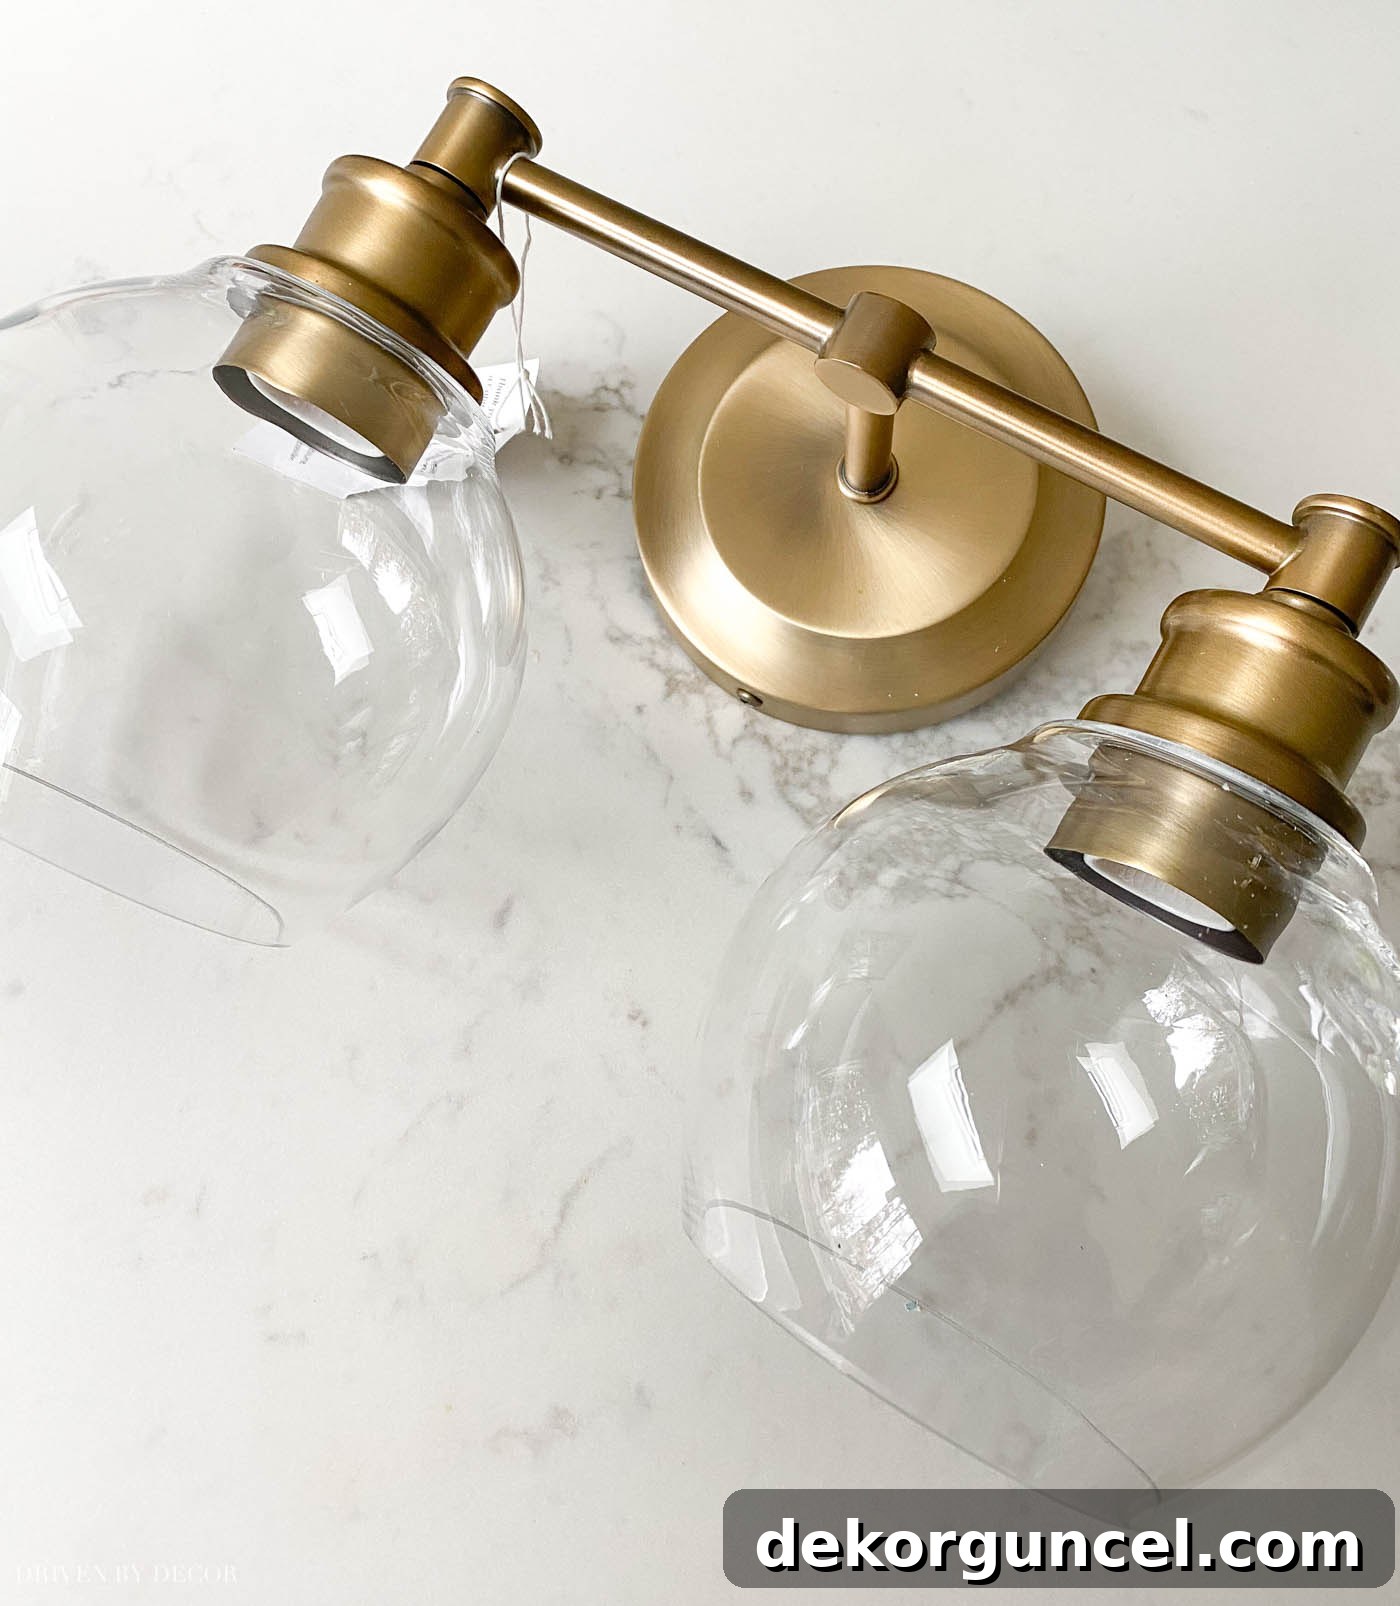
The choice for a pendant or chandelier above our freestanding tub has been a delightful puzzle. Initially, I had a couple of contenders, but my design vision evolved. For the tub area, I’m now leaning towards a statement piece that will add an artistic touch. I’ve been considering two top options for this focal point:
Thoughtful Storage: Floating Shelves
To maximize both style and functionality, we will be incorporating open shelving between our shower and the accent wall of the tub niche. This space will be perfect for displaying plush towels, decorative accessories, and essential bath items, keeping them easily accessible while enhancing the room’s design. My plan is to install these beautiful floating shelves, which offer a clean, modern look and will integrate seamlessly with the overall aesthetic.
Bringing the Vision to Life: The Final Stages
With just a few minor details left to iron out, I am largely proceeding with these carefully chosen selections, eagerly anticipating the moment when my mental design vision fully materializes into our stunning new master bathroom. The anticipation is palpable! What are your thoughts on our design choices and progress so far? If you’re keen to follow the day-to-day progress and see more behind-the-scenes details of this exciting renovation, be sure to follow along on my Instagram posts and stories {here}. There’s an incredible amount of activity planned for this space in the coming weeks, and I can’t wait to share every step with you!
Exciting Update! The tiling is now completely finished, and I’m deeply immersed in the final finishing touches, including the much-anticipated light fixture for over the tub. I’ve refined my initial plan and am now almost certain that this gorgeous, oversized pendant (also conveniently available {here}) will be the perfect centerpiece for this tranquil space:
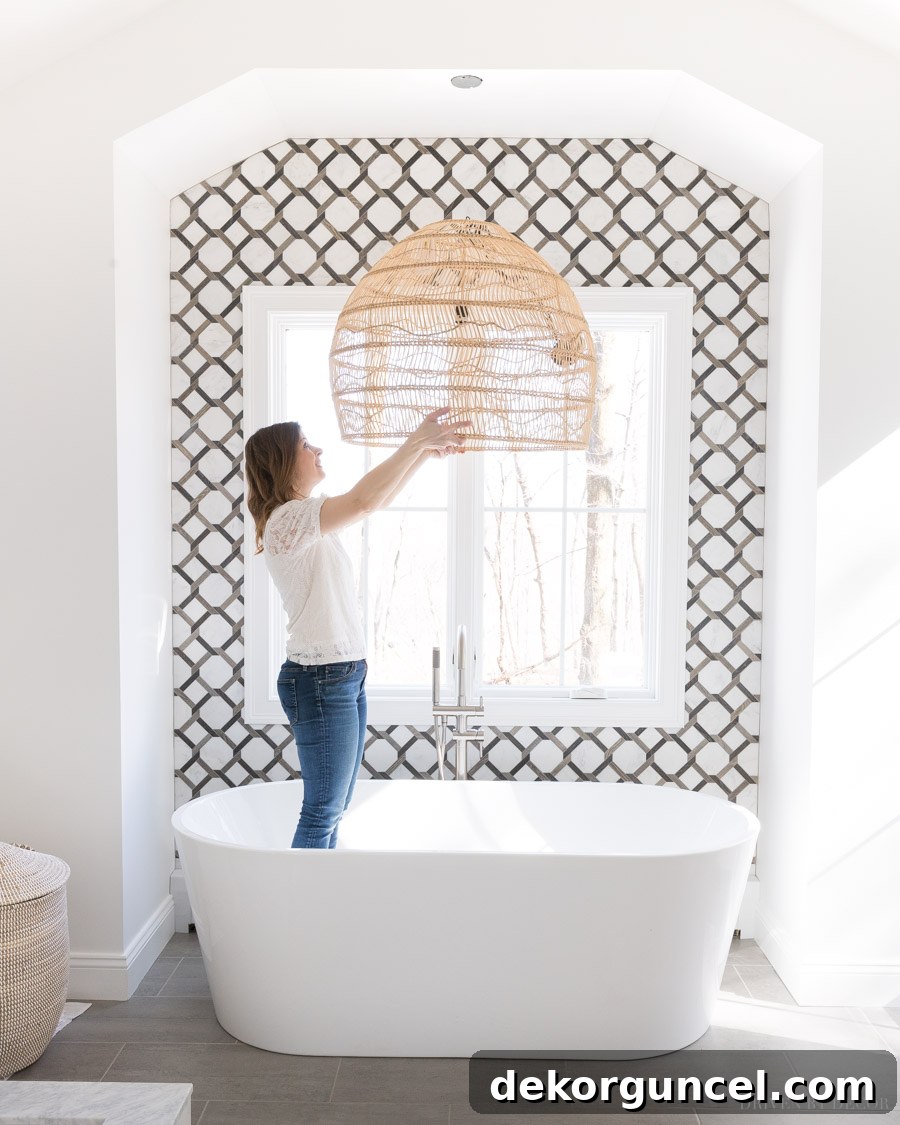
This pendant truly makes a statement with its impressive size! If you love this look but prefer it on a slightly more compact scale, consider {this similar pendant option}. It offers the same captivating aesthetic with a more modest footprint. 🙂
The moment we’ve all been waiting for! Our master bathroom renovation is officially complete!
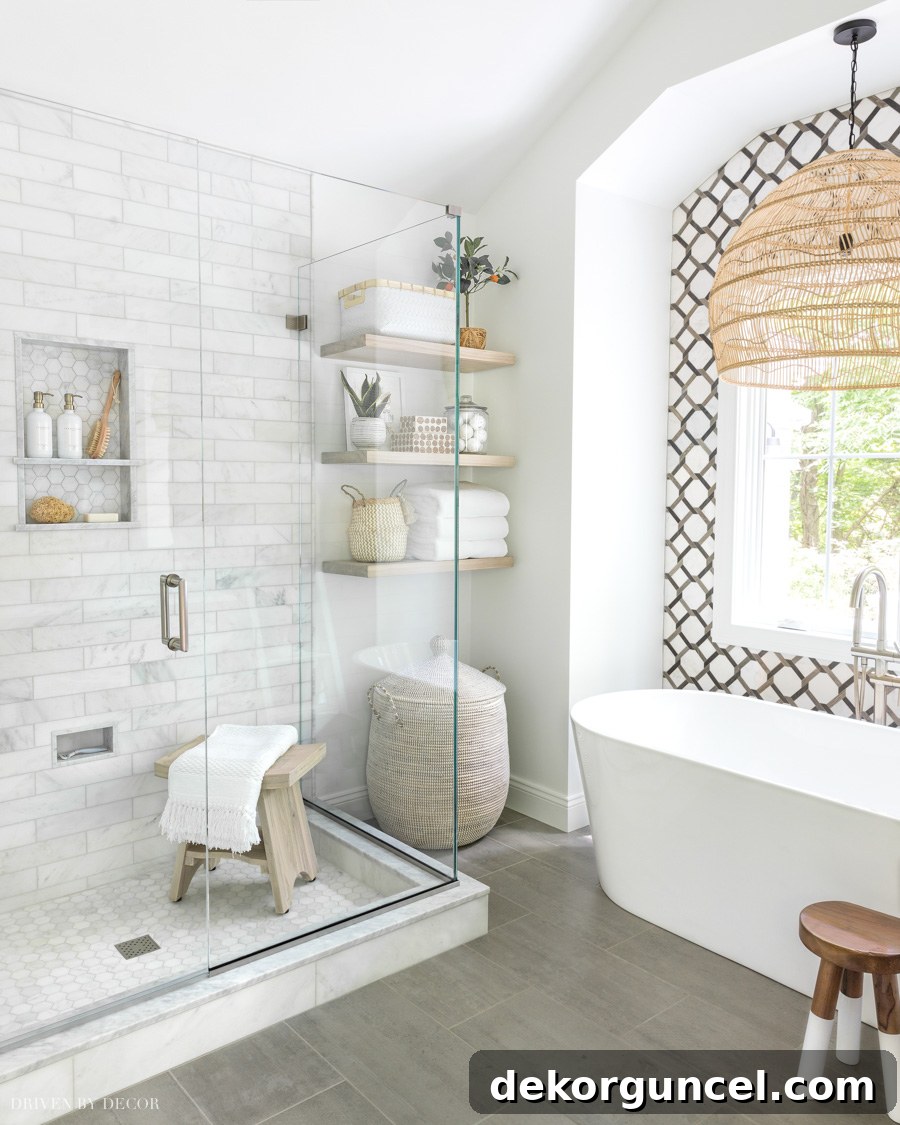
Don’t miss a single detail! Head over to {this post} to immerse yourself in the full bathroom reveal!
Thank you, as always, for taking the time to join me on this exciting journey. Enjoy the remainder of your weekend!
