
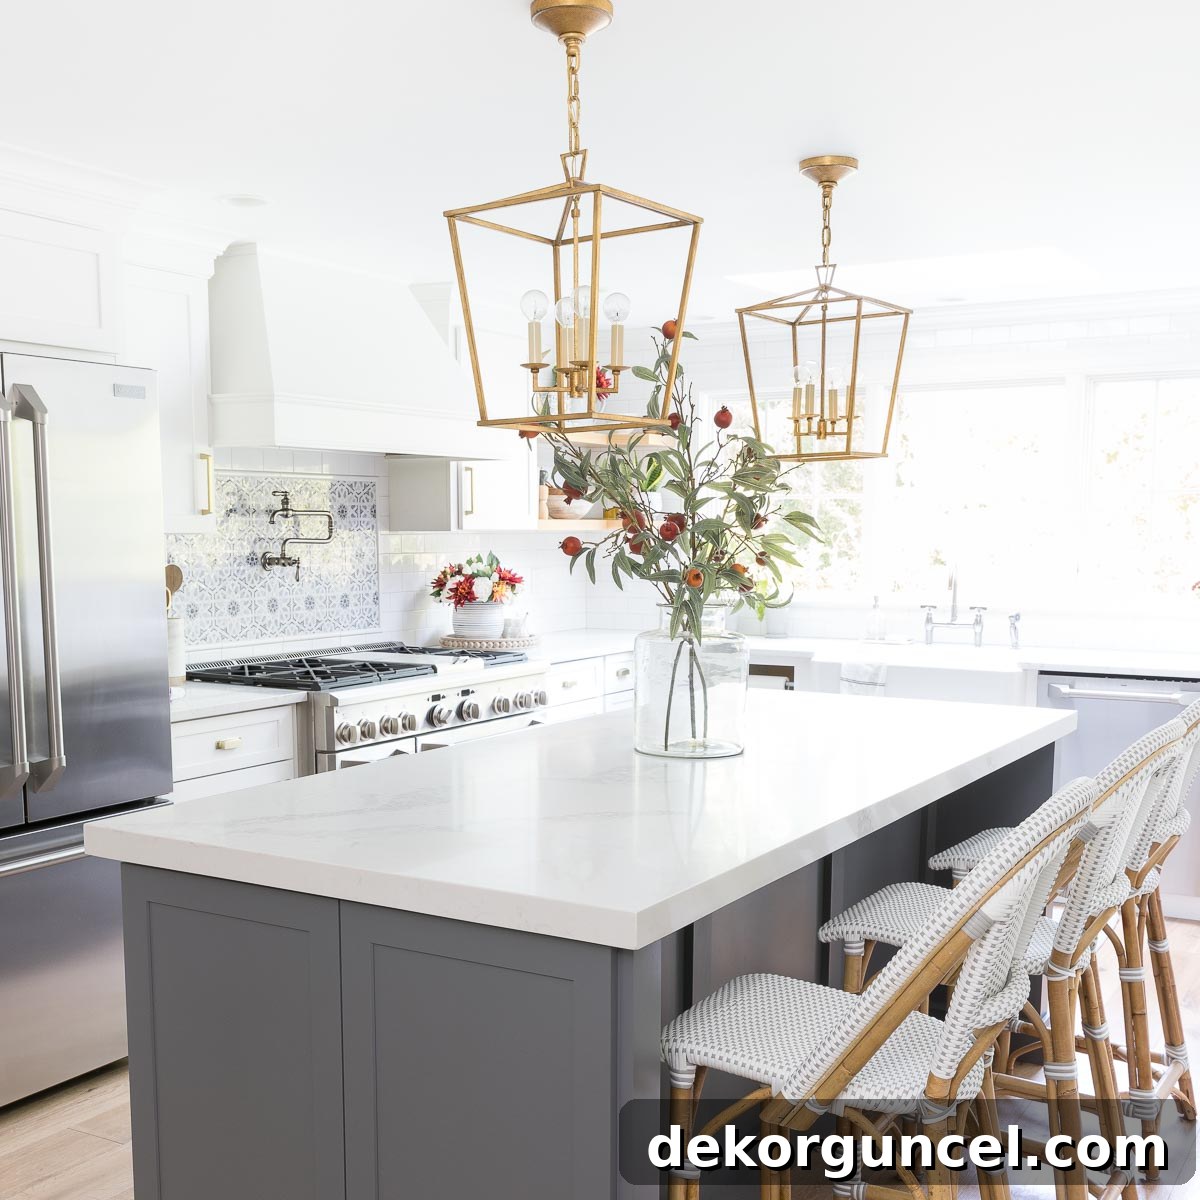
Achieving the ideal pendant light height and spacing above your kitchen island is just as crucial as the style of lighting you select. Since sharing my preferred kitchen remodel ideas from our recent renovation, I’ve received frequent questions about the optimal pendant light height and how to properly space multiple pendants. This comprehensive guide aims to address these common queries, offering practical tips and proven methods to help you perfect your kitchen lighting design.
I’ve compiled essential insights, including the exact spacing of our own kitchen island pendants, along with actionable advice to ensure you get it right in your home. Moreover, I’ve curated a selection of my favorite kitchen pendants to give those planning a kitchen renovation a fantastic head start! This post includes affiliate links, and a disclosure statement is available here.
Determining the Best Pendant Light Height Over Your Kitchen Island
The height at which you hang your pendant lights can dramatically influence both the functionality and aesthetics of your kitchen island. The general guideline suggests that the distance between the bottom of your pendant lights and your countertop should be between 30 and 36 inches. This range is established to provide ample task lighting without obstructing views or feeling overcrowded.
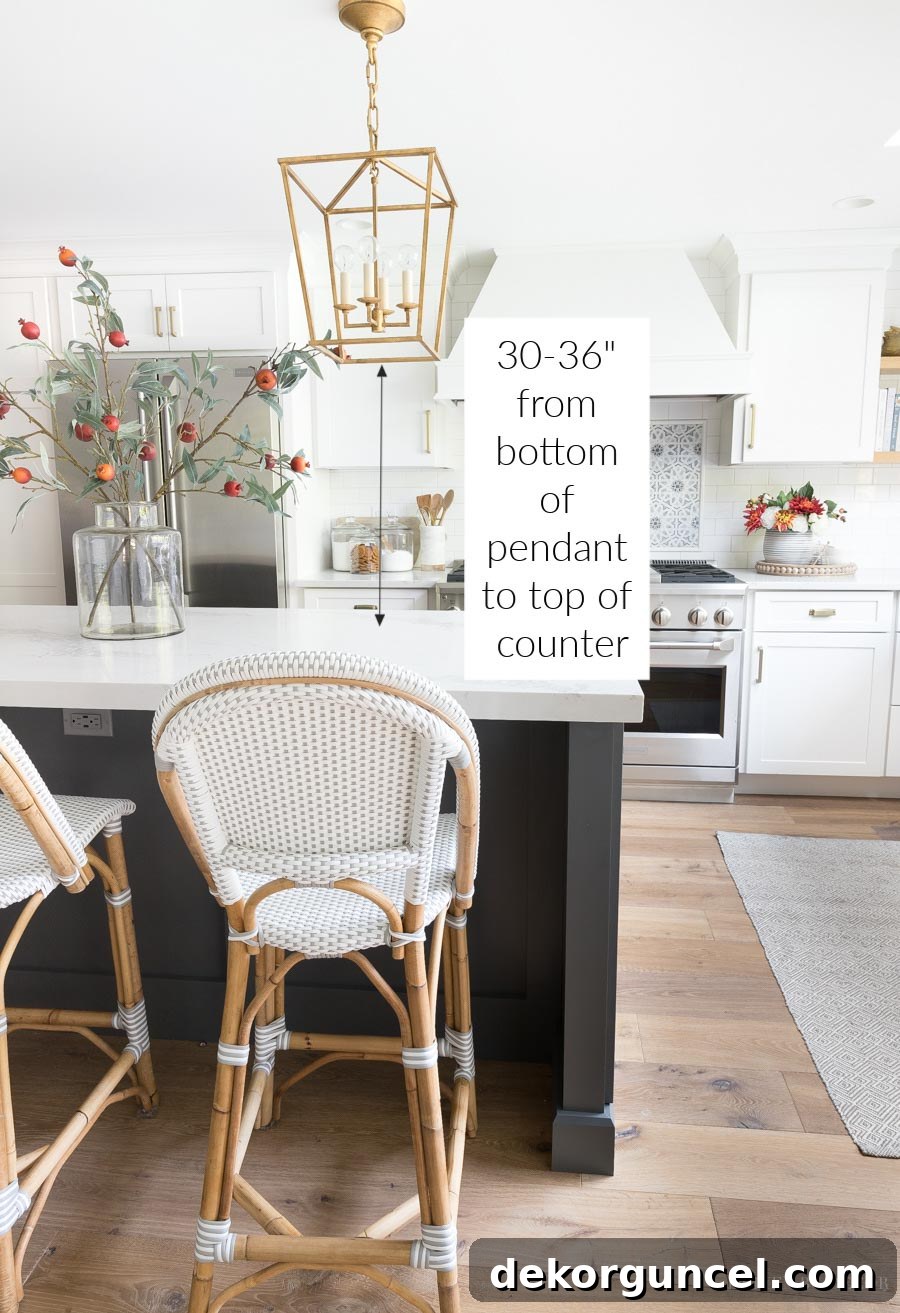
Featured Kitchen Elements: Elegant Lantern Pendants | Rattan Counter Stools in Fog Finish | Pot Filler (Vibrant Stainless) | Stylish Cabinet Cup Pulls | Complementary Cabinet Pulls | Sophisticated Gray Geometric Rug | Chic Round Wood Beaded Edge Tray
Where within this 30-36 inch range should your pendants be hung? Several factors come into play. As a practical rule of thumb, if your kitchen features standard 8-foot ceilings, positioning your pendants closer to the 30-inch mark is generally appropriate. For kitchens with taller ceilings, such as 9-foot or 10-foot ceilings, you might opt to hang them slightly higher, closer to the 34-36 inch range, to maintain visual balance and prevent them from looking dwarfed by the ample vertical space. The key is to ensure your lights blend seamlessly with the room’s proportions.
Crucially, you must also consider your line of sight. The pendants should not impede your view across the kitchen or into an adjoining living space, especially in open-concept layouts. You want to be able to comfortably converse with someone across the island without having to duck or strain to see past the fixtures. Ideally, the bottom edge of your pendant lights should not hang lower than the eye level of the tallest person who regularly uses your kitchen. This ensures a comfortable and unobstructed visual flow, promoting clear communication and an inviting atmosphere.
This consideration can become particularly challenging in kitchens with lower ceilings, such as those that are 8 feet or less. Some design advice suggests avoiding pendants altogether in such spaces, recommending recessed lights or semi-flush mount fixtures instead. However, I strongly disagree with this rigid approach. I believe that foregoing pendants entirely only emphasizes the lower ceiling height. Instead, the solution lies in making strategic adjustments to both the pendant light height over the island and the specific style of pendants chosen.
My successful strategies for incorporating pendant lights into kitchens with low ceilings involve two key adjustments. Firstly, I recommend slightly adjusting the standard height measurements. In my own kitchen, my pendants are actually hung a bit under 30 inches, demonstrating that a slight deviation can work beautifully. Secondly, and perhaps more importantly, opt for open-design or see-through pendants. These types of fixtures, like the {12.5-inch pendants} I have, create an airy feel, allowing light and sightlines to pass through them. This visual lightness prevents them from feeling heavy or imposing, effectively tricking the eye into perceiving more vertical space. When standing in my kitchen, one would never guess my ceilings are unusually low, thanks to these deliberate choices. For those seeking a similar aesthetic on a more modest budget, consider {this pendant option} or {this alternative pendant}, both offering great style and value.
Optimal Spacing: How Far Apart to Hang Pendant Lights Over an Island
Proper spacing of pendant lights is as vital as their height for achieving a balanced, functional, and visually appealing kitchen. The goal is to distribute light evenly across the island surface while creating a harmonious aesthetic that complements the overall kitchen design. Let me share a simple yet effective trick I devised for accurately spacing two pendant lights, particularly useful during renovations when the island itself might not even be in place yet.
During my kitchen renovation, I faced the challenge of marking the exact placement of our pendants when the space was down to the studs, with no kitchen island to use as a reference. This necessitated a precise formula to avoid guesswork. Here’s how it works: first, accurately measure the total length of your kitchen island countertop.
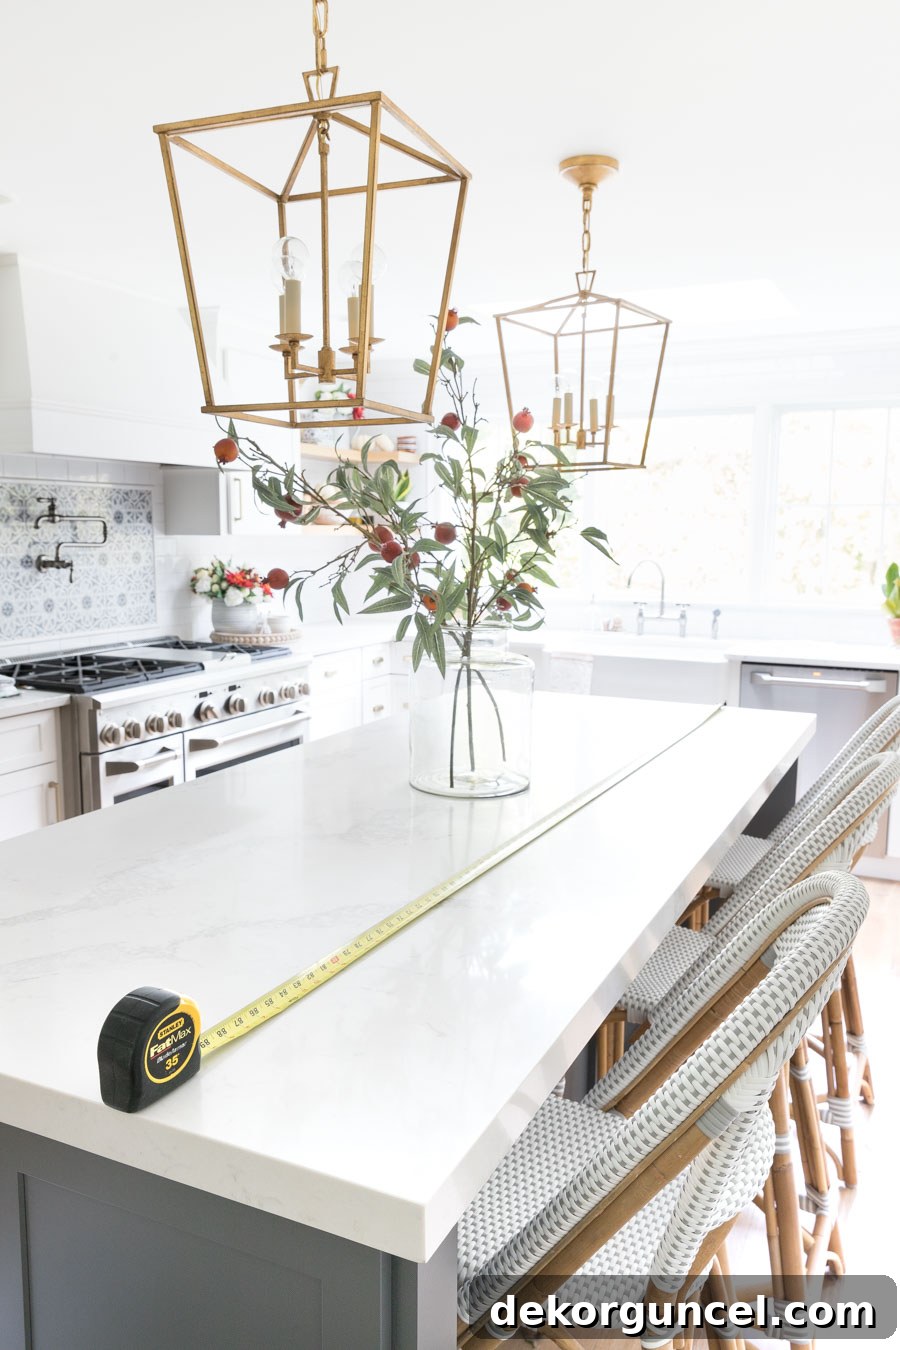
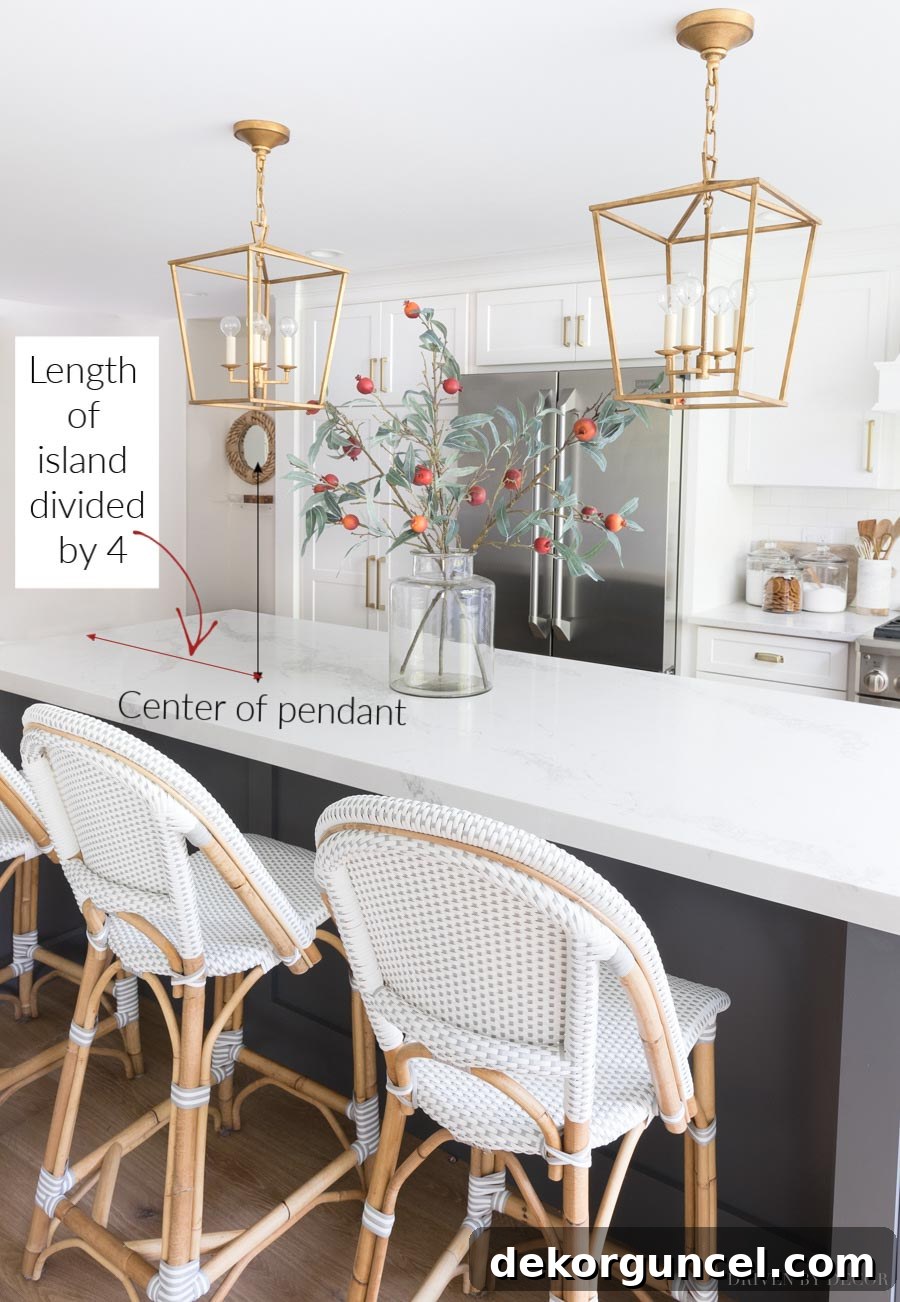
Once you have the total length, divide that number by four. The resulting figure tells you how many inches in from each end of the island to place the center of your pendants. For instance, my kitchen island counters are approximately 94 inches long. Applying my formula: 94 inches divided by 4 equals 23.5 inches. Therefore, I centered each of my two pendants 23.5 inches in from either end of the kitchen island. This method creates a visually pleasing and symmetrical arrangement, ensuring adequate light coverage without crowding the center or leaving too much bare space at the ends.
An alternative method frequently used for spacing two pendants involves dividing the length of your kitchen island by three, then hanging the pendants that distance in from each end. Using my island’s length of 94 inches as an example: 94 divided by 3 equals approximately 31.3 inches. Following this method, I would place my pendants about 31 inches in from each end. While this is a valid approach, I personally find it leaves more empty space at the island ends and positions the pendants closer together in the middle, which isn’t my preferred aesthetic. However, design is deeply personal, and there’s no single right or wrong answer as long as the spacing from both ends is symmetrical and visually balanced. Some may prefer this look if their pendants are particularly wide or if they desire a more concentrated lighting effect in the middle.
What if your design calls for three pendants? This configuration is often a bit simpler to plan. Begin by hanging one pendant precisely in the center of your kitchen island. Once the central pendant is established, you can then space the two remaining pendants on either side. Ensure they are positioned at least 24 inches apart from each other. The exact distance between them will depend on your island’s overall length and the size (width) of your chosen pendants. For most spaces, a spacing of 30 to 32 inches between the centers of the pendants works very well, providing ample light distribution and a harmonious visual rhythm. Consider the overall scale of your island and the pendants themselves; larger pendants will naturally demand more space to avoid looking cramped.
How Many Pendants Should Adorn Your Kitchen Island?
While I’d love to provide a definitive, one-size-fits-all answer, the truth is that determining the optimal number of pendants for your kitchen island involves several considerations. The primary determinant is undoubtedly the length of your kitchen island, but other factors like ceiling height, the amount of ambient light needed (especially if pendants are a primary light source without recessed lighting), and the physical size of the pendants themselves all play a significant role in the final decision.
From a design perspective, I firmly believe that two pendants are the best choice for the vast majority of kitchens. Even for longer islands, opting for two more substantial, visually impactful pendants often yields a more sophisticated and less cluttered result than adding a third. A pair of well-proportioned pendants can anchor the island beautifully, providing excellent task lighting while maintaining a clean, open aesthetic. Overcrowding an island with too many fixtures can make the space feel busy and visually heavy, detracting from its overall elegance.
My own kitchen island, for example, is quite long, stretching close to 8 feet. Despite its generous length, I found that two pendants were the perfect choice. Even with pendants that aren’t excessively large, the pair provides ample illumination and strikes an ideal balance, preventing the space from feeling either under-lit or over-cluttered. The result is a harmonious and functional lighting scheme that complements the entire kitchen’s design.
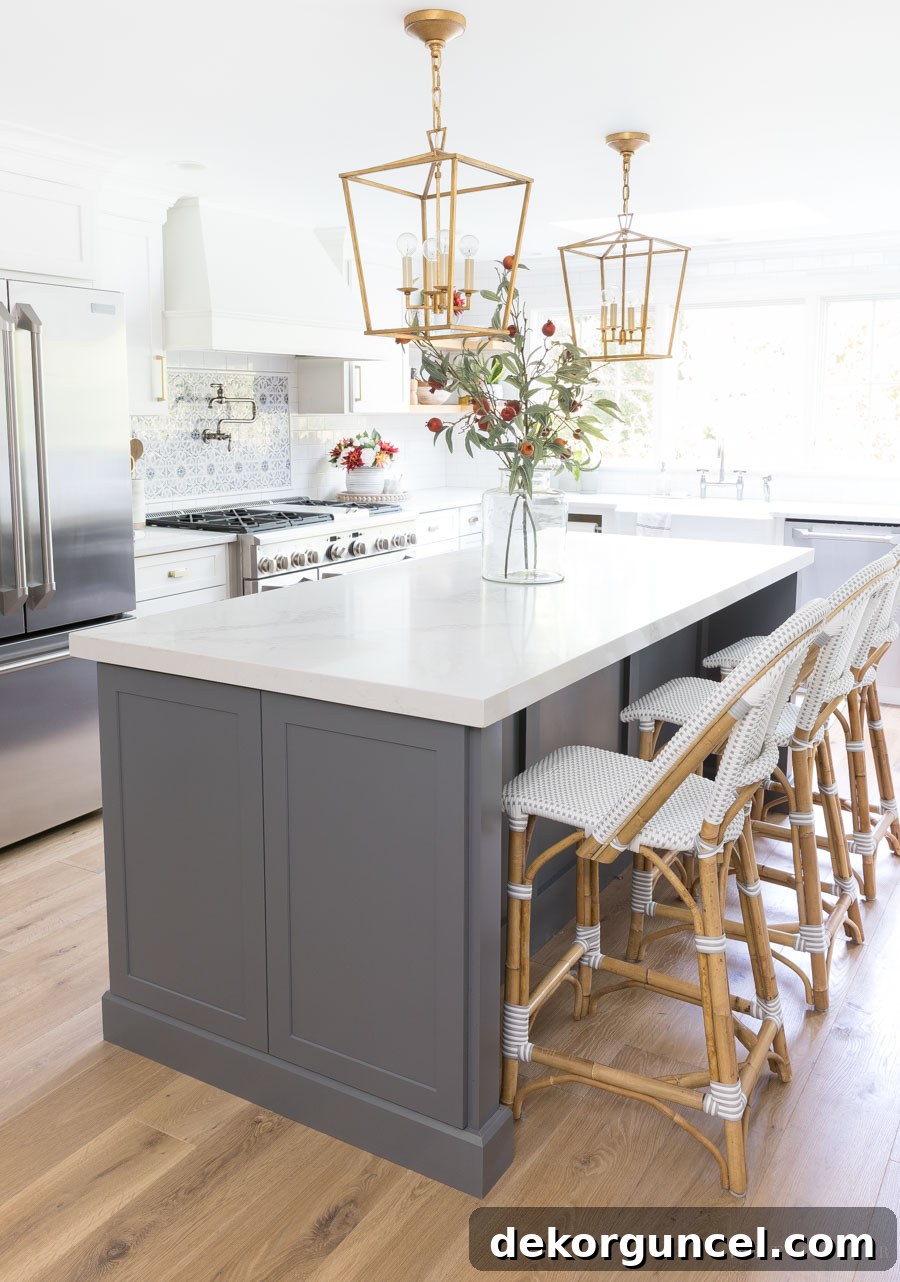
A common myth suggests that you should have one pendant light per stool at your island. I strongly advise against following this rule! I find that a combination of three stools and two strategically placed lights creates a far more interesting and dynamic visual composition. Three pendants alongside three stools can often look overly busy and redundant. I would only consider adding a third pendant over my kitchen island if its length extended by at least another 2 to 3 feet, pushing it into the 10-foot plus category.
Therefore, consider going with three pendants primarily in these specific scenarios: if your island is exceptionally long (10+ feet), if you prefer using smaller, less visually commanding pendants, or if you genuinely require a significant amount of additional light in that area. Ultimately, these are guidelines based on my personal design aesthetic. If you have a smaller island with three pendants and absolutely love the look, then you’ve made the right choice, because the most important thing is that your home reflects your style and makes you happy. Design principles offer a strong foundation, but personal preference always holds the final say.
Curated Selection of Favorite Pendant Lights
Choosing the perfect pendant lights for a kitchen island is a journey that often involves extensive searching. Before settling on the fixtures for my own kitchen, I explored countless options and discovered many other exquisite designs along the way. Below is a carefully curated selection of some of my absolute favorite pendant lights, offering a range of styles to inspire your own kitchen renovation or design project.
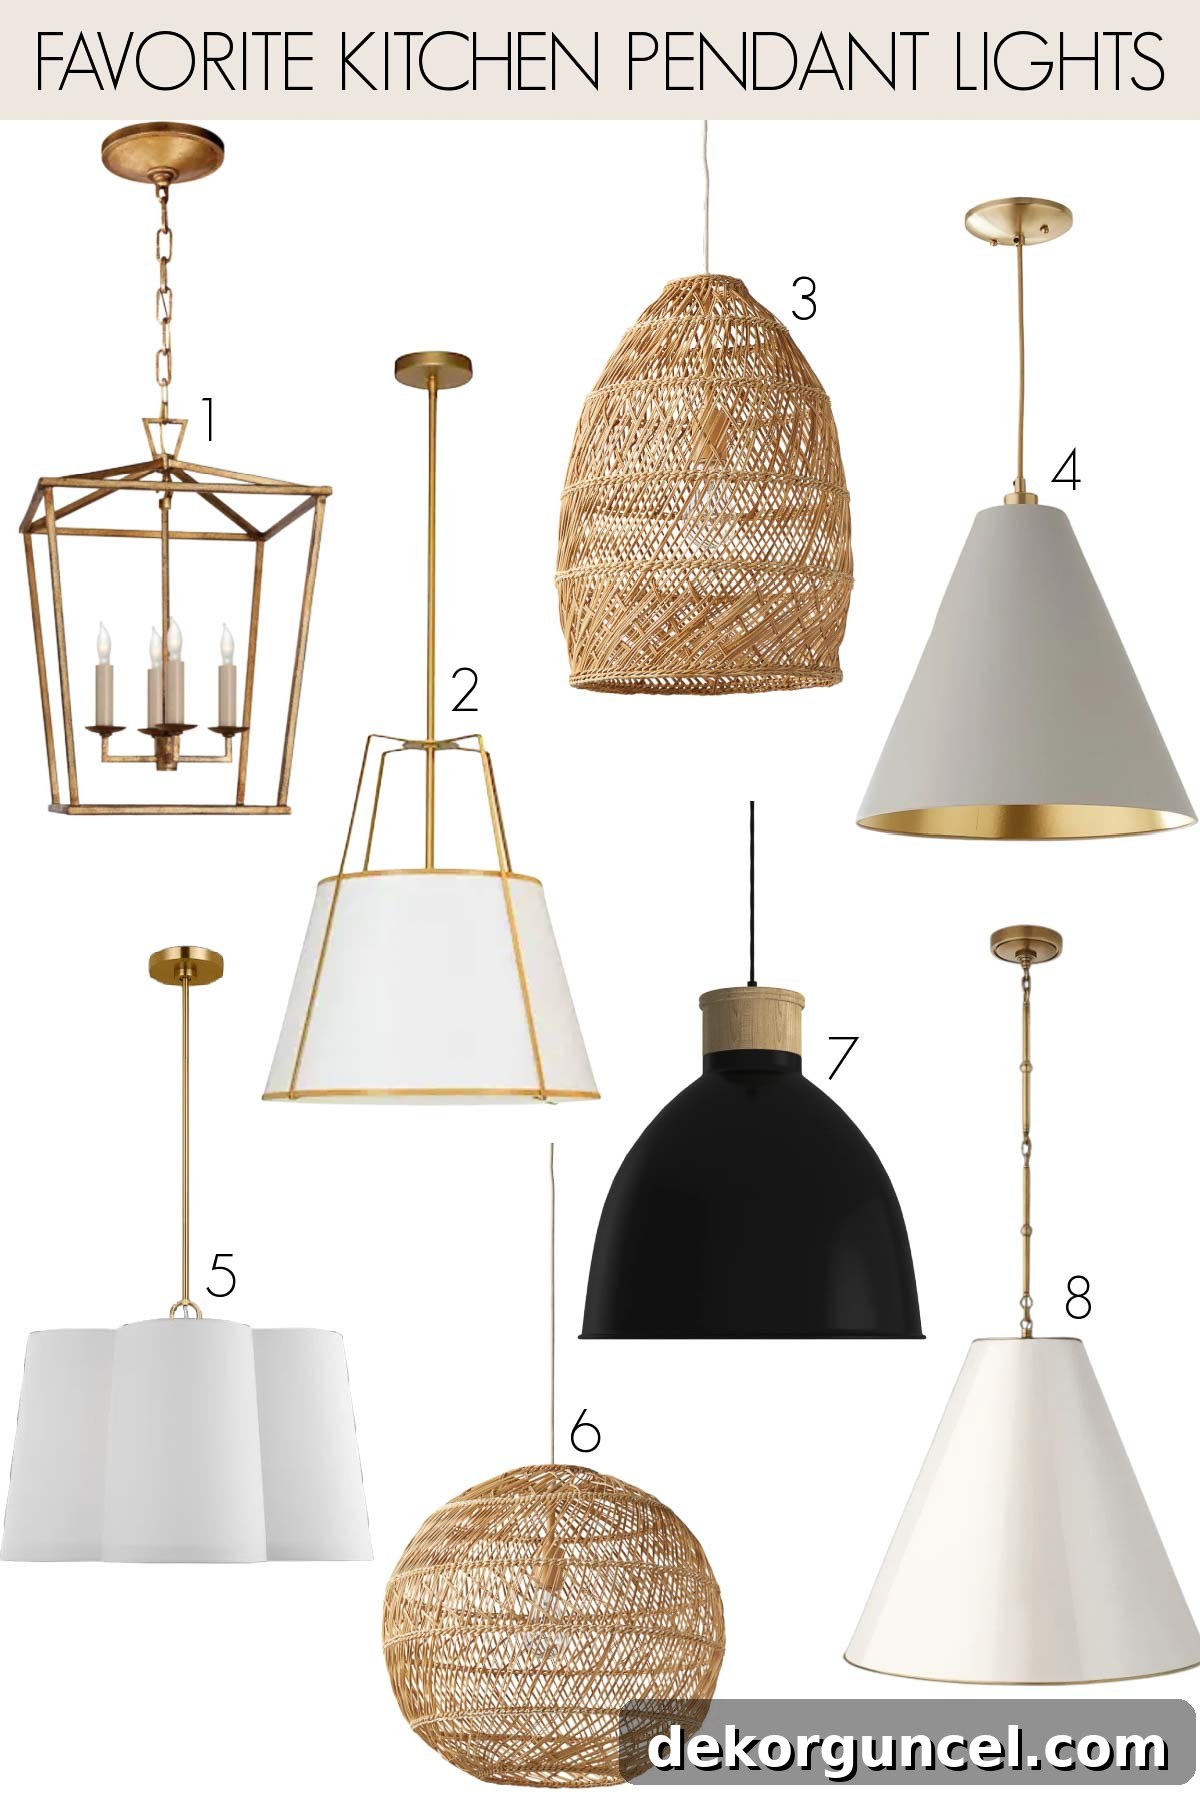
Explore These Stunning Pendants: 1. Classic Lantern Pendant | 2. Sleek White Cone Pendant | 3. Artisanal Woven Bell Pendant | 4. Modern Gray Paper Cone Pendant | 5. Elegant Scalloped Shade Pendant | 6. Organic Round Woven Pendant | 7. Minimalist Black Cone Pendant | 8. Refined White Cone Pendant with Brass Trim
I trust these insights have provided valuable guidance for your current or future kitchen design projects. Mastering the height and spacing of your kitchen island pendant lights is a key step in creating a space that is both beautiful and highly functional. Remember to carefully measure, consider your line of sight, and choose pendants that complement your overall aesthetic. Don’t forget to Pin an image or two if you wish to easily revisit these essential tips later!
Should you have any questions regarding the sources for specific items featured in our kitchen, a complete Source List is conveniently provided at the end of this post. Additionally, if you missed any of my previous must-have measurements posts for other areas of your home, you can find them linked below:
Essential Measurements for Your Bathroom Layout
Guide to Hanging Artwork: Optimal Heights
Decorating Your Living Room: Key Design Considerations
Decorating Your Dining Room: Expert Tips and Measurements
Selecting and Hanging Lighting: Size, Height, and Style
Wishing you all a wonderful start to your week!


Paint color: Benjamin Moore Cloud White (Flat for Walls, Satin for Trim) | Cabinets: For detailed insights, see my post on kitchen cabinet design choices | Appliances: Monogram (more details available here) | Countertops: Caesarstone’s Statuario Maximus – further details here | Flooring: Read my comprehensive Hallmark wood floors review | Backsplash tile: Mosaic behind range: Walker Zanger mosaic (Villa D’ Oro Granada) | Subway tile: AKDO Essential Ceramic in Cloud | Liner around mosaic: AKDO Vista Liner Essential Ceramic in Cloud | Grout Color: Discover details on our white subway tile with gray grout
For additional photos of our kitchen and a complete list of sources, please see my post on our kitchen remodel before and after!