
The enchanting allure of a freshly snow-dusted Christmas tree captures the very essence of winter magic. For years, I’ve admired the sophisticated charm of flocked Christmas trees, their branches softly veiled in what appears to be a gentle snowfall. The idea of bringing that serene, snowy aesthetic into our family room was incredibly tempting. However, we already owned a magnificent artificial tree, perfectly sized and still beautiful, making the purchase of a new, pre-flocked tree feel somewhat extravagant and unnecessary. It was then that a brilliant realization dawned: why buy a new one when I could achieve that coveted snow-kissed look on my existing tree? This year, I finally embraced the DIY spirit, and the transformation was nothing short of delightful! The process turned out to be surprisingly straightforward and immensely rewarding. Today, I’m thrilled to share a comprehensive, step-by-step guide on how to flock a Christmas tree, empowering you to create your own winter wonderland right at home. (Please note: this post contains affiliate links, which means I may earn a small commission on purchases made through these links at no extra cost to you. For full disclosure details, please refer to our {disclosure statement}.)
Before we dive into the creative fun, let’s walk through each essential step. Afterward, I’ll address some of the most common questions about the flocking process and, of course, reveal my beautifully decorated, newly flocked tree!
Step 1: Gather Your Essential Flocking Supplies
Embarking on your Christmas tree flocking journey requires a few key items, all easily accessible. Investing in the right tools from the start ensures a smoother, more successful experience. Here’s a detailed list of what you’ll need to create that perfect snowy effect:
- Flocking Powder: This is the star of the show. I personally achieved fantastic results with a 2-pound bag of {this specific snow flocking powder}. The amount you’ll need depends on your tree’s size and your desired level of “snowiness.” For a lightly flocked 6.5-foot tree, a 2-pound bag is usually sufficient, but consider purchasing an extra bag if you prefer a heavy, dense snowfall effect or have a larger tree. Remember, flocking powder tends to sell out quickly as the holiday season approaches, so it’s wise to order yours early!
- Fine Mesh Kitchen Strainers: These are indispensable for achieving an even, natural-looking snow distribution. A set with various sizes is ideal. I found {this set of four strainers} to be incredibly versatile. Larger strainers are great for broad areas, while smaller ones allow you to reach inner branches and delicate tips with precision.
- Spray Bottle of Water: A simple spray bottle that produces a fine mist is crucial. You can find stylish glass spray bottles with silicone sleeves like mine {here}, but any clean spray bottle will work perfectly. The key is a consistent, gentle mist.
- Bowl: A medium-sized bowl placed beneath your strainer will catch any excess flocking powder, minimizing waste and helping to keep your workspace tidier.
- Thin Plastic Drop Cloths: If you plan to flock your tree indoors, protecting your surroundings is paramount. I recommend using {these thin plastic drop cloths}. You’ll need enough to cover the floor, nearby furniture, and walls completely.
- Painter’s Tape: Essential for securely taping down your drop cloths, ensuring they don’t shift during the flocking process and providing maximum protection for your floors and furniture.
- Step Stool or Ladder: A sturdy step stool is crucial for safely reaching the higher branches of your tree, allowing for even flocking from top to bottom.
- Protective Mask: Flocking powder is a fine particulate. Wearing a mask, such as a dust mask or an N95, is highly recommended to prevent inhalation during application.
- Pitcher of Water: Keep a pitcher filled with water nearby for easy and quick refills of your spray bottle. This saves you trips to the sink and prevents tracking wet flocking powder through your house.
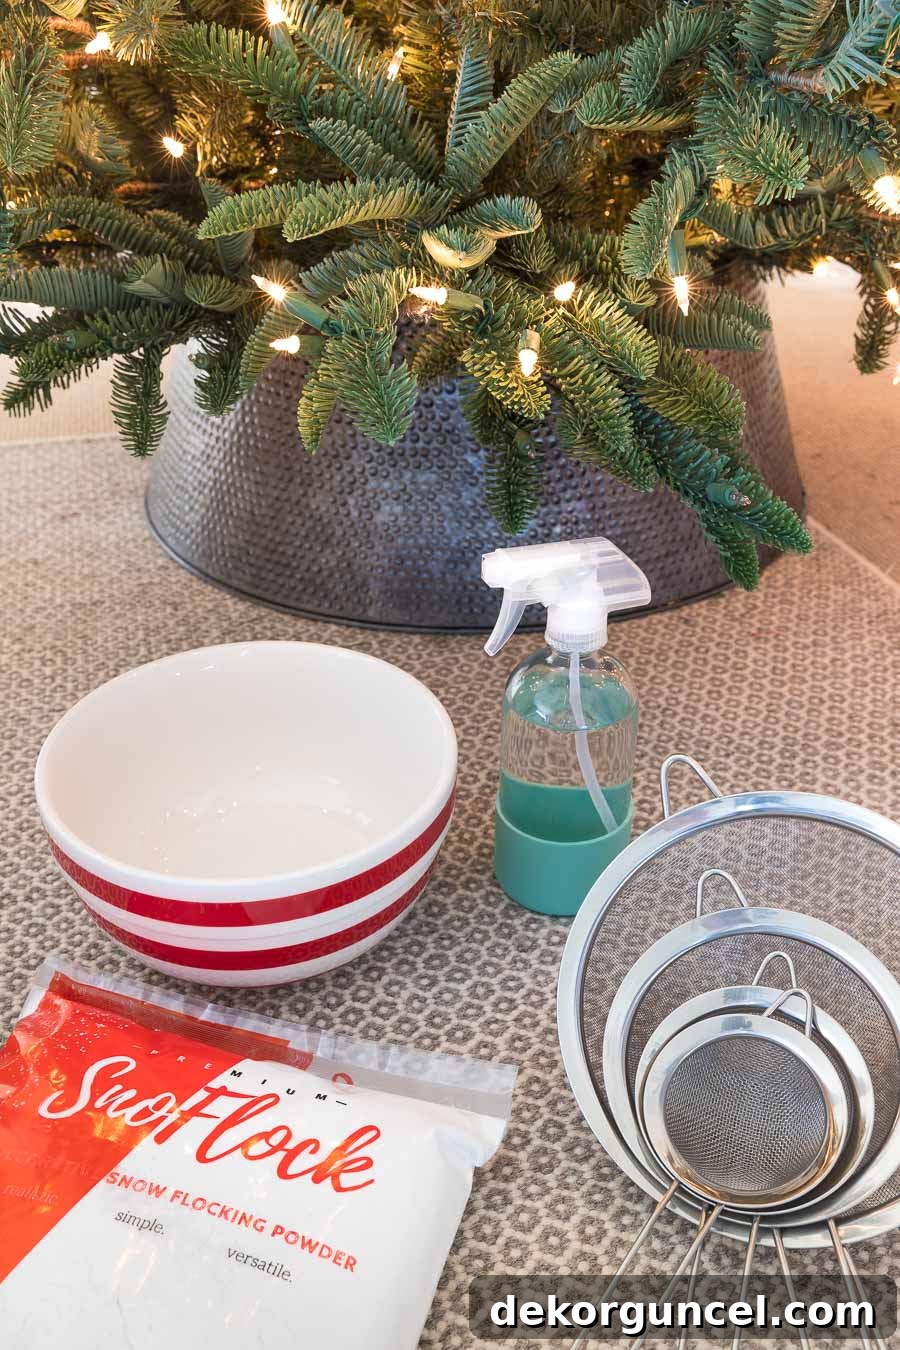
Gathering these items in advance will ensure your flocking project is efficient and enjoyable, leading to a stunning, snowy tree.
Step 2: Assemble & Fluff Your Tree to Perfection
Before you even think about applying that beautiful faux snow, proper tree preparation is key. This step is vital whether you’re working with a new tree or refreshing an old favorite, and it applies equally to both artificial and fresh trees. If you’re flocking a faux tree, begin by assembling it according to its instructions. Once assembled, the crucial next step is to “fluff” every single branch and tip. By fluffing, I mean meticulously fanning out each branch and individual tip so that they extend in various directions, creating a full, lifelike appearance. Artificial trees, especially after being stored for a year, tend to have compressed and flattened branches. Taking the time to gently bend, separate, and shape each component not only makes your tree look significantly fuller but also ensures better surface area for the flocking powder to adhere to, resulting in a more even and realistic snow effect.
For pre-lit artificial trees, it’s a good practice to check all the lights at this stage to ensure they are working before you begin flocking. This is also the ideal time to make any adjustments to the shape of your tree, as the flocking process will essentially “lock” the branches into their new, snow-covered positions. Our tree, even before flocking, was quite lovely. Taking the time to fluff it properly made me even more excited for its transformation, hoping the flocking would elevate its beauty further.

Step 3: Meticulously Protect Your Workspace (Especially Indoors)
While many flocking kits recommend applying the faux snow outdoors for optimal ventilation and easier cleanup, I made the conscious decision to flock my tree indoors. The weather on the day I planned my project was uncooperative—cold, windy, and frankly, quite unpleasant for outdoor work. Additionally, the thought of disassembling our beautiful tree, moving it outside, flocking it, and then reassembling it back in our family room seemed like an unnecessary hassle. If you choose to flock indoors, as I did, it’s absolutely imperative to take extensive protective measures. Proceeding indoors means you’re doing so with the understanding of potential mess, so thorough preparation is key.
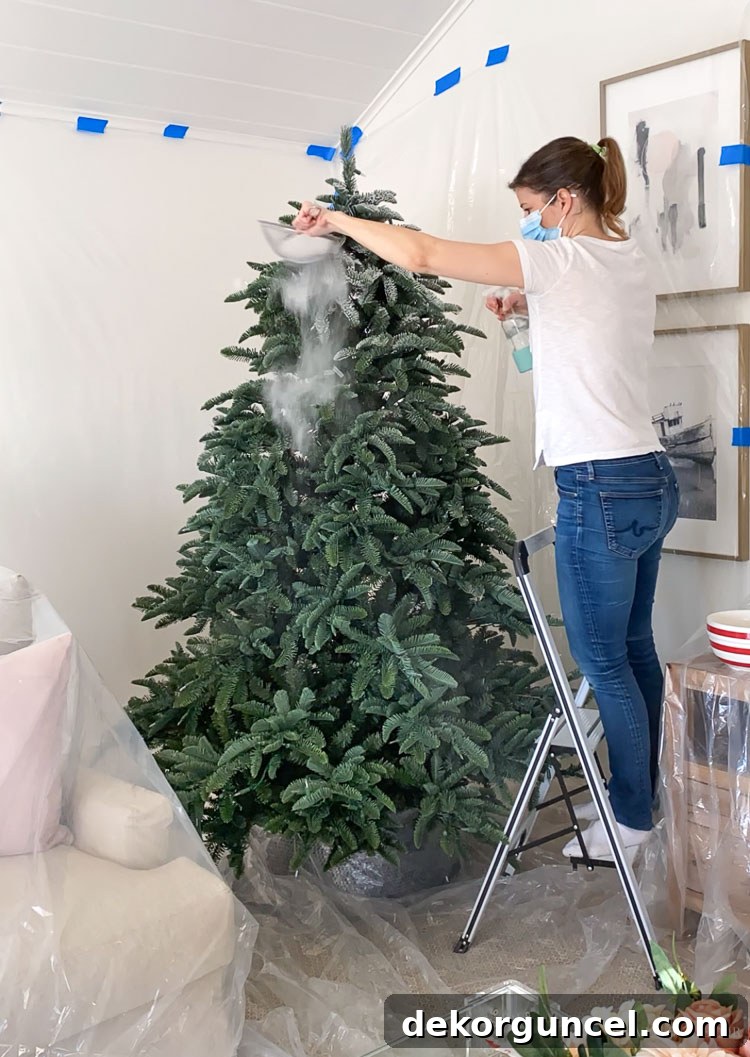
To ensure my family room remained pristine, I meticulously covered every nearby surface. This included all surrounding walls, any furniture within close proximity, the entire floor area where the tree stood, and even the Christmas tree collar. I used multiple thin plastic drop cloths, overlapping them generously and securing all edges firmly with painter’s tape. This creates a protective barrier that catches all stray flocking powder, preventing it from adhering to unwanted surfaces. Think of it as creating a temporary “flocking booth” around your tree. This careful preparation allowed me to flock the tree conveniently in its permanent spot, minimizing movement and potential damage.
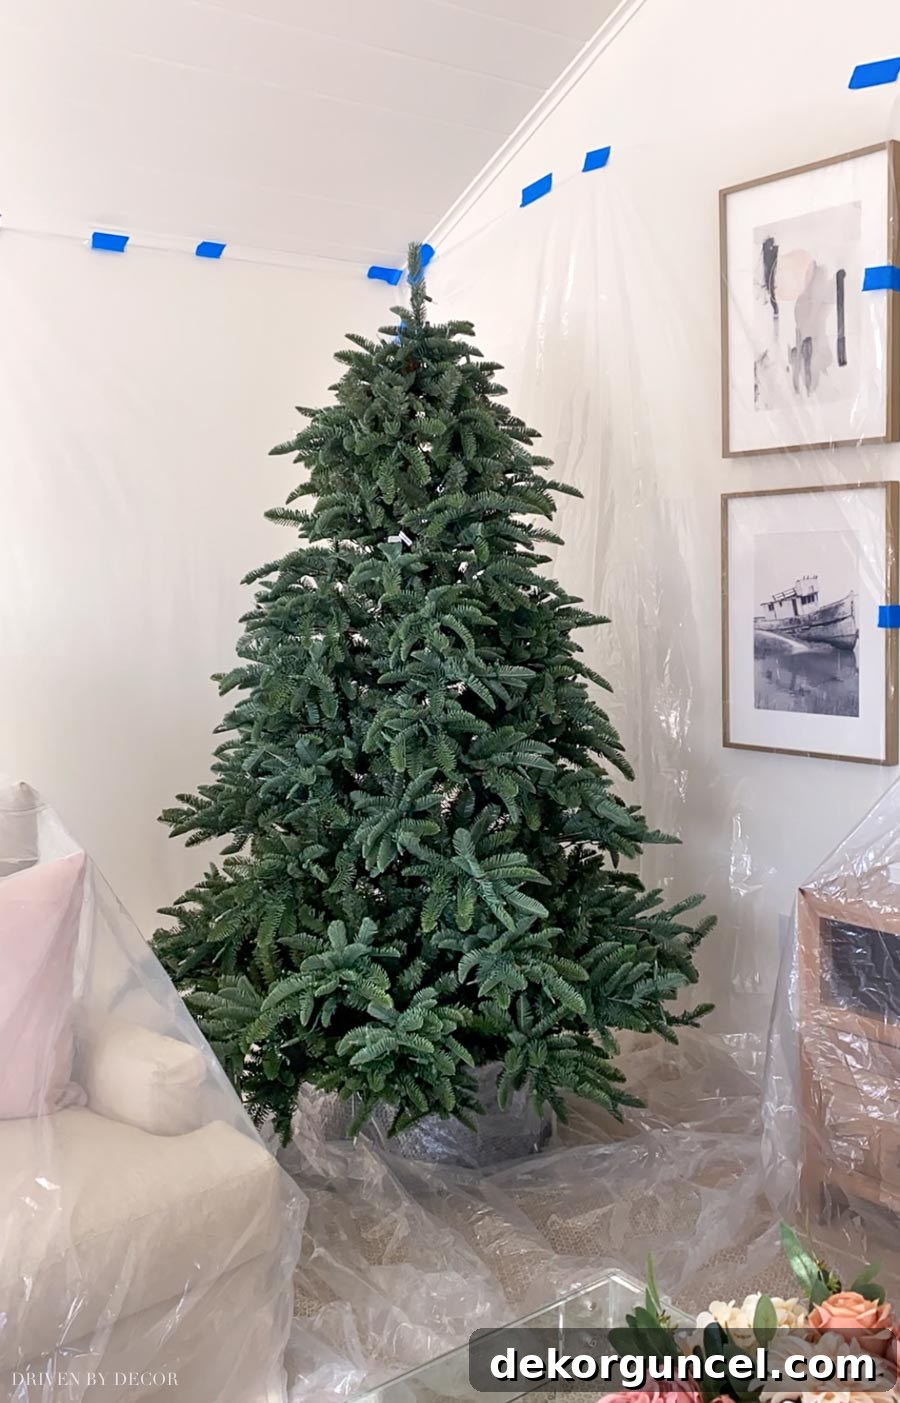
Remember, a little extra time spent on setup will save you significant cleanup time later and protect your home from the fine, adhesive flocking material.
Step 4: Load Your Strainer & Prepare the First Section of Your Tree
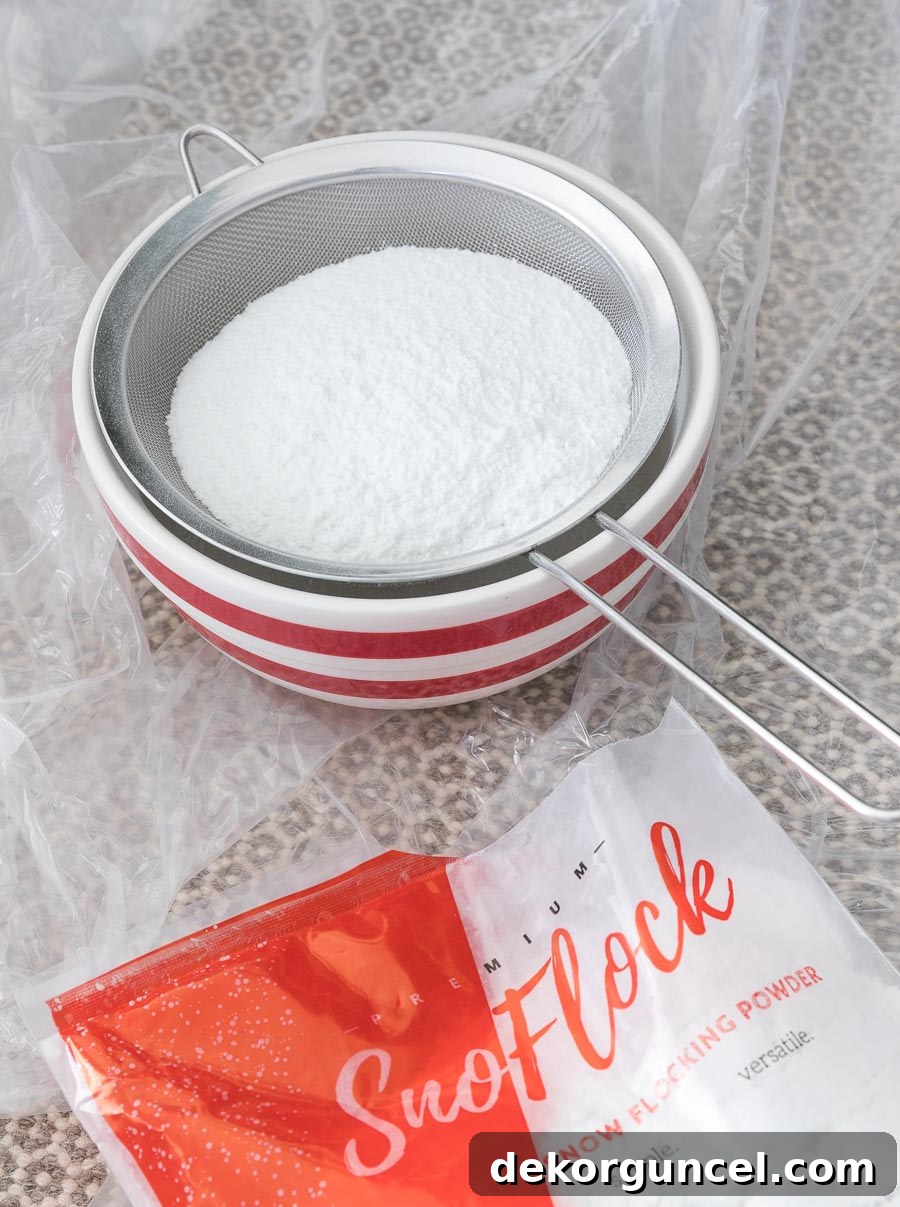
With your workspace protected and your tree perfectly fluffed, it’s time to begin the magical transformation. Take one of your fine mesh kitchen strainers and place it over a bowl. This bowl acts as a catch-all for any flocking powder that falls through, ensuring you waste as little as possible. Now, carefully fill the strainer about halfway with your flocking powder. Filling it only halfway allows for better control during the sifting process and prevents the strainer from becoming too heavy or unwieldy, which could lead to uneven application.
Next, working from the top of your tree downwards, select a manageable section to begin flocking. It’s much more effective to work on one large section at a time rather than trying to mist the entire tree at once, as the water can dry before you get to apply the powder. Using your spray bottle, thoroughly mist the branches in this chosen area. The goal is to make the branches damp, but not dripping wet. A fine, even mist allows the flocking powder to adhere beautifully without clumping. Think of it like a light morning dew on a winter morning. This initial mist creates the adhesive surface necessary for the flock to stick, giving you the perfect canvas for your faux snow.
Step 5: Master the Sprinkle & Spray Technique for a Natural Look
Now for the truly transformative part: applying the flock! This step requires a bit of coordination, but it’s remarkably intuitive once you get the hang of it. Hold your strainer, filled with flocking powder, in one hand, and your spray bottle of water in the other. Position yourself over the section of the tree you just misted.
Begin to gently tap or shake the strainer, allowing the flocking powder to drift downwards like falling snow. Simultaneously, as the powder is descending, use your spray bottle to mist the falling flock *onto* the tree. The fine water particles will activate the adhesive properties of the flocking powder, causing it to bond to the branches and create that desired snowy texture. The key is to mist the falling powder, not the strainer itself. If you spray the strainer directly, the powder will clump up and block the holes, making even application impossible.
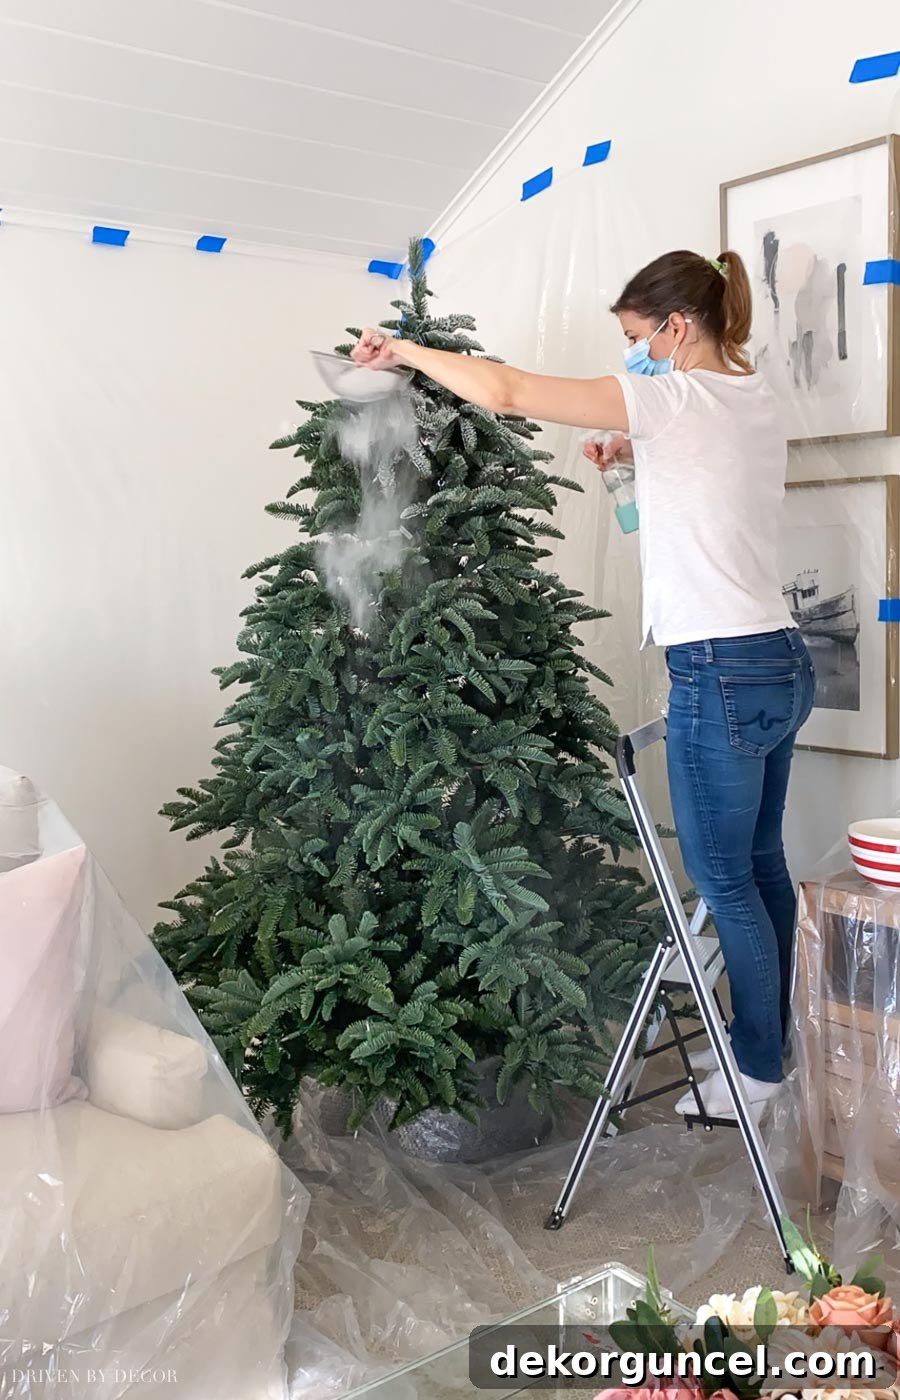
The beauty of DIY flocking lies in your ability to control the density of the snow. You can apply it as lightly or as heavily as you wish. For my tree, I aimed for a subtle, light dusting—just enough to give it that fresh, natural snow-kissed appearance without obscuring the green needles entirely. Focus on the outer tips and upper surfaces of the branches, mimicking how real snow would naturally settle. You don’t need to flock every single little branch or deeply into the inside of the tree; these areas are typically not visible, and real snow wouldn’t naturally penetrate that far anyway.
As you work your way around each section, you might find some areas a bit challenging to reach with your larger strainer. For these trickier spots, I found it incredibly helpful to transfer some flocking powder into a smaller, fine-mesh strainer. This allowed for more precise application. Sometimes, gently lifting some of the branches above an area provided better access for a thorough, even coating.
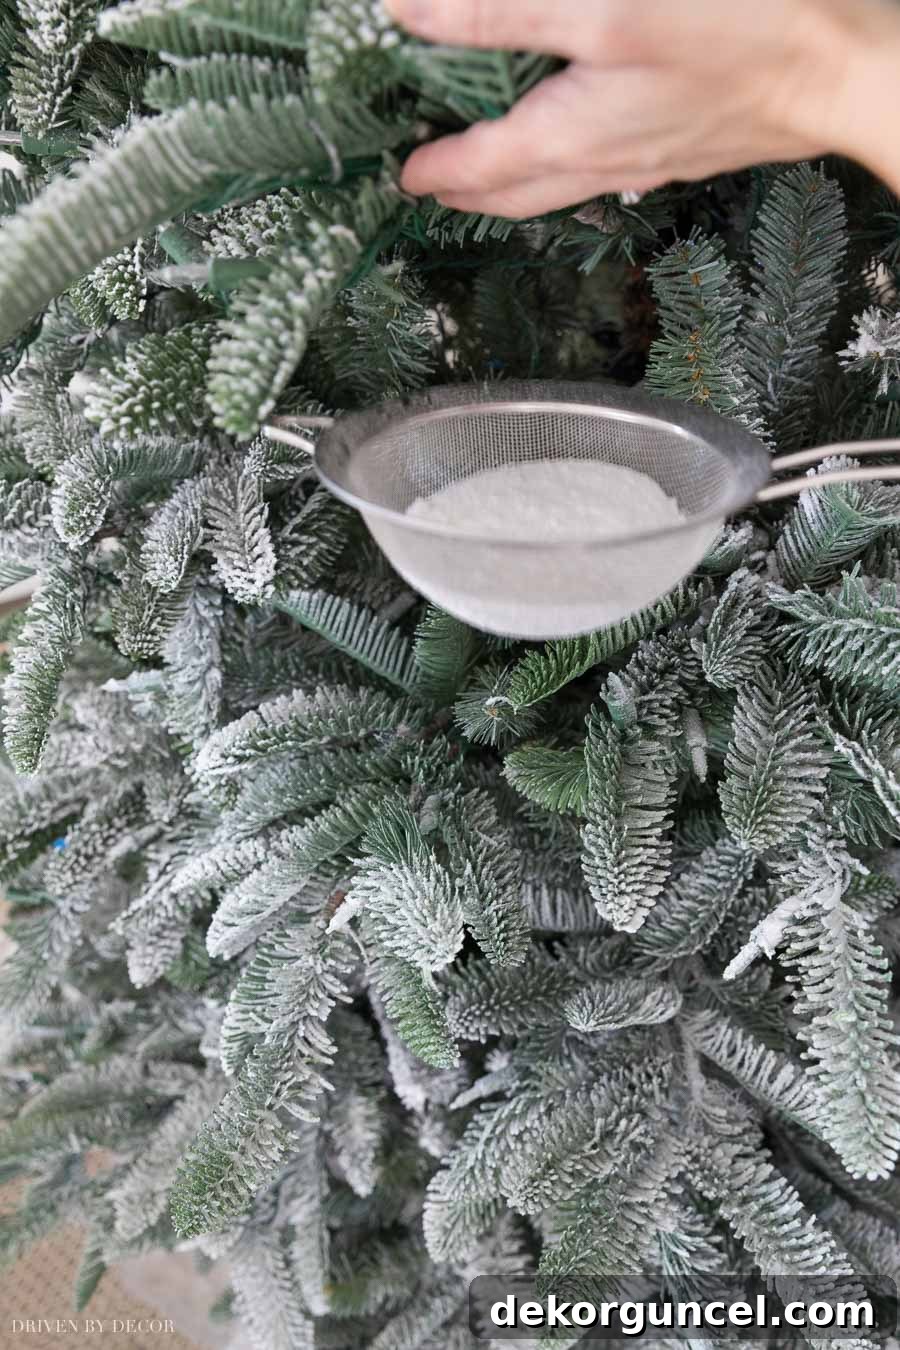
Continue this sprinkle and spray method section by section, ensuring you’re happy with the snow coverage before moving on. Patience and a steady hand will yield the most professional-looking results.
Step 6: Finish with an Overall Misting to Permanently Seal the Flocking
Once you’ve meticulously worked your way around the entire tree, applying flocking powder to every desired section, you’re almost done! The flocking process itself is surprisingly quick; I completed my tree in approximately 40 minutes, which is a testament to how efficient this method can be. However, there’s one critical final step to ensure your beautiful faux snow lasts throughout the holiday season and beyond.
After you’ve achieved your desired snow coverage, take your spray bottle and give the *entire* flocked tree a comprehensive, overall misting with water. This final misting is essential for “sealing” and “locking” the flocking powder firmly into place. The water reacts with the adhesive agents in the flocking powder, causing it to harden and permanently bond to the tree branches. Just as with your initial misting, you want the tree to be thoroughly damp, but avoid saturating it to the point of dripping. A consistent, even spray over all flocked surfaces will create a durable, long-lasting finish.
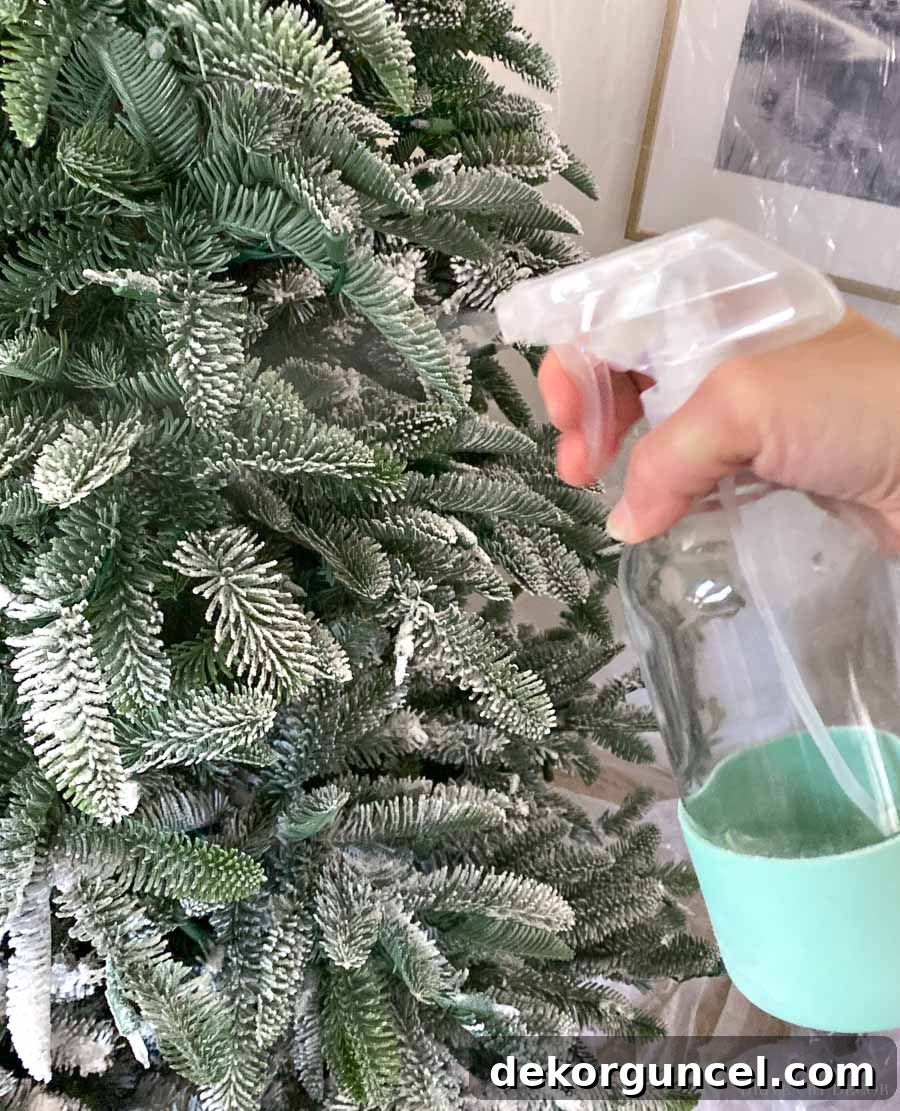
This sealing step prevents excessive shedding and ensures your DIY flocked tree maintains its enchanting winter appearance for many seasons to come. Take your time with this step, ensuring every flocked area receives a sealing mist.
Step 7: Allow Your Newly Flocked Tree to Fully Dry
After the final misting, the most important step is patience. You must allow your newly flocked tree ample time to dry completely before you do anything else to it, especially before removing the protective plastic or adding any decorations. The flocking powder needs to cure and harden fully, which can take several hours. I flocked my tree in the afternoon, and by the next morning, it was perfectly dry and ready for the next stage.
Drying time can vary depending on factors like humidity, room temperature, and how heavily you flocked your tree. Ensuring good air circulation in the room can help speed up the process; you might even consider running a fan on a low setting, pointed away from the tree, or opening a window slightly if the weather permits. Do not rush this step, as disturbing the flock while it’s still damp can cause smudging or unevenness.
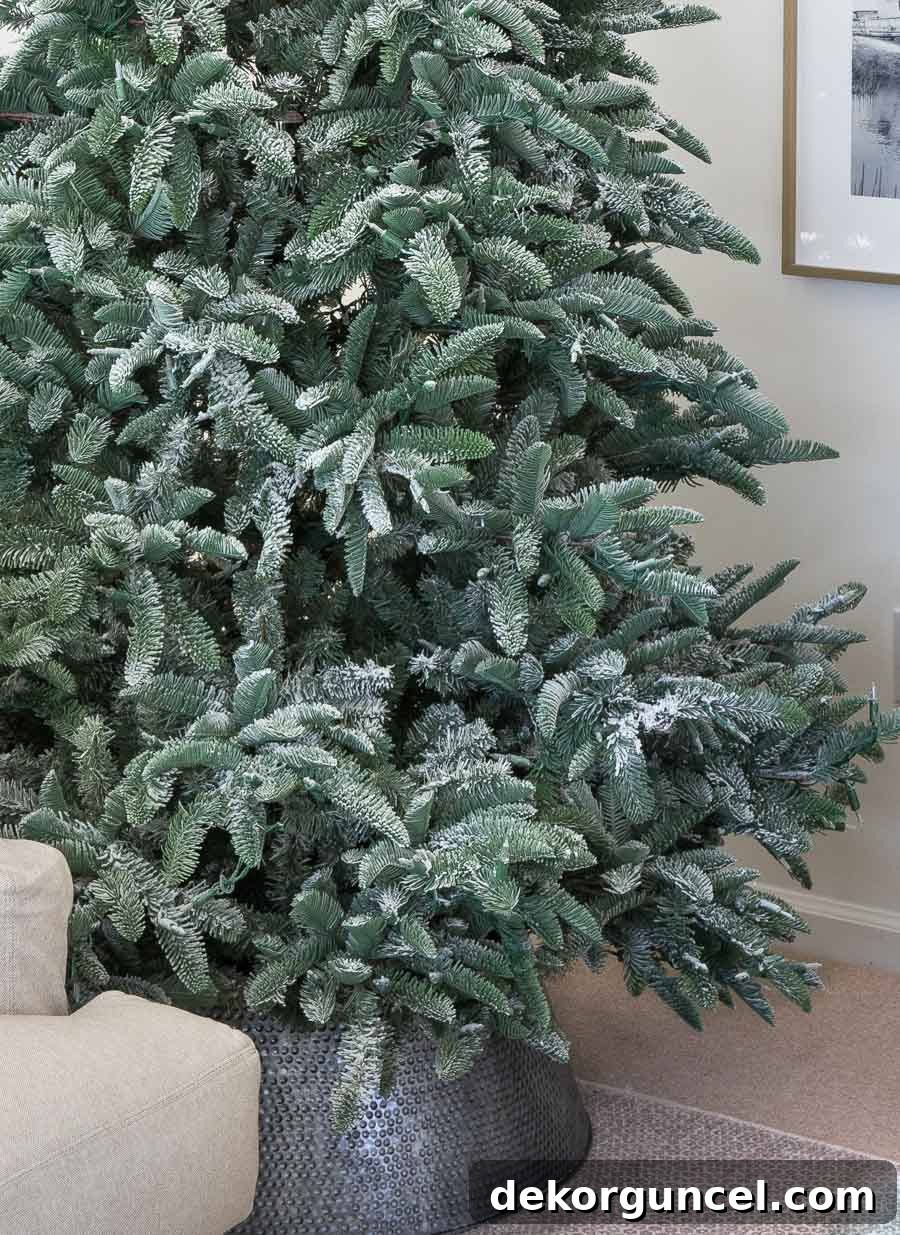
Once your tree is completely dry and the flocking feels firm to the touch, you can carefully remove all the surrounding plastic drop cloths and painter’s tape. Peel the tape slowly to avoid dislodging any flocking. This reveal is incredibly satisfying! Seeing the pristine, snowy branches against the clean floor is a wonderful moment. My newly flocked tree, in its “naked” state, looked precisely as I had envisioned—natural, elegant, and imbued with that coveted winter charm. I was absolutely thrilled with the outcome, confirming that this DIY project was worth every moment.

Step 8: Decorate Your Beautiful Winter Wonderland!
With your tree now perfectly flocked and fully dry, it’s time for the most enjoyable and creative part: decorating! This is where you truly bring your winter wonderland vision to life, adding personal touches that reflect your holiday style. If you’re looking for comprehensive guidance on decorating, don’t miss {this detailed post} on how I decorate my Christmas trees, covering everything from selecting the perfect tree collars to elegantly adding ribbon and ornaments. A flocked tree provides a magnificent snowy backdrop, making any color scheme pop beautifully.
This year, I opted for a sophisticated and serene palette, blending shimmering silver, warm gold, and rich green tones. My decoration arsenal included a beloved 4-inch gray velvet ribbon from Balsam Hill, which I’ve cherished for years, complemented by {this charming gray & white check ribbon}, {this delicate sheer ivory ribbon}, a lush green and gold wired ribbon (which is no longer available, unfortunately), and {this elegant sheer silver ribbon}. The varying textures and widths of the ribbons added depth and visual interest, creating a luxurious layered effect that truly enhanced the flocked branches.
For ornaments, I curated a collection that harmonized with my chosen color scheme. My silver and gold ornaments, sourced from Balsam Hill and HomeGoods, sparkled against the white flocking, reflecting the ambient light beautifully. The deep green ball ornaments, discovered at Terrain, added a touch of natural color, reminiscent of evergreen peeking through fresh snow.

The final result filled me with immense joy and pride. The DIY flocked tree, adorned with its carefully selected decorations, completely transformed our family room into a cozy, festive sanctuary. The soft glow of the lights through the faux snow, combined with the elegant ornaments, created a truly magical atmosphere.

I’ll be sharing more photos of our family room once the rest of the holiday decor is complete, but for now, we’re all thoroughly enjoying the early start to the festive season. Even our beloved Cricket seems to appreciate the new look!
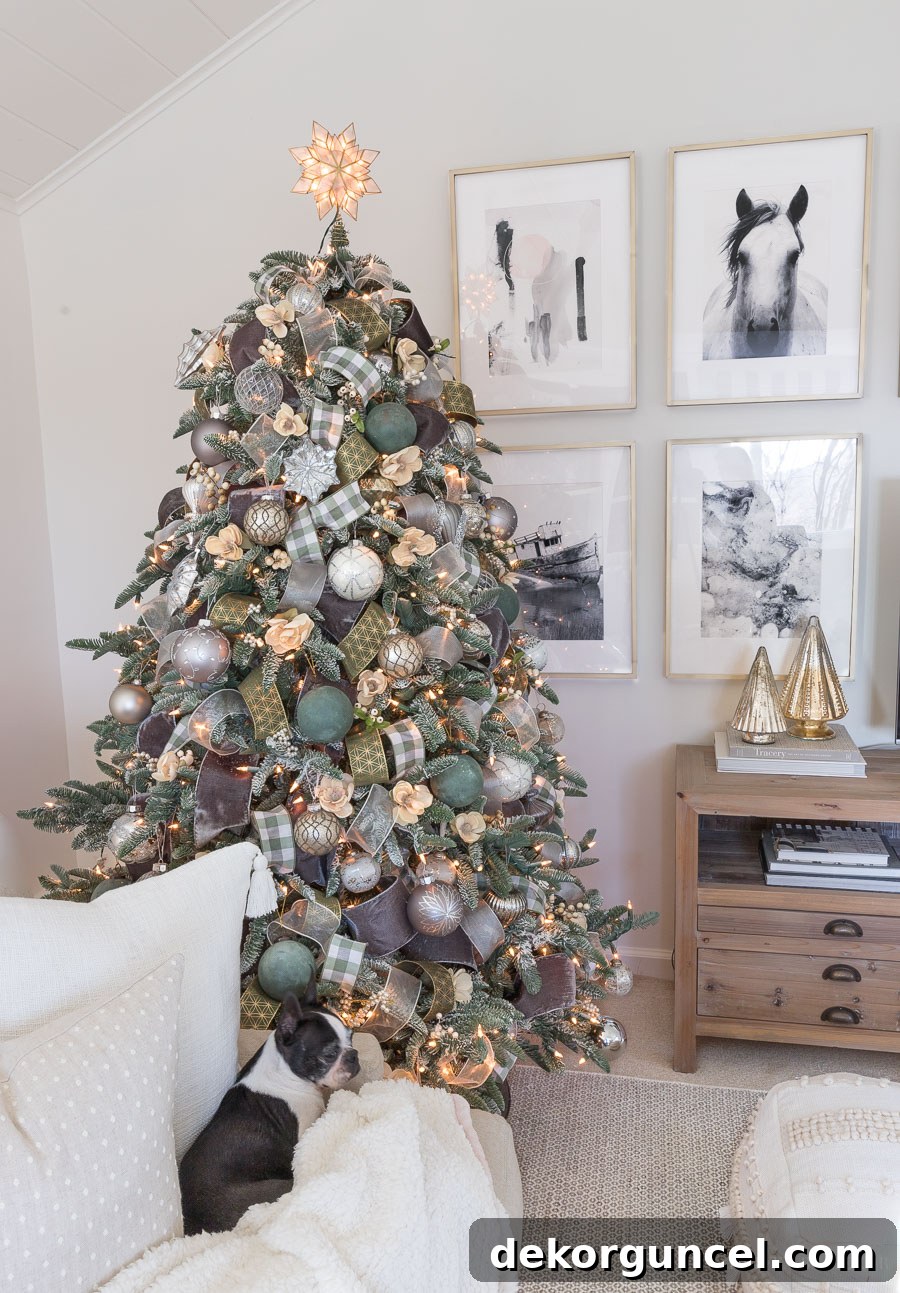
Sources for Featured Decor: Cream tassel pillow | Neutral dot pillow | Pom pom throw | Rug | White textured floor poufs | Metallic trees – HomeGoods | Capiz star tree topper
To help you further, let’s address some of the most commonly asked questions about Christmas tree flocking, many of which came up when I shared a sneak peek on Instagram Stories.
How Much Flocking Powder Do I Need for My Christmas Tree?
The amount of flocking powder required is largely dependent on two factors: the height of your tree and your desired level of flocking (light dusting vs. heavy snow). For context, my Christmas tree stands at 6 ½ feet tall, and I aimed for a beautiful, light dusting of snow. This effect was achieved using approximately 5/6 of a 2-pound bag of flocking powder. As a general guideline:
- For a 4-6 foot tree with a light flock, 1 pound may suffice.
- For a 6-7.5 foot tree with a medium flock, 2-3 pounds is usually ideal.
- For a 7.5-9 foot tree desiring a heavy, dense flock, or for a very large tree, you will likely need 4-5 pounds or more.
It’s always a good idea to purchase a little more than you think you’ll need, especially since flocking powder sells out quickly during the holiday season. Having extra ensures you can achieve your desired look without running out mid-project, and any leftover can be saved for future touch-ups or another project.
Can You Flock a Pre-Lit Christmas Tree Without Damaging the Lights?
This is a very common and important question. The directions provided with most flocking powders generally state that you *can* flock a pre-lit tree, but with a crucial caveat: only if the lights are rated for both indoor and outdoor use. My specific tree had lights rated solely for indoor use, so I proceeded with the flocking at my own discretion and risk. Fortunately, everything turned out perfectly for me—I didn’t experience any issues or lost lights. However, if your pre-lit tree’s lights are not outdoor-rated and you choose to flock it, be aware that there are no guarantees against potential harm to the lights. They might dim, flicker, or even cease to function, and it could potentially void your tree’s warranty.
Regardless of your lights’ rating, it is absolutely essential to unplug your Christmas tree during the entire flocking process. Do not plug the lights back in until your tree is completely and thoroughly dry, which can take 12-24 hours. If you are particularly concerned, you could consider taping off your lights before flocking or, for an even safer option, purchasing an unlit tree and adding string lights *after* the flocking has dried. This gives you maximum control and peace of mind.
Doesn’t the Flocking on the Lights Make Them Dimmer?
While some flocking powder will inevitably settle on the light bulbs, in my experience, it dims them only very slightly—and not noticeably enough to detract from the overall brilliance of the tree. I already owned a pre-flocked tree that I use upstairs, which also has flocking on its bulbs, so I knew from that experience not to worry excessively about this. The tiny particles of flocking diffuse the light rather than completely blocking it, often creating a soft, warm glow that enhances the wintery ambiance.
If you are highly particular about your lights retaining their maximum brightness, you absolutely have the option to tape off each individual bulb with painter’s tape before you begin the flocking process. This would prevent any flocking powder from adhering to the bulbs. Alternatively, you can opt to add string lights to your tree *after* the flocking process is complete and fully dry. This ensures your lights remain completely free of flocking, though it does add an extra step to your decorating process.
Is Flocking a Christmas Tree a Messy Process? How Easy Is the Cleanup?
Let’s be honest: flocking a Christmas tree is undeniably a somewhat messy endeavor, primarily due to the fine powder and the water involved. However, the good news is that the cleanup is surprisingly manageable if you’ve prepared adequately. The dry flocking powder, which will inevitably settle on your plastic drop cloths, vacuums up remarkably easily.
The key challenge lies with the *wet* flocking powder. Once mixed with water, it becomes adhesive and will dry and harden if it gets onto unwanted surfaces like your bare floor, making it quite difficult to remove. This is why the comprehensive protection of your floors and furniture with plastic drop cloths, secured with painter’s tape, is absolutely critical. To prevent tracking wet flocking powder, I highly recommend keeping a pitcher of water next to you for spray bottle refills. This avoids the need to leave your designated flocking area and walk to a sink with potential snow-flock-covered feet. When flocking, wear socks, and once you’re completely finished and stepping off the plastic, remove them immediately. Any clothes or socks that come into contact with the flocking can generally be washed, and I found mine cleaned up perfectly in a standard laundry cycle.
It’s also important to note that flocked trees, whether DIY or store-bought, will experience some shedding of the flocking, especially during initial setup and takedown. This is normal. However, this shed material typically vacuums up easily. Should you find that too much flocking comes off after a few years, or if you decide you want an even heavier snow effect, you can always re-flock your tree in the future!
Is the Flocking Permanent Once Applied to the Tree?
Yes, the flocking applied to your Christmas tree is permanent. Once the flocking powder is mixed with water and allowed to dry and cure, it hardens onto the tree branches, much like a strong adhesive such as Elmer’s glue. This means you cannot simply “take it off” the next year to revert to an unflocked tree. The snowy effect you create will be a lasting feature of that specific Christmas tree.
This permanence is part of the appeal, as it provides a durable, long-lasting winter wonderland look for many holiday seasons. It’s a commitment, so ensure you love the flocked aesthetic before you begin! If you ever wish for an unflocked tree again, you would need to purchase a new one. However, with proper care and storage, your beautifully flocked tree will bring joy for years to come.
How Long Does a Flocked Christmas Tree Last?
A properly flocked Christmas tree, whether DIY or professionally done, can last for many holiday seasons. The flocking itself, once cured, is quite durable. With good care, your DIY flocking can last as long as the artificial tree itself—potentially 5-10 years or even more! The key to longevity is careful handling and proper storage. While there might be minimal shedding over time, especially during assembly and disassembly, the majority of the flocking should remain intact.
Can I Flock a Real (Fresh Cut) Christmas Tree?
Absolutely! Flocking powder works beautifully on both artificial and fresh-cut Christmas trees. The process is exactly the same for real trees. In fact, flocking a real tree can offer an added benefit: the flocking acts as a sealant, which can help to slow down the drying process of the needles, potentially extending the fresh look of your tree throughout the holiday season. Just ensure the tree is well-hydrated before you begin flocking.
Is Flocking Safe for Pets and Children?
Once the flocking powder has been applied and is completely dry and cured, it is generally considered non-toxic. It essentially hardens into a solid, inert material. However, during the application process, it’s crucial to prevent inhalation of the fine powder by wearing a mask, and to keep pets and children away from the immediate area to avoid them inhaling it or coming into contact with the wet, adhesive mixture. While the dry product is safe, it’s always best practice to supervise young children and pets around any decorated Christmas tree to prevent ingestion of ornaments or other materials.
What’s the Best Way to Store a Flocked Christmas Tree?
Proper storage is essential to maintain the beauty and integrity of your flocked tree for years to come. To minimize shedding and keep the flocking clean, I recommend wrapping your flocked tree loosely in large plastic sheets or using a dedicated Christmas tree storage bag. If possible, store the tree upright to prevent crushing the branches and flocking. Avoid compressing the tree too tightly, as this can dislodge the flock. Choose a cool, dry place for storage, away from extreme temperatures or humidity, which can affect the flocking over time.
What If I Don’t Like the Flocked Look After I’ve Applied It?
Given that flocking is permanent, it’s very important to be confident in your decision before you start. There’s no easy way to remove the flocking once it’s cured. My advice for anyone feeling hesitant is to start with a very light application. You can always add more flocking powder to achieve a denser snow effect, but you cannot take it away. Take your time, work in sections, and evaluate the look as you go to ensure you’re happy with the evolving transformation. Most people find themselves delighted with the natural, wintery aesthetic once they see the final result!
I hope this detailed guide and expanded FAQ section have answered all your questions and inspired you to try flocking your Christmas tree this year. It’s a truly rewarding DIY project that brings a unique, magical touch to your holiday decor. If you have any other questions that weren’t covered, please don’t hesitate to ask!
