
Welcome to a journey through some of my most cherished home renovation projects! As a passionate advocate for the power of transformation, I’ve had the privilege of bringing countless “before” and “after” visions to life within my own home. There’s an undeniable magic in seeing a dated, dysfunctional space evolve into something beautiful, inviting, and truly reflective of personal style. Today, I’m thrilled to share a curated selection of five such makeovers that stand out as my absolute favorites, each telling a unique story of design, determination, and the sheer joy of creating a dream home. Get ready to be inspired by dramatic changes that prove a little creativity (and sometimes a lot of elbow grease!) can go a very long way. (This post includes affiliate links, meaning I may earn a small commission on purchases made through these links, at no extra cost to you. Full disclosure statement available here):

The Dynamic Duo: Paint and Wall Art Revitalize Our Dining Room
When we first moved into our house, the dining room presented a rather eclectic, and frankly, unappealing, color palette. Imagine a mix of light blue, yellow, red, and green – a scheme that was decidedly “not me.” The walls were further complicated by a textured faux finish on the upper half and a rather flimsy, outdated chair rail that seemed to serve no purpose other than to break up the wall visually in an awkward way. It was clear that this space needed a complete overhaul to align with the more sophisticated and cohesive aesthetic I envisioned for our new home.
The transformation of our dining room began with a massive undertaking: prepping the walls. This was, without exaggeration, one of the most arduous tasks of the entire renovation. I meticulously removed the existing chair rail, which left behind unsightly damage requiring extensive patching. Following this, I applied multiple layers of skim coat and spent countless hours sanding every inch of the walls to achieve a perfectly smooth surface. This rigorous preparation was crucial for the flawless application of our chosen paint color: a carefully tweaked version of Sherwin Williams Keystone Gray, a shade I had loved in our previous home for its ability to create a warm, inviting, yet elegant atmosphere. The before-and-after contrast speaks volumes:
to this:
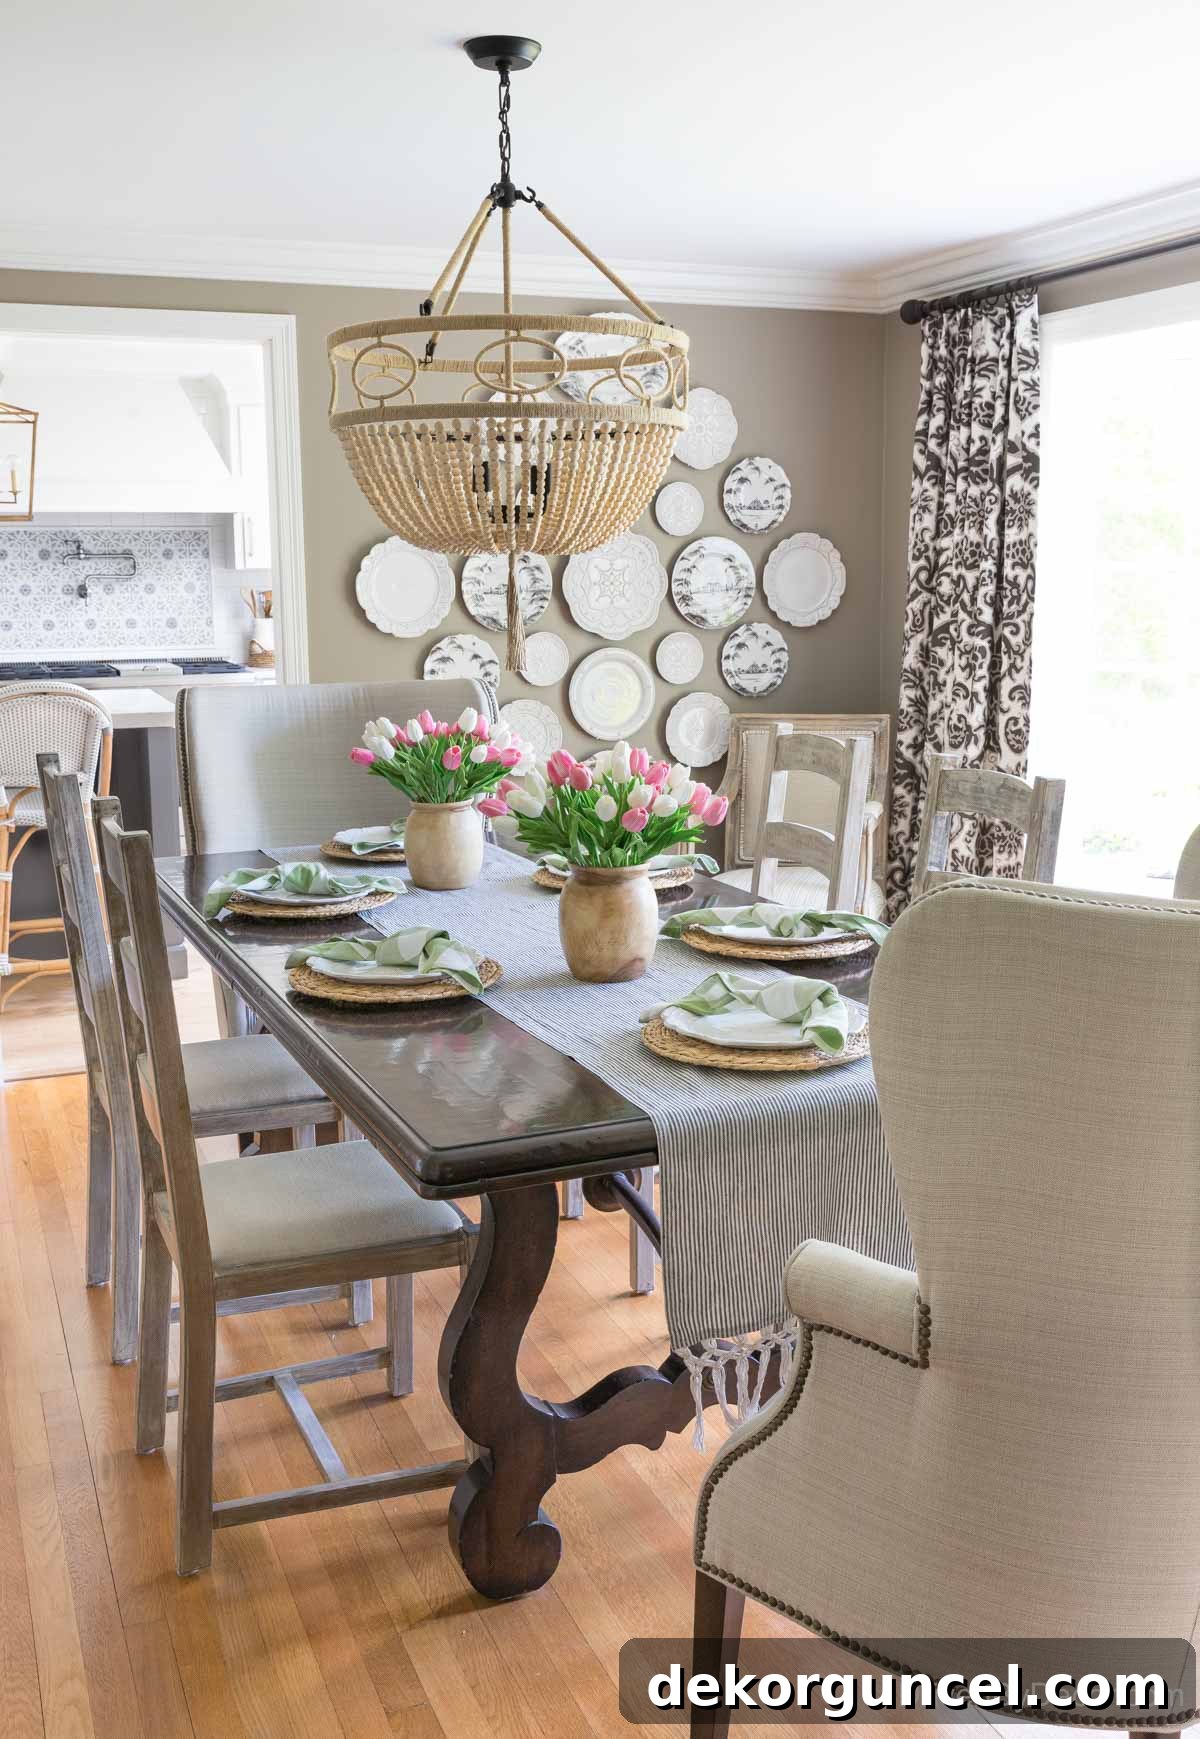
Dining Room Sources: Wood bead chandelier | Table & chairs – no longer available | 13″ Rattan chargers (similar) | Green & white plaid napkins | Table runner (similar) | Wood vases – no longer available | Faux pink tulips | Faux white tulips | White wall plates | Patterned wall plates | Drapes – no longer available
One of the most satisfying aspects of this dining room transformation was the ability to reuse much of our existing furniture from our old house. This strategic decision meant we didn’t have to purchase a single new piece of furniture, significantly reducing the overall cost of the makeover. Even our drapes were carefully transplanted, proving that smart planning and repurposing can yield stunning results. The primary new additions were a captivating chandelier and a collection of decorative plates, which I creatively arranged and hung on the wall to serve as unique, statement-making art. This simple yet impactful detail added a layer of personality and sophistication that truly completed the room’s elegant new look.

Crafting Focal Points: The Art of Statement Walls in Our Home
I’ve always admired the dynamic visual impact of a well-executed gallery wall, yet the idea of creating one myself felt incredibly daunting. Prior to moving into our current home, I had never dared to tackle such a project, intimidated by the perceived complexity of arranging various art pieces and frames into a cohesive display. However, a turning point arrived when some friends invited me to participate in a group design challenge. Before I knew it, I had committed to transforming a prominent wall in our home office with a brand-new gallery wall. The initial panic was real – there were certainly moments in the week leading up to the reveal where I feared an “epic-fail.” Yet, with perseverance and careful planning, everything came together beautifully, proving that stepping outside your comfort zone can lead to remarkable results. This is what that wall looked like when we first moved in:
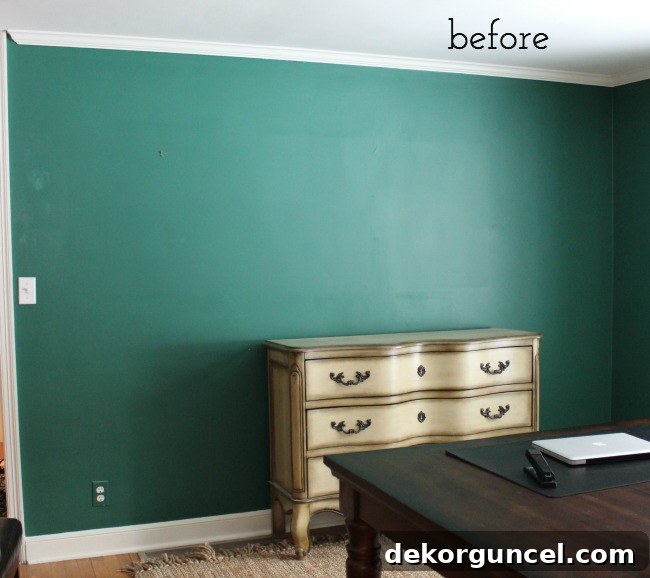
and this is what it looked like after:
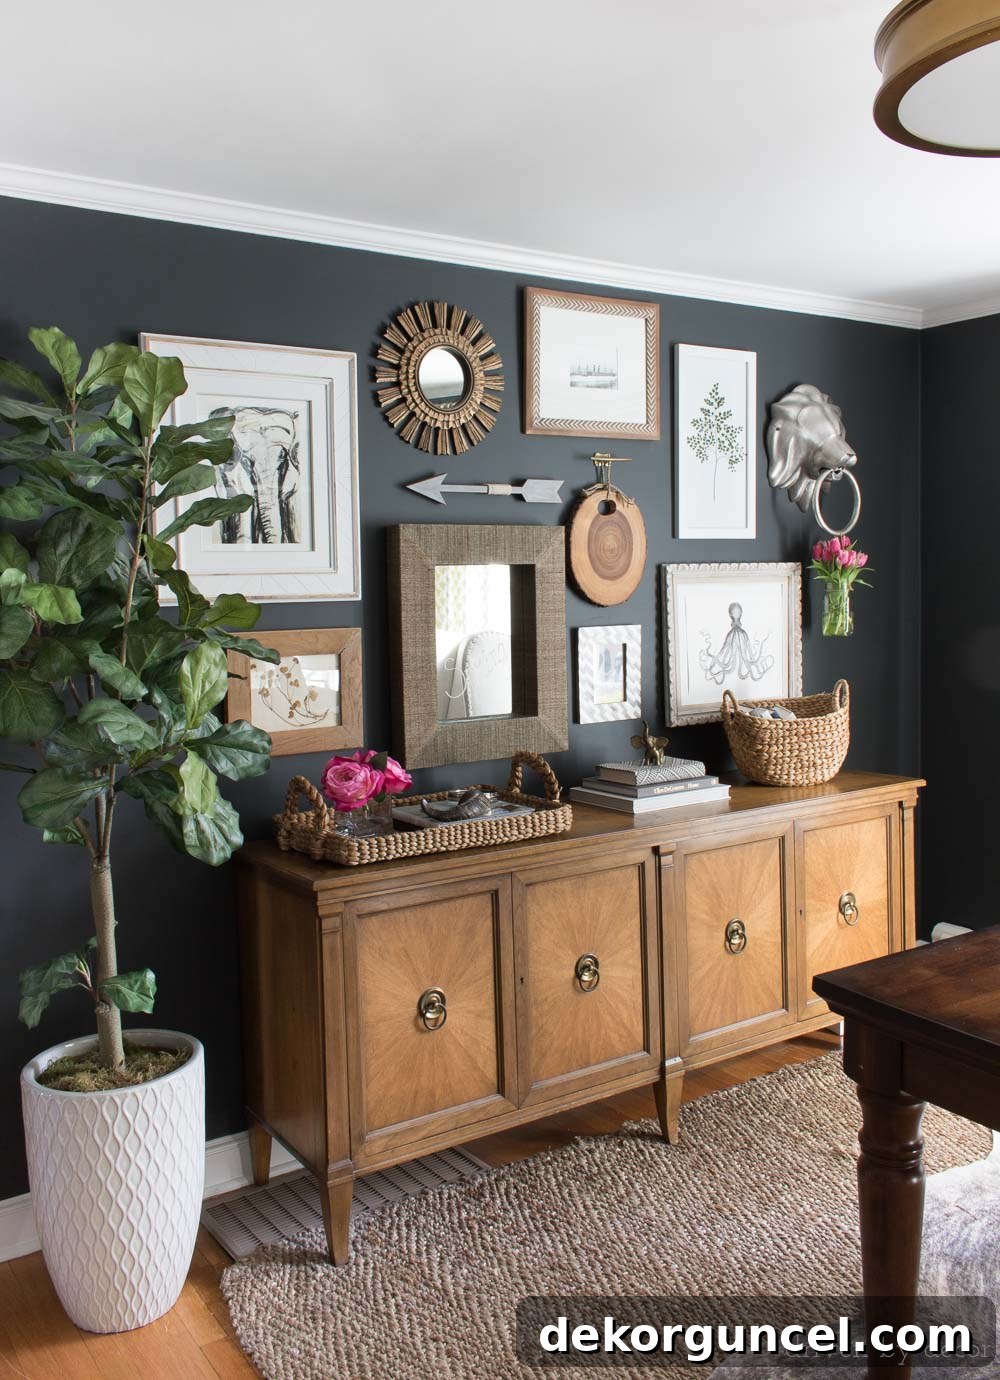
The creation of the gallery wall was just one element of a broader transformation in the home office. Significant changes included painting the walls a dramatic Benjamin Moore Nightfall, a sophisticated hue that provided the perfect backdrop for the eclectic art arrangement. We also introduced a new credenza, a fantastic find from Craigslist, which added both style and functionality to the space. What truly speaks volumes about the success of this project is its longevity; the gallery wall remained exactly as it was for the entire duration of our stay in that home, with only the decor on the console occasionally changing. For someone who loves to constantly refresh and rearrange, this consistency is a testament to a truly timeless and well-executed design. For more pictures and details, you can explore this post on our home office.
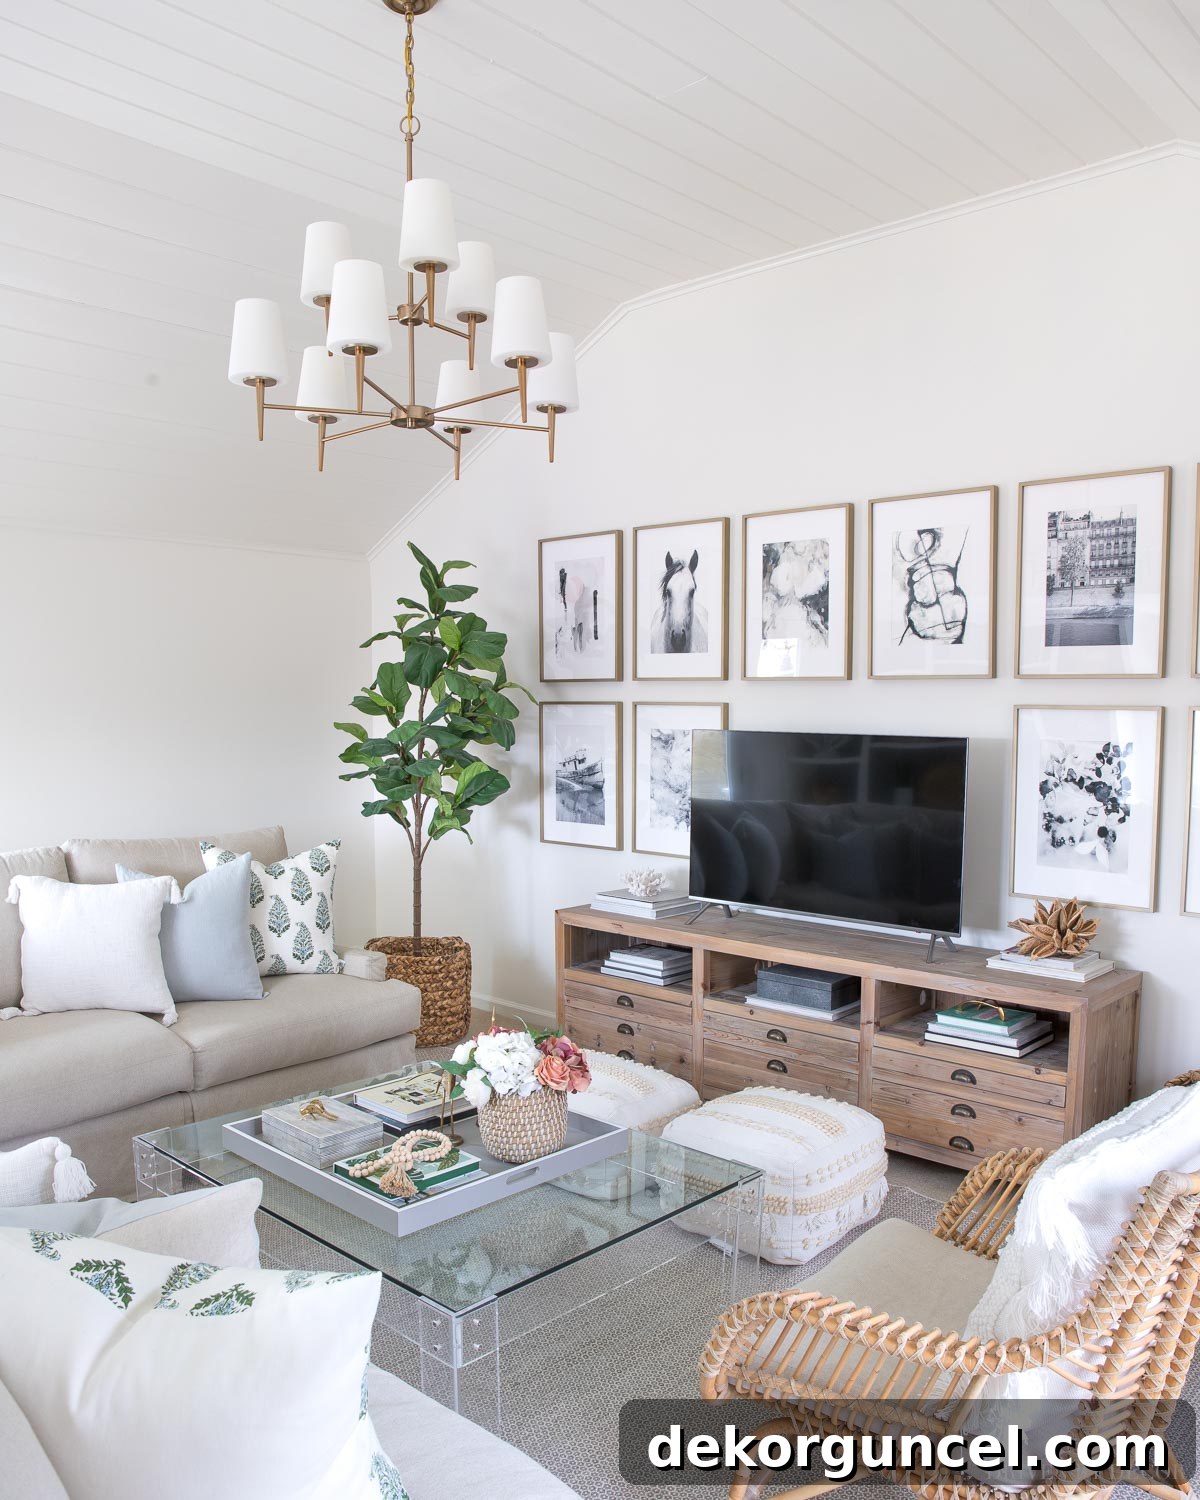
Inspired by the success of the home office, a year later, I decided to tackle another blank canvas: a large wall in our family room. This time, I opted for a more structured approach, envisioning a tailored grid arrangement of art to create a cohesive and impactful feature. This choice was a deliberate departure from the more organic feel of the office gallery wall, showcasing the versatility of art displays in different settings. The goal was to elevate a functional space, particularly the area around our television, into a captivating focal point. The transformation from this:
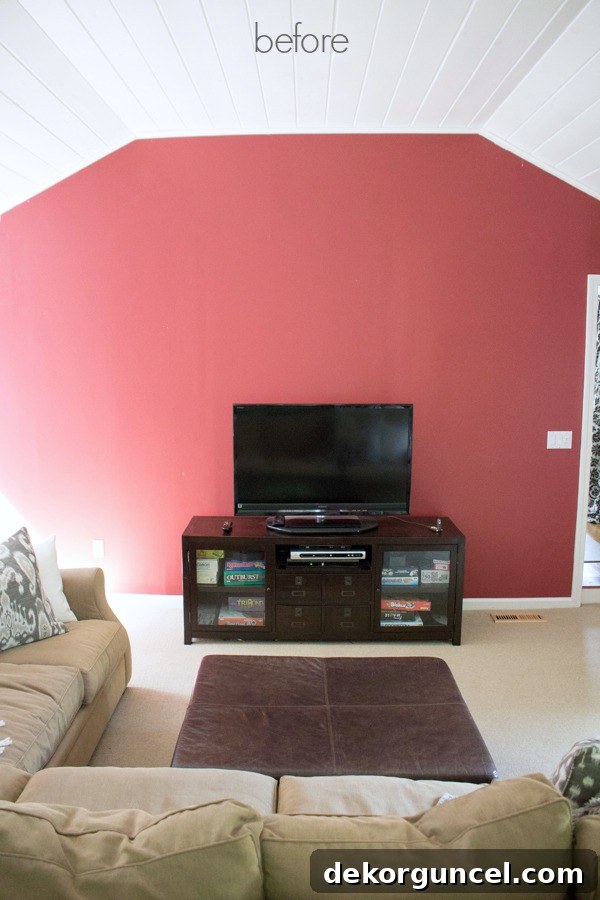
into a statement-making feature wall:
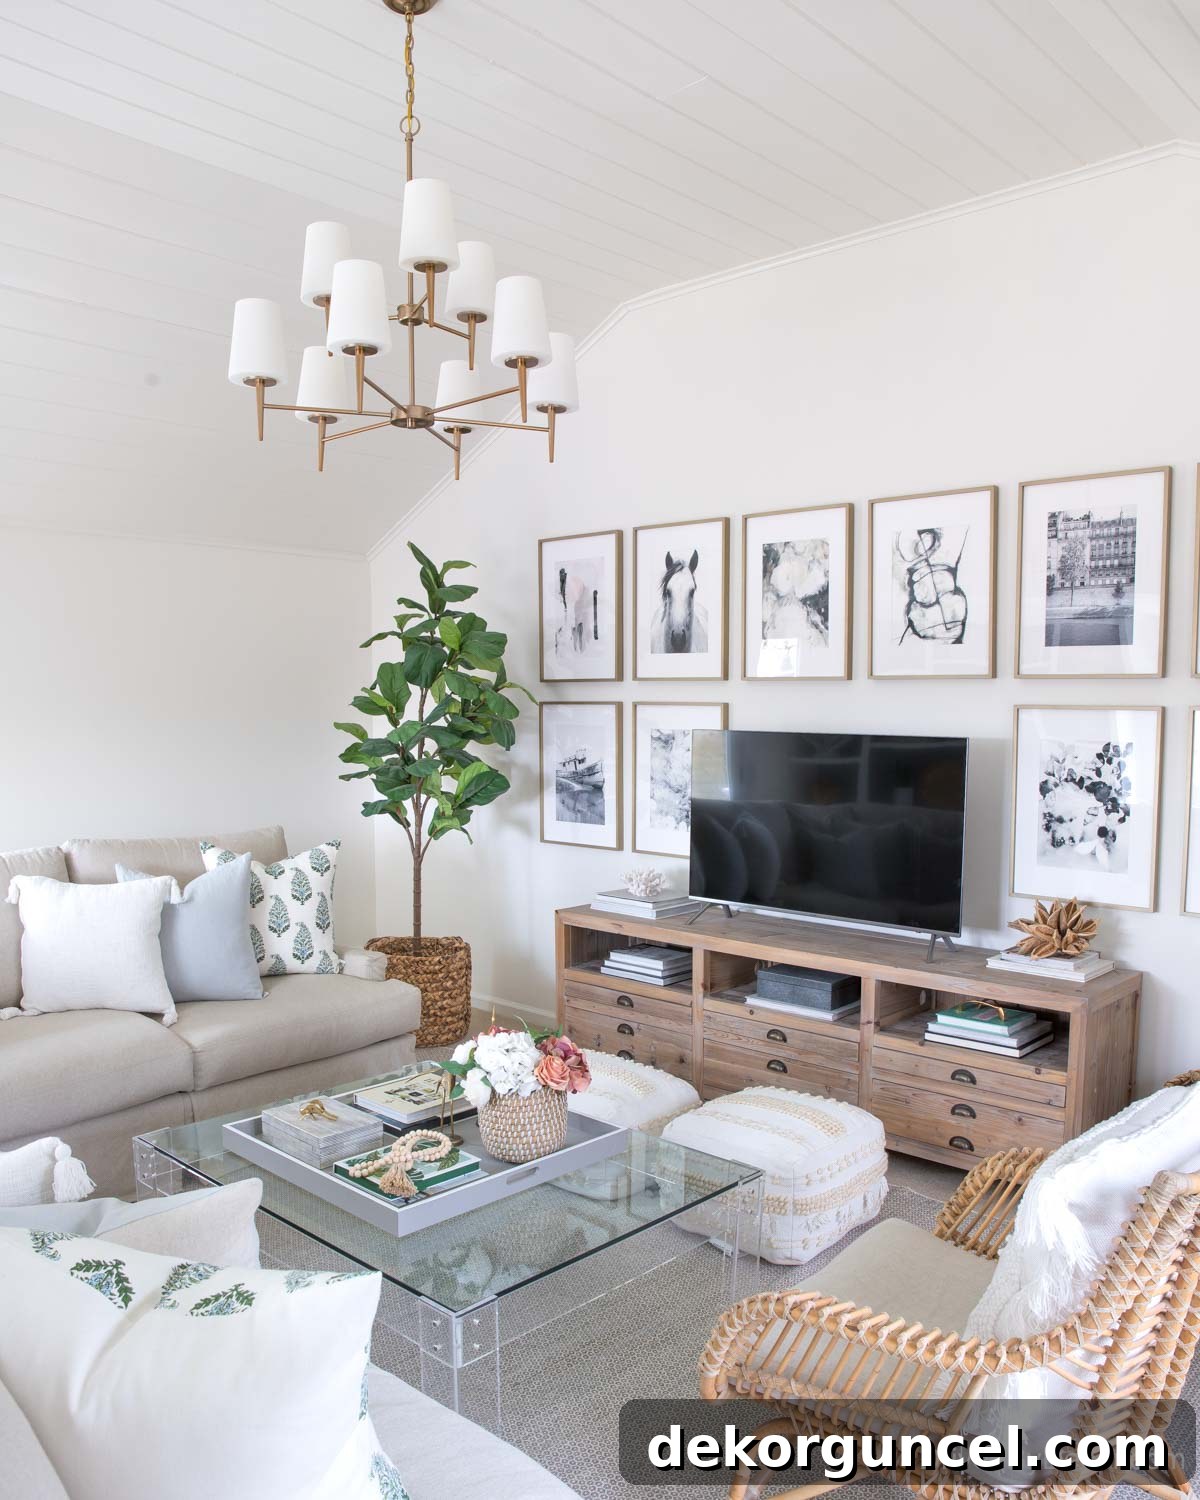
Sources: TV console (similar) | Chandelier (satin bronze) | White tasseled pillow cover | Blue linen pillow cover | Green & blue block print pillow cover | Faux fiddle leaf fig tree | Rug | Pair of floor poufs | Art prints (details in this post) | Acrylic coffee table (similar) | Coffee table tray (28″ square) | Black and white striped box (on coffee table) | Brass cricket (on coffee table) | Wood beads | Basket planter | Rattan chair
I was incredibly pleased with the outcome, especially considering that all the elements for this family room makeover were ordered at the eleventh hour as part of a One Room Challenge. There was no backup plan, making the successful integration of each piece even more rewarding. Many of you who regularly visit the blog have seen this space evolve over time, but for new readers, I highly recommend exploring the complete before-and-after transformation of our family room here, which includes a comprehensive source list to guide your own design endeavors.

From Drab to Fab: Our Master Closet’s Functional & Stylish Makeover
Coming in at number three on my list of favorite makeovers is a project that wins the award for best functional improvement. Our master bedroom closet was a constant source of frustration. While it offered a decent amount of square footage, its design was incredibly inefficient. A bulky center divider, coupled with two sets of bifold doors, rendered approximately one-third of the closet practically inaccessible. Adding to the daily annoyance, the closet door would consistently collide with our bedroom door if both were opened simultaneously. It was a space screaming for an intelligent, accessible, and stylish solution.
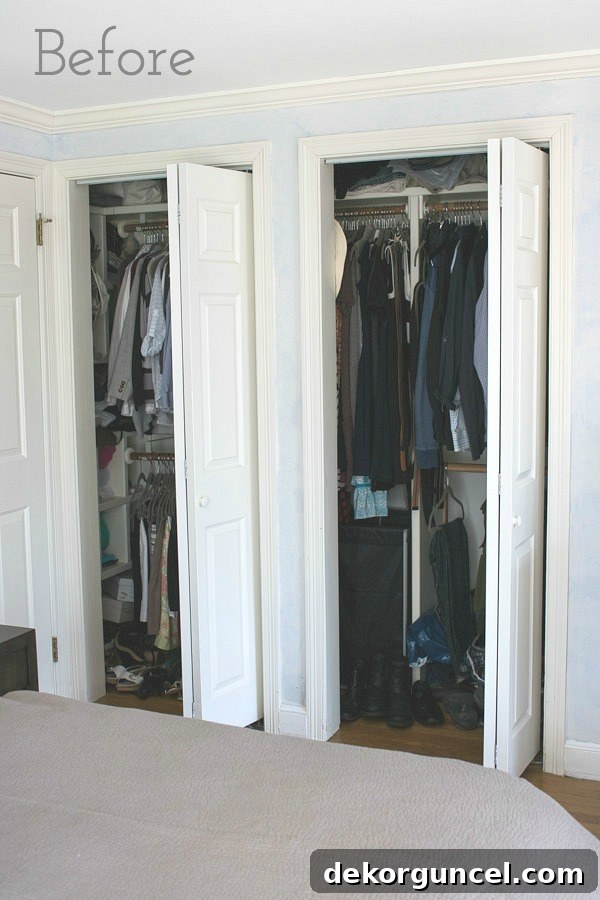
As part of the One Room Challenge makeover for our master bedroom, I enlisted my contractor to remove the obstructive center divider and the cumbersome bifold doors. This immediately opened up the space, making it entirely usable. To replace the traditional doors, I opted for a more elegant and flexible solution: IKEA drapes hung on a stylish brass rod. In a clever DIY touch, the “brass rod” was actually a plumbing pipe that I spray-painted, demonstrating how readily available materials can be transformed into chic design elements. The result was a glamorous new closet that became 100% accessible and visually appealing:
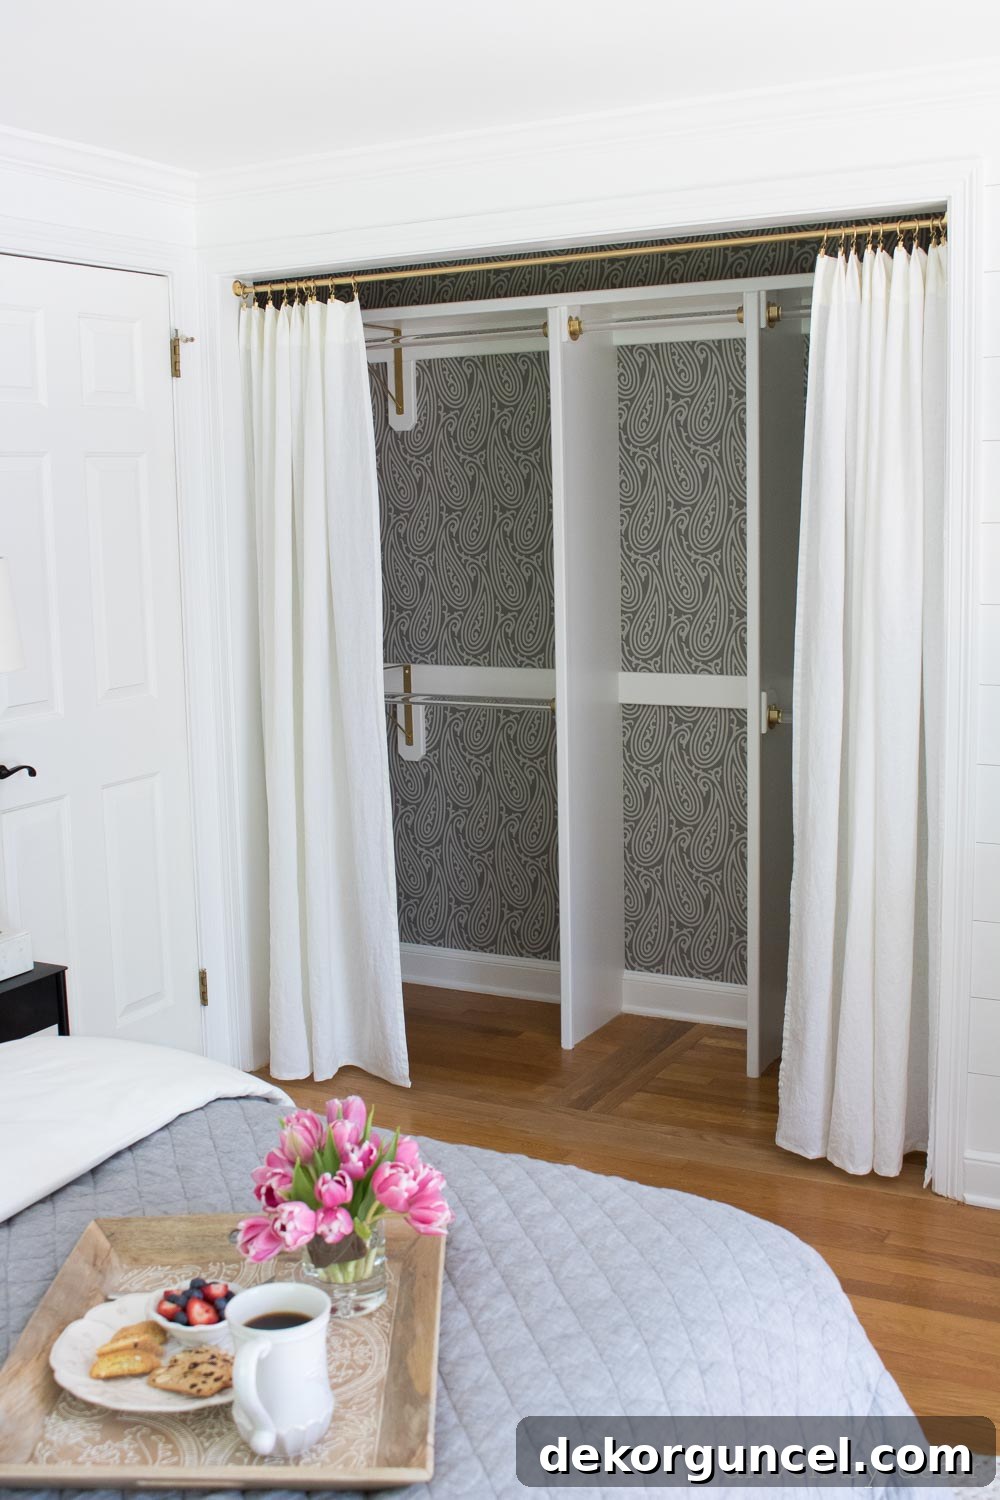
I’ve frequently been asked about my experience with replacing traditional doors with curtains, and after several years of living with this setup, I can unequivocally say I absolutely love it. The practicality is unmatched; 95% of the time, the drapes remain open, offering effortless access to our belongings without any doors clanging or getting in the way. When guests are visiting, it takes mere seconds to draw the curtains closed, instantly creating a tidy and polished look. This innovative solution not only solved our functional problems but also added a touch of soft elegance to the bedroom. If you missed the initial reveal, you can see my full One Room Challenge bedroom makeover here, and a more detailed post about my closet transformation, including links to each piece used, can be found here.

Bidding Farewell to Dated Tile: Kitchen & Fireplace Transformations
Our home, when we first purchased it, was a treasure trove of dated tile, and two particular instances stand out in my memory for their dramatic transformations. First, the kitchen harbored a yellow tiled backsplash adorned with quaint, if not slightly kitschy, farm animals and flowers. While a tiny part of me found the cow somewhat endearing, the overall “country vibe” simply did not align with my design aesthetic. Adding to the imperative for change was a critical functional issue: this section of the kitchen completely lacked electrical outlets, a significant inconvenience given our desire to establish a dedicated coffee station there. It was time to say a firm goodbye to the old tile backsplash and countertops, embarking on a project to create both beauty and utility.
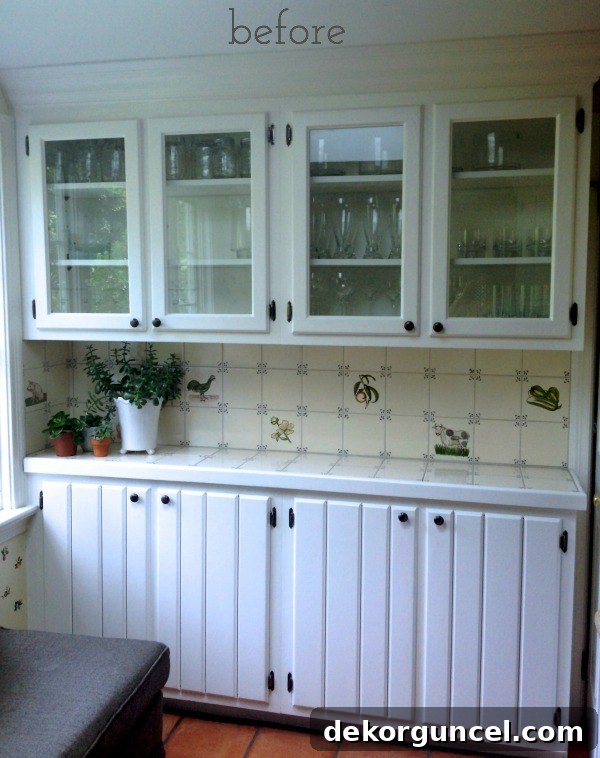
Our goal for this kitchen corner was a budget-friendly yet impactful makeover. Instead of re-tiling the backsplash, we opted for the simple and cost-effective solution of dry-walling the area, as there was no sink or risk of water damage in this specific spot. For the countertops, we chose IKEA butcher block, which my contractor expertly cut to size. I then personally sealed it with Waterlox, a durable finish that protects the wood and enhances its natural beauty. This practical approach allowed us to create a charming and highly functional coffee station, complete with much-needed electrical outlets, transforming a dated eyesore into a delightful feature:
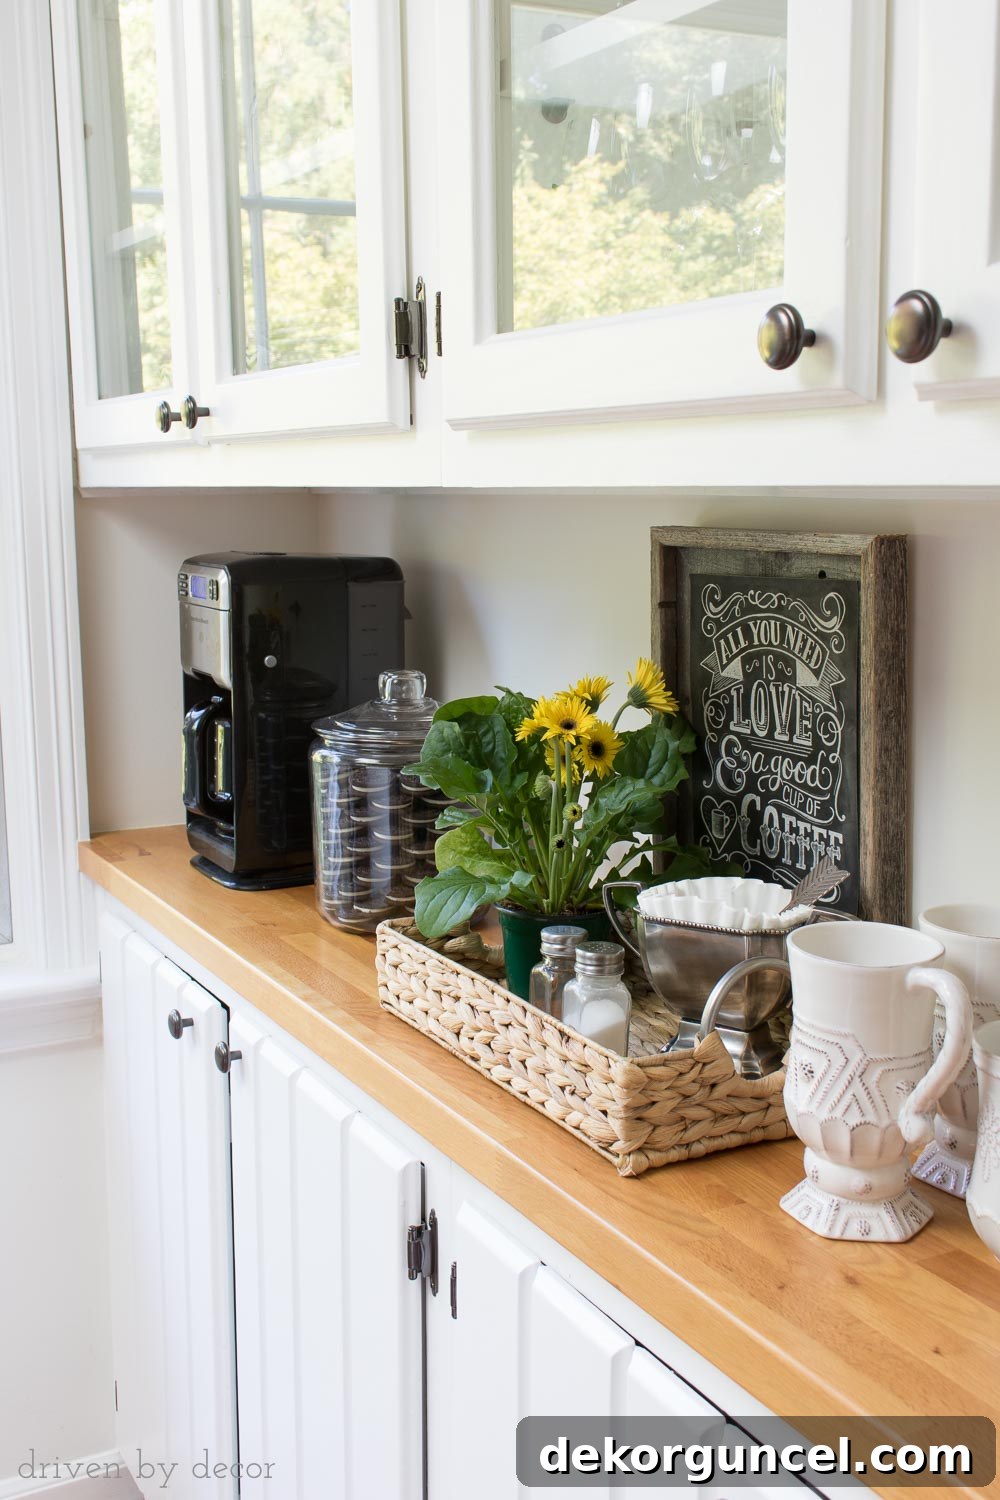
Coffee bar sources: Coffee chalkboard print | Glass lidded jar | Heart shaped coffee scoop
Of course, this small coffee station makeover was just the beginning of our kitchen’s journey. A few years later, we embarked on a full kitchen remodel, and I couldn’t be more in love with our current kitchen! If you missed its grand reveal, you can explore our stunning remodeled kitchen here for more inspiration.
The second significant tile removal project took place in our living room, centered around the fireplace. This decision was actually harder to make, as I had a certain affection for the existing (though inexpensive reproduction) delft tile. However, it simply did not harmonize with the evolving aesthetic of the room, creating a visual disconnect that I ultimately couldn’t ignore. Once the fireplace makeover project, which also included redesigning the mantel, was complete, any lingering regrets vanished. The transformation from this:
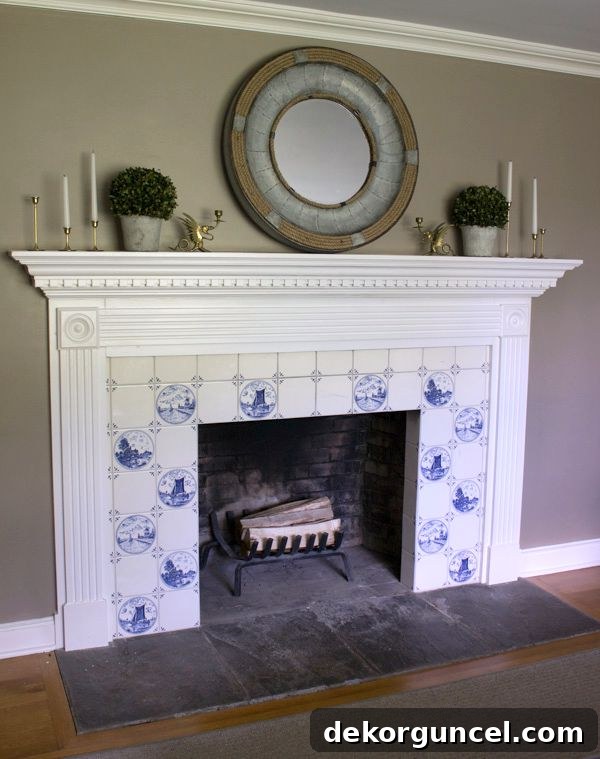
to this:
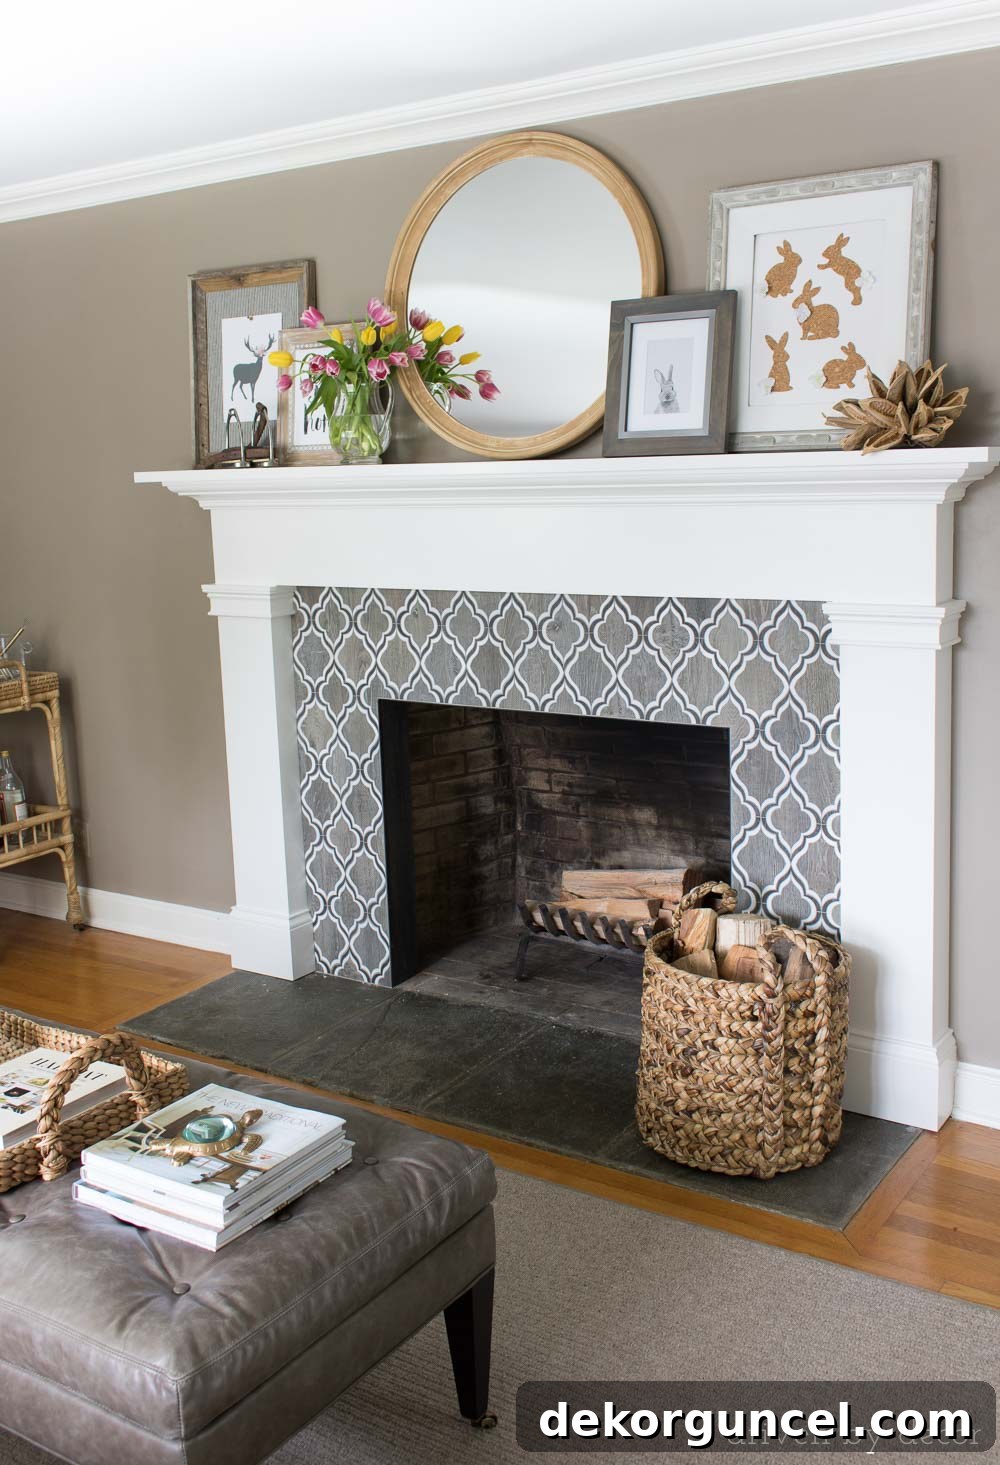
I couldn’t be happier with the final result. The new patterned tile surround and redesigned mantel seamlessly integrate with the rest of our living room decor, creating a cohesive and inviting focal point. The fireplace now feels perfectly at home within the space, elevating the entire room’s ambiance. If you’re interested in diving deeper into our fireplace makeover, see this post. For a comprehensive tour of our living room and details on the new paint color (Anew Gray), click here.

A Dream Come True: The Joyful Reveal of a Blue & White Teen Bedroom
I’m concluding my list of favorite makeovers with a project that holds a special place in my heart, not just for its stunning aesthetic outcome (though I absolutely adore it!), but for the sheer joy and excitement surrounding its reveal. Several years ago, I undertook a complete redesign of my oldest daughter’s bedroom. While she had a say in certain elements, she graciously entrusted me with many of the design decisions, allowing me to plan a grand surprise reveal. This meant she was “kicked out” of her room for several weeks, with all progress carefully kept under wraps. The last time she saw her room, it was a blank canvas, looking like this:
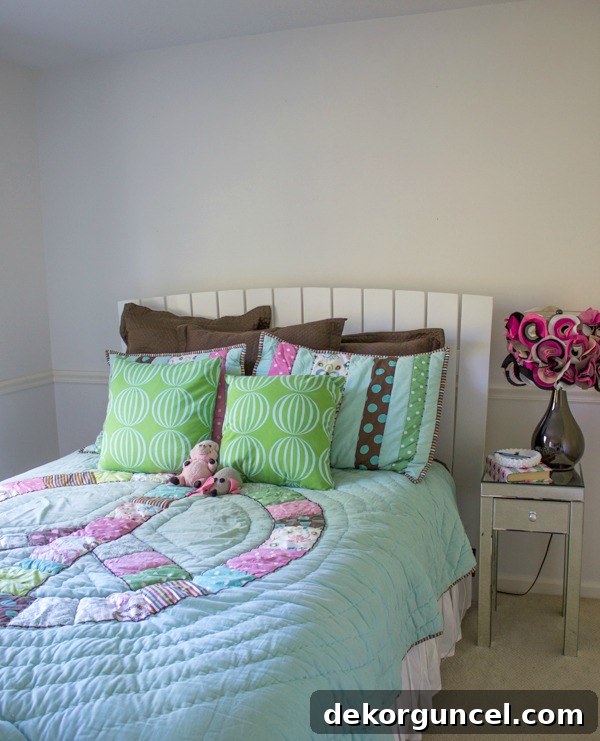
and when she returned to it, it looked like this:
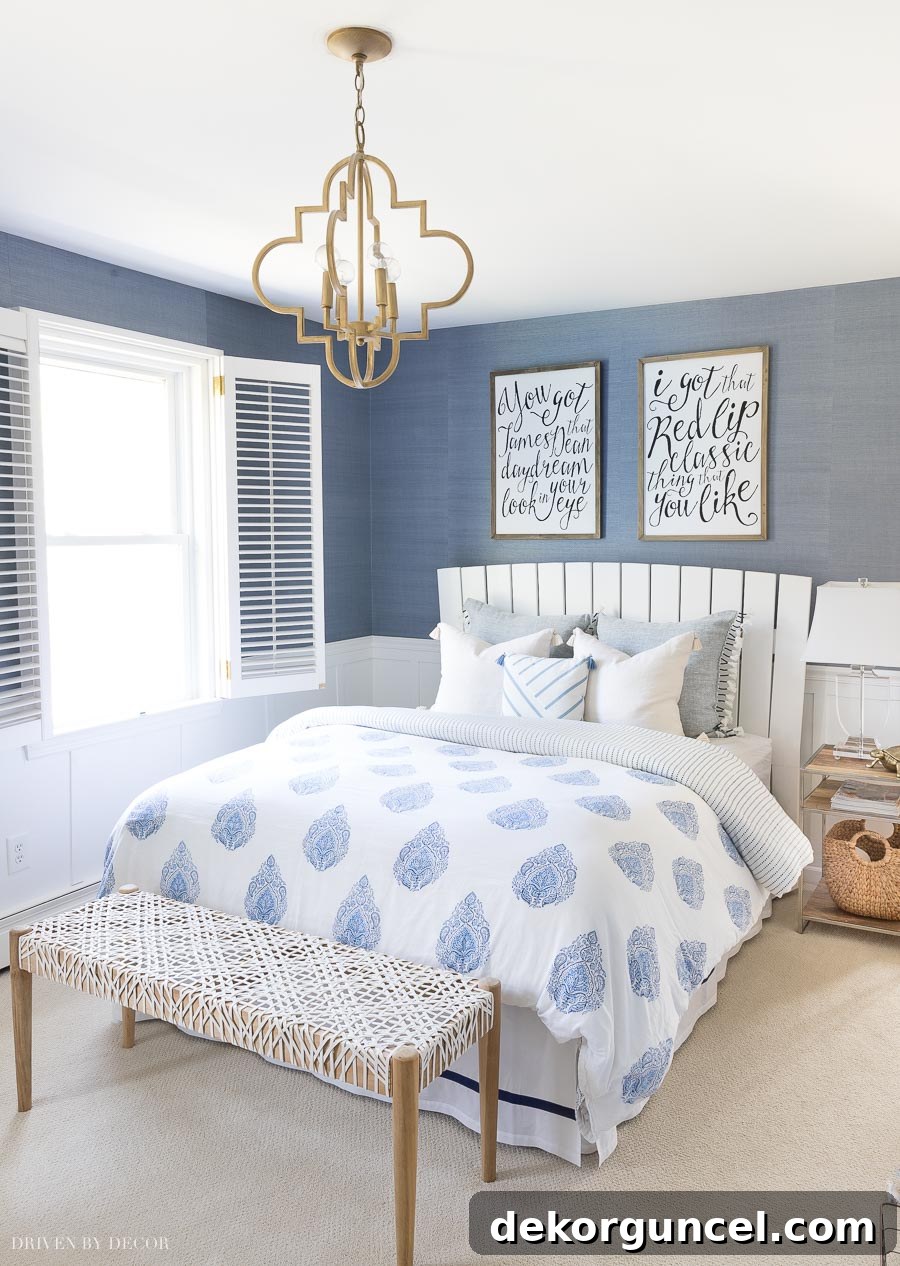
Discover more details and sources for my daughter’s room makeover in the linked posts.
Her reaction was absolutely priceless, making the entire makeover process an unforgettable and incredibly fun experience. Beyond the obvious redecorating, the project involved several specific enhancements. My favorite among these was the ingenious transformation of her otherwise plain, flat closet doors. Instead of leaving them as standard, uninspired surfaces, I reimagined them:
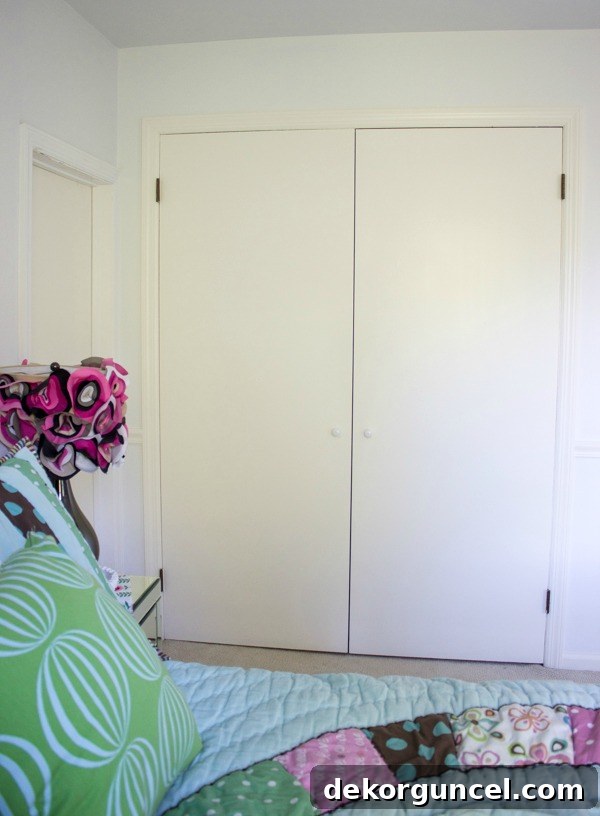
into elegant paneled doors, thoughtfully integrated with inset cork boards. This brilliant design provides the perfect spot for her to pin and repin photos, notes, and mementos without consuming valuable wall space with a traditional bulletin board. It’s a functional and stylish solution that perfectly suits a teenager’s evolving needs and aesthetic preferences.
You can get all the details of this specific closet door makeover in my post on creative closet door ideas.
So there you have it—a deep dive into my all-time favorite “before” and “after” makeovers, each a testament to the transformative power of design and a passion for creating beautiful, functional spaces. From overcoming structural challenges to embracing creative solutions, these projects highlight how thoughtful renovations can truly elevate a home. I’d love to hear your thoughts: which one of these transformations resonates with you the most?
Update!: Since the time of this post, we embarked on a master bathroom addition that exceeded every expectation I had! It truly turned out better than I had ever dreamed, combining luxurious comfort with impeccable style. Check out our master bathroom reveal here for stunning photos and a complete list of sources, showcasing yet another rewarding home transformation!
