
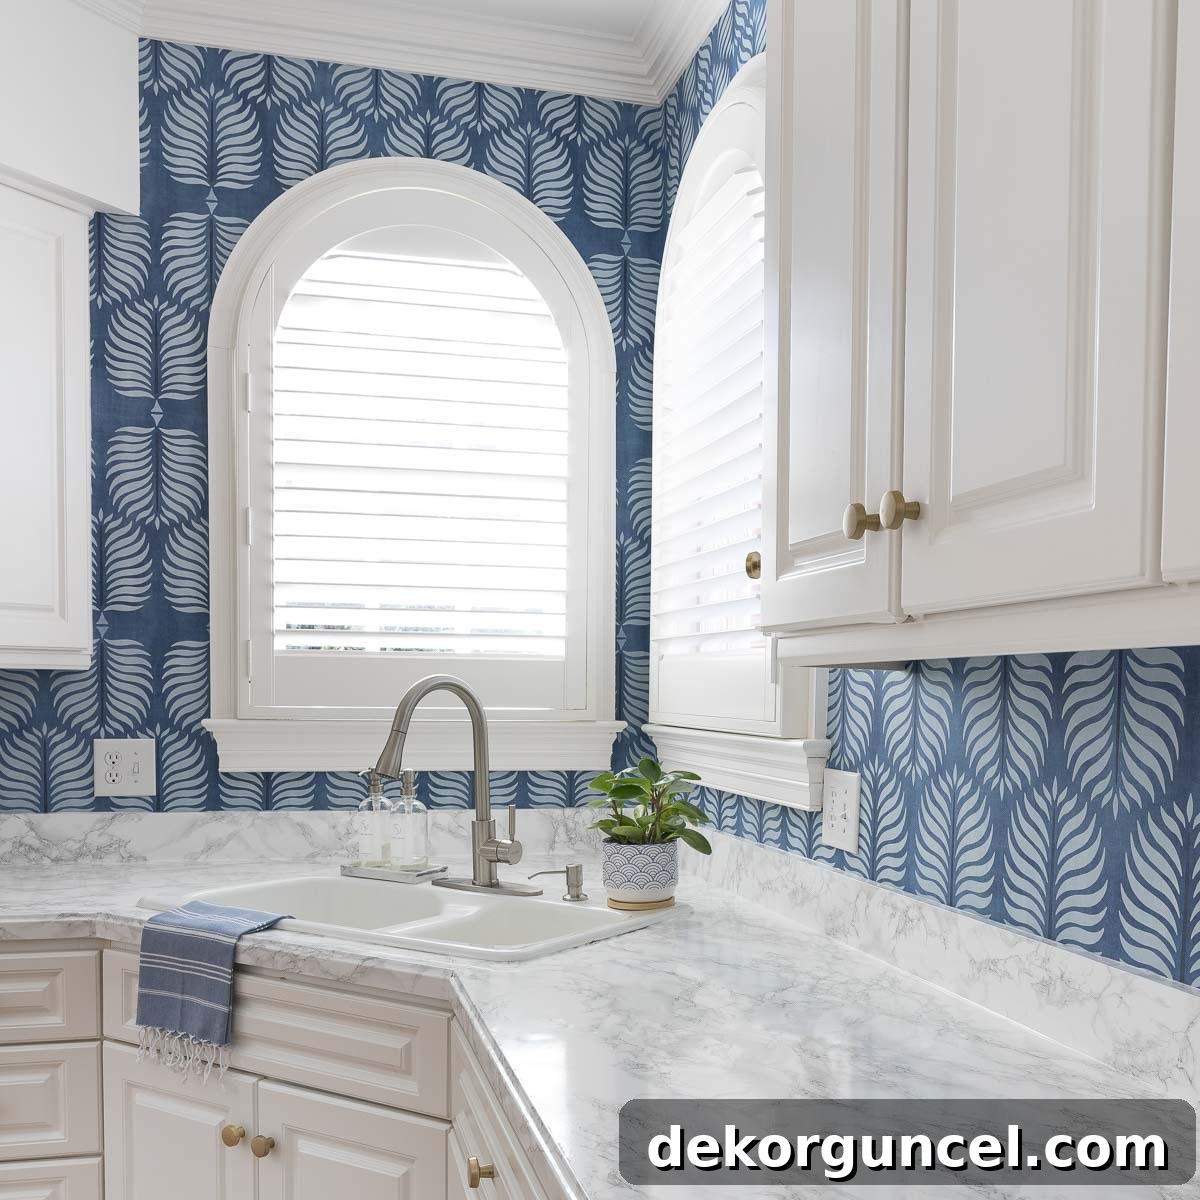
Envisioning a stunning kitchen backsplash often brings to mind luxurious tile or exquisite natural stone. While undeniably beautiful, these materials frequently come with a hefty price tag, complex installation processes, and a sense of permanence that can be daunting. But what if there was a brilliantly simple, remarkably affordable, and incredibly stylish alternative that you might have overlooked? Enter wallpaper. With just a single, often leftover, roll of patterned wallpaper, you can utterly transform your kitchen, infusing it with vibrant color, captivating texture, and a unique focal point – all without the financial strain, the messy grout work, or the long-term commitment associated with traditional tiling.
In this comprehensive guide, I’ll reveal the exact steps I took to achieve this remarkable transformation, detailing how I made the wallpaper entirely water-resistant and created a surprisingly durable, high-end look that has gracefully withstood the test of time for years. Whether your goal is a quick, impactful refresh, a temporary aesthetic upgrade before a more extensive renovation, or simply a desire to inject more personality and charm into your culinary space, this project stands as compelling proof. It demonstrates that you can indeed have impeccable style, practical function, and impressive affordability, all encapsulated within a single roll of wallpaper. Join me as we explore this ingenious approach to a kitchen update! (This post includes commissionable links; for more information, please refer to my full disclosure statement {here})
The Before & The Brilliant Decision to Embrace Wallpaper
When we first acquired our home, the kitchen, much like many other rooms throughout the house, was steeped in a past era. It featured dated, somewhat stained wallpaper that, while perhaps fashionable once, now detracted from the room’s potential. The original wallpaper contributed to a heavy, somewhat drab atmosphere, making the space feel smaller and less inviting than it truly was.
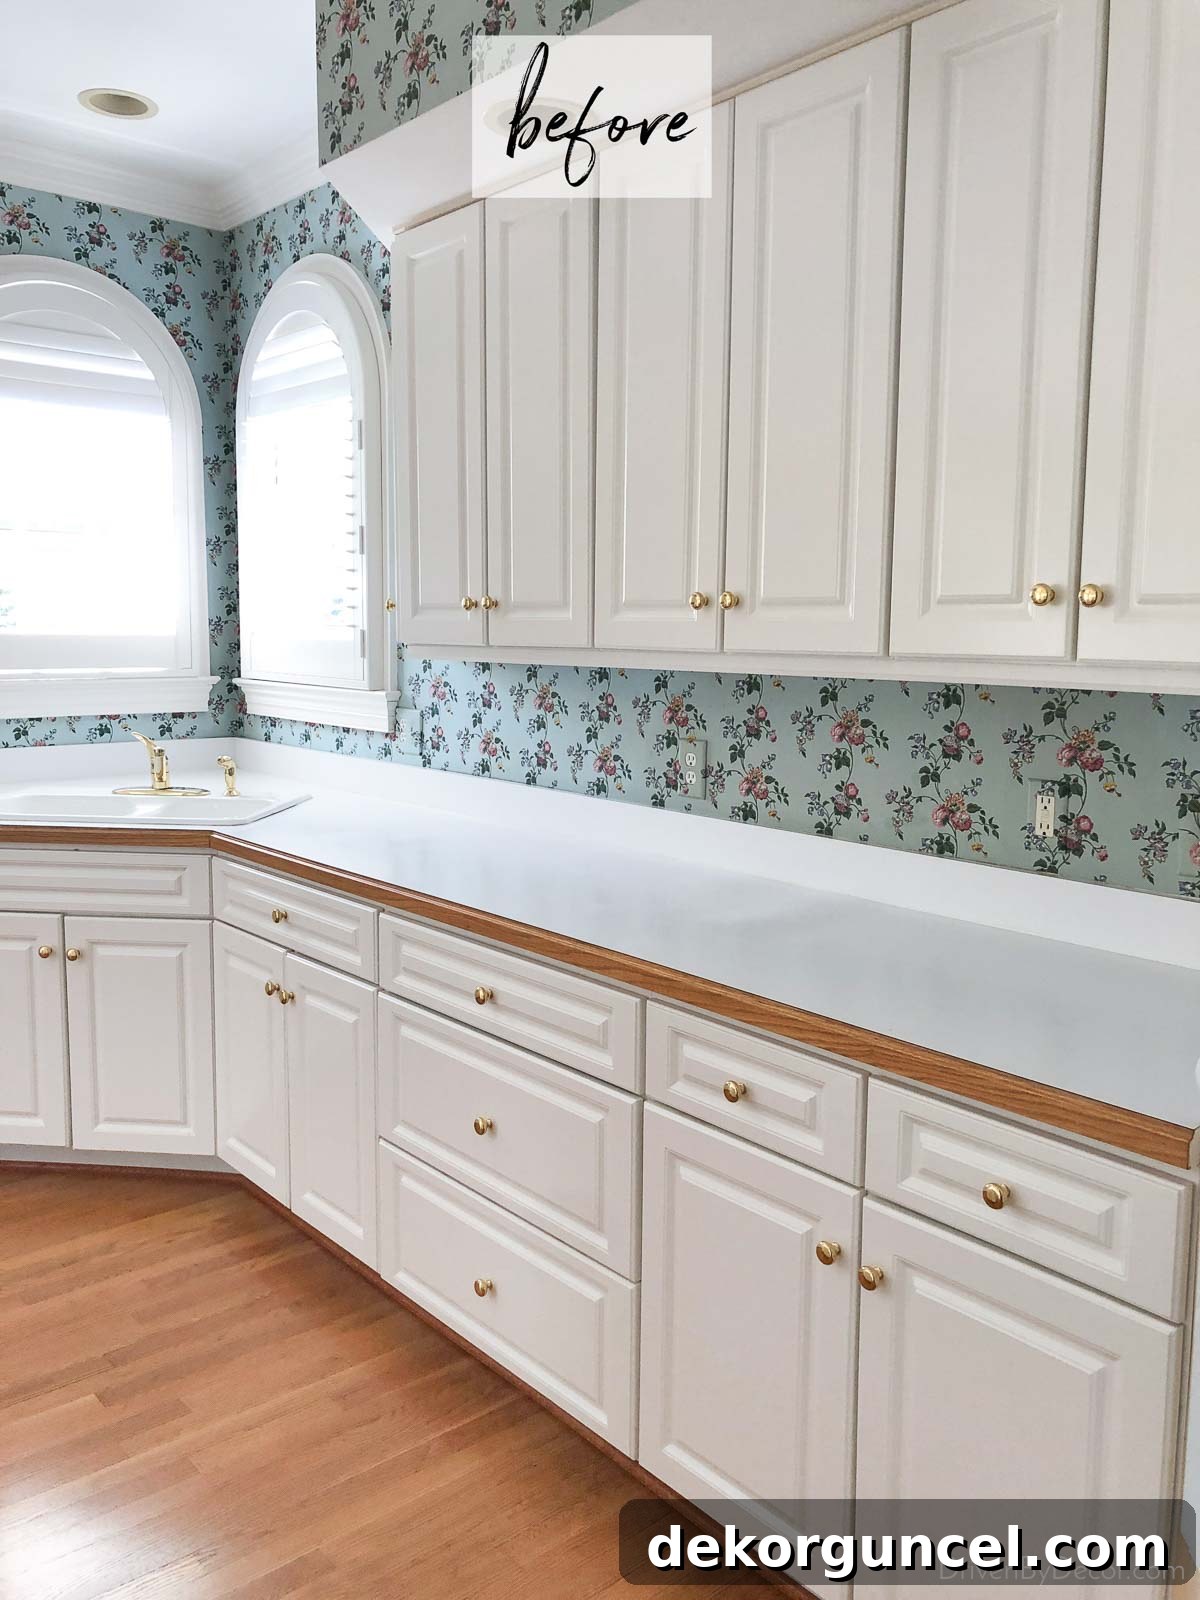
The initial step towards modernizing our kitchen involved meticulously removing this old wallpaper. This task, while somewhat labor-intensive, delivered an immediate and dramatic update, instantly brightening the space. (For a detailed, step-by-step guide on how to efficiently remove wallpaper, you can refer to my dedicated post here.) However, after the initial euphoria of a clean slate subsided, a new challenge emerged. The expansive, freshly painted white walls, though pristine, began to feel excessively bright and undeniably sterile. The kitchen, once cluttered with old patterns, now felt devoid of personality, lacking the warmth and visual interest that transforms a house into a home.
It was at this juncture that inspiration struck. I happened to have some of {this captivating patterned blue wallpaper} remaining from a previous decorating project. Gazing at the stark white backsplash area, a thought sparked: why not utilize this beautiful leftover roll to inject some much-needed character and warmth? The idea of transforming the bland backsplash into a vibrant focal point, without the commitment or expense of tile, was too appealing to resist. This small roll of wallpaper held the potential to be a powerful, budget-friendly design solution, breathing new life into our kitchen’s heart.
Seamless Wallpaper Installation: Tips for a Stunning Backsplash
For those new to the art of wallpapering, tackling a kitchen backsplash offers an excellent entry point. Unlike entire rooms that demand long, continuous drops of wallpaper and intricate pattern matching across vast surfaces, a backsplash typically involves shorter pieces. This makes it a more manageable project for beginners, allowing you to hone your skills without the daunting scale of a larger area. However, every project has its unique challenges, and for me, it was the arched windows in my kitchen. These architectural details truly put my wallpapering expertise to the test, requiring meticulous cutting and careful alignment to achieve a flawless finish.
If you find yourself facing a similarly tricky installation, or simply want to ensure a smooth process, I highly recommend consulting my comprehensive guide on wallpaper installation tips. It’s packed with invaluable advice, clever tricks, and practical strategies to help you navigate common obstacles and achieve professional-looking results. From preparing your walls and measuring accurately to handling corners and patterns, these insights will empower you to wallpaper with confidence.
Once the final piece of wallpaper was meticulously applied, the transformation was nothing short of delightful. The immediate impact was profound; the previously sterile white space was instantly imbued with a playful yet sophisticated dose of color and pattern. The chosen blue wallpaper not only added visual depth but also created a stunning contrast that made my crisp white cabinets and elegant windows truly pop. The backsplash, once an overlooked area, became a captivating focal point, drawing the eye and adding an undeniable layer of charm and personality to the entire kitchen.
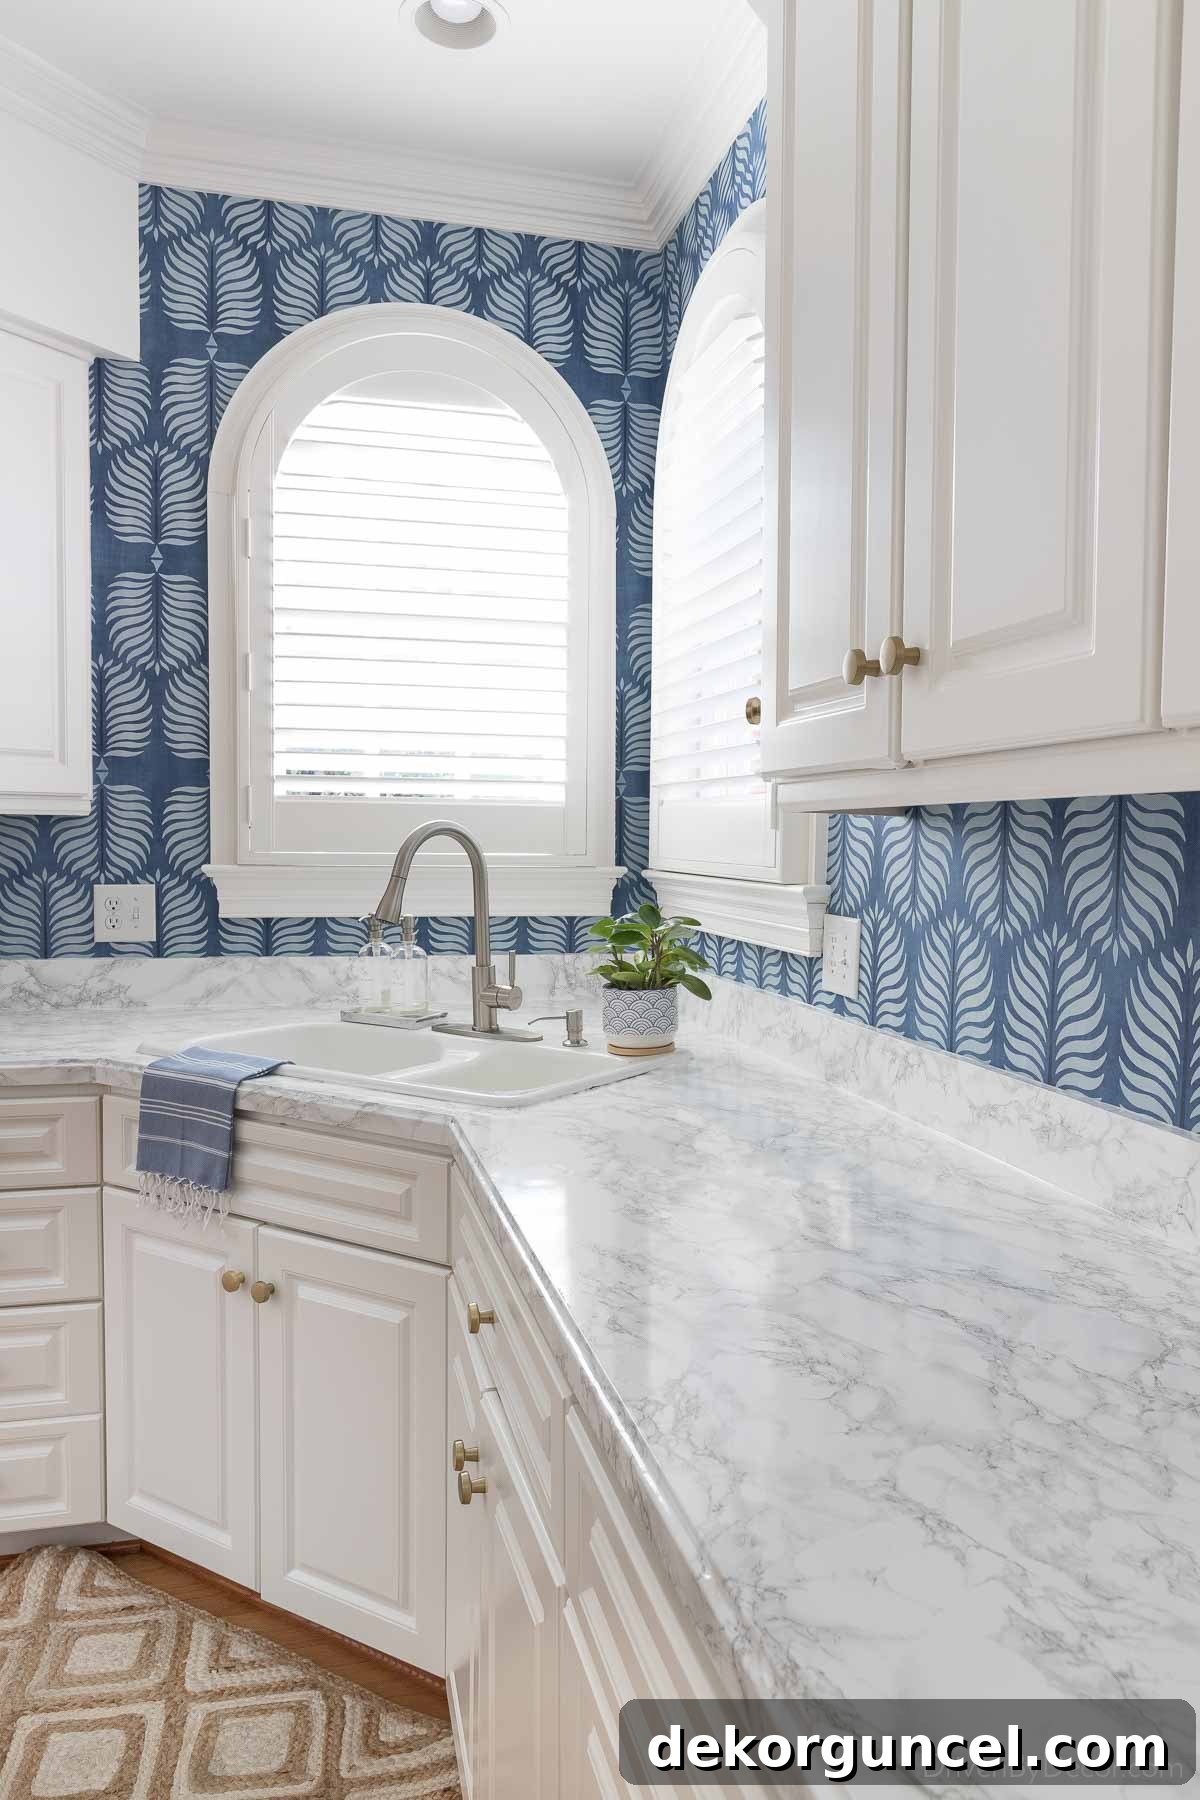
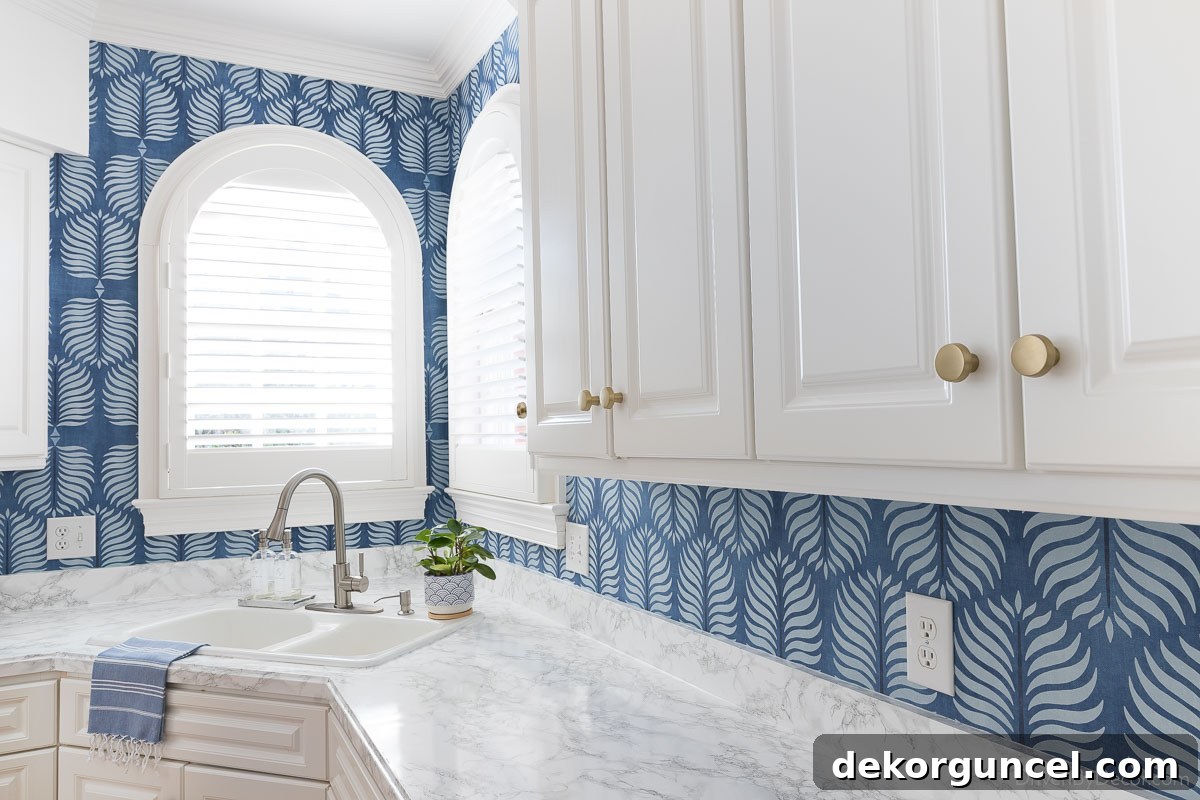
Remarkably, this entire design upgrade was achieved using just a single roll of wallpaper! This illustrates a crucial point: a kitchen backsplash is an ideal location to indulge in a truly spectacular wallpaper that might otherwise be prohibitively expensive for an entire room. When only a small quantity is needed, you can justify splurging on a high-end designer pattern or a luxurious texture that would require multiple costly rolls for a larger space. This allows you to bring a touch of opulence and distinctive style into your home without breaking the bank, transforming a small area into a significant design statement.
Complementary Kitchen Updates: Maximizing Impact on a Budget
While the wallpapered backsplash was a significant transformation, I didn’t stop there. To create a cohesive and fully refreshed kitchen aesthetic, I implemented several other budget-friendly changes that collectively elevated the space without incurring major costs. These thoughtful updates worked in harmony with the new backsplash, creating an overall look that felt custom and intentional.
- Upgraded Hardware and Fixtures: Swapping out the existing cabinet hardware, the kitchen faucet, and the pendant light above the island immediately modernized the room. These seemingly small changes have a surprisingly large impact, acting like jewelry for the kitchen and instantly updating its perceived age and style.
- Marble Contact Paper Countertops: For a fraction of the cost of real marble, I applied marble contact paper to the countertops. This clever solution provided the elegant, luxurious look of natural stone, transforming the utilitarian surfaces into sophisticated design elements, proving that high style doesn’t always demand high expense.
- Painted Soffits: Instead of extending the wallpaper to the soffits, which might have made the space feel more enclosed, I opted to paint them in a fresh coat of Benjamin Moore Simply White (flat finish). This strategic choice helped to visually expand the upper portion of the kitchen, making the entire space feel significantly airier and more open, connecting seamlessly with the white cabinetry and enhancing the overall brightness.
Each of these updates, undertaken with a keen eye for cost-effectiveness and maximum visual impact, contributed significantly to the kitchen’s new identity. They demonstrate how a series of small, smart decisions can culminate in a dramatic transformation that feels both luxurious and entirely achievable on a practical budget. You can delve into all the intricate details of these and other budget-savvy kitchen renovation ideas in my dedicated post on kitchen remodel ideas on a budget.
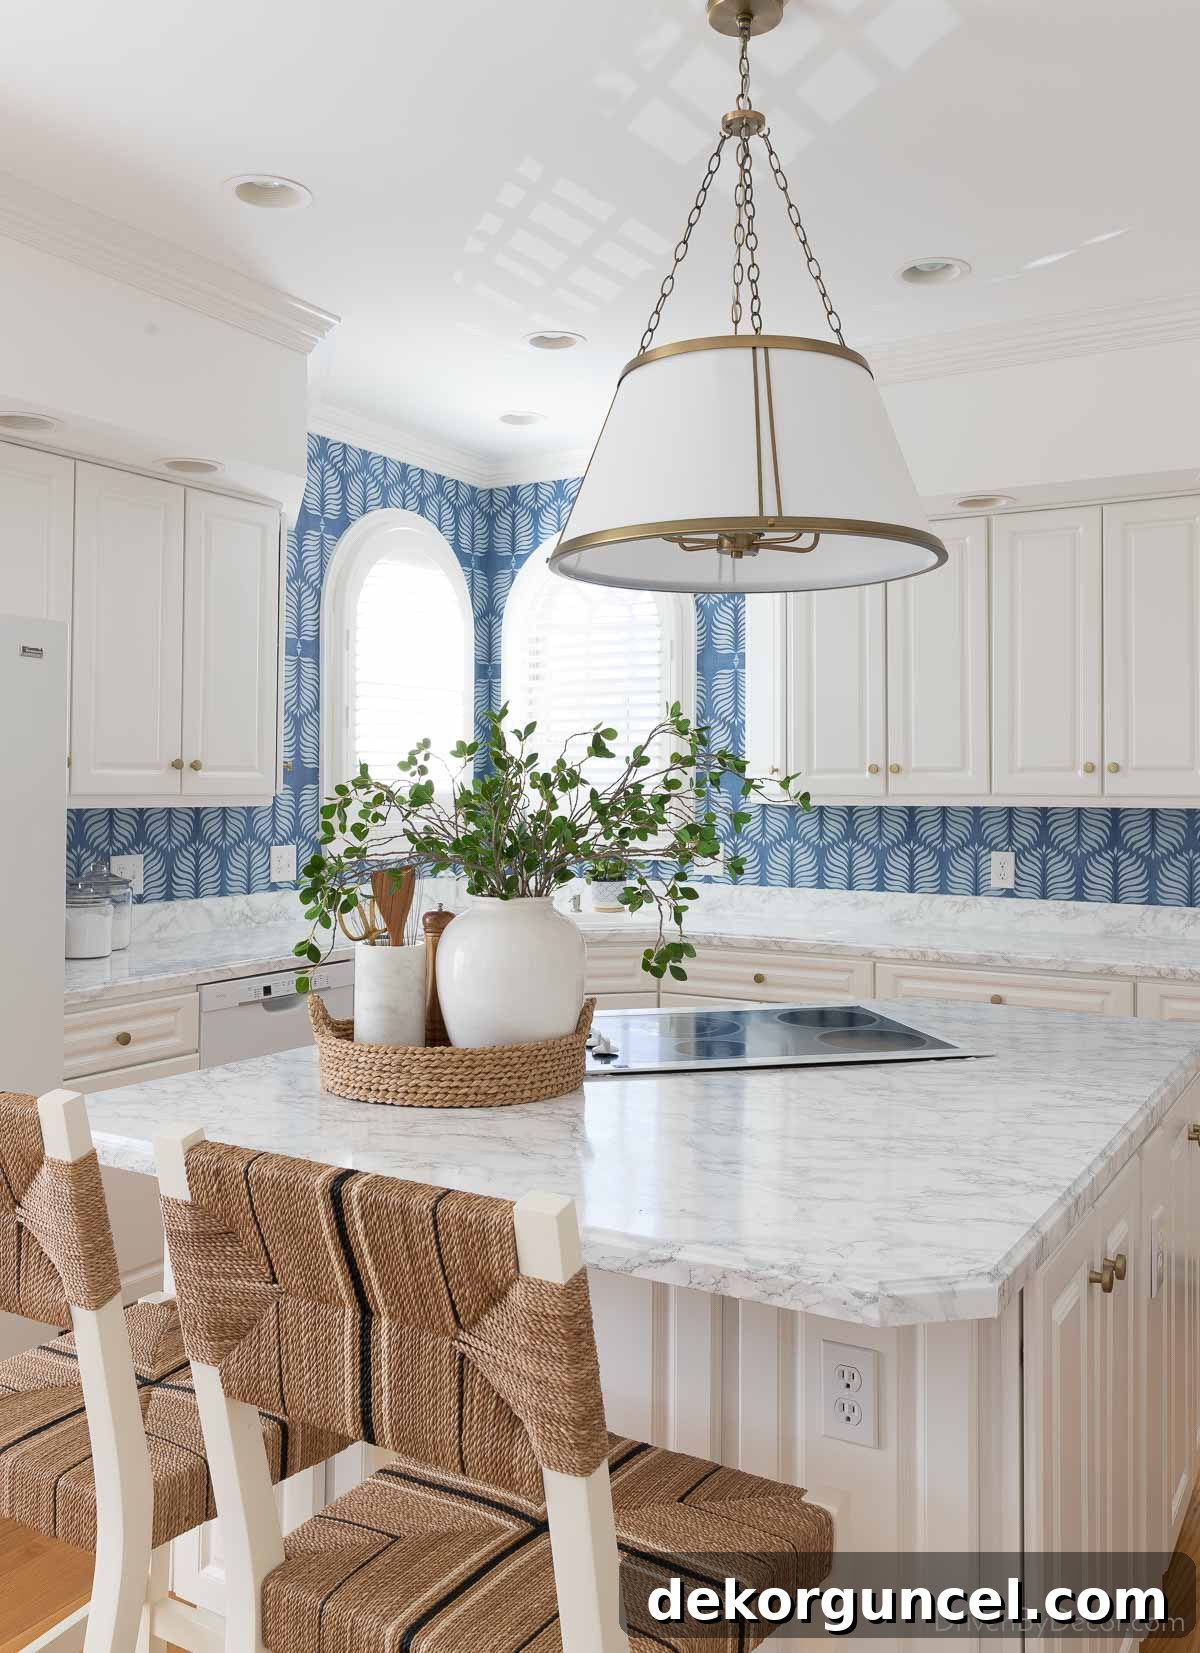
Sources: Island pendant | Round woven tray | Faux leafy branches | Utensil holder
Ensuring Longevity: How to Protect Your Wallpaper Backsplash
The secret to successfully integrating wallpaper into a high-moisture, high-traffic area like a kitchen backsplash lies in proper protection. While many wallpapers are inherently durable, adding a protective layer is crucial to ensure it withstands splashes, steam, and everyday wear without damage or staining. The good news is, you can use almost any wallpaper you love as a backsplash, provided you apply the right sealant.
For my own backsplash, I opted for a double coat of {this specific flat varnish}. This product is specifically formulated for use on wallpapers in environments prone to water and moisture, such as kitchens and bathrooms. Its specialized composition creates an invisible, robust barrier that seals the wallpaper, making it highly resistant to splashes, spills, and the ambient humidity common in cooking areas. This protective layer ensures that the wallpaper remains pristine and easy to clean, just like a traditional tiled surface.
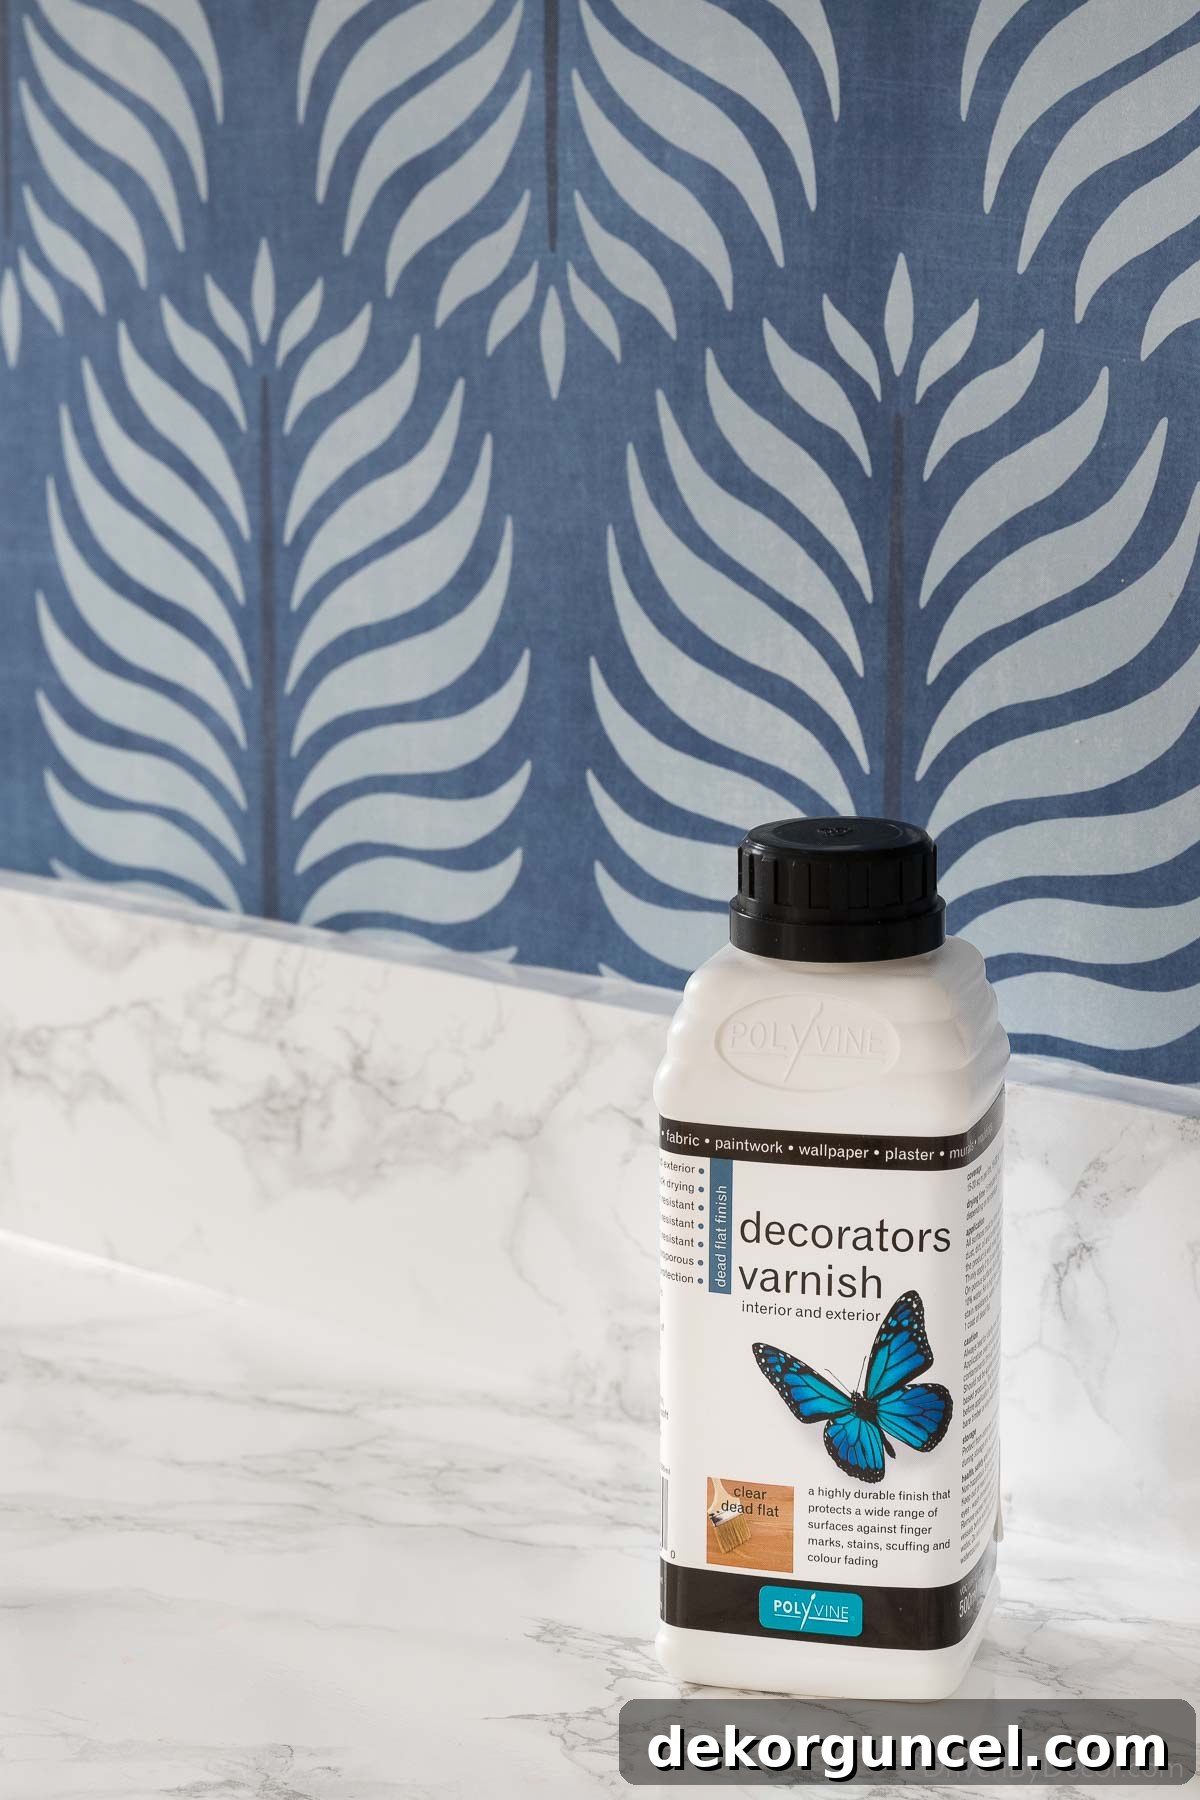
One of the standout features of this particular varnish is its truly dead-flat finish. This is incredibly important, especially when working with matte wallpapers, as it preserves their intended aesthetic. Many varnishes can impart an unwanted sheen or glossy look, altering the wallpaper’s original appearance. This product, however, maintains the wallpaper’s natural texture and finish, ensuring your design vision remains intact. As a critical precautionary step with any coating, always test the varnish on a small, inconspicuous scrap piece of your wallpaper first. This allows you to confirm you are completely satisfied with the finish and its interaction with your specific wallpaper before committing to applying it across your entire backsplash. This simple test can save you from potential disappointment and ensures a perfect result every time.
Update! We enjoyed our beautiful wallpapered backsplash for four full years before embarking on a complete kitchen remodel. During this entire period, it held up absolutely beautifully, looking as good as the day it was installed, without a single stain or sign of wear! This longevity truly speaks to the effectiveness of the protective varnish.
While varnish offers excellent protection, here are a couple of other highly effective options for enhancing the durability of your wallpaper backsplash, each with its own advantages:
- Vinyl Performance Wallpaper: For ultimate built-in durability and moisture resistance, consider vinyl performance wallpaper. Modern advancements mean these wallpapers are no longer limited to utilitarian designs; they now come in a breathtaking array of beautiful patterns and sophisticated textures from renowned brands like Schumacher and Phillip Jeffries (explore their collections {here}). Vinyl wallpapers are inherently more robust and easier to clean, making them a fantastic choice for kitchens and bathrooms. However, a crucial caveat: vinyl wallpaper can be sensitive to high heat. Therefore, it’s advisable to avoid using it directly behind a range or cooktop where intense heat exposure is constant. For these areas, alternative heat-resistant materials should be considered.
- Acrylic Sheets Over Wallpaper: For an unparalleled level of protection and a sleek, contemporary aesthetic, installing clear acrylic sheets over your wallpaper is an exceptional solution. This method provides a virtually impenetrable barrier against moisture, grease, and impacts, ensuring your wallpaper remains flawlessly preserved beneath. The acrylic can be cut precisely to fit your backsplash area, offering a seamless, glass-like finish that enhances the wallpaper’s design while protecting it. While this option offers serious protection and a sophisticated look, it’s typically seen in higher-end homes because both the material costs (for high-quality, cut-to-size acrylic) and the professional installation can become quite pricey, making it a more significant investment than the other options.
Why Opt for a Wallpaper Backsplash? Unpacking the Benefits
Choosing to wallpaper your kitchen backsplash offers a myriad of compelling advantages, making it an increasingly popular choice for homeowners and renters alike. Here are several key reasons why this creative solution might be perfect for your next kitchen update:
- Unbeatable Budget-Friendliness: This is arguably the most significant draw. Wallpaper is dramatically less expensive than traditional ceramic or natural stone tiles. Not only are the material costs significantly lower, but the installation is also far more accessible for DIY enthusiasts, eliminating costly labor charges. Should your style evolve or the paper become damaged, it’s also much easier and more affordable to replace than a tiled backsplash.
- Limitless Style and Personality: Wallpaper opens up an entire universe of design possibilities that tiles simply cannot match. From bold, dramatic prints to subtle, tactile textures, intricate metallics, charming botanicals, or crisp geometric patterns, there is truly something to suit every taste and décor scheme. It’s an unparalleled way to infuse your kitchen with a unique personality and reflect your individual style, transforming a functional space into a true design statement.
- Low Commitment, High Impact: Unlike the permanence of tile, wallpaper offers a low-commitment design solution. If your style preferences shift over time, or you simply crave a fresh look, wallpaper is relatively easy to remove and swap out for a new pattern or color. This flexibility allows for regular updates without the major upheaval or expense associated with tile removal.
- Ideal for Temporary Upgrades: If you’re currently planning a more extensive kitchen remodel for the future but desire an interim refresh, a wallpaper backsplash is the perfect temporary upgrade. It provides immediate visual impact and elevates the space, allowing you to enjoy a beautiful kitchen now without investing heavily in a permanent solution that might be torn out later. It bridges the gap elegantly and affordably.
Furthermore, the creative application of wallpaper doesn’t have to be confined solely to the backsplash area. You could extend the design to cover all the walls of your kitchen, creating a truly immersive and cohesive aesthetic. Imagine the vibrant and airy feel, for example, of a kitchen adorned with Serena & Lily wallpaper, as beautifully demonstrated in homes that embrace this full-wall approach. This broad application can make a smaller kitchen feel expansive and inviting, or add a delightful visual narrative to a larger space, turning the entire room into a captivating design experience.
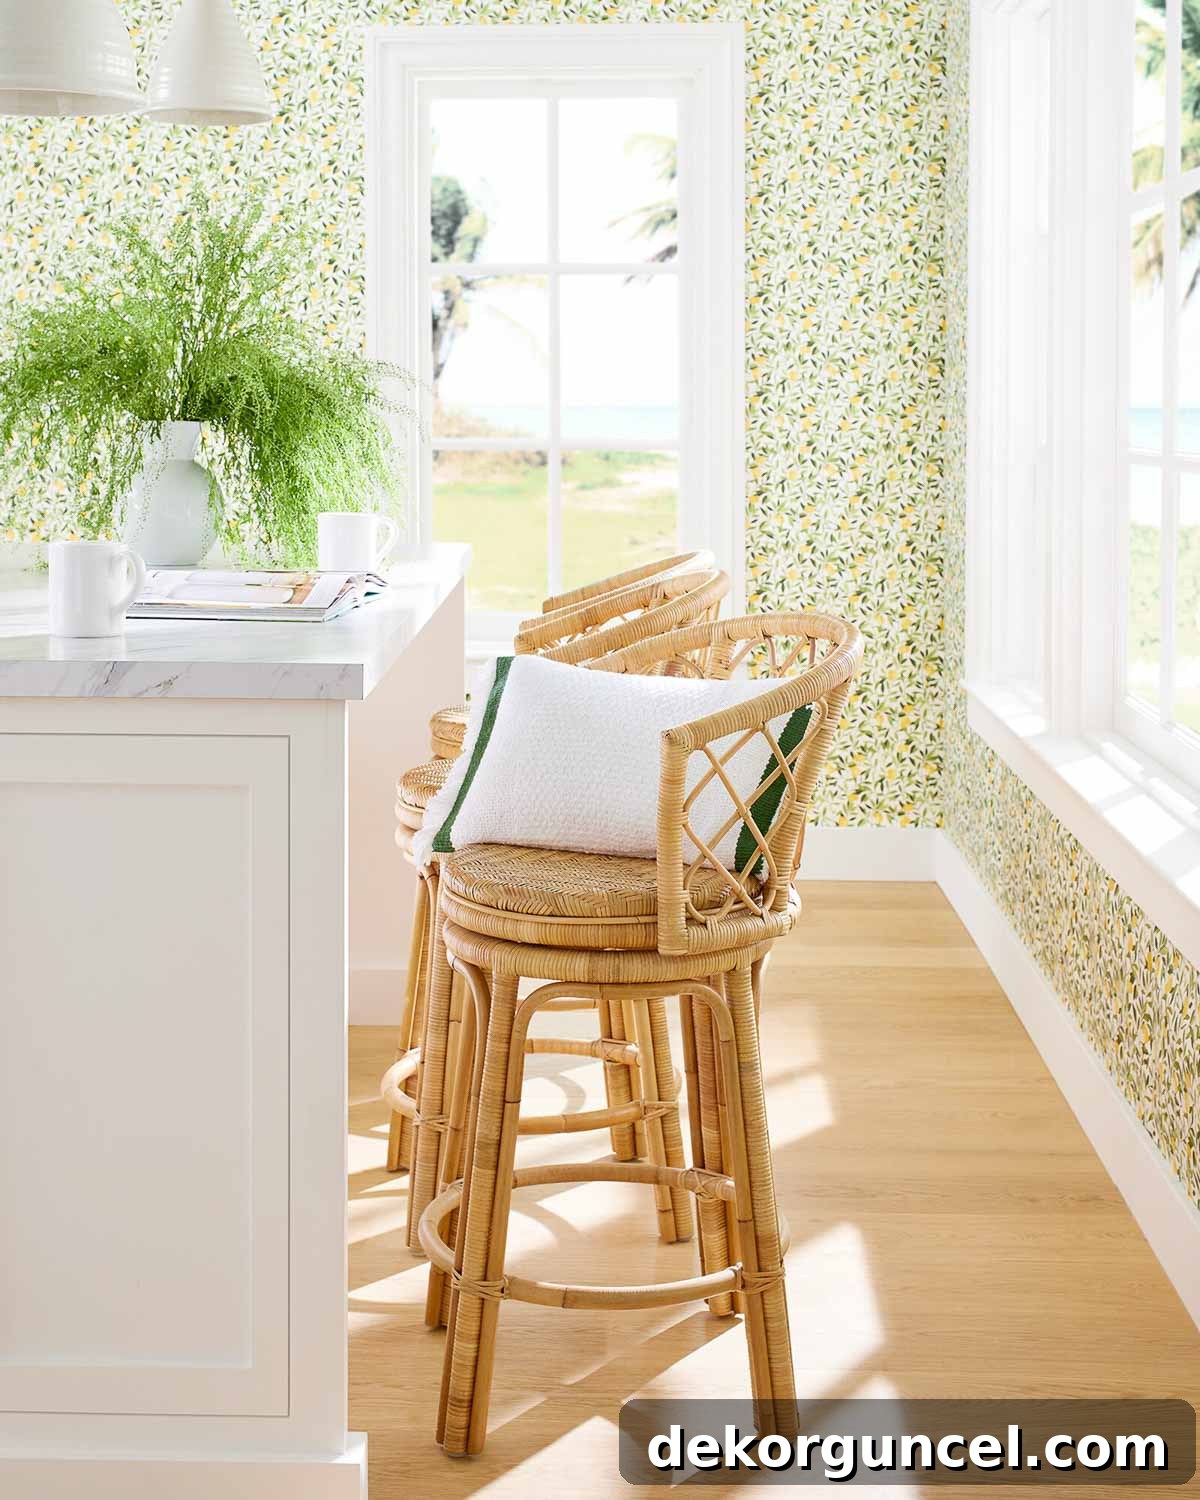
Other sources: Rattan swivel stools
Beyond Wallpaper: Exploring Other Smart Budget Backsplash Solutions
While wallpaper offers a fantastic and versatile solution for an affordable kitchen backsplash, it’s not the only game in town when it comes to budget-friendly updates. There are several other ingenious options that can deliver a fresh, stylish look without the high cost or labor intensity of traditional tiling. These alternatives provide different textures, finishes, and application methods, ensuring there’s a perfect fit for nearly every taste and skill level.
One popular and incredibly easy method is the use of peel and stick subway tile stickers, such as {these}. These innovative products offer the classic, timeless aesthetic of subway tiles but with the convenience of an adhesive backing. They are remarkably simple to apply: just peel off the backing and stick them directly onto your clean wall. They instantly transform your backsplash, mimicking the look of real tiles without the need for grout, messy mortar, or specialized tools. Similarly, a wider variety of tile stickers, often featuring more intricate patterns and colors, can be found {here}. These stickers are designed to be durable and often water-resistant, making them practical for kitchen use.
Among the many options available, my absolute favorite tile stickers that I’ve encountered are {these beautiful tile stickers}, which do an exceptional job of mimicking the intricate, vibrant patterns of traditional Moroccan tile. These particular stickers are a true standout, offering a rich, exotic aesthetic that can dramatically elevate a kitchen’s style, injecting it with a sense of global charm and artisanal craftsmanship at a fraction of the cost of genuine Moroccan tiles.
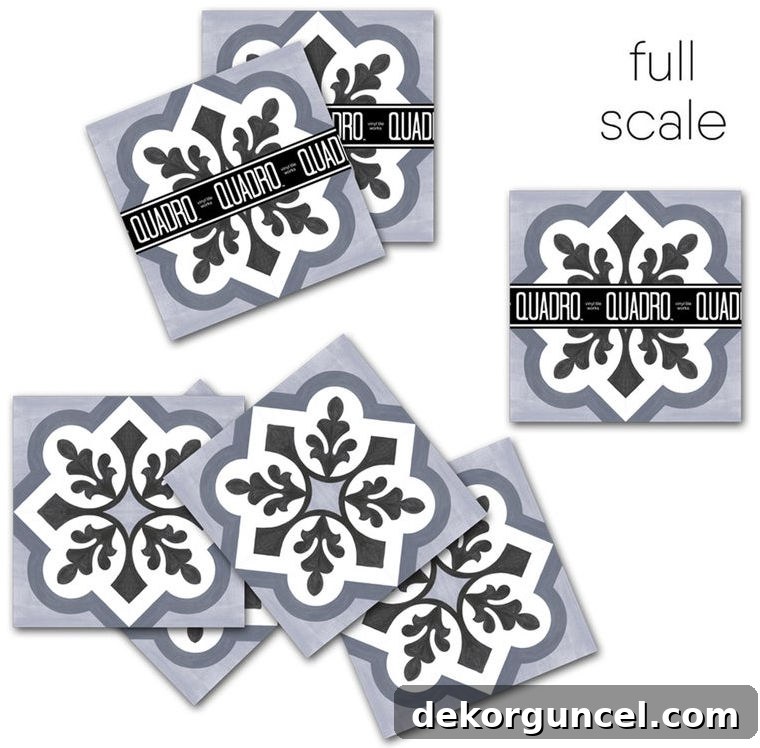
For more detailed insights into the application and versatility of these types of adhesive solutions, you can explore my post on vinyl wall decals. In that article, I share specific details on how I applied similar products to the walls of our laundry room, demonstrating their ease of use and impressive visual impact in various home settings. These alternatives prove that a stunning kitchen backsplash is well within reach, regardless of budget or DIY experience.
Exploring Peel and Stick Wallpaper for a Kitchen Backsplash: The Ultimate DIY Solution
Absolutely! Peel and stick wallpaper is an outstanding and increasingly popular option for a kitchen backsplash, offering unparalleled convenience and design flexibility. Unlike traditional wallpaper that requires paste and a more involved application process, peel and stick varieties come with a pre-applied adhesive backing. This innovative design makes installation remarkably straightforward – simply peel away the backing and adhere the paper to your prepared wall surface. This method drastically reduces installation time and mess, making it an ideal choice for DIY enthusiasts, renters, or anyone looking for a quick, impactful update.
The benefits of using peel and stick wallpaper for a backsplash extend beyond ease of installation. Many modern peel and stick wallpapers are designed to be durable, wipeable, and even moisture-resistant, making them suitable for the demands of a kitchen environment. They are also famously removable, often without damaging the underlying paint or surface. This feature is particularly appealing for those who enjoy frequent decor changes or reside in rental properties where permanent alterations are prohibited. You can easily update your kitchen’s look seasonally or whenever a new trend catches your eye, keeping your space fresh and contemporary with minimal effort.
For a comprehensive guide on navigating the world of peel and stick wallpaper, including expert tips for a flawless application and links to some of my favorite designs, be sure to check out my detailed post on how to hang peel and stick wallpaper. This resource will equip you with all the knowledge you need to confidently embark on your peel and stick backsplash project, ensuring beautiful and long-lasting results.
Do you have any further questions about transforming your kitchen backsplash or other budget-friendly decor ideas? I’d love to hear them! Thanks so much for stopping by today and exploring these creative solutions!
