
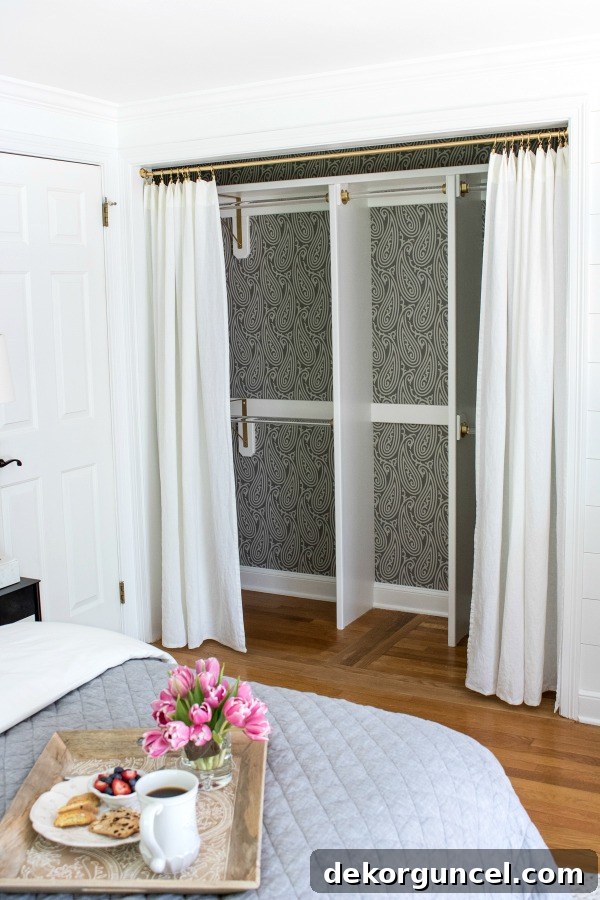
Tired of unsightly bi-fold or sliding closet doors? Transform your space with stylish closet curtains! Discover how we upgraded our master bedroom closet, said goodbye to frustrating doors, and embraced a beautiful, functional, and fully accessible storage solution.
In countless home design projects, few elements evoke as much frustration as outdated closet doors. For many, the dreaded bi-fold or restrictive sliding closet doors are a constant source of annoyance, hindering both accessibility and aesthetic appeal. If you’ve ever wrestled with a closet door that jams, blocks half your wardrobe, or simply clashes with your bedroom’s decor, you’re not alone. Our master bedroom closet, once plagued by such issues, underwent a remarkable transformation – replacing cumbersome bi-fold doors with elegant closet curtains. This seemingly simple project has been an absolute game-changer, not only elevating the room’s style but also vastly improving the functionality of our storage space. And today, we’re excited to share the complete step-by-step guide to this closet makeover, helping you achieve a similar refresh in your own home.
The idea of swapping traditional doors for curtains might seem unconventional at first, and admittedly, I approached this project with a degree of skepticism. Could curtains truly provide the privacy and organization needed, while also looking chic? The answer, I’m thrilled to report, is a resounding yes. This strategic update has unlocked every inch of our closet, a monumental benefit in an older home where storage is a precious commodity. No more struggling to reach items tucked away behind a partially open door; everything is now effortlessly within reach. This guide will walk you through every phase of the project, from the initial demolition to the final touches, complete with all the resources and insider tips you’ll need to replicate our success. Let’s dive into creating a closet space you’ll truly love!
Why Closet Curtains Are the Ultimate Closet Door Alternative
Before diving into the “how-to,” let’s address the “why.” You might be wondering what could possibly be so problematic about standard closet doors. In many contemporary homes, closet doors function perfectly well. However, for a significant number of us, especially those in older residences, traditional doors — particularly bi-fold and sliding varieties — present a host of functional and aesthetic challenges. Our previous bi-fold doors were a prime example of this frustration.
The primary issue with bi-fold doors is their inherent design flaw: they consume valuable space. When folded back, these doors typically occupy approximately a quarter of the closet’s opening. This reduction in access makes it remarkably difficult to see and retrieve clothing or items stored towards the ends of the closet. This constant struggle to reach the back corners or fully survey your wardrobe can make getting ready a daily chore rather than a seamless experience. Beyond limited access, our bi-fold doors created another unique inconvenience: they obstructed the swing of our bedroom door. To fully open the left bi-fold, we first had to close the bedroom door, creating an irritating two-step process just to access our belongings. This seemingly minor design flaw added an unnecessary layer of friction to our daily routine.
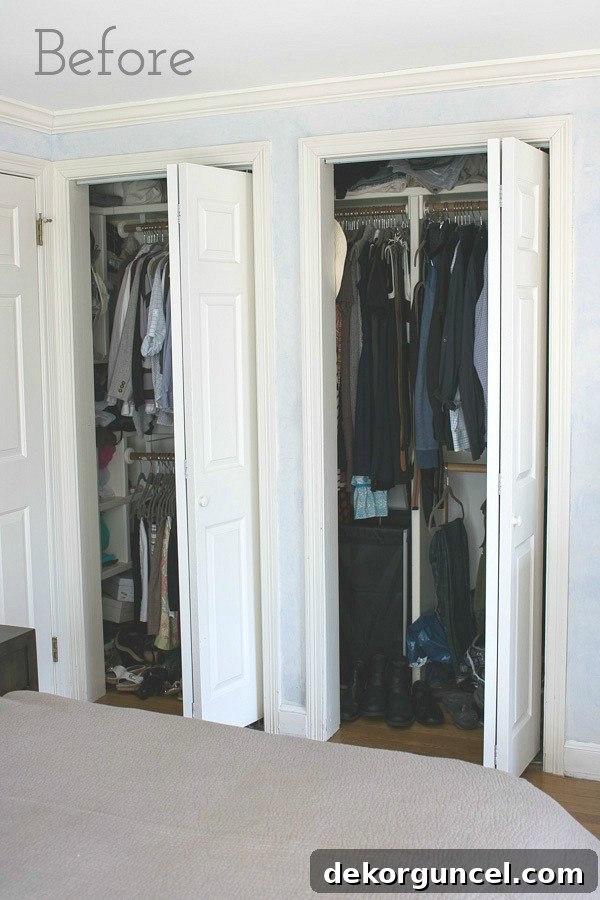
Considering alternatives, traditional hinged doors wouldn’t solve the problem of interfering with the bedroom door swing, and they often require substantial clearance. Sliding doors, while seemingly more efficient, come with their own set of drawbacks. They inherently limit your view to only half of your closet at any given time, forcing you to slide them back and forth just to locate items. This can be particularly frustrating when you’re trying to compare outfits or find a specific accessory. For us, neither of these common alternatives offered the full accessibility and open feel we craved. Closet curtains, on the other hand, presented a transformative solution, offering full, unimpeded access to the entire closet while introducing a soft, inviting aesthetic. They eliminate door interference, provide complete visibility, and infuse the space with a sophisticated, custom-designed touch.
Step-by-Step: Removing Your Old Closet Doors and Prepping the Opening
The first crucial step in transforming your closet involves removing the existing doors. For many standard closets featuring bi-fold doors, this process is relatively straightforward. Typically, these setups consist of two doors that meet in the middle, held by a track at the top and sometimes pivots at the bottom. To remove them, you’ll simply detach the doors from their hinges and pivot points, then carefully unscrew and remove the overhead track. Once the doors and track are gone, you might find some minor holes or imperfections in the doorframe. These can easily be patched with wood putty, sanded smooth, and then painted to blend seamlessly with the surrounding wall. This simple removal often leaves you with a clean, wide opening, ready for your new curtain system.
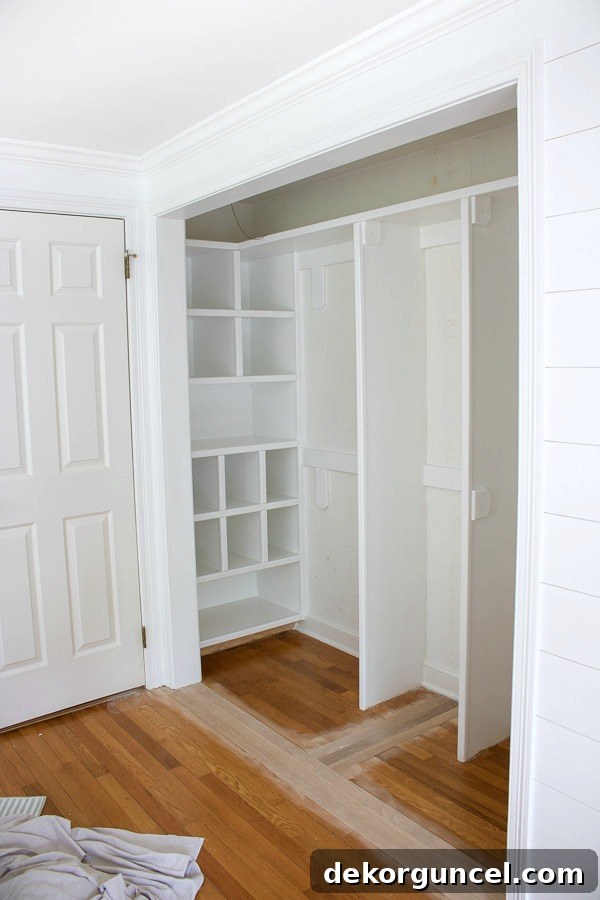
However, our closet presented a slightly more complex challenge. Unlike a simple two-door setup, ours featured a central support column positioned between the two bi-fold doors. This column, though not always structural, often houses electrical wiring or provides essential framing. Before attempting to remove any such partition, it is absolutely critical to verify that it is not a load-bearing structural support. For peace of mind and safety, I consulted a professional contractor to assess the situation. After confirming its non-structural nature, my contractor carefully removed the central support, added a new header to create a continuous, wide opening, and patched the hardwood floors where the column once stood. The difference was immediate and dramatic; the ability to view and access the entire closet space was already a significant improvement.
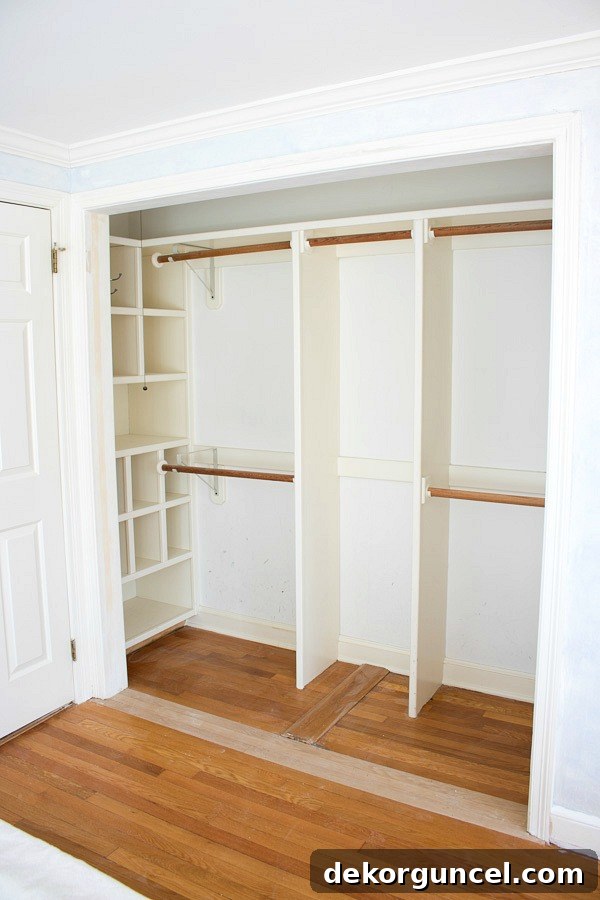
As part of this demolition, we also discovered an odd, raised section of hardwoods in the center of the closet floor, a relic from the old door setup. Taking advantage of the contractor’s expertise, we had this unsightly bump removed and the floor expertly patched, ensuring a smooth and level surface throughout the closet interior. With all the structural changes complete, the next phase involved meticulous preparation of the newly opened space. I diligently removed all remnants of the previous closet hardware – old rods, brackets, and any lingering pieces from the bi-fold system. The final touch for the opening was a fresh coat of paint. The existing wood trim, having yellowed over time, was rejuvenated with Farrow & Ball’s All White, providing a crisp, clean canvas that instantly brightened the entire space. This meticulous preparation, though time-consuming, is essential for a polished and professional-looking finished product, ensuring your new closet curtains truly shine.
Elevating the Interior: New Closet Rods and Designer Wallpaper
With the old doors gone and the opening pristine, this was the perfect opportunity to give the closet’s interior a much-needed upgrade. Since everything had to be emptied for the demolition, it made perfect sense to beautify the inner sanctuary of our wardrobe. This comprehensive approach ensures that even when the curtains are open, the closet itself becomes a stylish extension of the room’s decor, rather than a hidden utility space.
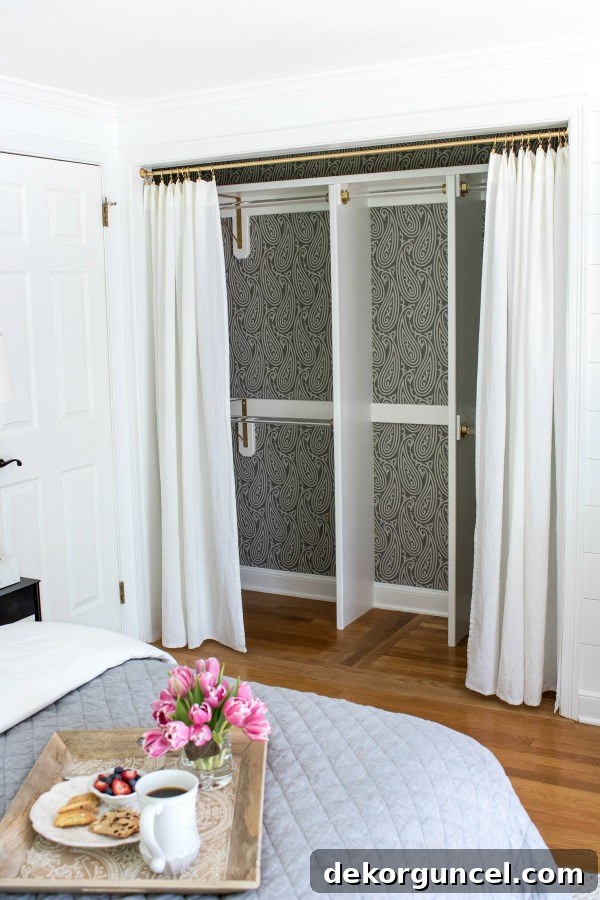
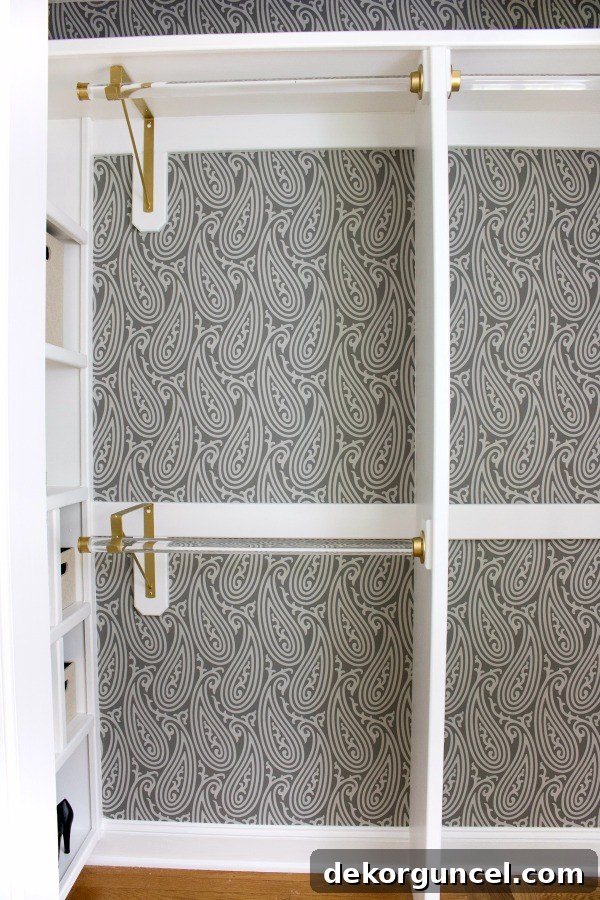
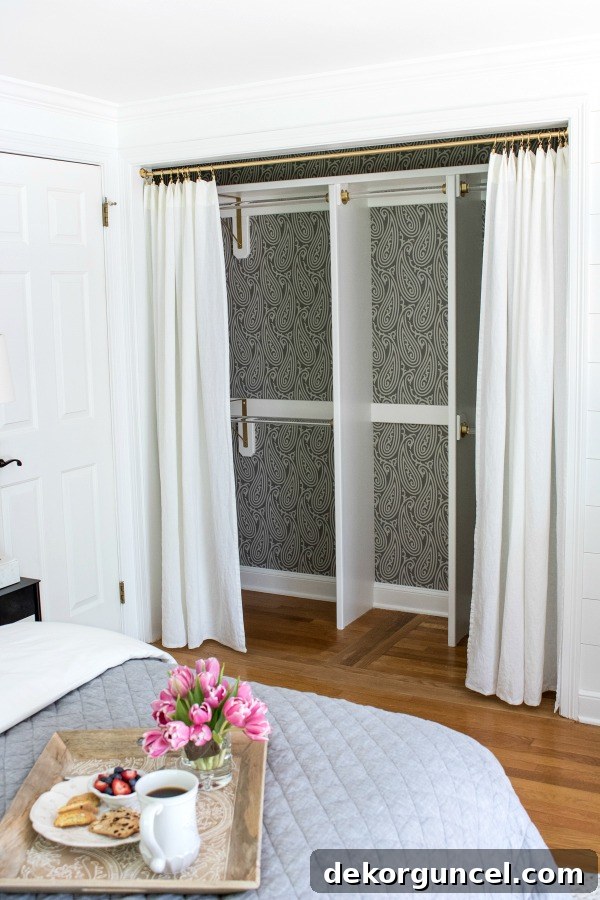
Our interior transformation began with the back wall. To infuse personality and a touch of luxury, I applied this exquisite paisley wallpaper. Choosing wallpaper for the back of a closet adds an unexpected element of design, turning a purely functional area into a delightful visual feature. This decision not only enhanced the aesthetics but also provided a subtle motivation to keep the closet organized and tidy, allowing the beautiful pattern to remain visible. Following the wallpaper installation, we installed new closet rods and matching hardware, creating a cohesive and elegant look.
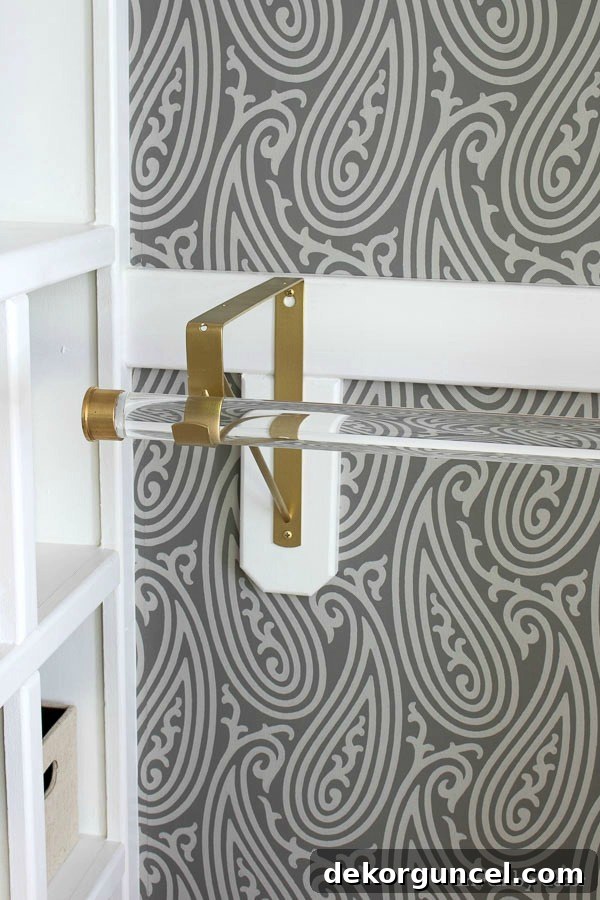
For the closet rods themselves, I opted for high-quality 1 ¼″ cell cast acrylic rods sourced from Curbell Plastics. This is the same trusted supplier I used for the acrylic curtain rods in our home office, a testament to their durability and sleek appearance. A significant advantage of working with Curbell Plastics is their custom cutting service; they conveniently cut the rods to the precise lengths I needed prior to shipping, saving valuable time and effort during installation. The clear acrylic provides a modern, airy feel, allowing the wallpaper to peek through and adding a touch of understated glamour to the closet interior.
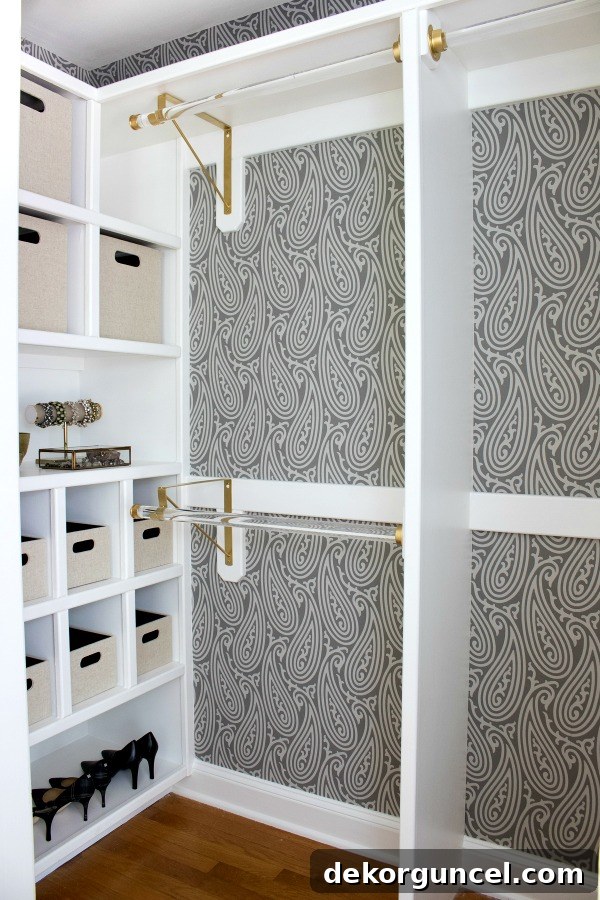
While the rods were new, a significant portion of the rod hardware utilized existing pieces from our previous closet setup. Rather than purchasing all new hardware, I chose a budget-friendly and highly effective approach: spray painting. This allowed for complete customization and ensured a unified metallic finish throughout the closet.
To ensure a durable and long-lasting finish for all the spray-painted hardware, I followed a specific protocol. First, each piece was lightly sanded to create a surface for better paint adhesion. This was followed by a thorough application of primer, which is crucial for preventing chipping and ensuring an even color. After the primer, several light, even coats of spray paint were applied. It’s important to remember to use a respirator, such as {this one}, for safety during spraying and to carefully read the application instructions on the spray can. Many spray paints, particularly metallic finishes, require a second coat within a specific timeframe (often 1 hour) or after 24 hours to achieve optimal results and avoid cracking. The specific products I found most effective were {this high-quality spray primer} and {this brilliant metallic brass spray paint}. Be careful not to confuse it with their metallic gold finish, which comes in an almost identical can but offers a slightly different hue.
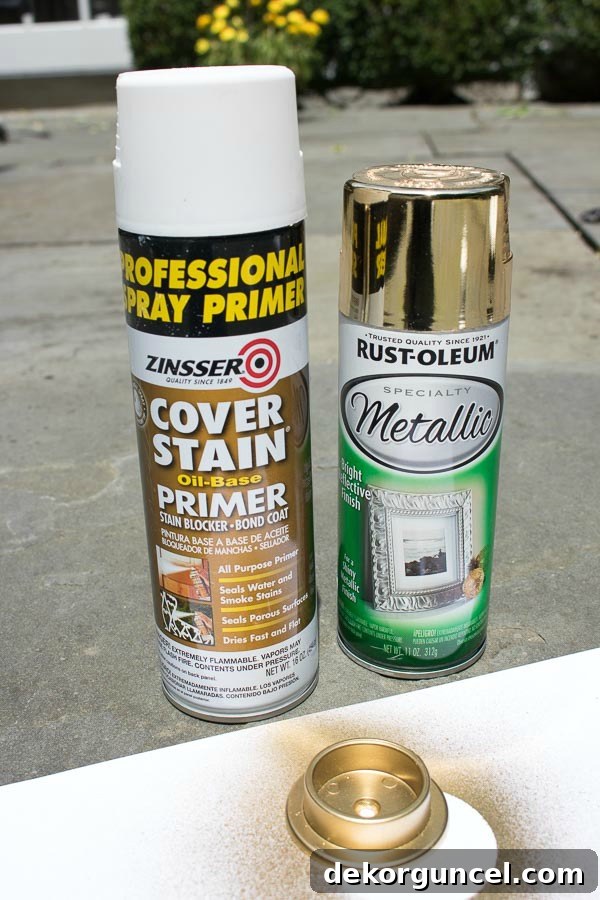
Quick Tip: Rustoleum has since released an excellent all-in-one primer + paint spray in brass, available {here}. This product significantly streamlines the process by combining both steps, making your project even more efficient!
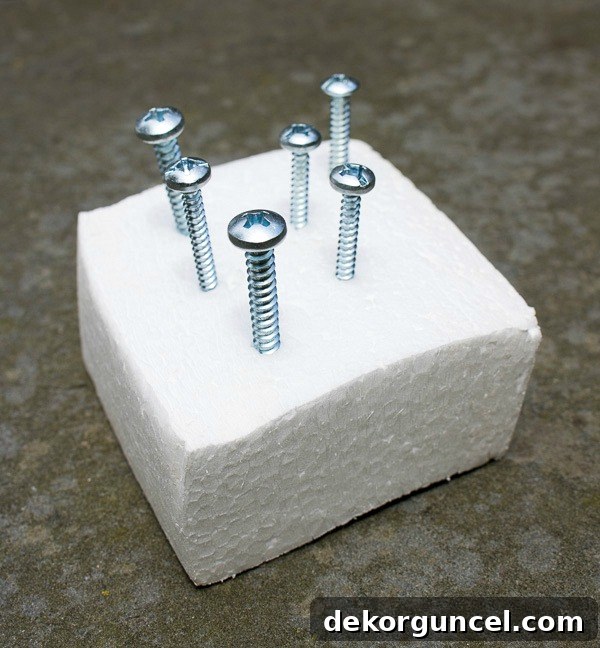
I applied this meticulous spray painting process to every piece of hardware in the closet: the rod brackets, flanges, the main curtain rod and its rings, the curtain rod brackets, and even the tiny screws. For spraying screws, I use a simple but effective trick: stick them into a piece of styrofoam before spraying. This holds them upright, preventing them from rolling and ensuring even, complete coverage.
For the end caps on the two acrylic rod pieces supported by brackets, I selected {these 1 ½″ brass end caps}. A minor challenge arose as the stated 1 ½″ measurement refers to the outside diameter, meaning the inside diameter was slightly too small for my 1 ¼″ rods. My creative solution was to secure them with a hot glue gun, which has held up perfectly. However, if undertaking a similar project in the future, I would prioritize finding end caps with a precise internal diameter match for a more seamless fit. Despite this small adjustment, the combination of acrylic rods, polished hardware, and designer wallpaper transformed the interior into a genuinely glamorous and highly functional space.
Selecting and Installing the Perfect Curtain Rod for Your Closet Curtains
Once the closet interior was gleaming, the next crucial step was to install the curtain rod that would support our beautiful new closet curtains. This step requires careful consideration of the opening’s width and the weight of your chosen drapes. Our closet opening measured 70 inches wide, a span that often proves challenging for many standard curtain rods without requiring additional central supports to prevent sagging. To overcome this, I opted for a creative and cost-effective solution: a 0.5-inch copper plumbing pipe from Lowe’s. This material offered both the necessary rigidity for the span and a slender profile that suited our aesthetic. It works exceptionally well for our 70-inch opening, especially given the lightweight nature of our chosen drapes. For wider openings or heavier curtains, however, you might consider a more robust, solid rod or additional intermediate brackets to ensure long-term stability.
Finding appropriate hardware for such a slender rod can sometimes be tricky. I sourced both the curtain rings and clips from Lowe’s as well, ensuring a cohesive look. The most challenging component to locate was a suitable set of supports for the narrow diameter of the copper pipe. After some searching, I discovered {these specialized brackets}, which proved to be absolutely perfect. Their design provided the necessary support without being overly bulky, maintaining the clean lines of the installation.
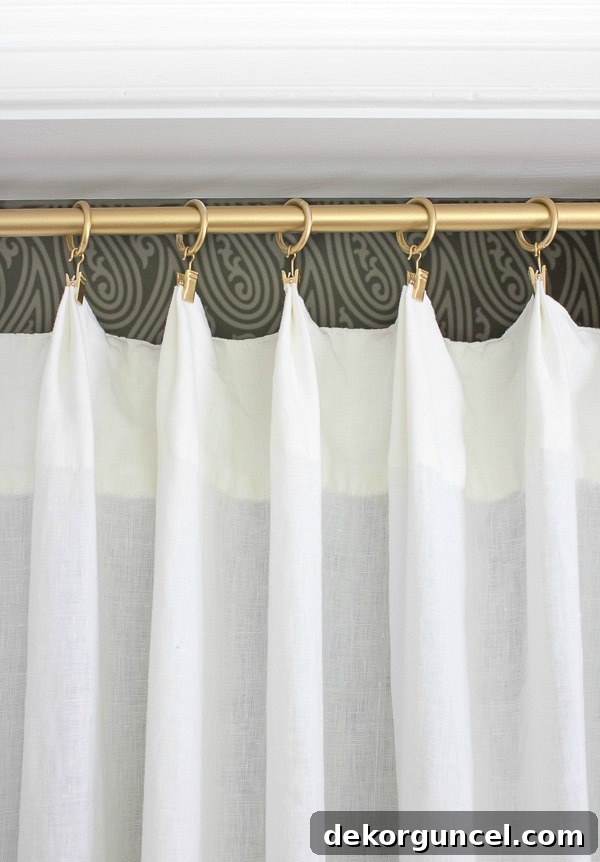
Naturally, the raw copper pipe and the brackets came in their unembellished, functional colors. To integrate them seamlessly with the glamorous new closet interior and the freshly painted hardware, I gave them the same gold spray paint treatment. This simple step transformed utilitarian components into elegant design elements, tying the entire look together. The result is a robust yet stylish curtain rod system that beautifully complements the renovated closet space, ready to showcase the final touch – the curtains themselves.
Choosing and Customizing Your Closet Curtains for a Perfect Fit and Finish
The final, and perhaps most impactful, element of this closet makeover is the selection and preparation of the curtains themselves. Your choice of fabric, color, and how you hang them will define the overall look and feel of your transformed closet. For our project, I opted for the budget-friendly and versatile AINA linen drapes from IKEA. These lightweight curtains offer a beautiful texture and a relaxed elegance that suited our desired aesthetic perfectly. Fortuitously, I already had a pair of these drapes from a previous project that never came to fruition, which was exciting until I hung them against our newly painted crisp white walls. The drapes, while lovely, appeared distinctly yellowed in comparison, creating an undesirable contrast.
Bleaching linen can be a risky endeavor, potentially damaging the fabric or resulting in an uneven finish. Instead, I decided to try {this Rit laundry treatment} specifically designed to whiten and brighten fabrics without harsh bleaches. The results were nothing short of amazing! The treatment effectively neutralized the yellow undertones, transforming the curtains into the pure, vibrant white I envisioned. The difference was truly remarkable, as you can see in the before and after comparison.
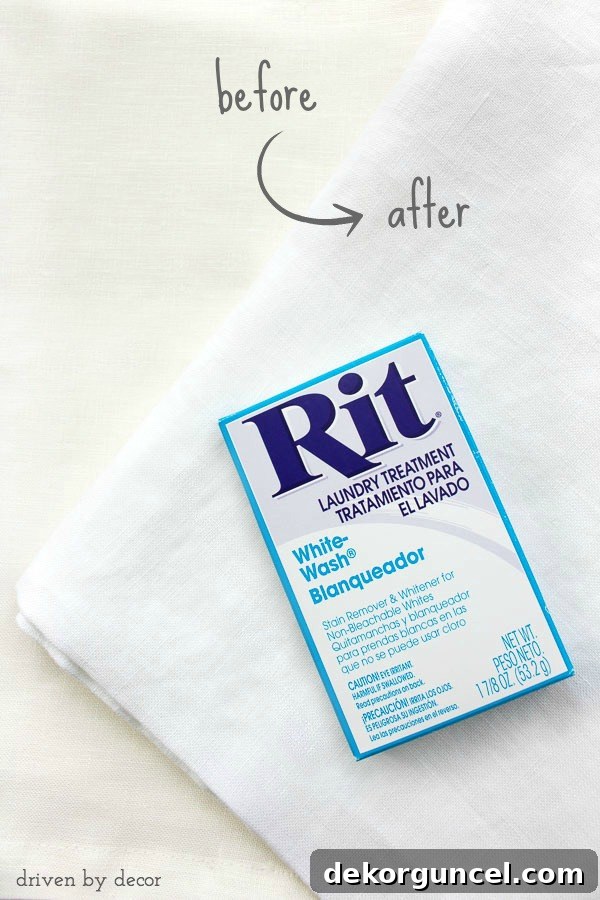
The application of the Rit treatment was incredibly simple. I filled our large basement sink with hot water, added the drapes and the treatment solution, then stirred and soaked them for approximately ten minutes. After this brief soak, I transferred them directly into the washing machine for a standard cycle. This easy process allowed me to achieve the exact shade of white I desired, perfectly complementing our clean, bright closet interior. The next step involved customizing the length. Using {this convenient no-sew hemming option}, I quickly adjusted the drapes to the ideal length, ensuring they just grazed the floor for a polished look. Finally, to hang the curtains, I carefully folded small, neat pleats at the top (which are visible in more detail in the images above) and clipped the drapes to the café rings, creating a tailored and sophisticated drape.
The single pair of curtains proved to be perfectly wide enough to comfortably cover the entire 70-inch closet opening when pulled closed, providing complete privacy and a neat appearance. The ability to fully enclose the space offers flexibility, allowing us to conceal any potential clutter with ease.
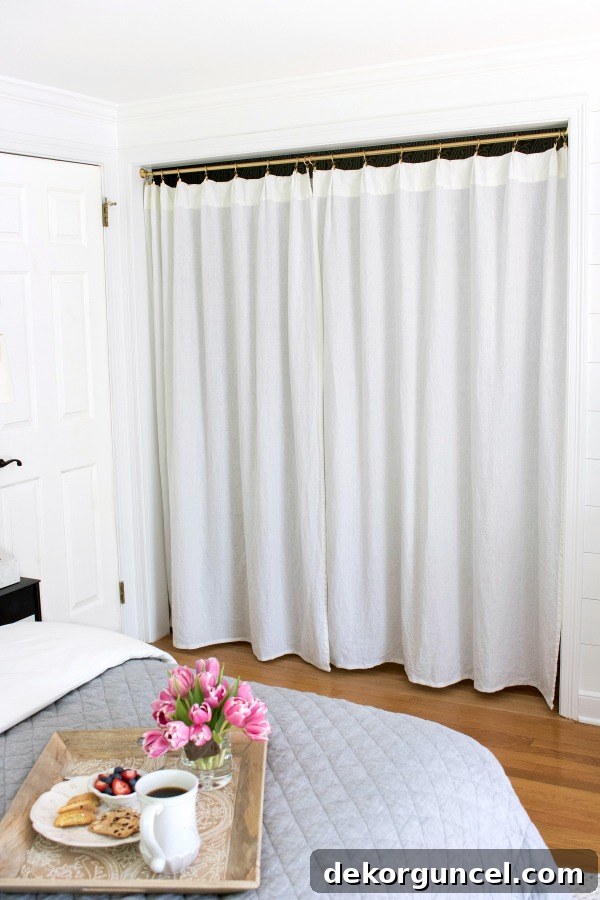
However, what’s truly remarkable is that since the day I installed them, our closet curtains have almost exclusively remained open. With the stunning wallpaper peeking through and the organized interior on display, there’s no desire to hide it! This continuous open access is not just aesthetically pleasing but also incredibly functional, making our daily routines much smoother. Furthermore, I’ve discovered an unexpected bonus: having the beautiful wallpaper on the back wall of the closet serves as excellent motivation to keep my wardrobe pared down and neatly organized. This way, I can always appreciate that lovely pattern, ensuring the closet remains a highlight of the room rather than a hidden storage space.
Update: Our Long-Term Experience with Closet Curtains – A Resounding Success!
It’s been several years since we completed this closet curtain transformation, and I can confidently provide a definitive answer to the question of whether I’ve enjoyed having closet curtains: a resounding, enthusiastic YES! This project has stood the test of time, proving to be one of the most practical and aesthetically pleasing upgrades we’ve made to our home. Over the years, we have experienced absolutely no issues with the curtain rod sagging, which was an initial concern for some. The copper plumbing pipe, once spray-painted and properly supported, has maintained its integrity beautifully, consistently holding the drapes without any compromise.
The sheer joy of being able to easily access every single item in my closet, without the obstruction of doors, remains unparalleled. This enhanced accessibility has truly streamlined my daily routine and made wardrobe management a far more pleasant task. Beyond the functional advantages, the visual impact of the closet curtains continues to delight. The soft lines of the drapes, combined with the elegant interior, create a sophisticated and inviting atmosphere that traditional doors simply could not achieve. Given the opportunity, I would undertake this project all over again in a heartbeat. It’s a testament to how thoughtful design choices can drastically improve both the functionality and beauty of a space.
I sincerely hope this comprehensive guide has answered all your questions regarding our closet makeover. Should any further queries come to mind, please don’t hesitate to leave a comment below, and I’ll be sure to get back to you. Additionally, for more inspiration on enhancing your home’s storage solutions, be sure to explore my dedicated post on innovative closet door ideas, offering several creative and cost-effective ways to make your closet doors both more beautiful and functional without breaking the bank. Wishing you all a fantastic week filled with inspiring home projects!
