
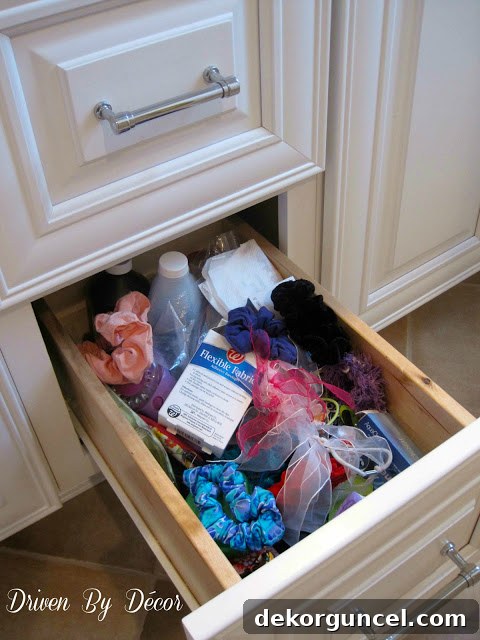
Effortless DIY Scrunchie Holder: Organize Your Hair Accessories in Style
Tired of tangled hair ties and misplaced scrunchies? Discover how to create a simple, stylish, and highly effective DIY scrunchie holder using everyday materials. This ingenious solution will transform your hair accessory chaos into perfectly organized harmony!
For anyone with a love for scrunchies or with children who do, the struggle is real: a seemingly endless collection of hair bands, hair ties, and scrunchies scattered across dressers, tucked into drawers, or even found hiding under furniture. This common dilemma often leads to frustration when you’re rushing out the door and can’t find the perfect accessory. But what if there was an incredibly simple, budget-friendly, and customizable way to bring order to this hair accessory anarchy?
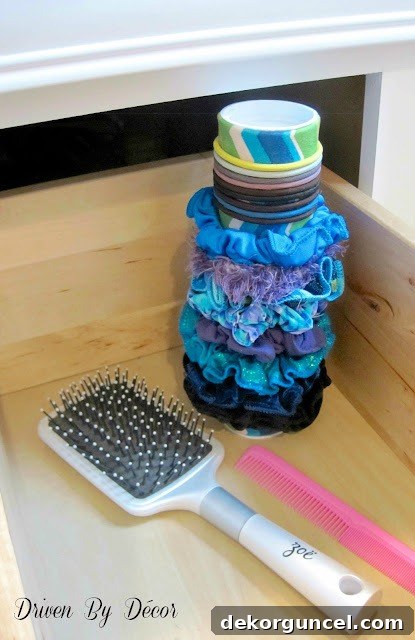
Inspired by the perpetual clutter of hair accessories in my own home, I embarked on a mission to find a practical solution. The result? A brilliant DIY scrunchie holder made from inexpensive mailing tubes and a few charming fabric scraps. This project is not only unbelievably easy to make but also highly effective at keeping your scrunchies neatly organized and easily accessible. Get ready to transform your hair accessory storage with this quick and satisfying craft! (Please note: This post includes commissionable links. For more information, please see our full disclosure statement here.)
Why a DIY Scrunchie Holder is a Game-Changer for Hair Accessory Organization
Before diving into the “how-to,” let’s explore why this particular DIY project stands out as an exceptional solution for hair accessory storage. The brilliance lies in its simplicity and functionality:
- Combats Clutter: Say goodbye to overflowing drawers and scattered scrunchies. A dedicated holder keeps everything in one place.
- Easy Access: No more digging! With scrunchies neatly stacked, you can see and grab the one you need in seconds.
- Prevents Damage: Storing scrunchies properly helps maintain their shape and elasticity, extending their lifespan.
- Customizable: This DIY allows for endless personalization to match your room decor or personal style.
- Budget-Friendly: Utilizing readily available and inexpensive materials makes this an incredibly economical organizing project.
- Perfect Gift Idea: A set of personalized scrunchie holders makes a thoughtful and practical gift for friends, daughters, or anyone who loves their hair accessories.
Gather Your Simple Supplies: What You’ll Need
One of the best aspects of this DIY scrunchie holder is the minimal and affordable list of materials required. Chances are, you might even have some of these items lying around your home!
Essential Materials:
- 2-Inch Mailing Tubes: These sturdy cardboard tubes are the foundation of your scrunchie holder. They come in various lengths, often in packs of two or more. You can find them at office supply stores, craft stores, or online. Their 2-inch diameter is absolutely crucial for the optimal fit of most scrunchies. You can purchase them here.
- Fabric Scraps: This is where you can truly let your creativity shine! Any fabric will do – cotton, linen, even old scarves or clothing can be repurposed. Choose patterns, colors, or textures that appeal to you or match the room where the holder will reside.
- Sharp Scissors: For clean cuts on your fabric.
- X-ACTO Knife or Utility Knife: Necessary if you plan to cut your mailing tubes down to a custom size. Always use with caution on a protected surface.
Optional Materials for Enhanced Customization or Durability:
- Ruler or Measuring Tape: For precise fabric cutting and tube measuring.
- Pencil or Fabric Marker: For marking cutting lines.
- Craft Glue (e.g., Fabric Glue or Hot Glue Gun): A small dab of glue can offer extra security for the fabric ends, though the end caps are usually sufficient.
- Washi Tape, Paint, or Decorative Paper: Alternative options for covering and decorating your tubes if fabric isn’t your preference.
The beauty of this project lies in its flexibility. Don’t feel limited to fabric; you could paint your tubes, decoupage them with decorative paper, or even wrap them in colorful yarn. The core idea remains the same: create a smooth, cylindrical surface for your scrunchies.
Step-by-Step Guide: Crafting Your DIY Scrunchie Holder
Creating your fabric-covered scrunchie holder is incredibly straightforward. Follow these simple steps for a perfectly organized accessory display:
Step 1: Prepare Your Mailing Tube
Start with your 2-inch mailing tube. These tubes typically come with plastic end caps, which are essential for this project, so make sure to keep them aside. The standard length of these tubes is usually quite generous, often around 12-14 inches, which is perfect for holding a good number of scrunchies. However, if you intend to store your scrunchie holder in a shallower drawer or on a specific shelf, you might want to trim it down. Using an X-ACTO knife or a utility knife, carefully cut the tube to your desired height. Always place the tube on a protected surface (like a cutting mat) and use a ruler to ensure a straight cut for a professional finish. If you’re happy with the full length, you can skip this step entirely.
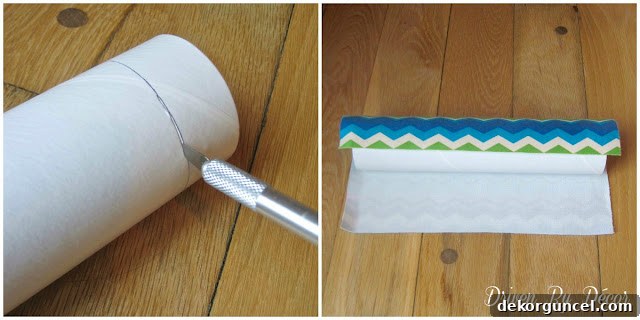
Step 2: Select and Cut Your Fabric
Now for the fun part – choosing your fabric! Pick a fabric that brings you joy and complements your space. Measure the length of your prepared mailing tube. You’ll need to cut a piece of fabric that is approximately 1 to 2 inches longer than the tube’s length. This extra length is crucial for tucking the fabric neatly into the ends. For the width, measure the circumference of your tube (or wrap the fabric around and mark where it overlaps slightly). Add about 0.5 to 1 inch to this measurement to ensure a generous overlap, which will help create a clean seam once wrapped.
Step 3: Wrap the Tube with Fabric
Lay your cut fabric flat, wrong side up. Position your mailing tube at one end of the fabric. Begin carefully wrapping the fabric around the tube, ensuring it’s snug and straight. Try to keep the tension even as you wrap to avoid wrinkles or loose spots. Once the fabric has fully encircled the tube, ensure there’s a slight overlap. You can use a small line of fabric glue or a few dots of hot glue along the overlapping edge to secure it, creating a smooth, seamless finish. However, for a truly no-sew, no-glue method, simply ensure the fabric is tightly wrapped.
Step 4: Secure the Fabric Ends
With the fabric securely wrapped around the tube, you’ll have about 0.5 to 1 inch of extra fabric extending beyond each end of the tube. Carefully tuck this excess fabric into the opening of the tube. Push it in firmly around the entire circumference. The rigidity of the cardboard will help hold the fabric in place. Once both ends are tucked, take the plastic end caps that came with your mailing tube and push them firmly back into place. These caps will provide the primary hold for your fabric, ensuring it stays taut and neat over time.
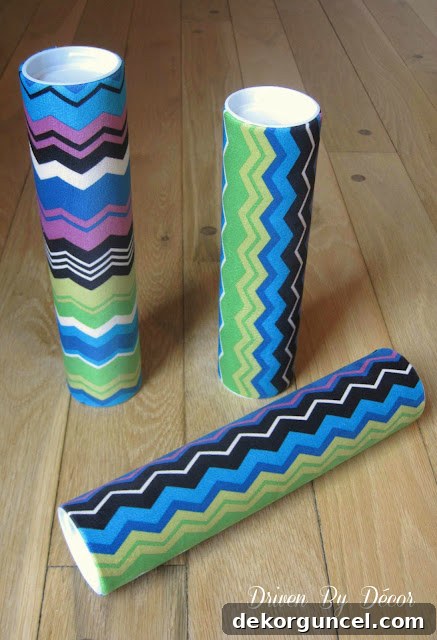
Step 5: Load and Display Your Scrunchies!
And just like that, your DIY scrunchie holder is complete! You now have a stylish and functional accessory. Begin carefully sliding your scrunchies onto the tube. The 2-inch diameter is ideal, allowing them to stack neatly without being too loose or too tight. Display your new organizer on your dresser, a bathroom counter, or inside a drawer. Enjoy the immediate visual satisfaction of a perfectly organized collection!
Personalization and Practical Advantages: Making It Your Own
Tailoring for Multi-User Households
If your household is anything like mine, with multiple individuals sharing hair accessories, organization becomes even more critical. A fantastic way to differentiate scrunchie holders is to cover each mailing tube with a distinct fabric. Imagine one daughter having a floral pattern, another a polka dot, and a third a vibrant solid color. This simple personalization makes it instantly obvious whose scrunchie holder is whose, preventing mix-ups and promoting individual responsibility for organization.
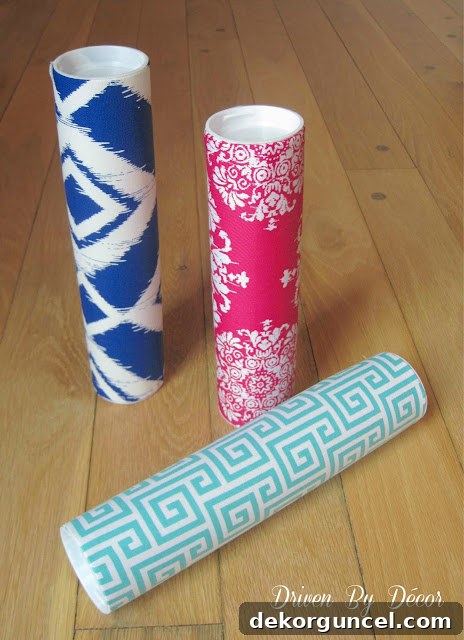
The Perfect Diameter: Why 2 Inches Matters
The 2-inch diameter of these mailing tubes isn’t arbitrary; it’s the key to their effectiveness as scrunchie holders. This specific size offers the perfect balance:
- Secure Hold: It’s large enough that standard scrunchies and hair elastics fit snugly and stay in place, preventing them from slipping off easily.
- Easy Manipulation: Yet, it’s small enough that you can effortlessly slide any scrunchie on or off without disturbing the others. No more wrestling with a stack of hair ties just to get to the one at the bottom!
- Versatile Storage: While ideal for scrunchies, these tubes can also hold thicker headbands or multiple regular hair ties, making them a versatile hair accessory storage solution.
Exploring Other Hair Accessory Organization Solutions
While the mailing tube scrunchie holder is a personal favorite for its simplicity and effectiveness, it’s worth exploring other options, both DIY and store-bought, to find what best suits your needs and budget.
Budget-Friendly DIY Alternatives to Mailing Tubes
If you’re looking for an even more economical solution and don’t mind a slightly less sturdy option, you can certainly repurpose cardboard rolls from household items:
- Paper Towel Rolls: These are readily available and free! They have a similar cylindrical shape, though they tend to be narrower than mailing tubes, which means scrunchies might sit a bit more loosely. They are also less durable and might bend or crease over time, especially if heavily loaded.
- Toilet Paper Rolls: Even smaller and less sturdy than paper towel rolls, these could be used for very small scrunchies or to organize individual hair ties. You’d need several to hold a collection, and they are definitely best for lightweight items.
For both paper towel and toilet paper rolls, you can still cover them with fabric, paint them, or decorate them with Washi tape to add a touch of personality. Just be aware of their reduced durability compared to robust mailing tubes.
Ready-Made Scrunchie Holders: Buy Instead of DIY
For those who prefer to purchase an off-the-shelf solution, the market offers a variety of stylish and functional scrunchie holders. These can be a great option if you’re short on time or prefer a specific aesthetic:
- Acrylic Scrunchie Holders: These clear stands are popular for their minimalist design, allowing your scrunchie collection to be the focal point. They are sturdy, easy to clean, and come in various sizes and configurations, often resembling a simple vertical rod or a tiered display. You can find excellent options like these acrylic scrunchie holders.
- Metal Scrunchie Holders: Offering a more industrial or modern look, metal stands can be very durable and come in various finishes like gold, rose gold, or matte black. They often feature sleek designs that can double as decorative pieces. Consider options such as this metal scrunchie holder for a sophisticated touch.
- Tiered or Multi-Rod Holders: Some designs offer multiple rods or tiers, perfect for larger collections or for organizing different types of hair accessories separately.
Simple Solutions for Hair Ties and Elastics
While scrunchie holders are perfect for their namesake, what about those smaller hair ties and elastics that often go missing? A brilliantly simple and inexpensive solution for these is a 2-inch binder ring. These rings are commonly found in office supply sections and are incredibly versatile:
- Keeps Them Together: Simply open the ring and slide all your hair ties onto it. They stay neatly grouped, preventing tangles and making it easy to find the one you need.
- Portable: A binder ring filled with hair ties can be easily tossed into a bag or travel kit without creating a mess.
- Cost-Effective: They are extremely affordable, often available in multi-packs. An example of these can be found here.
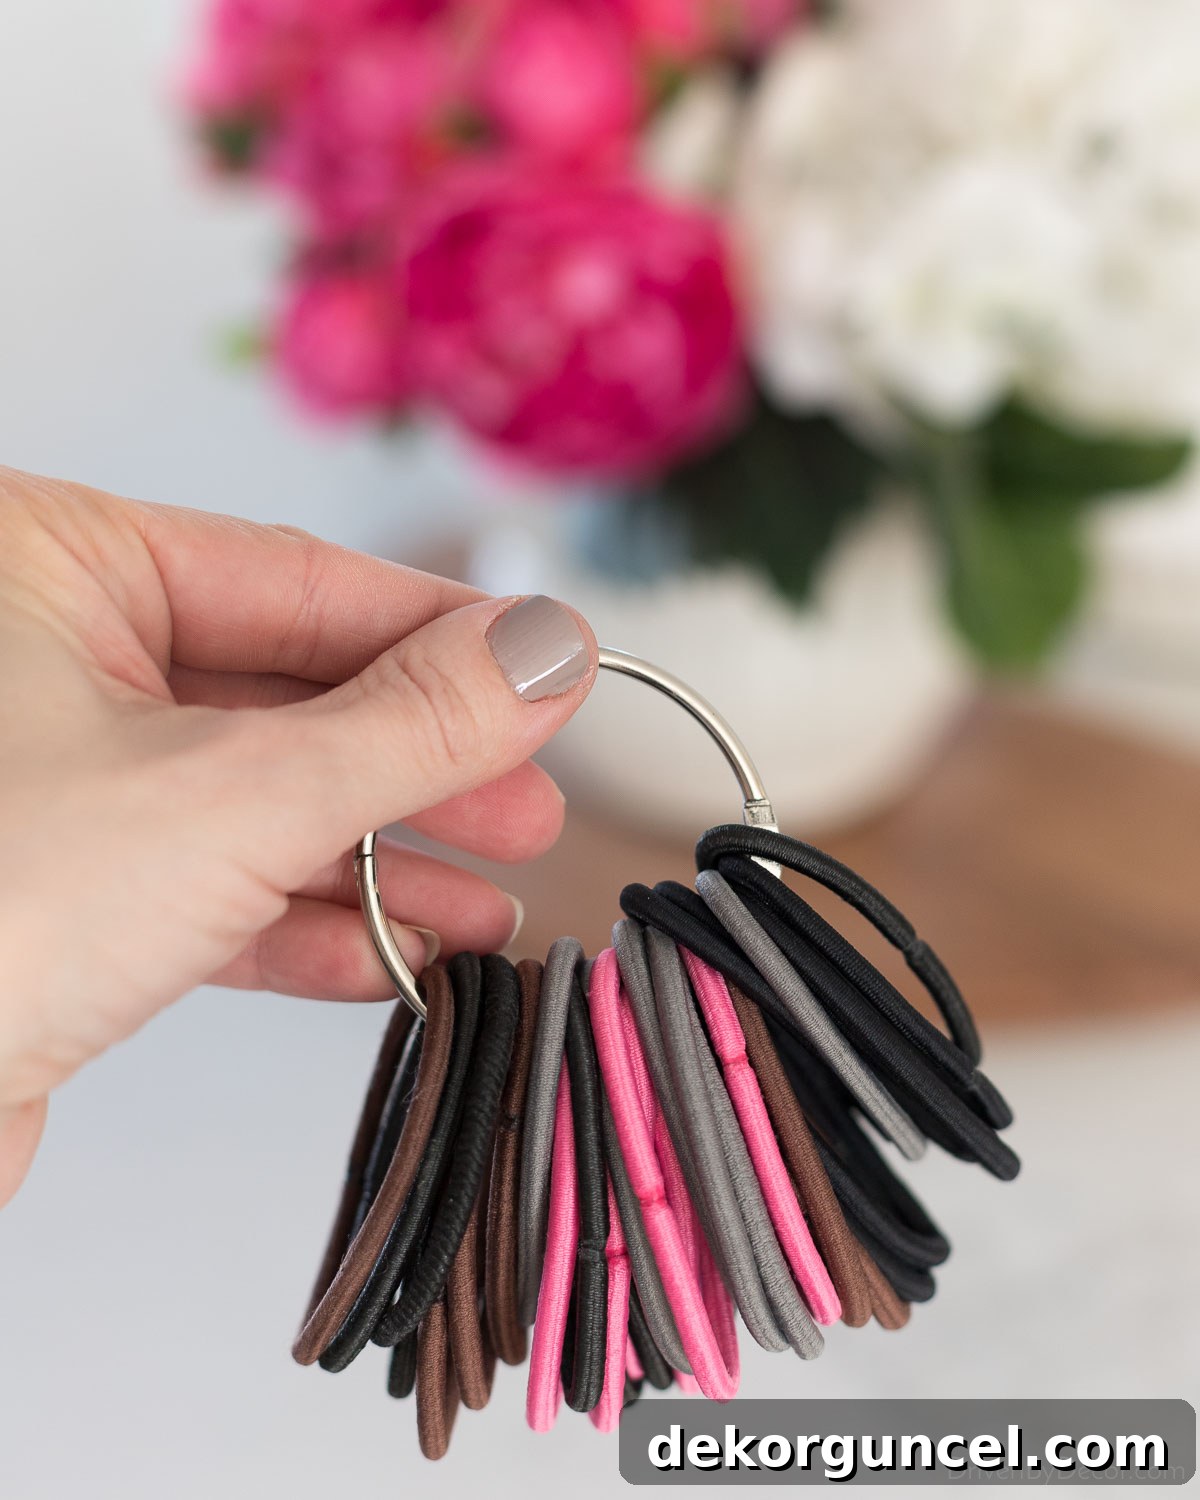
This method is fantastic for keeping those smaller, often problematic hair ties under control, complementing your scrunchie holder perfectly.
Transform Your Space with Smart Organization
Embracing simple DIY solutions like this scrunchie holder can make a significant difference in maintaining an organized and calm living space. No more rummaging through cluttered drawers or finding rogue hair ties in unexpected places. With just a few basic materials and a little creativity, you can create a functional and beautiful accessory that keeps your scrunchies tidy and easily accessible.
We hope this guide inspires you to tackle the hair accessory clutter in your life. It’s a rewarding project that combines practicality with personal style, proving that organization doesn’t have to be dull or expensive. Give it a try this weekend and enjoy the immediate impact of a tidier vanity or dresser!
Ready to continue your organizing journey and bring more order to your home? Explore some of our other popular posts for fresh ideas and actionable tips:
15 Bedroom Organization Ideas
10 Linen Closet Organization Ideas
15 Small Bathroom Storage Ideas
8 Budget-Friendly Kitchen Organization Ideas
Happy organizing!
