

Unlock Perfect Home Harmony: Essential Decorating Measurements You Need to Know
Achieving a beautifully balanced and cohesive look in your home often comes down to precise measurements and thoughtful placement. Whether you’re a seasoned decorator or just starting to personalize your space, having a reliable set of guidelines can transform your decorating projects from guesswork into guaranteed success. I’ve compiled my tried-and-true measurements for hanging art, installing drapes, choosing lighting, and placing rugs – the very same rules of thumb I use to ensure every element in my home feels just right. These insights will empower you to create spaces that are not only aesthetically pleasing but also functional and inviting. Let’s dive into these foundational principles that will elevate your interior design game!

Mastering Artwork Placement: How High to Hang Art & Achieve Balance
The way you hang artwork can dramatically impact the feel of a room. Proper placement ensures that your pieces are enjoyed at their best, drawing the eye and complementing your furniture. Whether you’re showcasing a single statement piece or curating a dynamic gallery wall, understanding a few key measurements will help you avoid common pitfalls and achieve a polished, professional look. Take a look at our home office gallery wall as an example of how thoughtfully placed art can transform a space:
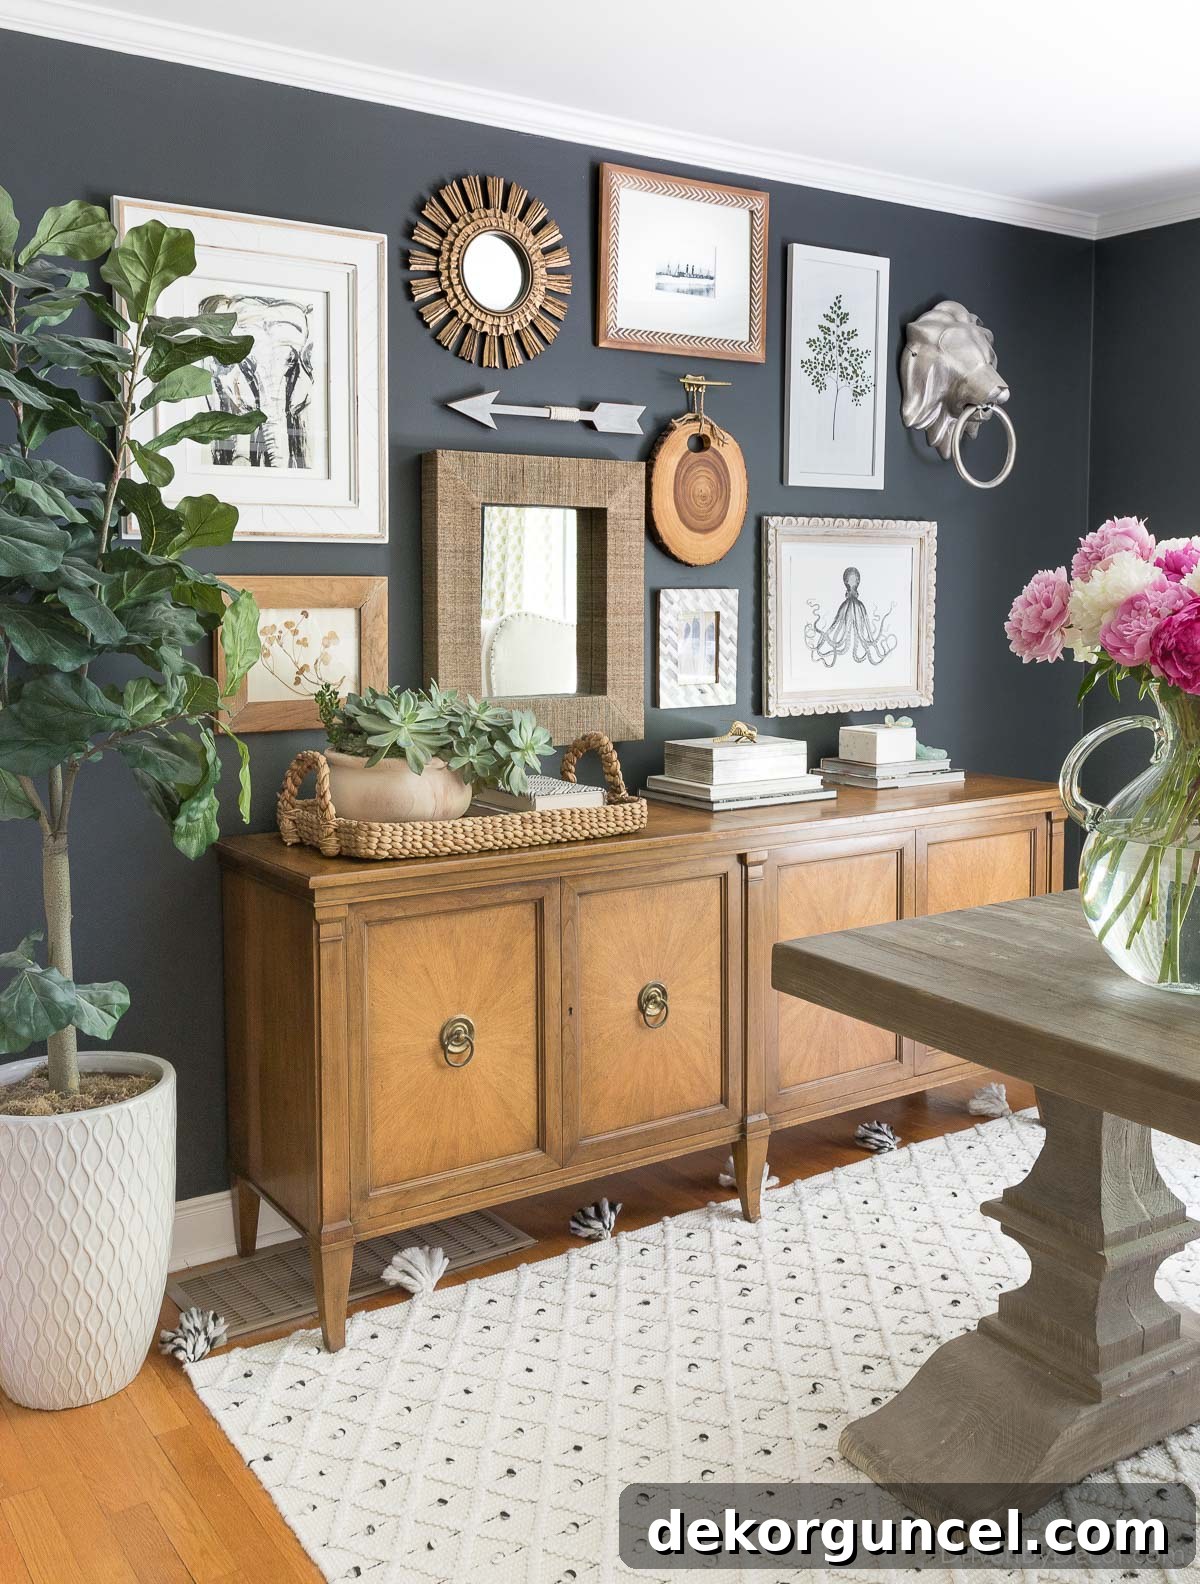
Sources: Desk (similar) | Rug | Faux fiddle leaf fig tree (similar) | Console is thrifted | Elephant art print | Woven tray | Other sources no longer available
These simple yet effective guidelines for how high and how far apart to hang your cherished art pieces will ensure they shine:
- **The Eye-Level Rule for Single Art Pieces:** For a single piece of art, the golden rule is to hang it so its center is approximately 57″ – 60″ from the floor. This range places the artwork at average human eye level, allowing for comfortable viewing without craning necks. When dealing with larger pieces, aim closer to the 57″ mark; the increased visual weight of a big artwork means it can be hung slightly lower without feeling disconnected from the floor. Always consider the overall scale of the room and the art itself.
- **Grouping Multiple Pieces Vertically:** If you’re hanging two pieces of artwork one above another, treat them as a single, cohesive unit. Find the central point between the two frames (including any space you plan to leave between them) and apply the 57″ – 60″ rule to this imaginary center. This technique creates a unified visual statement rather than two disconnected pieces.
- **Spacing for Adjacent Art:** For larger pieces of art displayed on the same wall, maintain a consistent spacing of about 2-3″ between them. This gap provides enough breathing room so each piece can be appreciated individually while still feeling part of a larger collection. Smaller pieces, due to their less commanding presence, can be hung a little closer together, perhaps 1-2 inches apart, to form a tighter grouping.
- **Art Above Furniture: Proportion is Key:** When hanging artwork or a collection above a sofa, console, or other furniture, the art grouping should ideally span about ⅔ the width of the furniture below it. For instance, if your sofa is 60″ long, an art grouping around 40″ in total length (including the spaces between pieces) would create a balanced and grounded look, preventing the art from appearing dwarfed or overwhelming.
- **The Vertical Gap Above Furniture:** To ensure a harmonious connection between your art and the furniture it floats above, leave a space of 3″- 8″ between the top of the sofa or furniture and the bottom edge of the artwork. Too little space can make the arrangement feel cramped, while too much space makes the art feel disconnected and float awkwardly above the piece.
Window Treatments: The Art of Hanging Drapes for Maximum Impact
Window treatments are more than just functional elements; they are crucial design components that can define the character of a room. Properly hung drapes can enhance natural light, offer privacy, and create the illusion of grander windows and higher ceilings. If you’ve ever wondered about the ideal height for your drapery rods or the perfect fullness for your panels, these expert tips are here to guide you:
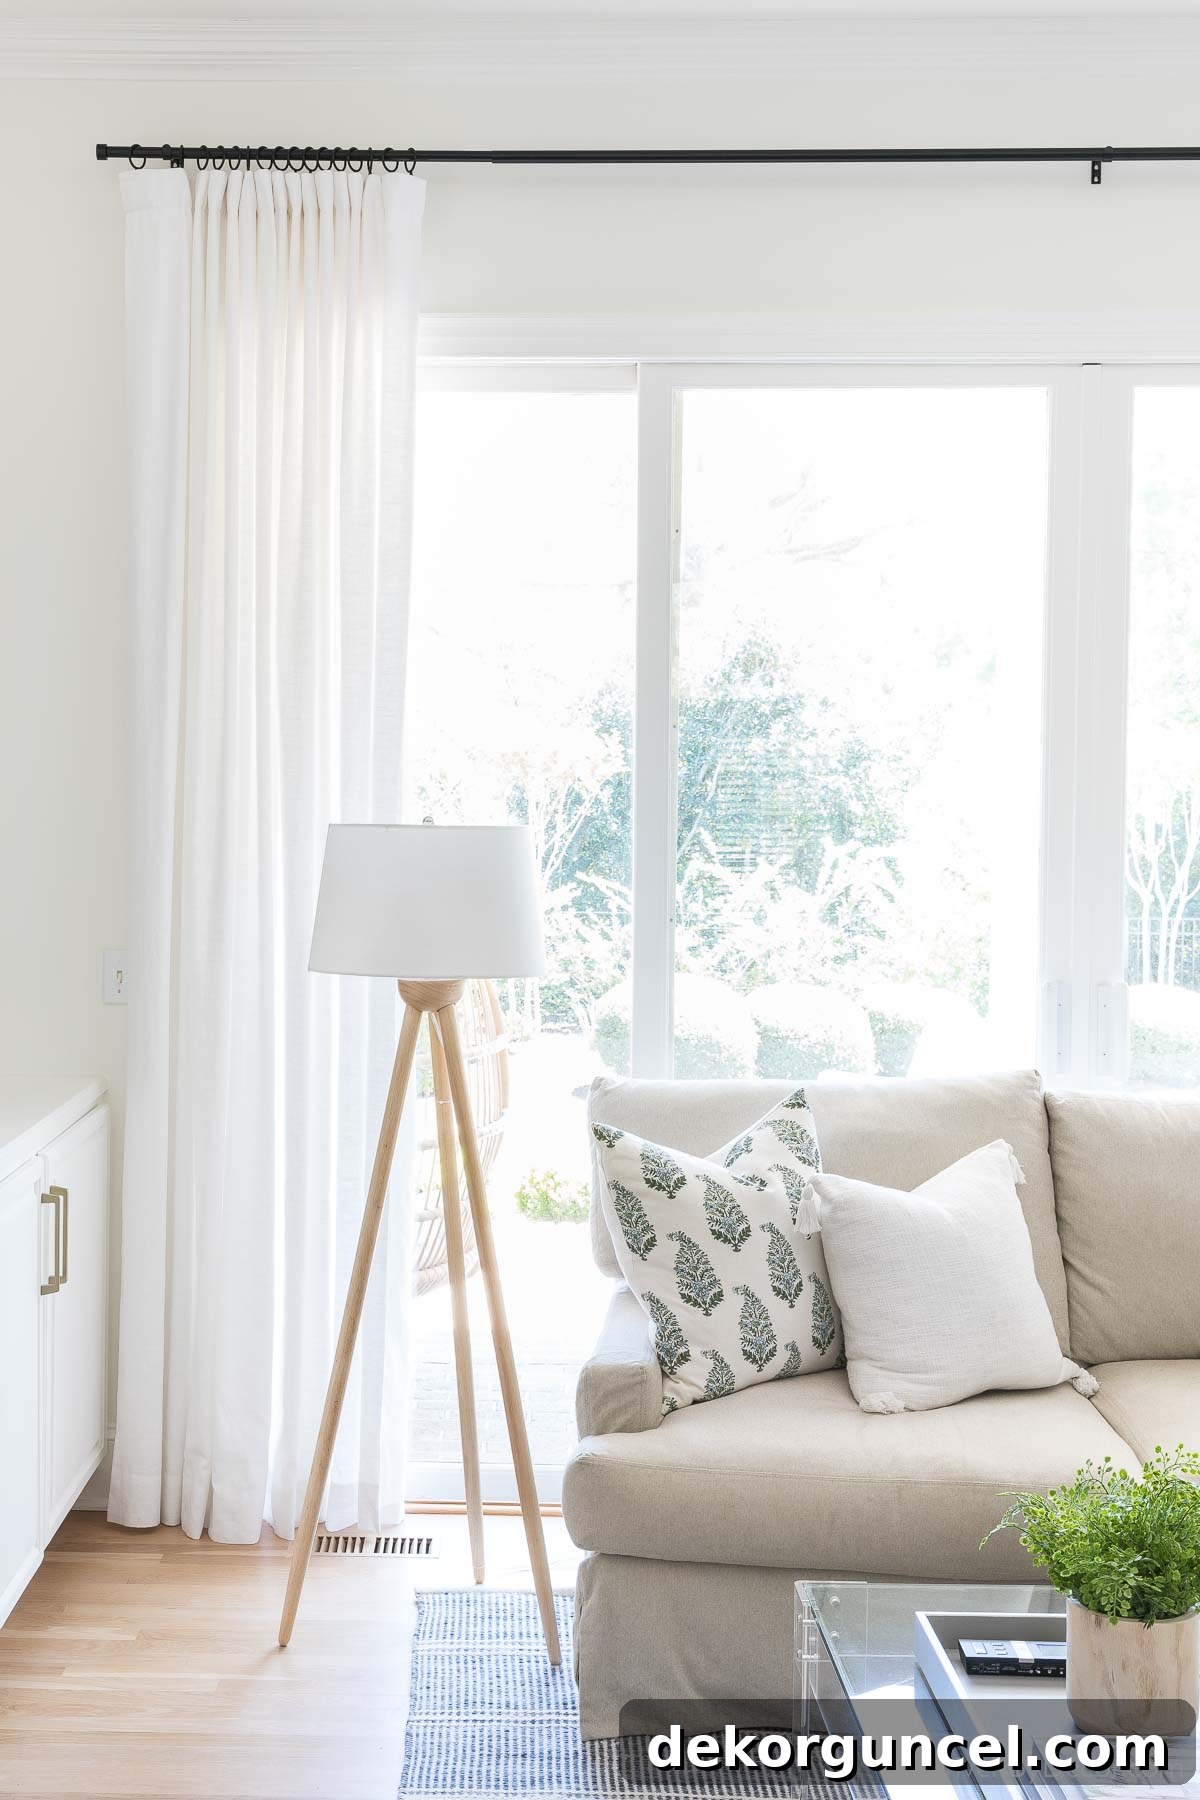
Sources: Drapes | Drapery rod | Drapery rings | Tripod lamp | Sectional sofa | Block print pillow | White tassel pillow | Rug | Acrylic coffee table (similar)
- **Drapery Length: The Perfect Break:** When selecting drapery panels, aim for a length that either “kisses” the floor or creates a slight “puddle” on it. Panels that just touch the floor offer a clean, tailored, and modern look, preventing tripping hazards and making cleaning easier. A slight puddle (1-3 inches of fabric resting on the floor) adds a touch of luxurious romance and softness, though it can accumulate dust more readily. Avoid panels that hover above the floor, as this often makes windows appear shorter and unfinished.
- **Mounting Rods High: Elevate Your View:** To create the powerful illusion of taller windows and higher ceilings, mount your drapery rods at least 4″ – 8″ above the window casing. If your ceiling height allows, you can even go higher, mounting them as close to the ceiling as possible. This draws the eye upwards, maximizing the perceived height of the room and creating a more elegant silhouette.
- **Extending Rods Wide: Maximize Light & Width:** To make your windows appear wider and allow maximum natural light to flood your space when the drapes are open, extend the drapery rods anywhere between 4″ and 10″ (excluding decorative finials) beyond the window casing on each side. This allows the drapes to stack entirely off the window glass when open, revealing the full window and creating a more expansive feel.
- **Drapery Fullness: The Secret to Luxury:** For a lush, professional, and opulent look, your drapery panels should have a combined width that is 2-3 times the width of the window itself. If you’re using two panels to frame a window, this means each individual panel should be 1 to 1½ times the window’s width. This generous fullness ensures that your drapes look rich and inviting, even when closed, avoiding a skimpy or stretched appearance.
Illuminating Your Space: What Size Light Fixture is Best?
Lighting is an essential element in interior design, capable of transforming the ambiance and functionality of any room. A well-chosen light fixture not only provides illumination but also serves as a sculptural art piece, anchoring the space and enhancing its overall aesthetic. Whether you’re selecting a grand chandelier for your dining room or an overhead fixture for a living area, getting the size and placement right is crucial for both visual balance and effective lighting. Here are the measurements you need to know to make brilliant choices:
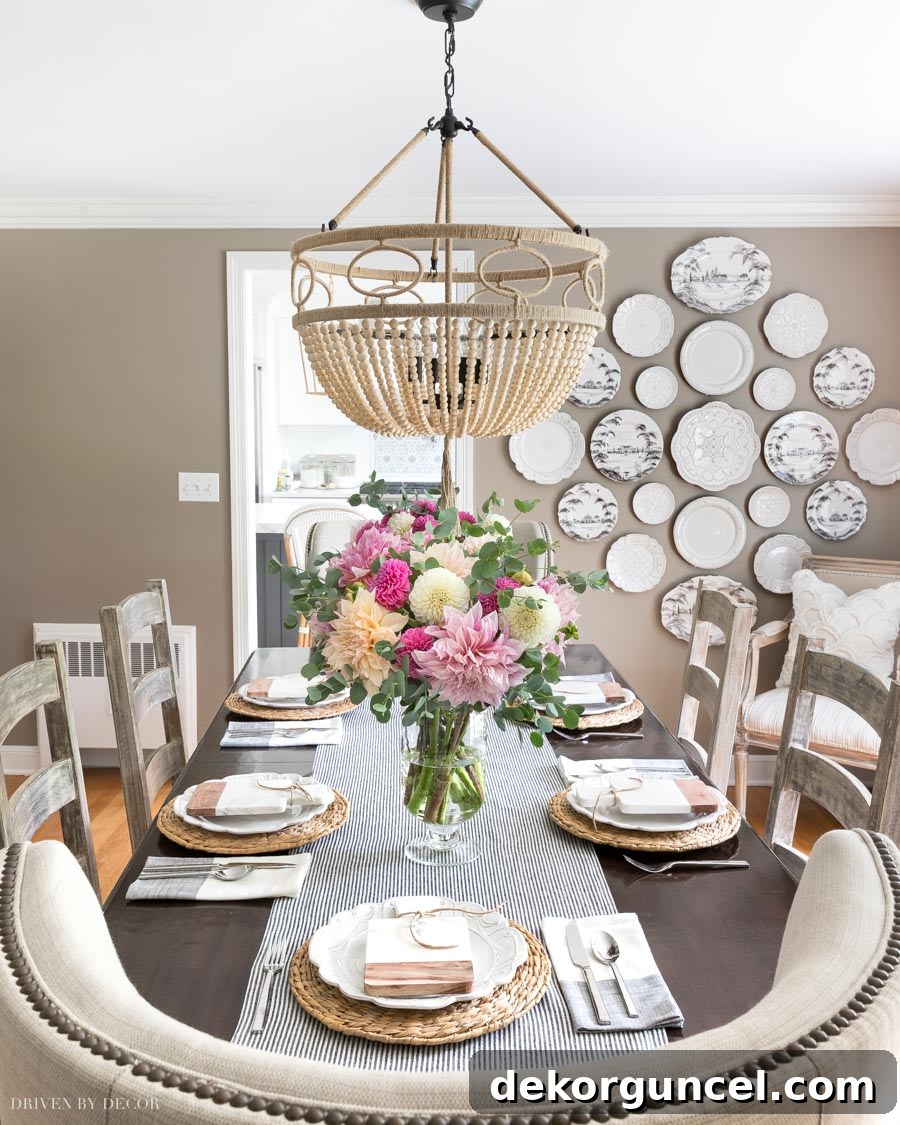
Dining Room Sources: Wood bead chandelier | Table & chairs – no longer available | 13″ Rattan chargers (similar) | Table runner (similar) | Glass hurricane vase | Wood vases – no longer available | White wall plates | Patterned wall plates
For Chandeliers Hanging Over a Dining Table:
- **Chandelier Width for Dining Tables:** The ideal width of your chandelier should be approximately ½ to ⅔ the width of the table it will illuminate. This proportion ensures the fixture feels substantial enough without overpowering the table or impeding the view of those seated. Another useful rule of thumb is that the chandelier’s width should be about a foot less than the width of the table at its widest point. This prevents accidental bumps and creates a comfortable zone around the light.
- **Chandelier Height Above Dining Tables:** For an 8-foot ceiling, the bottom of the chandelier should hang between 30″ – 36″ above the surface of the dining table. This height allows for clear sightlines across the table and provides effective illumination without causing glare. If you have higher ceilings, you can adjust the chandelier upwards by 3-4″ for each additional foot of ceiling height to maintain the correct visual proportion within the room.
For Overhead Fixtures in General Rooms (e.g., Living Room, Entryway) Not Hanging Over a Table:
- **Determining Fixture Width for Open Spaces:** To find a good approximate width for an overhead light fixture in a general room, measure the length and width of the room in feet. Add these two measurements together, and the resulting number (in inches) provides an excellent guideline for the fixture’s ideal width. For example, if your living room measures 10 feet x 15 feet, add 10 + 15 to get 25. A 25″ wide fixture would be appropriate for this space, creating a balanced focal point. For rooms with exceptionally high ceilings, you might add an extra 6″ or more to the calculated width to account for the increased vertical space.
- **Determining Fixture Height for General Rooms:** To ascertain a suitable height for your overhead fixture, multiply the height of your ceiling (in feet) by 2.5 and then by 3. The height of your fixture, measured from the ceiling to the bottom of the fixture, should typically fall within this calculated range (in inches). For instance, if you have 8-foot ceilings, calculating 8 x 2.5 = 20 and 8 x 3 = 24 suggests an appropriate fixture height between 20″ and 24″. This ensures the fixture is proportional to the room’s vertical dimension.
- **Headroom Clearance for Walkways:** Any overhead fixture that will be walked directly underneath, such as in an entryway or hallway, must hang at least 7 feet or more above the floor. This critical clearance measurement ensures safety and comfort, preventing people from bumping their heads and allowing for unimpeded movement throughout the space.
Rugs: Sizing Your Area Rugs for a Defined and Cohesive Space
Area rugs are far more than just floor coverings; they are fundamental design elements that define zones, add warmth, texture, and a touch of luxury to any room. Choosing the right size rug is crucial for grounding your furniture, creating visual harmony, and ensuring a comfortable, well-proportioned space. A rug that’s too small can make a room feel disjointed, while one that’s too large might overwhelm it. These practical tips will help you select the perfect rug size for your home:
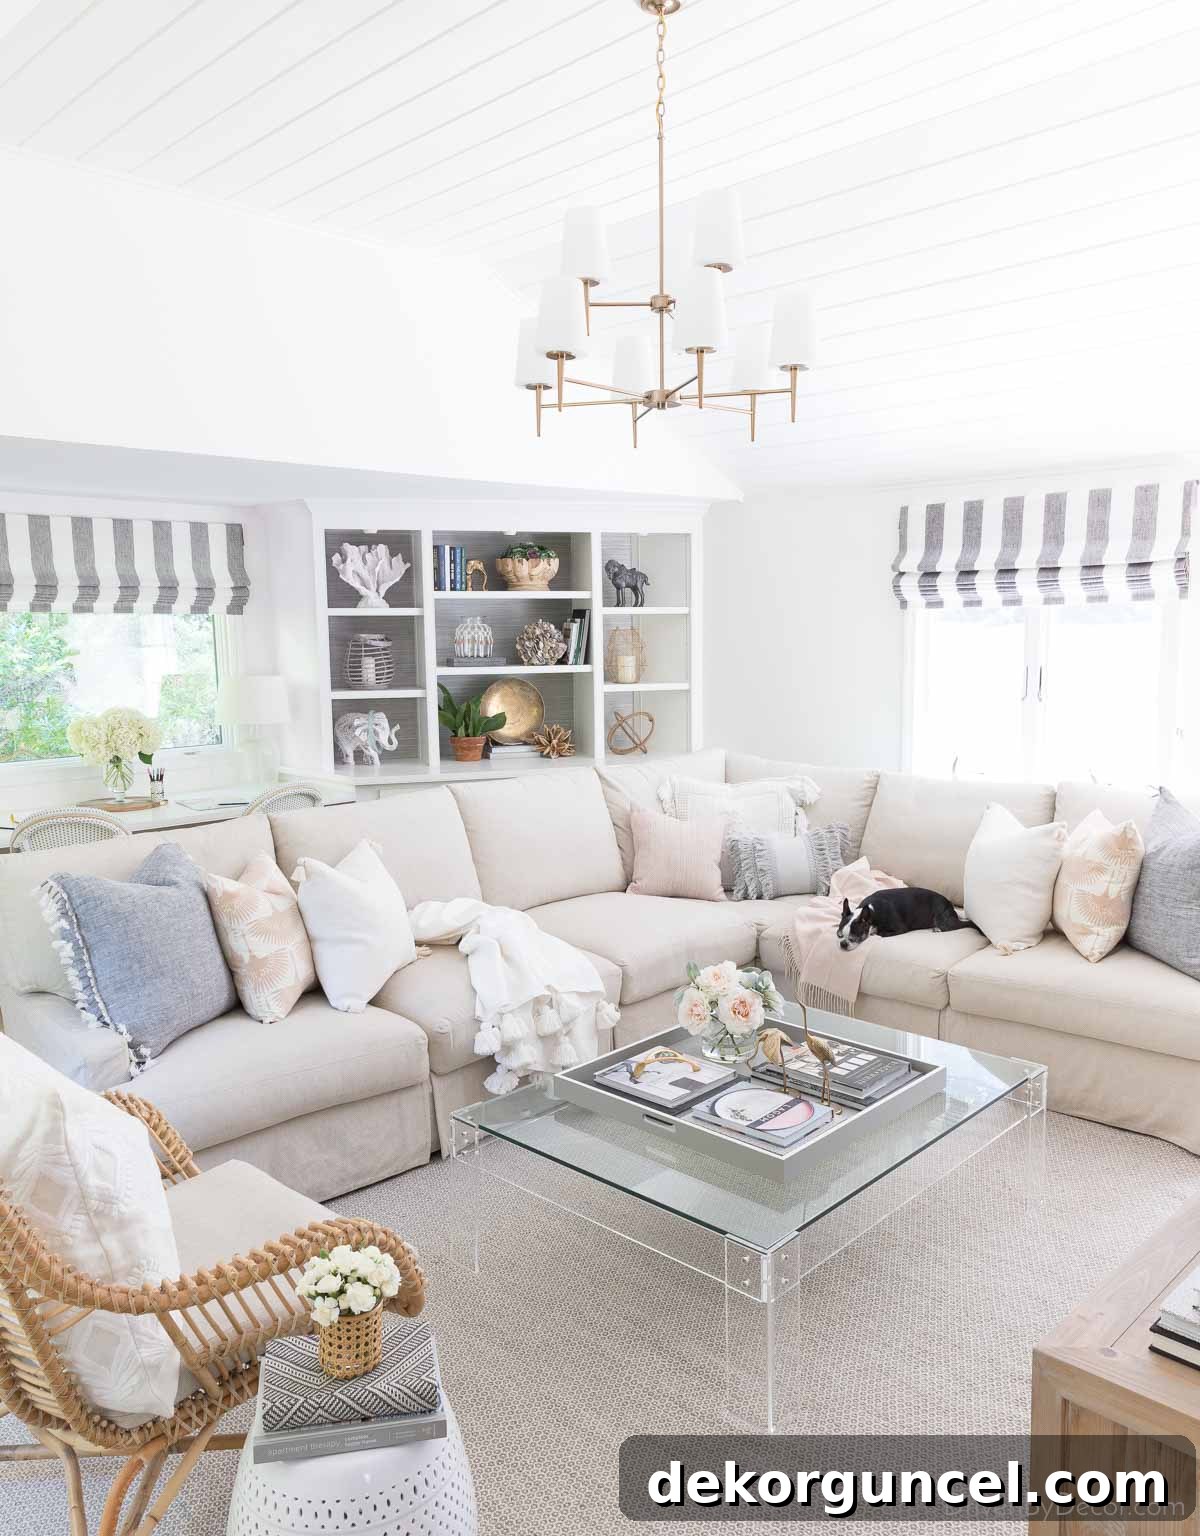
Sources: Sectional | Chandelier (satin bronze) | Tasseled pillow covers | Cream corner pillow | Rug | Acrylic coffee table (similar) | Coffee table tray (similar) | Rattan chair | Garden stool side table | Grasscloth wallpaper behind bookcase shelves (Charcoal) |
- **Dining Room Rugs: Keep Chairs On:** For dining areas, the rug placed under your table should extend at least 24-30″ wider and longer than the table itself on all sides. This generous extension ensures that when dining chairs are pulled out from the table, their back legs remain comfortably on the rug. This prevents chairs from catching on the rug’s edge, maintains stability, and creates a cohesive, inviting dining zone.
- **Bedroom Rugs: Anchoring Your Sleep Space:** Area rugs under a bed should extend a minimum of 18-24″ beyond each side and the foot of the bed. This creates a soft landing for your feet when you get out of bed and helps to ground the furniture. For most small to medium bedrooms with a king-sized bed, an 8 x 10 rug is typically the best fit, with the longer 10′ side running in the same direction as the headboard to maximize coverage. If your bedroom is larger, a 9 x 12 rug can provide even more luxurious coverage. For rooms featuring a queen-sized bed, an 8 x 10 rug is generally the most effective size to achieve this desired extension and balance.
- **General Room Rugs: The Bare Floor Border:** In most typically sized rooms, aim to leave approximately 12″ – 18″ of bare floor between the edges of the area rug and the walls of the room. This border allows the room’s flooring to show through, creating a visual frame for the rug and preventing the space from feeling overwhelmed. For smaller rooms where space is at a premium, a narrower margin of approximately 8″ of exposed floor is a good rule of thumb, still providing definition without making the room feel cramped. For living rooms, ensure at least the front legs of all major upholstered pieces (sofa, armchairs) rest on the rug to properly anchor the seating arrangement.
These last two rules might just be the most important:
- **Plan Before You Purchase:** Always take a few minutes to carefully consider these measurements and guidelines before committing to buying drapes, lighting fixtures, or rugs. A little planning can save you a significant amount of time, money, and the frustration of making a purchase you’ll later regret because it doesn’t quite fit or look right. Use painter’s tape or old sheets to map out rug and art sizes on your floor and walls!
- **Embrace Creative Freedom: Don’t Be Afraid to Break the Rules!** While these “rules of thumb” are invaluable tools for achieving balance and proportion, remember they are meant to guide you, not to stifle your creativity or the joy of decorating. If you’ve experimented with a design choice that doesn’t strictly adhere to these measurement guidelines but looks and feels absolutely perfect to you, then wholeheartedly go for it! Some of the most stunning and memorable gorgeously designed rooms are those that confidently break every rule in the book, prioritizing unique vision and personal style. Trust your instincts and create a home that truly reflects you.
