
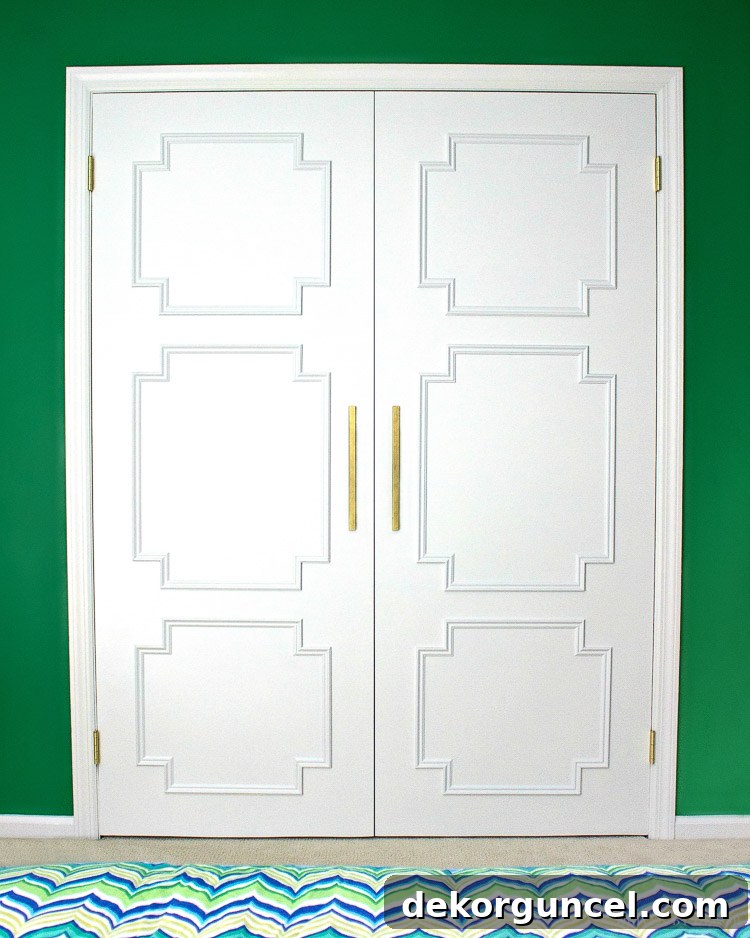
Flat Panel Door Makeover: Transform Your Basic Doors into Masterpieces
Are your interior doors looking a little… flat? Many homes come equipped with plain, builder-grade slab doors that lack character and can make a space feel uninspired. If you’ve been dreaming of elegant, paneled doors but balk at the high cost of replacement, prepare to be amazed! A DIY flat panel door makeover is an incredibly effective and budget-friendly way to infuse your home with charm and sophistication. You can elevate your doors to a luxurious, custom look for a mere fraction of the price of buying new ones.
In this comprehensive guide, I’ll walk you through a step-by-step process, revealing how I transformed my own unadorned flat doors into stunning architectural features. The best part? This entire project can be completed with minimal tools, making it accessible even for novice DIYers. Say goodbye to dull and hello to distinguished!
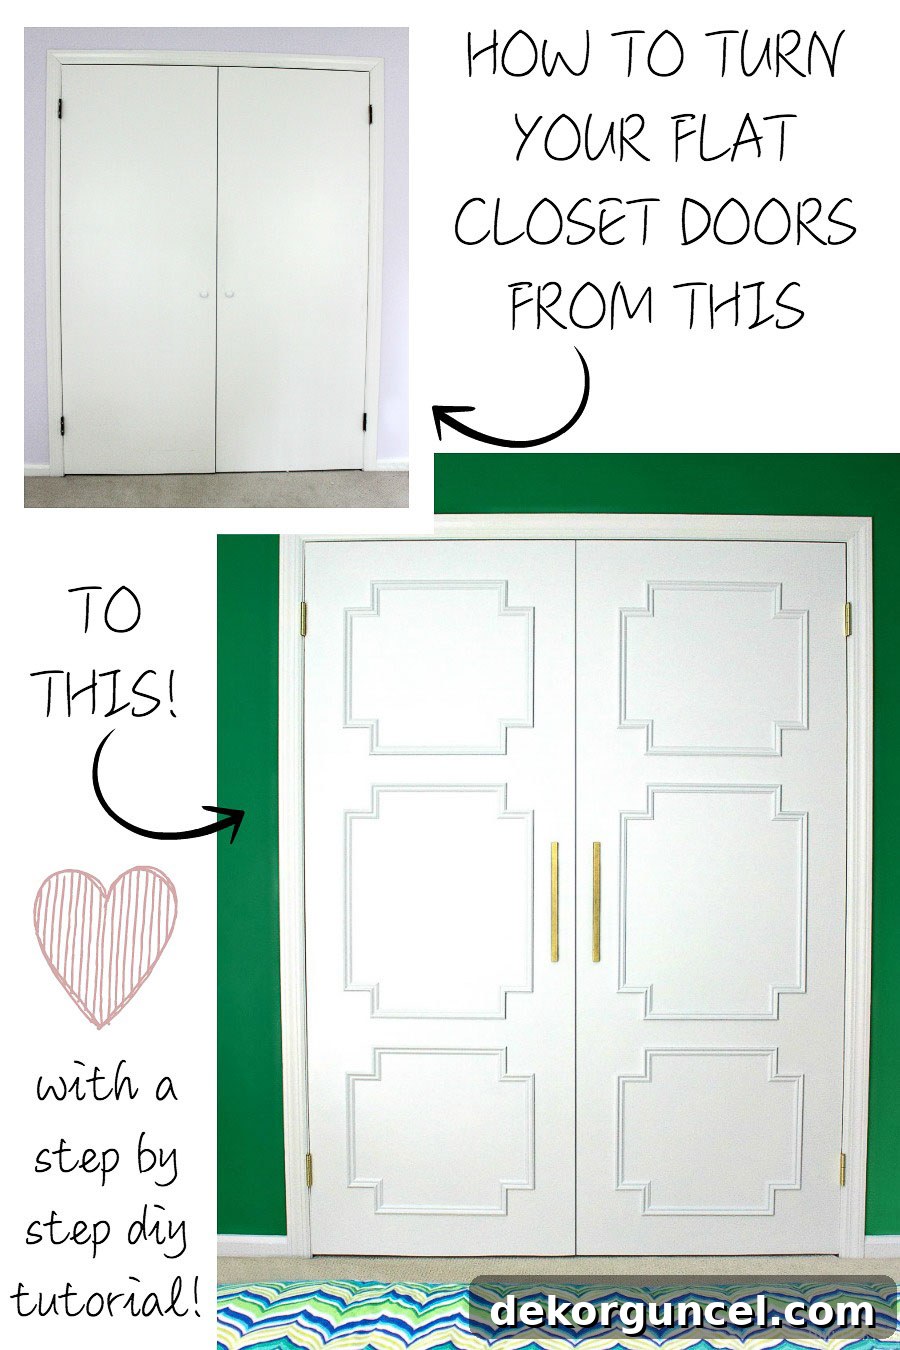
Witness the incredible transformation from this:
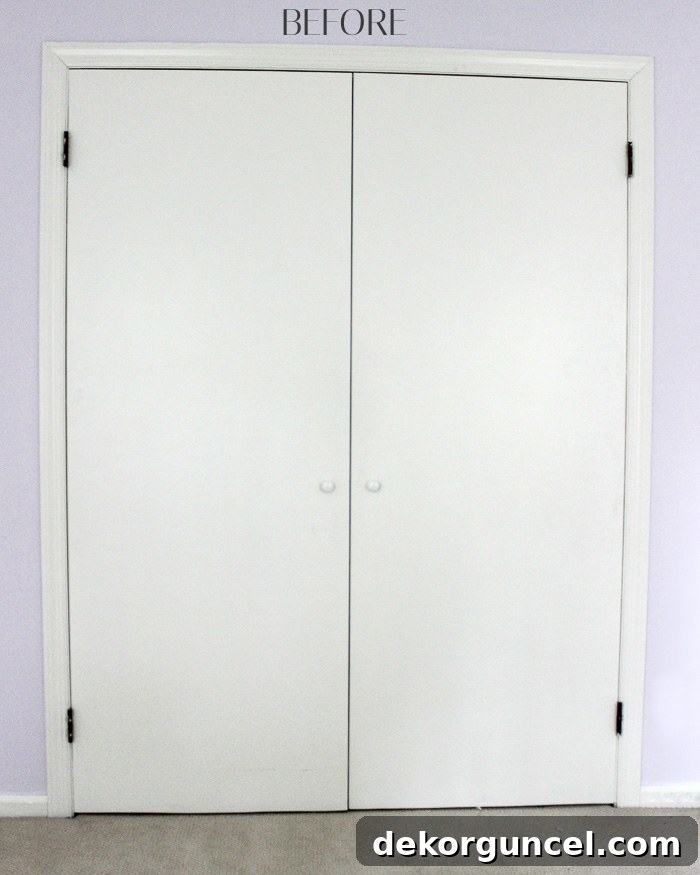
to this breathtaking result:
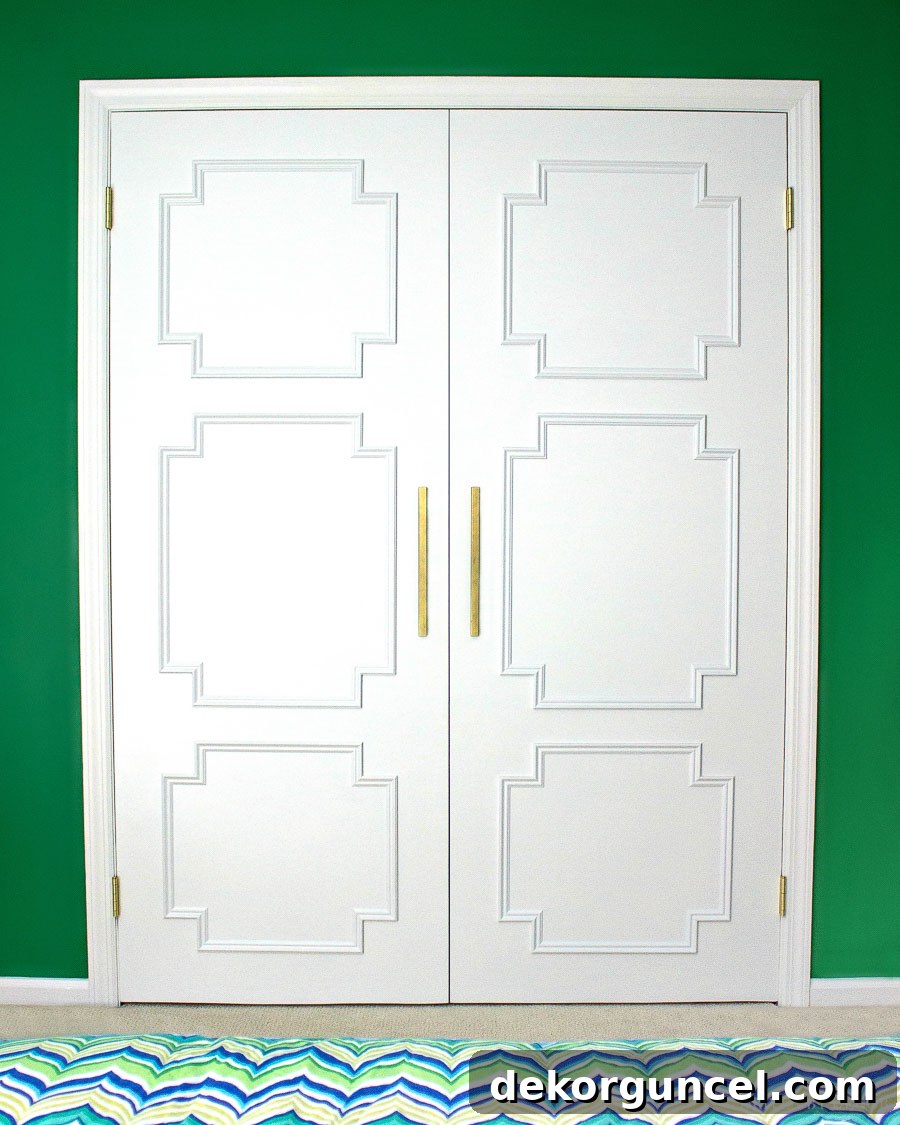
You might be surprised to learn that I accomplished this entire project with nothing more than basic hand tools and a simple drill. This proves that you don’t need a workshop full of expensive equipment to achieve professional-looking results. Let’s dive into the detailed steps and turn those ordinary doors into extraordinary focal points. (Please note: This post includes commissionable links. For more information, please see my full disclosure statement {here}.)
Why Upgrade Your Flat Doors? The Benefits of a DIY Makeover
Beyond the obvious aesthetic improvement, a flat panel door makeover offers a multitude of benefits:
- Enhanced Home Value: Upgraded interior doors can subtly boost your home’s perceived value and appeal to potential buyers.
- Personalized Style: This DIY allows you to tailor the look of your doors to match your unique home decor, whether it’s classic, modern farmhouse, or contemporary.
- Cost-Effective Elegance: Achieve a high-end look without the high-end price tag. Molding and paint are significantly cheaper than purchasing new custom doors.
- Sense of Accomplishment: There’s immense satisfaction in transforming an ordinary element of your home with your own hands.
- Architectural Interest: Adding trim creates depth and dimension, turning a plain surface into an architectural feature that elevates the entire room.
Gathering Your Essential Tools and Materials
Before embarking on your door transformation journey, it’s crucial to gather all the necessary supplies. My raised panel design was crafted using inexpensive panel molding, readily available at most local hardware stores. Finding a similar low-profile molding is key for this look. Here’s a close-up of the molding I used, which measures 1 inch wide and 5/16 inch at its thickest point, providing just enough depth for a classic panel effect:
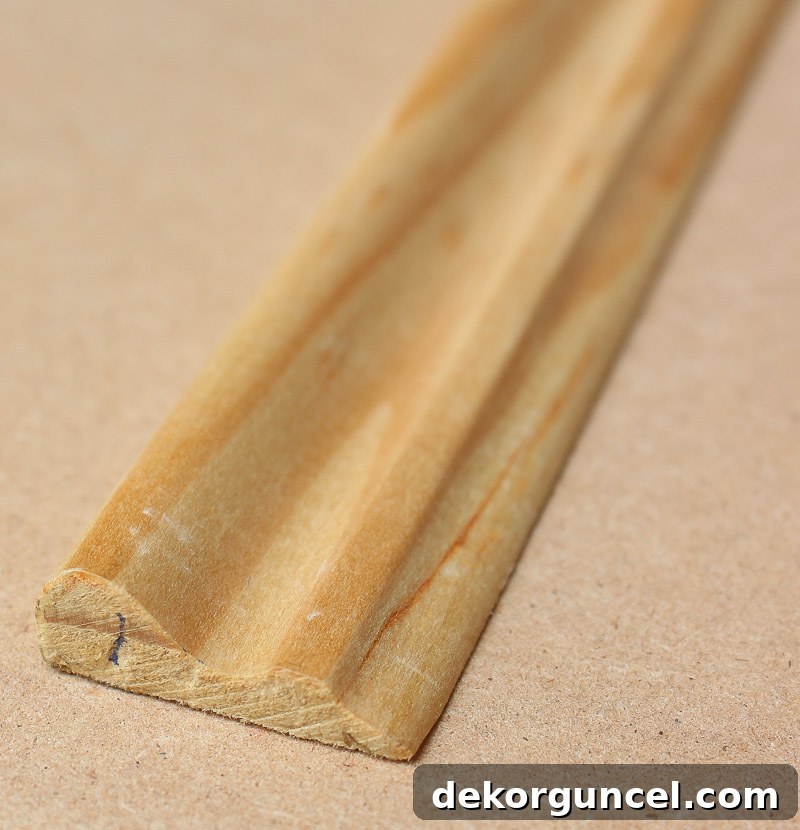
Here’s a comprehensive list of what you’ll need:
- Panel Molding: Choose a low-profile design that complements your desired aesthetic. It’s always wise to buy a little extra for mistakes.
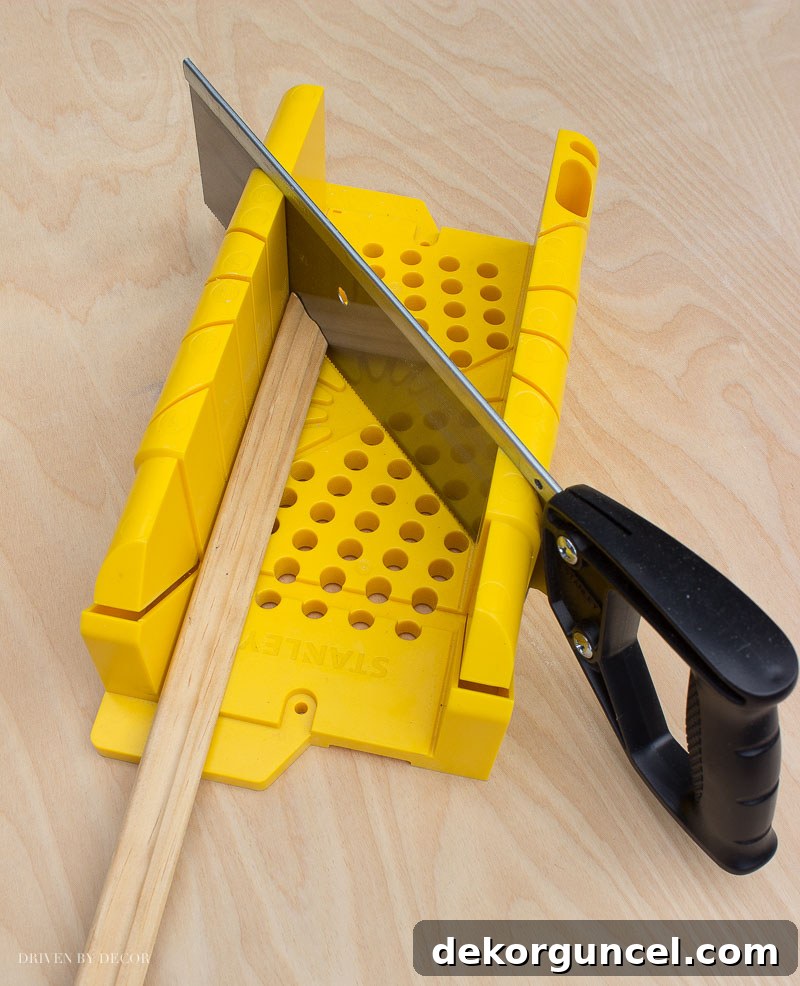
- Miter Box and Saw: Essential for making precise 45-degree angled cuts to form crisp corners. While a manual miter box works perfectly, if you have access to a power miter saw, it will speed up the process considerably.
- Wood Glue: A strong wood adhesive is critical for securing the molding. Opt for a high-quality glue that dries clear.
- Small Brad Nails and Hammer: For added security, especially on longer or slightly warped pieces of molding. A small finish nailer (brad nailer) is an excellent alternative if you have one.
- Drill with Small Drill Bit: Used for pre-drilling pilot holes for brad nails, preventing the thin molding from splitting.
- Paintable Caulk: The secret weapon for achieving a seamless, professional finish by filling any small gaps between the molding and the door.
- Wood Filler: To conceal any nail holes or minor imperfections in the molding.
- Painter’s Tape: Indispensable for temporarily holding molding pieces in place while the glue dries and for marking layout lines.
- Level: Absolute essential for ensuring all your molding pieces are perfectly straight and square.
- Measuring Tape: For accurate dimensions of your door and molding pieces.
- Pencil: For marking cut lines and panel layouts.
- Paint and Painting Supplies: High-quality paint (e.g., Benjamin Moore Advance for durability), brushes, and a roller for a smooth finish. Consider a primer if your doors are currently a dark color or have an uneven surface.
Step-by-Step Guide to Your Door Transformation
Step 1: Planning Your Panel Layout and Measurements (The Creative Blueprint)
This is arguably the most crucial and time-consuming step, so don’t rush it. The success of your flat panel door makeover hinges on careful planning. Begin by deciding on the type of panel pattern you want to create. Popular choices include single large panels, multiple smaller panels (like a classic two-panel or three-panel door), or even custom geometric designs. Consider the style of your home and the existing architecture when making this decision.
Once you have a design in mind, it’s time to meticulously measure your door. My closet doors were 30 inches wide by 79.5 inches tall. I aimed for a symmetrical, classic look. I recommend sketching your design on paper first, carefully noting all measurements. Determine the desired spacing from the door’s edges and between any internal panels. For a professional look, try to keep these margins consistent.
Here are the measurements I used for my specific paneling pattern, which created two distinct rectangular panels:
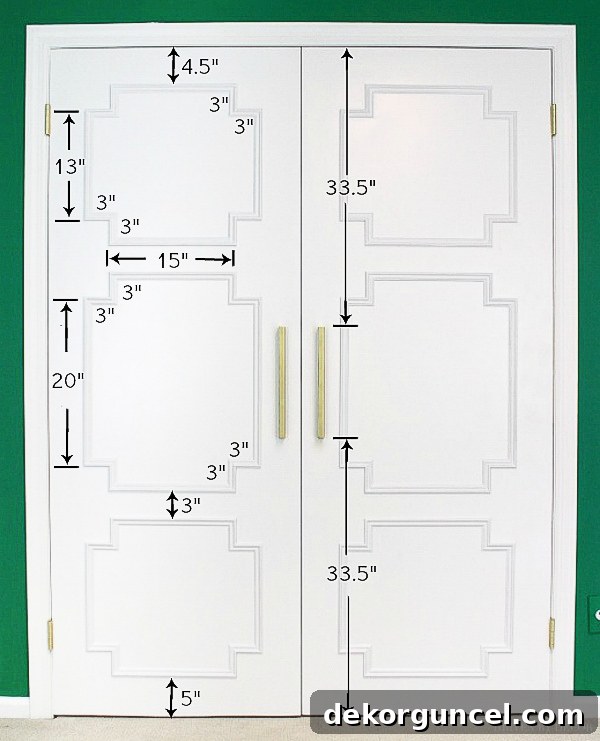
Once you’ve finalized your dimensions, it’s time to cut your molding. Using the miter box and saw, carefully cut each piece of molding to size, ensuring all corners are cut at a precise 45-degree angle. This will allow them to join perfectly to form crisp, square corners. This cutting phase can take a while – for my project, it was about 2.5 hours from start to finish due to the sheer number of cuts. If you own or can borrow a power miter saw, it will drastically reduce this time and effort!
Step 2: Hinge Check and Door Preparation (Setting the Foundation)
Before you commit to adhering any molding, take a moment to inspect your door’s hinges. If your doors are old, squeaky, or slightly misaligned, now is the ideal time to replace or adjust the hinges. New hinges can sometimes subtly change the door’s alignment within its frame, and you want the door in its final, stable position before you begin measuring and leveling your molding pieces. Ensure the door operates smoothly and closes correctly.
Also, give the door a good wipe down to remove any dust, dirt, or grease that could interfere with glue adhesion. A lightly dampened cloth followed by a dry one usually suffices.
Step 3: Marking, Taping, and Visual Confirmation (Trial Fit)
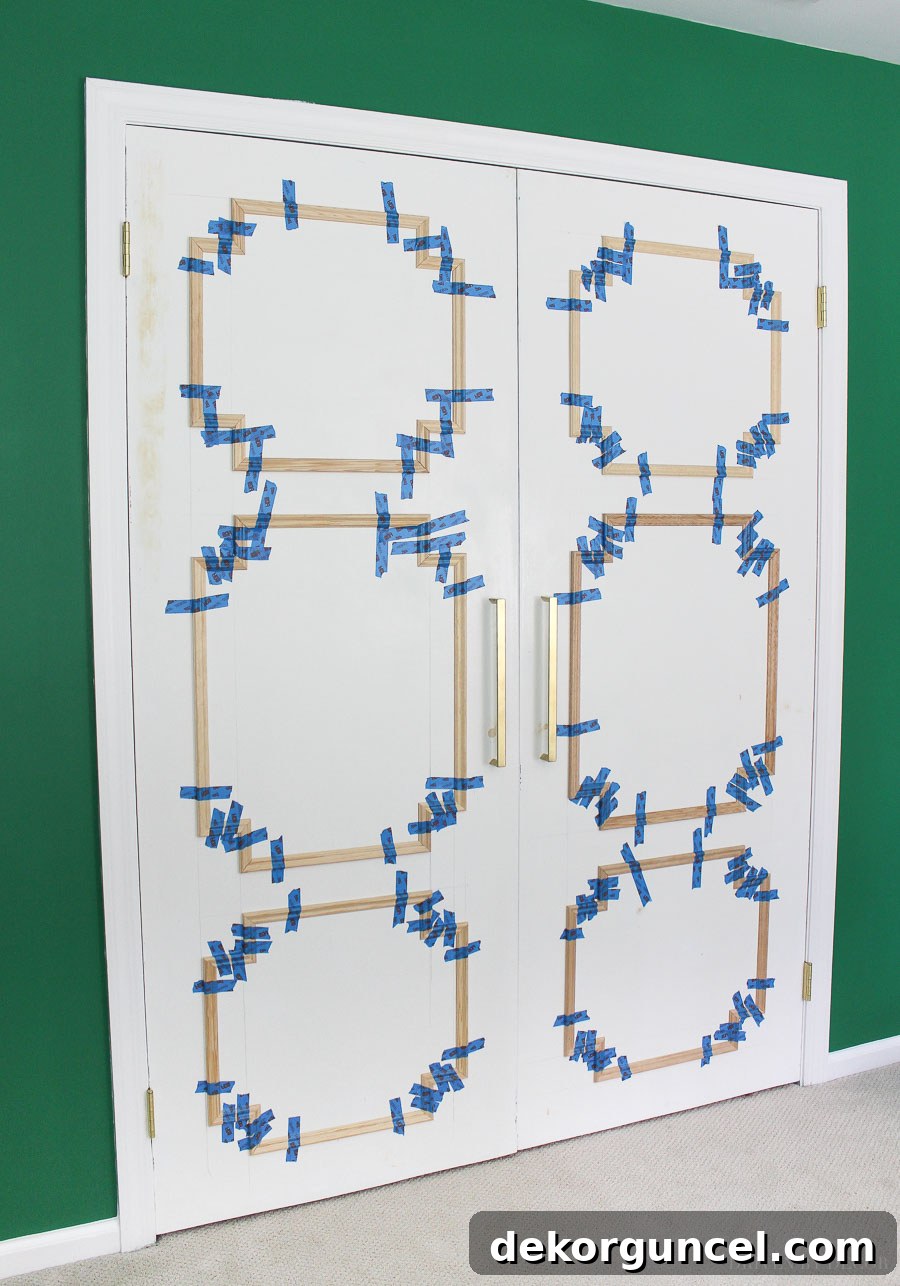
With your molding pieces cut, it’s time for a dry run. Begin by carefully marking your door. Use your measuring tape, level, and pencil to lightly draw guide lines where each piece of molding will be placed. Precision here is paramount to ensure your panels are straight and symmetrical.
Next, temporarily tape each of the cut molding pieces in place using painter’s tape. Don’t be shy with the tape; it needs to hold the pieces firmly. Step back and double-check everything: ensure all pieces are level, corners meet perfectly, and the overall alignment is exactly as you envisioned. This “trial fit” allows you to make any necessary adjustments before permanent adhesion.
Step 4: Securely Attaching the Molding (Making it Permanent)
Once you are completely satisfied with the layout, it’s time to glue the molding in place. Working one piece at a time, remove a piece of molding, apply a continuous, thin bead of wood glue to the back of it, and then carefully press it back into its marked position on the door. Press firmly for a few seconds to ensure good contact.
Re-secure the molding piece with painter’s tape immediately after gluing. The tape acts as a clamp, holding the molding flush against the door while the glue dries. Quickly wipe away any excess glue that squeezes out with a damp cloth; dried glue can be difficult to remove and will show through paint.
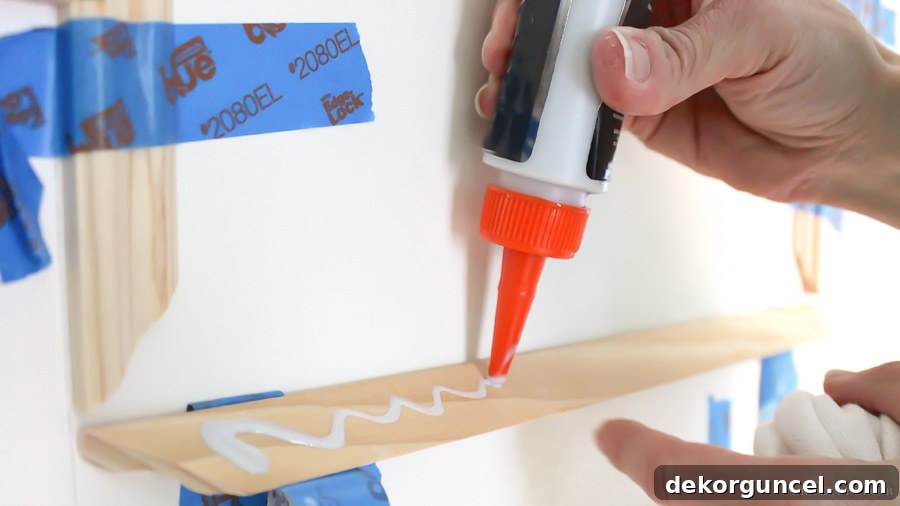
For most pieces, glue alone, coupled with the painter’s tape, will suffice. However, I found that about six of my longer molding pieces weren’t perfectly flat. These slightly warped pieces wouldn’t stay completely flush with the door while the glue dried. For these stubborn pieces, I added a small brad nail to each end that was lifting. This ensured they stayed down until the glue fully cured.
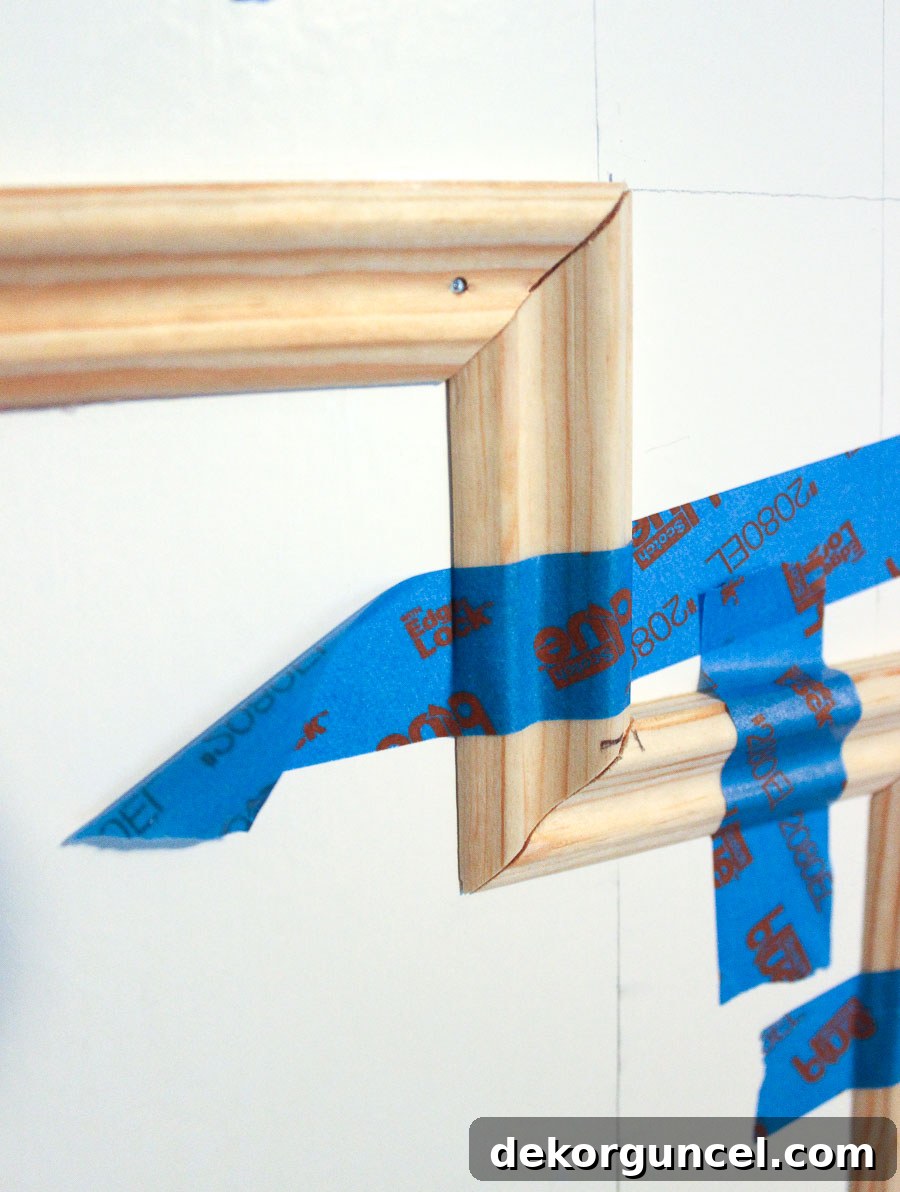
Pro Tip for Nailing: Molding as thin as panel molding can easily split when a nail is driven directly into it. To prevent this, always pre-drill a tiny pilot hole using a drill bit slightly smaller than your brad nail. Once the pilot hole is ready, gently tap the brad nail in with a hammer, ensuring it’s set flush or slightly below the surface. After the glue has completely dried (check the manufacturer’s recommended drying time, usually 24 hours), you can remove all the painter’s tape.
Step 5: Finishing Touches – Filling, Caulking, and Sanding (Seamless Integration)
This stage is where your DIY project transforms into a professional-looking upgrade. First, apply wood filler to any small holes where you used brad nails and to any minor gaps in the mitered corners. Overfill slightly, as wood filler can shrink as it dries. Once the wood filler is completely dry (again, check product instructions), lightly sand these areas smooth with fine-grit sandpaper until they are flush with the molding. This creates an impeccable surface for painting.
Next comes the magical touch: caulking. Caulk any remaining gaps between the molding and the door, and along any seams where molding pieces meet. A continuous, smooth bead of paintable caulk along all edges is essential for a truly finished appearance. Use a caulk gun to apply a steady, even line, then smooth it out with a wet finger or a caulk tool. This step hides any imperfections and makes the molding look like an integral part of the door, not just an add-on. Allow the caulk to dry fully before proceeding to paint.
Step 6: Painting Your Masterpiece (The Final Transformation)
The final step in this flat panel door makeover is painting, which brings all your hard work together. Ensure your doors are clean and free of any dust from sanding. If your doors were previously painted with an oil-based paint, like mine were, you’ll need a compatible product. I highly recommend Benjamin Moore’s Advance paint. It offers the durability and smooth finish of an oil-based paint but cleans up easily with water, like a latex paint. Be aware that it does have a longer dry time between coats, so plan accordingly to achieve a flawless, streak-free finish.
Apply multiple thin coats for the best results, lightly sanding between coats if necessary. Use a high-quality brush for cutting in around the molding and edges, and a small foam roller for the flat surfaces of the door to minimize brush strokes. Proper ventilation is also important during this stage.
Step 7: Adding Hardware (The Jewelry for Your Door)
To complete the sophisticated look, add stylish new door pulls or knobs. For my closet doors, I chose IKEA’s 13-inch TYDA handles, which unfortunately are no longer sold. However, {these pulls} are quite similar and would achieve a comparable modern and elegant aesthetic. When installing hardware, measure carefully to ensure it’s centered and level, providing a polished final touch.
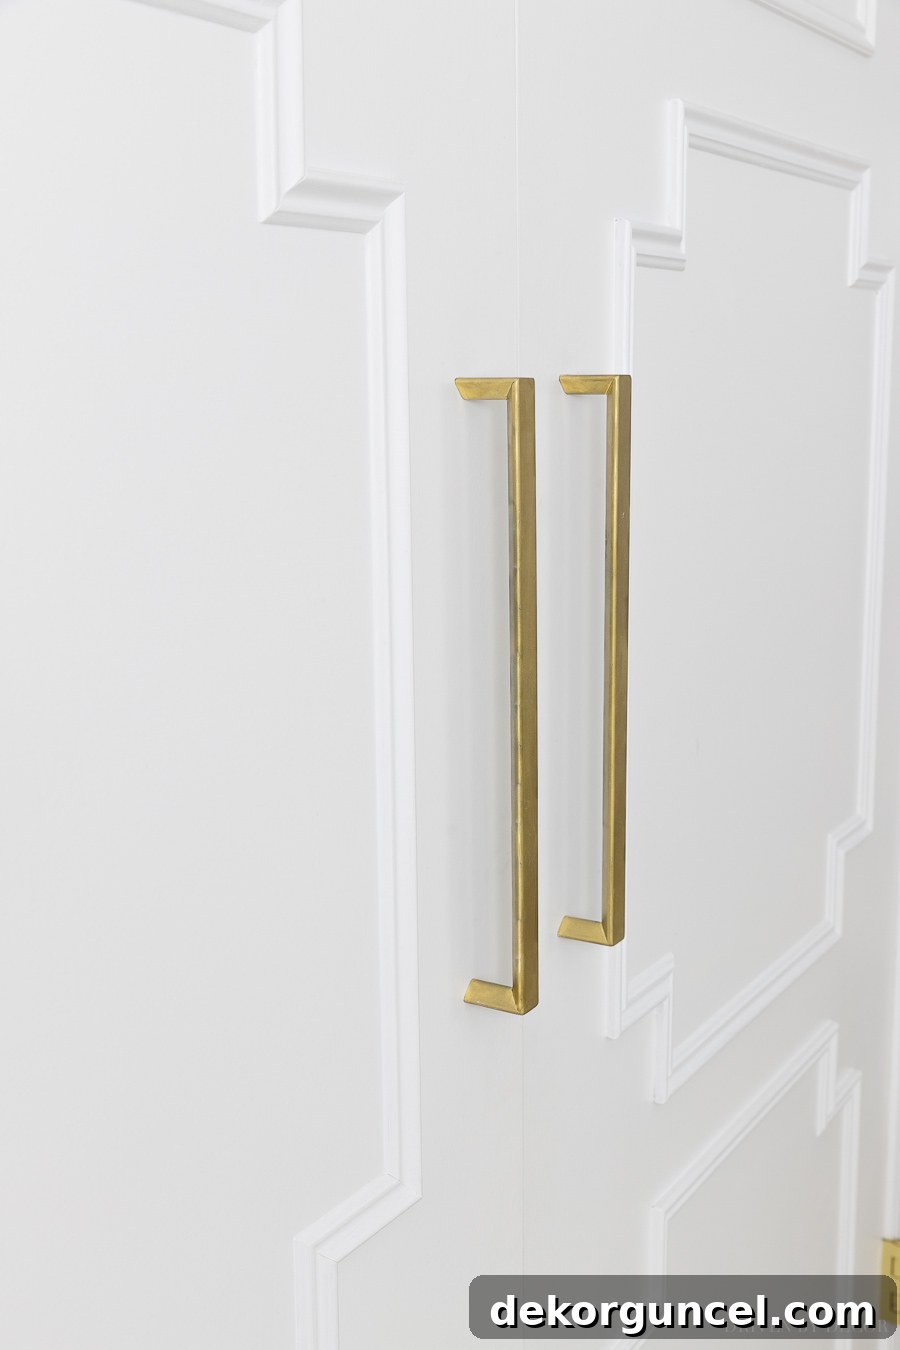
The Stunning Reveal!
And with those final touches, my flat panel door makeover was COMPLETE!
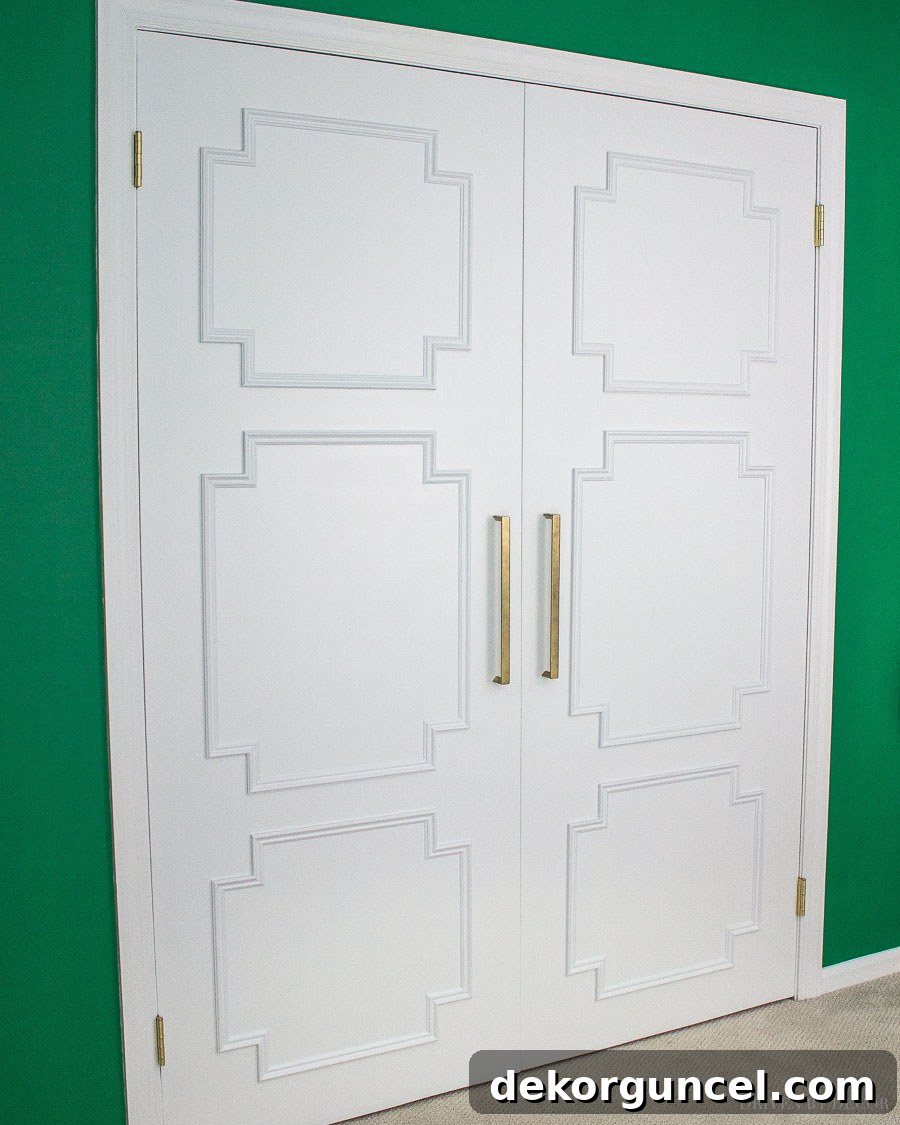
I couldn’t be happier with how they turned out, and more importantly, my daughter loves her “new” closet doors! This project truly transformed a bland, overlooked feature into a beautiful element of the room. If you have any flat doors in your home that are crying out for a little TLC and a significant upgrade, I sincerely hope you found this detailed guide helpful and inspiring.
This technique isn’t limited to just closet doors; you can apply it to any interior slab door in your home, or even to cabinet doors for a cohesive, custom look throughout your space. Imagine the possibilities!
Be sure to pin the image below to your DIY or home decor boards so you can easily find this post when you’re ready to tackle this rewarding project yourself!
Update: I loved this transformation so much that I even made over the flat closet doors in my other daughter’s bedroom, but with a totally different and equally stunning approach! Check out more creative ideas and inspiration in my post on closet door ideas.
Hope you all enjoyed seeing this project come to life and I’ll see you back on the blog next week for more home decor and DIY inspiration!
