
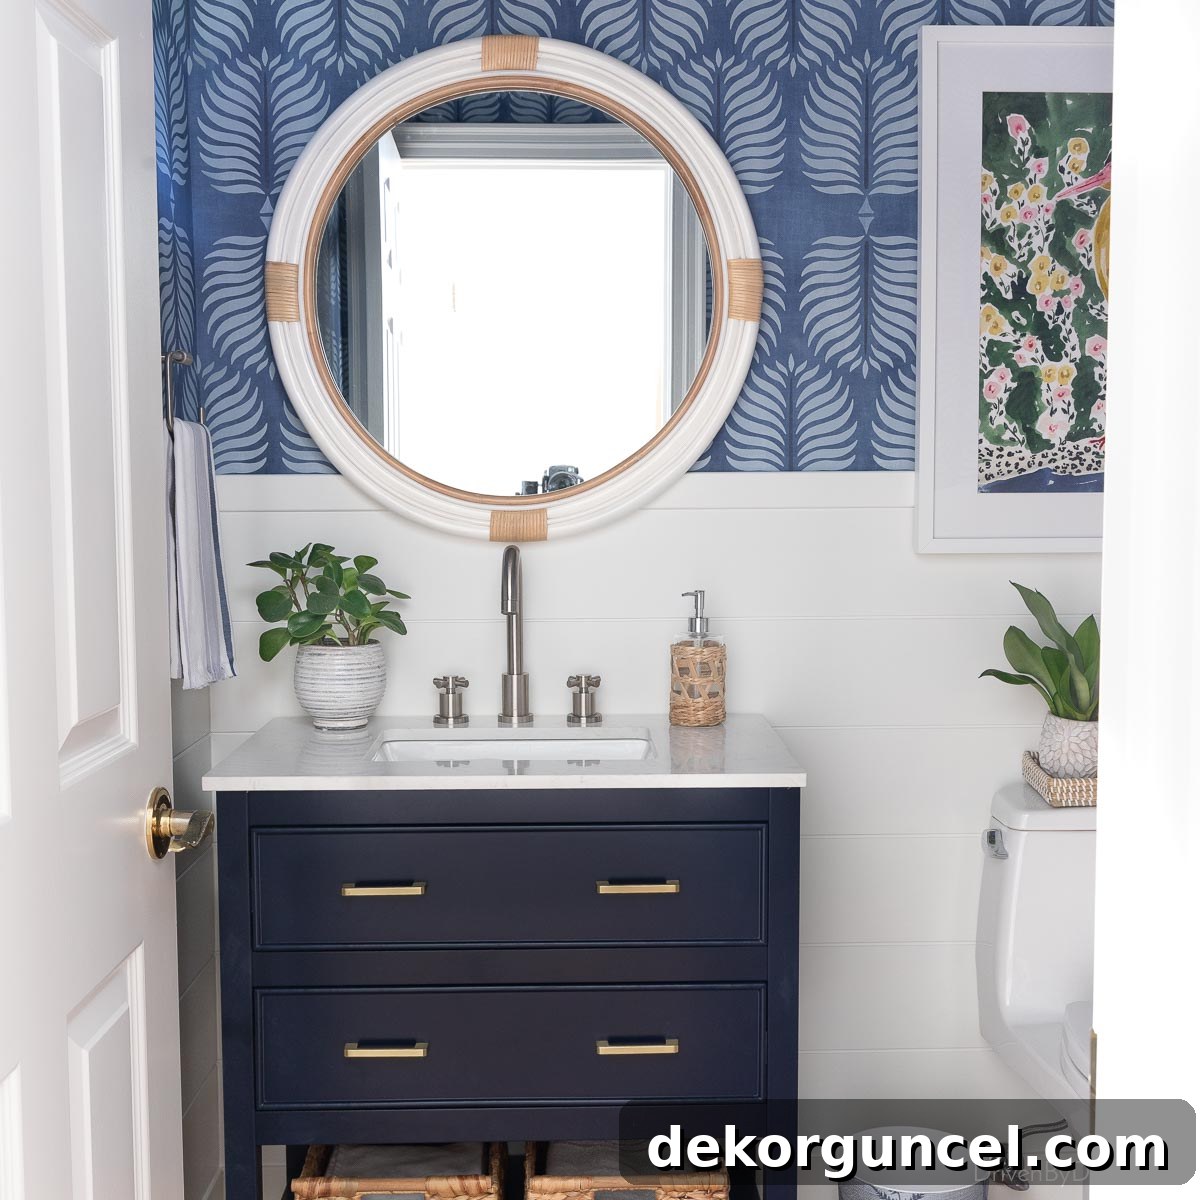
Welcome back, home design enthusiasts! We’re absolutely thrilled to finally unveil the grand reveal of our powder room remodel! This project has been a labor of love, a journey of transformation, and today, we’re pulling back the curtain to share every meticulous detail. Prepare to be inspired as we dive into the “before and after,” answer all your burning questions about our stunning new shiplap, and explore the myriad of other changes that have completely redefined this essential space in our home.
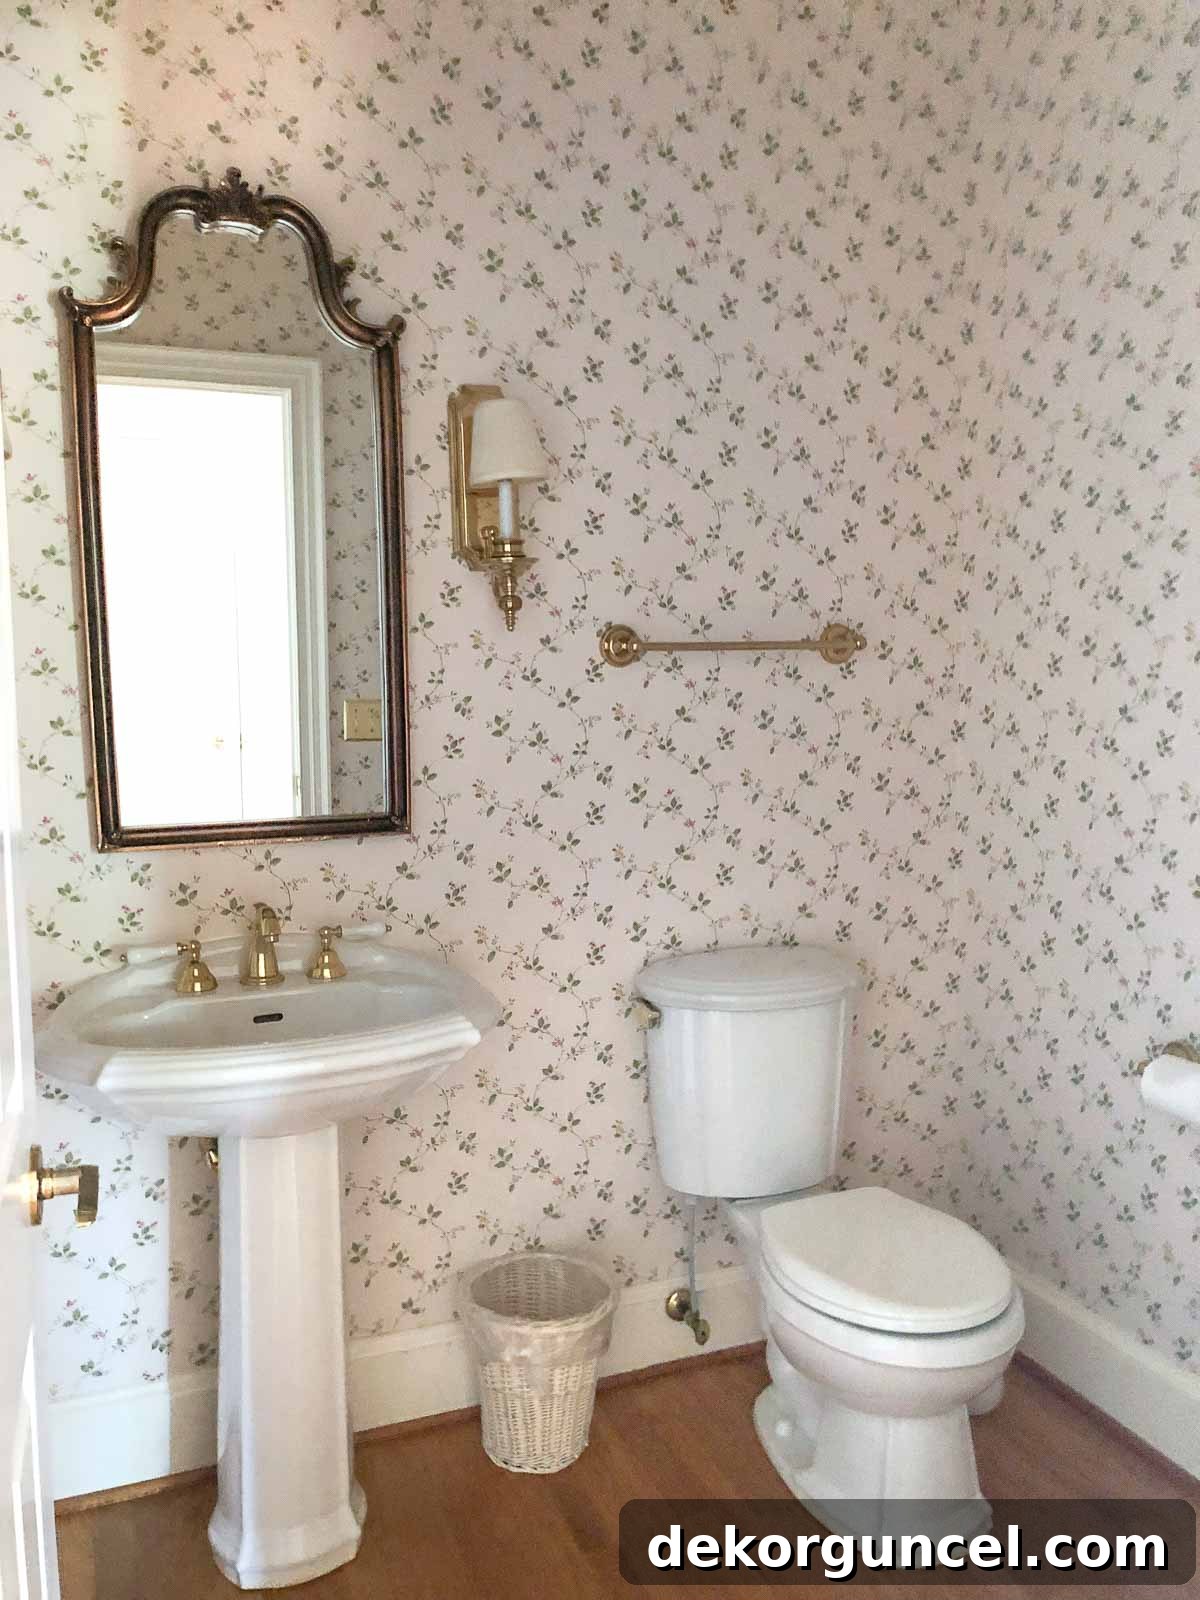
Unlike many of our previous renovation endeavors where we often preserve certain charming elements, this powder room remodel was a full-scale overhaul. We embraced the opportunity for a complete metamorphosis, leaving no stone unturned and no original fixture untouched. From the dated floral wallpaper that once adorned the walls to the clunky pedestal sink, the antiquated mirror, the old toilet, and the outdated lighting – everything has been meticulously replaced with fresh, modern, and functional alternatives. This wasn’t just an update; it was a total reinvention, designed to elevate both the aesthetic and practical appeal of our most-used small bathroom.
Even the foundational elements of our home have seen an upgrade, including a complete refinishing of our hardwood floors since we first moved in. For those interested in the journey to revitalized flooring, you can find all the details and tips in my comprehensive post on hardwood floor refinishing. Now, are you ready to step inside and witness this dramatic transformation for yourself? Let’s embark on this design adventure! (Please note: this post includes commissionable links, meaning I may earn a small commission if you make a purchase through them. For more information, please see my full disclosure statement {here})
To truly appreciate the extent of this renovation, it’s essential to start with a glimpse into the past. Here’s how things looked when we first purchased our home, offering a clear picture of the starting point for this exciting project:
And now, prepare for the dramatic reveal! Here’s that same view today, showcasing a breathtaking transformation that blends modern elegance with classic charm:
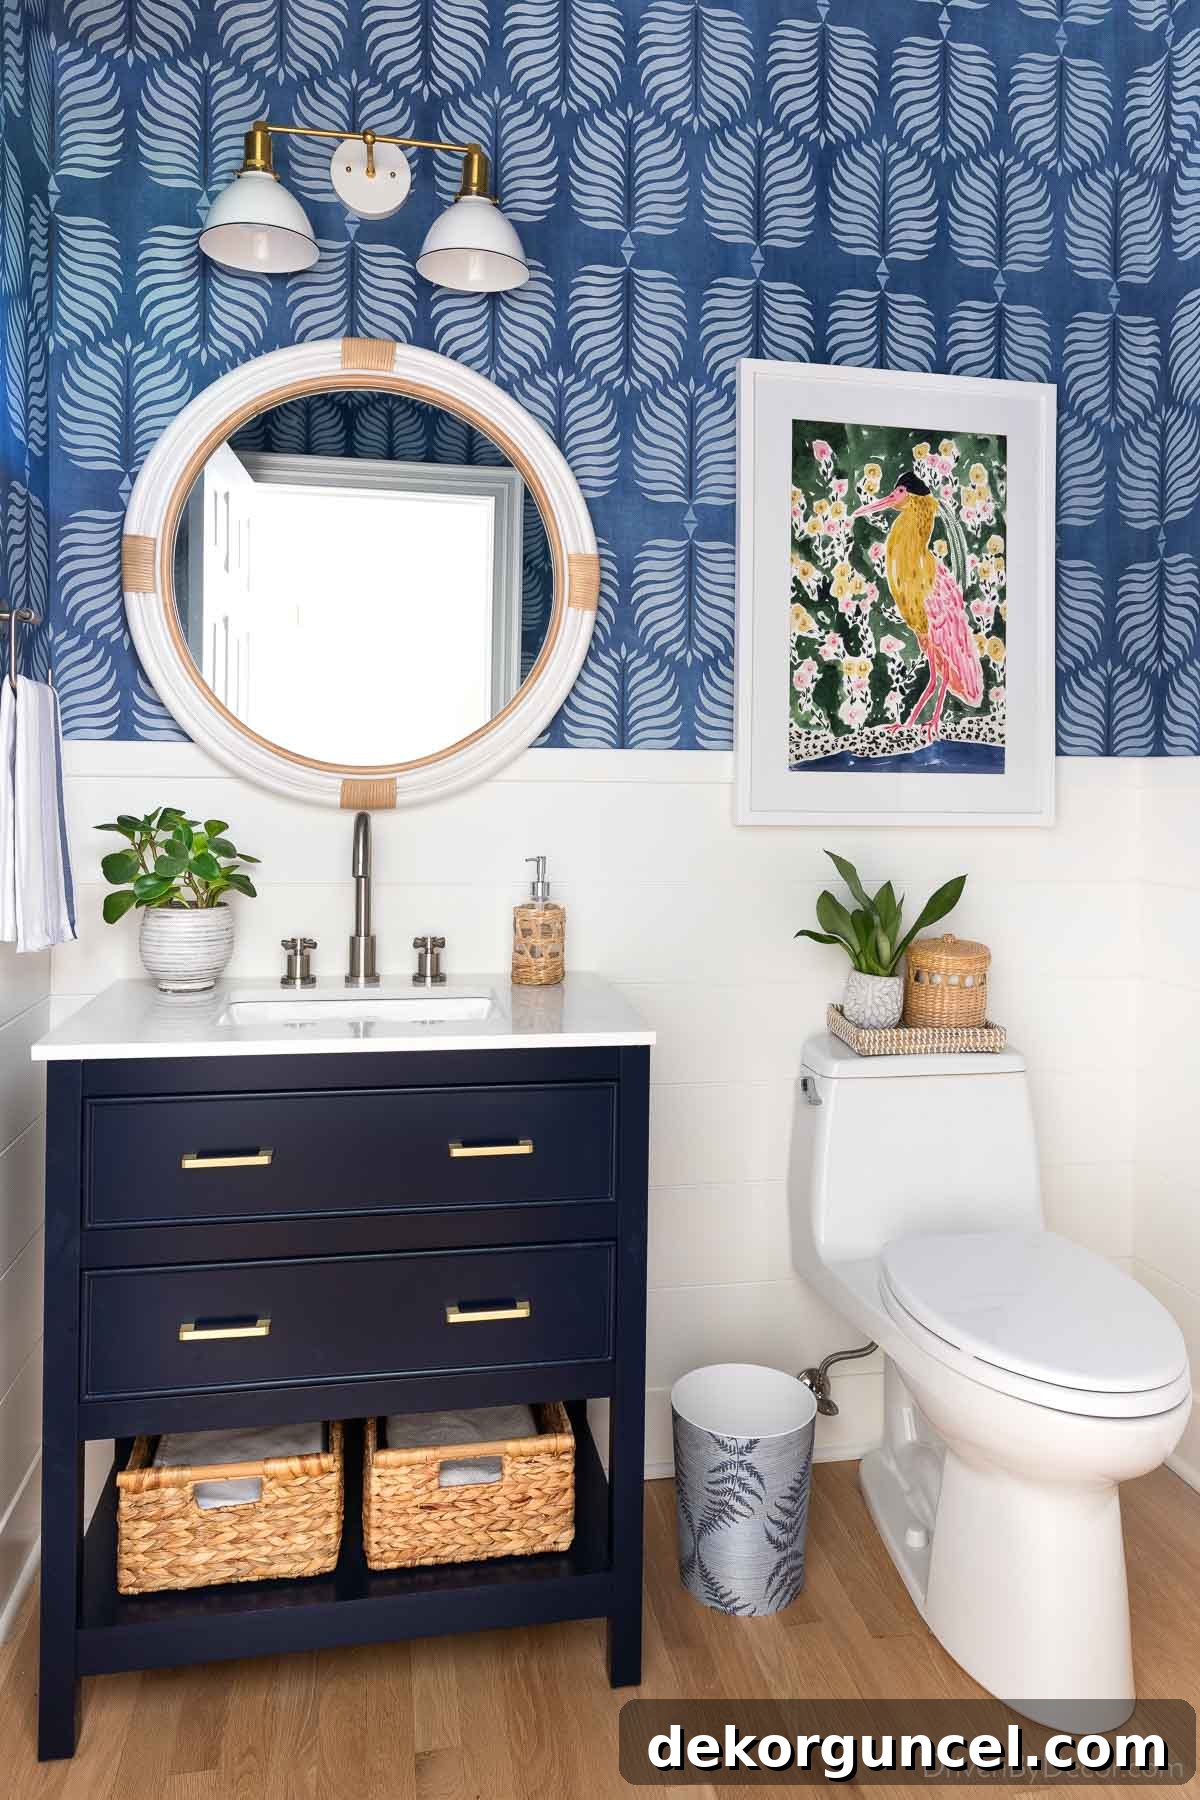
Design Sources & Selections: Indigo Patterned Wallpaper | Elegant 2-Light Sconce | Boho Round Rattan Mirror | Stylish Navy Blue Vanity | Modern Faucet (similar style) | Chic Woven Soap Pump | Stainless Steel Towel Ring | Large Woven Vanity Baskets | Sleek One-Piece Toilet | Brushed Gold Toilet Paper Holder | Small Woven Toilet Tray | Beautiful Bird Art Print (18 x 24) with White Wood Frame (similar aesthetic) | Economical Waste Basket artfully covered with a grasscloth wallpaper remnant.
Now that you’ve seen the stunning transformation, let’s delve deeper into the specific elements and design choices that breathed new life into our powder room. Each decision was carefully considered, balancing aesthetics, functionality, and budget to create a space that feels both luxurious and welcoming.
Transforming Walls: Powder Room Shiplap Installation & Design
One of the most impactful changes in our powder room remodel was undoubtedly the addition of shiplap. This classic architectural detail instantly infuses a space with character, texture, and a touch of modern farmhouse charm. Our process began by meticulously removing the old floral wallpaper, a task detailed in my dedicated post on how to remove wallpaper efficiently. Once the walls were prepped, we embarked on a two-tiered wall treatment: installing crisp shiplap on the bottom third and layering a fresh, patterned wallpaper on the upper two-thirds of the walls.
Our vision for the shiplap was very specific: we wanted boards that were at least 6 inches wide to achieve a substantial, yet refined look, and crucially, they needed to be thinner than our existing baseboards. This dimension was vital to allow us to keep our current baseboards and door casing in place, saving both time and effort on extensive trim work. After an extensive search, we were delighted to discover thin 7-inch MDF shiplap at Lumber Liquidators. It proved to be the perfect material, offering the desired aesthetic and fitting seamlessly into our existing trim structure. The thinner profile allowed the shiplap to rest perfectly against the wall without requiring us to remove and reinstall the baseboards, which often happens in shiplap projects.
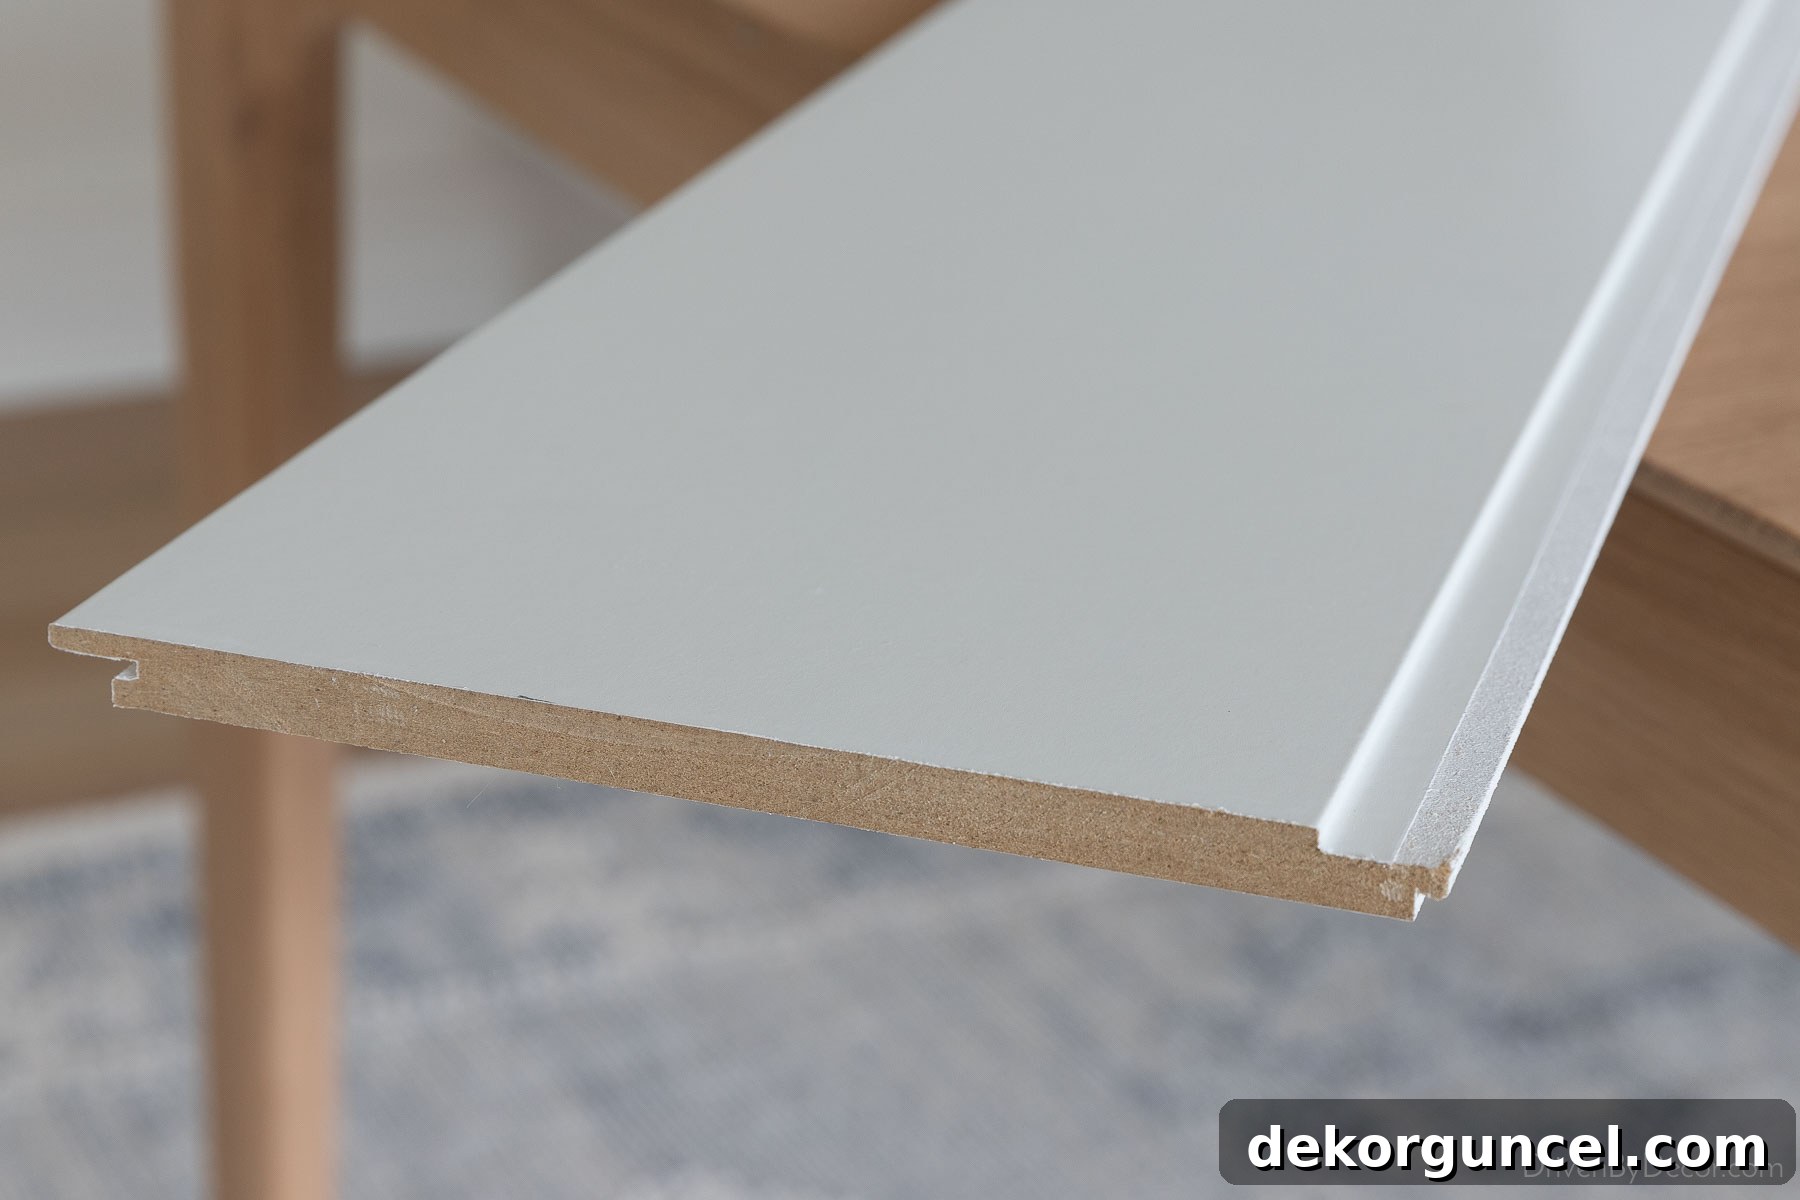
While Lumber Liquidators no longer carries the exact product, the popularity of shiplap means there are now numerous excellent alternatives available. I’ve sourced and linked several similar MDF shiplap options below, perfect for replicating this look in your own home:
- Versatile 7 ¼″ x 9/16″ x 7′ Shiplap Boards (Available on Amazon)
- Compact 5 ¼″ x .56″ x 6′ Shiplap Panels (Available on Amazon)
- Lowe’s Home Improvement Shiplap: Choose from 5 ¼″ or 7 ¼″ x 0.55″ in 8′ or 12′ lengths
- Home Depot Premium 7 ¼″ x 9/16″ x 8′ Shiplap Planks
Before proceeding with the shiplap installation, a small but necessary step involved removing the decorative cap from the top of our existing baseboards. This allowed for a clean, flush transition once the shiplap was installed. The removal process was relatively straightforward, and any minor wall damage it caused wasn’t a concern, as it would be completely covered by the new shiplap panels.
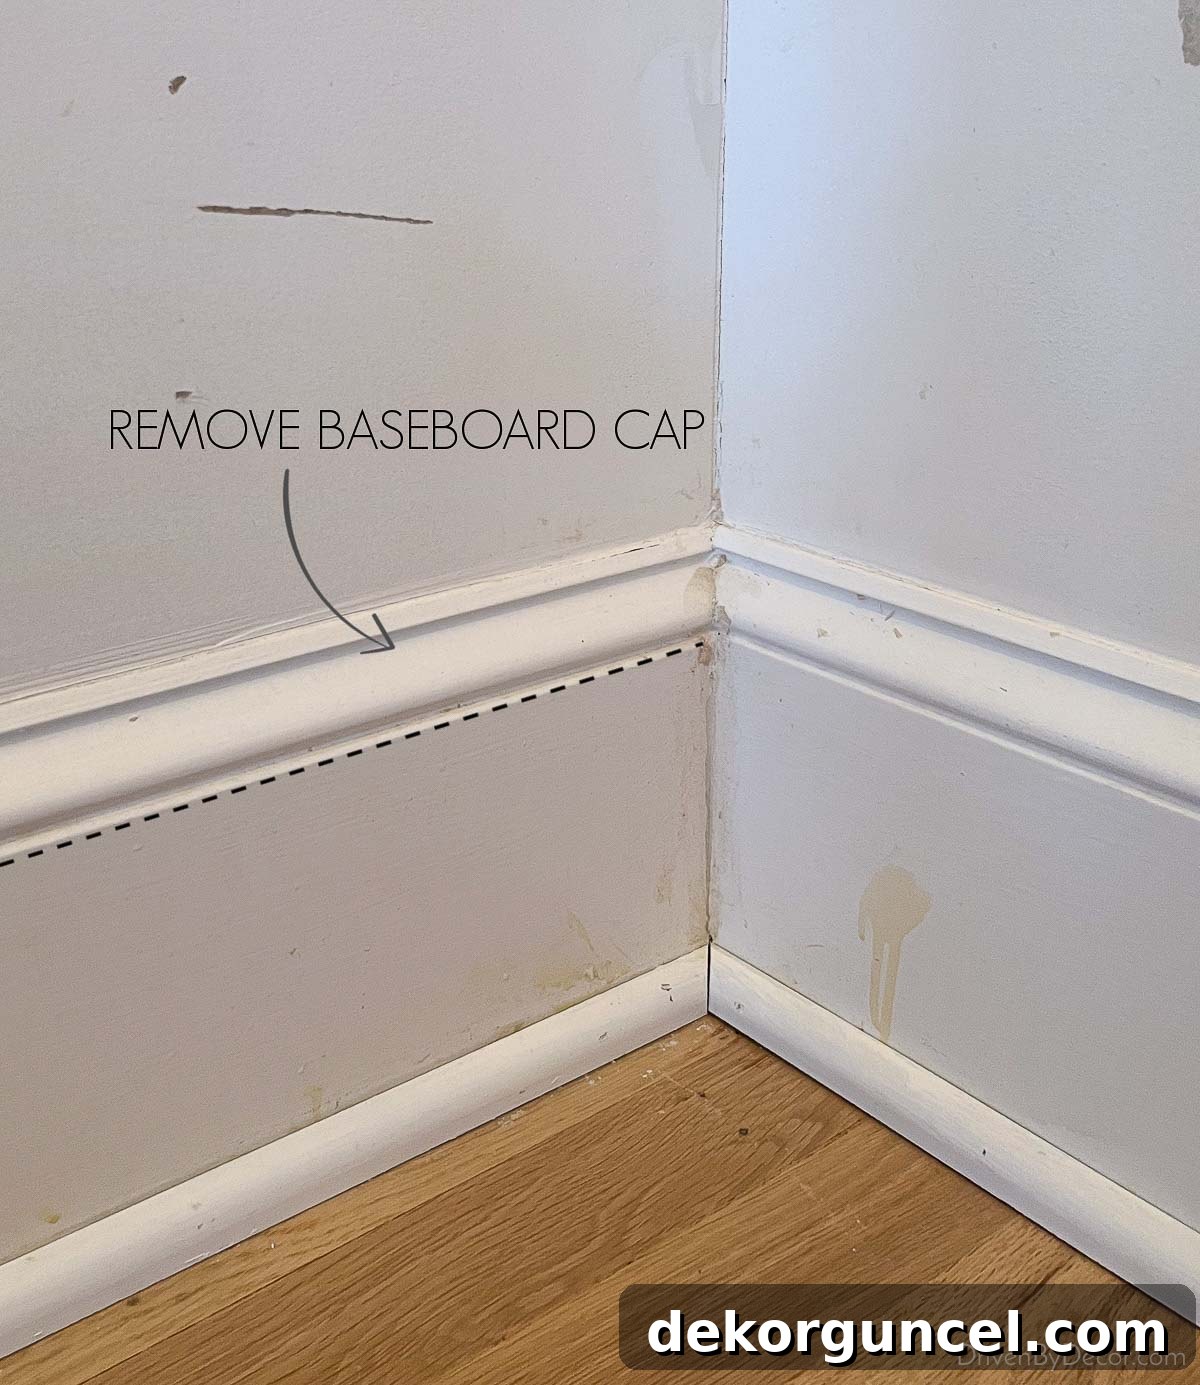
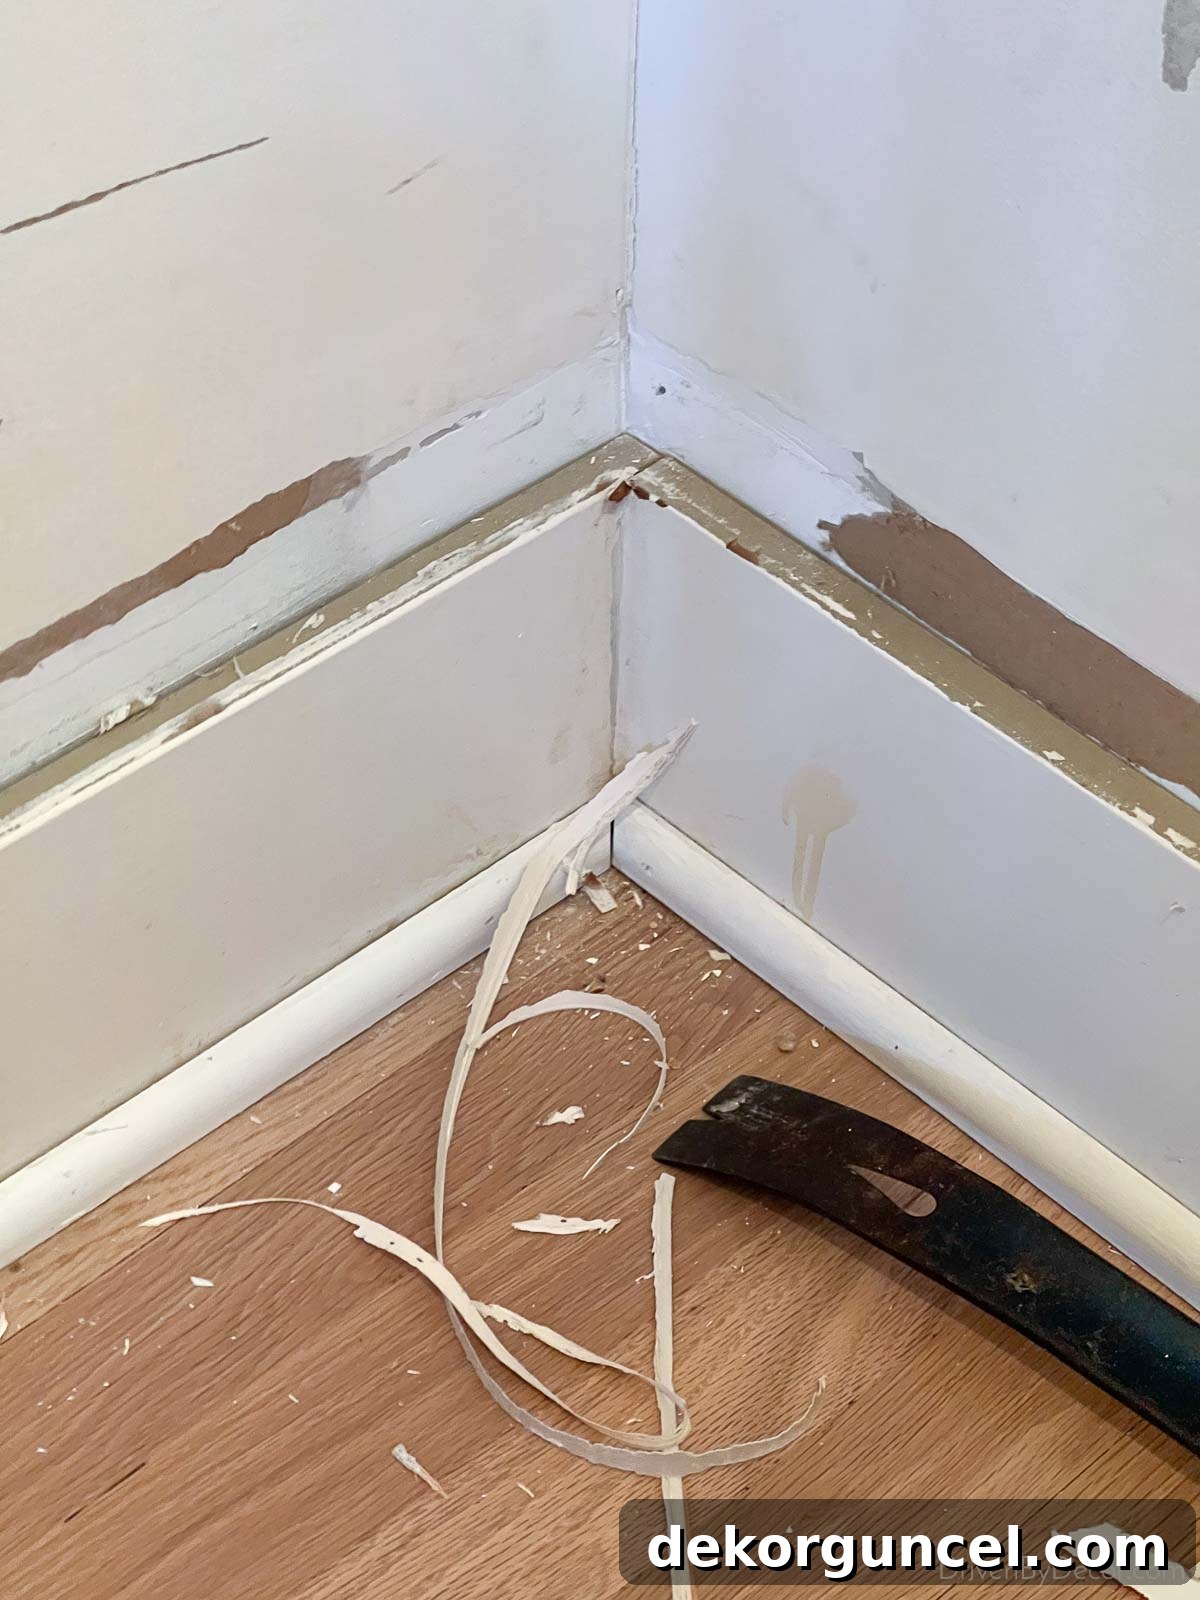
This strategic preparation ensured that our new shiplap would integrate seamlessly with the existing trim. The foresight in choosing thinner shiplap meant we could preserve the original character of our baseboards while introducing a fresh, modern element to the walls. Here’s a look at the baseboards after the cap removal, ready for the shiplap transformation:
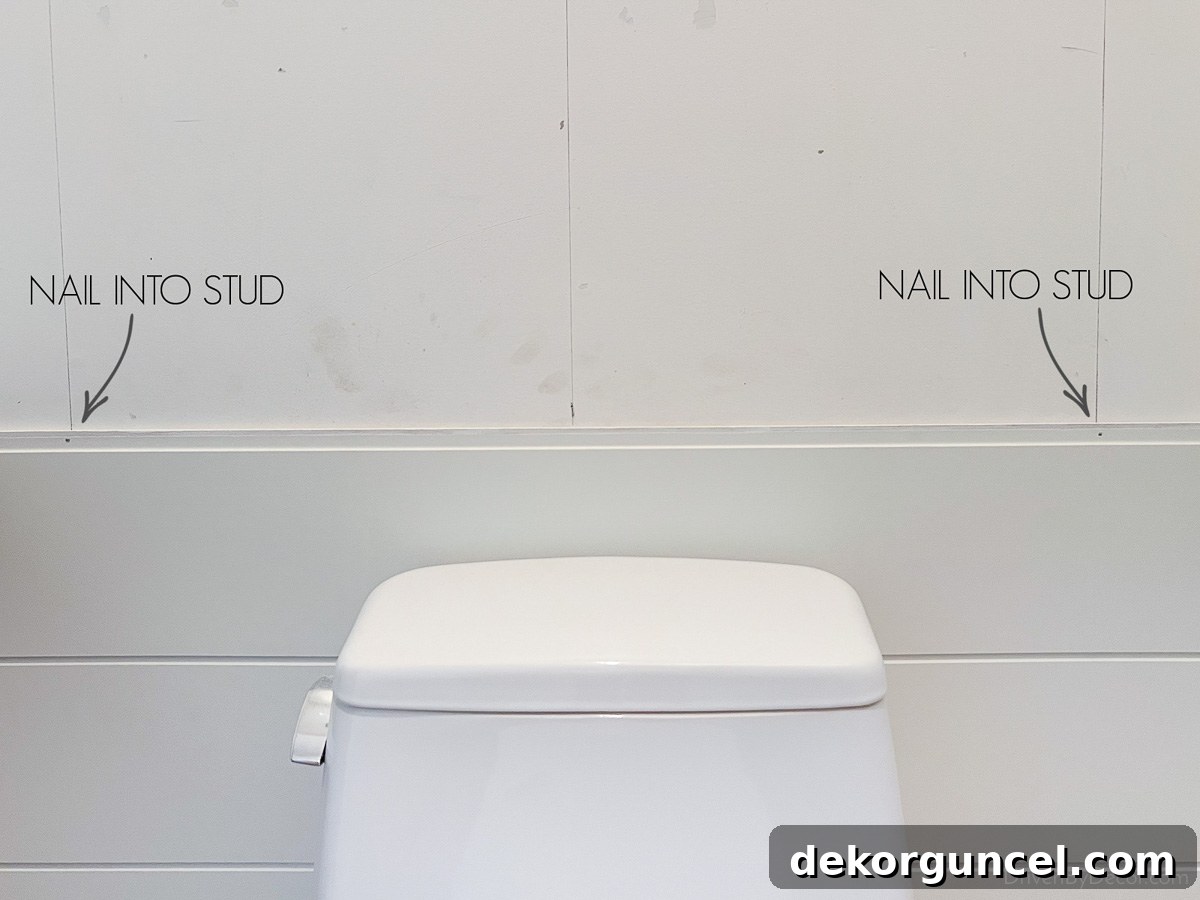
With the preparatory steps complete, the installation of the shiplap began. Given that our chosen shiplap was intentionally thinner than the baseboards, the first row could simply be placed directly on top of the baseboard, creating a clean, integrated look. We secured each board by nailing it into the wall studs, which we had carefully marked with vertical pencil lines for precision. A nail gun, loaded with 15-16 gauge nails, made quick work of this process, ensuring each board was firmly affixed.
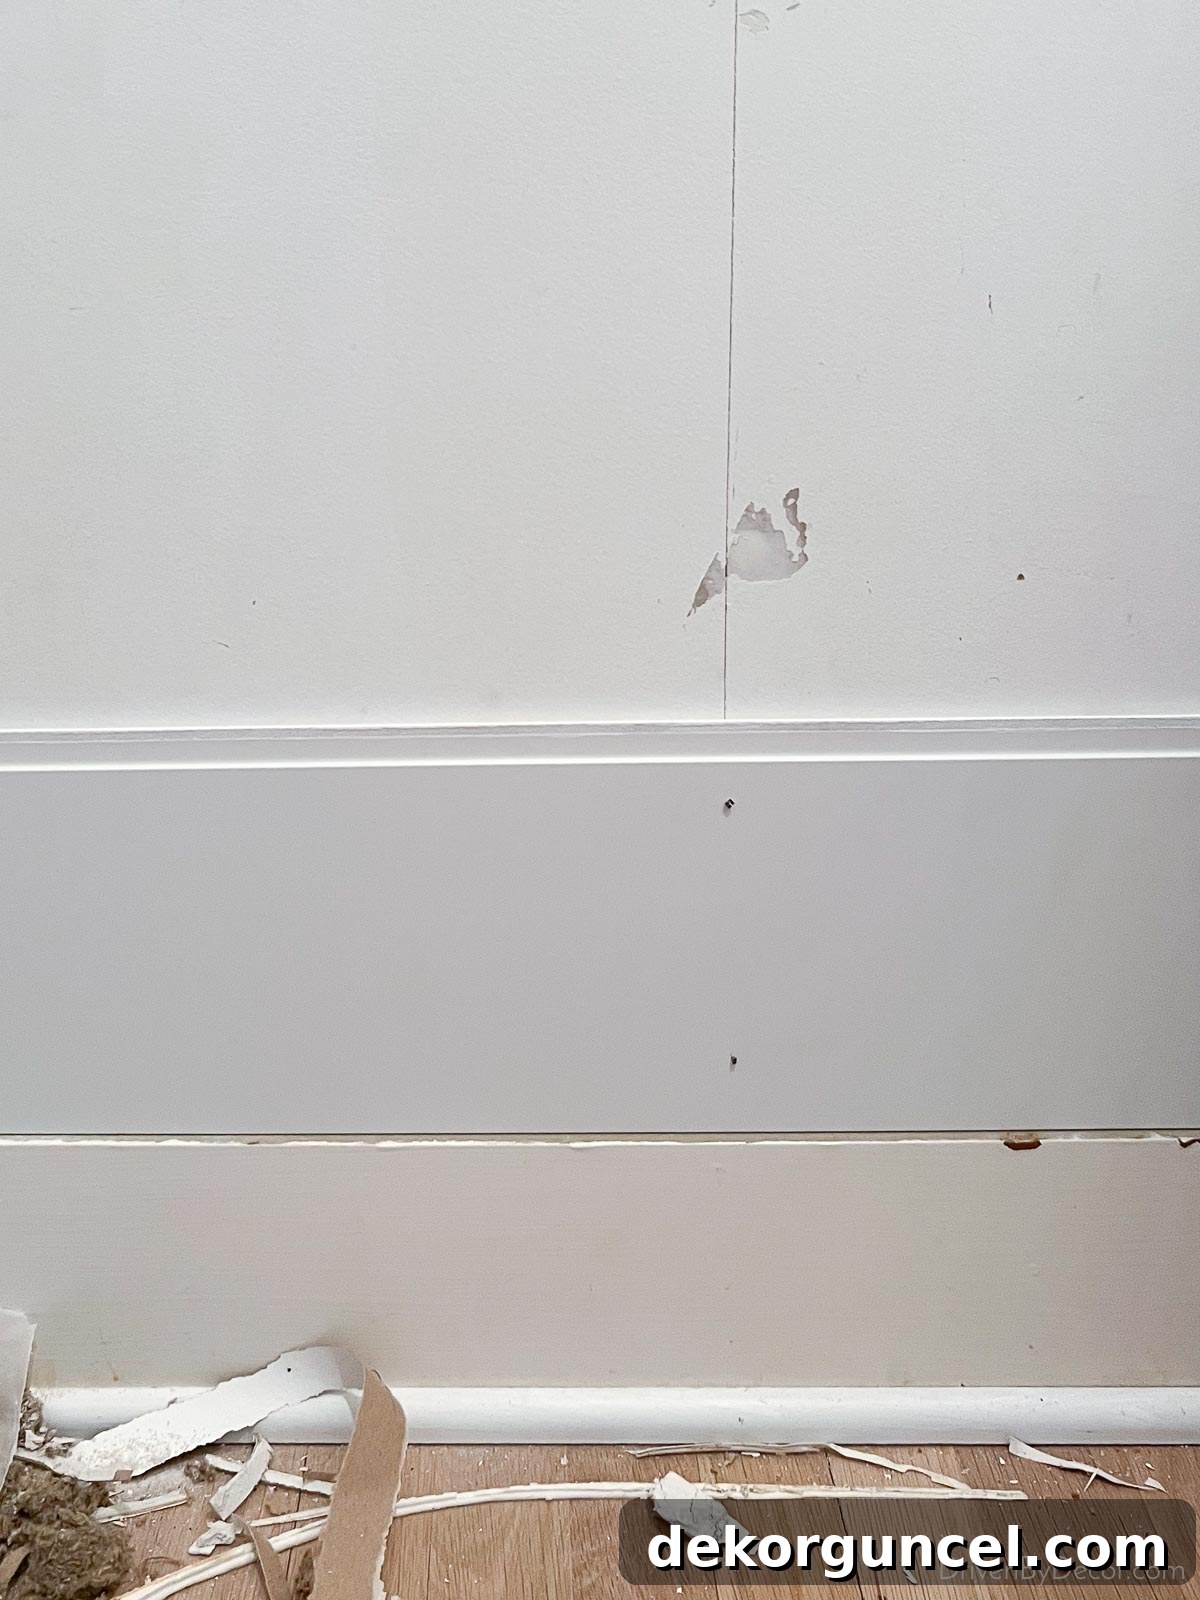
For any nails that didn’t fully recess or protruded slightly, we used a nail setter to ensure a perfectly smooth surface, ready for painting. While we opted not to use additional adhesive for our installation, applying a high-quality construction adhesive like Liquid Nails to the back of each shiplap board can provide extra security and is a recommended step for those seeking maximum stability, especially in high-traffic areas or on uneven walls. This extra measure can help prevent any future shifting or warping, ensuring a long-lasting finish.
One of the beauties of modern shiplap is its interlocking design, which greatly simplifies the installation process and creates a seamless finish. Each subsequent row of shiplap effortlessly interlocks with the one below it. Starting from the second row upwards, the boards are nailed into the wall studs through a small strip located along the top edge of each piece. This clever design means that the interlocking strip of the next shiplap piece effectively conceals the nails, eliminating the need for tedious sanding and patching of nail holes – a significant time-saver and a key advantage for DIYers.
When installing shiplap, you will inevitably encounter obstacles such as electrical outlets, light switches, or plumbing fixtures. For outlets and light switches, precision is key. A jigsaw is the ideal tool to carefully cut out the necessary rectangular openings in the shiplap boards, ensuring a snug fit around the electrical boxes. My contractor handled this with expert precision, creating clean cuts that blend seamlessly with the wall. For any plumbing pipes, such as those for a sink or toilet, a hole saw – a specialized drill bit designed to create perfect circular holes – is indispensable. This ensures that pipes pass through the shiplap cleanly and professionally, maintaining the integrity of the design.
As you approach the final rows of shiplap, a crucial step ensures a polished top edge. Before permanently nailing the top row of shiplap to the wall, you’ll need to “rip” off (cut away) the projecting tongue piece along the top of the board. This is the part that would typically interlock with a subsequent piece. By removing it, you create a flat top edge that can be cleanly finished with trim. I temporarily held the final row in place with painter’s tape to confirm the exact desired height for the shiplap, ensuring it aligned perfectly with our design vision and the planned wallpaper transition.
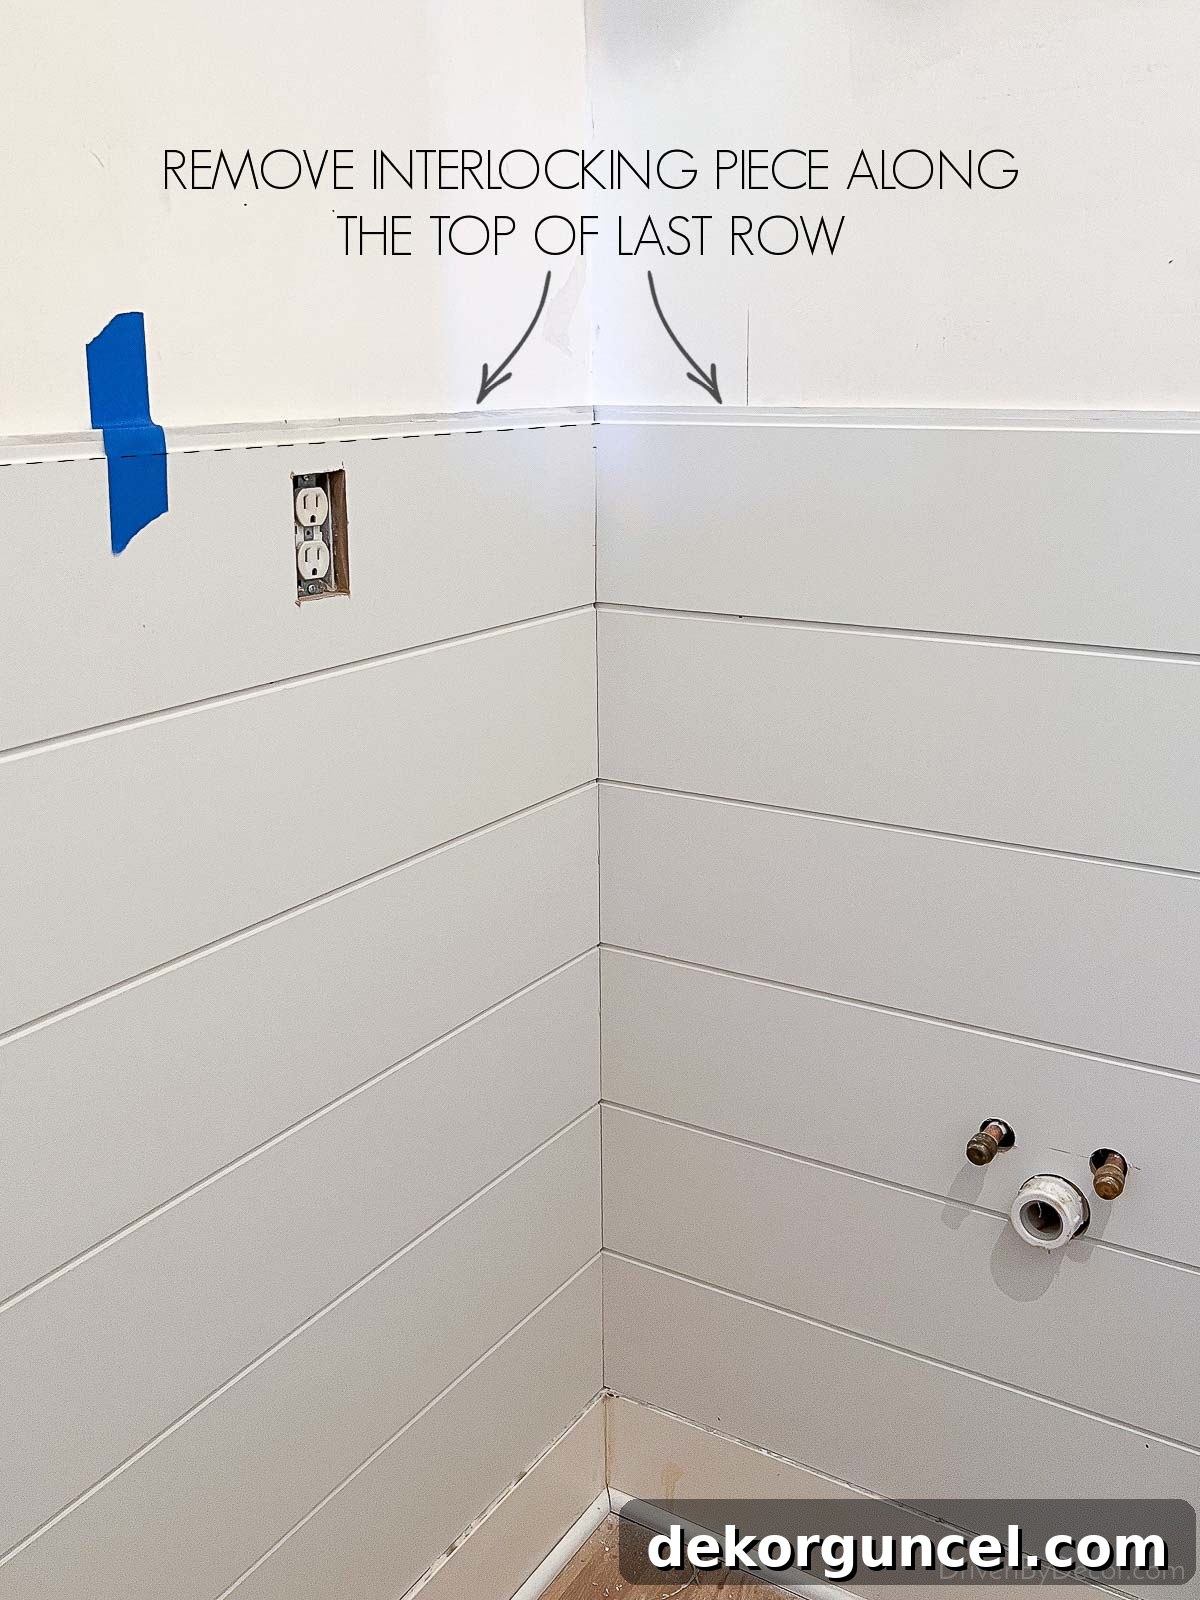
Once this projecting piece was carefully removed, the modified shiplap board was nailed into place, creating a crisp, flat top edge. This attention to detail ensures a professional and finished appearance, ready for the next layer of design. The clean top edge is essential for the seamless integration of our chosen trim piece and the beautiful wallpaper above, defining the distinct zones of our powder room walls.
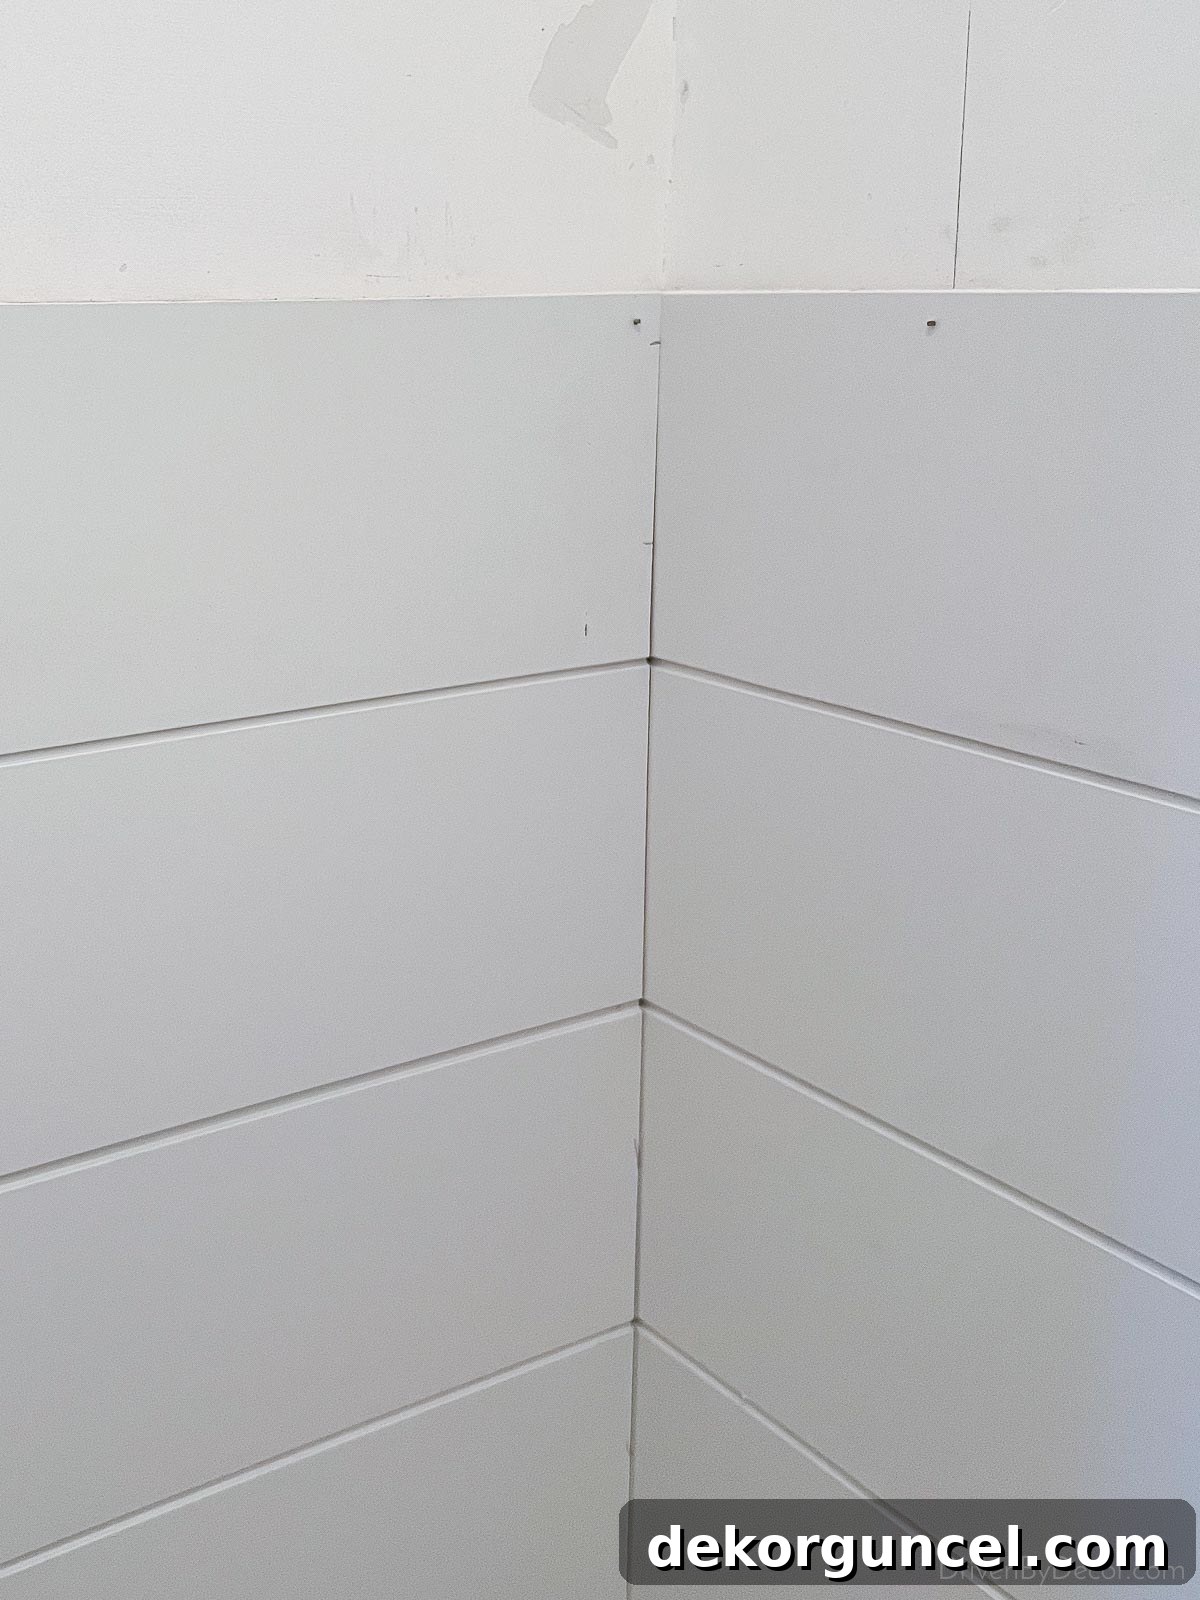
To provide a refined and elegant finish to our powder room shiplap, we carefully selected {this specific trim piece}. While many shiplap installations feature a trim that projects noticeably from the wall, our design called for something more subtle. Since we planned for the mirror and artwork to gracefully overlap this trim, a shallow profile was essential to avoid creating an awkward visual break. What truly captivated us about this particular trim was its gently rounded edges, which impart a wonderfully finished and sophisticated aesthetic, elevating the entire look of the shiplap wall.
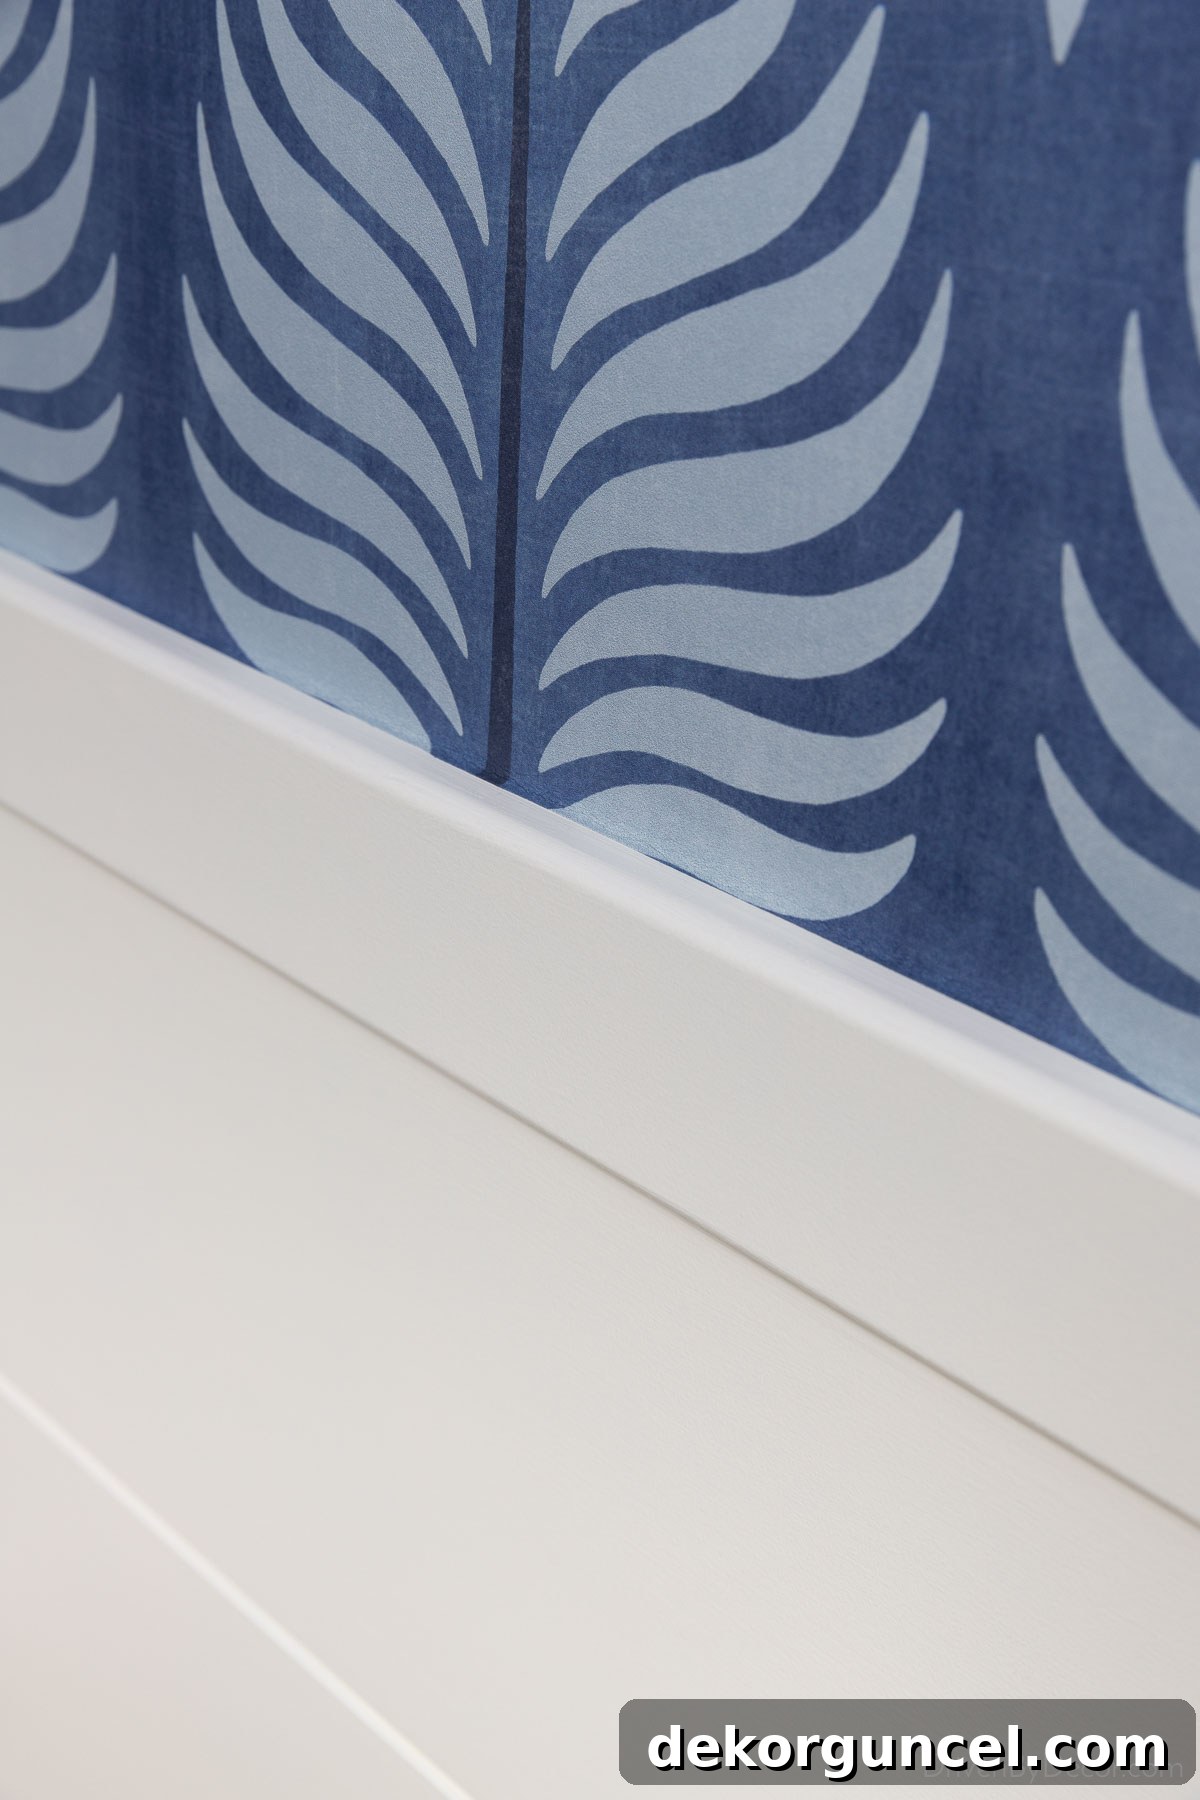
With all the shiplap and trim in place, the final step before painting was preparation. We meticulously caulked all corners and along the joints where the top shiplap board met the new trim piece, ensuring a perfectly smooth and seamless surface. This careful attention to detail helps to create a professional, polished finish. Following this, we painted the entire shiplap installation, along with our existing baseboards, in Benjamin Moore Simply White, using a durable satin finish. This classic, crisp white not only brightens the space but also provides a beautiful contrast to the wallpaper above, making the powder room feel larger and more inviting.
I’ll be sharing a few more in-depth details and addressing common questions about our powder room shiplap installation towards the end of this post for those keen on all the specifics. But for now, let’s continue our tour and explore the other exciting elements that complete this stunning room!
Focal Point Finesse: Vanity, Mirror, & Bathroom Lighting
The original pedestal sink in our powder room was not only aesthetically unappealing but also highly impractical, lacking even a flat surface for a simple soap pump. This was a key area for improvement in our remodel. To replace it, I opted for {this elegant 30-inch vanity}. Despite being significantly wider than the old pedestal sink, its intelligent design and deep navy hue actually contribute to making the room feel more expansive and cohesive, rather than cramped. It anchors the space, providing a strong visual focal point and much-needed functionality.
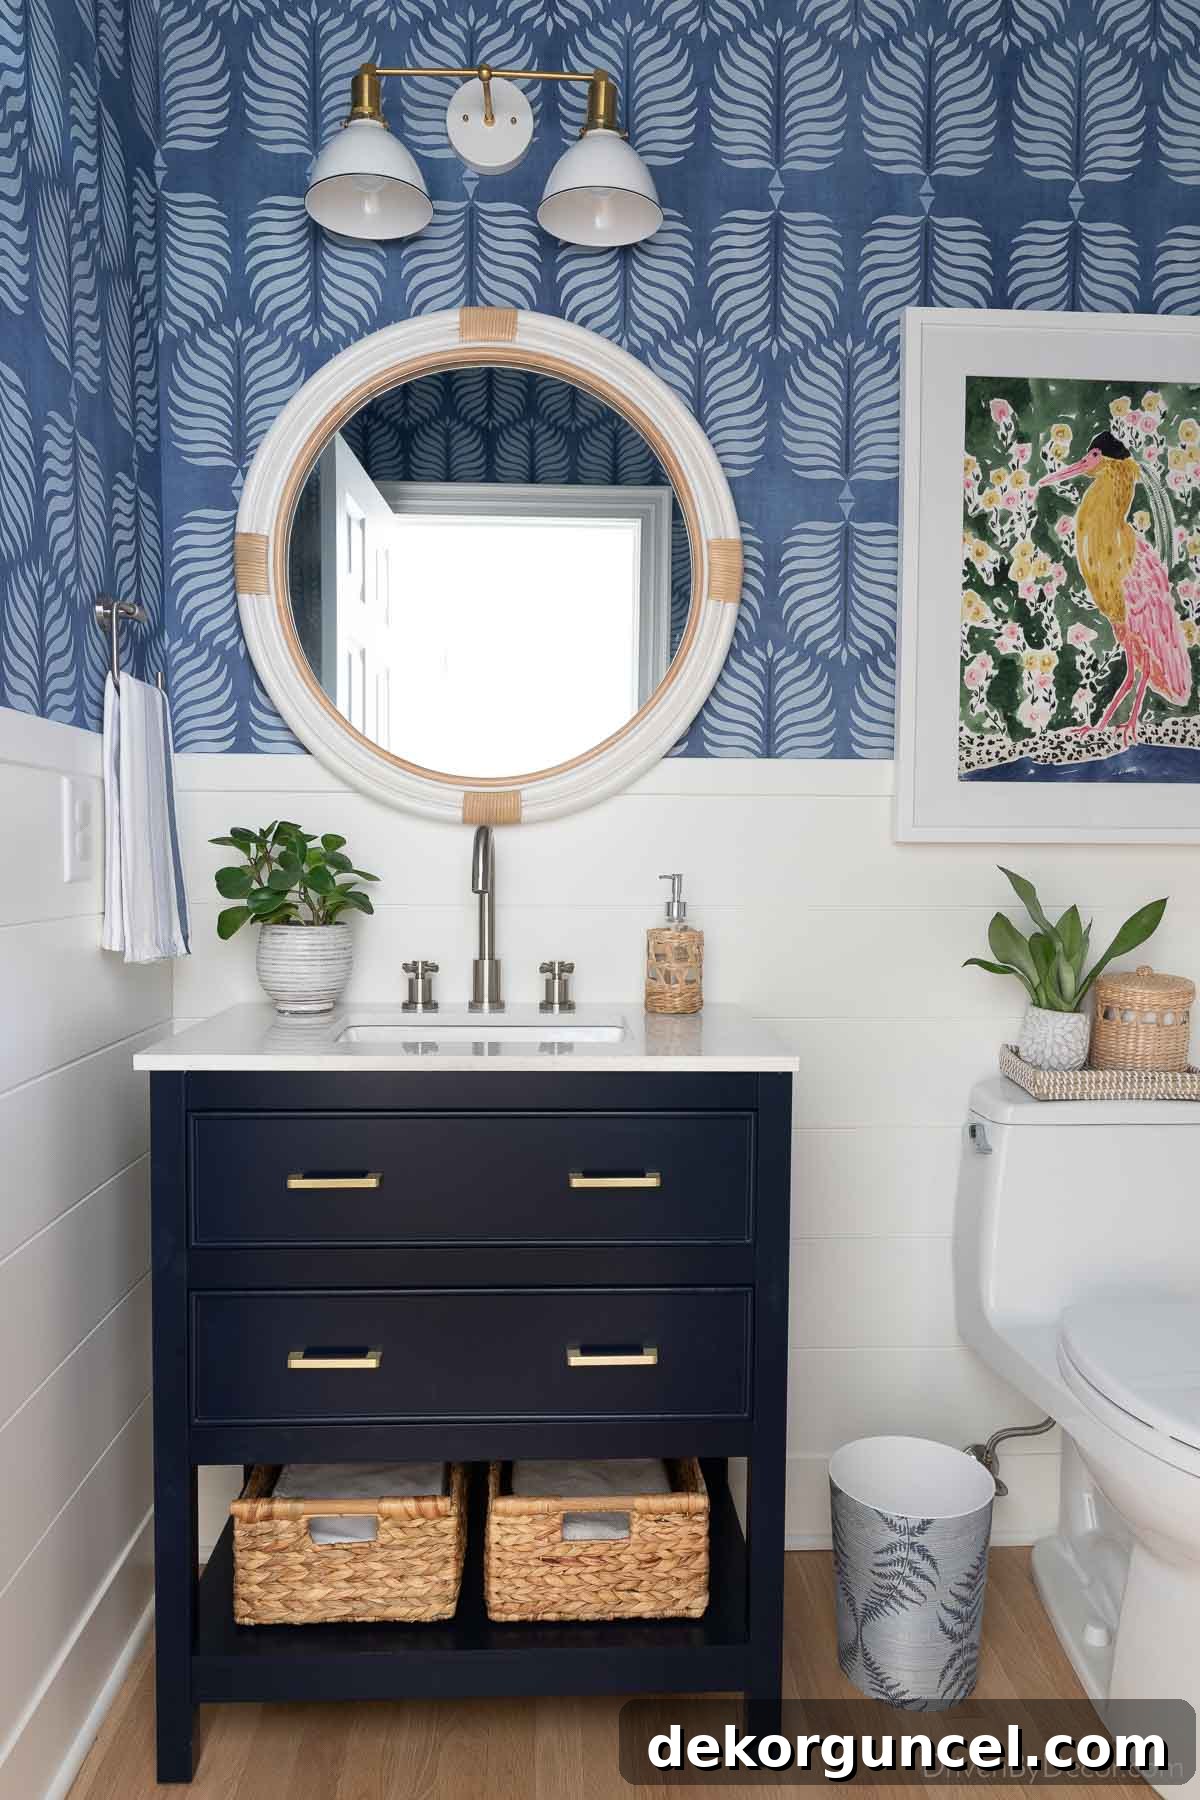
Typically, I find myself replacing the standard hardware that comes with new vanities to better suit my design aesthetic. However, in a pleasant surprise, I absolutely adored the gold pulls that adorned this particular navy vanity. Their warm, metallic gleam provided the perfect contrast to the deep blue, adding a touch of sophistication and warmth, so I happily left them as-is. This small detail truly elevated the vanity, making it feel custom and luxurious without any extra effort or cost.
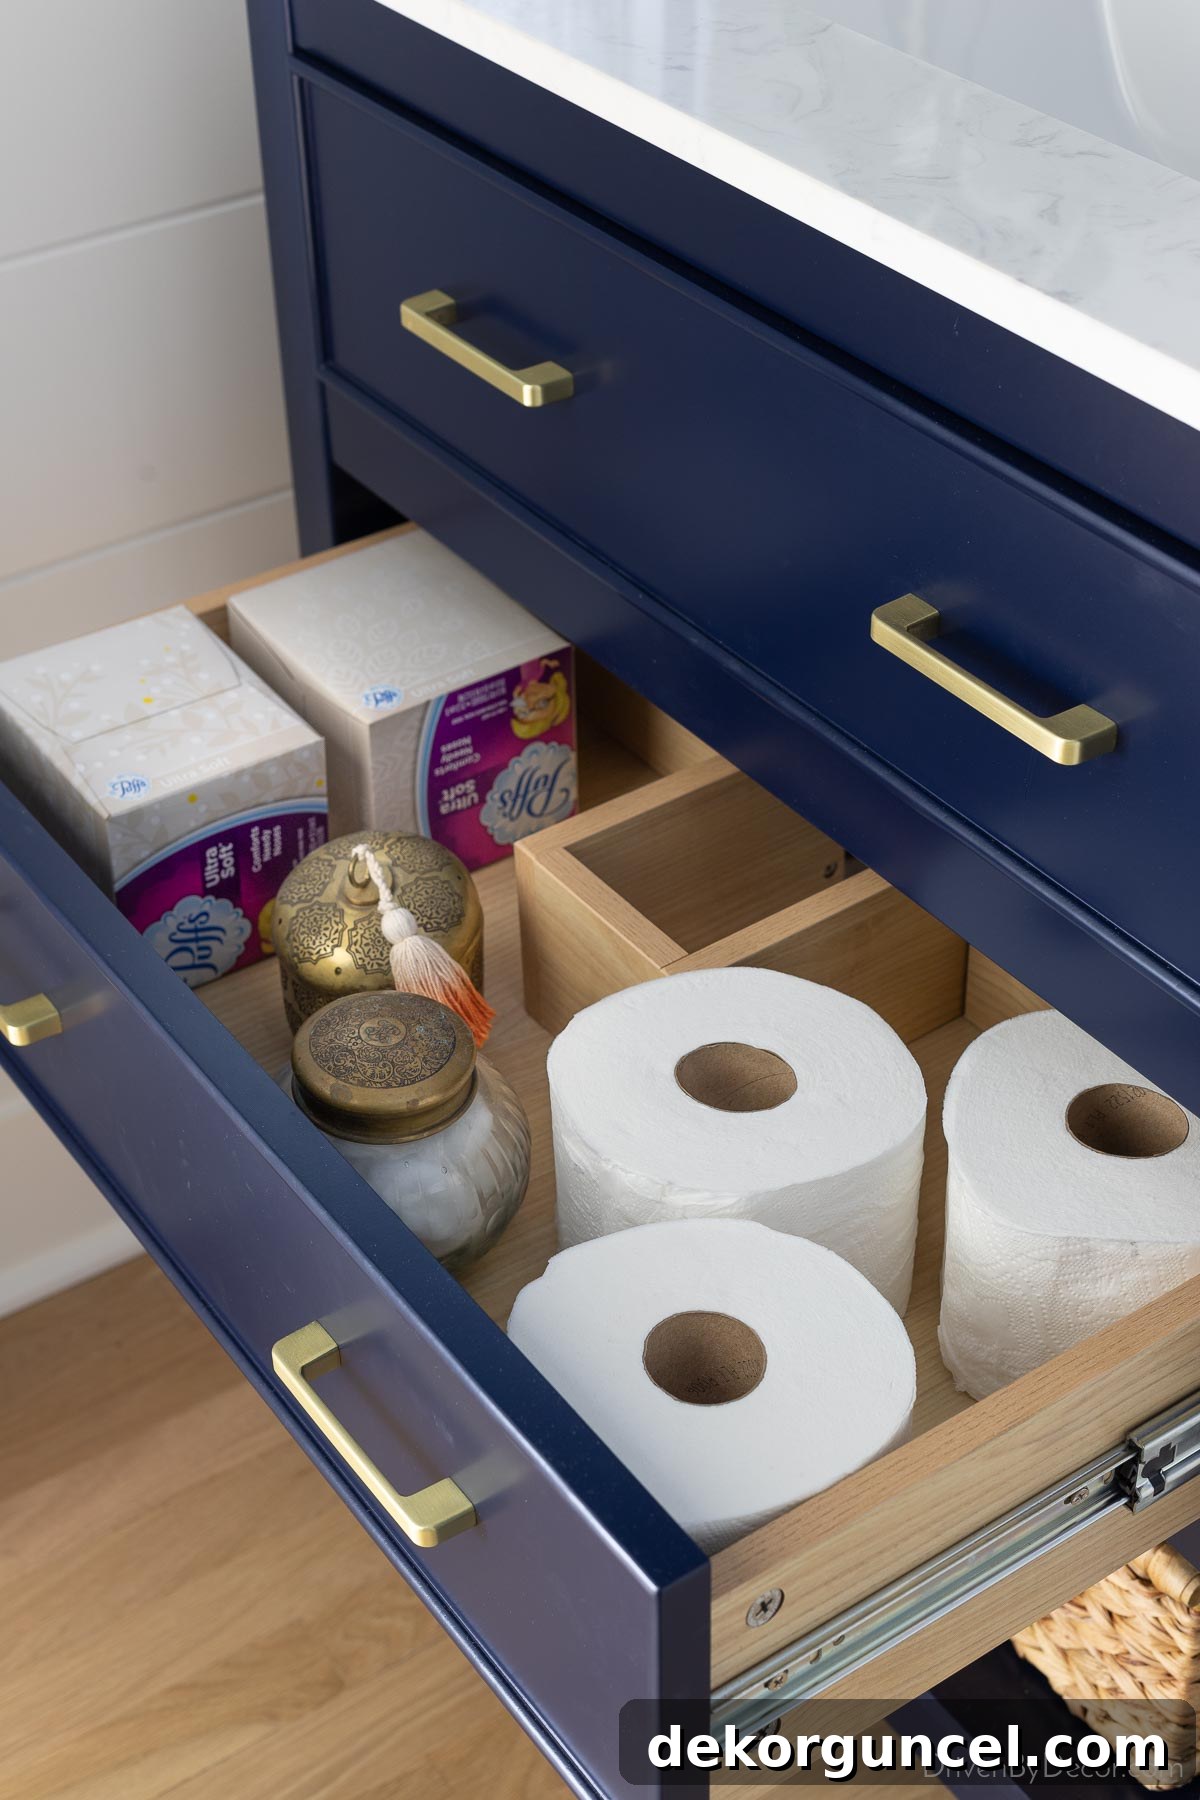
Beyond its striking visual appeal, the new vanity offers significant practical advantages. I am absolutely delighted with the generous amount of counter space it provides, a stark contrast to the virtually non-existent surface of the old pedestal sink. This expanded counter allows for decorative elements like our woven soap pump and a small plant, while still offering ample room for everyday essentials. More importantly, this vanity is a storage powerhouse, featuring two fully functional drawers that glide smoothly and are perfect for organizing toiletries, extra hand towels, and other bathroom necessities, keeping the countertop clutter-free and serene.
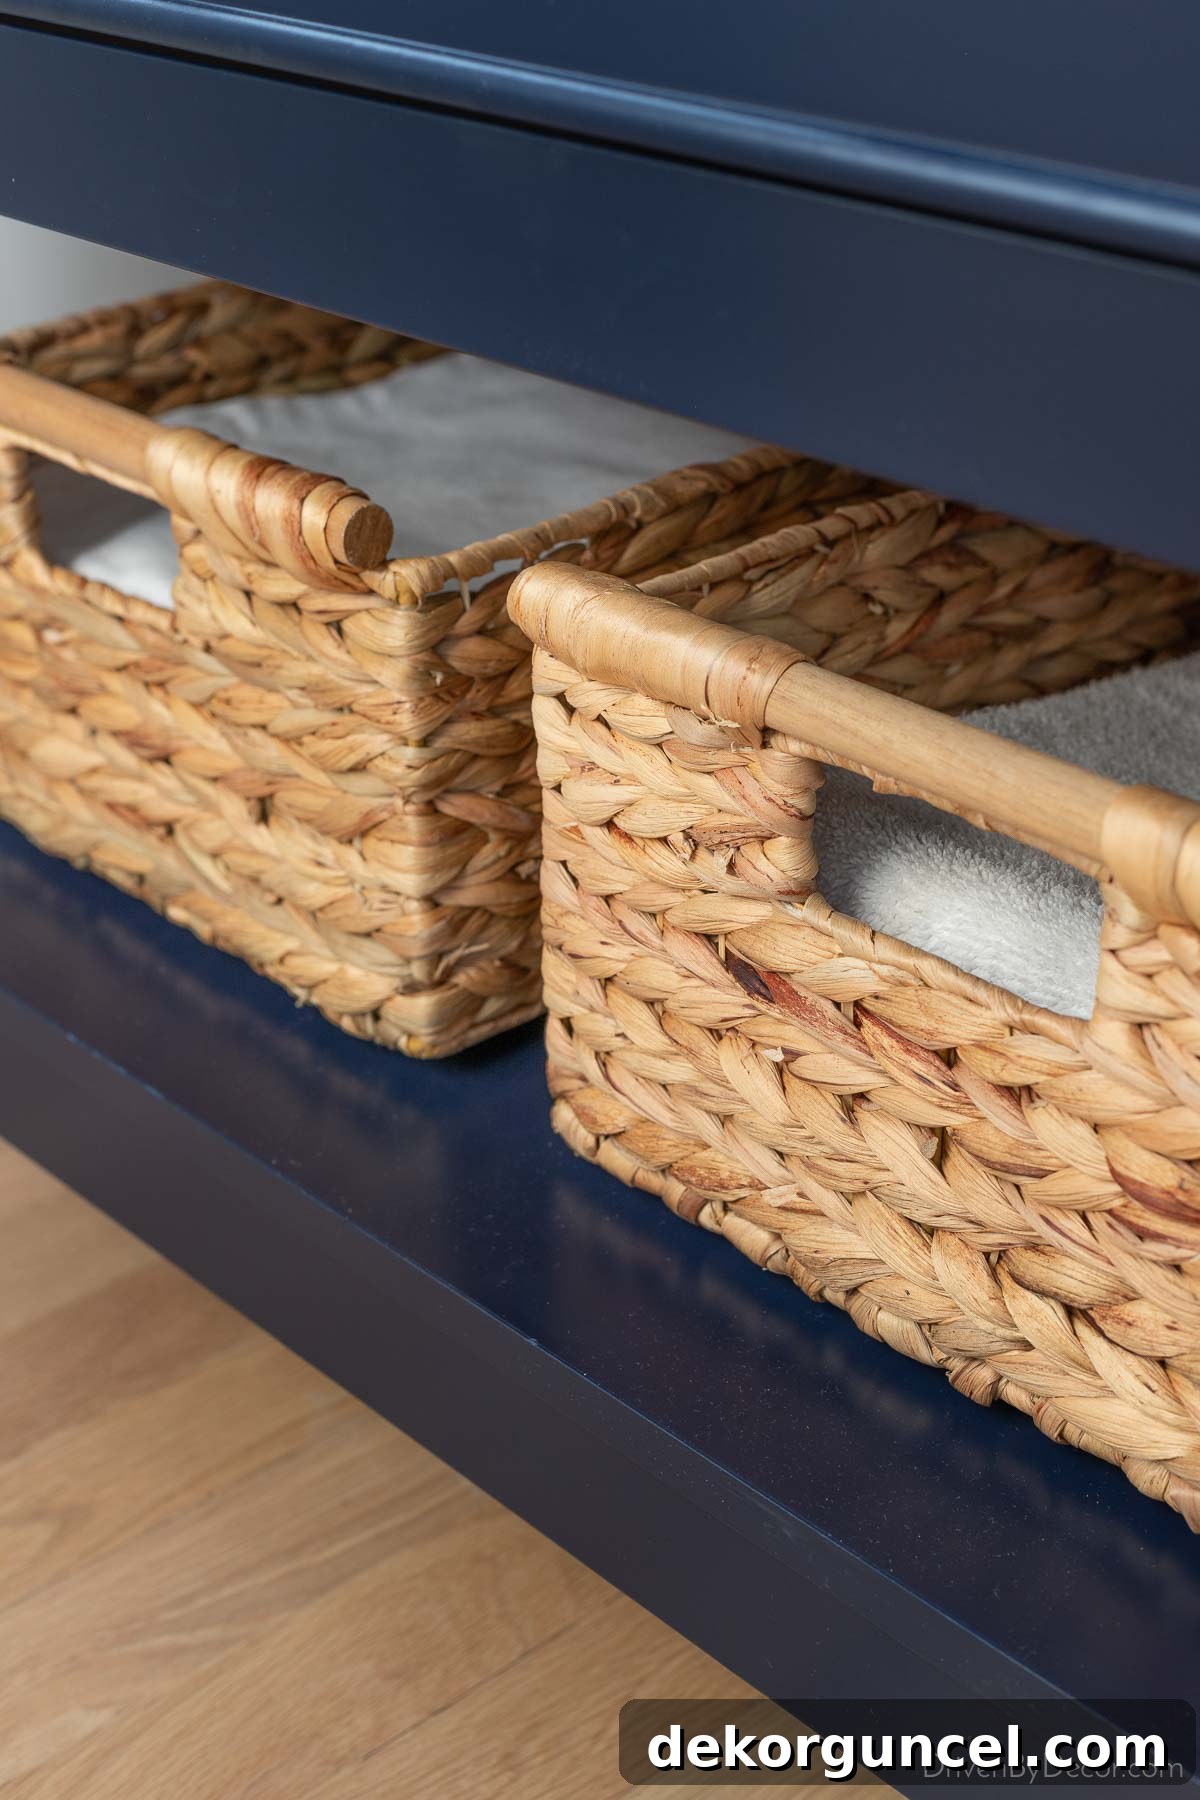
In addition to the practical drawers, the open shelf below the vanity provides another excellent opportunity for both storage and aesthetic display. To maximize this space and maintain the room’s cohesive design, I carefully selected a pair of {these beautifully woven baskets}. They fit perfectly on the shelf, offering discreet storage for larger items like extra toilet paper rolls or cleaning supplies, all while adding a touch of natural texture and warmth to the vanity area. This blend of closed and open storage ensures everything has its place, contributing to a tidy and inviting powder room.
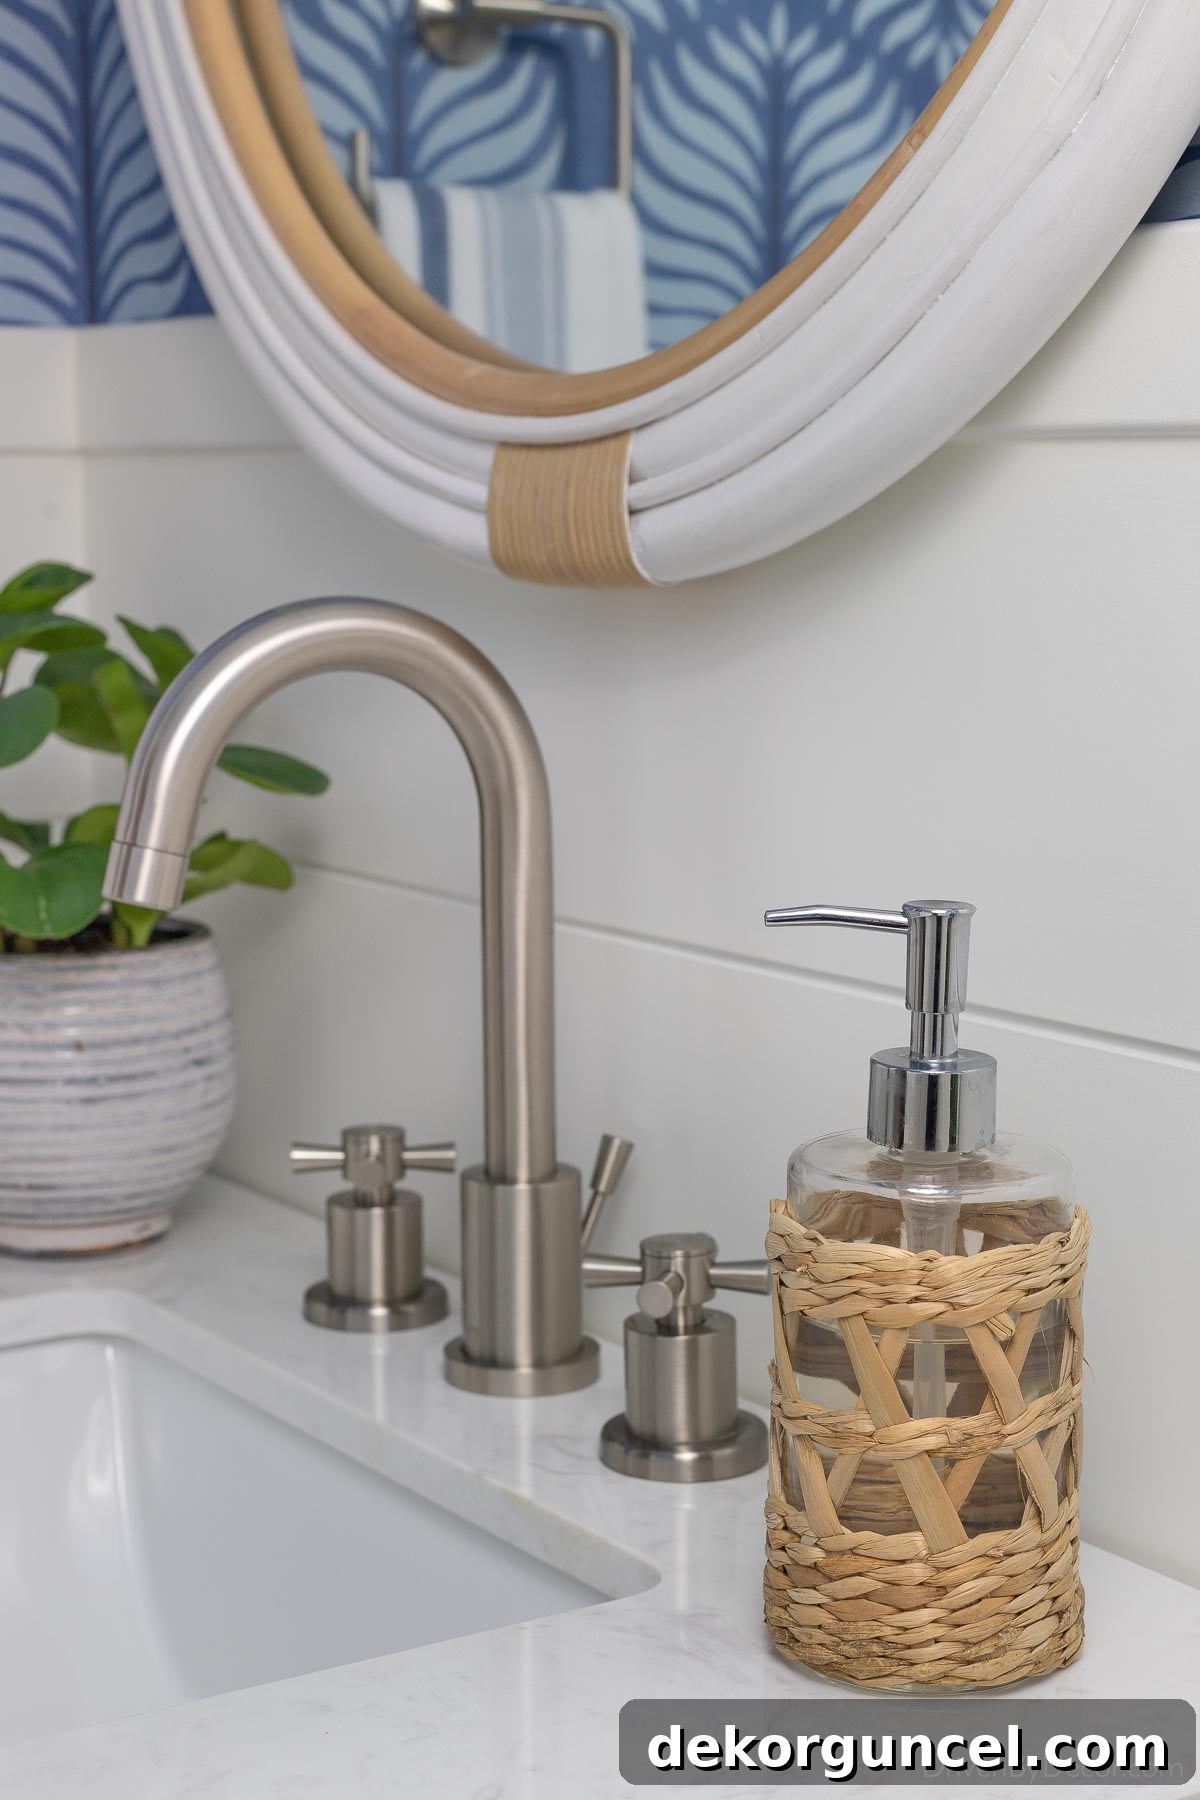
For the faucet, I specifically sought a high-arched design in a brushed nickel finish. This style not only adds a touch of modern elegance but also provides excellent functionality and clearance for handwashing. The specific model I chose is unfortunately no longer available, but {this similar faucet} captures the same sophisticated aesthetic and practical design. Its graceful curve and brushed finish perfectly complement the navy vanity and other metallic accents in the room, creating a harmonious blend of styles.
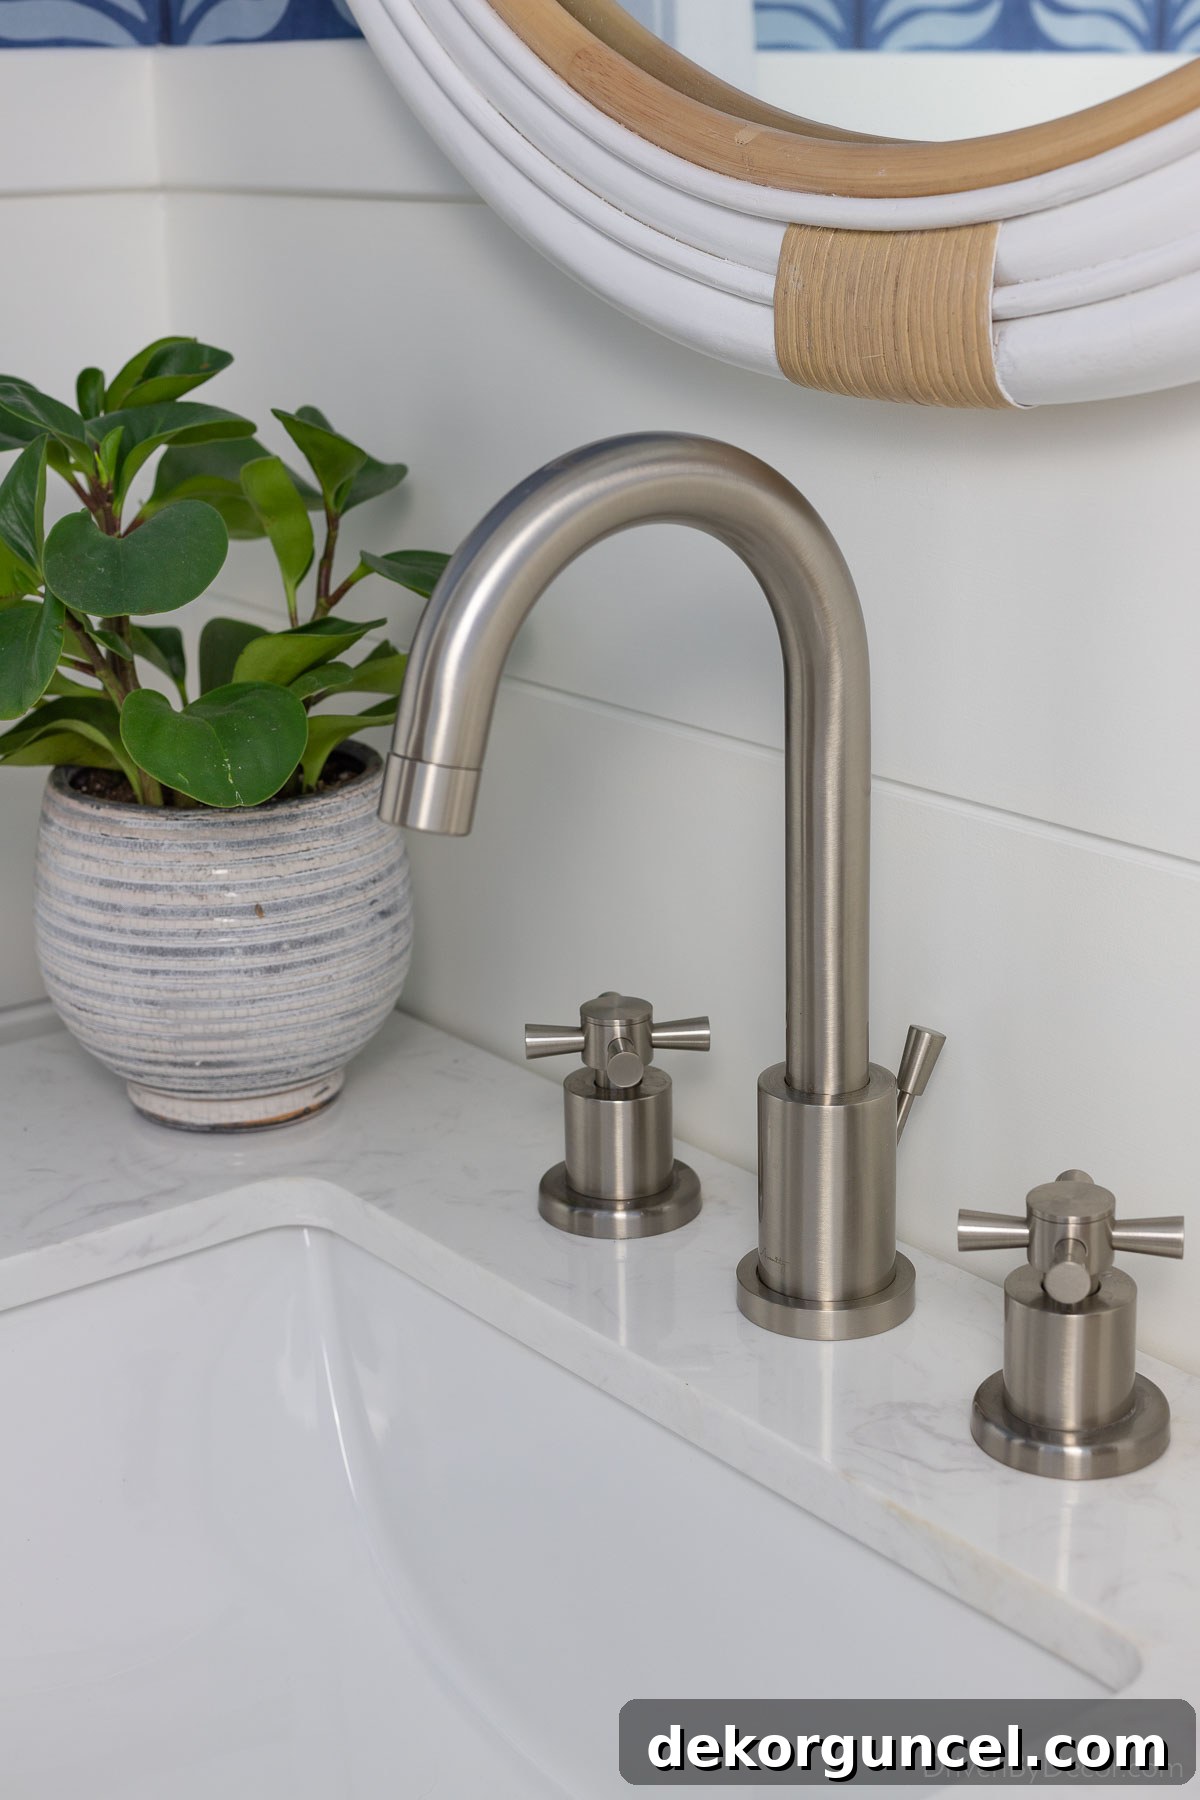
If this faucet looks familiar, it’s for good reason! It’s the exact design I fell in love with and installed in our master bathroom remodel, a testament to its enduring appeal and functionality. Above the newly installed vanity, I hung {this charming round rattan mirror}. This choice was highlighted in my recent post on bathroom mirror ideas, showcasing how a well-selected mirror can dramatically enhance a space. Its natural texture and rounded form soften the room’s lines, creating a welcoming and organic feel that perfectly balances the crisp shiplap and structured vanity.
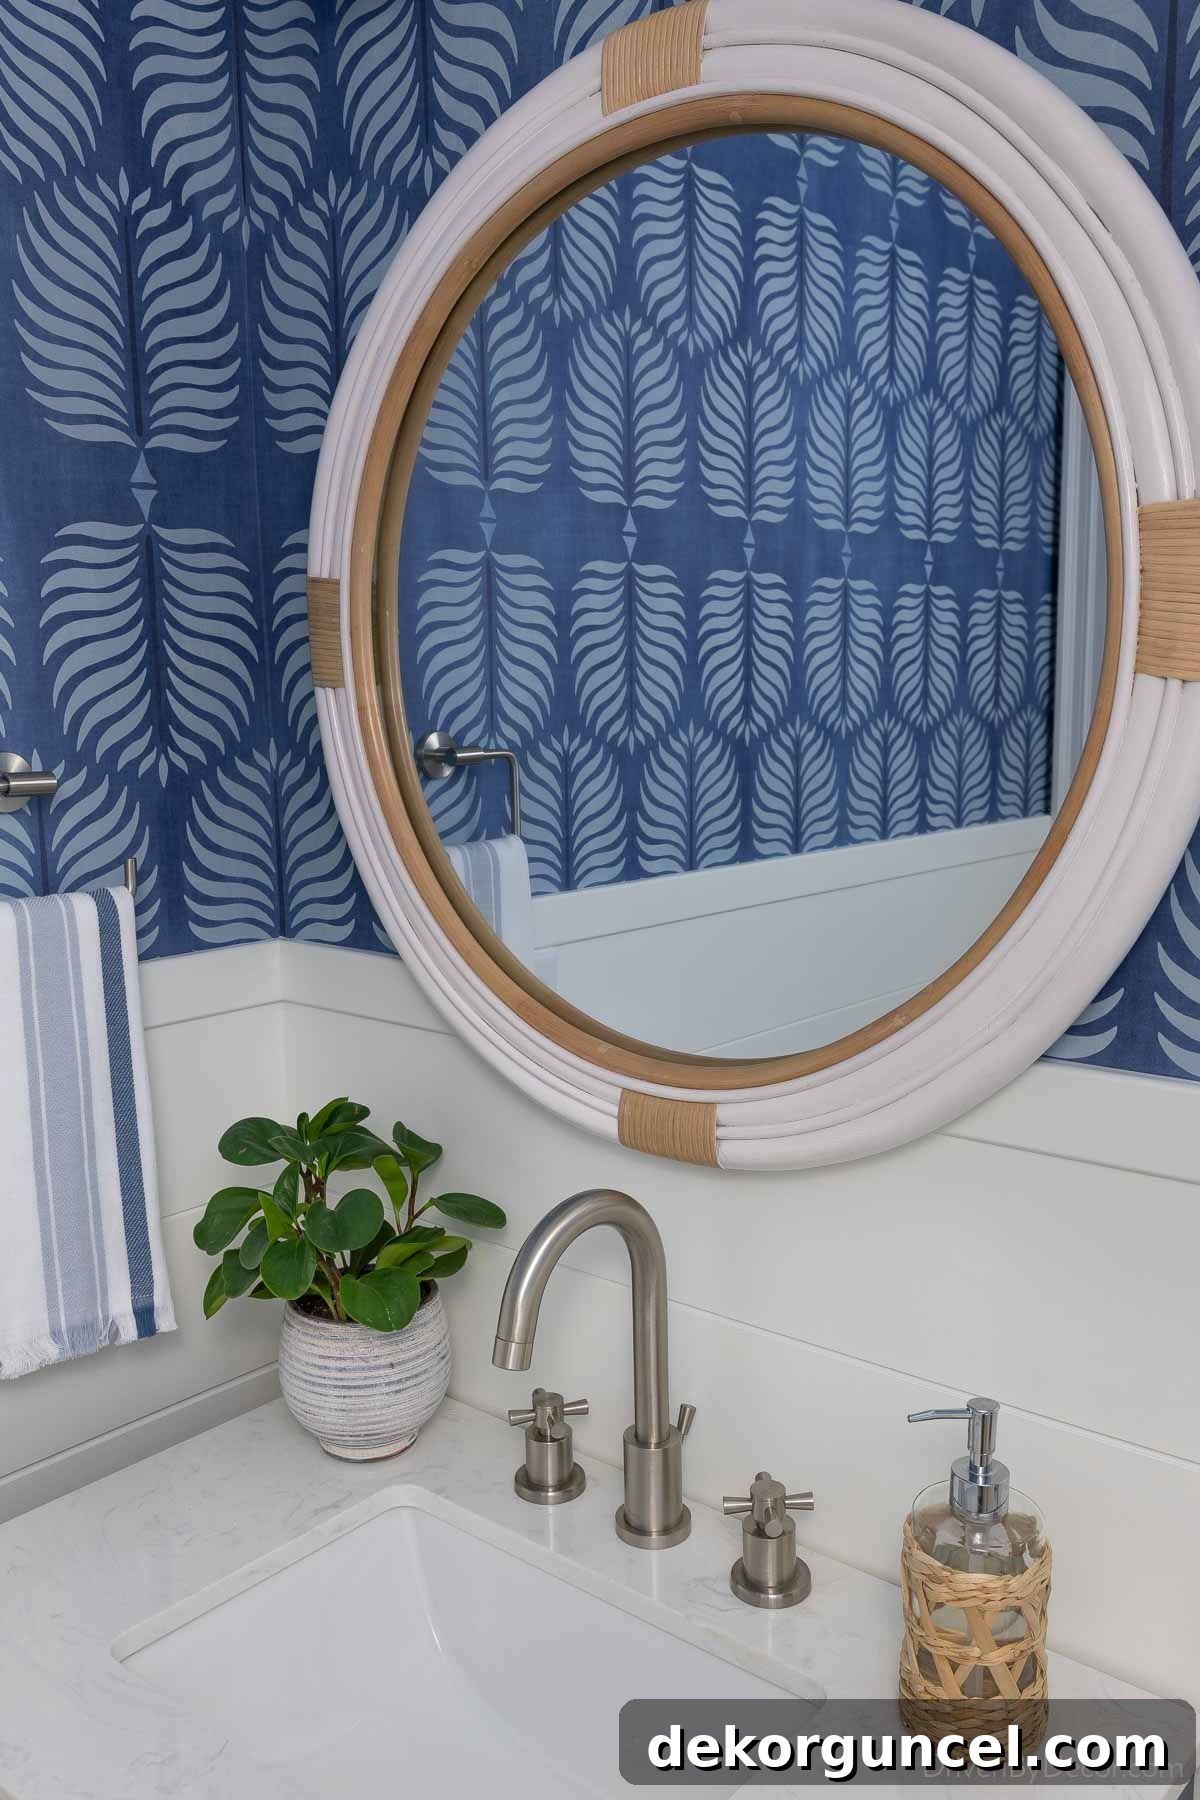
This particular rattan mirror is a fantastic, budget-friendly look-alike to {this high-end mirror from Serena & Lily}, proving that stunning design doesn’t always have to come with a hefty price tag. Its natural texture and warm tone beautifully complement the fresh, crisp whites and blues of the room. To further enhance this organic, woven aesthetic and create a cohesive design, I also incorporated another touch of rattan with {this charming woven soap pump}. These small, thoughtful details are what truly bring a space to life, adding layers of texture and personality.
The lighting in a small space like a powder room plays a pivotal role in both functionality and ambiance. To achieve our desired aesthetic and improve illumination, we hired an electrician to reroute the existing wiring. Instead of the typical sconces placed on either side of the mirror, which can sometimes feel crowded in a compact space, we opted for a single, impactful fixture above. We installed {this elegant double-light sconce} directly above the mirror, creating a symmetrical and sophisticated lighting solution. Its brass and white finish adds a touch of classic charm, perfectly complementing the room’s transitional style.
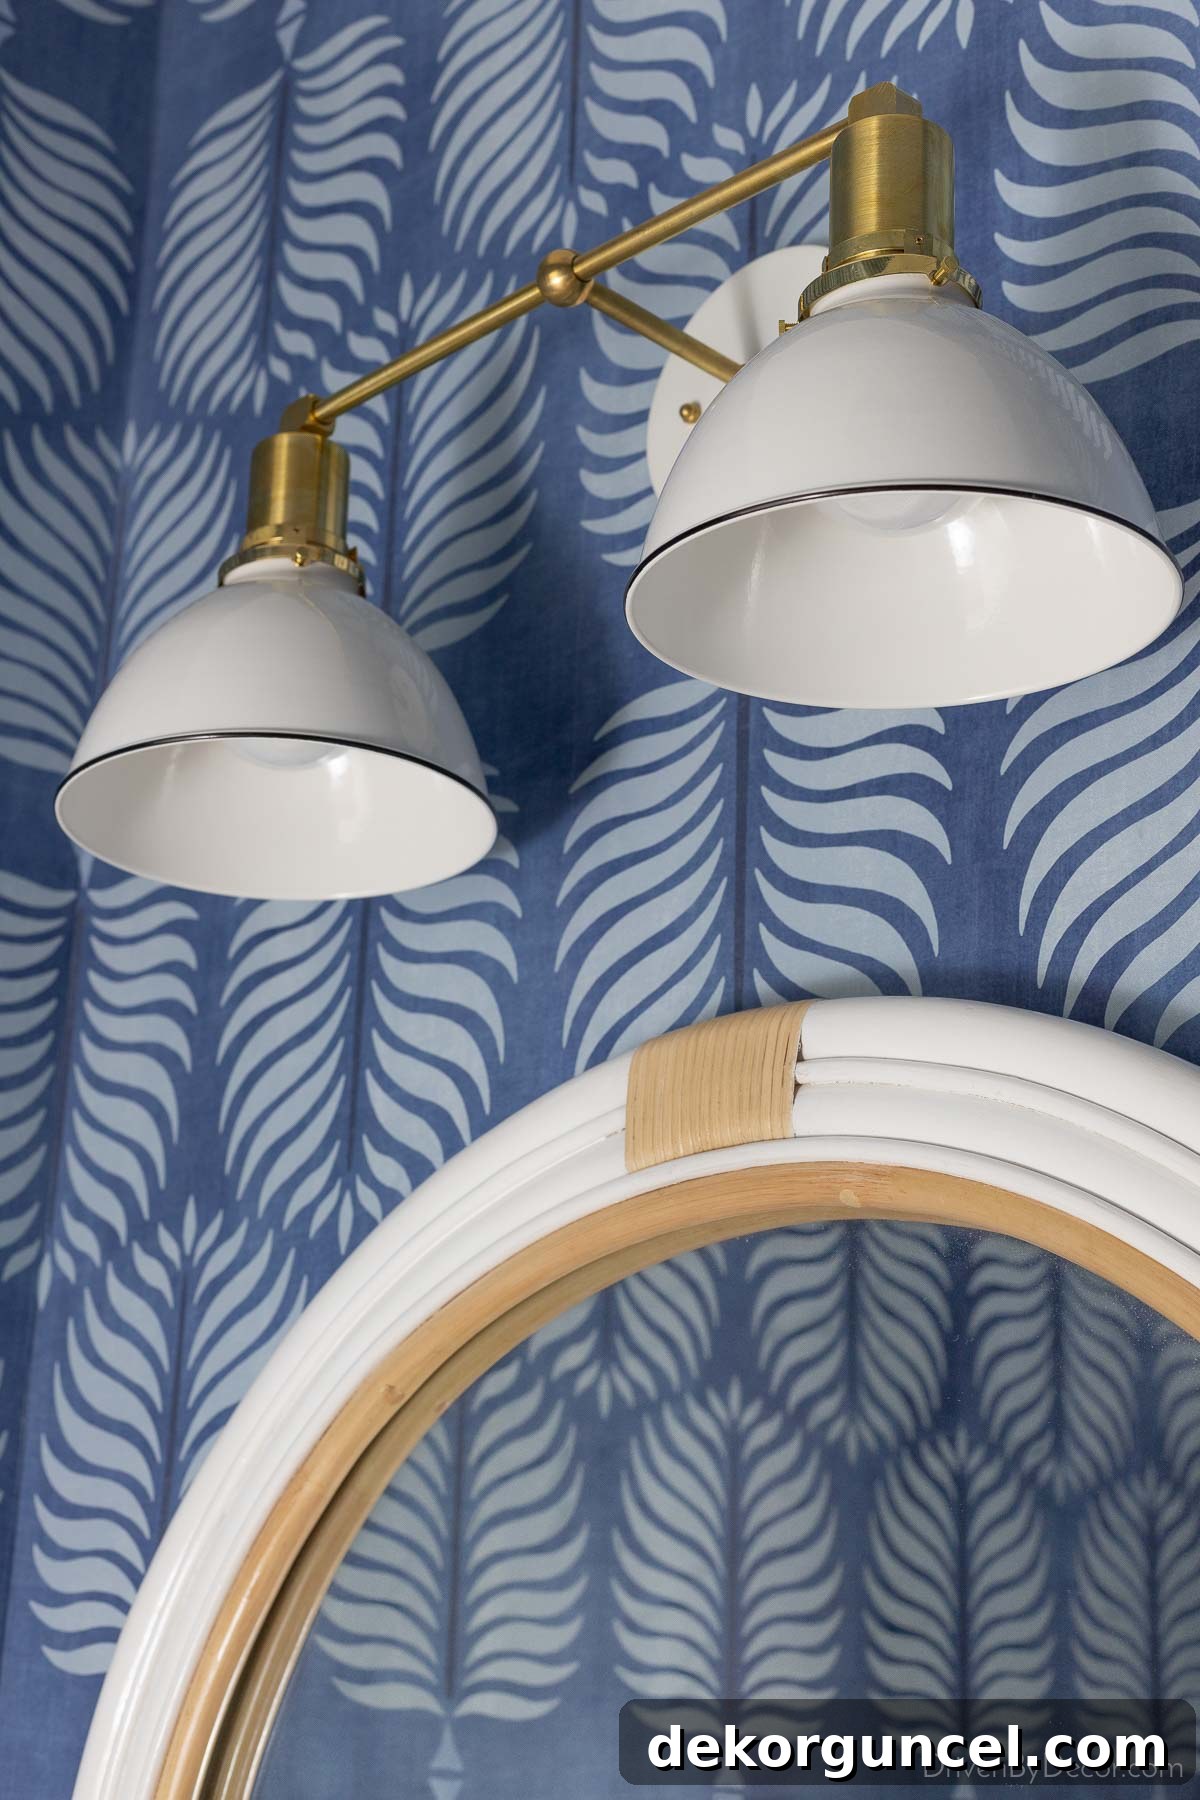
Finding the perfect light fixture can be a treasure hunt, and I was absolutely thrilled to discover this sconce from a small Etsy shop! It was exactly what I had envisioned for the space – a blend of classic design with a fresh, modern appeal. With our powder room boasting impressive 10-foot ceilings, we also decided to incorporate additional ambient lighting. While not immediately obvious unless you’re specifically looking for it, I added {this simple, yet stylish flush mount light} to the ceiling. It’s ideal for providing essential overall illumination in a small area and perfectly complements the room’s understated elegance without drawing too much attention. This layered lighting approach ensures the powder room is always beautifully lit, whether for a quick handwash or a moment of reflection.
We have 10′ ceilings in the powder room so you really don’t notice it unless you’re looking for it, but I also added {this simple flush mount light} to the ceiling. It’s perfect for overall lighting in a small space like this and I love the look of it too!
Pattern Play: Embracing Elegant Wallpaper
Selecting the perfect wallpaper for the upper two-thirds of our powder room walls was a journey of deliberation. I explored various patterns and color palettes, carefully considering how each option would interact with the crisp white shiplap below and the overall mood we wanted to create. Ultimately, I settled on {this captivating indigo wallpaper}. Its rich blue tones and intricate pattern introduce a sophisticated burst of color and visual interest, transforming the upper walls into a striking design statement. This choice beautifully complements the navy vanity and adds depth to the otherwise bright and airy space.
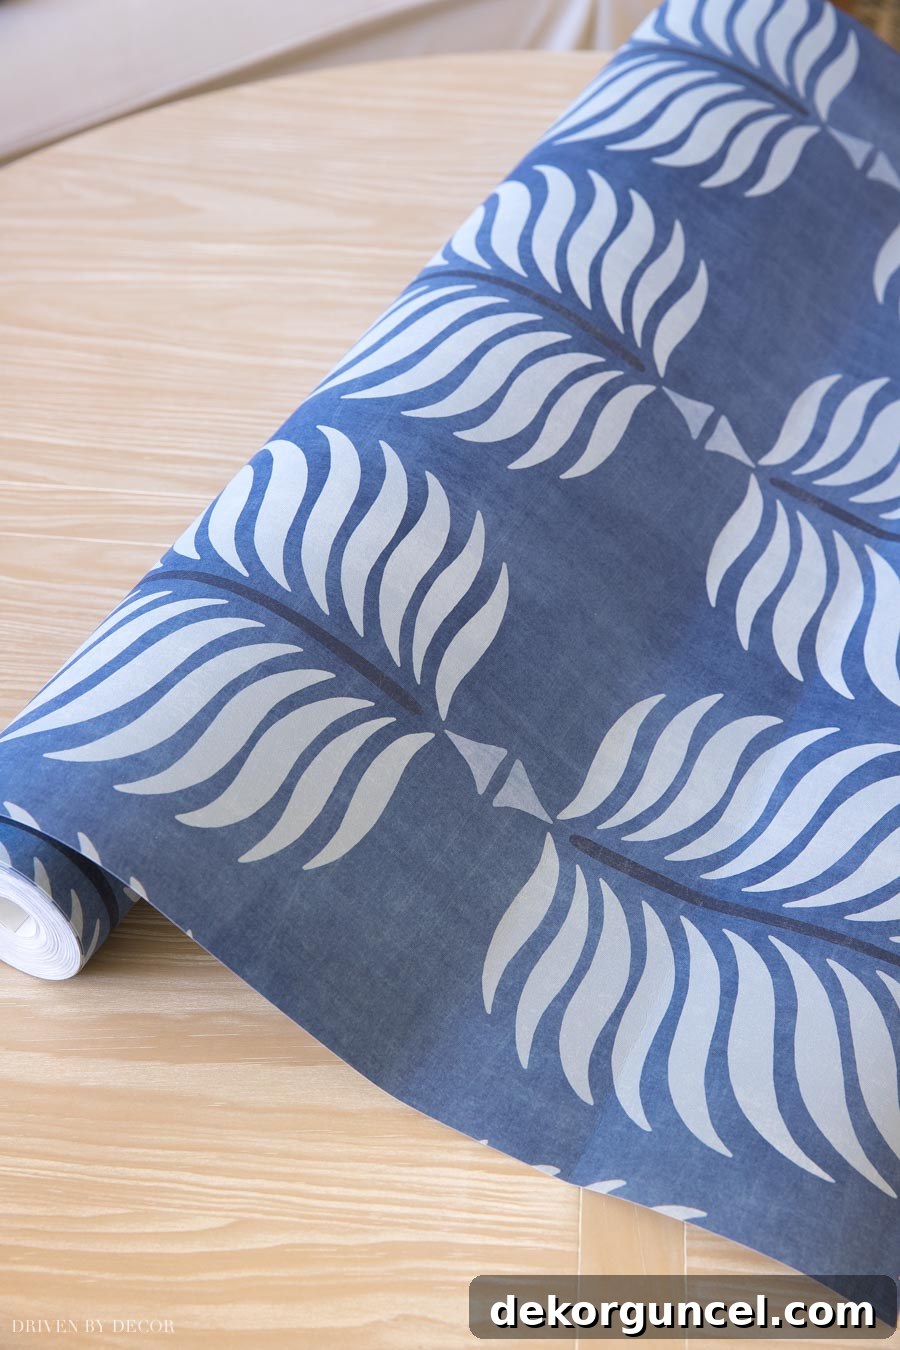
For those with a keen eye for design, you might feel a sense of déjà vu with this wallpaper, and you’d be absolutely right! This isn’t its first appearance in our home. I previously utilized this very same pattern as a unique wallpaper backsplash in our kitchen before its own major remodel. Its versatility and timeless appeal convinced me it was the perfect choice to bring a cohesive, yet fresh, look to our powder room. Reusing beloved patterns not only speaks to a consistent design aesthetic but also showcases how a well-chosen material can adapt beautifully to different spaces and functions within a home.
If you’ve been following our design journey from the beginning, you might recall my initial inclination towards {this luxurious grasscloth wallpaper}. While I absolutely adore its texture and natural elegance, I ultimately decided against it for the powder room. The cost was a significant factor, and more importantly, its delicate nature wasn’t the most practical choice for a bathroom, where moisture resistance and durability are key considerations. However, I wasn’t ready to abandon the grasscloth dream entirely! I found a wonderfully creative way to incorporate a small remnant of it into our powder room’s decor by covering {this inexpensive waste basket}. This clever DIY project allowed me to introduce that desired texture without the full commitment or expense, proving that sometimes the best design solutions are found in unexpected places.
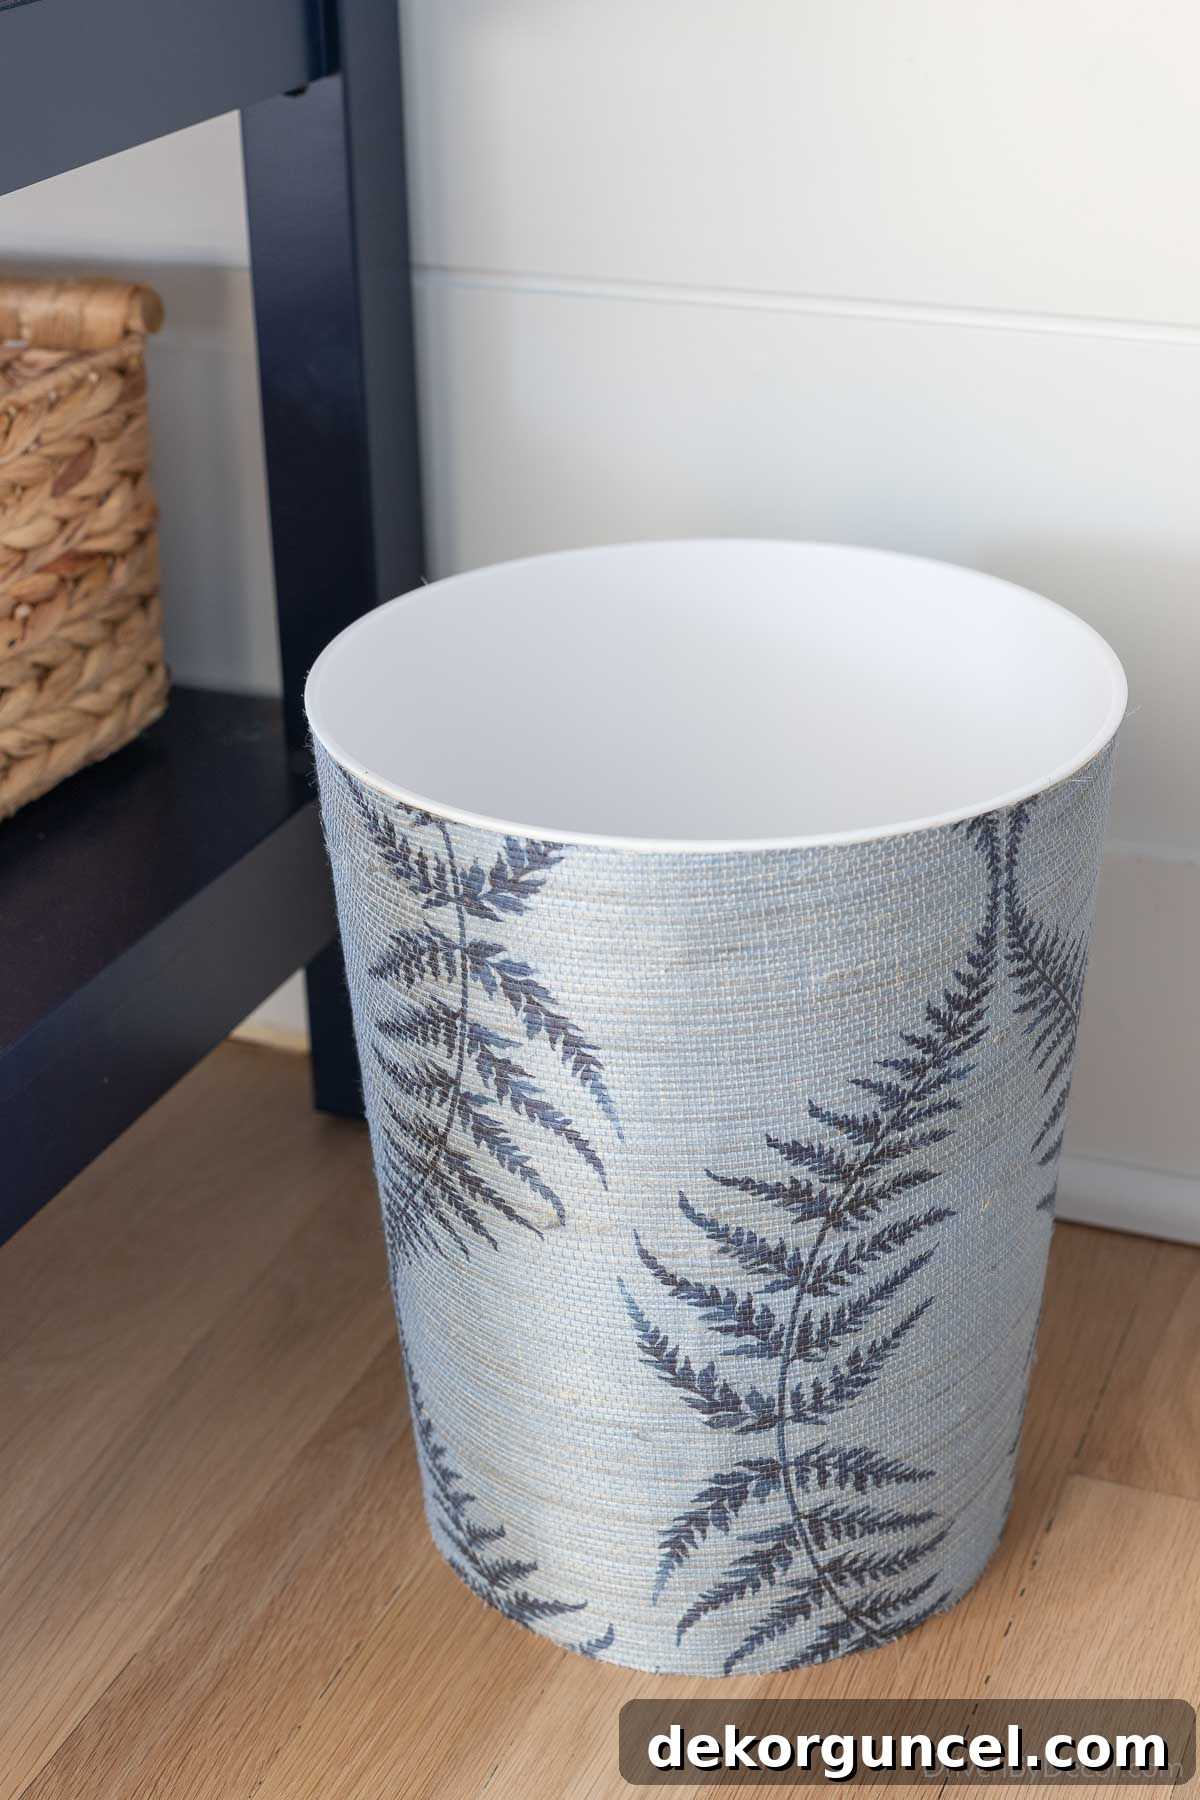
This little waste basket transformation was a truly simple and satisfying project, taking less than 20 minutes to complete! Here’s how I did it: First, I carefully wrapped the grasscloth wallpaper remnant around the waste basket, ensuring it was aligned vertically. Then, I traced along the top edge of the basket onto the wallpaper, marking the precise cut line. This initial wrap helped determine the ideal height and width for the paper. After unwrapping it, I meticulously cut along the traced line, ensuring a clean, straight edge.
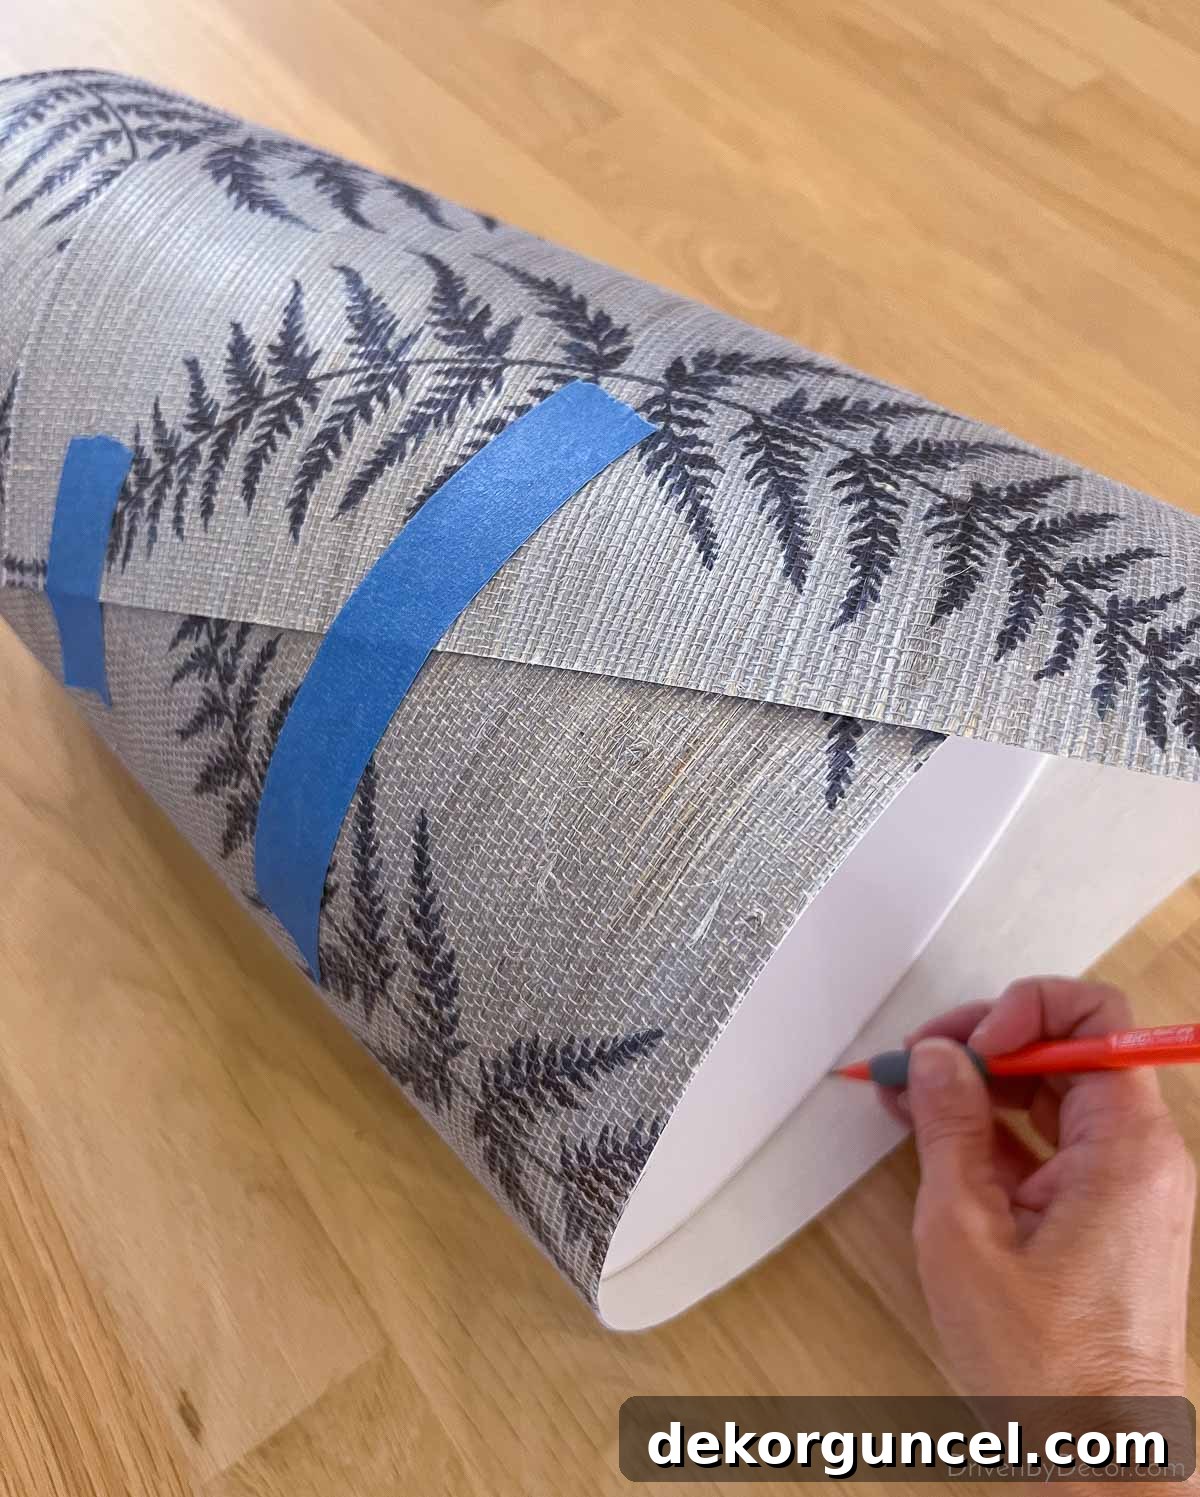
Next, I rewrapped the wallpaper around the waste basket, positioning it so that its freshly cut top edge sat just below the top lip of the basket, creating a polished finish. With the top aligned, I then traced along the bottom edge of the waste basket, unwrapped the paper, and made the final cut along that line. Before applying the wallpaper, I gave the plastic waste basket a light sanding to slightly degloss its surface. This step is crucial as it creates a better adhesion surface for the wallpaper paste, ensuring the paper sticks firmly and evenly. Finally, I applied wallpaper paste to the back of the remnant and carefully wrapped it around the waste basket, smoothing out any bubbles or wrinkles as I went. For added durability and protection against potential stains in a bathroom environment, I plan to eventually coat it with a flat varnish, similar to the method I used for the wallpaper backsplash in our kitchen. This protective layer will help preserve the beauty of the grasscloth for years to come.
Finishing Touches: The Rest of the Powder Room Details!
No remodel is truly complete without the thoughtful incorporation of small, exquisite details that tie the entire space together. In our powder room, these “little pretties” contribute significantly to the overall charm and functionality. One essential upgrade was replacing the old, inefficient toilet with {this sleek one-piece toilet}. This modern choice not only boasts a more contemporary aesthetic but also offers superior flushing efficiency – a welcome change from having to hold down the handle on the old toilet for what felt like an eternity! Its compact tank is perfectly sized to accommodate {this charming small woven tray}, which elegantly holds a potted plant and a coordinating woven canister, adding a touch of natural beauty and practical storage right above the toilet.
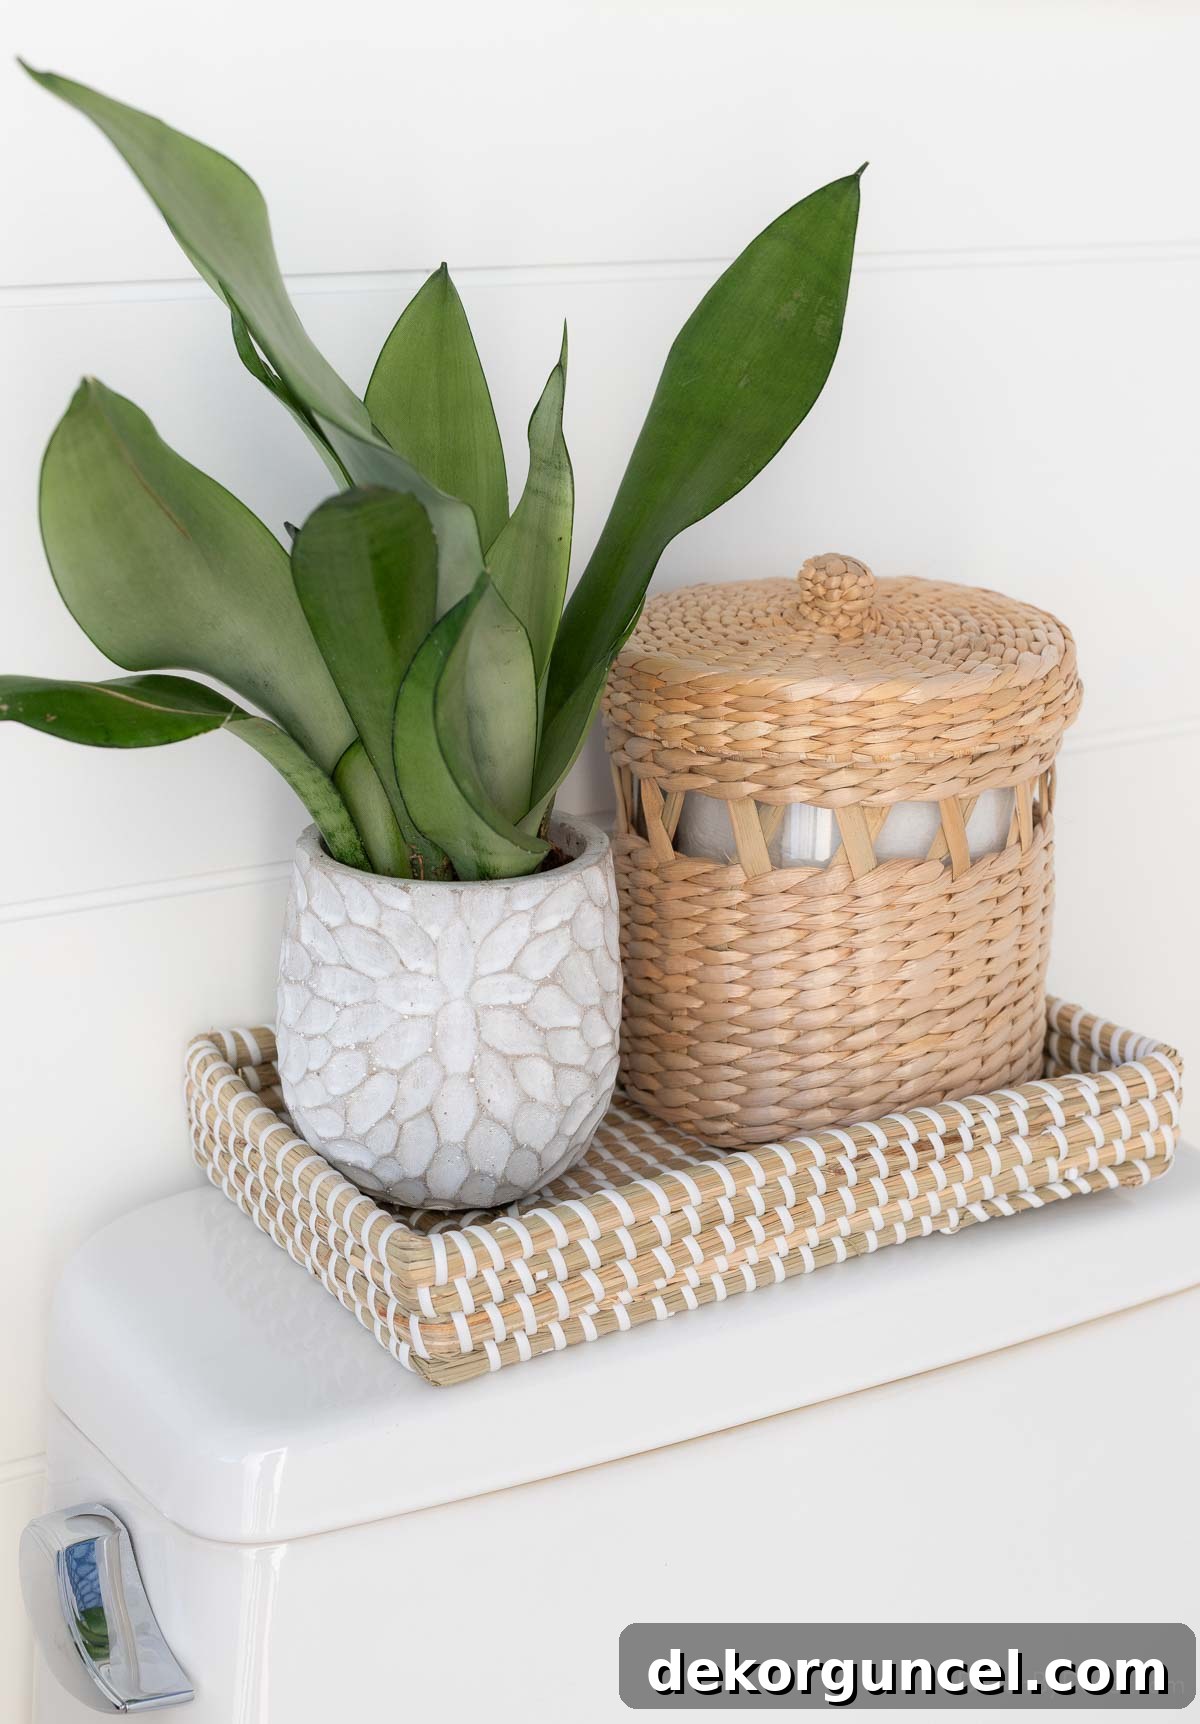
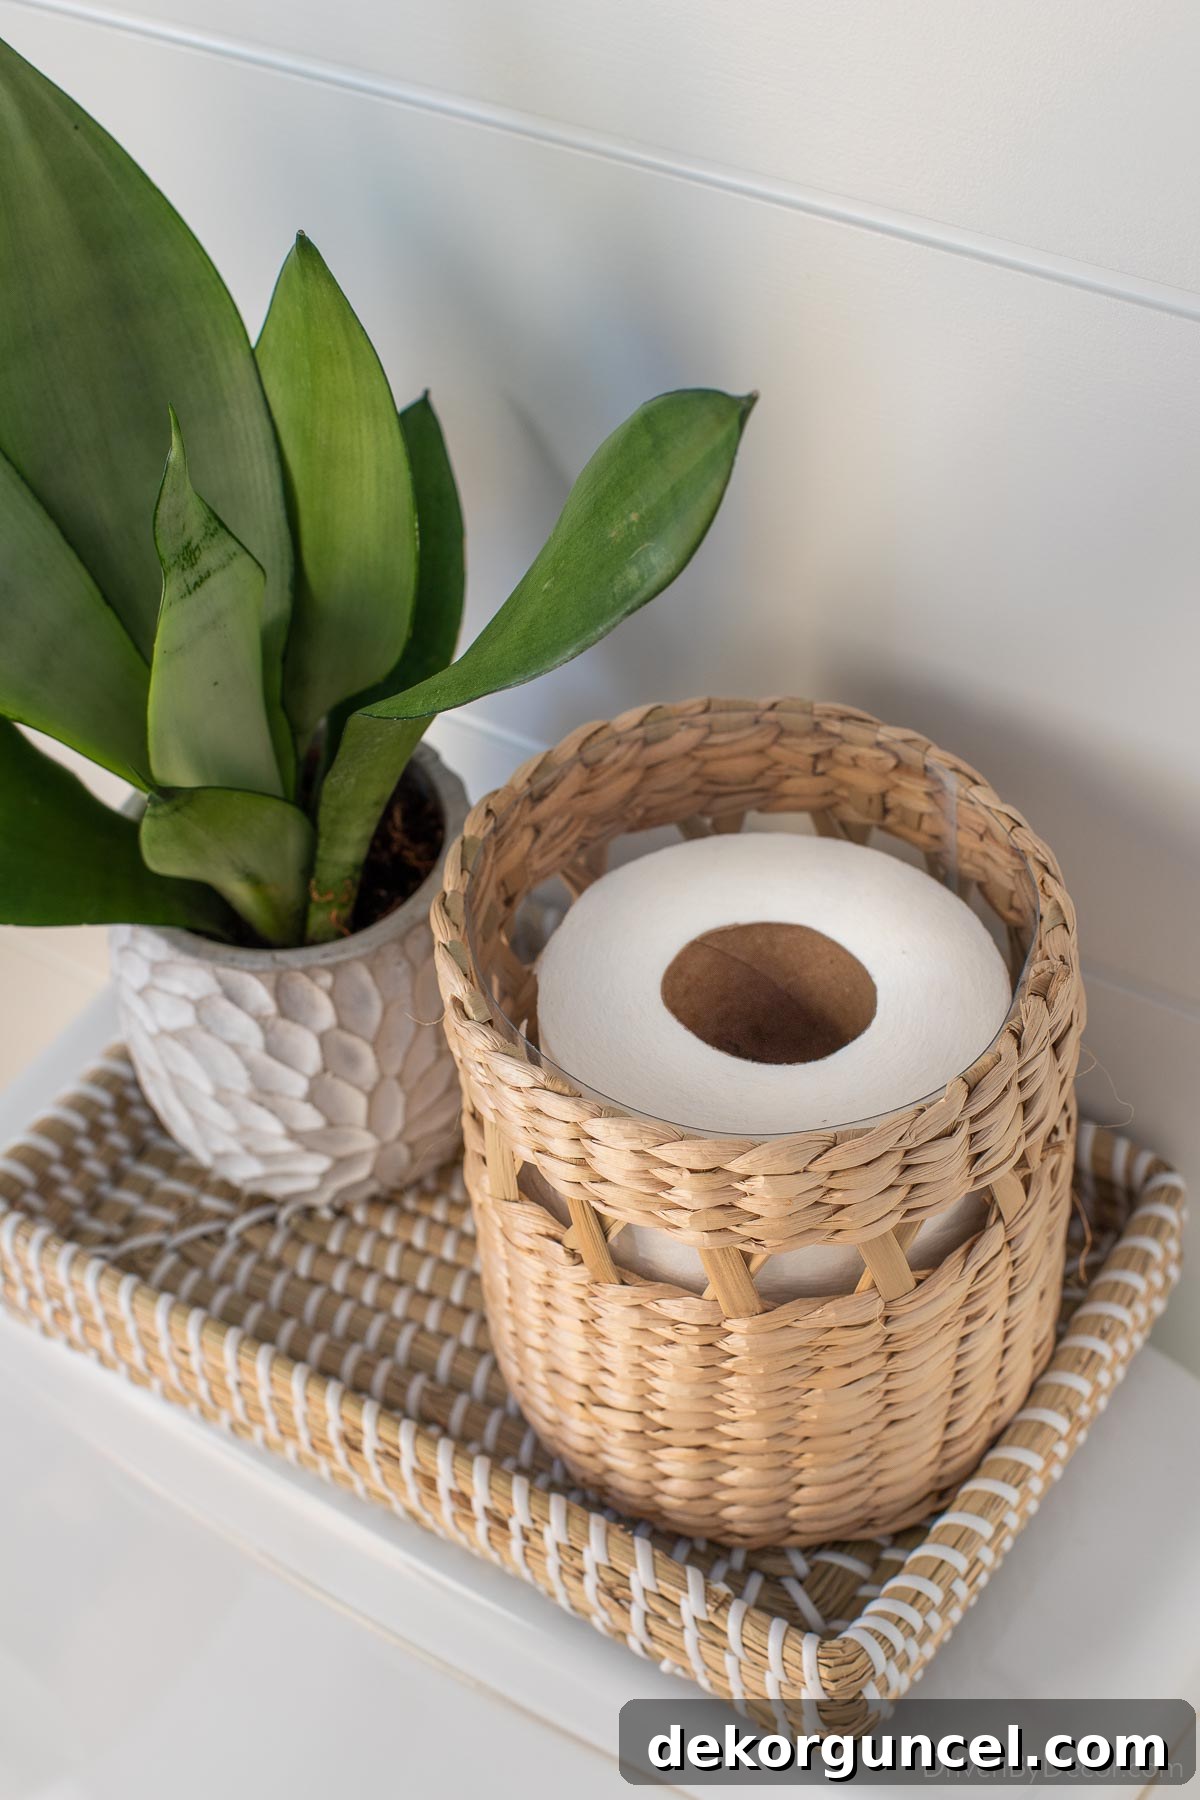
The beauty of thoughtful design often lies in its hidden utility. The decorative woven canister, nestled perfectly on the toilet tray, isn’t just for show. It ingeniously serves as discreet storage for an extra “in case of emergency” roll of toilet paper, keeping it easily accessible yet neatly out of sight. This small detail ensures that both practicality and aesthetics are harmoniously balanced, contributing to a truly well-appointed powder room.
Above the toilet, to complete the wall decor, I hung {this beautiful art print}. I chose the 18″ x 24″ size, which creates a significant visual impact without overwhelming the space. The print is elegantly matted in white and encased in a classic wood frame. While I already owned the specific frame, {this similar frame} offers a comparable look and size, allowing you to replicate this refined aesthetic. The art adds a touch of personality and color, tying into the room’s overall palette and providing a sophisticated focal point.
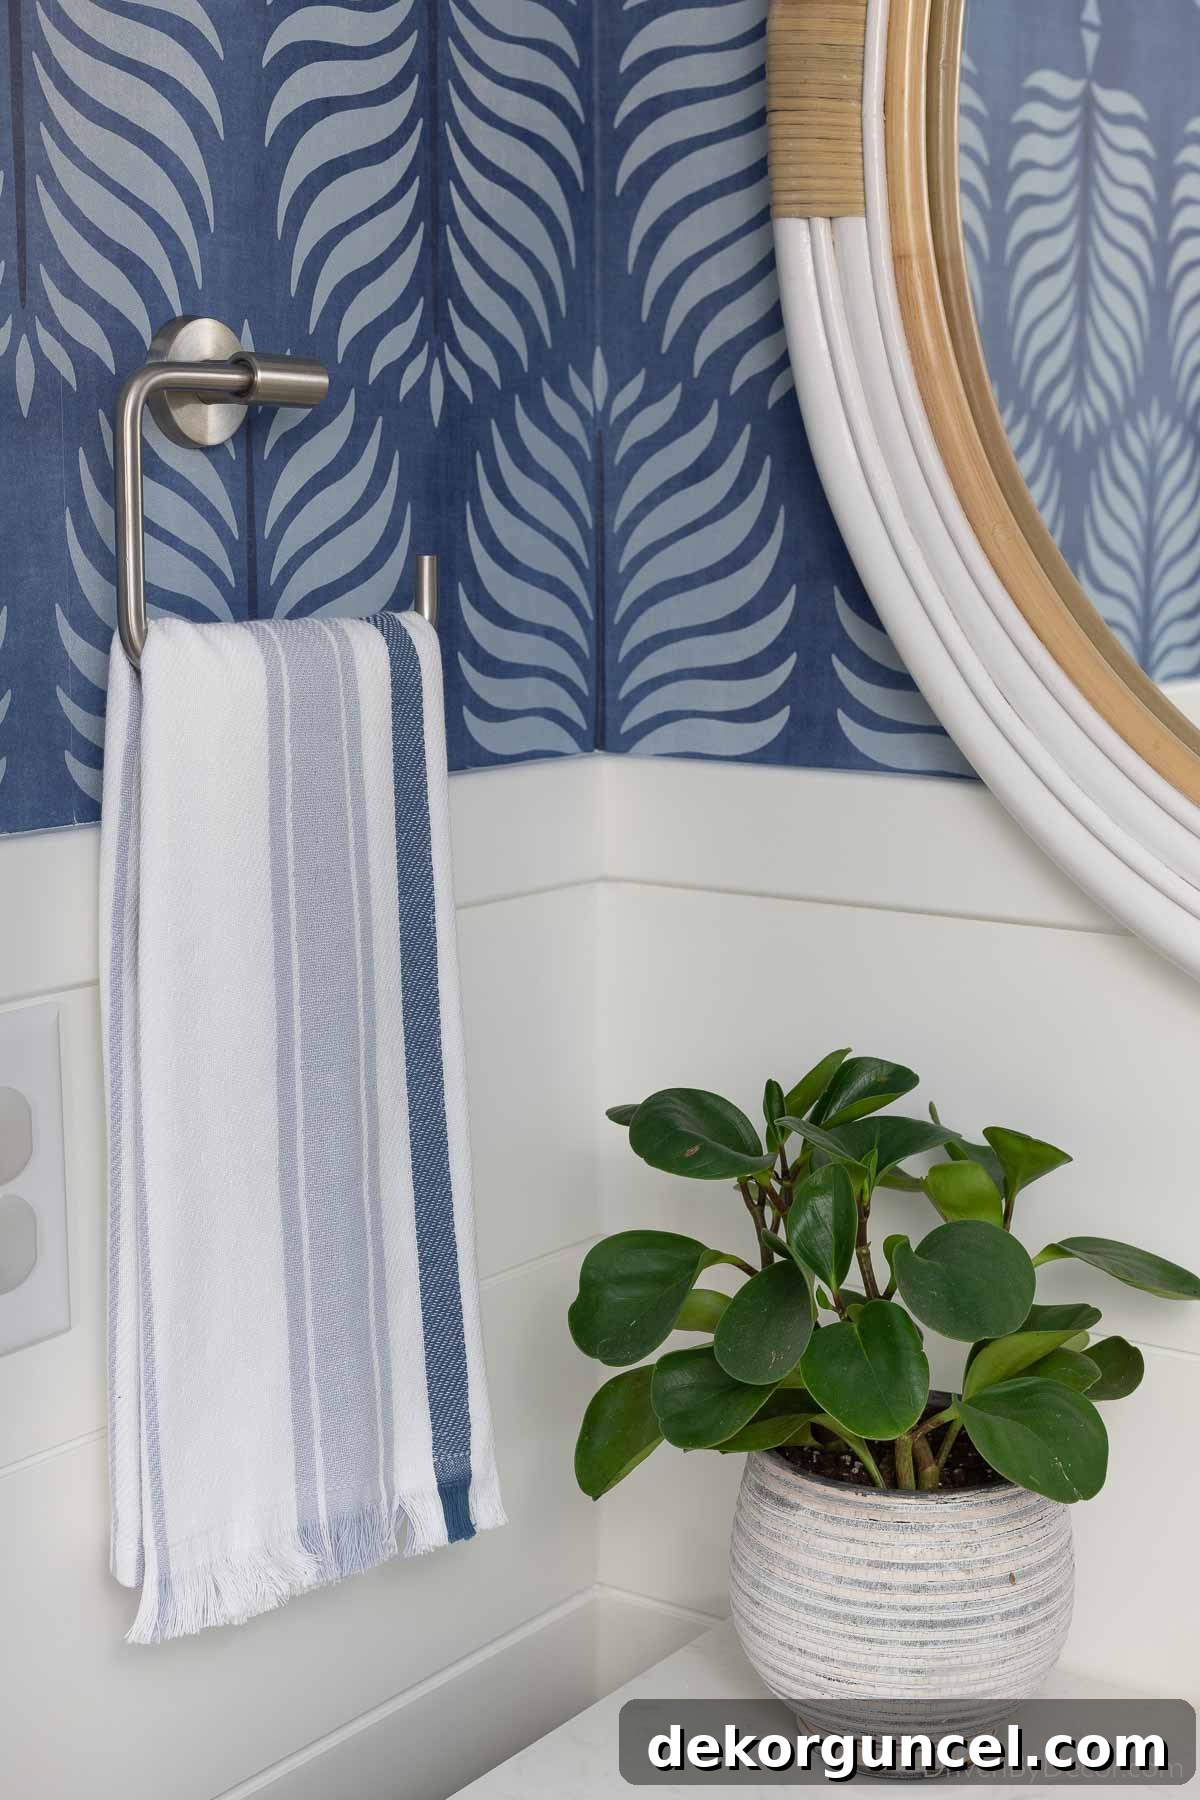
When it came to hardware, I decided to blend functionality with a subtle touch of elegance. For hand towels, I selected {this sleek towel ring} in a brushed stainless steel finish. Its minimalist design perfectly complements the clean lines of the shiplap and the vanity, offering a practical spot for a soft, blue striped hand towel that adds a refreshing pop of color and texture to the space.
However, to introduce a touch of visual interest and follow a growing design trend, I decided to mix things up with the toilet paper holder. I opted for {this elegant toilet paper holder} in a brushed gold finish. The warm metallic tone of the gold provides a beautiful contrast to the cooler stainless steel, creating a dynamic and sophisticated look without feeling disjointed. This intentional contrast adds depth and a modern edge to the powder room.
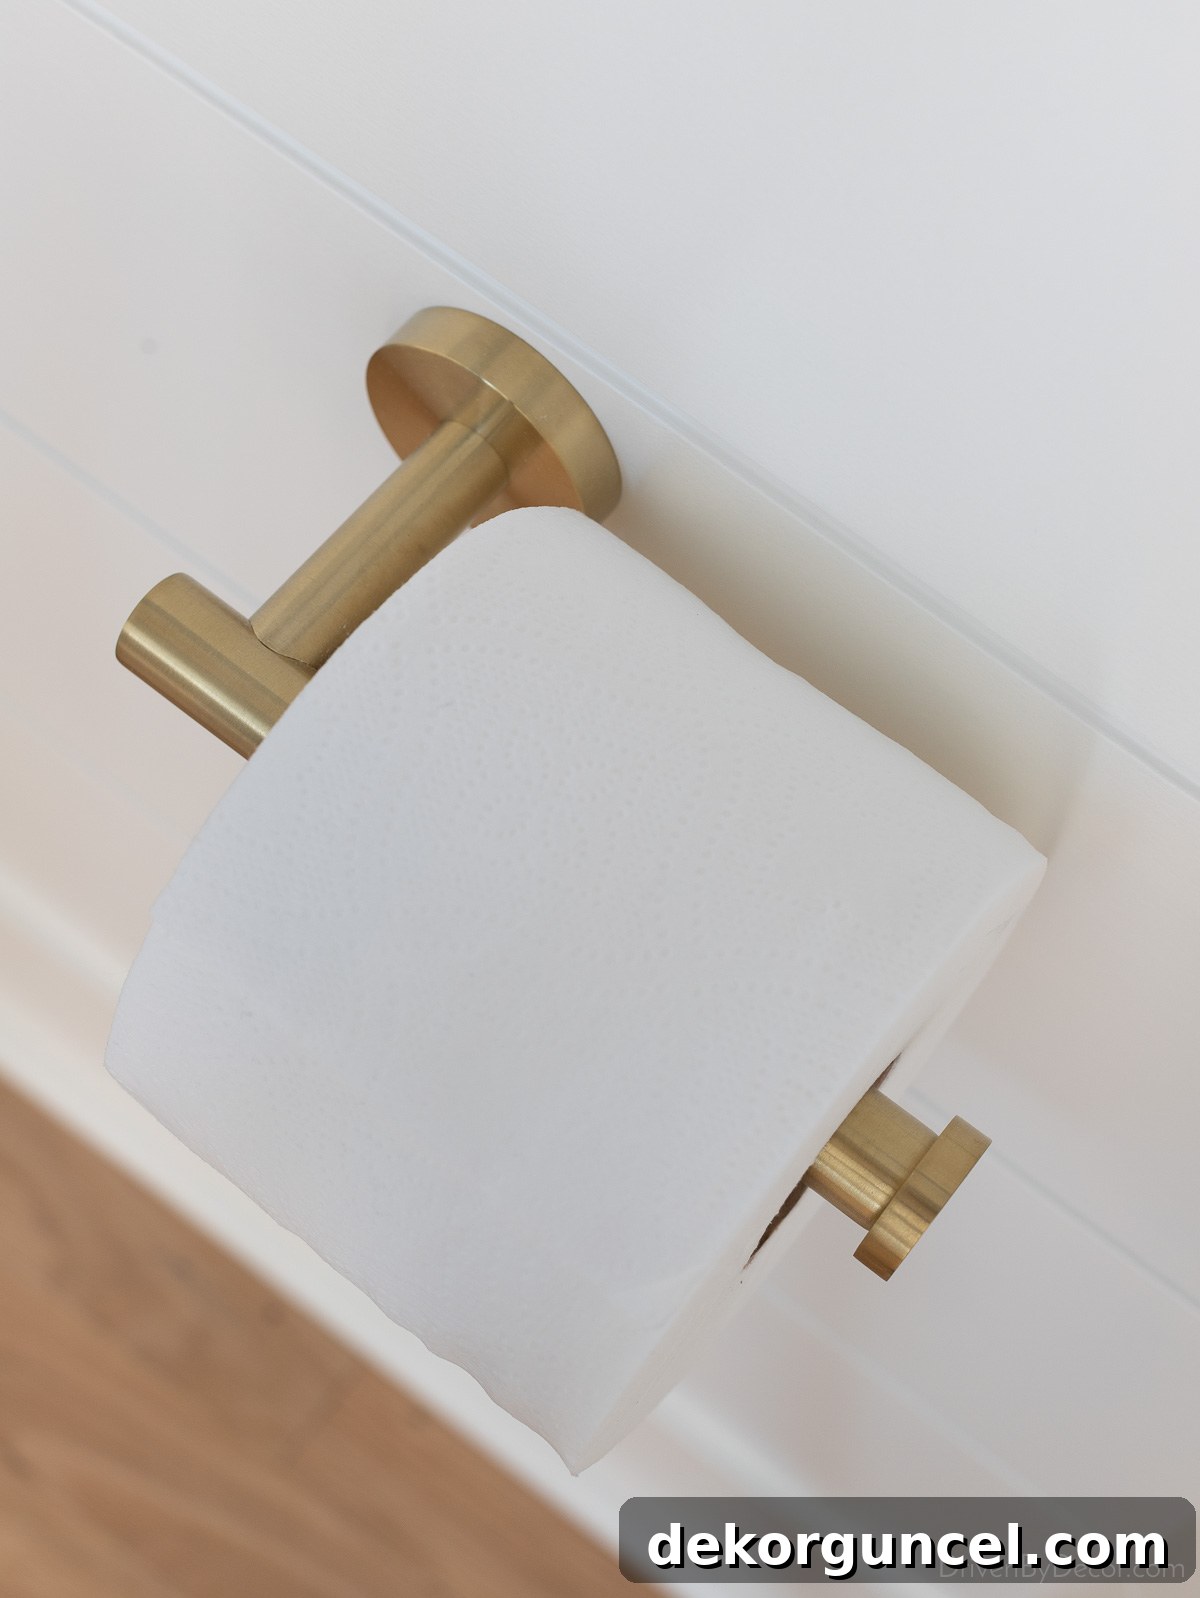
While my usual approach is to maintain a consistent finish for all powder room hardware, this time, it felt absolutely right to deviate and embrace the mixed metal trend. The combination of brushed nickel and brushed gold creates a layered and curated aesthetic that feels both contemporary and timeless. If you’re intrigued by this sophisticated design technique, I’ve put together a comprehensive post filled with invaluable tips and inspiration on mixing metals beautifully in your home, especially in bathroom settings. It’s a fantastic way to add personality and a custom feel to any space!
Phew… that was a lot of detail for a little bathroom! What do you think of our newly renovated powder room? We poured so much thought and effort into every element, and we couldn’t be happier with the bright, functional, and stylish space it has become. Before we wrap up this comprehensive post, I want to circle back and address two frequently asked questions I received about our powder room shiplap. For those interested in all the granular details and practical considerations for installing shiplap, read on!
Shiplap in Bathrooms: Is it a Good Idea?
This is a question I get asked frequently, and the answer is a resounding YES, you can absolutely use shiplap in a bathroom or powder room! The critical factor, however, lies in selecting the appropriate shiplap material, which should be determined by the moisture levels present in the specific bathroom where you plan to install it. Understanding the environment of your bathroom is key to a successful and long-lasting installation.
If you’re considering adding shiplap to a powder room, much like mine, you typically don’t face the same high humidity and direct moisture concerns that come with a full bathroom equipped with a shower or bathtub. In these lower-moisture environments, a wider variety of shiplap materials can be suitable. As long as the shiplap is properly painted, sealed, or inherently made of a moisture-resistant material, most types should perform beautifully in a powder room, offering both durability and timeless style.
However, if your project involves a full bathroom with a shower that generates occasional high humidity, you must exercise caution and be very selective about your shiplap choice. In such conditions, I strongly advise against using MDF shiplap, like the one I successfully used in our powder room. MDF (Medium-Density Fiberboard) is highly susceptible to swelling and expanding when exposed to water and significant moisture, which can lead to warping and damage over time. Instead, for full bathrooms, it’s imperative to opt for shiplap made from inherently moisture and rot-resistant materials. Excellent choices include PVC shiplap, such as {this durable PVC shiplap option}, or high-performance composites like AZEK, which offers superior resistance to moisture, insects, and rot, exemplified by {this AZEK tongue and groove shiplap}. Another resourceful option is to purchase a large PVC sheet, like {this versatile one}, and cut it into strips, then install it using the same method I detailed for the DIY shiplap walls in our bedroom. These materials provide the necessary resilience for humid bathroom environments, ensuring your shiplap remains beautiful and intact for years. It’s also worth noting that the MDF shiplap we used is generally not recommended for ceiling applications due to potential moisture and weight considerations. For comprehensive guidance on achieving the shiplap look on a ceiling, including the best materials and techniques, refer to my detailed post on the shiplap ceiling in our “circus room.”
Painting MDF Shiplap: Achieving a Flawless Finish
Once the MDF shiplap was meticulously installed in our powder room, the next crucial step was painting it to achieve that crisp, clean finish. Since the surface of the MDF shiplap I used had a slight sheen, proper preparation was key to ensuring excellent paint adhesion and a smooth, professional result. I began by lightly sanding the entire surface with very fine 400-grit sandpaper. This gentle sanding not only removes any minor imperfections but also creates a subtle texture that helps the primer and paint adhere better, preventing peeling or an uneven finish.
After sanding, I meticulously caulked all the corners of the room where the shiplap boards met, as well as the joint between the topmost shiplap board and the finishing trim piece. Caulking fills any tiny gaps, creating seamless transitions and giving the walls a truly built-in, polished look. Following this, I used a microfiber cloth to thoroughly wipe down all surfaces, removing every trace of sanding dust and debris, which is essential for a smooth paint application.
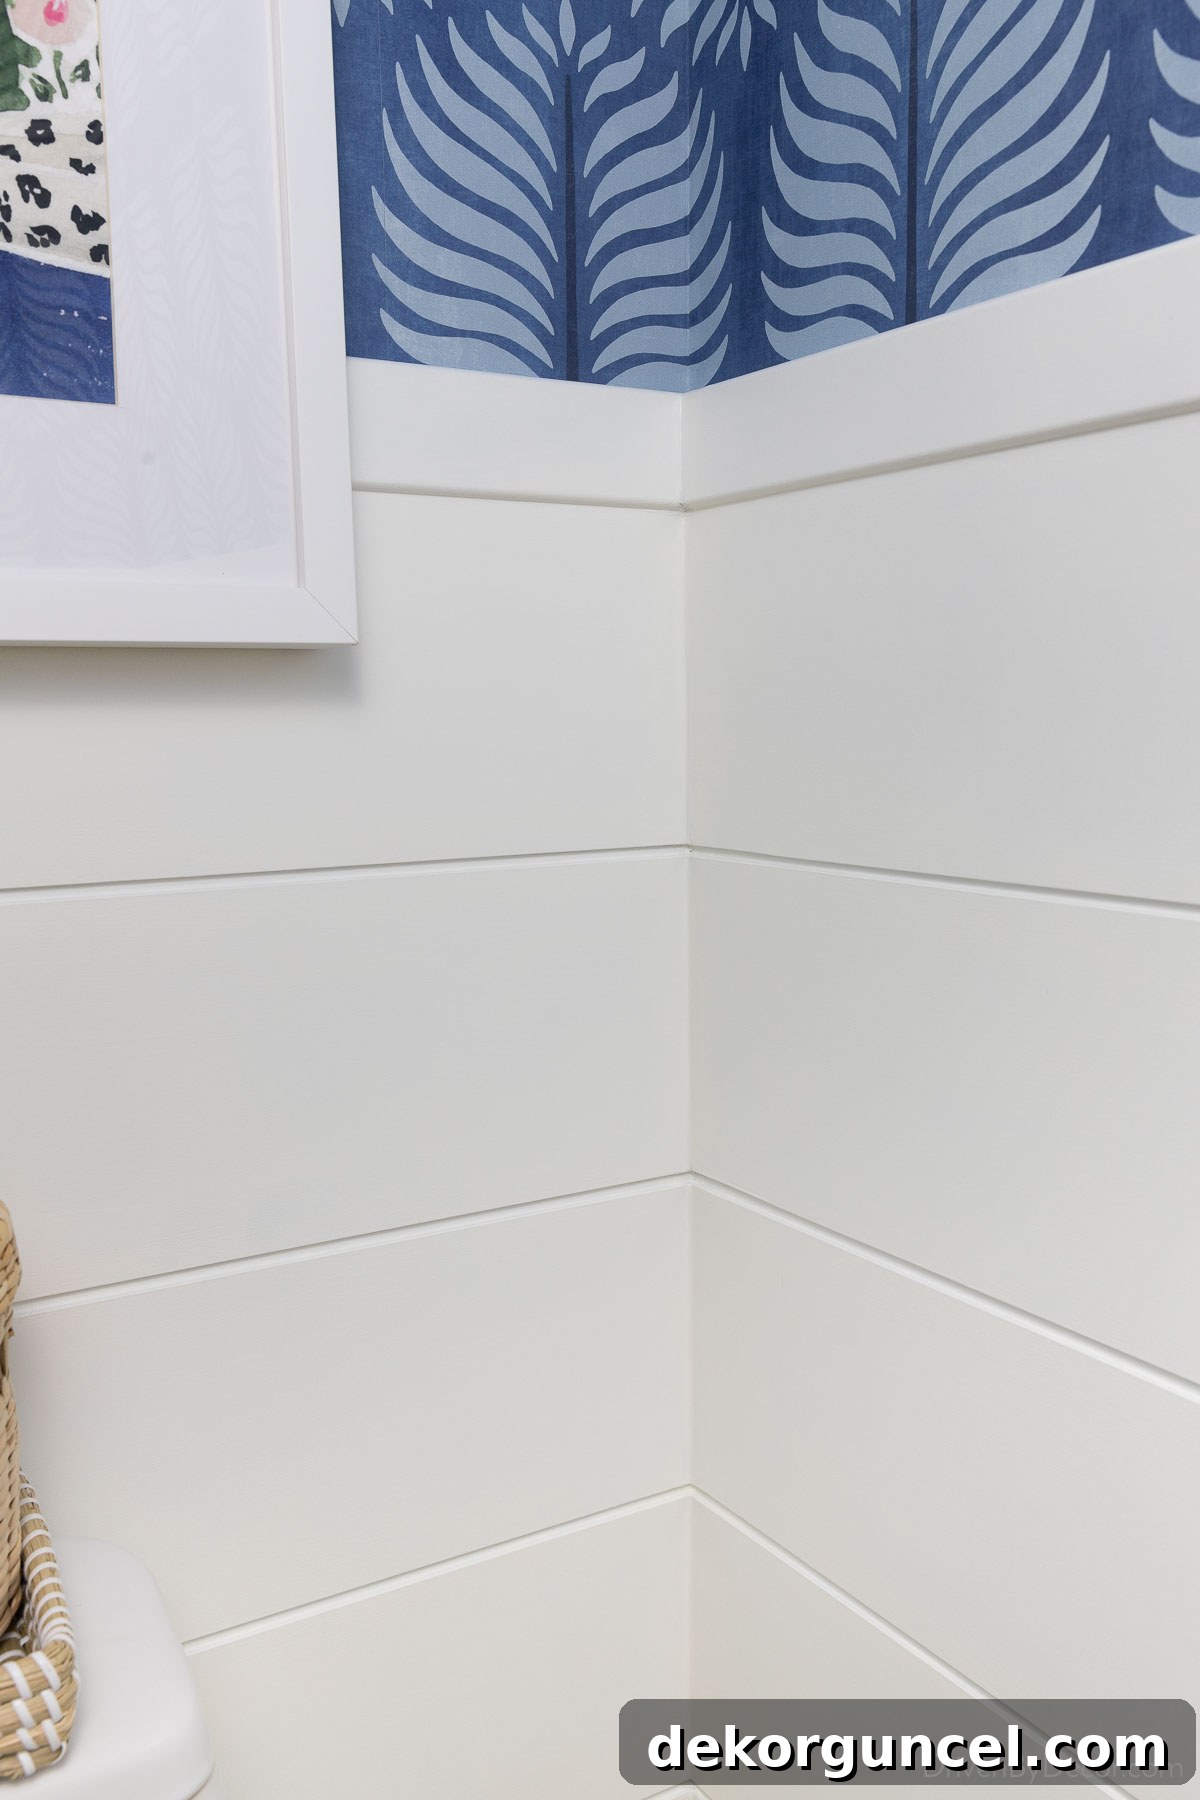
For the paint itself, I opted for Benjamin Moore Advance paint in a satin finish, choosing the timeless shade of Simply White. This paint is renowned for its durability, smooth finish, and excellent leveling properties, making it ideal for trim and cabinetry – and, as it turns out, shiplap! To achieve a perfectly smooth finish with no brush marks, I used a two-step application process. First, I used a high-quality paint brush to carefully cut in and get into the grooves between each shiplap board, ensuring full coverage. Immediately after brushing a section, I followed up by rolling paint onto the flat surfaces of the boards using {this small ¼″ nap roller} fitted onto {this roller frame}. The small nap roller is crucial for achieving a smooth, even finish on flat surfaces like shiplap, minimizing texture. This technique ensures consistent coverage and a beautiful, streak-free result. Here’s a close-up of what the painted shiplap looked like once I was completely finished, showcasing the flawless, smooth finish in the corner:
And with that, our powder room makeover journey has come to a beautiful and successful close! This renovation was a testament to how even the smallest spaces can undergo a dramatic transformation with careful planning, thoughtful design choices, and a little bit of elbow grease. We’ve managed to create a space that is not only highly functional but also a true reflection of our evolving style – a blend of classic charm and modern sophistication. We hope this detailed tour has provided you with inspiration, practical tips, and the confidence to tackle your own home improvement projects, big or small.
Thank you so much for joining us on the blog today and following along with every step of this exciting powder room remodel. Your interest and engagement mean the world to us!
XO,
