
Discover the ultimate guide to transforming your discolored grout! After countless attempts with various products, we’ve uncovered effective solutions that truly deliver sparkling, like-new results. Say goodbye to dingy grout and hello to a brighter space!
(This post includes some affiliate links. For a full disclosure statement, please click here.)
Revitalize Your Tiles: The Ultimate Guide to Achieving Sparkling White Grout
Grout lines, while essential for holding tiles together, often become the most challenging element to keep clean and pristine in any tiled area. Over time, these porous lines absorb dirt, grime, soap scum, hard water stains, and even mildew, leading to a dull, discolored, and often unsightly appearance. This common issue can significantly diminish the overall appeal of an otherwise beautiful tiled surface, making a bathroom, kitchen, or entryway feel less clean and inviting. Many homeowners find themselves in a constant battle against stubbornly stained grout, trying various cleaning products and methods with often disappointing results.
For years, the floor grout in our guest bathroom presented a persistent challenge. Despite regular cleaning, it had developed a deeply embedded discoloration that no amount of scrubbing or commercial cleaner seemed to remedy. I embarked on an extensive quest, experimenting with virtually every recommended solution on the market. From powerful bottled grout cleaners promising miraculous transformations to various homemade concoctions involving baking soda and peroxide, and even the application of high-temperature steam, I left no stone unturned. While these efforts often provided a temporary improvement, making the grout appear somewhat better, they consistently fell short of restoring it to its original, crisp white color. The underlying stains remained, leaving a noticeable dullness that was incredibly frustrating. I was determined to find a more permanent and effective solution that would truly bring back the grout’s pristine condition, rather than just masking the problem.
The Breakthrough Discovery: Grout Renew – A Game Changer for Discolored Grout
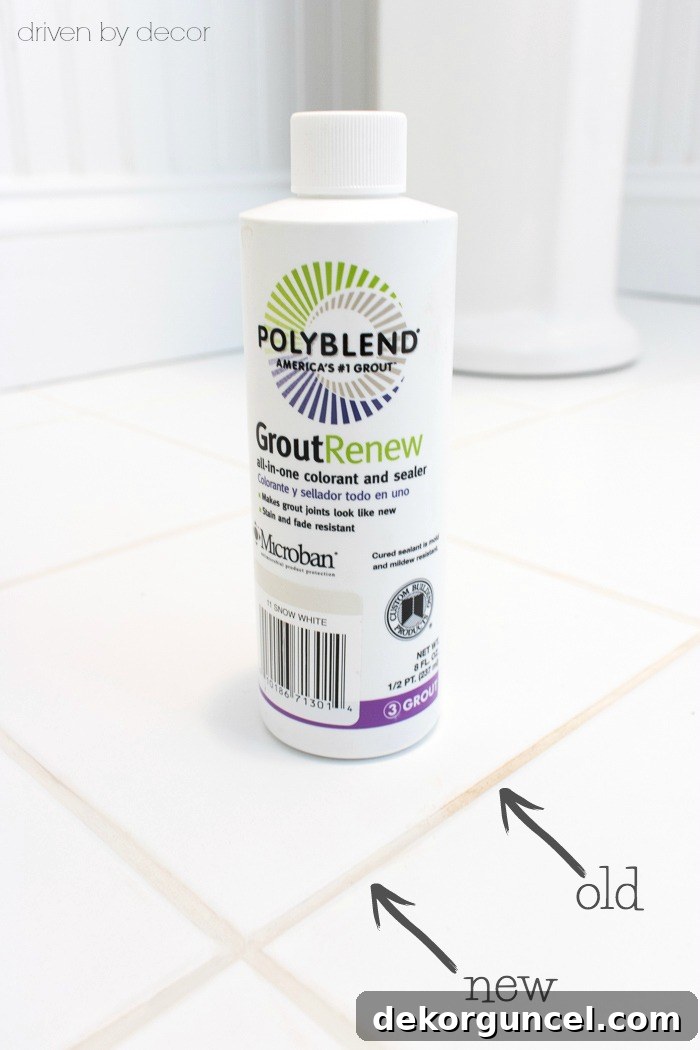
My persistence finally paid off when, after extensive online research and sifting through countless product reviews, I stumbled upon a product called Grout Renew. Its overwhelmingly positive feedback from users who had experienced similar grout dilemmas immediately caught my attention. Intrigued by the promises of lasting restoration, I decided to give it a try. This wasn’t just another cleaner; it presented itself as a comprehensive solution designed to not only cover stains but also to seal and protect the grout for the long term. You can find the specific product I used here.
From the moment I started using Grout Renew, I wished I had discovered it years ago! The transformation was nothing short of remarkable. It delivered an immediate and dramatic difference, completely restoring my grout to its beautiful, original soft white color. I opted for the “Snow White” shade, which provided a lovely creamy white finish that perfectly complemented my existing tiles. For those whose original grout is a truer, brighter white, there’s also a “Bright White” option available, along with a wide array of other non-white colors to match various tile designs or to introduce a fresh new look. Beyond its incredible coloring capabilities, one of the most significant advantages of Grout Renew is its dual function as a sealer, which actively helps to prevent future stains and makes ongoing maintenance considerably easier. This protective barrier is crucial for high-traffic areas and damp environments like bathrooms and kitchens.
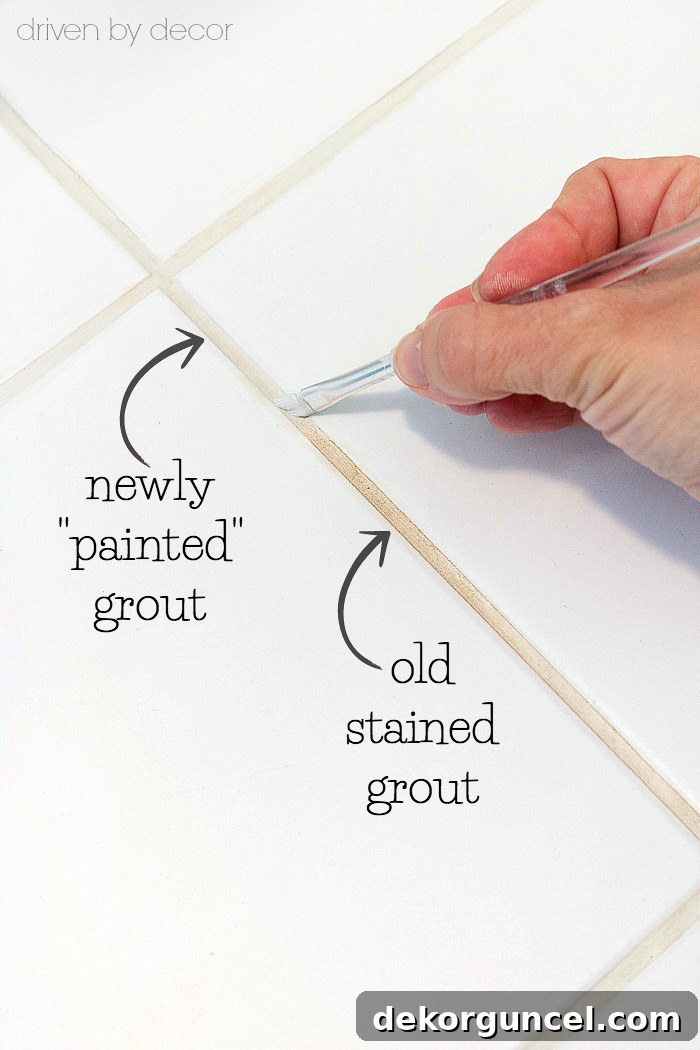
Through a bit of trial and error, I found that the most effective application method for Grout Renew was with a small, angled paintbrush. This allowed for precise application along the grout lines, minimizing contact with the surrounding tiles. The results after just a single coat were astonishing:
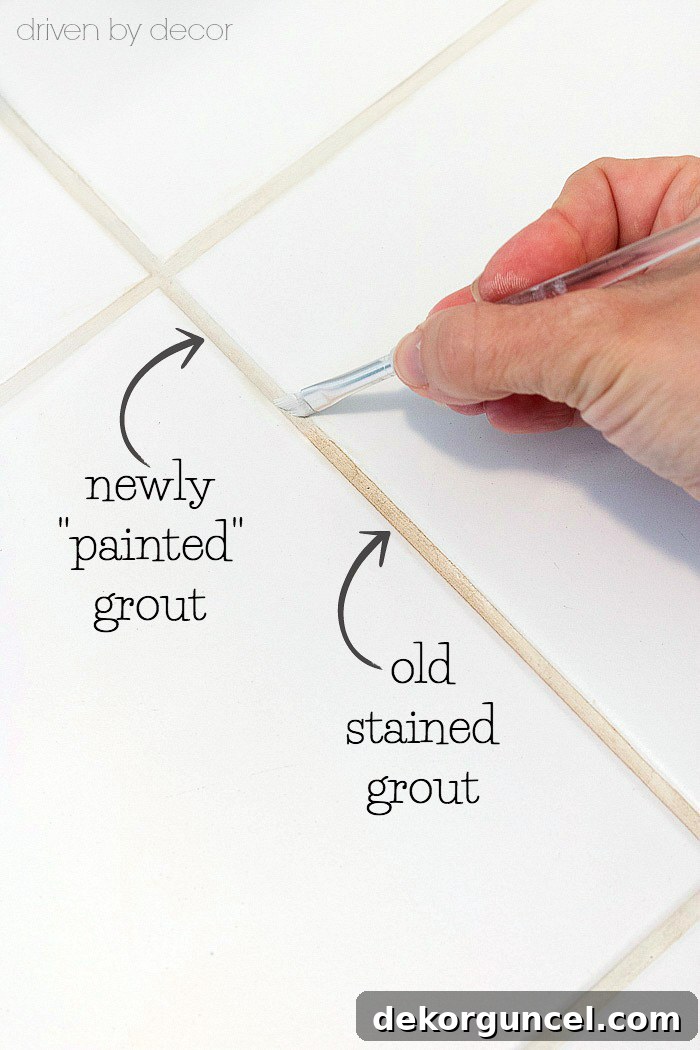
Detailed Application Process for Optimal Grout Restoration
Achieving professional-looking results with Grout Renew requires a little patience and attention to detail, but the effort is undeniably worth it. For approximately 75% of my grout lines, a single coat proved sufficient to achieve the desired bright white finish. However, for areas that were more heavily stained, or had accumulated years of discoloration, a second (and in some particularly stubborn spots, even a third) coat was necessary. It’s crucial to allow the first coat to dry completely for several hours before applying subsequent layers. This ensures proper adhesion and an even finish. While the process of meticulously applying the product along each grout line can be a bit painstaking, especially for larger areas, the time investment is relatively minimal for a smaller space like my guest bathroom, where it took only about an hour to cover all the grout lines. The transformation is so dramatic and long-lasting that I consider this product my new best friend for tile maintenance, and I wholeheartedly recommend it if you’re also struggling with how to whiten grout effectively.
Step-by-Step Guide to Using Grout Renew:
- Preparation is Key: Before you begin, ensure your grout lines are as clean as possible. While Grout Renew will cover discoloration, removing any loose dirt, grime, or mildew will help it adhere better and last longer. A good scrub with a general-purpose grout cleaner and a brush, followed by thorough rinsing and drying, is recommended. Ensure the area is completely dry before applying the product.
- Gather Your Tools: You’ll need the Grout Renew product, a small angled paintbrush (as recommended, or a similar fine-tipped applicator), a damp cloth or sponge for wiping away excess, and potentially painter’s tape if you’re concerned about getting the product on your tiles (though wiping immediately usually suffices). Good ventilation is also advisable.
- Shake Well: Grout Renew is a colorant, so the pigments need to be thoroughly mixed. Shake the bottle vigorously for at least a minute before opening.
- Apply with Precision: Dip your angled paintbrush into the Grout Renew, ensuring you don’t overload it. Carefully apply a thin, even coat directly onto the grout line. The angled brush allows you to get into the recess of the grout without getting too much on the tile surface.
- Wipe Away Excess Promptly: This step is critical. As you work in small sections (e.g., a 2×2 foot area), immediately wipe any excess Grout Renew off the adjacent tiles with a damp cloth or sponge. Do not let it dry on the tiles, as it can be much harder to remove once cured.
- Allow to Dry: Let the first coat dry completely for at least 2-4 hours, or as per the product instructions. Proper drying time ensures optimal adhesion and prevents peeling or unevenness when applying subsequent coats.
- Apply Additional Coats (If Needed): Inspect the grout lines after the first coat has dried. For heavily stained areas, or if you desire a more opaque finish, apply a second (or even third) thin coat, following the same application and wiping procedure. Again, allow adequate drying time between each coat.
- Curing Time: While the surface may feel dry to the touch, Grout Renew typically requires 24-72 hours to fully cure and achieve its maximum durability and stain-resisting properties. Avoid heavy foot traffic or excessive moisture during this period.
The remarkable difference it made is truly inspiring:
Introducing the Convenience of a Grout Pen: An Excellent Alternative for Quick Fixes
For those seeking a quicker, perhaps less intensive, solution for smaller areas, touch-ups, or minor discolorations, a white grout pen offers a fantastic alternative. This innovative product acts as both a colorant and a sealer, much like Grout Renew, but in a highly convenient, marker-like format. The primary advantage of a grout pen is its ease of use – there’s no need for separate applicators or brushes, making the process incredibly straightforward. You simply use it just like you would a marker, drawing directly along the grout lines. Many grout pens also come with dual tips, allowing you to choose between a narrow or wide tip depending on the width of your specific grout lines, which offers excellent precision.
I’ve personally tried a white grout pen (such as this white grout pen) and found it to work exceptionally well for its intended purpose. It’s particularly useful for refreshing specific areas that see more wear or for quick touch-ups without having to commit to a larger project. While it might not offer the same comprehensive coverage and long-term durability as a full Grout Renew application for an entire floor, it’s an indispensable tool for maintaining the brightness of your grout with minimal effort. It dries quickly and provides a crisp, clean finish that instantly brightens the tiled surface. The precision of a pen also makes it ideal for areas with intricate tile patterns or narrow grout lines where a brush might be cumbersome.
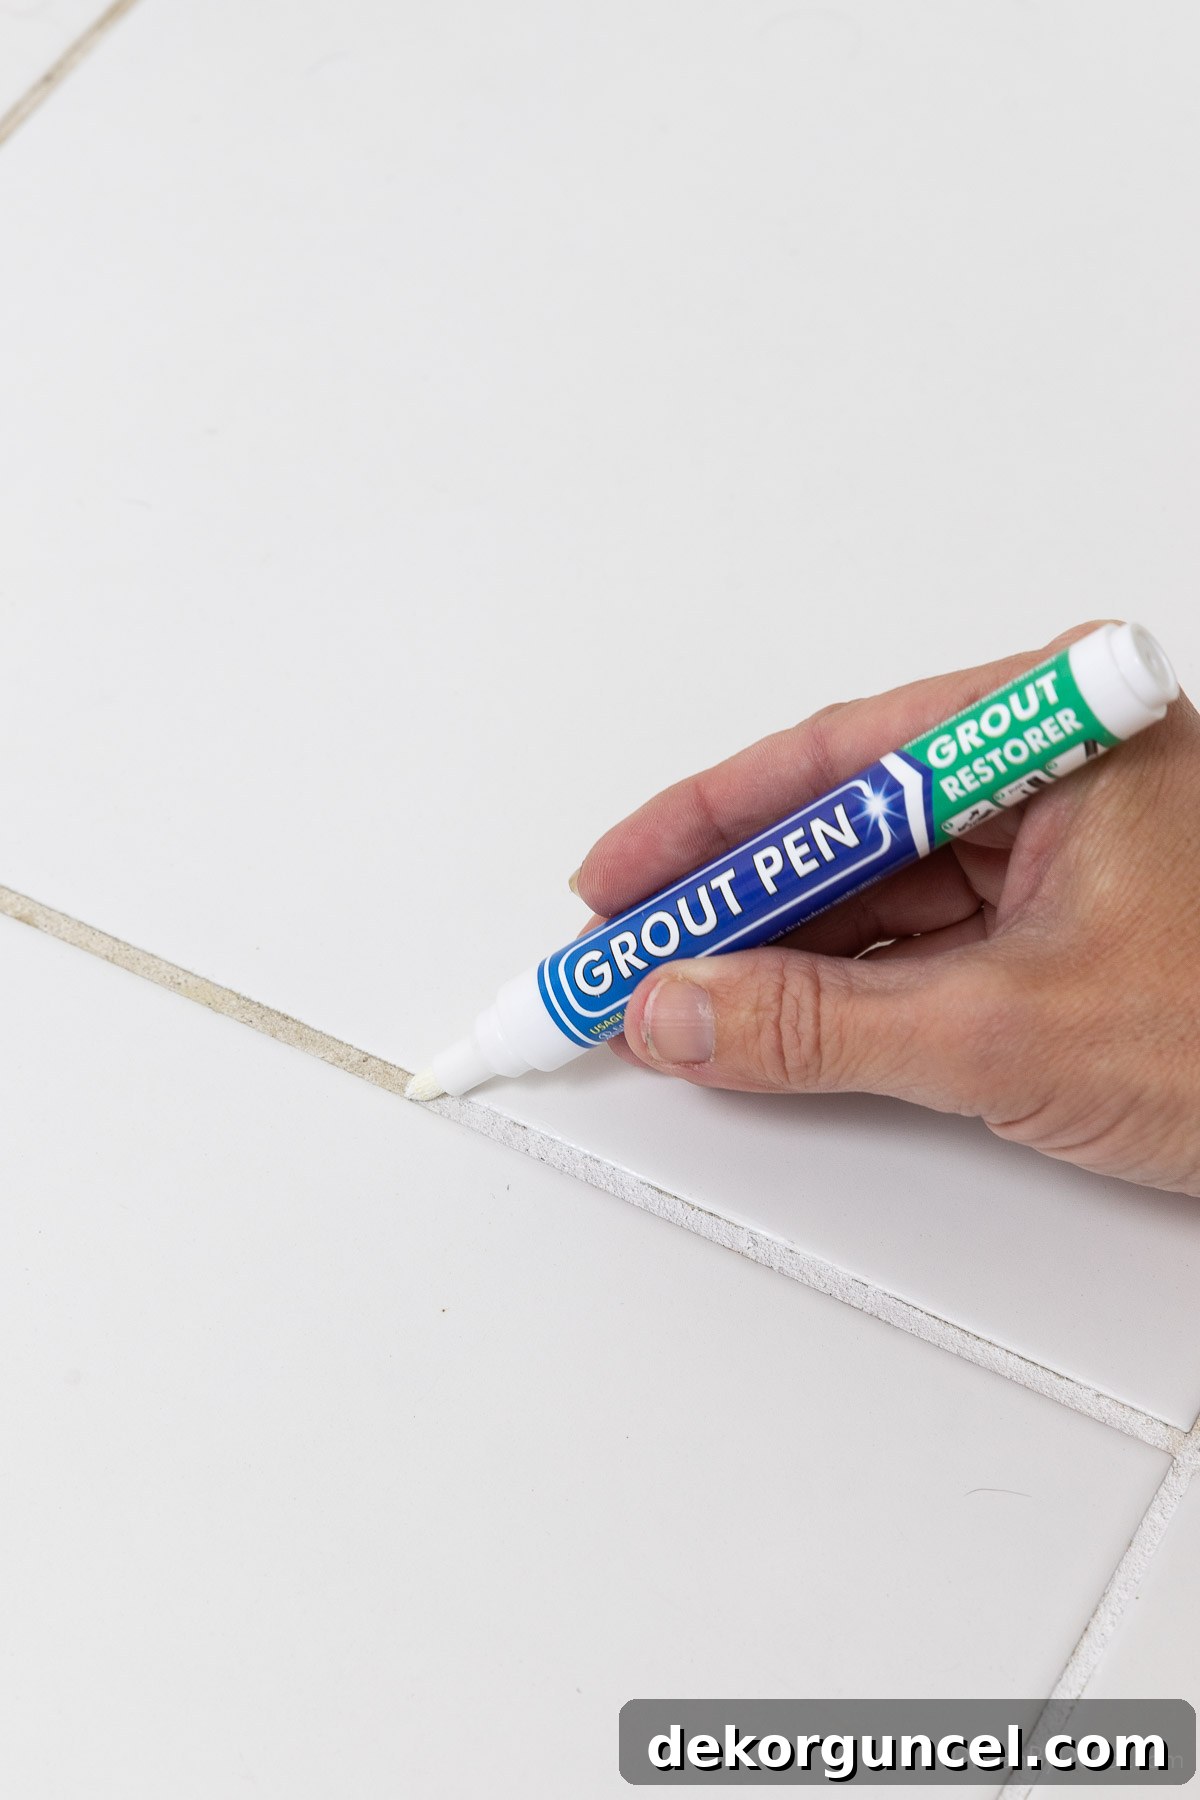
How to Use a Grout Pen Effectively:
- Clean First: Just like with Grout Renew, ensure your grout lines are clean and dry before applying the pen. Any dirt or grease can prevent proper adhesion.
- Shake and Prime: Shake the pen thoroughly to mix the pigment. Press the nib down on a piece of scrap paper a few times until the ink starts to flow evenly.
- Draw Along Grout Lines: Carefully draw the pen along the grout lines, ensuring even coverage. Use a steady hand to avoid getting too much on the surrounding tiles.
- Wipe Quickly (If Needed): If you do get some on the tile, quickly wipe it away with a damp cloth before it dries.
- Allow to Dry: Grout pens typically dry much faster than liquid renew products. Follow the manufacturer’s instructions for drying and curing times before exposing the area to moisture or heavy traffic.
Why Invest in Grout Restoration? Beyond Just Aesthetics
Restoring your grout is much more than a cosmetic fix; it offers several significant benefits for your home and overall well-being:
- Enhanced Aesthetics: Clean, white grout instantly brightens any room, making it appear larger, cleaner, and more inviting. It brings out the true beauty of your tiles, which might otherwise be overshadowed by dingy lines.
- Increased Home Value: Well-maintained tiled surfaces contribute positively to your home’s appeal, especially important if you’re considering selling. Potential buyers often scrutinize bathrooms and kitchens, and pristine grout leaves a strong positive impression.
- Improved Hygiene Perception: While grout colorants aren’t disinfectants, a fresh, sealed surface is significantly easier to keep clean. Dirt and grime are less likely to penetrate the sealed surface, making routine cleaning more effective and faster. This also reduces the breeding grounds for mildew and mold.
- Cost-Effective Renovation: Grout restoration is a remarkably affordable alternative to the much more expensive and disruptive processes of re-grouting or entirely re-tiling a room. For a fraction of the cost, you can achieve a similar “new tile” look.
- Protection Against Future Damage: Products like Grout Renew and grout pens provide a protective barrier that seals the grout. This barrier helps prevent water infiltration, stains from spills, and the growth of mildew, extending the life and beauty of your tiled surfaces.
Maintaining Your Newly Whitened Grout for Lasting Brilliance
Once you’ve successfully restored your grout to its pristine white, the key is to implement a maintenance routine that preserves its brilliance. While the sealing properties of products like Grout Renew offer significant protection, proper care will ensure your grout remains beautiful for years to come.
- Regular Cleaning: Establish a routine of cleaning your tiled areas regularly. For daily or weekly cleaning, use a mild, pH-neutral cleaner specifically designed for tiles and grout. Harsh, abrasive, or highly acidic/alkaline cleaners can degrade the grout sealer over time, leading to premature staining.
- Prompt Spill Cleanup: Address any spills immediately, especially those from colored liquids like coffee, wine, or juice. The quicker you clean them, the less chance they have to penetrate the sealed surface.
- Avoid Harsh Tools: While scrubbing is necessary, avoid overly abrasive brushes or steel wool, which can scratch the grout surface or remove the sealant. A soft-bristled brush or an old toothbrush is usually sufficient for regular cleaning.
- Ensure Ventilation: In bathrooms and other damp areas, proper ventilation is crucial. Use exhaust fans during and after showers to reduce humidity, which is a primary contributor to mildew and mold growth on grout.
- Consider Re-Application: Depending on the amount of traffic and moisture your tiled area receives, you might consider reapplying a grout sealer every few years. If you notice signs of wear or slight discoloration returning, a touch-up with Grout Renew or a grout pen can quickly refresh the look without starting the entire process from scratch.
For more in-depth information on keeping your floor tile grout impeccably clean, be sure to check out my detailed post on how to clean floor tile grout, where I share insights on the grout cleaners that truly deliver the best results!
