
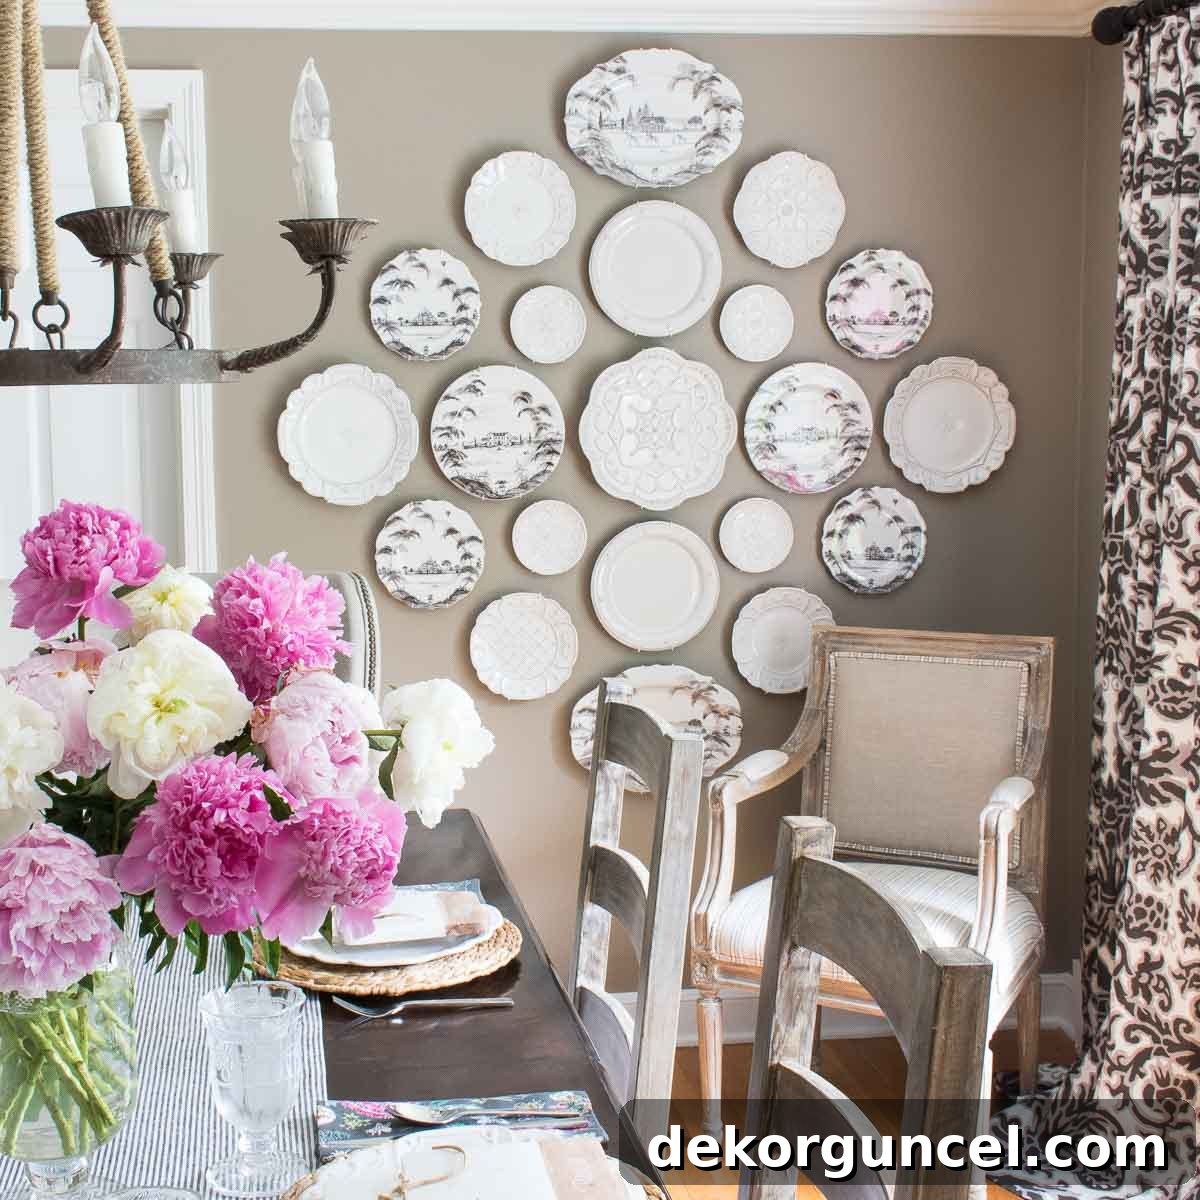
Transform your walls with a stunning plate display! Discover the ultimate guide to hanging plates, complete with expert tips, tricks, and the best plate hangers to ensure a flawless, lasting result.
For far too long, my exquisite new plates remained hidden away in a kitchen cabinet, never truly seen or appreciated. Meanwhile, the expansive, bare wall in my dining room echoed emptiness, a constant reminder of a decorating project I felt intimidated to tackle. The very thought of designing and executing a decorative plate wall seemed daunting, a challenge beyond my DIY capabilities. Yet, the desire for a unique, personalized touch in our home pushed me forward. I finally decided to take the leap, gathering my collection of beautiful plates and embarking on a journey to transform that blank canvas. The result? A breathtaking focal point that now graces our dining room wall, breathing life and personality into the space:
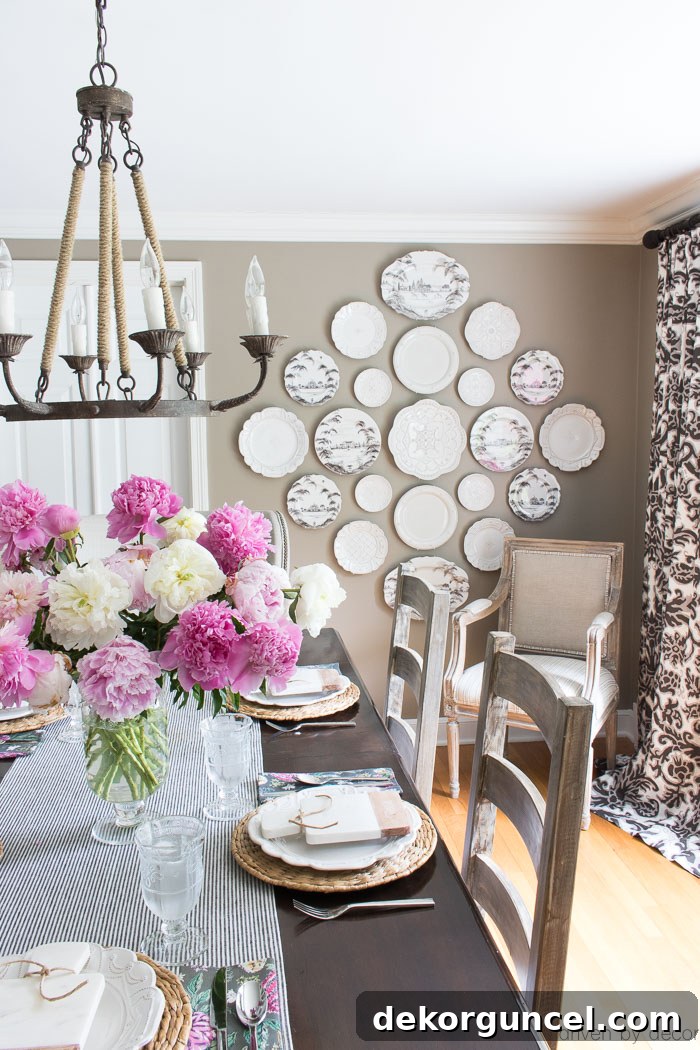
This plate wall quickly became one of my absolute favorite dining room wall decor ideas. The initial apprehension gave way to immense satisfaction, and the once tricky part of figuring out the “how-to” of hanging plates became a manageable, even enjoyable process. To help you avoid the pitfalls and uncertainties I faced, I’m thrilled to share a comprehensive guide based on what worked best for me, insights from others, and a detailed comparison of different hanging methods. This post aims to equip you with all the knowledge needed to create your own stunning plate wall, ensuring your cherished plates are displayed beautifully and securely (this post includes commissionable links; for more information, see my full disclosure statement {here}).
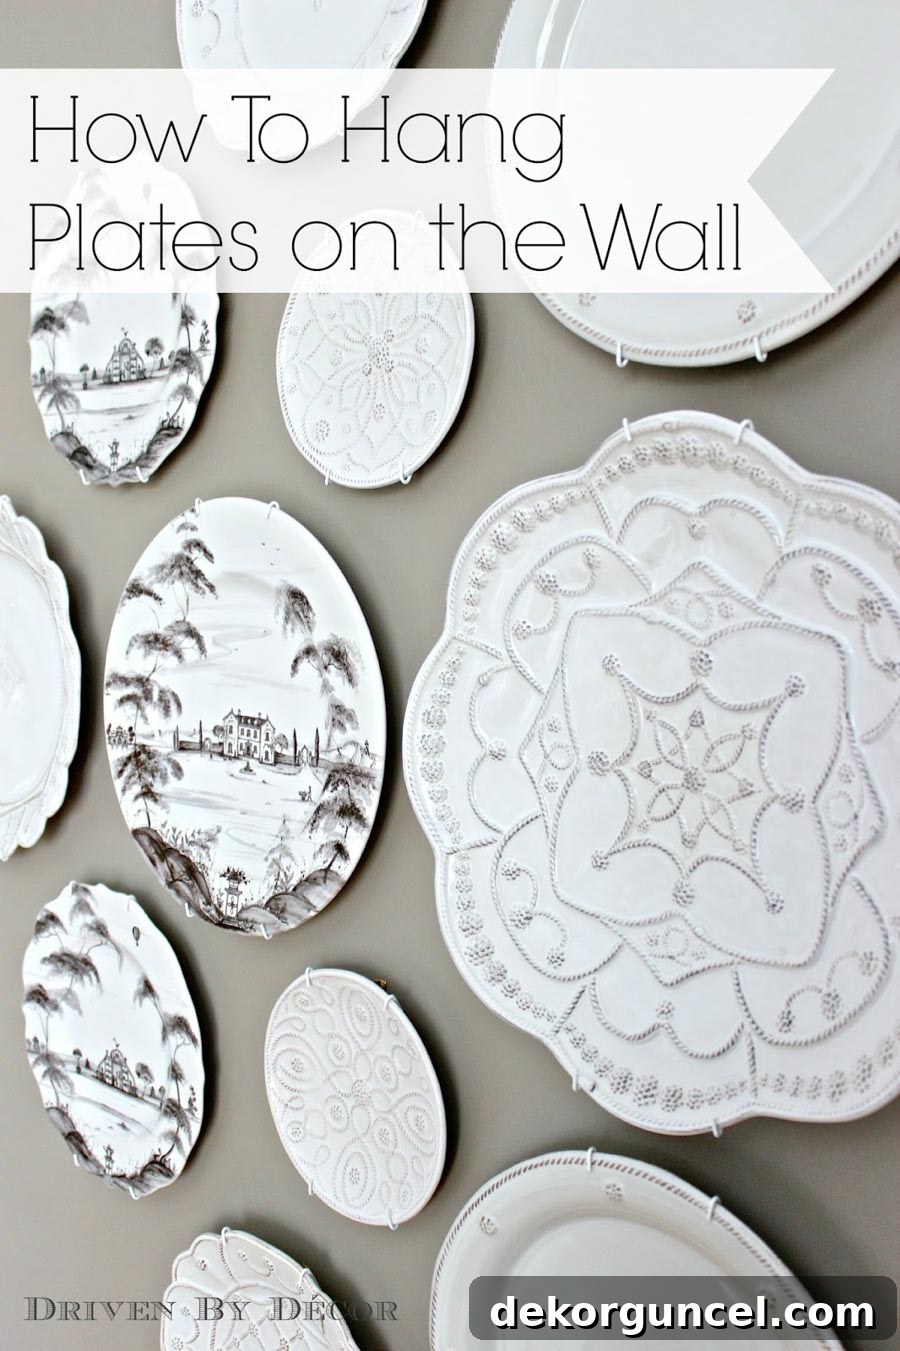
Step 1: Strategize Your Plate Arrangement for Optimal Visual Impact
Before any drilling or hammering begins, the most crucial first step in creating a captivating plate wall is to meticulously plan your arrangement. Gather all the plates you envision using for your display, whether they are a curated collection or an eclectic mix, and lay them out on a clean, flat surface—the floor is typically ideal. This allows you to experiment with various layouts without committing to the wall prematurely. If you’re working with specific wall dimensions or an odd-shaped area, I highly recommend using painter’s tape to mark the maximum width and height you have to work with on your floor. This creates a realistic boundary, helping you design an arrangement that perfectly fits your intended space.
Take your time with this stage. Arrange and rearrange the plates, shifting them around, experimenting with different groupings, and observing how they interact with each other. Consider factors like plate sizes, colors, patterns, and textures. Do you prefer a symmetrical, grid-like pattern, or a more organic, free-flowing cluster? Think about balancing larger plates with smaller ones, and distributing colors or dominant patterns evenly across the design. Step back frequently to view the arrangement from a distance, just as you would see it on the wall. This trial-and-error process is invaluable, as it helps you visualize the final outcome and ensures you absolutely love the design before moving on to the more permanent steps. This planning phase not only sparks creativity but also prevents unnecessary holes in your wall down the line.
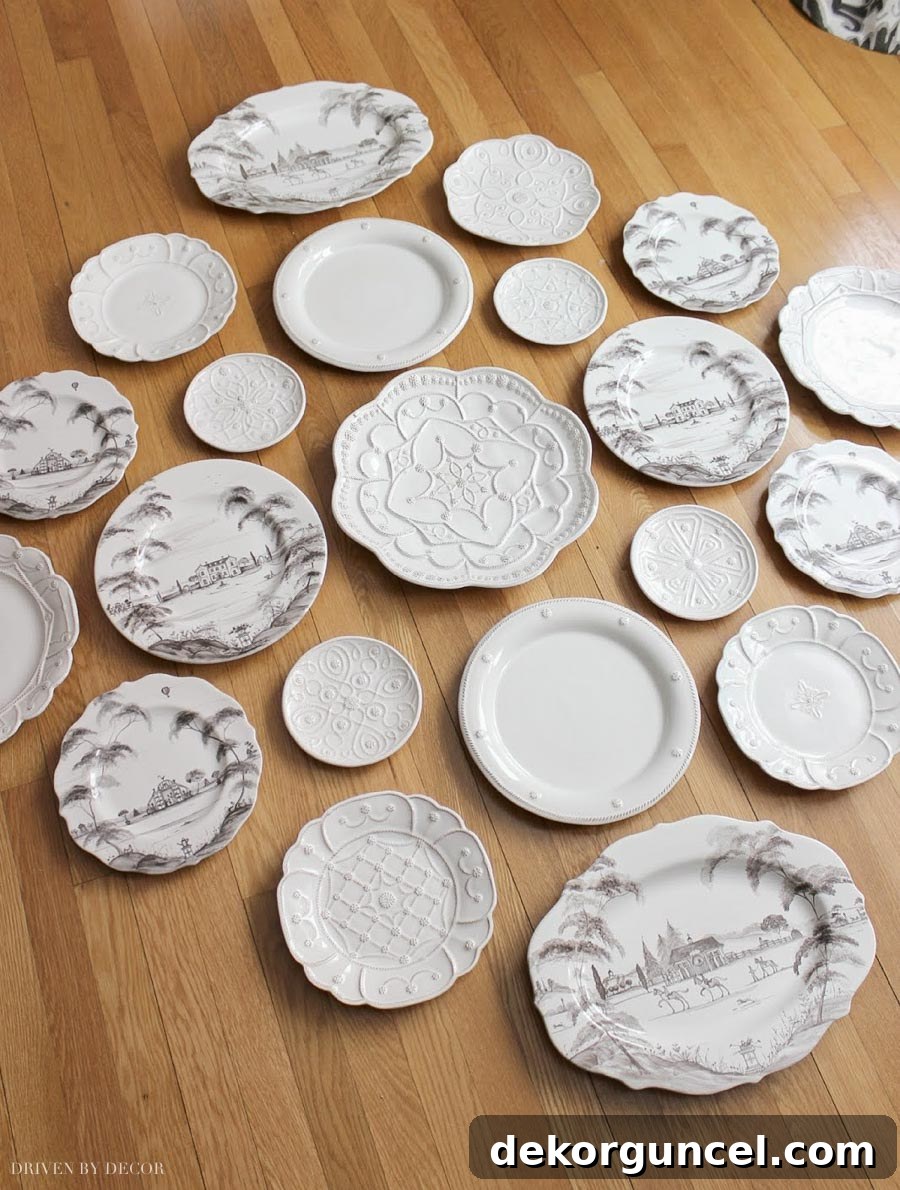
For those curious about the plates featured in my own dining room, they are predominantly from Juliska. The picturesque scenes are part of their Country Estate collection, specifically in the elegant Flint color, which you can often find {here}. Complementing these, I incorporated two beautiful dinner plates {from their Berry & Thread collection}, alongside a variety of different-sized plates from their exquisite Jardins du Monde collection {here}. The commanding center platter, a true statement piece, is the Jardins du Monde grande charger. While it’s no longer widely available new, dedicated decorators can sometimes uncover it on platforms like eBay {here}. Mixing and matching these collections allowed me to create a layered, visually rich display that feels both cohesive and dynamic.
Step 2: Create Paper Templates for Precise Placement
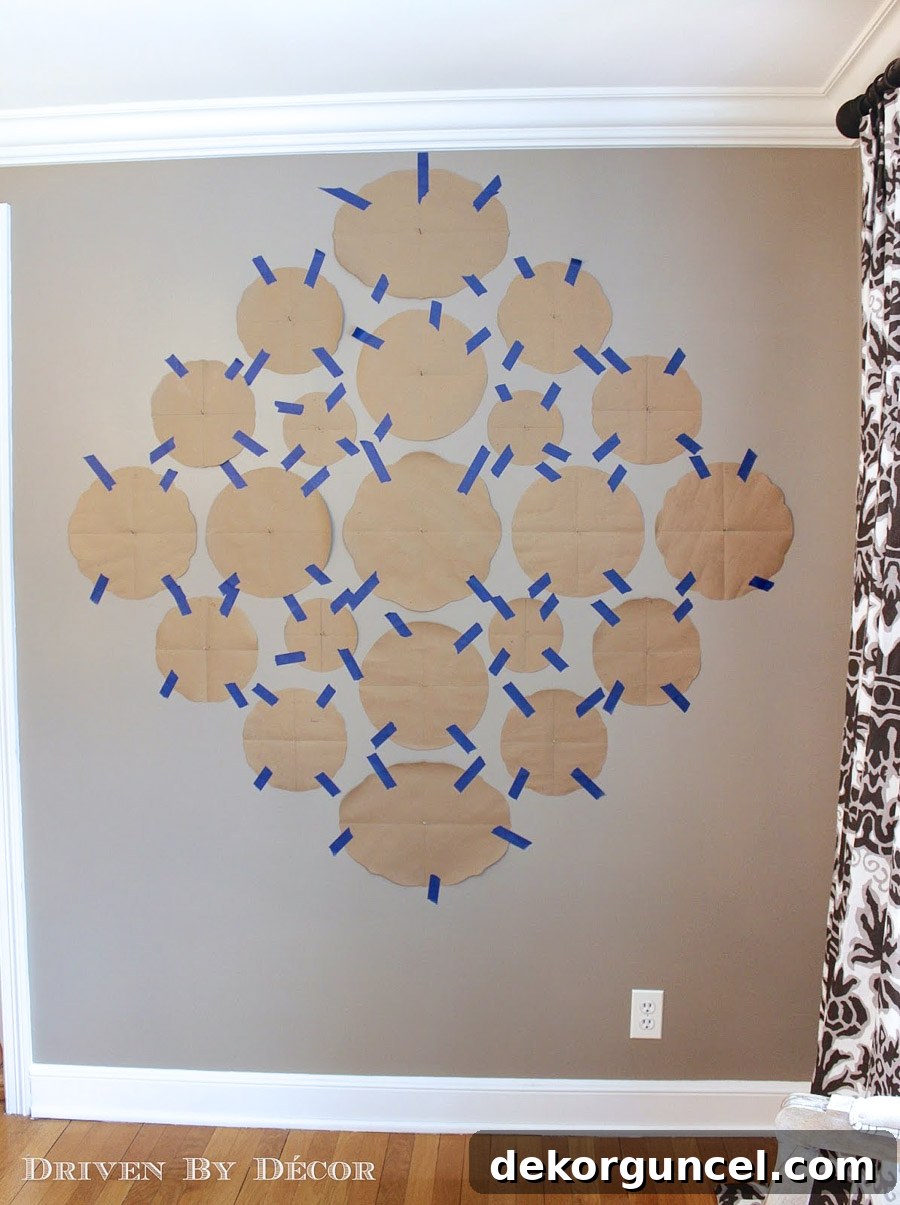
Once you’ve finalized your ideal plate arrangement on the floor, the next step involves translating that vision to your wall with absolute precision. To avoid the frustration of drilling numerous holes only to realize the arrangement needs shifting, I highly recommend creating paper templates for each plate. This method is a game-changer for achieving a perfectly balanced and aesthetically pleasing display. Simply take each plate, place it on a sheet of craft paper, newspaper, or even old wrapping paper, and carefully trace its outline. After tracing, cut out each paper template. This collection of paper cutouts will serve as your stand-in plates for the wall test.
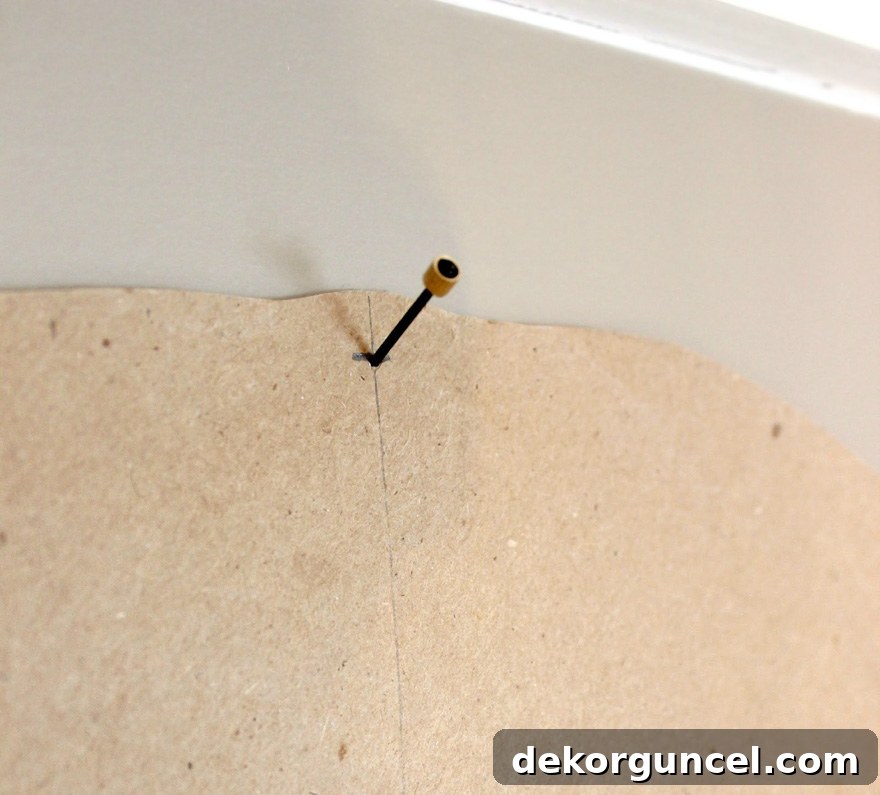
To further aid in achieving perfect alignment, once each plate template is cut, draw both a horizontal and a vertical line directly through the center of each paper plate. These intersecting lines are incredibly useful guides. When you tape these templates to the wall, these lines, combined with a reliable level, will allow you to precisely line up your arrangement, ensuring that plates are not only evenly spaced but also perfectly straight. This meticulous approach might seem like an extra step, but it’s a small investment of time that pays dividends in the final outcome. While some individuals might possess the innate talent to “wing it” and not fret over slight imperfections, I know myself well enough to understand that any visibly “off” alignment would perpetually bother me. This template method eliminates that concern, guaranteeing a professional-looking and satisfying plate wall.
Step 3: Securely Test Your Templates on the Wall
With your precisely cut and marked paper templates ready, it’s time to transfer your floor arrangement to the wall. Carefully tape each template to the wall, replicating the exact layout you perfected on the floor. This visual trial run is essential for confirming the scale, spacing, and overall balance of your plate wall in its intended location. Once all the templates are up, step back, observe, and live with the arrangement for a while. This allows you to view it at different times of day, from various angles, and to solicit feedback from family members, ensuring you are completely happy with the design.
A crucial lesson I learned during this stage relates to the adhesive power of your tape. My initial attempt involved using “Delicate Surfaces” painter’s tape, hoping to protect the wall finish. However, as I was preparing breakfast the following morning, a tell-tale rustling sound from the dining room alerted me to a disheartening sight: my carefully arranged templates lay in a heap on the floor! Ugh, a clear lesson learned about tape selection. When redoing the arrangement, I switched to regular, stronger painter’s tape. To add an extra layer of security and prevent any repeat incidents, I also gently tapped a tiny nail through the center of each paper plate template directly into the wall. This ensured that even if the tape weakened, the templates would remain firmly in place, preserving my meticulously planned layout. This small extra step provides peace of mind and guarantees that your chosen arrangement will stay put until you’re ready for the permanent installation.
Step 4: Select and Install the Ideal Plate Hangers for Your Collection
Choosing the right plate hangers is paramount for both the aesthetics and security of your plate wall. There are several types available, each with its own set of advantages and disadvantages. Understanding these differences will help you make an informed decision tailored to your specific plates and preferences.
Exploring Plate Hanger Options: Disc Hangers vs. Wire Hangers
My initial strategy involved using {these} Disc Hangers, which are essentially adhesive discs designed to stick to the back of your plates. The primary allure of Disc Hangers lies in their ability to make your plates hang perfectly flat against the wall, creating a seamless, almost floating effect. Moreover, once installed, these hangers are completely invisible, offering an unblemished view of your beautiful plate design.
However, I quickly discovered a critical limitation: most of my plates feature a raised, intricate pattern on the back. This textured surface is unequivocally not conducive for securely adhering a flat Disc Hanger, as it prevents the adhesive from making full, consistent contact. This immediately ruled them out for a significant portion of my collection. Beyond this, Disc Hangers come with other potential drawbacks. Their permanent adhesive nature means you cannot easily remove a plate for cleaning or, more importantly for me, for serving food at parties. I wanted the flexibility to occasionally use some of my larger platters, and Disc Hangers would have prevented this versatility.
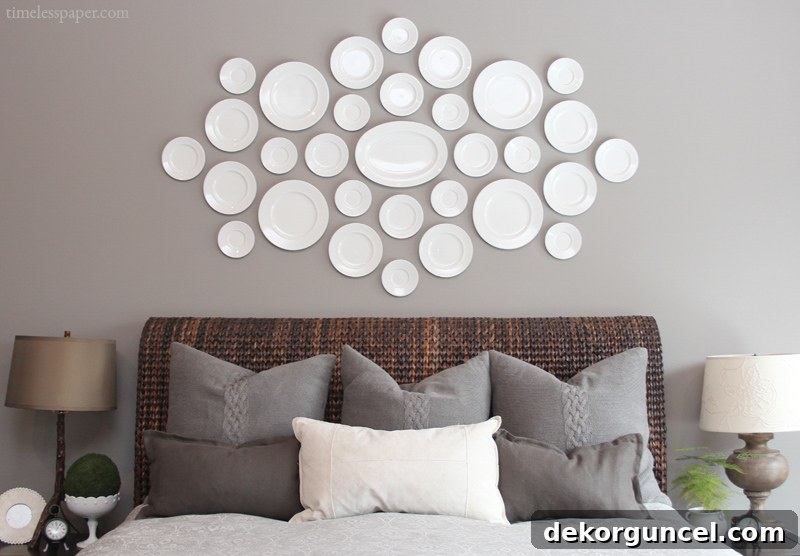
Furthermore, consumer reviews sometimes highlight concerns about plates falling off the wall when using Disc Hangers, particularly if not applied perfectly or if humidity levels fluctuate. This risk, however, is not universal. Many decorators achieve beautiful and lasting results with them, such as Emily of Timeless Paper, who used them to create a truly gorgeous plate wall above her bed (it’s absolutely stunning, isn’t it?!). For smooth-backed, purely decorative plates that you don’t intend to move, Disc Hangers can be an excellent, minimalist choice, provided you follow application instructions meticulously.
My Preferred Method: Vinyl-Coated Wire Plate Hangers
Given the limitations of Disc Hangers for my specific collection, I opted for a more flexible and robust solution: Tripar’s white vinyl-coated plate hangers, found {here}. These wire hangers are an excellent choice for a variety of plates, especially those with textured backs or if you desire the ability to remove plates easily.
A crucial piece of advice regarding these hangers: they tend to “run small.” For example, my 9-inch plates did not fit the advertised 7-9 inch hanger size; I had to size up significantly to the 10-14 inch size to ensure a secure fit. Always measure your plates carefully and consider ordering a size larger than the manufacturer’s suggested range, or purchase a few different sizes to test. The vinyl coating is a significant advantage, as it protects your precious plates from scratches or marks that plain metal wire hangers might cause. Beyond protection, one of the greatest benefits of this type of plate hanger is the ease with which you can remove and re-hang plates, making them perfect for those who wish to use their decorative platters for serving or simply for seasonal rotations.
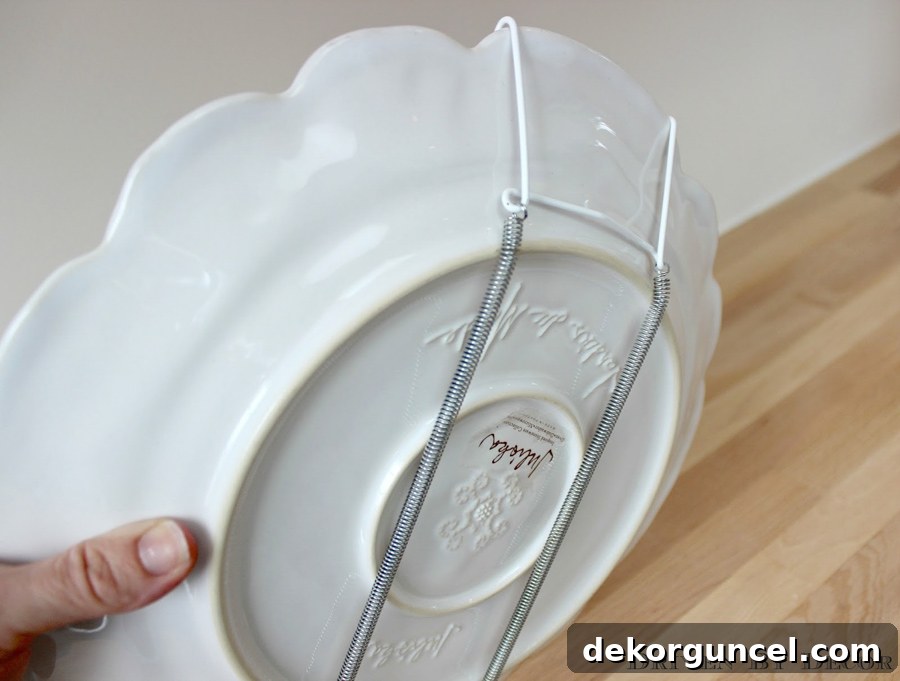
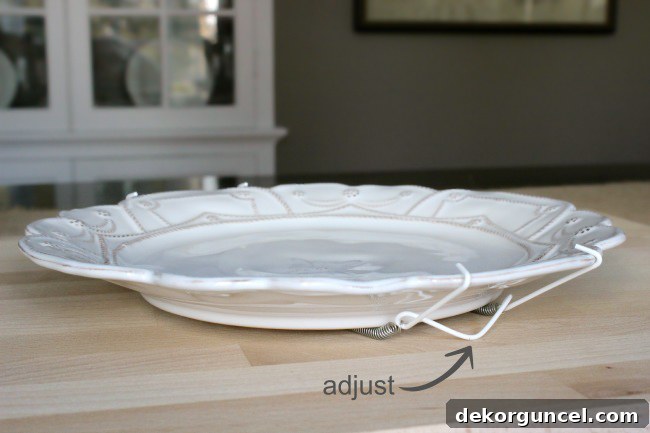
To ensure your plates lay as flat as possible against the wall, a simple but essential adjustment is required. First, attach the plate hanger to the plate. Then, place the plate face down on a flat surface, such as a table. Observe the top hook of the hanger; it should just barely touch the flat surface. If it doesn’t, carefully remove the hanger, gently bend the top portion inwards or outwards as needed, and then reattach it to the plate to re-test. Repeat this process until the hanger’s top hook aligns perfectly with the flat surface. This minor adjustment is key to preventing your plates from tilting forward once hung, ensuring a neat and polished display.
Once all your plates are fitted with their perfectly adjusted hangers, it’s time to bring your vision to life on the wall. For hanging, I highly recommend using {these OOK picture hooks}. OOK hooks are renowned for their strength, minimal wall damage, and secure hold, making them ideal for heavier decorative plates. To pinpoint the exact location for each hook, attach an OOK hook onto the wire hanger of a plate and measure the distance from the very top edge of the plate down to where the nail will enter the OOK hook. This precise measurement is crucial for translating your template’s perfection to the actual plate. Transfer this exact measurement to the corresponding paper template on your wall, marking the spot where the nail should go. Then, gently tap the OOK hook nail into the wall just enough to make a small indentation.
Once your mark is made, remove the paper template from the wall. Align the OOK hook with the indentation, carefully guiding the nail through the hook’s eyelet. Using a hammer, drive the nail fully into the wall at the precise spot you marked. With the hook securely in place, you are now ready to hang your first plate! Carefully place the wire loop of your plate’s hanger onto the OOK hook. Step back and admire your first successfully hung plate. Repeat this methodical process for each remaining plate, working through your carefully arranged templates one by one.
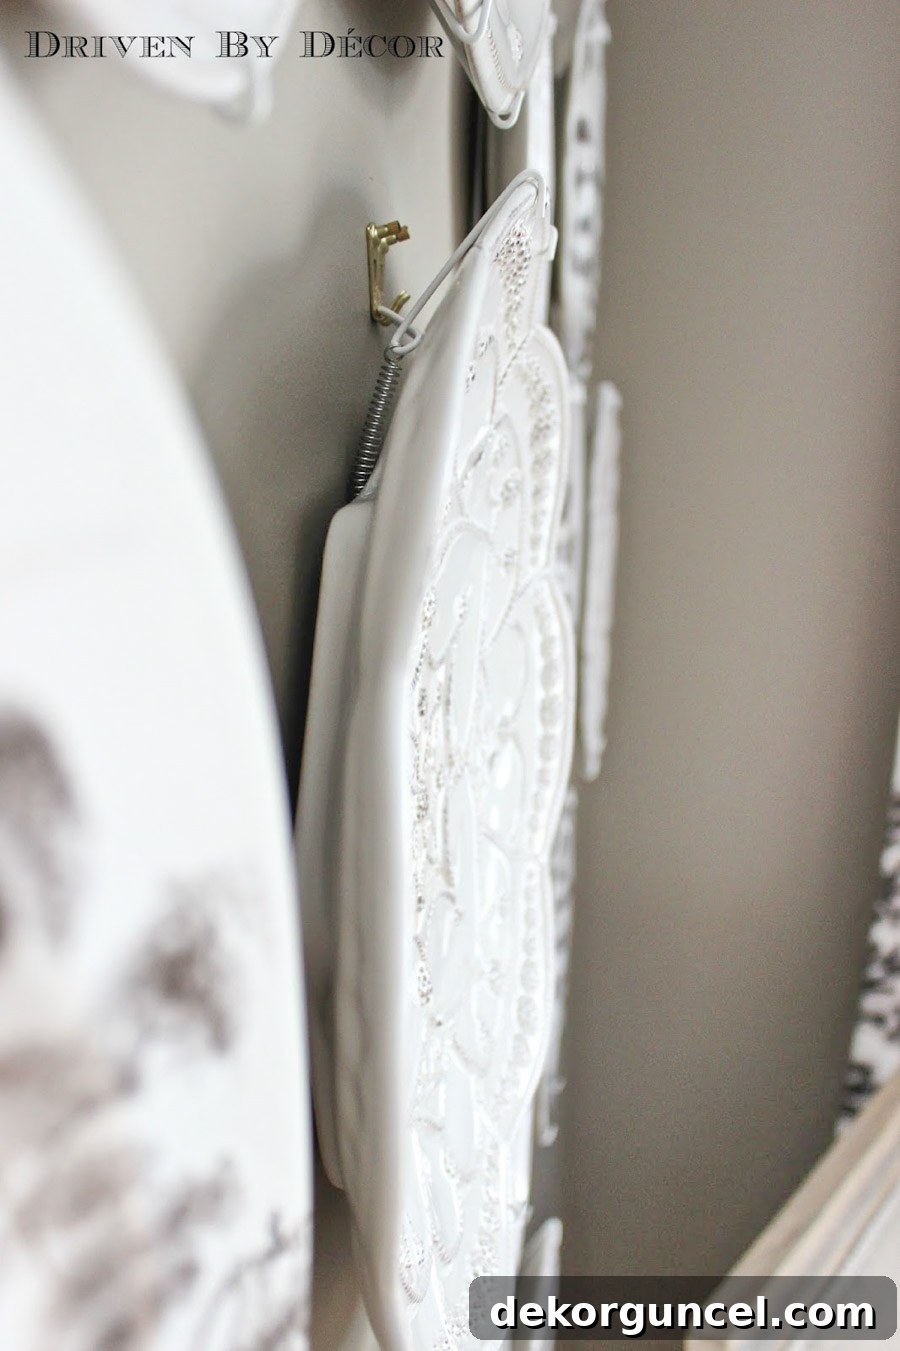
Repeat this precise procedure for every plate in your arrangement. The initial planning and templating will now truly pay off, as each plate finds its perfect place on the wall.
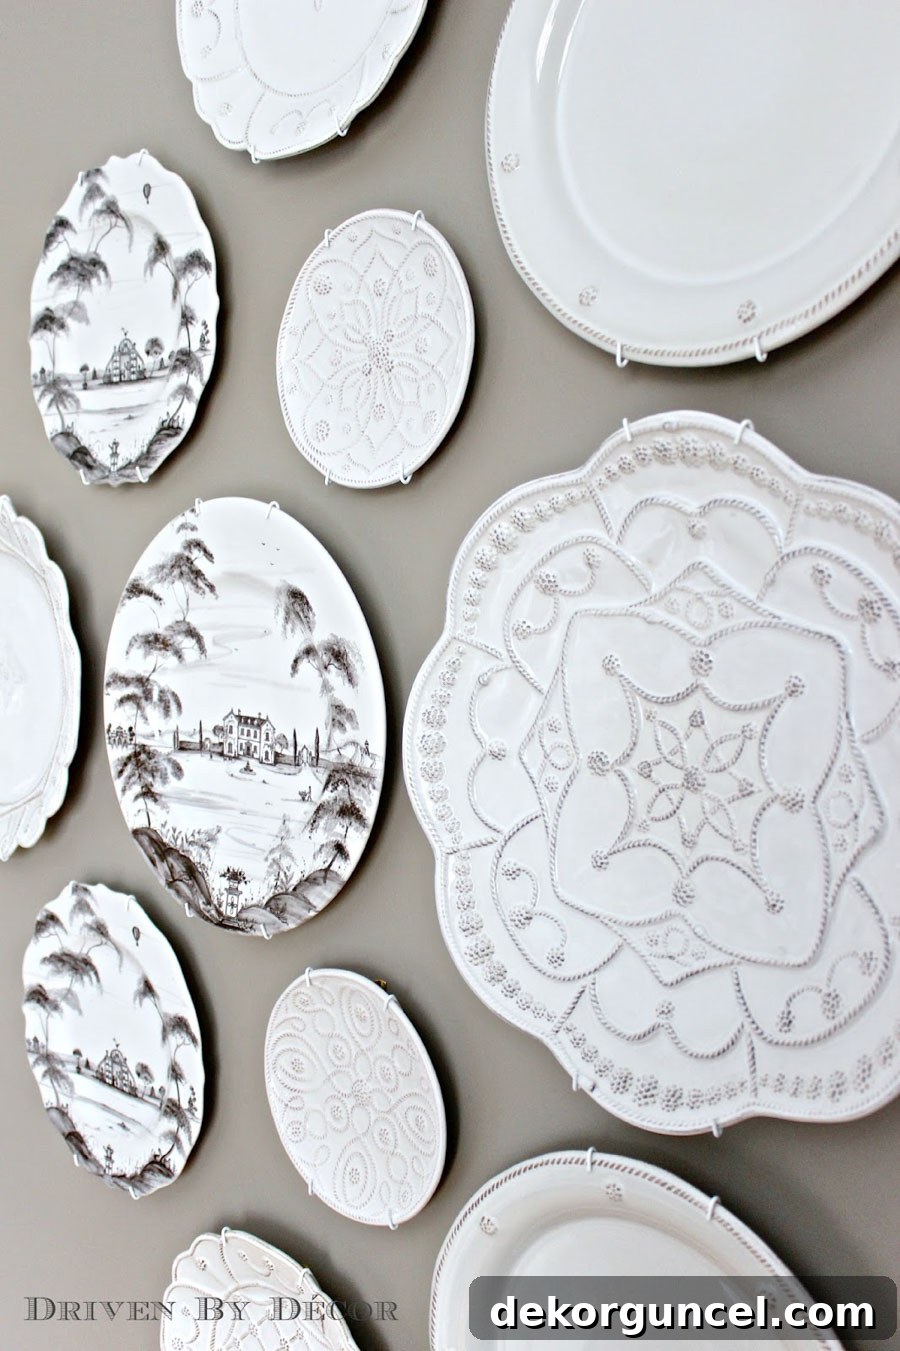
With each plate carefully hung, your once bare wall will transform into a magnificent gallery of art and personal expression. The meticulous steps might seem involved, but the rewarding outcome of a secure, perfectly aligned, and visually stunning decorative plate wall makes every effort worthwhile. This method ensures your plates are displayed safely and beautifully, becoming a cherished focal point in your home for years to come.
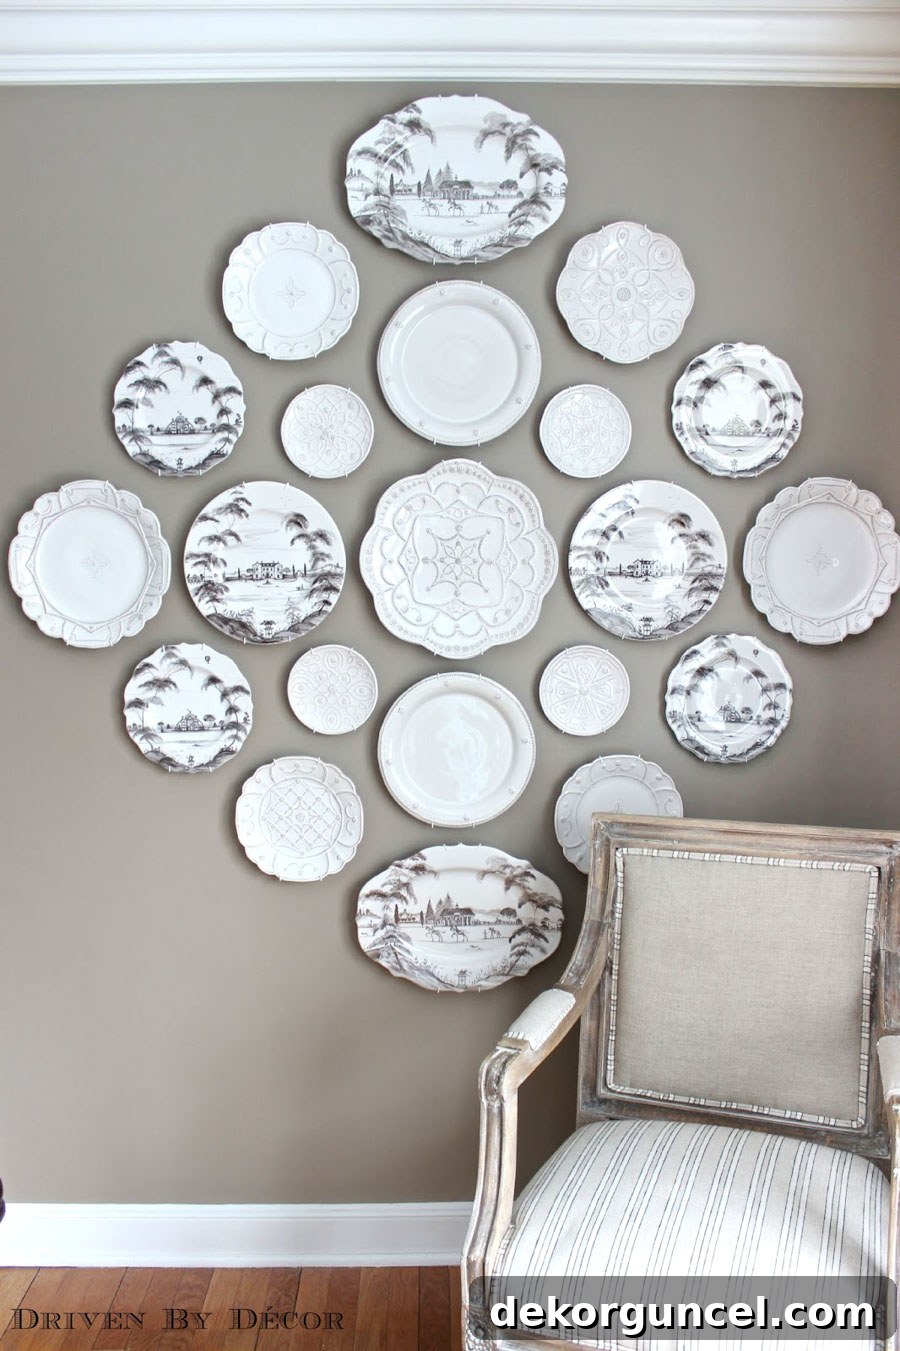
Our newly installed plate wall has undeniably become my favorite feature in our dining room, infusing the space with character and warmth. I invite you to take a full tour to explore the entire space, including a collection of fun “before” and “after” photos that truly showcase its incredible transformation (it was certainly not pretty when we first moved in!) {here}! Additionally, for more inspiration and practical advice, be sure to check out my comprehensive post offering valuable tips on decorating your dining room, covering everything from layout to measurements. Happy decorating!
