
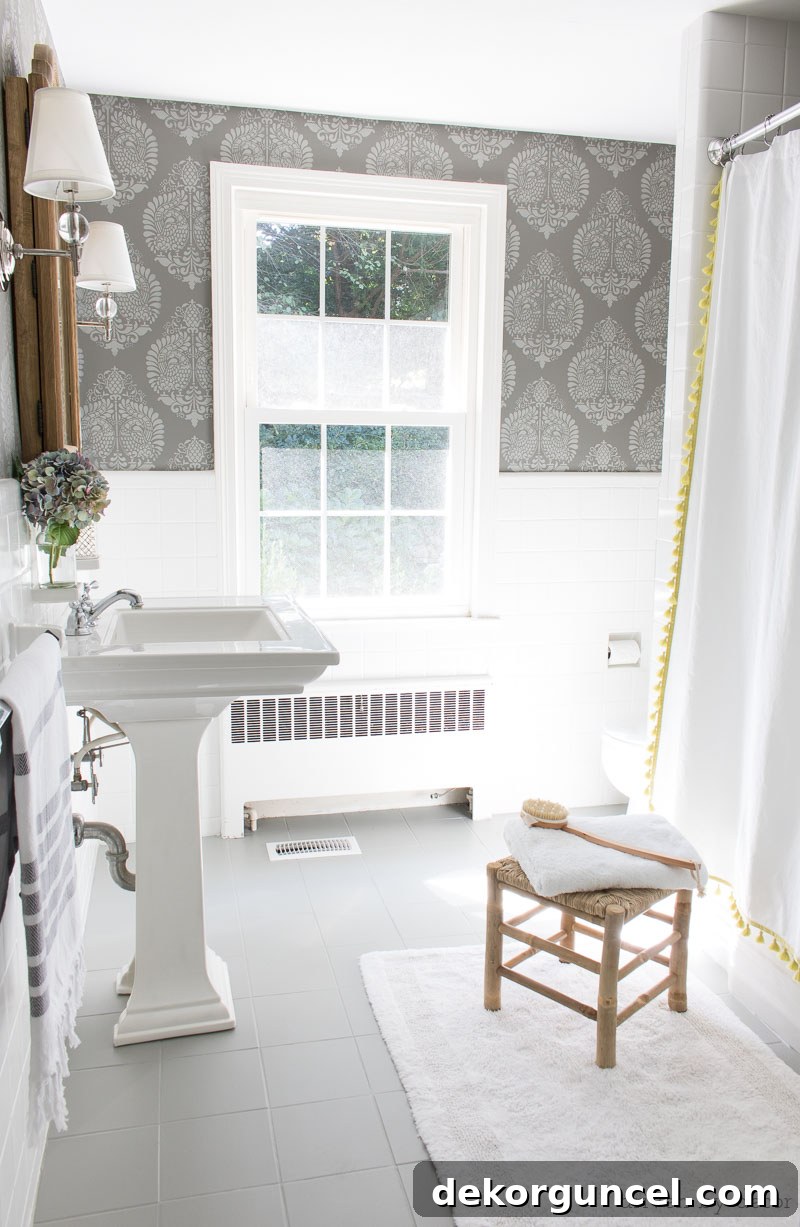
Dreaming of a refreshed space without the hassle and expense of tile replacement? Learn how to paint tile floors to achieve a stunning, durable finish that truly lasts. Our simple, budget-friendly DIY transformed our bathroom, and we’ll show you exactly how to do it!
Unlock Your Home’s Potential: The Ultimate Guide to Painting Tile Floors
Have you ever put off a home improvement project, only to discover later that it was far easier and more rewarding than you ever imagined? Painting the ceramic tile floors in our first-floor bathroom was precisely that kind of project. For years, I eyed those drab, reddish tiles with a sigh, convinced that a full renovation was the only solution. The thought of the expense, the dust, and the disruption kept me from tackling it.
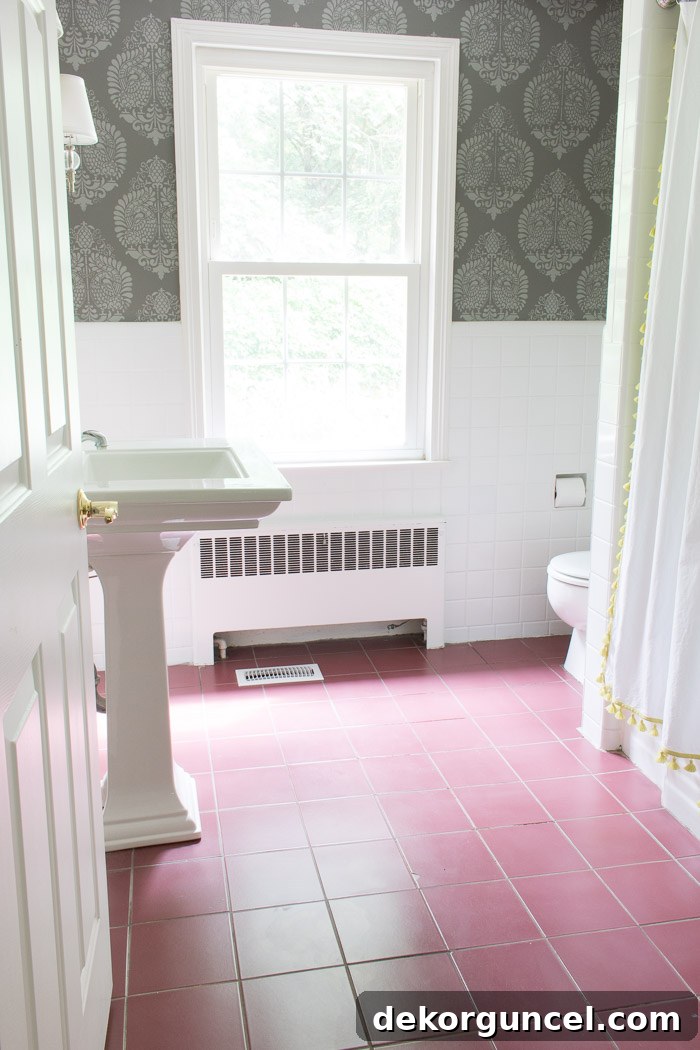
My journey to a beautifully painted tile floor began back in 2014, when I envisioned a complete transformation for our bathroom during the One Room Challenge. While the intricate stenciling of the bathroom walls consumed much of my time, the idea of painting the floors remained a persistent whisper. Three full years passed before I finally committed to this “little” DIY. The result? A breathtaking transformation that was incredibly cheap and surprisingly easy to achieve! Welcome to a bathroom that’s a hundred times better than its former self, free from those unsightly, stained reddish floors.
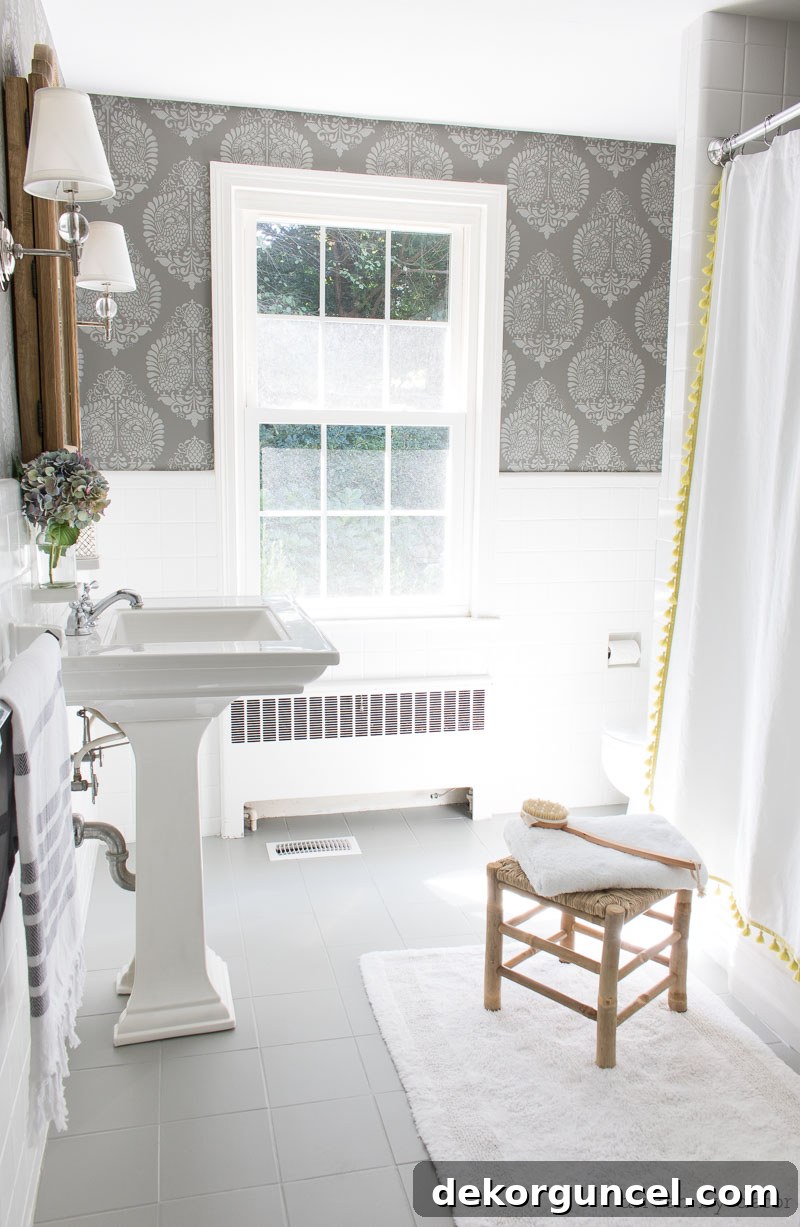
The improvement over the original reddish tile is truly remarkable, wouldn’t you agree? It’s not just about aesthetics; it’s about creating a space you genuinely love to be in.
Beyond the unappealing color, the old tile floors harbored an even more egregious flaw. Hidden behind both the sink and the toilet were grotesque, persistent stains that defied every cleaning attempt. These stains were truly gag-worthy, a secret the previous owners had cunningly concealed beneath a custom-cut rug when we first purchased the house. It was a disheartening discovery, making the bathroom feel perpetually unclean and unwelcoming.
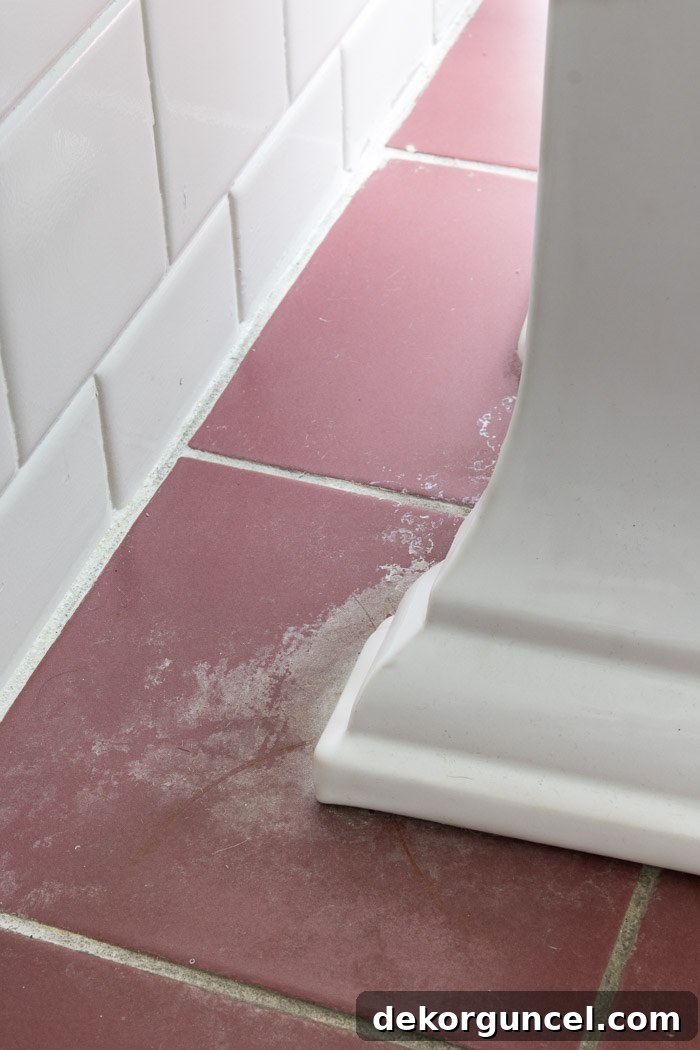
Now, standing in our revitalized bathroom, you’d never suspect its grimy past. The transformation is so complete, so seamless, that the memory of those ugly stains fades into oblivion. It truly showcases the power of paint to not only update a space but to completely erase its imperfections.
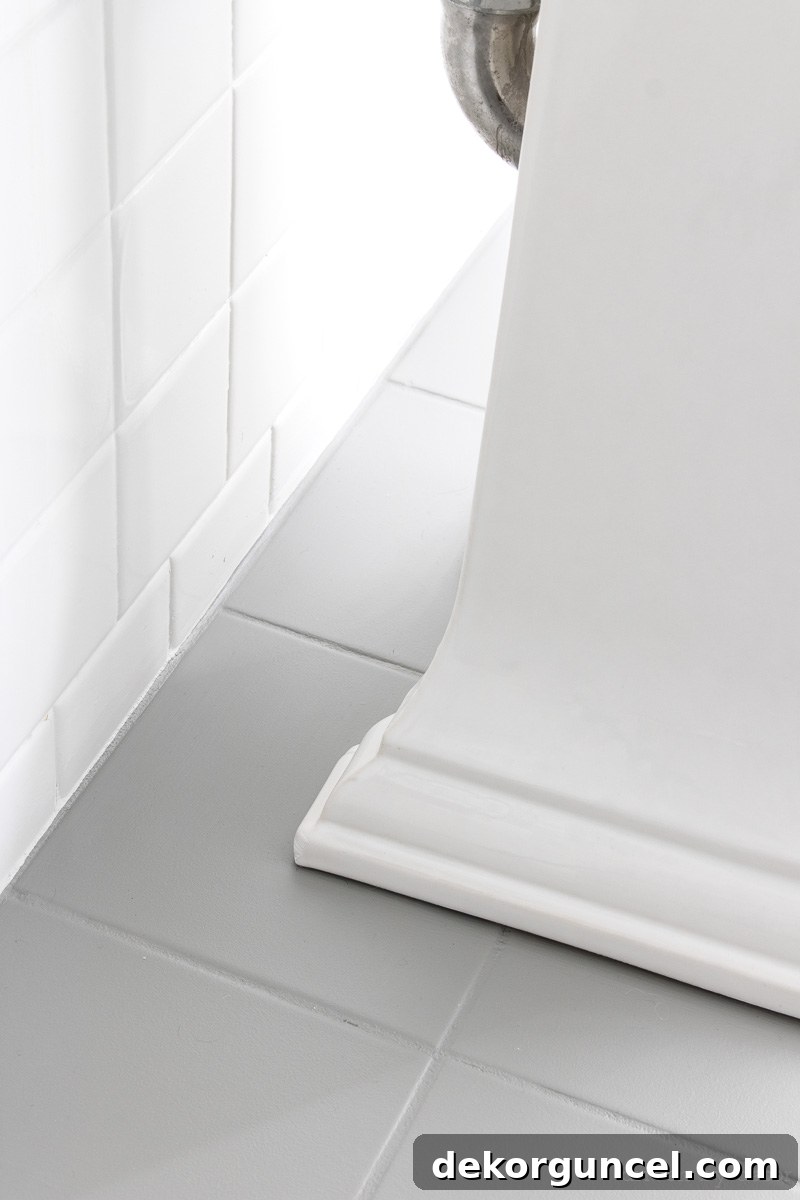
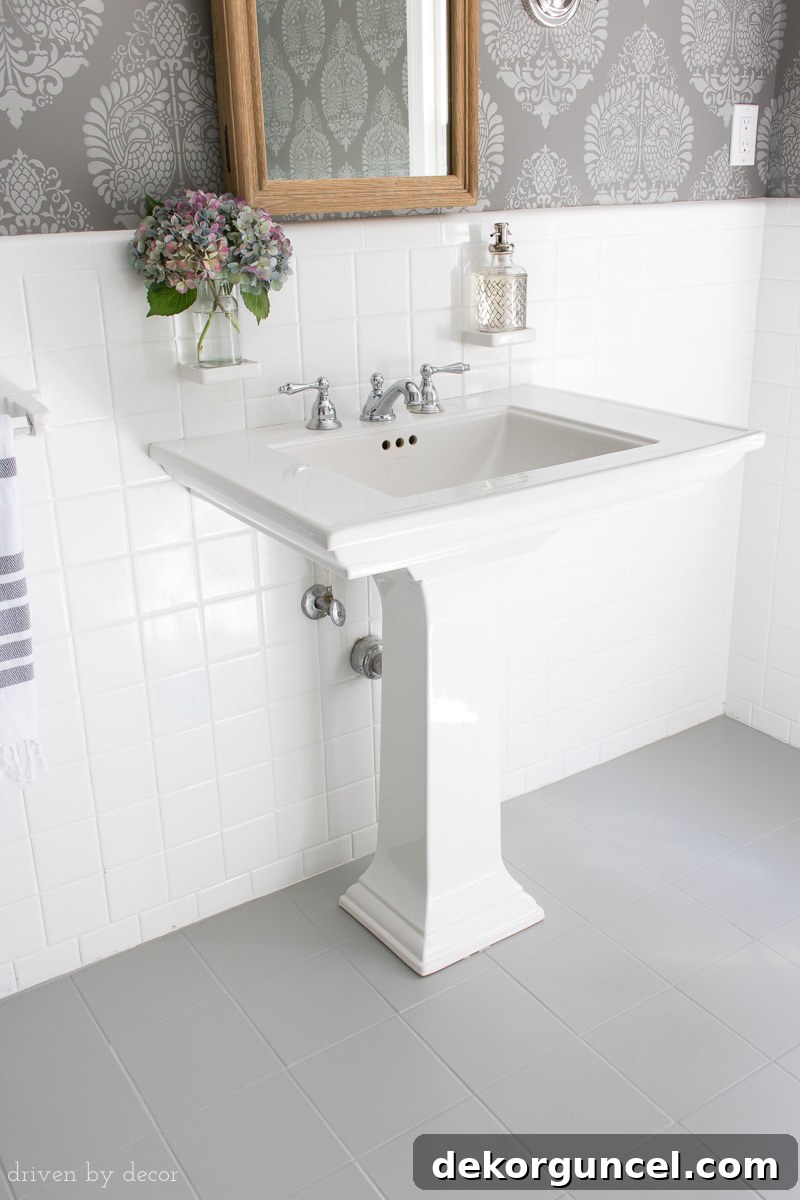
It has been six years since we embarked on this tile painting adventure, and I can confidently say I would undertake this project again without hesitation! The durability and sustained beauty of our painted floors have exceeded all expectations. Today, I’m excited to share a comprehensive, step-by-step guide detailing everything you need to know about how to paint a tile floor so it not only looks fantastic but also withstands the test of time. Get ready to transform your space with this incredibly effective DIY! 🙌🏻 (This post includes commissionable links; for more information, please refer to my full disclosure statement {here})
Step 1: Gather Your Essential Supplies for Tile Painting Success
Embarking on any DIY project requires the right tools, and painting tile floors is no exception. Having all your supplies ready before you start will ensure a smooth and efficient process. Here’s a comprehensive list of what you’ll need to successfully tackle this project and achieve a professional-looking finish:
- Sandpaper: A variety of grits (e.g., 80, 120, and 220 grit) is crucial for proper surface preparation. The coarser grits help address stubborn grime, while finer grits smooth the surface for optimal primer adhesion.
- Electric Sander: While manual sanding is possible for smaller areas, an electric sander significantly speeds up the process and ensures an even scuffing of the entire floor. I highly recommend {this orbital sander} and compatible {sandpaper} for efficiency and ease of use.
- Heavy-Duty Stripper and Cleaner: Essential for deep cleaning and removing any residue or stubborn stains that could prevent proper adhesion. I used {this specific cleaner} with excellent results.
- Grout or Paintable Caulk: For repairing cracked or missing grout lines and minor tile imperfections. Paintable caulk offers a simpler alternative to full regrouting for small touch-ups.
- High-Quality Bonding Primer: This is arguably the most critical supply. A superior bonding primer is the secret to ensuring your paint adheres firmly to the glossy tile surface. I consistently rely on {STIX bonding primer} for its exceptional performance on challenging surfaces.
- 4″ Mini Rollers with ¼″ Nap: These small rollers are perfect for achieving a smooth, even finish on tile surfaces and in tight spaces. Look for high-density foam rollers or those specifically designed for smooth surfaces, such as {these}.
- Mini Roller Frame: To hold your mini rollers securely.
- Quality Paint Brush: A good quality angled brush is indispensable for cutting in around edges, corners, and painting grout lines precisely. A reliable paintbrush will make a significant difference.
- Durable Floor & Patio Paint: Choose a paint specifically designed for floors and high-traffic areas, like Benjamin Moore Floor & Patio Paint. These paints are formulated for superior durability and resistance to wear and tear.
- Polyurethane Topcoat (Optional): While not always necessary with high-quality floor paint, a polyurethane topcoat can offer an extra layer of protection, particularly in very high-traffic areas. Consider your preference and the paint manufacturer’s recommendations.
- Protective Gear: Always include safety glasses, gloves, and an appropriate mask or respirator, especially when sanding and working with cleaners or paints.
- Cleaning Supplies: Buckets, sponges, old towels, and a vacuum cleaner for dust and debris removal.
Investing in quality supplies will pay dividends in the longevity and aesthetic appeal of your painted tile floors. Don’t skimp on the essentials!
Step 2: Thorough Floor Preparation – Sanding is Key for Adhesion
Proper surface preparation is the cornerstone of any successful painting project, and painting tile floors is no exception. The first and arguably most critical step is to lightly sand your tile floors. The objective here isn’t to remove the tile’s existing glaze entirely; rather, it’s to “scuff up” the surface, creating microscopic etches that allow the primer to bond effectively. This process significantly enhances paint adhesion and durability. Additionally, for our bathroom, sanding proved invaluable in removing stubborn, disgusting residue that resisted all other cleaning efforts.
Important Safety Note: If your ceramic tile floors were installed before 1978, there’s a possibility they may contain lead. It’s crucial to consider testing for lead or consulting with a professional if you’re unsure about your tile’s composition. Regardless of the tile’s age, always prioritize safety: wear protective eyewear and an appropriate mask or respirator to prevent inhaling sanding dust. Furthermore, take steps to contain the dust, preventing it from spreading to other areas of your home. Covering doorways with plastic sheeting and sealing vents can help.
To make the job quicker and significantly easier than manual sanding, I utilized {this electric sander}. If you frequently undertake DIY projects, I wholeheartedly recommend investing in one. It’s lightweight, fits comfortably in your hand, and features an angled head, making it surprisingly easy to reach into corners and tight spaces. This tool alone can cut down on hours of tedious manual labor.
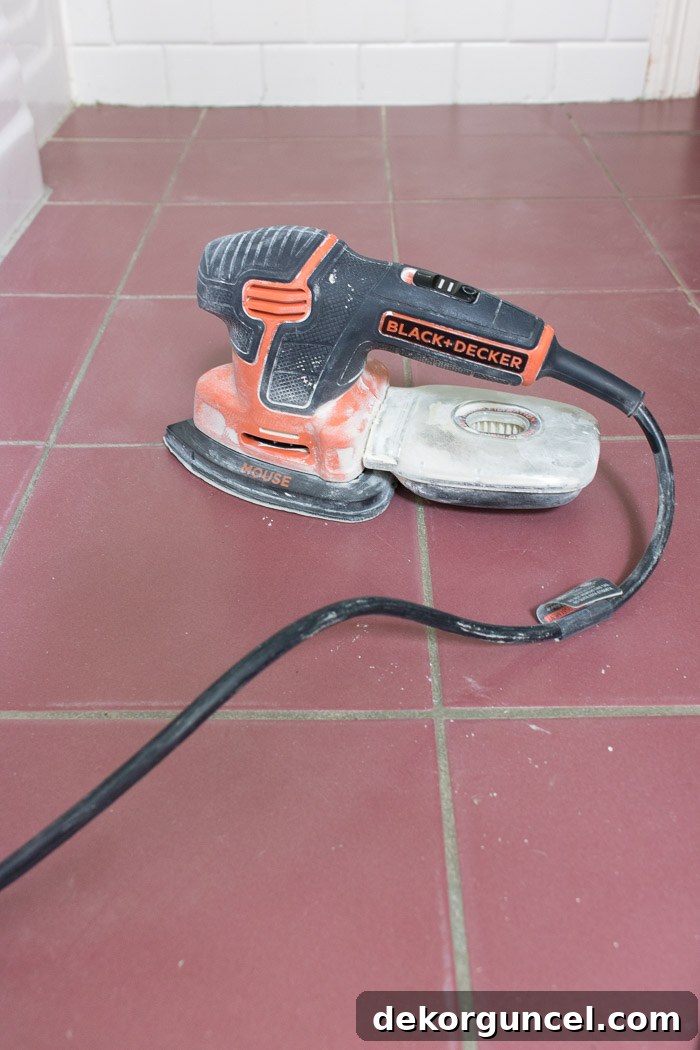
I approached the sanding process strategically. For areas with heavy crud buildup, I started with 80-grit sandpaper to break through the grime. I then followed with a light sanding of the entire floor using 120-grit sandpaper, which is ideal for general surface preparation and creating a good “tooth” for the primer. Finally, I gave the entire floor a quick once-over with fine 220-grit sandpaper to ensure a smooth, uniform surface. A variety pack of sandpapers designed for mouse sanders, such as {this one}, is perfect for this multi-stage approach. Remember, thorough sanding provides the foundation for a durable and beautiful finish.
Step 3: Deep Cleaning for Optimal Adhesion – Sparkle and Shine!
After the sanding is complete, the next crucial step is an exceptionally thorough cleaning of your floors. This isn’t just a casual wipe-down; it’s a deep-clean mission to remove every speck of dust, grease, grime, and cleaning product residue that could compromise the adhesion of your primer and paint. Any contaminants left on the tile surface can act as a barrier, leading to peeling or chipping down the line. A truly clean surface is paramount for a long-lasting finish.
First, use a powerful shop vacuum or a regular vacuum with a brush attachment to meticulously remove all sanding dust and loose debris. Pay close attention to grout lines and corners where dust tends to accumulate. Once the visible dust is gone, it’s time for a heavy-duty cleaning. Almost any robust stripper and cleaner designed for floor prep should do the trick. I personally achieved excellent results with the one I used, available online {here}.
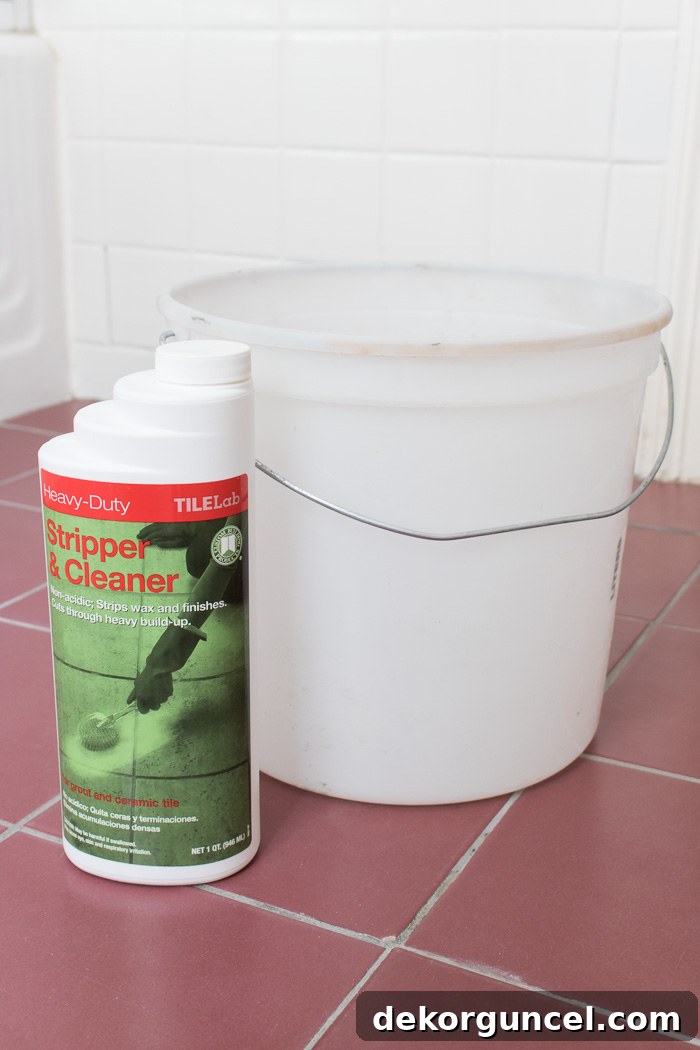
Follow the instructions on your chosen cleaner precisely. For my cleaner, I mixed it with warm water according to the manufacturer’s guidelines, then mopped it generously onto the entire floor. I allowed it to sit for approximately 15 minutes, giving the solution ample time to penetrate and loosen deep-seated dirt and grime. After the dwell time, I meticulously scrubbed every inch of the floor with a sturdy nylon scrub brush, focusing on grout lines and heavily soiled areas. You’ll be amazed at the amount of hidden dirt that comes up!
Once scrubbing was complete, I thoroughly rinsed the floor multiple times with clean, warm water and fresh sponges or mops, ensuring all traces of the cleaner and loosened grime were removed. I then repeated the entire cleaning process a second time to guarantee an absolutely pristine surface. This double-cleaning method ensures maximum adhesion and a superior final result. Remember, the cleaner your floor is, the better your primer and paint will adhere, and the longer your beautiful new finish will last!
Step 4: Repairing Imperfections – Addressing Missing Grout and Cracked Tiles
With your floors meticulously cleaned and prepped, it’s time to address any physical imperfections that could detract from your final painted finish. This step is crucial for achieving a smooth, uniform surface that truly looks professionally done. Ignoring these issues can lead to an uneven finish or, worse, compromise the integrity of your painted floor over time.
The grout on our bathroom floor was in a sorry state; several areas had chunks completely missing, creating unsightly gaps and traps for dirt. While a full regrouting job would offer the most permanent solution, it’s a labor-intensive process that involves extensive time spent digging out old grout. To save time and effort without sacrificing appearance, I opted for a simpler, yet highly effective, route: using paintable caulk. I carefully filled in and smoothed over any bare spots or small cracks in the grout lines with the caulk. Once dried and painted, you would genuinely never know that this expedient repair method was used. The caulk adhered beautifully and seamlessly blended with the painted surface.
Now is also the opportune moment to address any cracked tiles. For larger, more significant cracks or chips, replacing the tile might be the best option for long-term durability. However, for minor cracks, especially in areas that might be less visible or covered by rugs, a simpler repair can suffice. I had one tile closer to our bathtub that featured a small crack. Knowing that this particular spot would typically be covered by our bathroom rug, I chose to caulk the cracked portion and lightly sanded down any rough edges to create a smoother transition. This minimized the visual impact and prevented further deterioration without the need for a full tile replacement.
Take your time with this repair phase. A smooth, even base is essential for a flawless painted finish. Ensure all repairs are completely dry and, if necessary, lightly sanded smooth before moving on to priming.
Step 5: The Power of Primer – Bonding for Unmatched Durability
Applying a high-quality bonding primer is the absolute key to success when painting ceramic tile. This isn’t a step you want to skip or cut corners on; it’s the foundation upon which your entire painted floor will rest. A standard primer simply won’t suffice for the glossy, non-porous surface of ceramic tile. You need a primer specifically formulated to create an aggressive bond with challenging surfaces, ensuring your paint adheres permanently and resists chipping or peeling.
My go-to primer for surfaces where paint traditionally struggles to adhere is INSL-X STIX (available {here}). This product is engineered to provide exceptional adhesion to ceramic, porcelain, glass, and other slick materials, making it indispensable for tile painting. Its ability to “grab” onto smooth surfaces creates the perfect base for your chosen floor paint.
For application, I found the most efficient method was to work with both a paintbrush and a small roller simultaneously. I used a ¼-inch nap mini roller (like {these}) for the main tile surfaces. First, I used my paintbrush to carefully cut in around the room’s edges and to thoroughly coat all the grout lines. This ensures every crevice receives proper primer coverage. Immediately after brushing, I followed up with the mini roller to apply primer to the rest of the tile, ensuring a smooth, even coat without any pooling.
Crucial Tip: Always begin painting or priming from the far end of the room and systematically work your way towards the exit door. This prevents you from painting yourself into a corner and having to step on wet primer. Once the first coat of primer was dry according to the manufacturer’s instructions (which is typically a few hours but can vary based on humidity and temperature), I applied a second coat using the exact same technique. Two thin, even coats of primer provide superior bonding and coverage compared to one thick coat. Allow the final coat of primer to fully dry and cure as recommended before proceeding to the painting stage, usually at least 24 hours for optimal adhesion.
Step 6: Choosing and Applying Your Durable Tile Paint
With your floors meticulously prepped and primed, you’re now ready for the exciting part: applying the paint that will completely transform your space! The technique for painting your tile floor mirrors the priming process, ensuring comprehensive coverage and a professional finish.
I continued to use a combination of tools for precision and efficiency. I started by using a paint brush to carefully paint along the edges of the room and to thoroughly cover all the grout lines. This ensures crisp lines and that every part of the grout receives adequate paint. Immediately after brushing the edges and grout, I followed up with a 4-inch mini roller (like {this type}) to apply the paint smoothly and evenly across the main tile surfaces. Work in small sections, always moving from the far end of the room towards the exit to avoid stepping on wet paint.
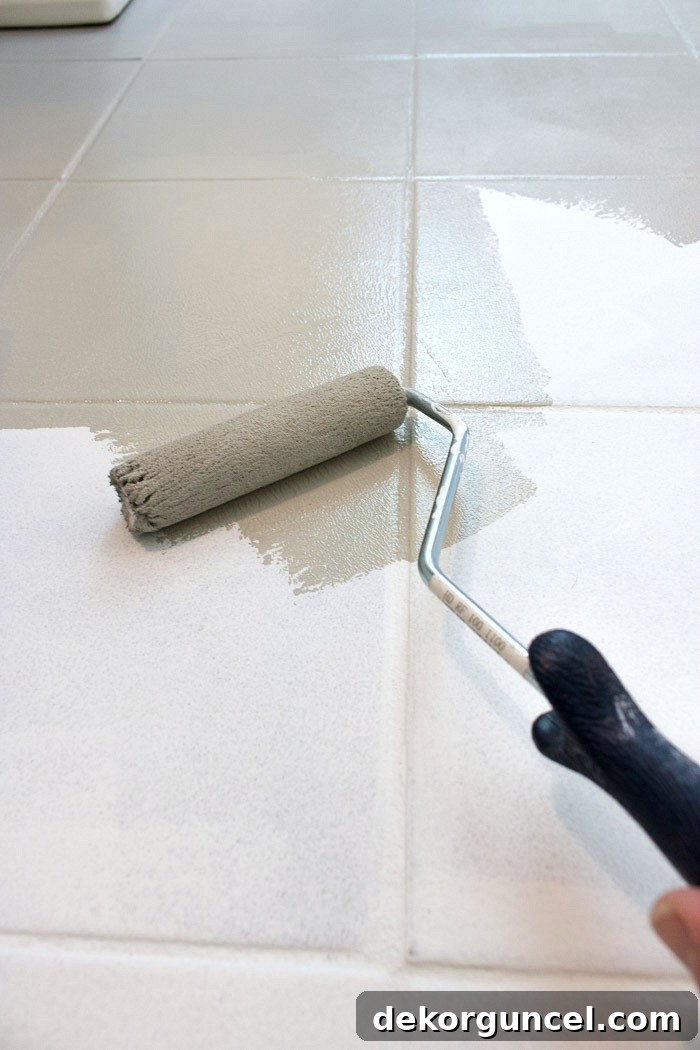
The type of paint you choose is paramount for durability. I specifically used Benjamin Moore’s Floor & Patio Paint, which is expertly formulated to withstand heavy foot traffic, everyday wear and tear, and general abuse. These specialized floor paints are much more robust than standard wall paints. Benjamin Moore offers this paint in both High Sheen and Low Sheen options. For a more subtle and less reflective finish that also tends to hide imperfections better, I personally opted for the Low Sheen. Consider the amount of light in your room and your desired aesthetic when making this choice.
For optimal durability and a rich, consistent color, I applied three thin coats of paint. It’s crucial to allow each coat to dry completely according to the paint manufacturer’s instructions before applying the next. Rushing this step can lead to an uneven finish, streaking, or compromise the paint’s adhesion. Typically, this means waiting several hours between coats, but always check your specific product’s recommendations, which can vary based on humidity and temperature.
For our bathroom, I selected Benjamin Moore Platinum Gray, a sophisticated neutral that perfectly complemented the lighter portions of our stenciled walls. Choosing a color that harmonizes with your existing decor or sets a new tone for the room will amplify the impact of this incredible transformation.
Step 7: To Seal or Not to Seal? The Polyurethane Topcoat Debate
The final step in painting your tile floor, and perhaps the most debated, is whether or not to apply a polyurethane topcoat. This decision often comes down to personal preference, the type of paint used, and the expected wear and tear on your floor. I was definitely torn on this step for our bathroom floors.
When using a high-quality floor paint, such as the Benjamin Moore Floor & Patio Paint I chose, a polyurethane topcoat is technically not required. These paints are specifically formulated to be incredibly durable and resistant to a significant amount of wear on their own. They are designed to stand up to heavy traffic without additional sealing.
The Pros of Adding a Polyurethane Topcoat:
- Enhanced Durability: A topcoat can provide an extra layer of protection against scratches, scuffs, and general abrasion, making your painted tile even more robust.
- Increased Water Resistance: While floor paint is water-resistant, a polyurethane layer can offer an additional barrier against moisture, which can be particularly beneficial in bathrooms or kitchens.
- Easier Cleaning: A smooth, sealed surface can be easier to wipe clean and may be more resistant to stains.
- Gloss Level Control: You can choose a polyurethane with a specific sheen (matte, satin, semi-gloss, gloss) to further customize the final look of your floor.
The Cons and Considerations of a Polyurethane Topcoat:
- Repair Complexity: If a deep gash or scratch occurs in a top-coated floor, repairing just that isolated area can be trickier. It’s harder to sand and repaint a small section and have it blend in perfectly if you have a clear topcoat over the paint. The repair might be more noticeable, or you might need to re-topcoat a larger area.
- Re-coating Challenges: Should you decide to freshen up your floors with another coat of paint years down the line, applying a new layer of paint over an existing polyurethane topcoat often requires additional prep work, such as light sanding, to ensure proper adhesion.
- Added Time and Cost: Applying a topcoat introduces another step to the project, adding both time for application and drying, as well as the cost of the polyurethane product itself.
Ultimately, I decided NOT to use a polyurethane topcoat on our bathroom floors. Six years later, I am still incredibly happy with that choice. At one point, a deep scratch mysteriously appeared on one of our tiles, likely caused by a stone stuck in a shoe tread during construction work on our house. Because there was no polyurethane, I was able to simply sand down that one tile, repaint it, and it blended in absolutely perfectly. No one would ever know! Furthermore, a few years after the initial painting, I decided to recoat our painted tile floors to freshen them up. Without a polyurethane topcoat, I was able to proceed directly to light cleaning and repainting, saving considerable time and effort that would have otherwise been spent on additional prep work.
Consider your specific needs, the level of traffic, and your willingness to potentially deal with slightly more complex repairs down the line when making this decision. Both options can result in a durable and beautiful painted tile floor.
Step 8: Curing Time and Long-Term Care for Your Painted Tile Floors
Congratulations, your tile floors are painted! However, the project isn’t truly complete until the paint (or polyurethane, if you chose to apply it) has had sufficient time to dry and, crucially, to cure. Drying refers to the evaporation of solvents, making the surface feel dry to the touch, while curing is a slower chemical process where the paint hardens and achieves its full durability. Rushing this final stage can lead to damage and compromise the longevity of your hard work.
After your last coat of paint or polyurethane, it’s vital to give your floor at least a couple of days (48-72 hours) to fully dry before allowing any foot traffic. The more humid your environment, the longer this drying period will likely take. It’s always better to err on the side of caution and allow extra time.
Beyond initial drying, the paint will continue to cure for several days, sometimes even up to a week or two, depending on the product and environmental conditions. During this curing period, it’s best to be extremely gentle with your newly painted floor. Avoid dragging furniture, refrain from wearing heeled shoes, and wipe up any spills immediately. Placing temporary felt pads under furniture legs can also provide extra protection during this vulnerable phase. Allow the paint to reach its maximum hardness before subjecting it to normal household activity.
Overall, I am incredibly happy with how our painted tile floor looks and, more importantly, how exceptionally well it has worn over the years! This project truly demonstrates that a significant aesthetic upgrade doesn’t have to come with a hefty price tag. For a project that cost me under $100 for materials, the impact has been monumental.
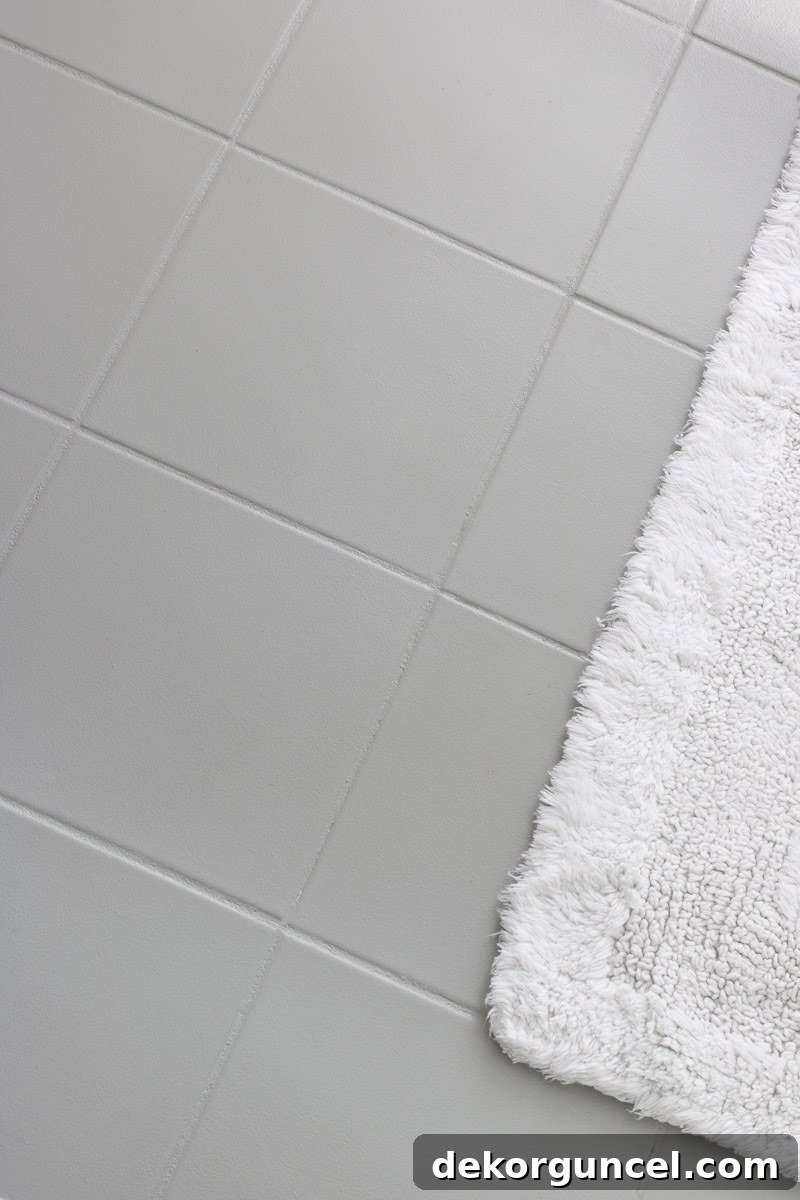
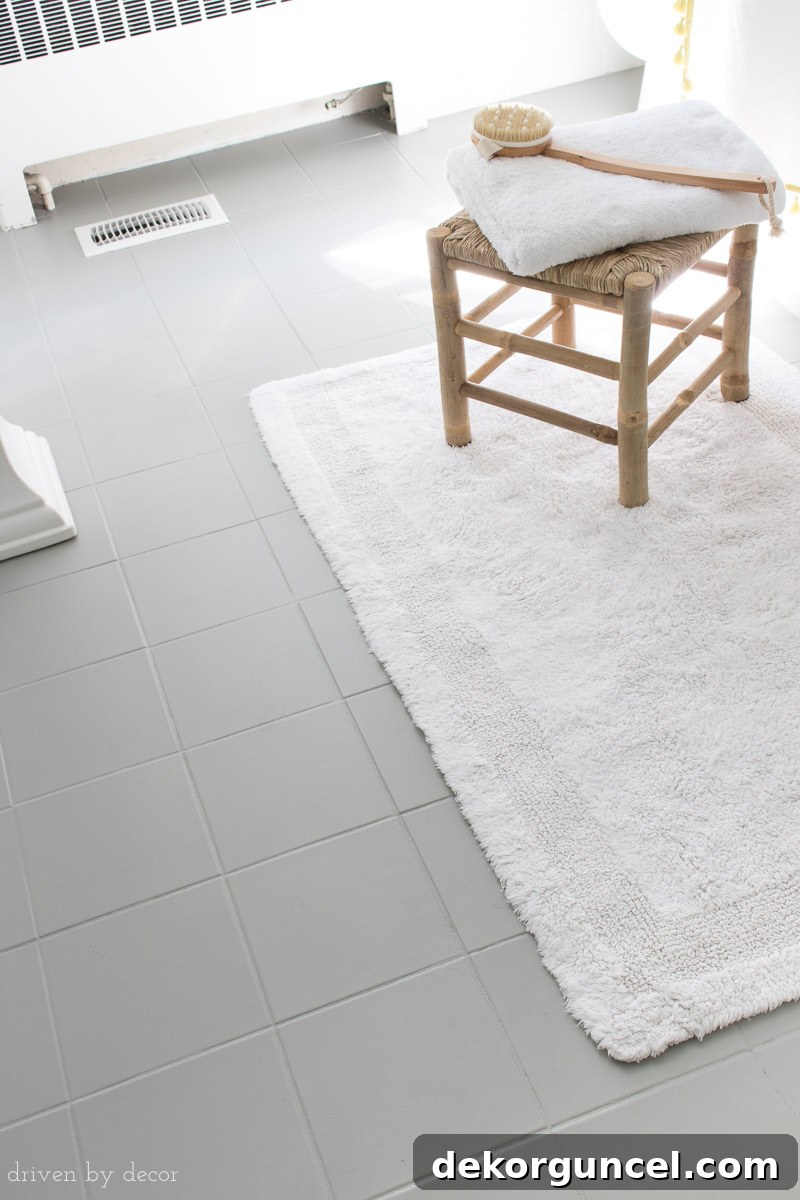
It’s truly satisfying to look back and see the incredible journey this bathroom has undergone. This is what it looked like when we first moved in – the tile was hidden beneath a wall-to-wall carpet. I quickly ripped out that rug, firmly believing that even the ugliest tile was preferable to a carpet that encircled the toilet – yuck! This transformation has made the space not only more appealing but also significantly more hygienic.
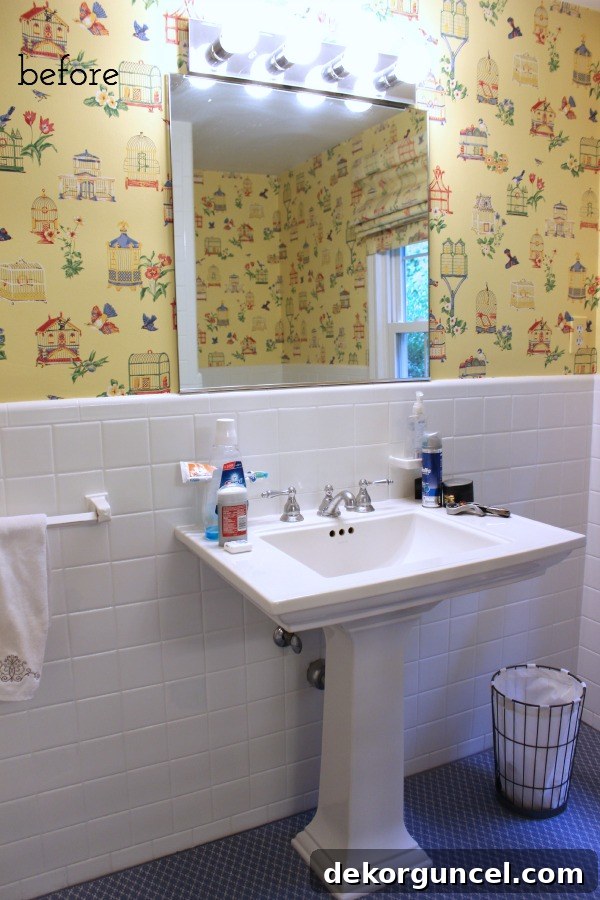
And here it is today, a testament to what a little paint and a lot of vision can achieve:
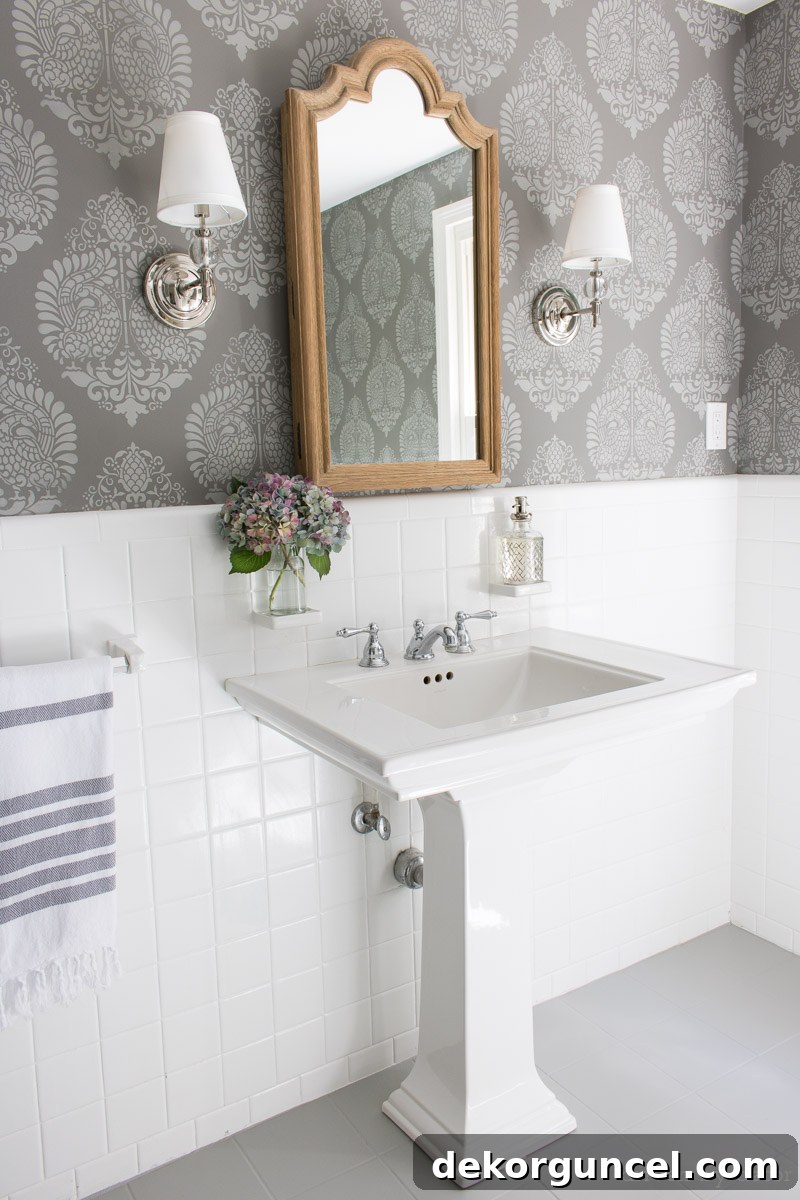
Powder Room Sources: Damask Wall Stencil (11.25″ x 15.5″) | Arched wood medicine cabinet mirror – no longer available | Pedestal Sink | Sconces (Polished Nickel) | Gray & white striped towel
Perhaps the most gratifying aspect of this entire bathroom makeover is that we didn’t have to spend a fortune. Apart from the investment in the beautiful wood medicine cabinet and the elegant sconces, all other changes were accomplished through resourceful and budget-friendly DIY projects. This approach allowed us to achieve a high-end look without the high-end cost, proving that thoughtful design and a little elbow grease can go a long way.
To delve deeper into our comprehensive bathroom transformation and discover more inspiring DIY ideas, be sure to explore my other posts detailing specific projects:
Wall Stencils:Discover the art of stenciling – yes, those walls are stenciled, not wallpapered, offering a cost-effective alternative to wallpaper!
How to Replace a Towel Bar with Fixed Ceramic Ends:Learn how to easily update bathroom fixtures, even when dealing with ceramic-mounted challenges.
Framed Agate Wall Art:Add a touch of natural elegance with this simple yet stunning DIY art project.
Also, don’t miss my post on our painted bathroom vanity, another incredibly easy painting project that delivered a massive aesthetic upgrade and perfectly complemented our newly painted tile floors!
UPDATE!! For those curious about the long-term performance of painted tile floors, make sure to check out my detailed post on how our painted tile lasted, providing a candid update on their durability years after the initial project!
Thank you for joining me on this transformative journey. I hope this guide empowers you to tackle your own tile painting project and create a space you truly adore!
