
The journey to a beautifully functional bathroom often involves tackling those small, yet crucial, details that make a significant difference. Recently, we completed a comprehensive remodel of our Jack and Jill bathroom, a project that encompassed everything from a gleaming new tile floor to updated vanities, modern lighting, stylish mirrors, and efficient toilets. Interestingly, the bathtub and its surrounding wall tiles were the only elements we opted to retain, primarily because they were in excellent condition. However, the same couldn’t be said for the caulk sealing the joint between the tub and the tile—it was an unsightly, cracked mess, compromising both the aesthetic and integrity of the space.
Re-caulking a bathtub is rarely anyone’s favorite task, but securing a professional for such a minor job can be surprisingly difficult and often expensive. Recognizing this common predicament, I decided to tackle this project myself. This guide is designed to empower you to do the same, providing a clear, step-by-step process for effectively removing old, damaged caulk and applying a fresh, professional-looking seal. Chances are, if you’re reading this, your bathtub might be calling for a caulk refresh too! So, let’s gather our tools, embrace the DIY spirit, and restore your bathroom’s pristine look and crucial water protection. (This post contains commissionable links; for more details, please refer to my complete disclosure statement {here}.)
Why Fresh Caulk is Essential for Your Bathroom
Beyond cosmetic appeal, the caulk around your bathtub plays a critical role in maintaining the health and longevity of your bathroom. That ugly, cracked mess we started with wasn’t just an eyesore; it was a potential gateway for serious problems. Failing caulk allows water to penetrate behind tiles and into wall cavities, leading to insidious water damage, wood rot, and the dreaded growth of mold and mildew. These issues can compromise the structural integrity of your home, create unpleasant odors, and pose health risks. Replacing old, compromised caulk is a vital maintenance task that protects your investment and ensures a hygienic environment. It was undeniably time to replace this failing caulk, and the first step to a successful project is always to gather the right tools and materials.
Gather Your Tools and Materials
Before diving into the actual work, proper preparation is key. Having all your supplies on hand will make the process smoother and more efficient. Here’s a look at the state of our old caulk and the essential items you’ll need to achieve a professional finish:
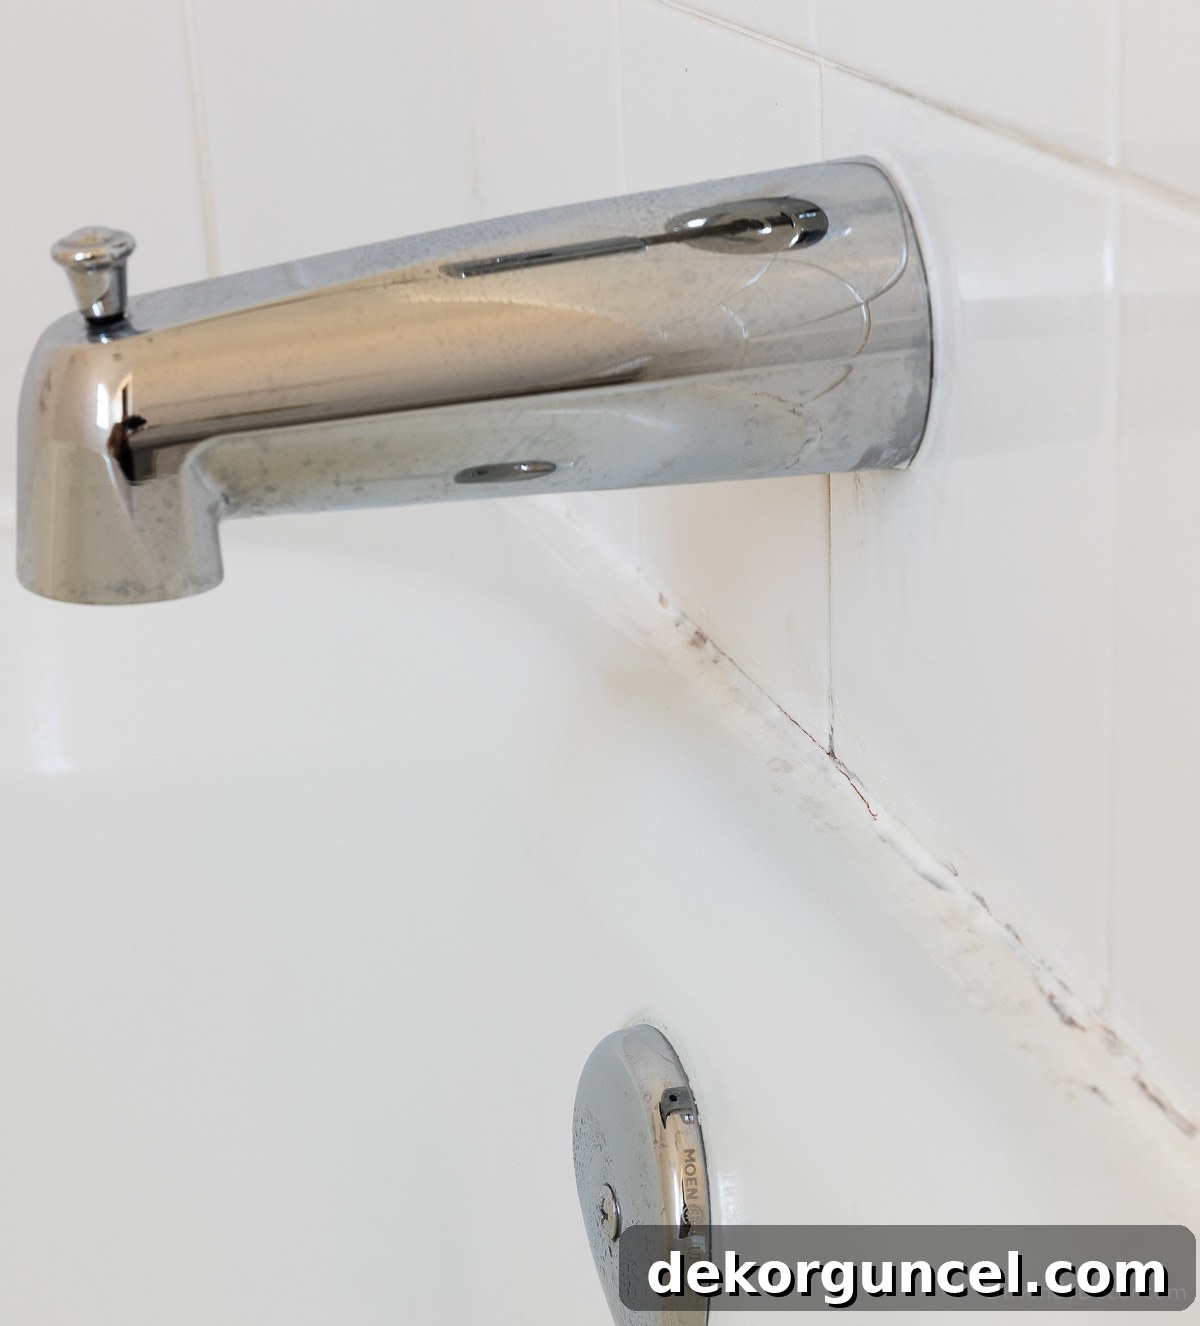
This image perfectly illustrates the kind of deterioration that signals an urgent need for re-caulking. To transform this from a cracked mess into a pristine seal, you’ll need the following:
- Drip-free caulking gun: While smaller, toothpaste-like tubes of caulk exist, they are notoriously difficult to apply with precision and often come at a higher cost per ounce. Investing in a good quality, drip-free caulking gun is highly recommended. It offers superior control, allowing for a more even and consistent bead of caulk, a skill invaluable for many future home improvement projects beyond just your bathtub.
- Caulk (Silicone): Selecting the correct type of caulk is paramount for wet environments. Always choose 100% silicone caulk, such as {this caulk}, specifically formulated for kitchens and bathrooms. Silicone is highly waterproof, flexible, and inherently resistant to mold and mildew, making it ideal for areas exposed to constant moisture. Unlike acrylic latex caulks, silicone will not crack, shrink, or yellow over time when properly applied in these conditions.
- Tools to remove old, dried caulk: Effective caulk removal is the most critical step for a long-lasting new seal. Various tools can assist you, including versatile options like {this 3-in-1 caulk tool}, specialized scraping tools such as {this Dig-It removal & scraping tool}, and a small, stiff-blade putty knife like {this one}. A combination of these often works best for different types and conditions of old caulk.
- Caulk finisher tool (optional but highly recommended): While a wet finger can work, a dedicated caulk finishing tool provides a consistently smooth and professional-looking bead, especially for those new to caulking.
- Painter’s tape: Essential for achieving crisp, clean lines and protecting surrounding surfaces from excess caulk. Opt for a high-quality painter’s tape that offers clean removal.
- Caulk cap: A small but useful accessory that seals the caulk tube tip, preventing the caulk from drying out between uses.
- Rags or paper towels: For cleaning up spills, wiping tools, and ensuring a tidy workspace.
- Magic Eraser: Excellent for removing stubborn residue or minor scuff marks left behind after caulk removal.
- Isopropyl rubbing alcohol: Crucial for a final cleaning step to ensure the surface is perfectly clean and free of any oils or residues, promoting optimal adhesion for the new caulk.
- Utility knife or razor blade: For cutting the caulk tube tip.
- Work gloves: To protect your hands from caulk and cleaning agents.
Remove the Old Caulk Thoroughly
Achieving a professional-looking and long-lasting caulk job hinges entirely on starting with a pristine surface. Attempting to take shortcuts by applying new caulk over old is a common mistake that will inevitably lead to failure. The new caulk will not adhere properly, creating an uneven and unsightly finish that will quickly crack and peel, defeating the entire purpose of your effort.
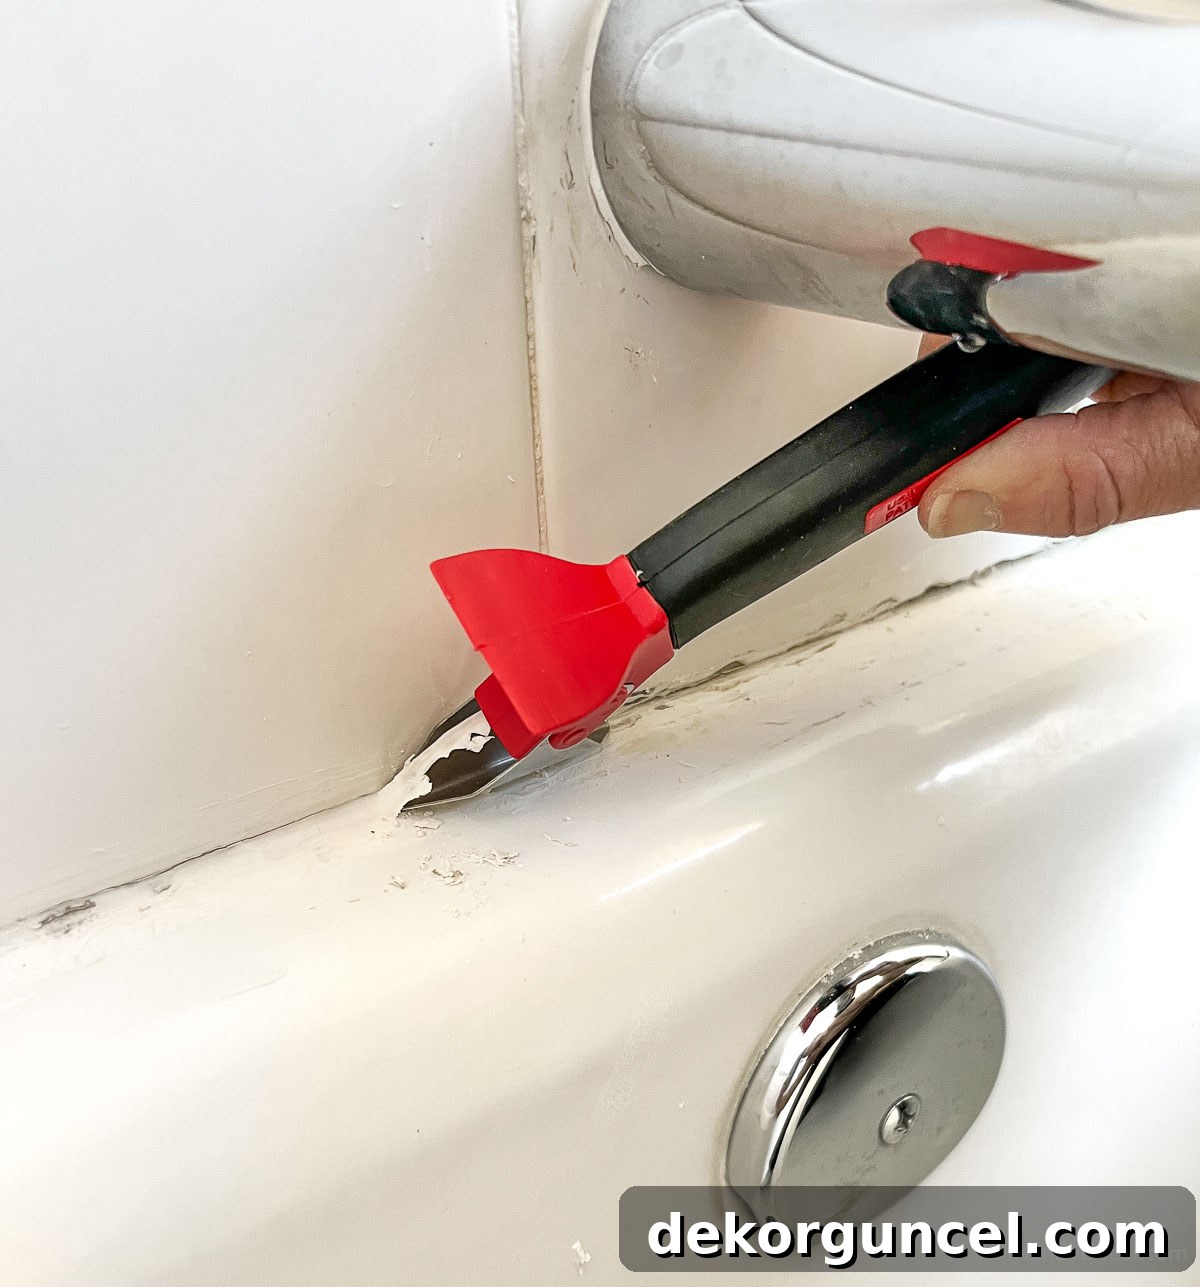
During my project, I experimented with several tools for removing the old, dried caulk and discovered that a combination approach yielded the best results. The {3-in-1 caulk tool} proved most effective on areas where the caulk was still somewhat pliable, allowing its angled blade to glide and lift. Conversely, the {stiff putty knife} was indispensable for tackling hard, brittle caulk that had firmly bonded to the surfaces.
Using the 3-in-1 tool is straightforward. It features a cupped, angled blade designed to scrape along the joint between the tub and tile. Simply position the blade and apply steady pressure as you slide it along the caulk line:
For the putty knife, you’ll employ a two-step technique. First, hold it vertically, with the blade perpendicular to the surface, and slide it along the top edge of your caulk line to break the seal and begin lifting the caulk:
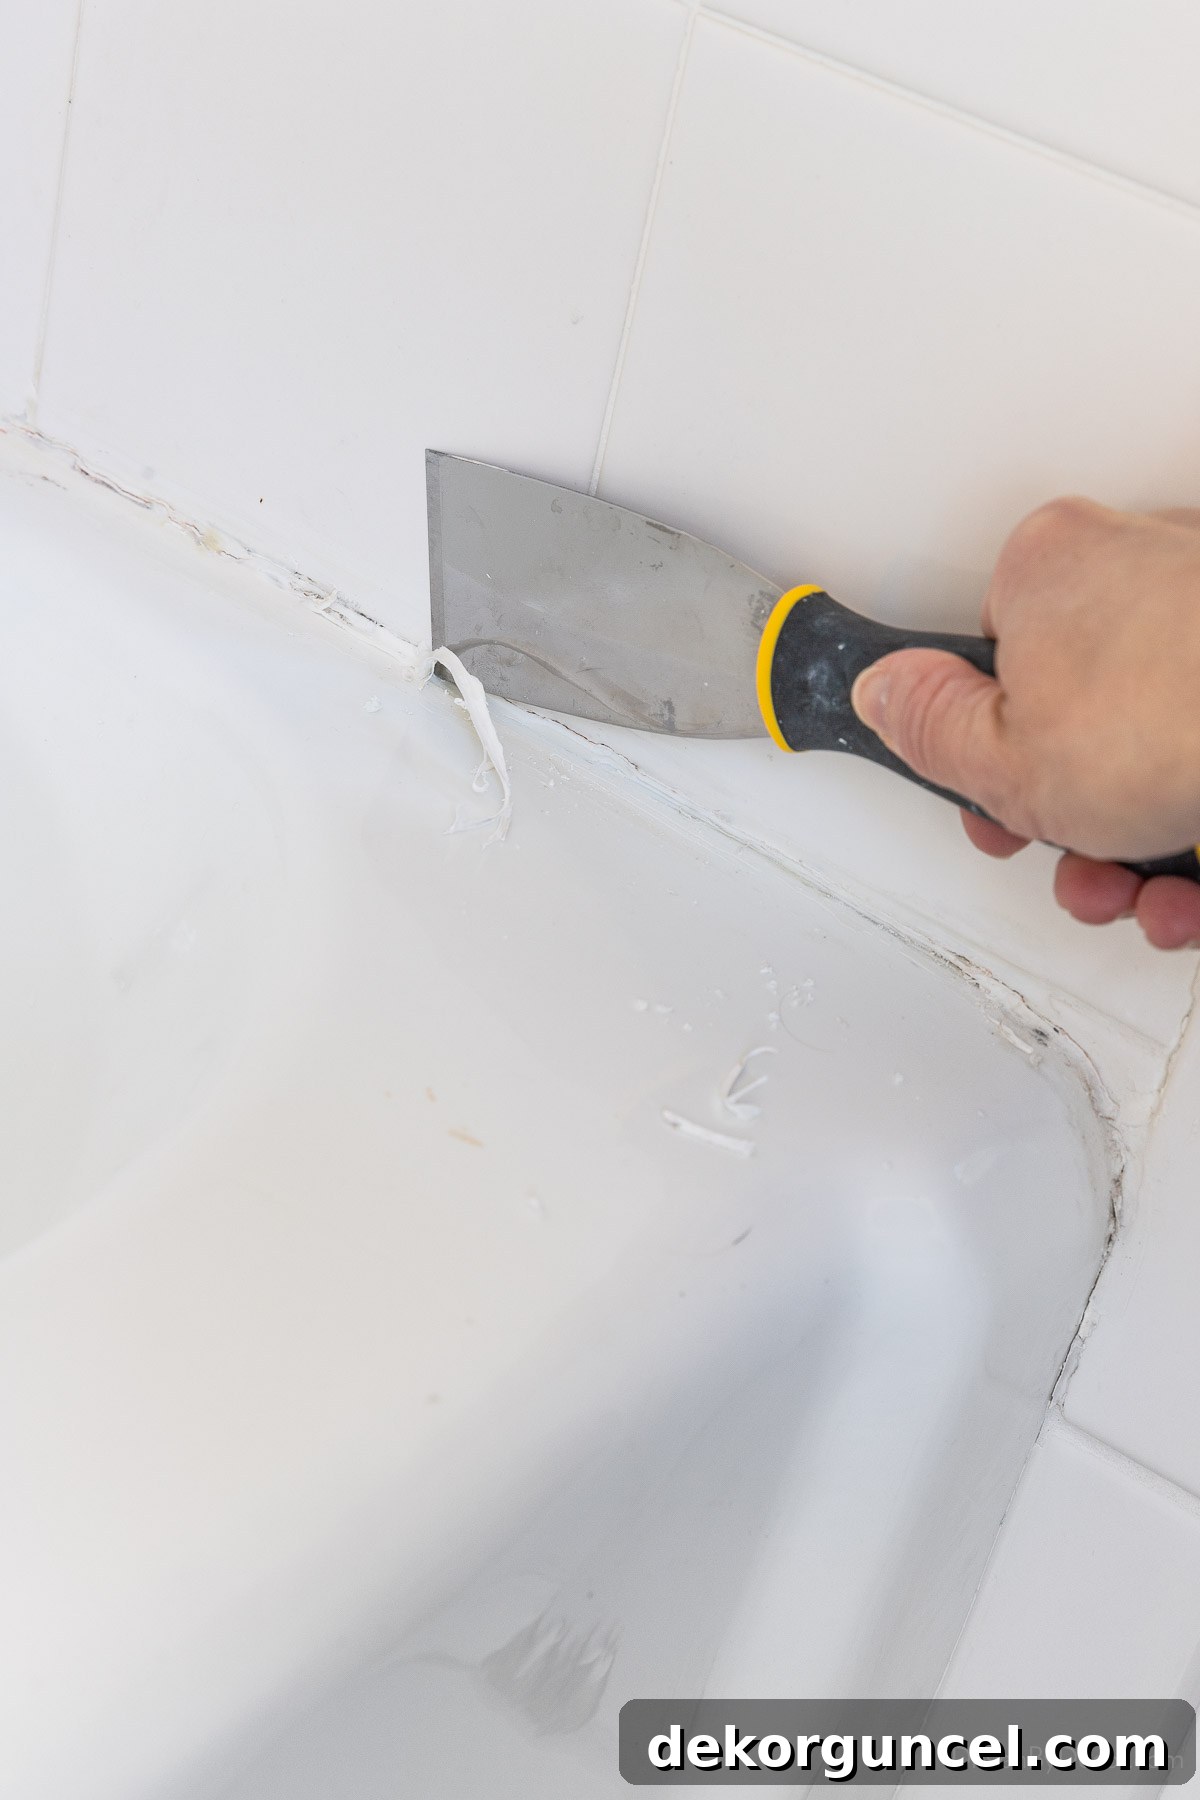
Next, pivot the knife to a horizontal position, holding it flush with the tub or tile surface, and slide it along the bottom edge of your caulk. This method helps to cleanly separate the caulk from the substrate:
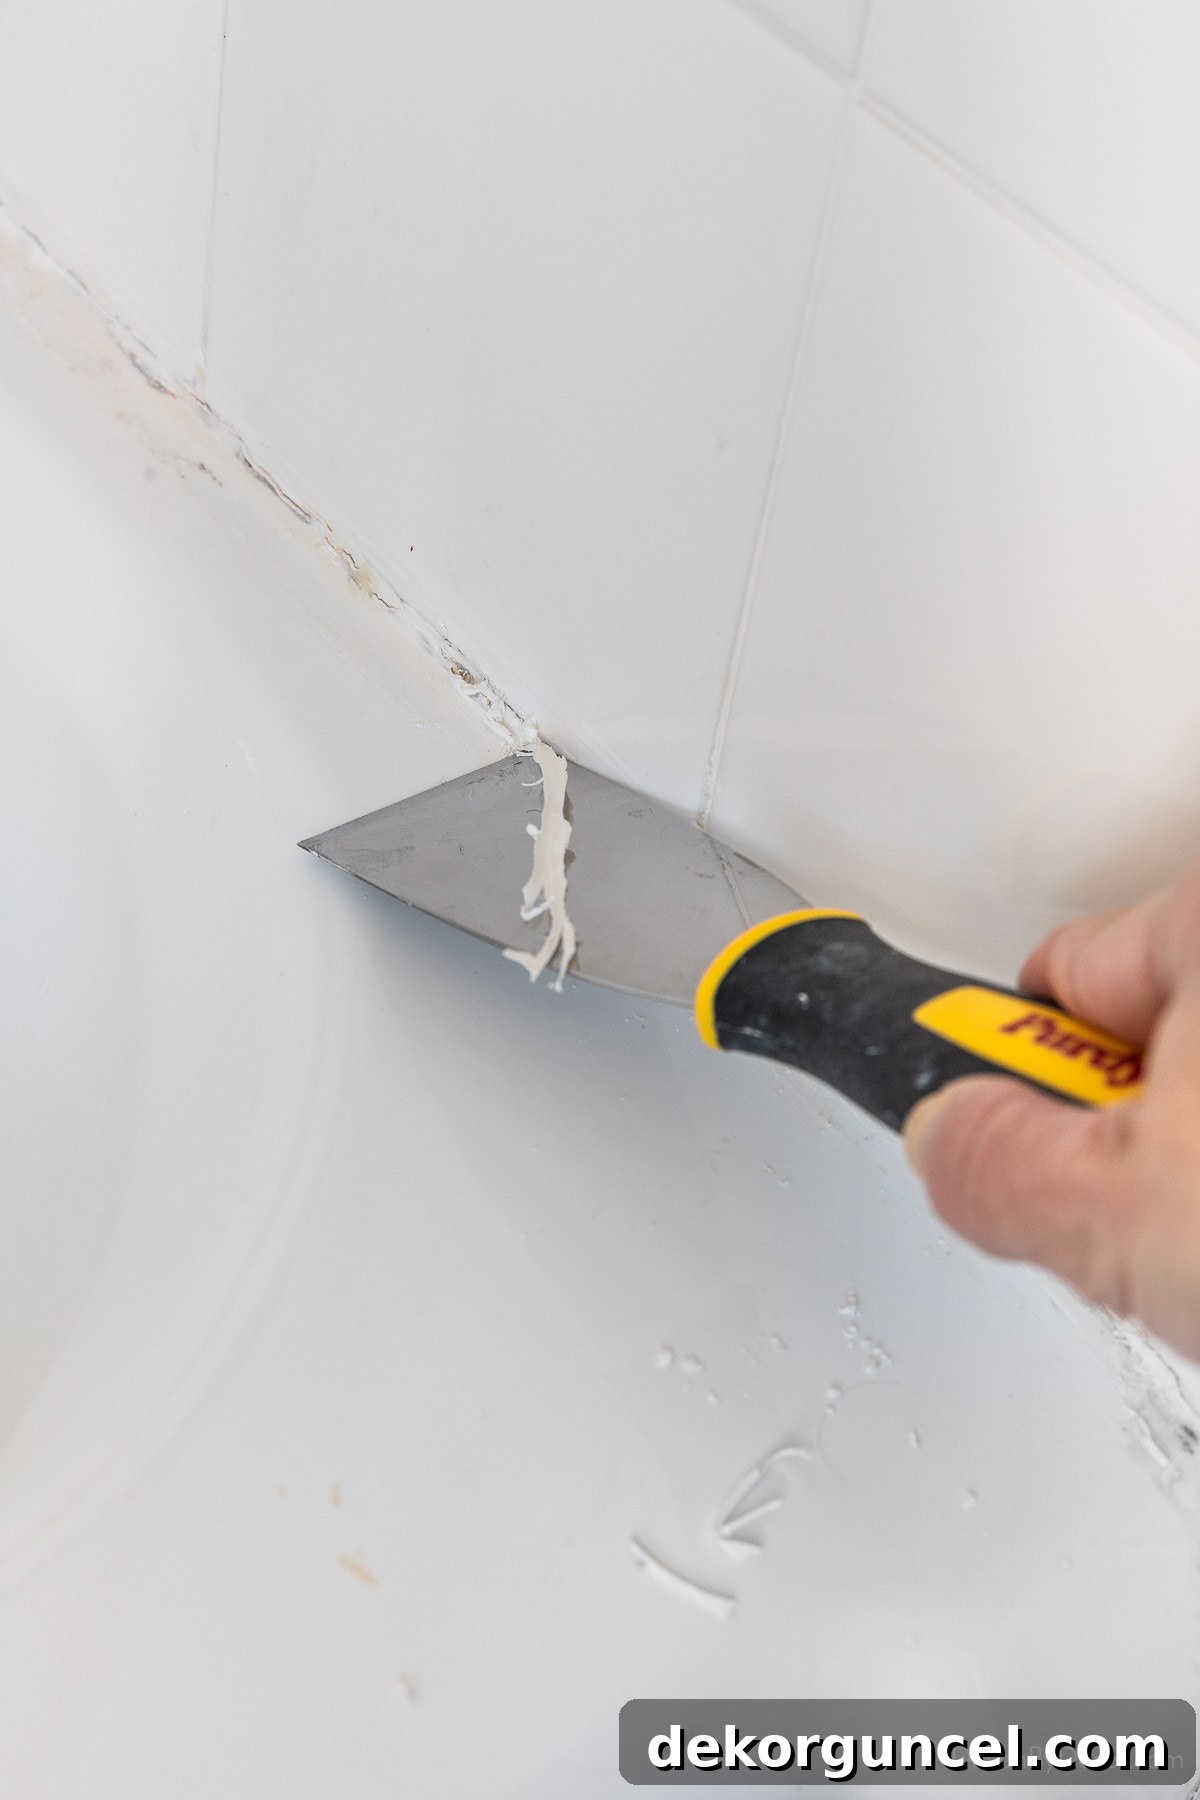
Throughout this removal process, exercise patience and caution. Always be mindful to avoid scratching or damaging the delicate surfaces of your bathtub or tiles. Take your time, working in small sections if necessary, to ensure thorough removal without causing new damage.
Troubleshooting Stubborn Caulk
If you encounter particularly stubborn caulk that resists removal, there are a couple of tricks you can try. A hairdryer can be surprisingly effective; simply direct warm air along the caulk line for a minute or two. The heat will soften the caulk, making it more pliable and significantly easier to scrape away. Alternatively, specialized liquid caulk removers, such as {this one}, are available. However, these products often receive mixed reviews and come with a crucial warning: they are generally not recommended for fiberglass, acrylic, or plastic/composite tubs and showers, as they can cause irreversible damage to these surfaces. Always test in an inconspicuous area if you decide to use a chemical remover.
Once you have painstakingly removed every last trace of the old caulk, the next critical step is thorough cleaning. Use a Magic Eraser to effectively lift any remaining residue, grime, or minor surface scrape marks. Follow this with a comprehensive wipe-down of the entire area surrounding your caulk line using isopropyl rubbing alcohol. Alcohol is excellent for degreasing and ensuring the surface is impeccably clean and free of any oils, soap scum, or cleaning product residues that could compromise the adhesion of the new caulk. Allow the area to dry completely before proceeding; even a hint of moisture can negatively impact your new caulk’s performance.
Get Prepped to Caulk for Success
With your surfaces clean and dry, it’s time to prepare for the application of the new caulk. This stage is crucial for ensuring a smooth, even, and professional finish.
Prepare the Caulk Tube and Gun
How you cut the tip of your caulk tube might seem like a small detail, but it significantly impacts the success of your caulking job. Using a sharp utility knife, cut the tip of your caulk tube at a precise 45-degree angle, making the cut relatively close to the end of the tip. This angle is ideal for guiding the caulk smoothly into the joint:
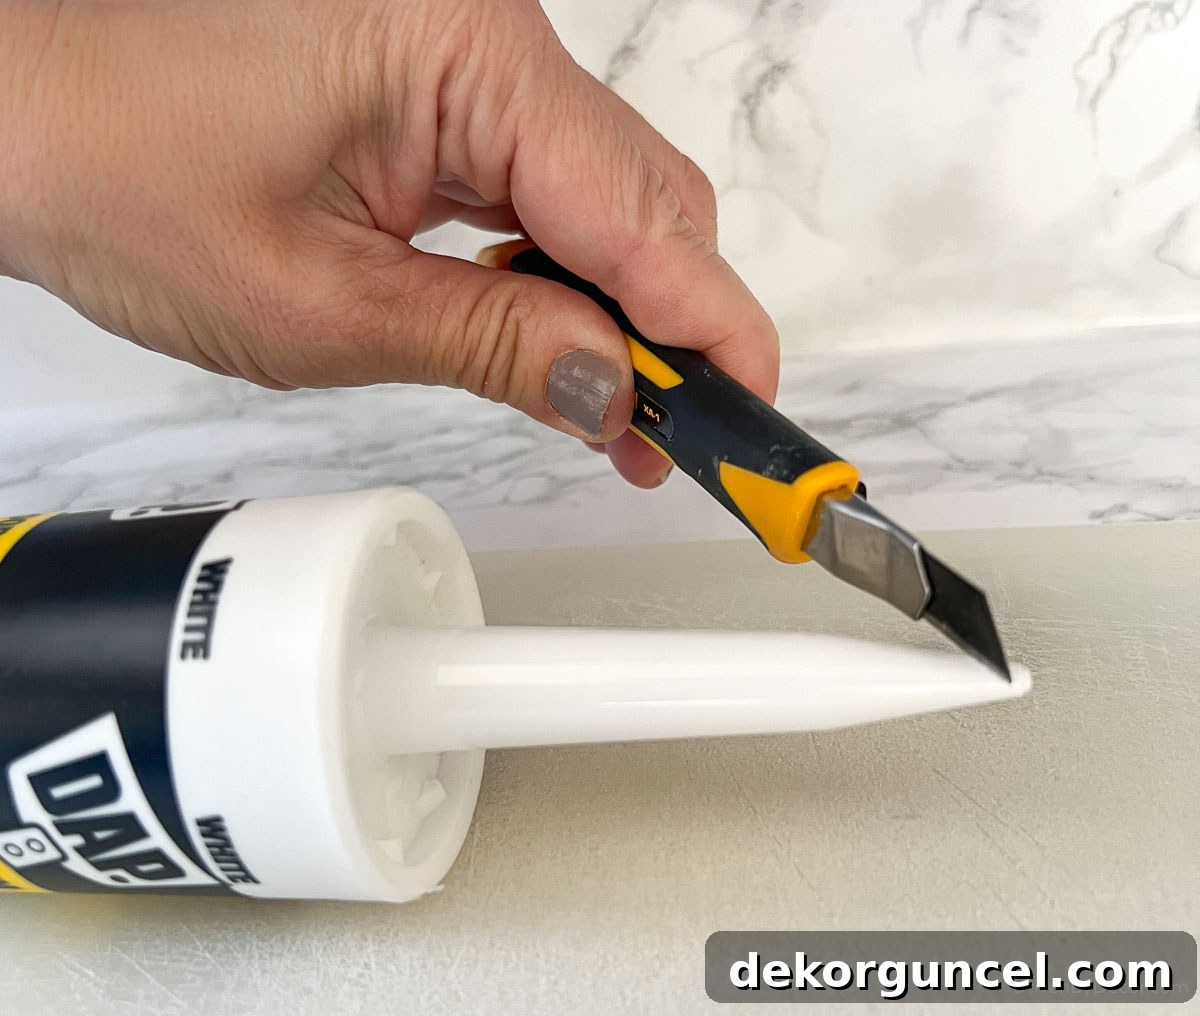
Many caulk tubes even have subtle 45-degree guide lines on the tip if you inspect closely. A common pitfall for caulking novices is to cut too much off the tip, which results in an overly thick caulk bead that is difficult to control and makes for a messy project. For this bathtub project, aim for an opening at the tip that is between 1/16 and ⅛ inch. This size will provide a manageable and appropriately sized caulk bead for standard tub-to-tile joints.
After cutting the tip, you must pierce the interior seal of the caulk tube. This internal foil barrier prevents the caulk from drying out before use. Most caulking guns come equipped with a piercing tool, usually a thin, stiff rod, which you can insert into the nozzle. Alternatively, some {caulk caps} also feature a piercing pin:
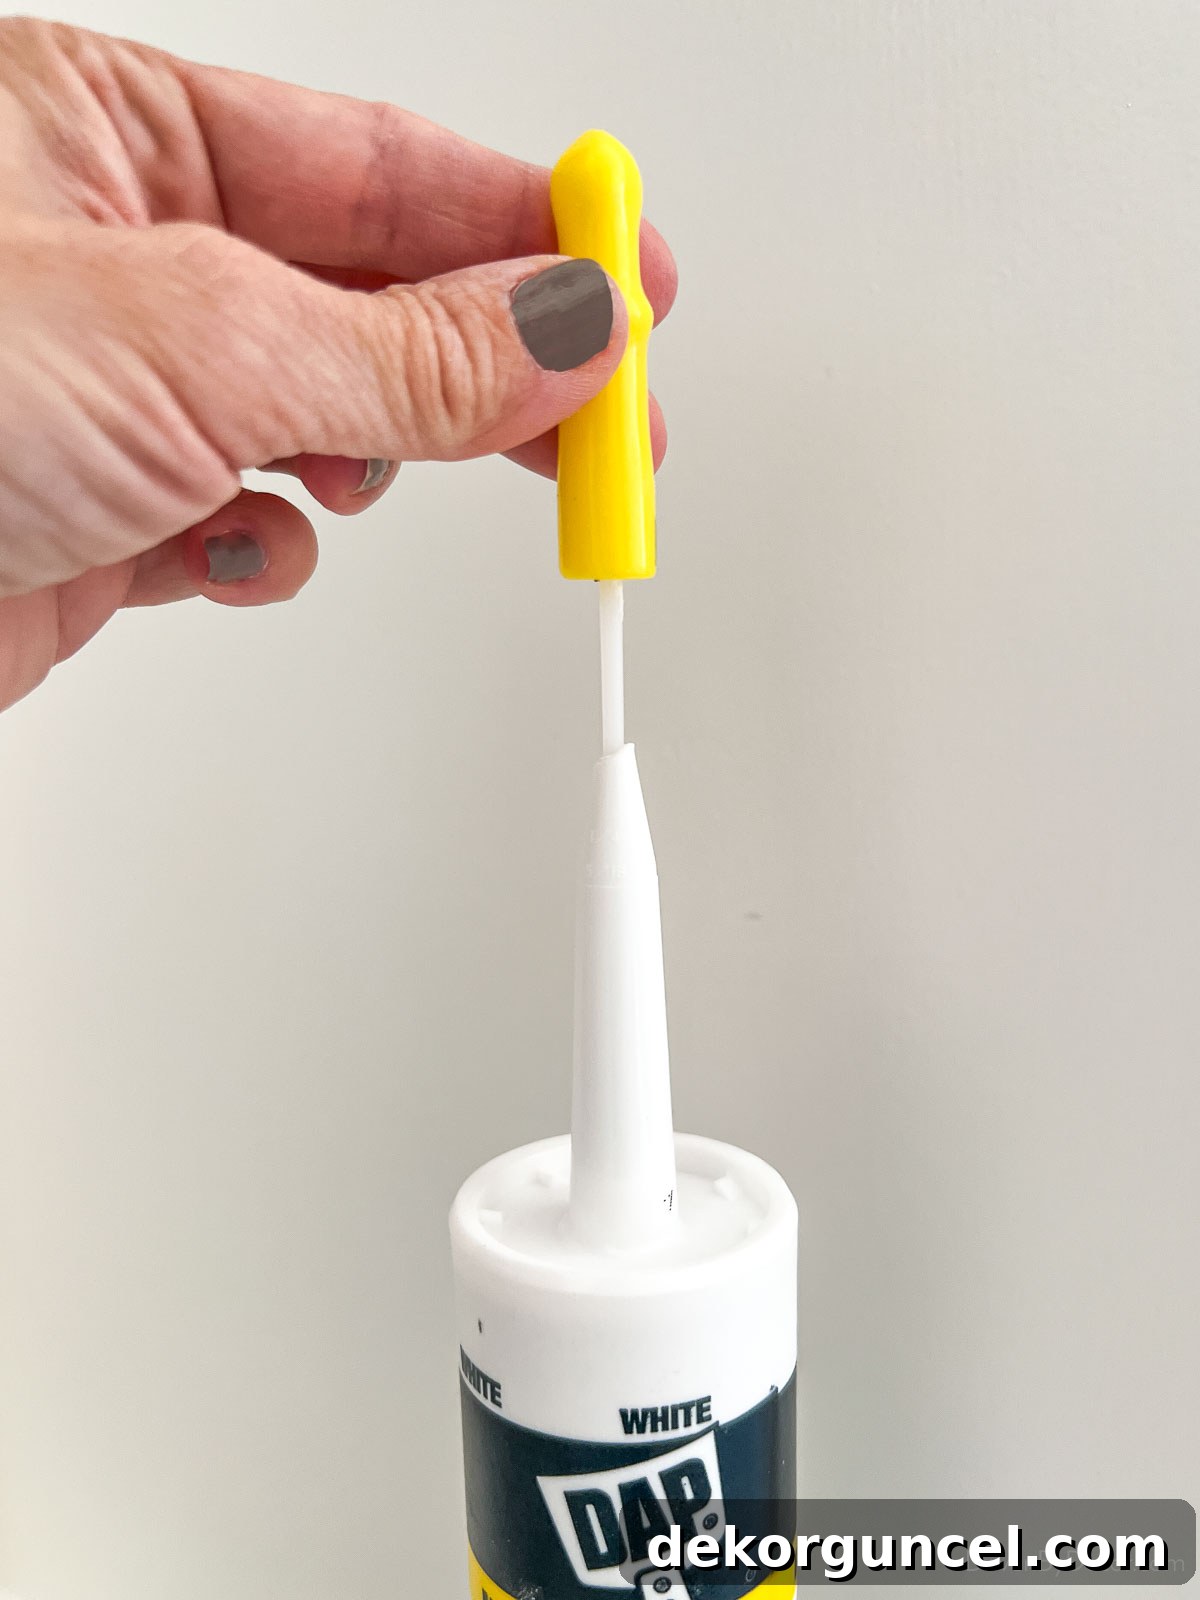
Once pierced, load your caulk tube securely into the caulking gun. Before you start applying caulk to your tub, pump the trigger of the gun a few times until a small amount of caulk begins to flow consistently from the tip. If no caulk emerges, you likely haven’t pierced the internal seal adequately. Re-insert your piercing tool and move it up and down at different angles to ensure the seal is completely broken; this usually resolves the issue.
Tape Off for Precision and Easy Cleanup
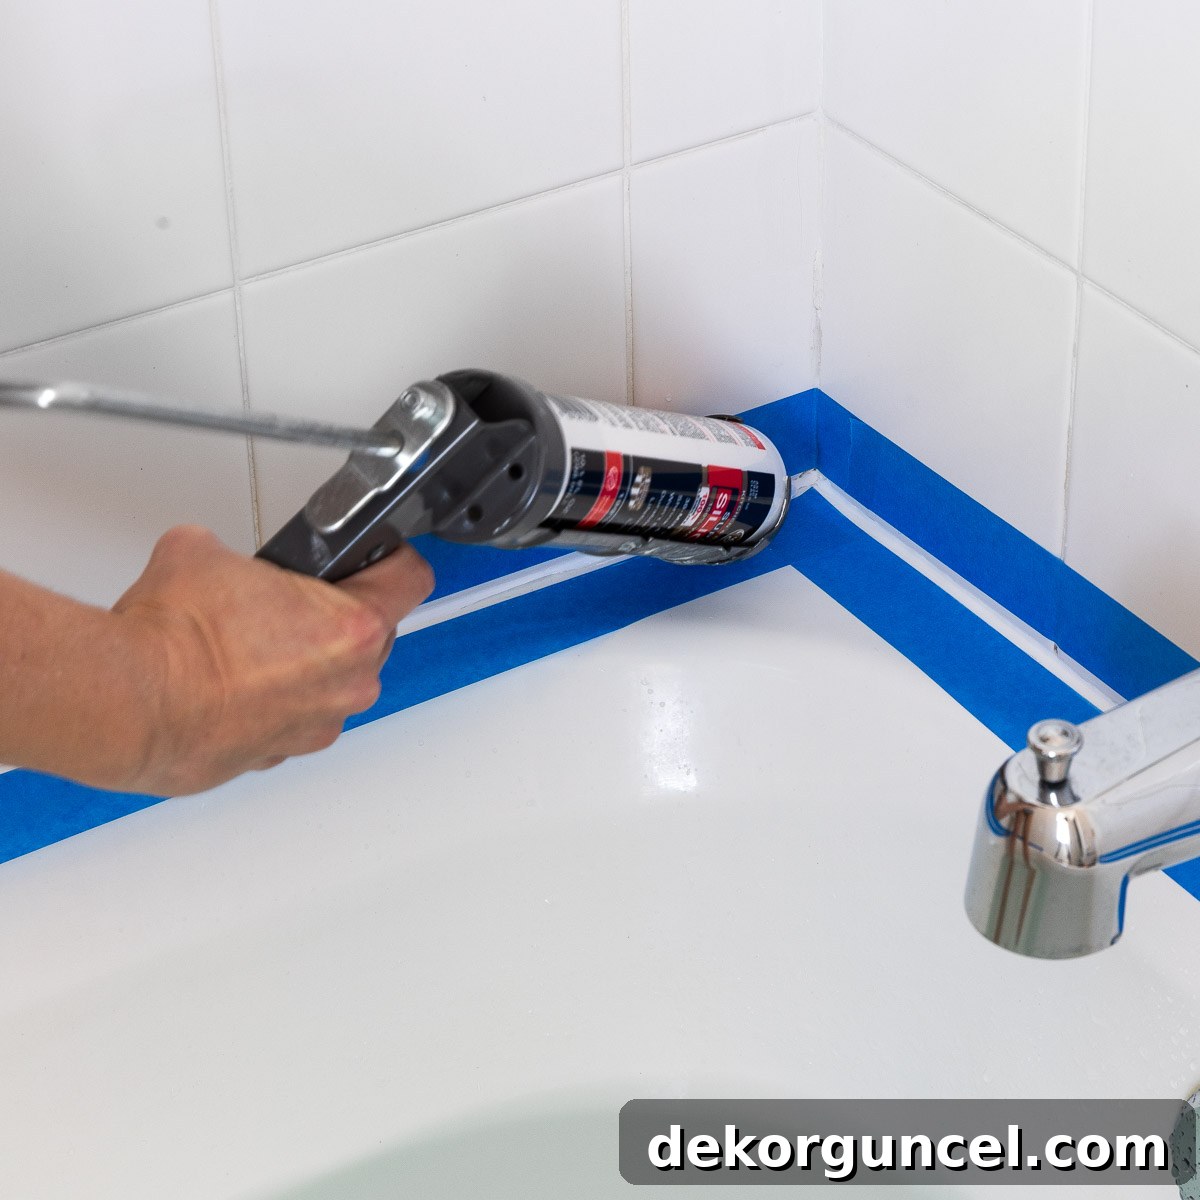
Unless you possess significant experience with a caulking gun and a truly steady hand, I strongly recommend applying strips of painter’s tape along both sides of the joint you intend to caulk. This creates a clean, uniform channel for your caulk bead:
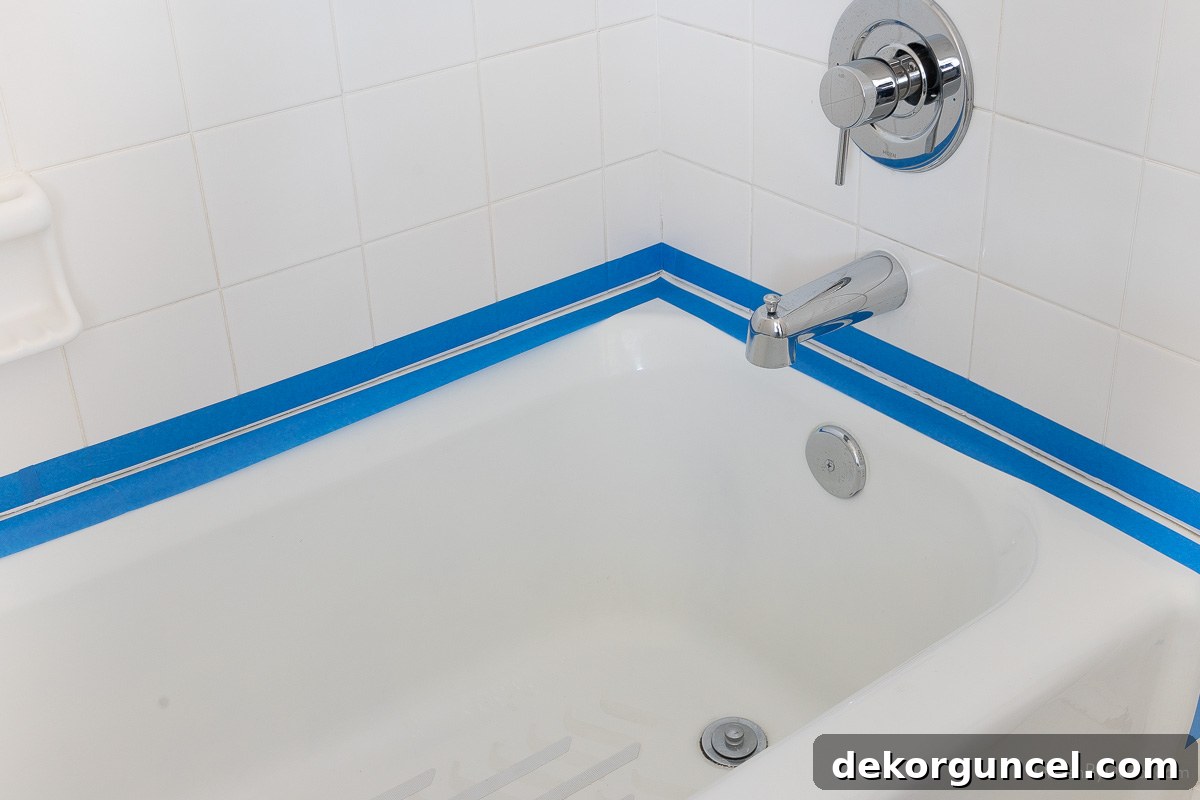
With the painter’s tape carefully positioned, any excess caulk you apply will simply land on the tape rather than directly on your clean tile or tub surfaces. This ingenious trick prevents messy clean-ups and guarantees you’ll achieve a beautifully straight, crisp caulk line, giving your work a truly professional appearance. Ensure the tape is pressed down firmly to prevent any caulk from seeping underneath.
Apply the New Caulk Like a Pro
With your caulk gun prepped and painter’s tape perfectly in place, there’s one final, crucial tip before you begin applying the new caulk: fill your bathtub with water! This step is often overlooked but is incredibly important for the longevity of your caulk. When a bathtub is filled with water, and especially when a person is in it, the weight causes the tub to settle or “flex” slightly. If you caulk an empty tub, this movement later on can stretch the caulk, potentially leading to premature cracking and failure. By filling the tub with water *before* you caulk, you mimic this maximum load condition, ensuring the caulk cures in its stretched state and significantly reducing the risk of cracking when the tub is used later.
Now, to apply the caulk, hold your caulk gun at the same 45-degree angle that you cut the tip of the caulk tube. This angle allows the caulk to be smoothly pressed into the joint. Apply slow, steady, and even pressure on the trigger, moving your caulking gun continuously along the joint between the tub and the tile:
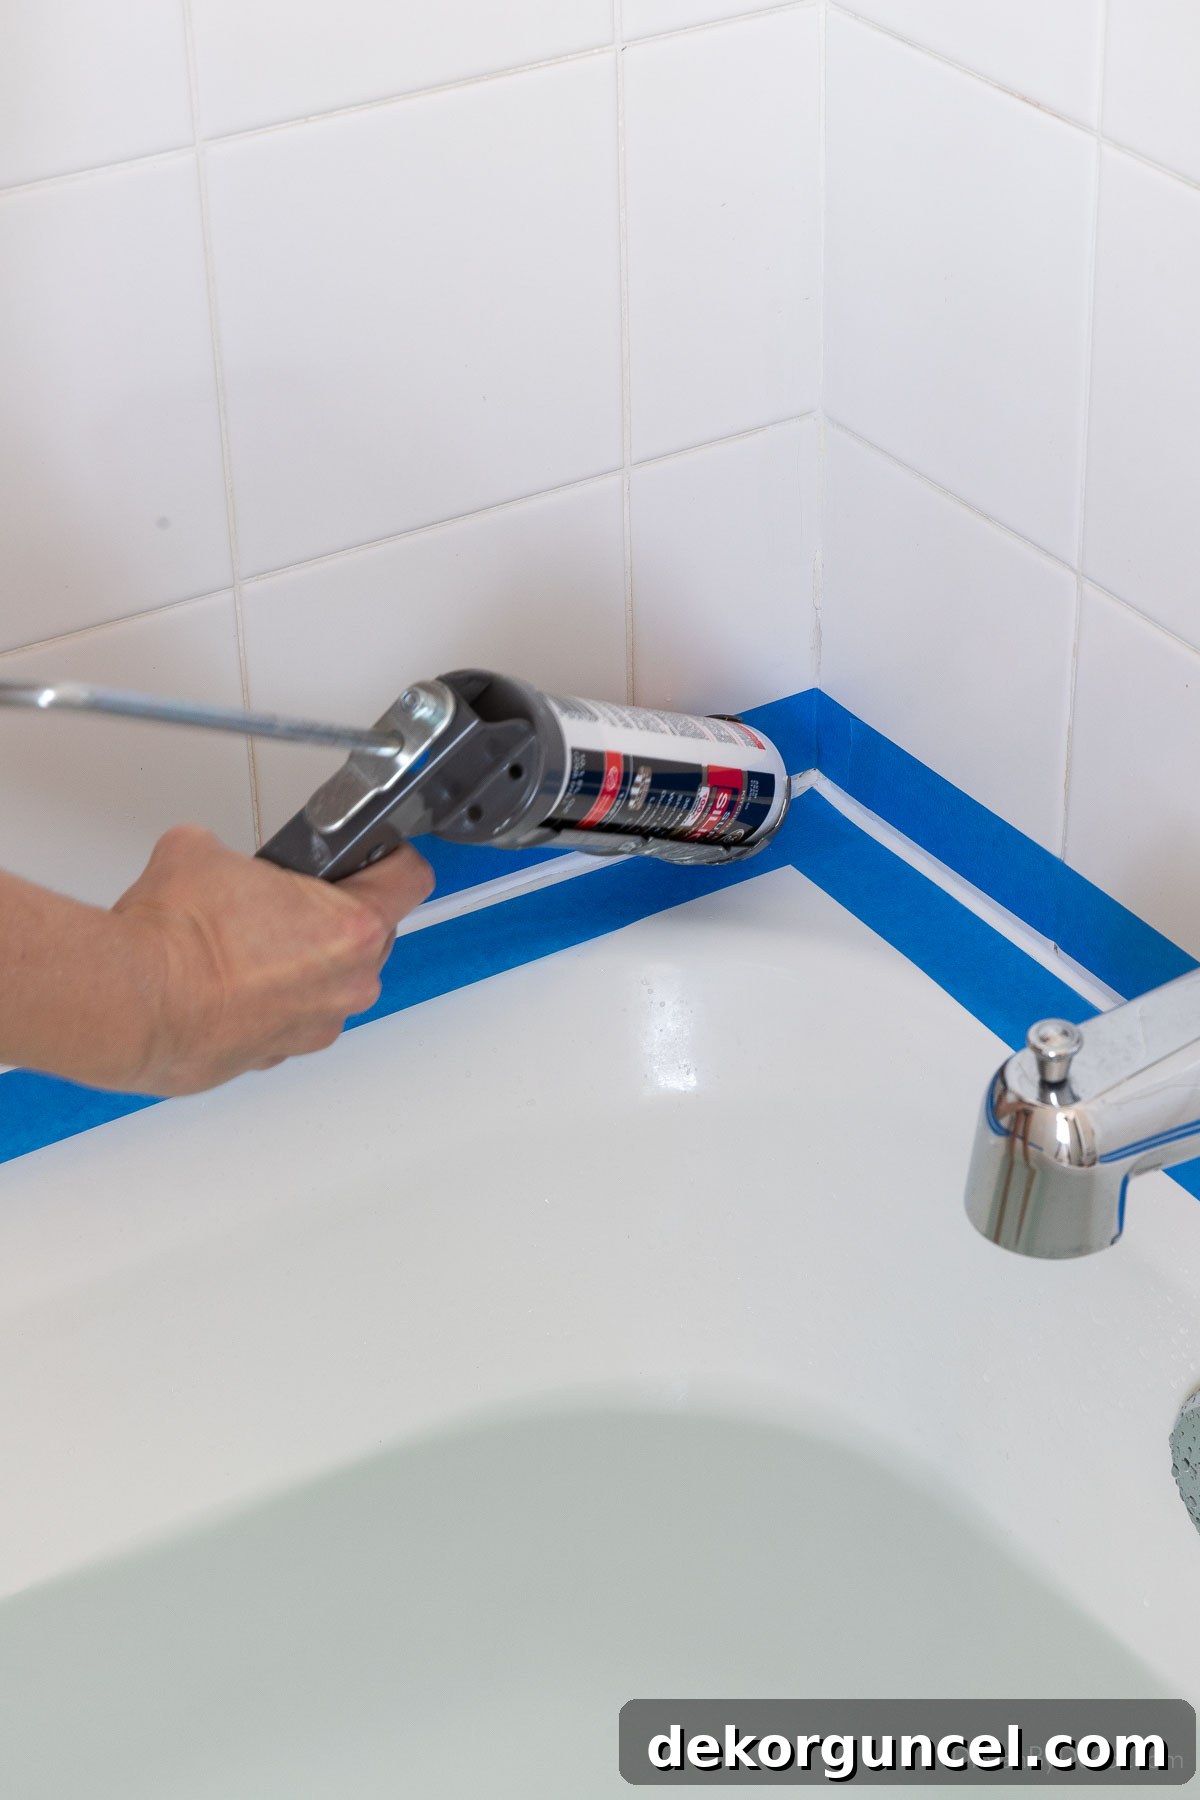
The objective is to achieve a consistent stream of caulk that fills the joint completely, aiming for what we call a “Goldilocks” amount—not too little, not too much. Too little caulk will result in unsightly gaps and compromised water sealing, while too much can create an excessive mess. Fortunately, if you took the time to tape the sides of the joint, even a slightly less-than-perfect application will still yield a fantastic result in the end, as the tape guides the final shape of the bead.
Pro Tip for Beginners: Practice Makes Perfect! If you’ve never used a caulking gun before, it’s highly advisable to practice a bit first. Nailing two scrap pieces of wood together at a 90-degree angle, or even using a spare piece of tile and plywood, creates an excellent practice surface for caulking the joint between them. This allows you to get a feel for the trigger pressure, speed, and angle without risking your actual bathroom project.
Smooth and Finish the Caulk Job for a Flawless Look
Now that you’ve applied the caulk, the next critical step is to smooth it out and achieve that pristine, professional finish. You have a couple of excellent options for this. The traditional method involves dipping a finger in water (or denatured alcohol for silicone caulk to prevent sticking) and gently running it along the entire length of your caulk joint. This technique helps to press the caulk into the joint, remove excess, and create a concave, smooth surface. For an even more consistent and professional result, especially if you’re a beginner, a dedicated caulk finishing tool is invaluable. Simply place the tool at one end of the bead and glide it steadily along the caulk line. Both methods will help remove any extra caulk and sculpt a smooth, uniform finish.
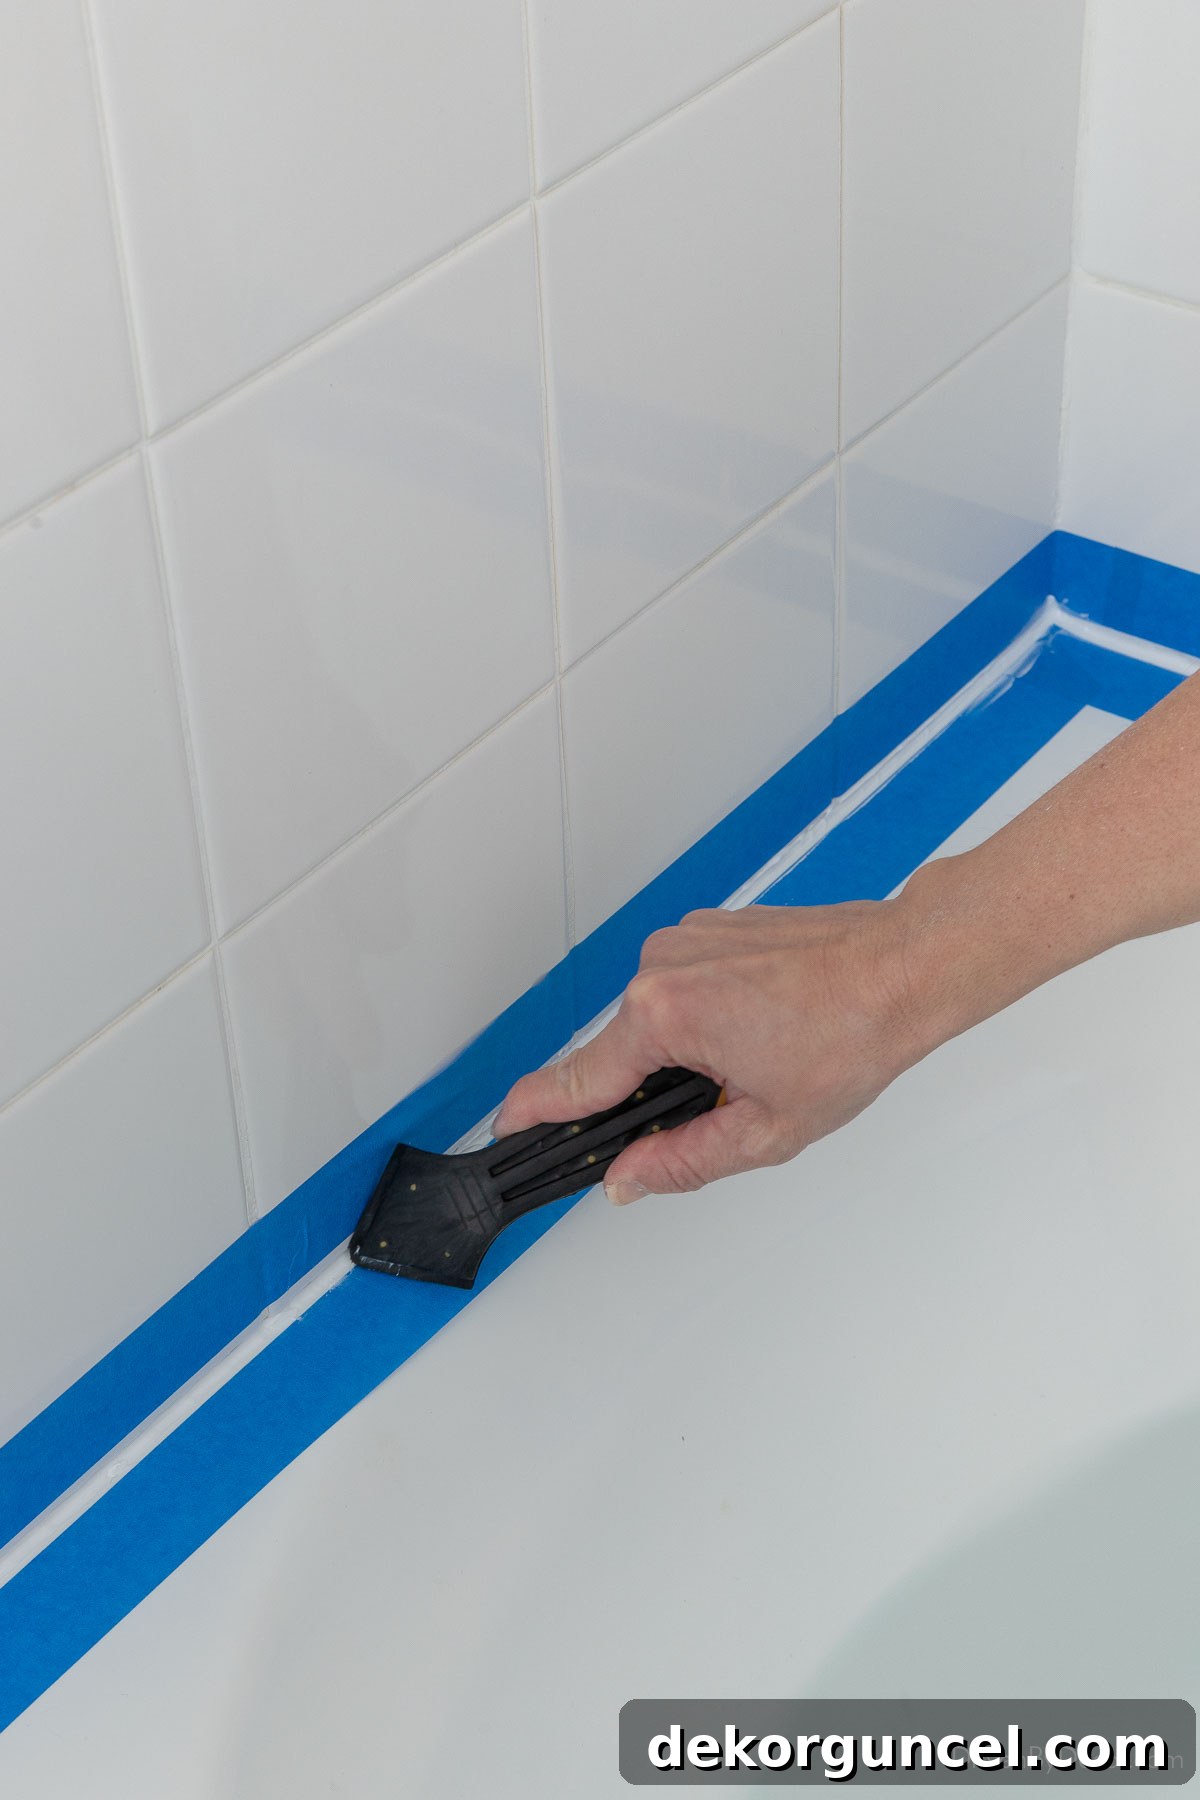
After smoothing, take a moment to step back and meticulously inspect your work. Look for any small gaps where more caulk might be needed or spots where there’s still an accumulation of excess caulk. If you find any gaps, apply a small dab of fresh caulk to those areas and re-smooth them using your finger or the finishing tool. This attention to detail ensures a flawless, waterproof seal.
With the caulk smoothed, it’s time for a truly satisfying moment: removing the painter’s tape. Gently pull the tape up at a 45-degree angle, peeling it away from the fresh caulk. The timing here is important; remove the tape *before* the caulk begins to skin over and fully dry, but *after* you’ve finished smoothing. This technique should leave you with a perfectly crisp, clean caulk line that looks like it was applied by a seasoned professional!
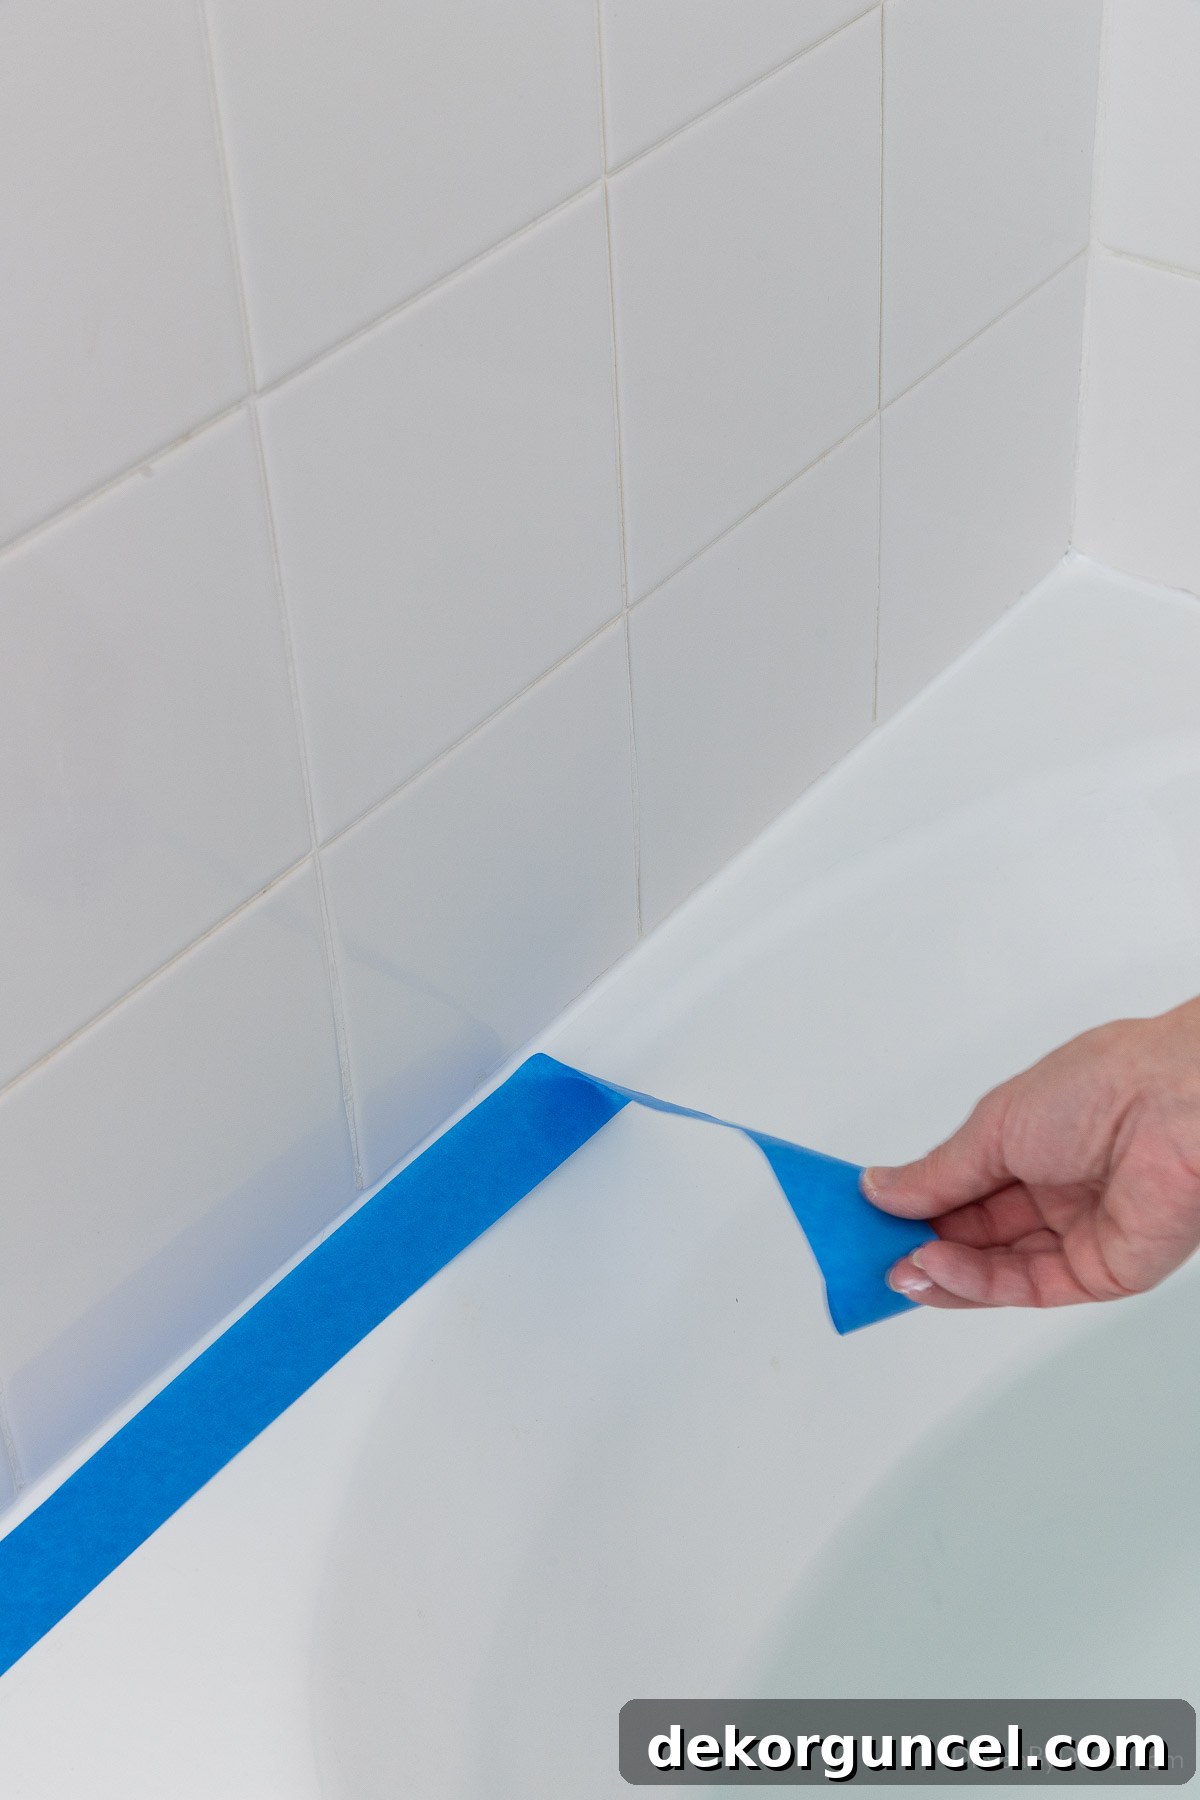
Perform one final inspection of your newly caulked surfaces. Use a damp cloth to wipe away any minuscule specks of extra caulk before they have a chance to dry and harden. To preserve any unused caulk in your tube for future projects, immediately place a caulk cap securely over the tip. This creates an airtight seal, preventing the caulk inside from curing and extending its shelf life significantly.
Allow Your Caulk to Cure for Maximum Durability
The final, and perhaps most challenging, step is simply to wait! It is absolutely essential to give the caulk ample time to fully cure—meaning it hardens and achieves its maximum strength and waterproofing properties—before you use your bathtub. The specific curing time can vary depending on the type of caulk you used, as well as environmental factors like humidity and temperature. Generally, most silicone caulks require 24 to 48 hours to cure completely. Always refer to the caulk label for the manufacturer’s specific instructions and recommended curing period. Rushing this step can lead to premature failure of your new caulk, undoing all your hard work.
Once the specified cure time has passed, you can safely drain the water from your tub. Step back and admire your handiwork—your bathtub now boasts a fresh, clean, and waterproof seal, looking like a million bucks. You’ve successfully completed a valuable home improvement project that not only enhances the aesthetics of your bathroom but also protects it from water damage and mold for years to come!
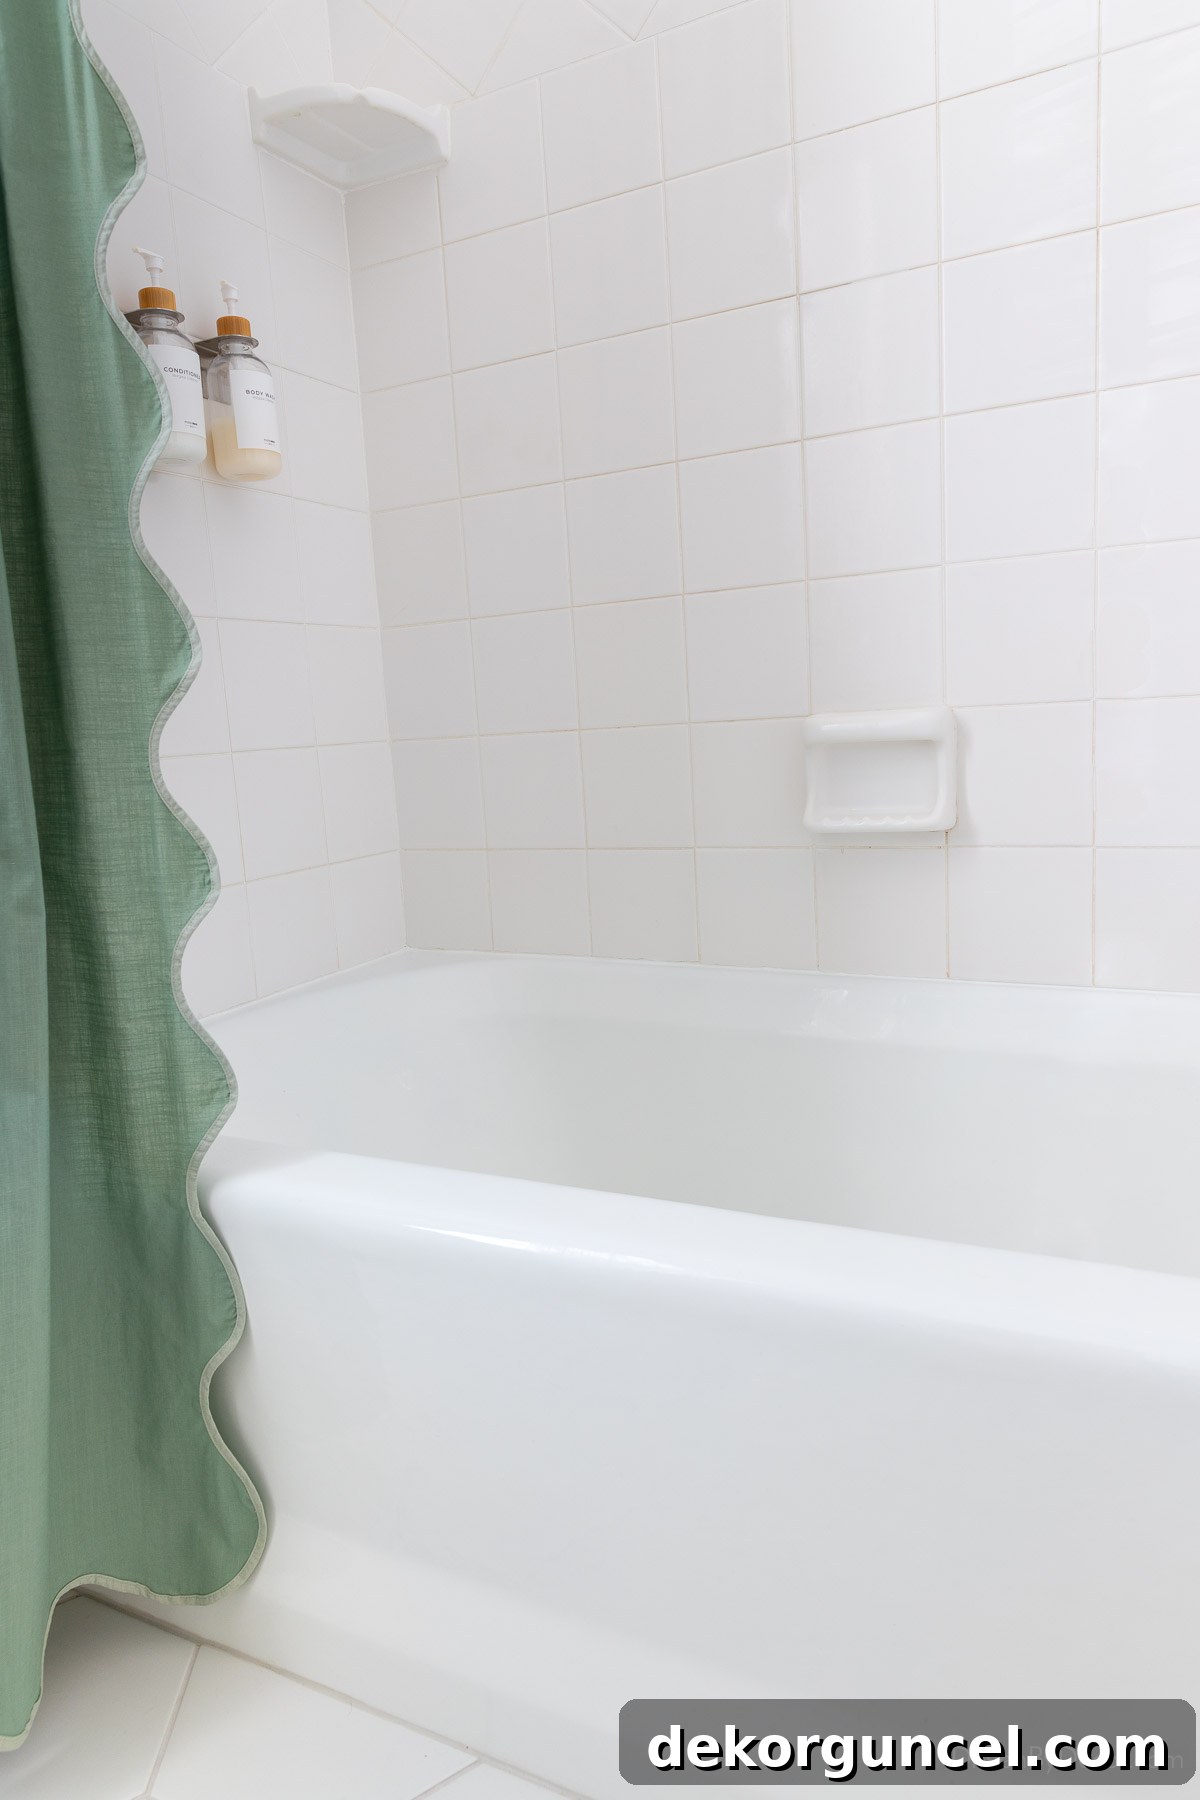
If you’re eager to see the complete transformation of this bathroom, including all the ‘before and after’ photos and design details, be sure to check out my full Jack and Jill bathroom remodel post. And for more inspiration and practical advice on upgrading your bathroom, explore these other popular articles:
12 Simple Yet Stylish Bathroom Decor Ideas to Refresh Your Space
10 Dreamy Master Bathroom Remodel Ideas You’ll Want to Steal for Your Home
Brilliant Bathroom Lighting Ideas to Infuse Style Into Your Space and Enhance Functionality
Creative Toilet Tank Decor Ideas to Add Charm to an Often-Overlooked Area
I look forward to sharing more home decor and DIY tips with you soon on the blog!
XO,
