
Unveiling Our Jack and Jill Bathroom Remodel: A Journey from Dated to Dreamy
Welcome to the grand reveal of our extensively remodeled Jack and Jill bathroom! This project, while experiencing a few unexpected detours and timeline extensions, has culminated in a space that perfectly blends functionality, style, and a vibrant personality. We poured our hearts into every detail, and the results speak for themselves. Get ready to embark on a comprehensive tour, showcasing the thoughtful upgrades that transformed this shared space into a true haven. (Please note: This post contains commissionable links, meaning we may earn a small commission on purchases made through them. For more details, refer to our disclosure statement.)
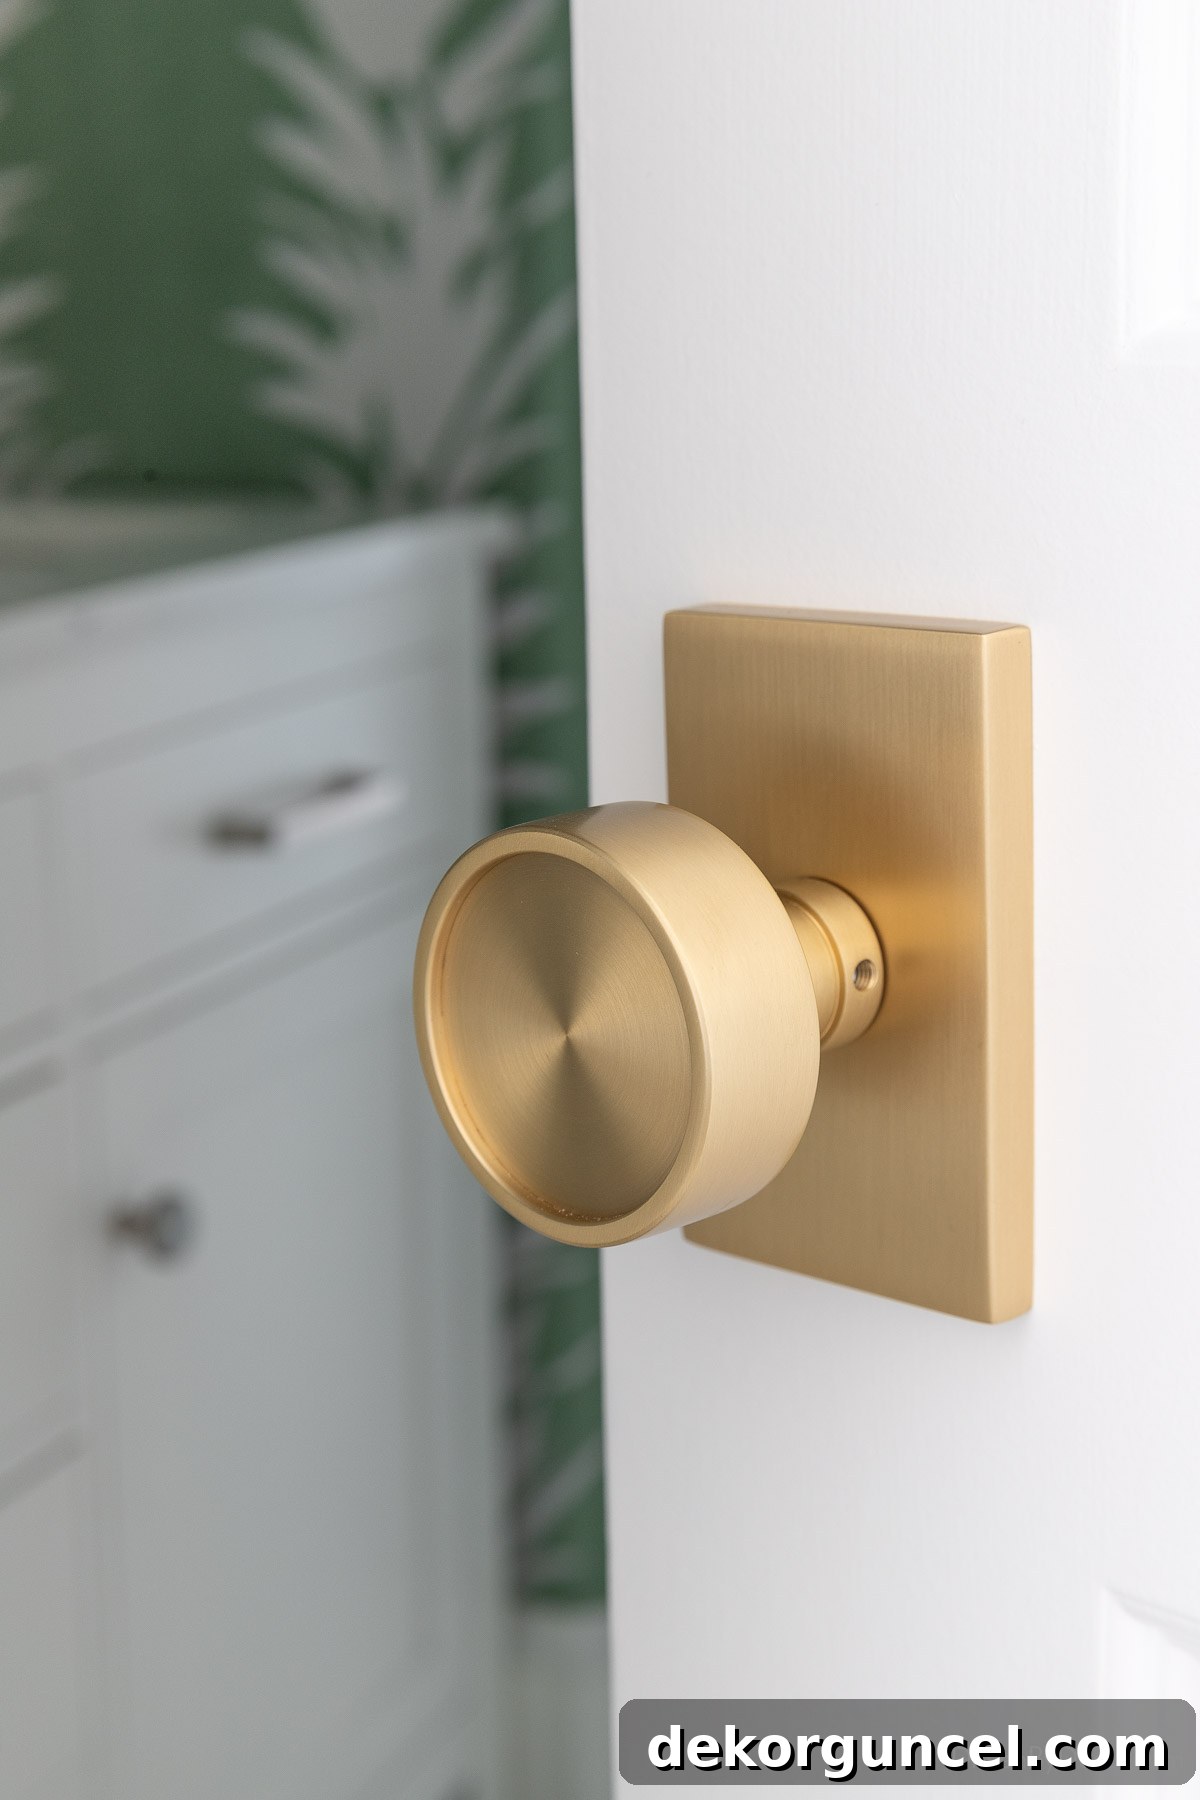
Our journey to revitalize this bathroom began even before stepping inside, starting with a crucial yet often overlooked detail: the doorknobs. We bid farewell to the old, tarnished hardware on both entry doors and introduced these exquisite satin brass Verve knobs from Emtek. This subtle change immediately elevated the aesthetic, setting a sophisticated tone for the entire space. It’s a design philosophy we’ve embraced throughout our home, progressively upgrading doorknobs in each renovated room to create a cohesive and luxurious feel.
Understanding the Jack and Jill Layout: Optimizing a Shared Space
For those unfamiliar, a Jack and Jill bathroom is designed for efficiency and shared access, typically connecting two separate bedrooms. Our bathroom adheres to this classic layout: the first section houses a spacious, shared vanity area, accessible from both adjoining bedrooms. A dividing door then leads into the second, more private portion, which features the toilet and the tub/shower combination. This thoughtful separation ensures privacy and convenience, allowing multiple users to utilize different sections of the bathroom simultaneously without disturbance. It’s an ideal setup for a family home, providing individual access while minimizing congestion during busy mornings.
Before & After: A Dramatic Vanity Area Makeover
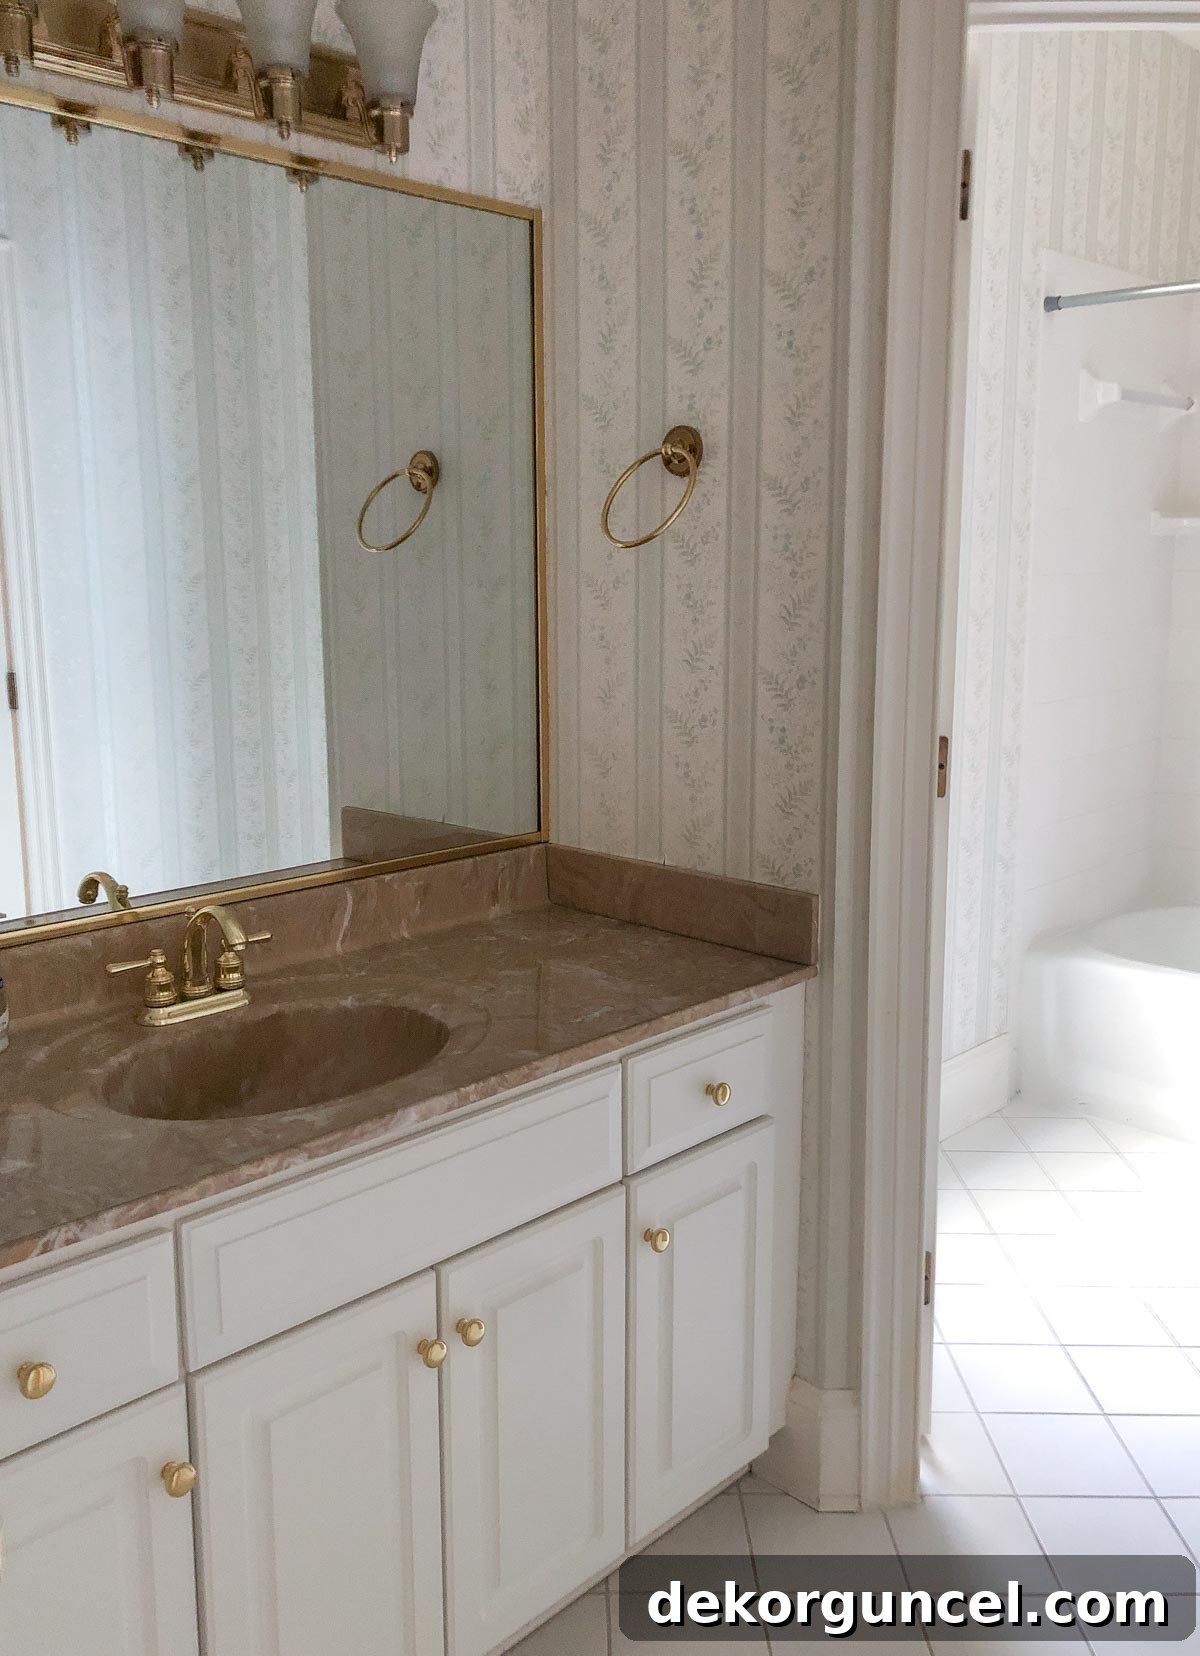
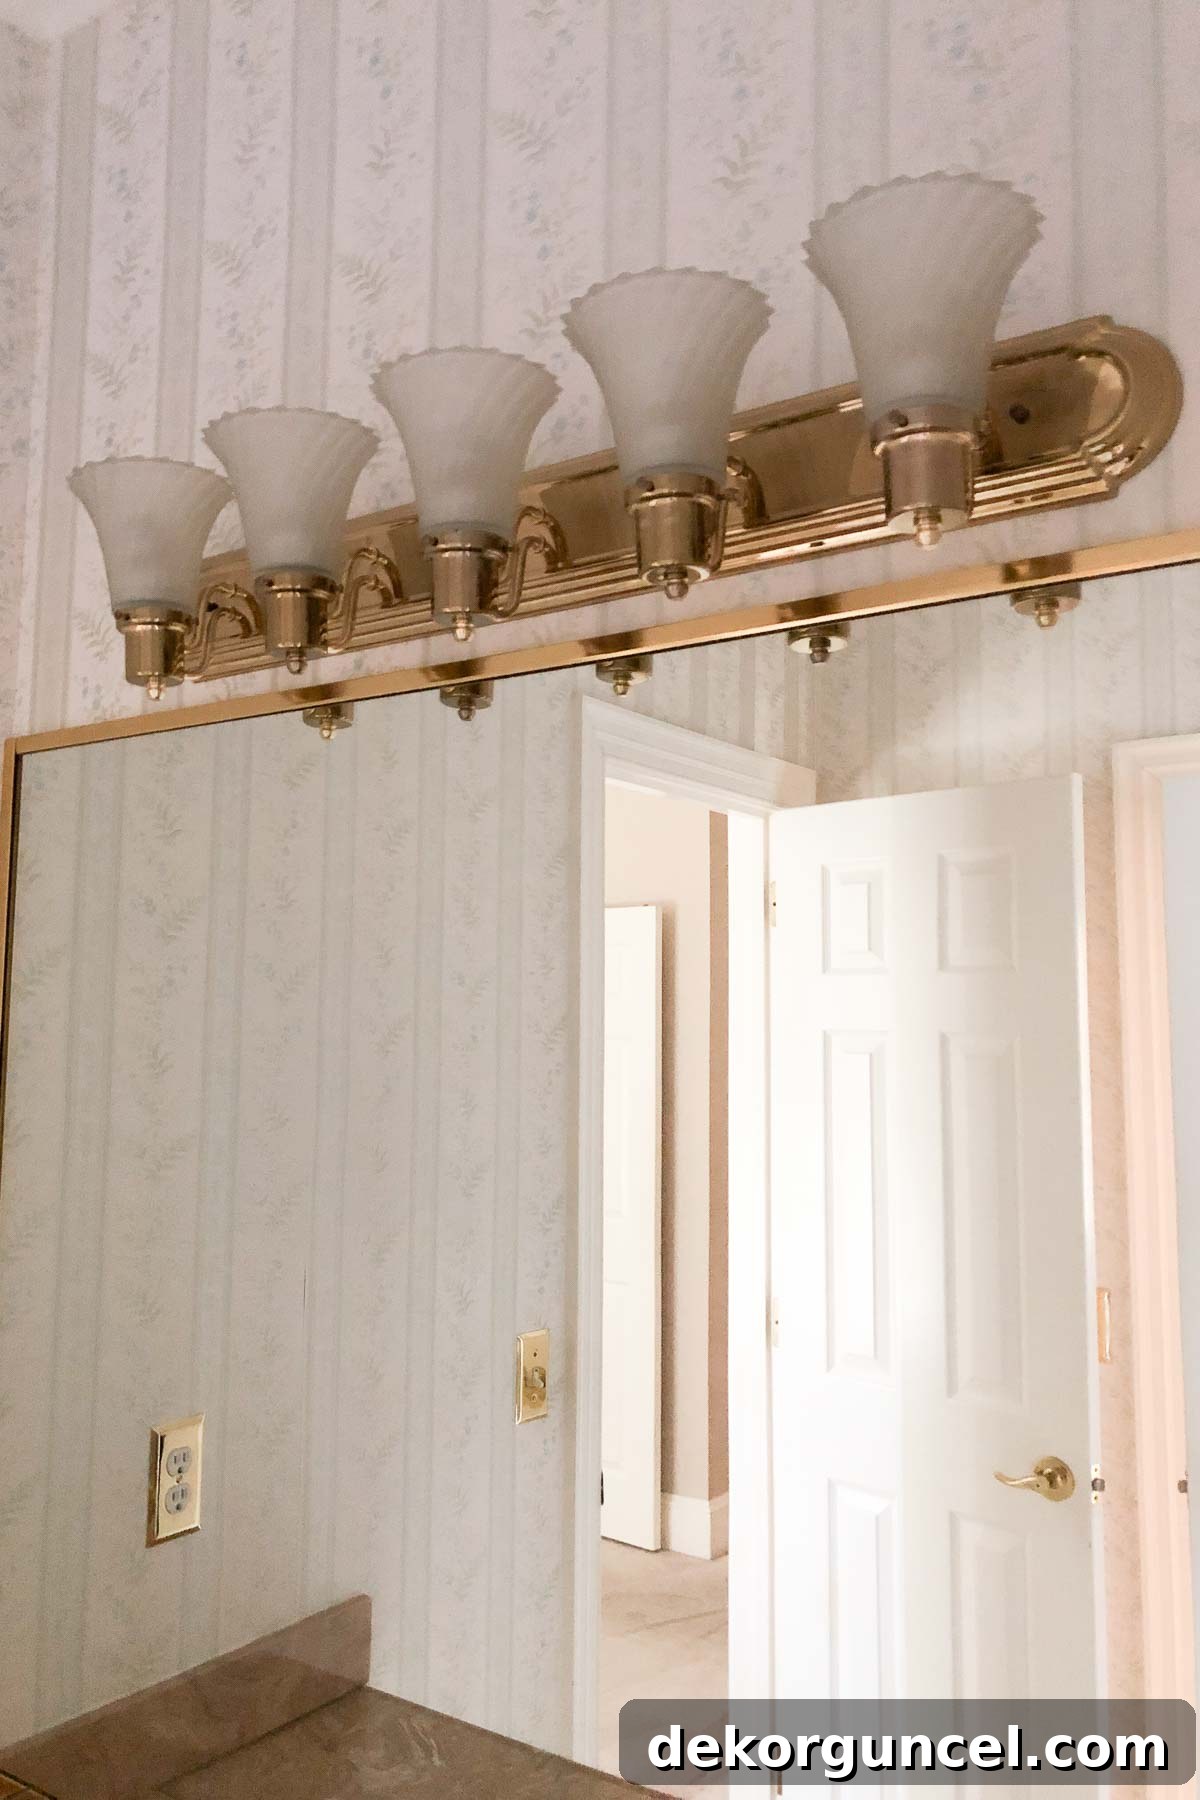
Let’s take a moment to appreciate the journey this space has taken. Here’s a glimpse of the vanity area from when we first moved into our home – a classic ‘before’ shot that truly highlights the scope of our remodel. It was functional, but undeniably dated, featuring a single sink, an expansive but uninspired mirror, and lighting that offered little in the way of style or effective illumination. The space yearned for a fresh perspective and modern amenities, capable of supporting the daily needs of a busy household.
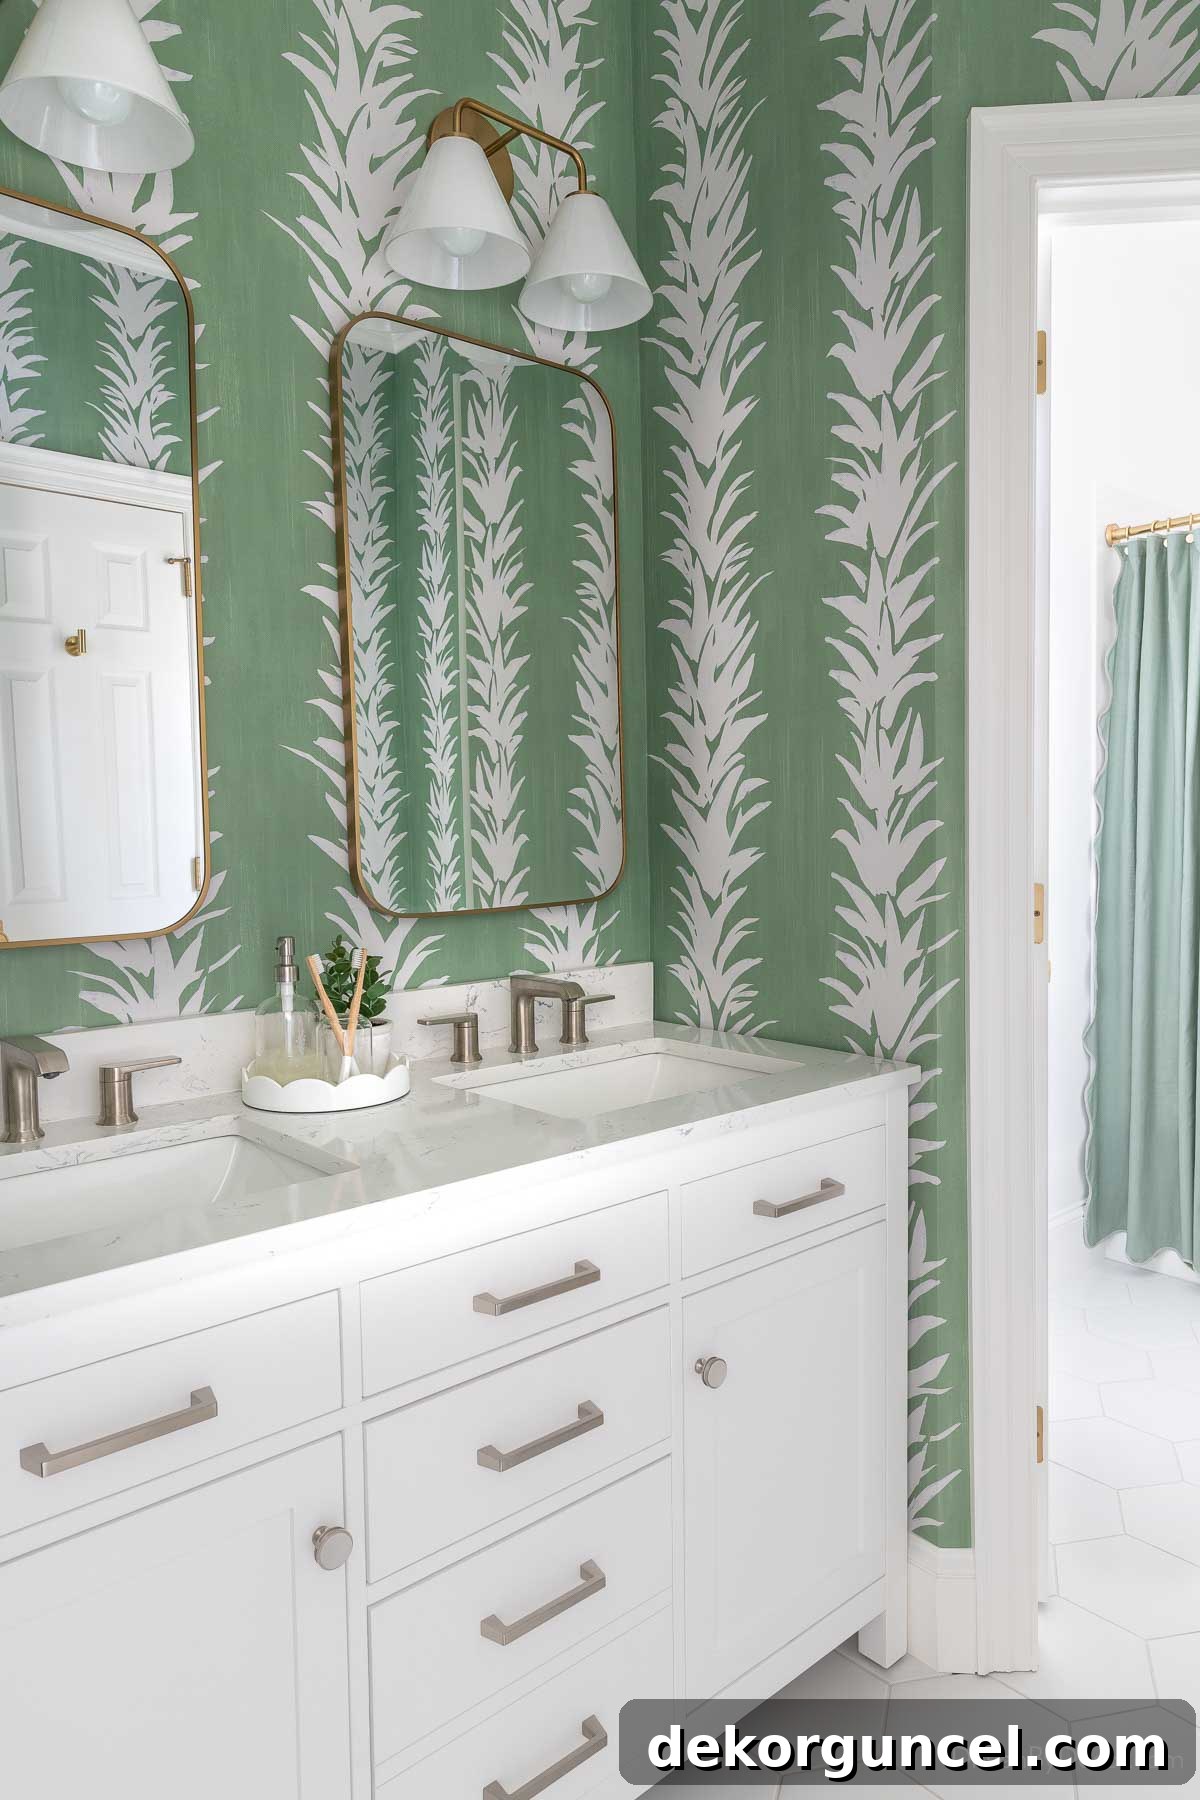
And now, prepare to be inspired! Feast your eyes on the same space today. The transformation is striking, showcasing a bright, airy, and beautifully organized double vanity designed for both aesthetics and ultimate usability. We’ve redefined this shared space with a blend of classic elegance and playful modernity, creating an environment that feels welcoming, sophisticated, and perfectly tailored for shared use. From the vibrant wallpaper to the clever storage solutions, every element contributes to a cohesive and inviting atmosphere.
Key Sources & Design Elements for the Vanity Area:
- Elegant Lotus Wallpaper
- Functional Double Vanity
- Chic 2-Light Cone Sconces
- Stylish Medicine Cabinet Mirrors
- Modern Faucets
- White Hexagon Floor Tile
A Splash of Personality: Thoughtful Wallpaper & Paint Choices
Since this bathroom is primarily used by our children, I embraced the opportunity to inject a playful yet sophisticated splash of color. The old, somewhat tired wallpaper was meticulously removed, making way for this stunning white lotus wallpaper in a soft green colorway. This particular design immediately caught my eye with its delicate watercolor effect, featuring various subtle shades of green that add depth and a serene natural feel to the space. It’s a pattern that feels both youthful and elegant, perfectly suiting the dual nature of a kids’ bathroom that also needs to appeal to adults.
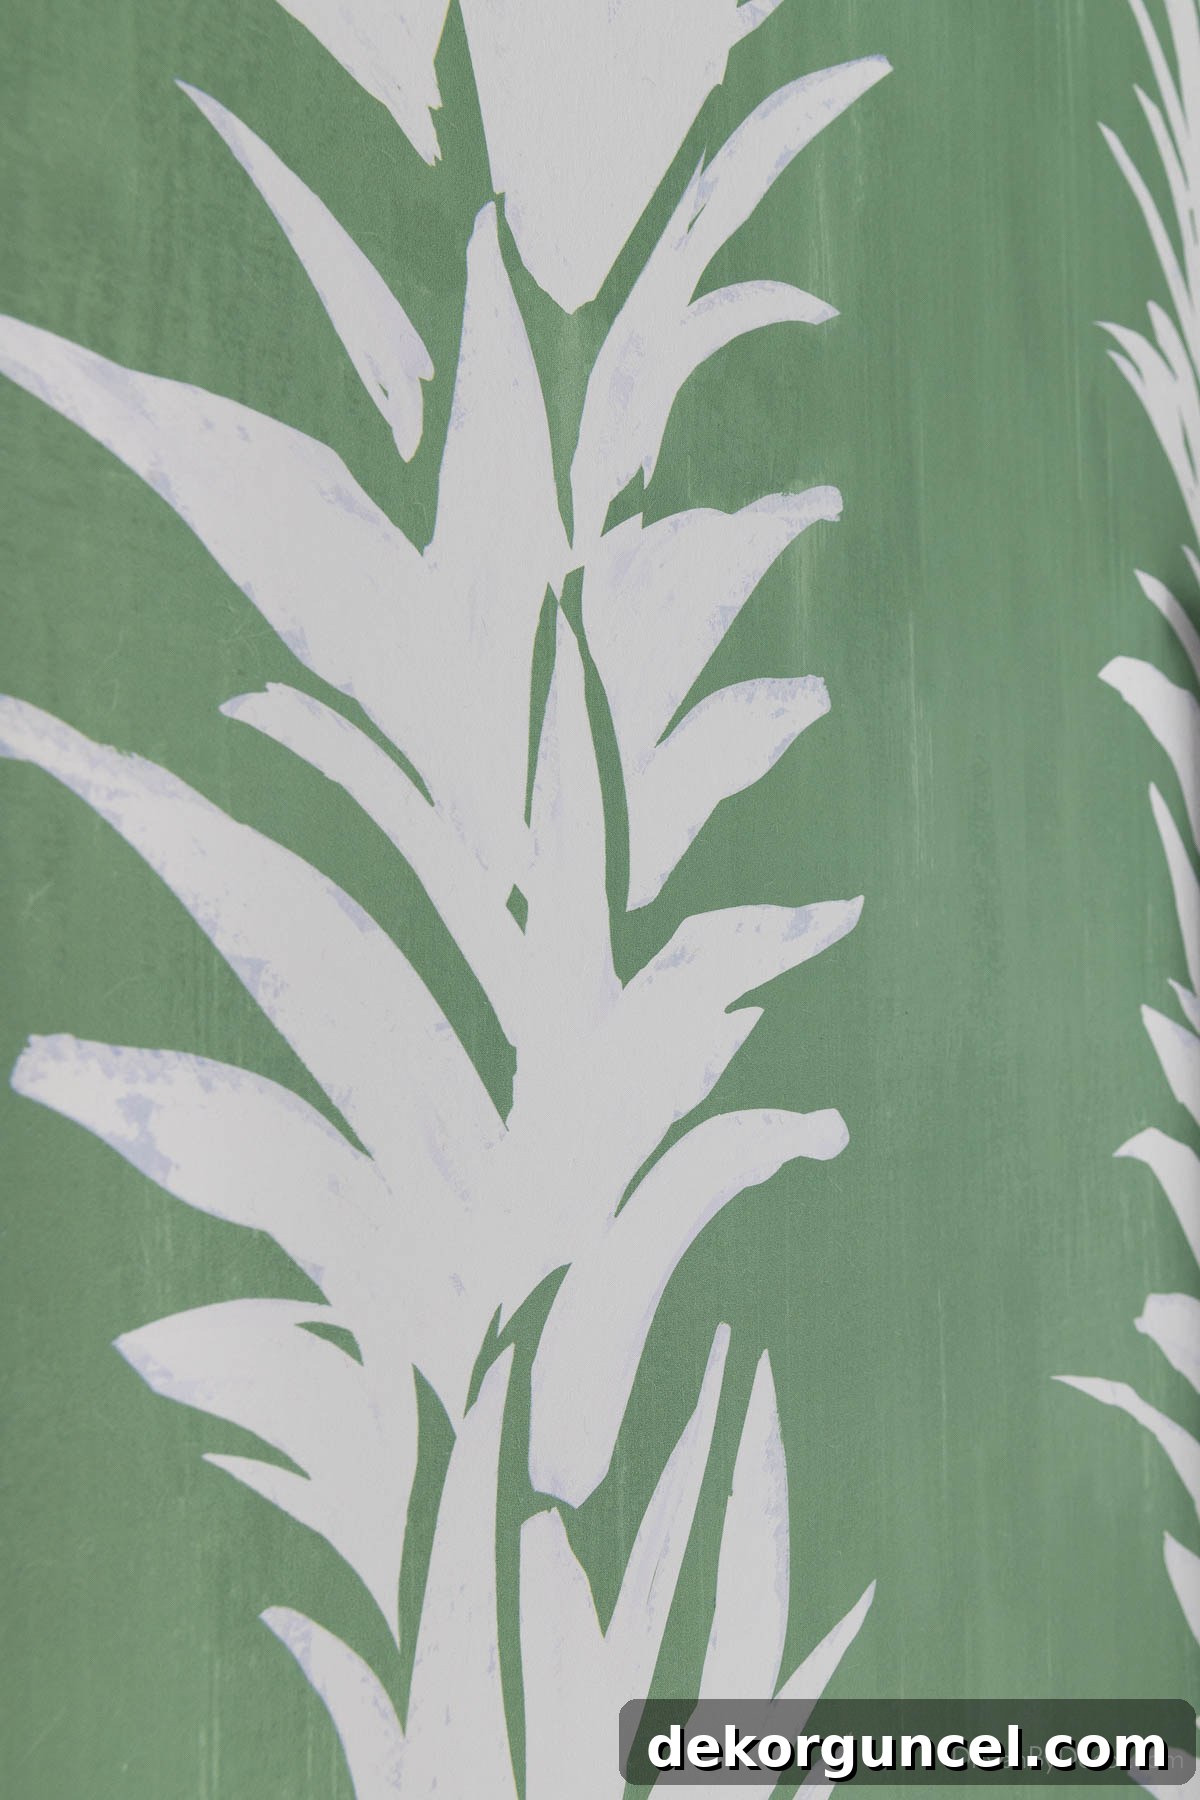
While both sections of the bathroom originally sported wallpaper, I made a deliberate choice to re-wallpaper only the vanity portion. The thought of floor-to-ceiling wallpaper right next to the toilet and shower felt a bit overwhelming and less practical for a high-moisture area. Instead, to maintain a harmonious flow and a clean aesthetic, the walls in the toilet and tub/shower area were painted with Benjamin Moore’s exquisite Chantilly Lace. This crisp, bright white provided the perfect complement to the green wallpaper, creating a balanced and refreshing atmosphere throughout the entire bathroom, ensuring durability and ease of cleaning in the wet zone.
Curious about the magic of Benjamin Moore Chantilly Lace? Dive deeper into its versatility with my detailed Chantilly Lace paint color review. You might also find invaluable insights in my post on selecting the best white paint for interior walls, offering proven tips for achieving that perfect bright and airy feel in any space.
The Heart of the Bathroom: A Double Vanity with Intelligent Storage Solutions
One of the most impactful changes in this remodel was replacing the old, single-sink vanity with this magnificent 54-inch double vanity. It proved to be the absolute perfect fit for our vanity niche, maximizing usable counter space and accommodating two users simultaneously – a crucial feature for a busy Jack and Jill bathroom. This particular vanity is a true gem, not only for its sleek design but also for its incredible versatility, available in a wide array of sizes and color options to suit any aesthetic preference. You can explore the full range of options here, making it easy to find a perfect match for your own bathroom design needs.
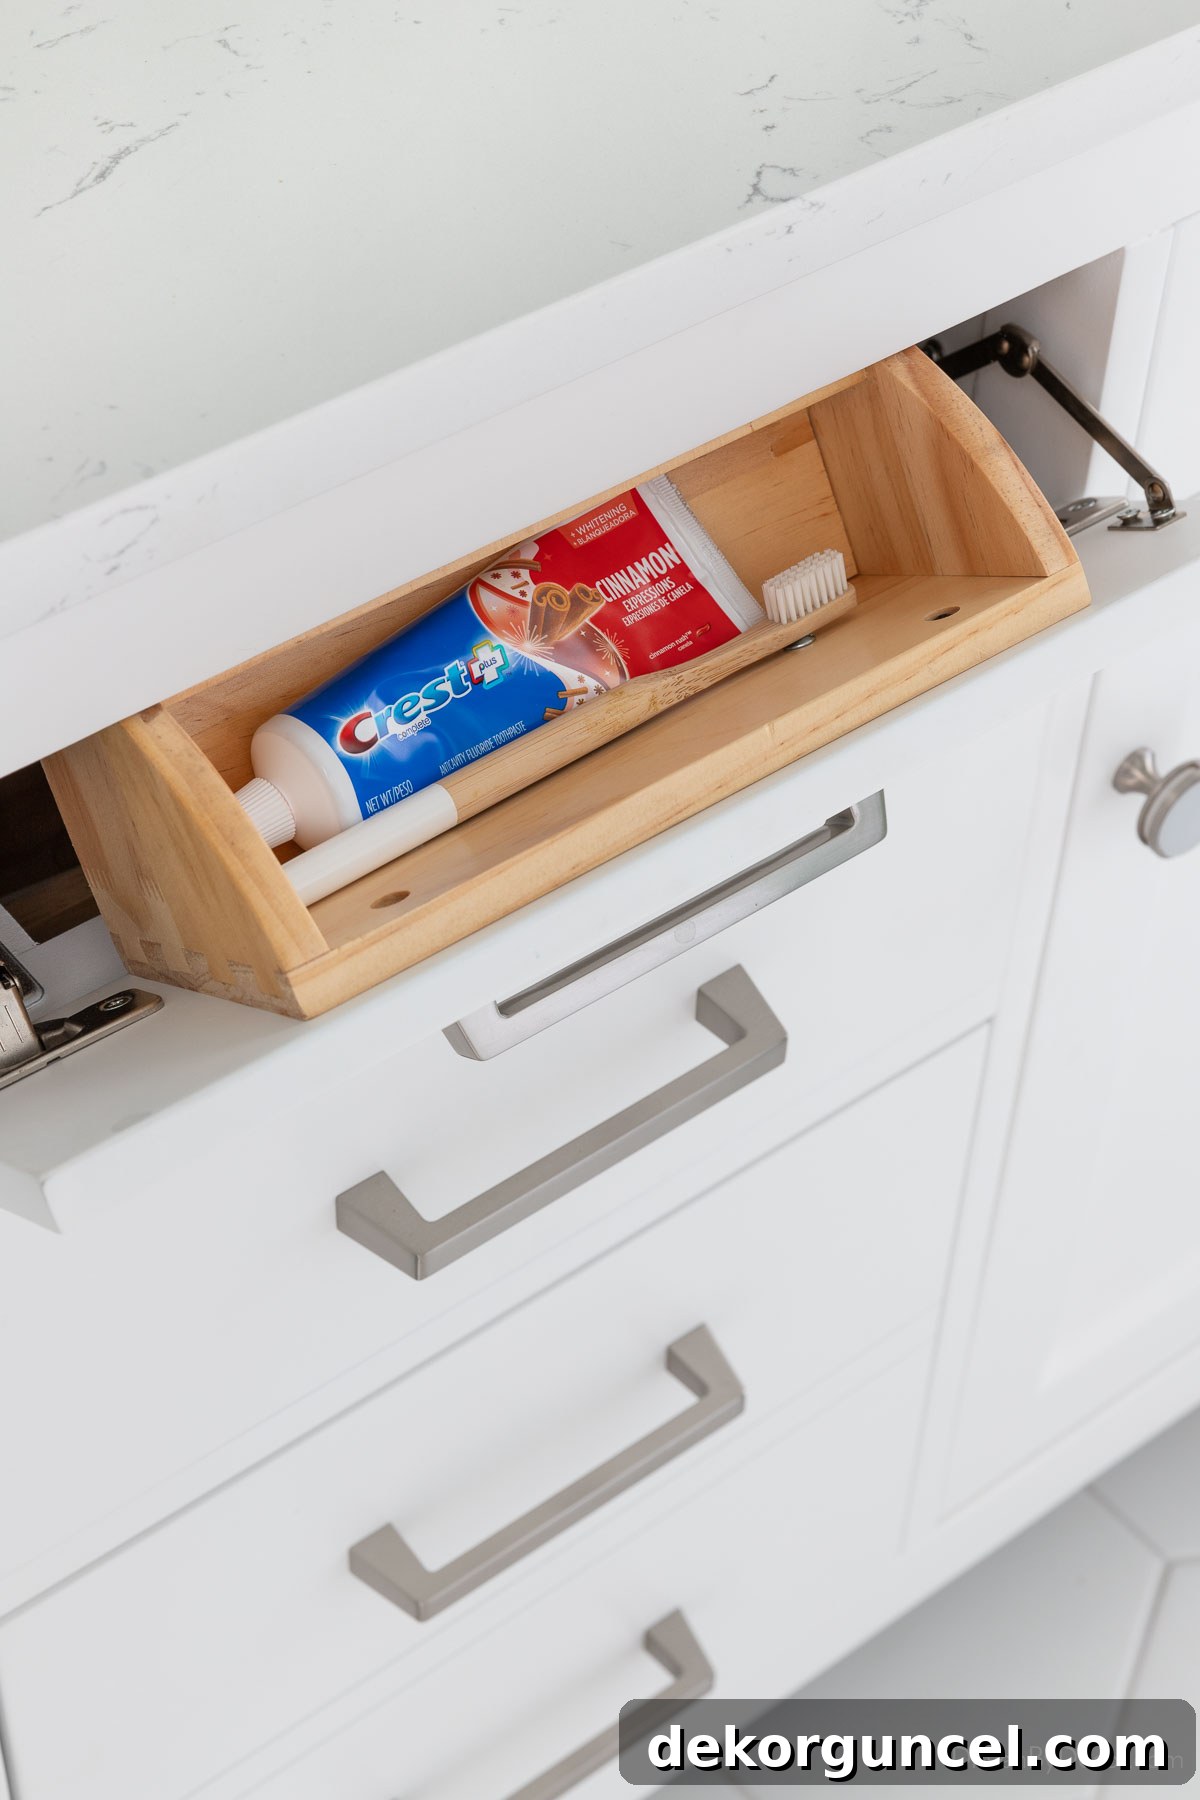
Beyond its striking appearance, this double vanity impressed us with its thoughtful organizational perks. It arrived complete with the vanity top and sinks, and boasts features designed to minimize clutter and maximize efficiency. A standout inclusion is the built-in tip-out tray, ingeniously tucked away beneath the countertop. This small but mighty addition provides a discreet spot for often-used items like toothbrushes and toothpaste, keeping the main counter free and pristine – a simple solution that makes a big difference in maintaining an uncluttered surface.
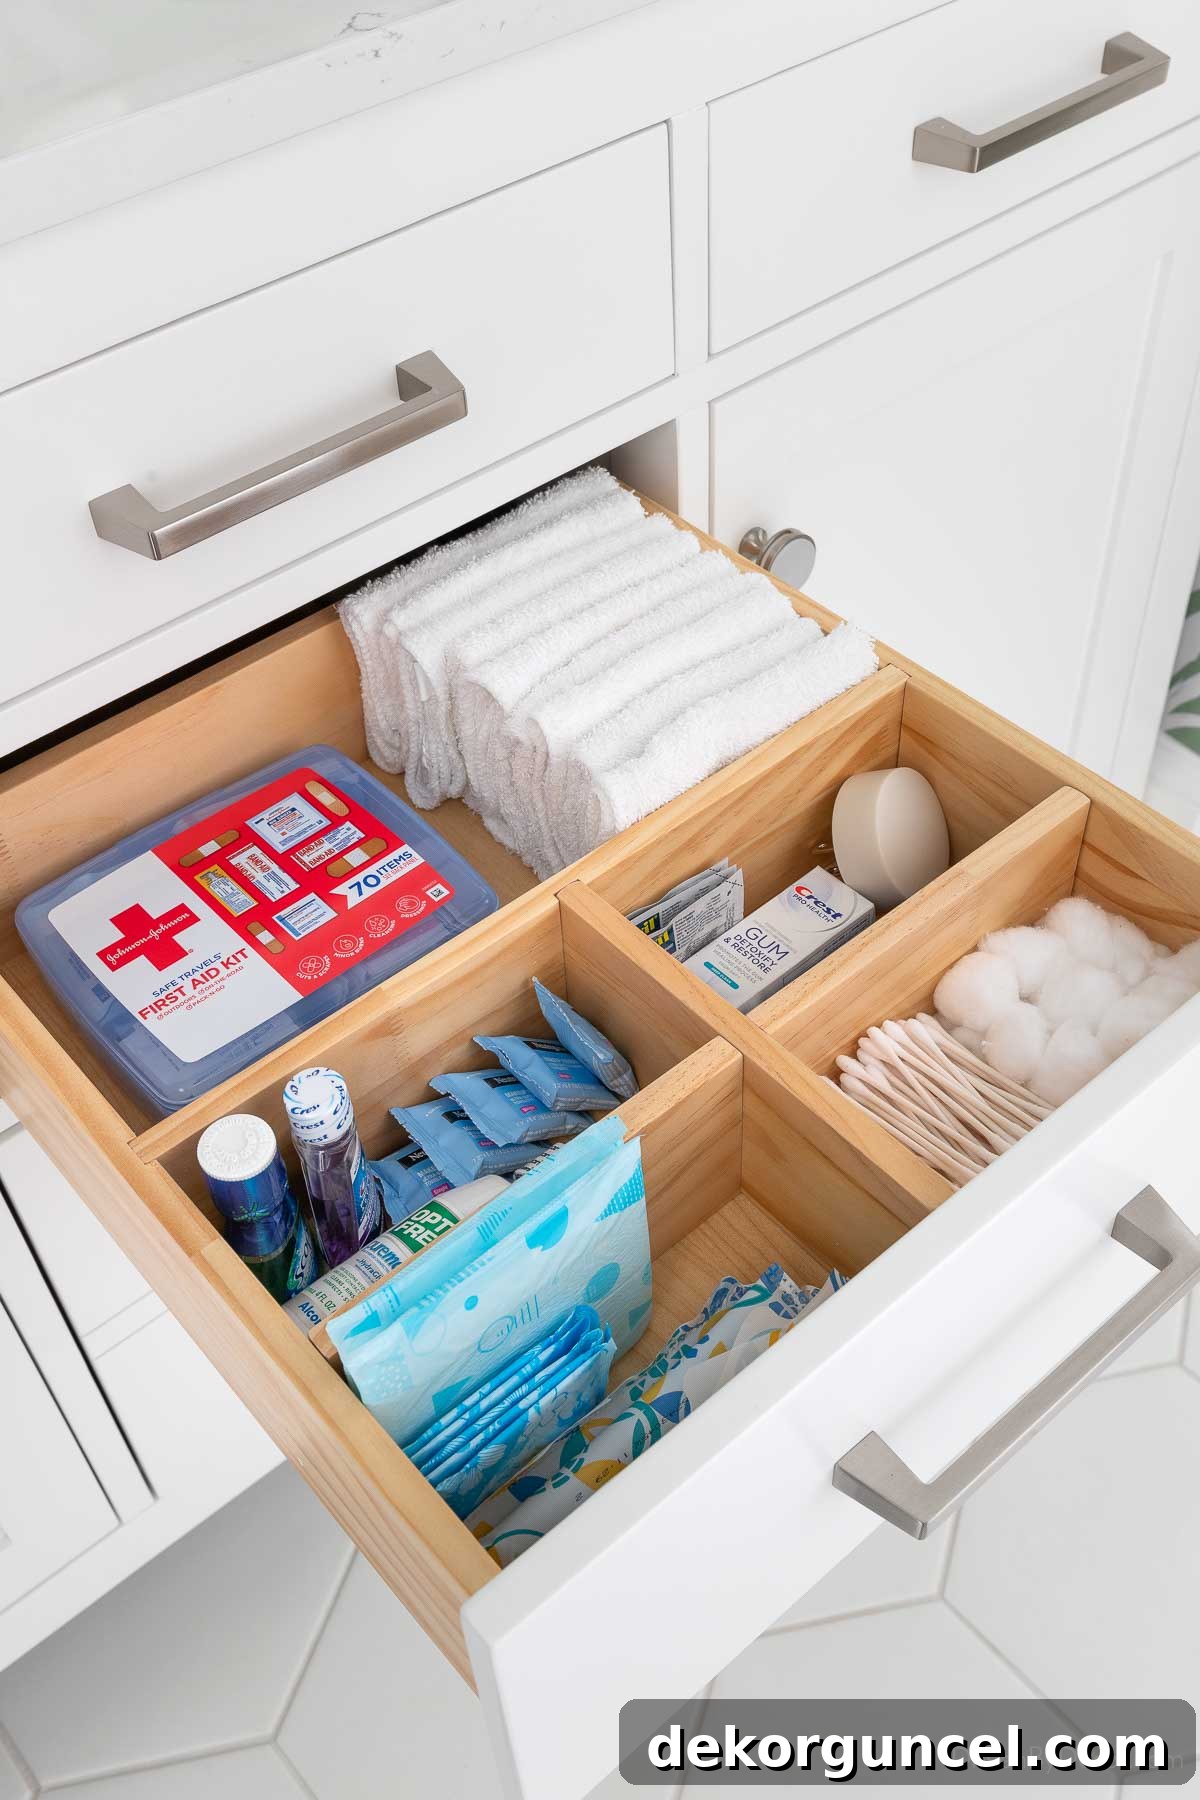
Another brilliant feature is a spacious drawer equipped with built-in wood dividers. This custom organization allowed me to neatly stock washcloths, a compact first aid kit, and extra toiletries, ensuring guests feel comfortable and have everything they might need close at hand. This level of internal organization is invaluable in preventing the chaos that can often creep into shared bathroom spaces, making it easy for everyone to find what they need and put things back in their place.
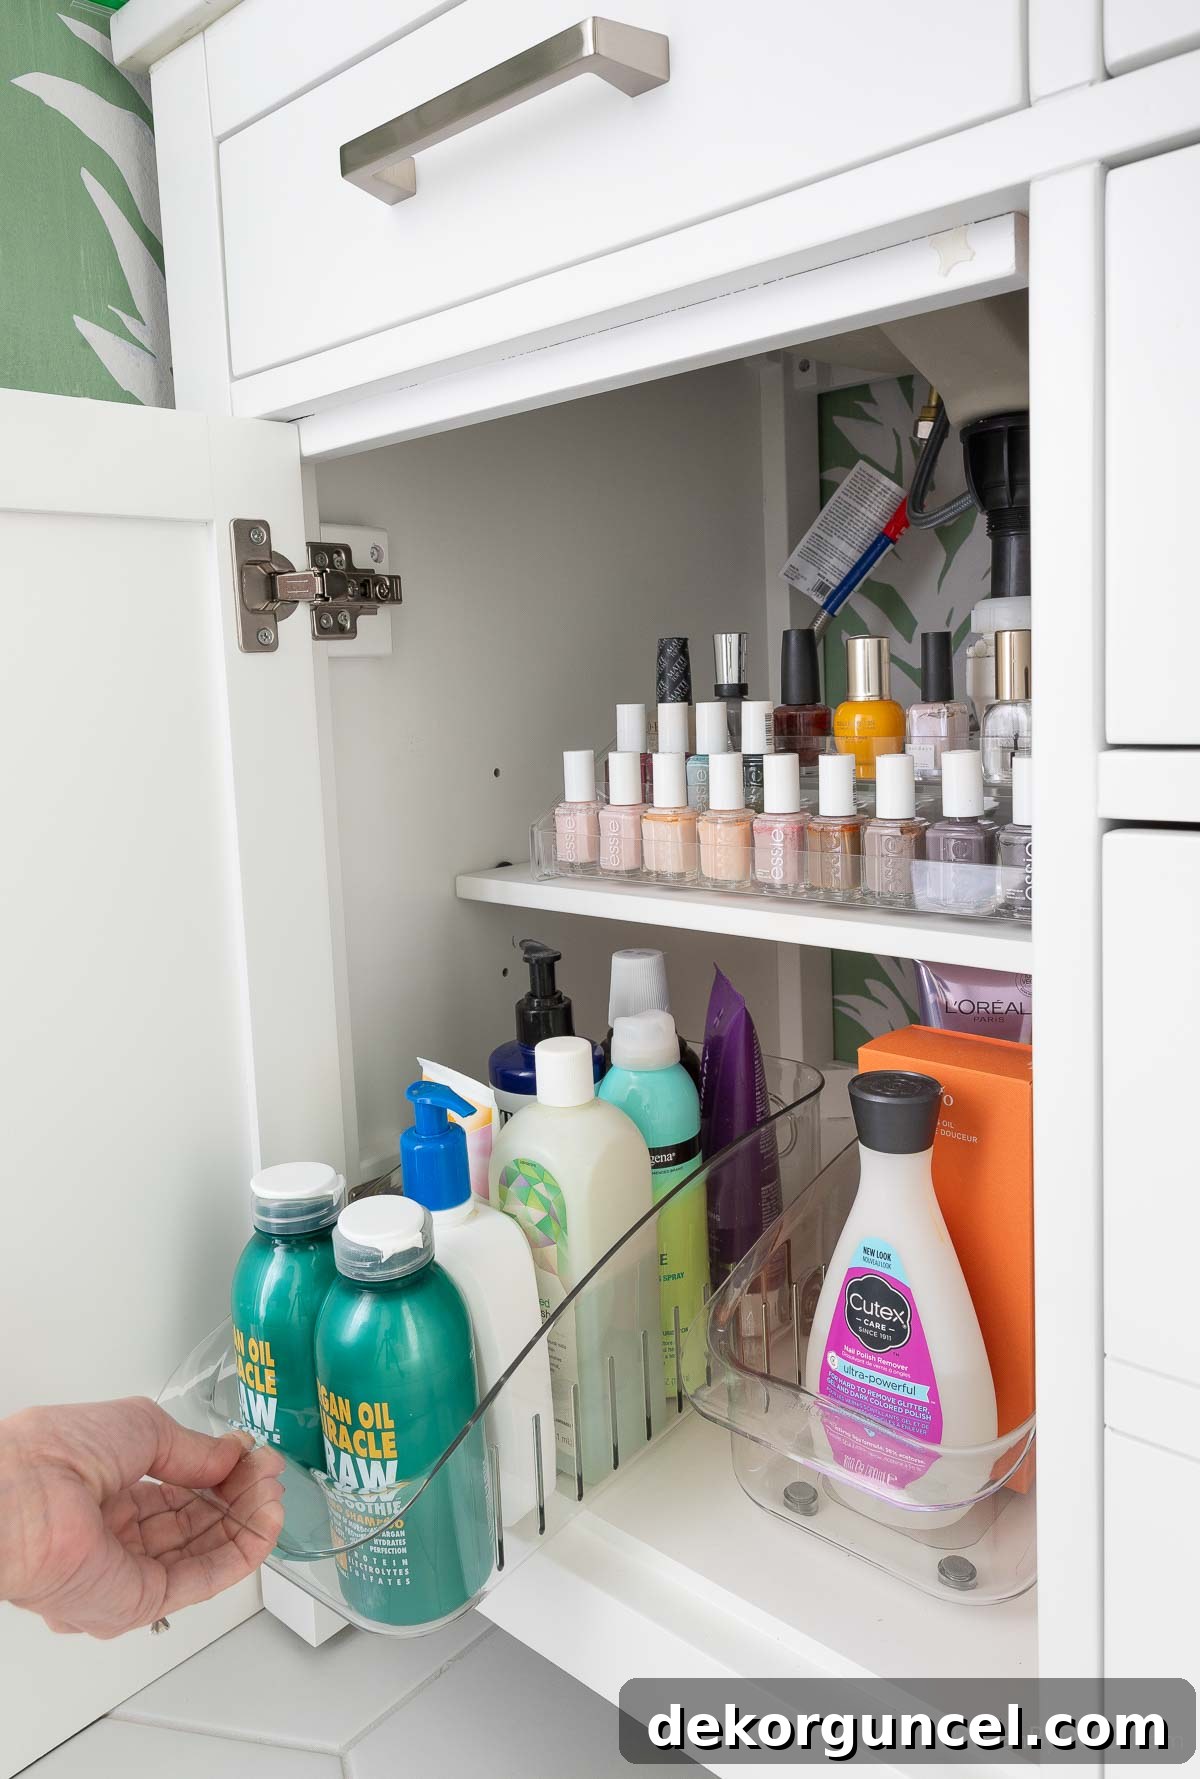
The deep bottom drawer provides ample space for larger items, making it the perfect home for a hair dryer, curling irons, and other styling tools, keeping them out of sight until needed. Furthermore, the cabinets beneath each sink feature adjustable shelves, offering flexible storage solutions that can adapt to changing needs. On the left side, I’ve optimized this space with this clear acrylic nail polish organizer on the top shelf, and two of these handy 6-inch roll-out organizers with adjustable dividers on the bottom shelf, perfect for small bottles and various personal care items, making everything easily visible and accessible.
The right side of the vanity smartly accommodates a small trash can and a few additional organizers, maintaining the clean and functional theme throughout the entire storage system. This meticulous approach to organization is key to a functional and serene shared bathroom.
Elevated Hardware: The Finishing Touch on the Vanity
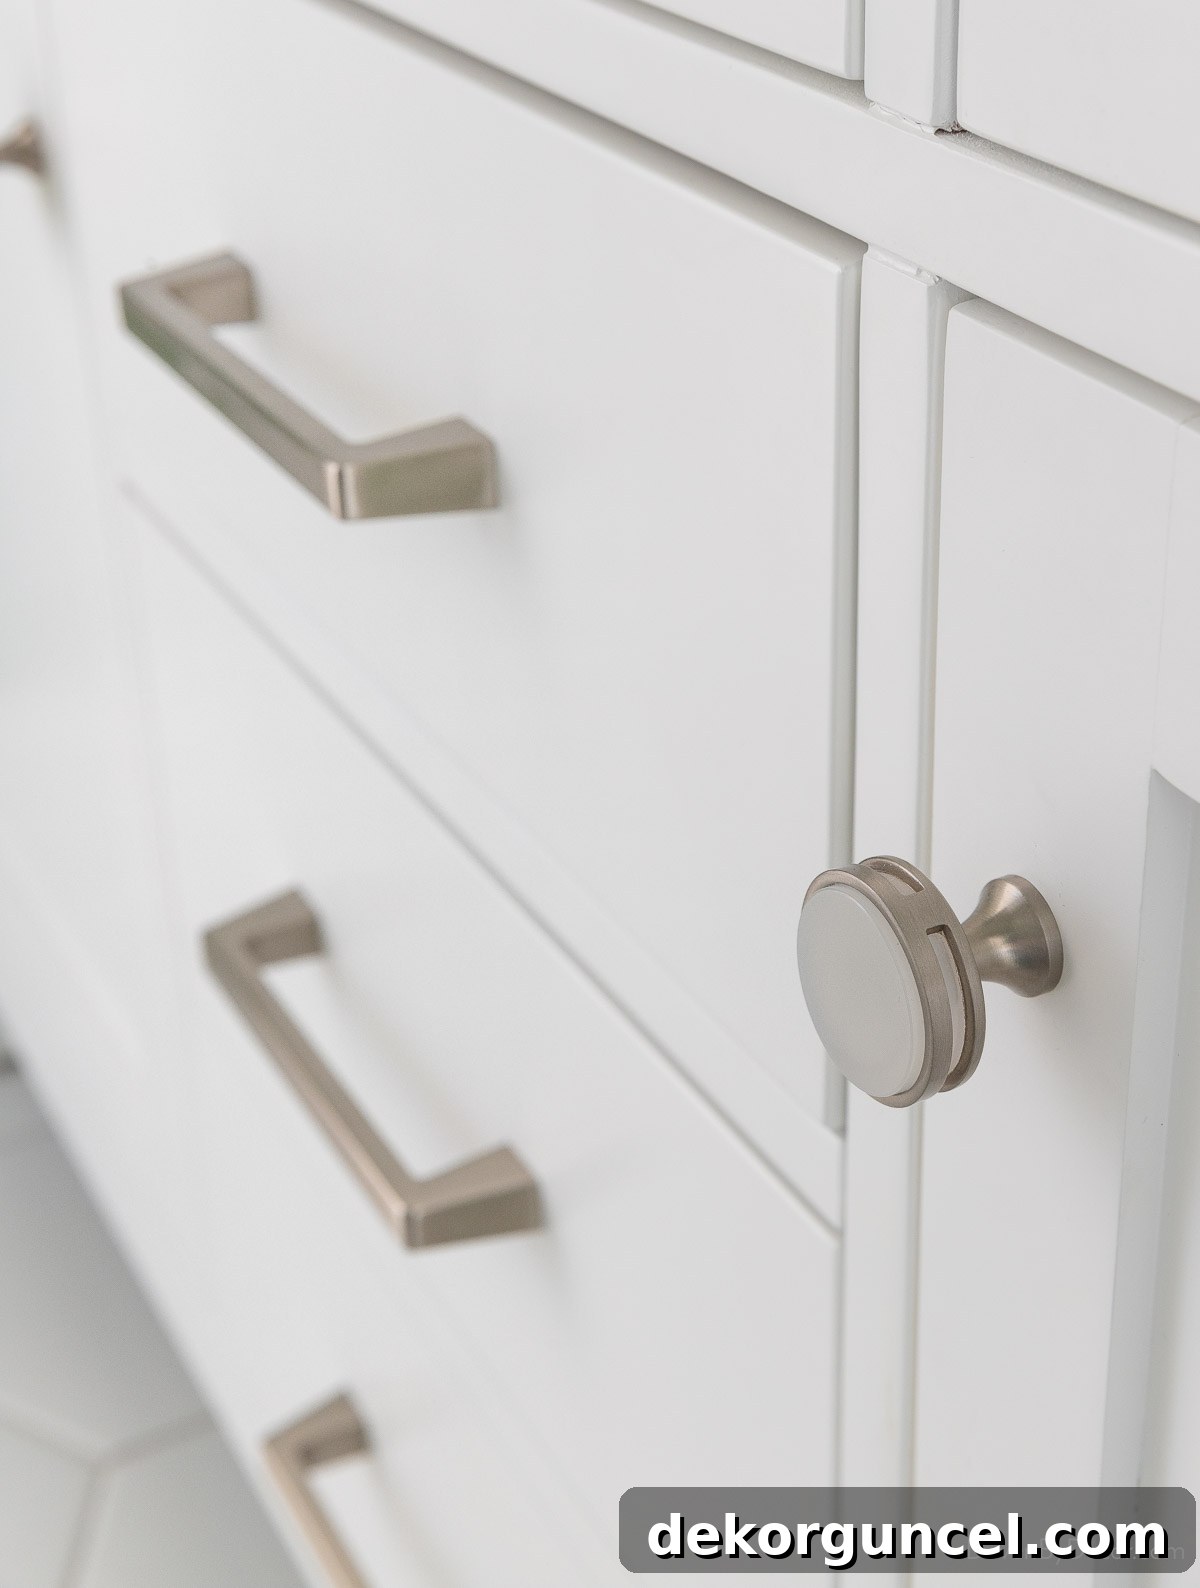
While the vanity came with decent knobs and pulls, I believe that hardware is akin to jewelry for furniture – it can truly elevate the entire piece and infuse it with personality. Therefore, I upgraded them to these sophisticated satin nickel pulls and these elegant satin nickel and frosted knobs. The combination provides a subtle contrast and a modern, cohesive look that ties in beautifully with the other metallic accents in the room, creating a polished and refined aesthetic.
Thoughtful Vanity Top Styling for Daily Use
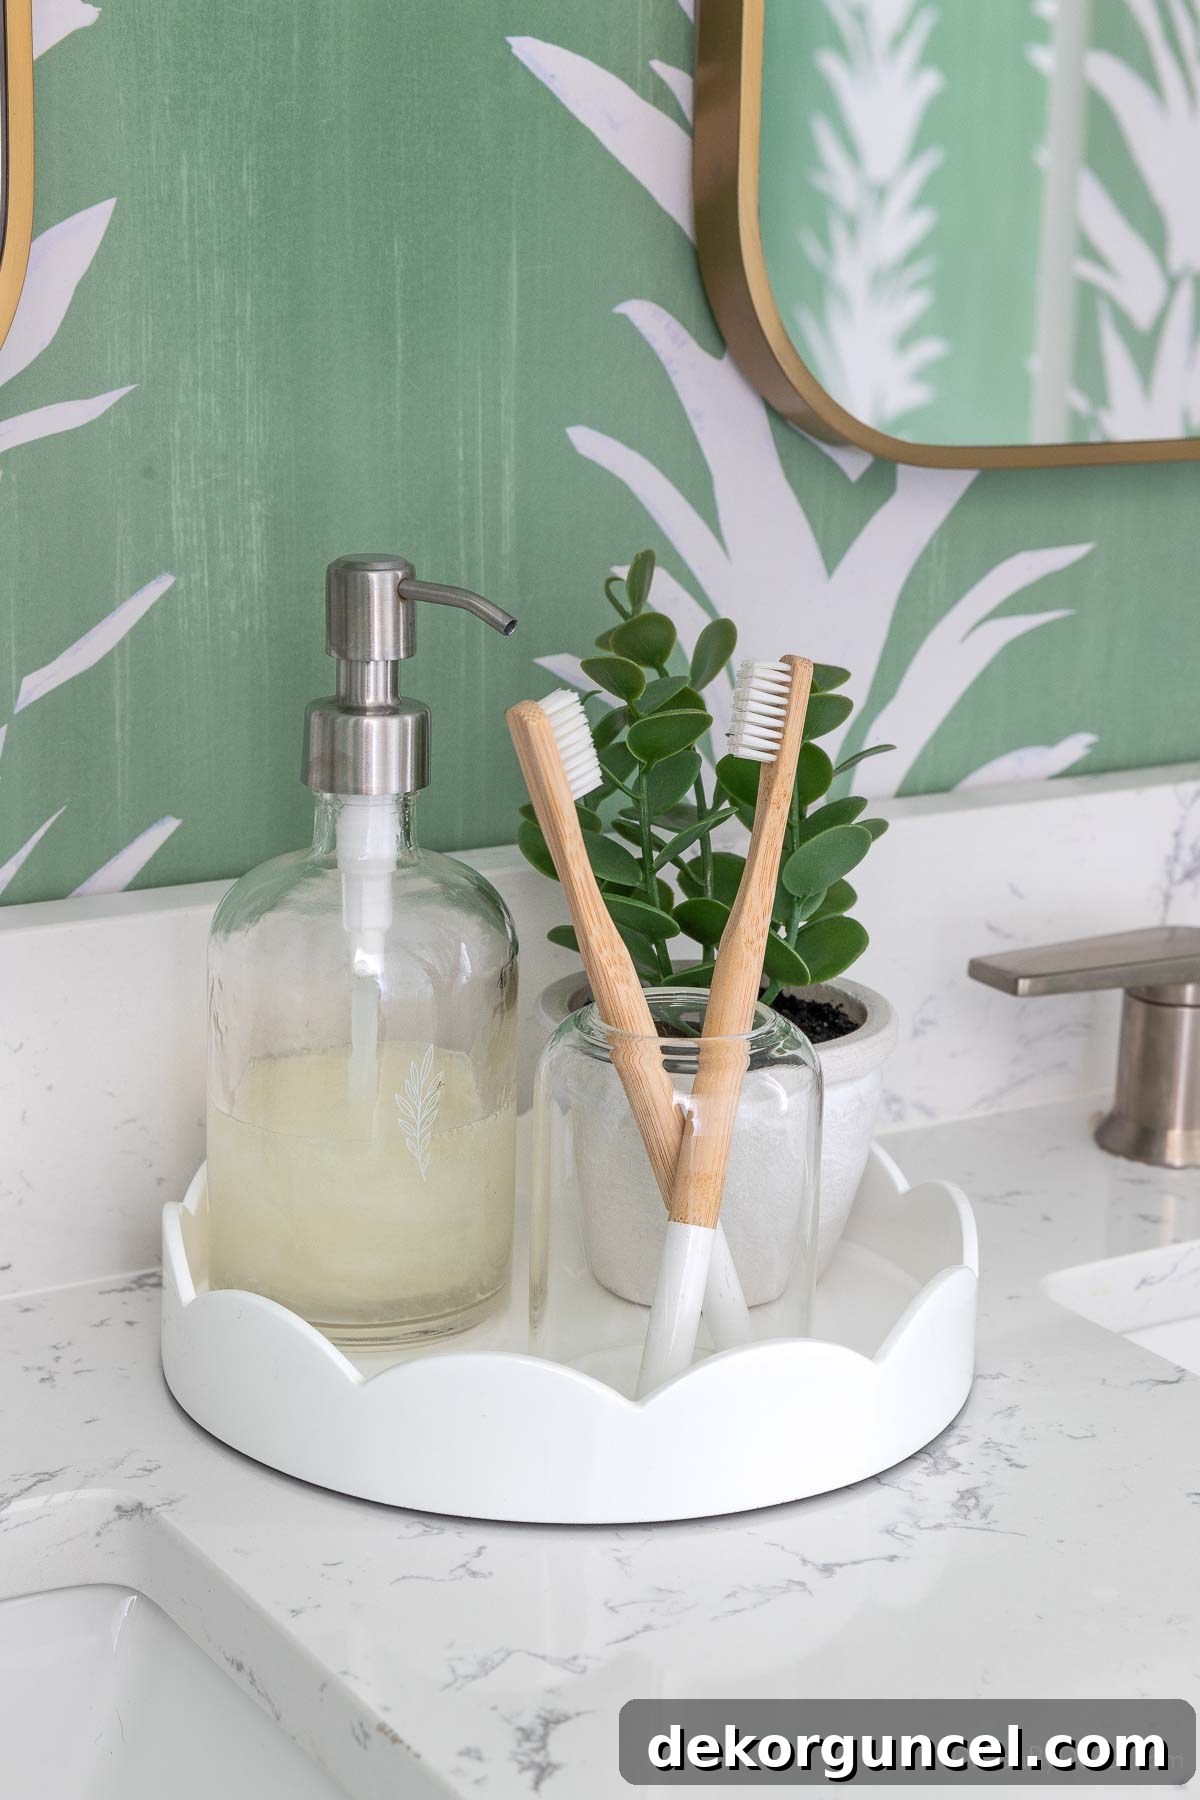
To further enhance the vanity’s appeal, I carefully selected decorative and functional items for the countertop that would be both beautiful and practical for daily use. A beautiful 8.6-inch round scalloped tray sits perfectly between the two sinks, serving as a charming focal point and containing smaller items. On this tray, you’ll find a mini faux succulent, adding a touch of greenery without the maintenance, eco-friendly bamboo toothbrushes elegantly displayed in one of these delicate glass bud vases, and a sleek soap pump similar to this one. These elements combine to create a welcoming, orderly, and hygienic vanity surface, perfect for a shared space.
Sleek Faucets for Modern Appeal and Durability
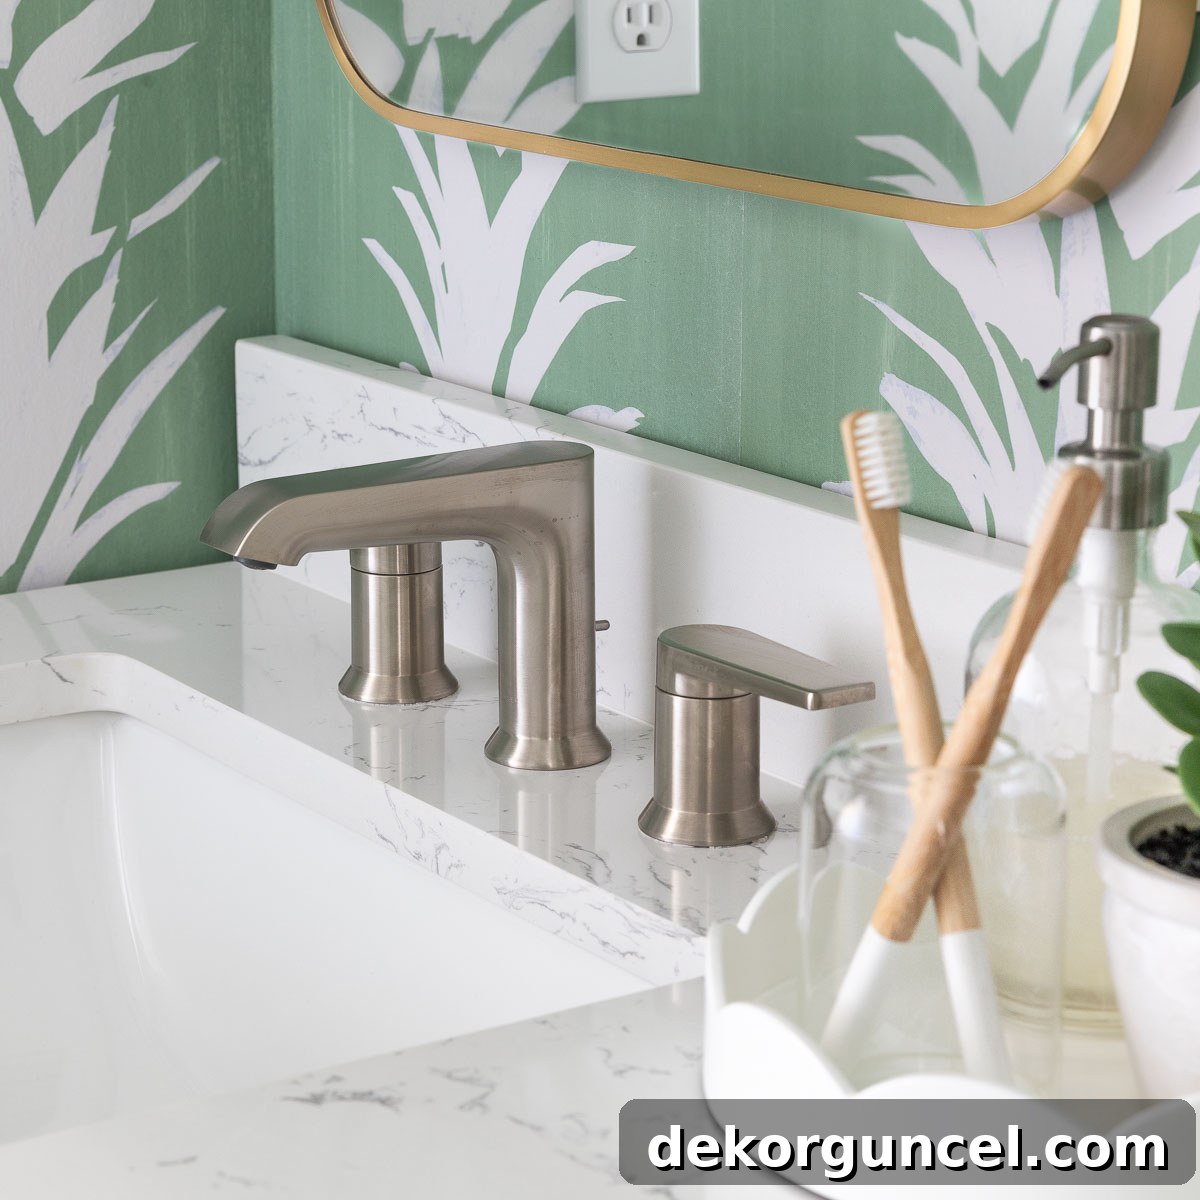
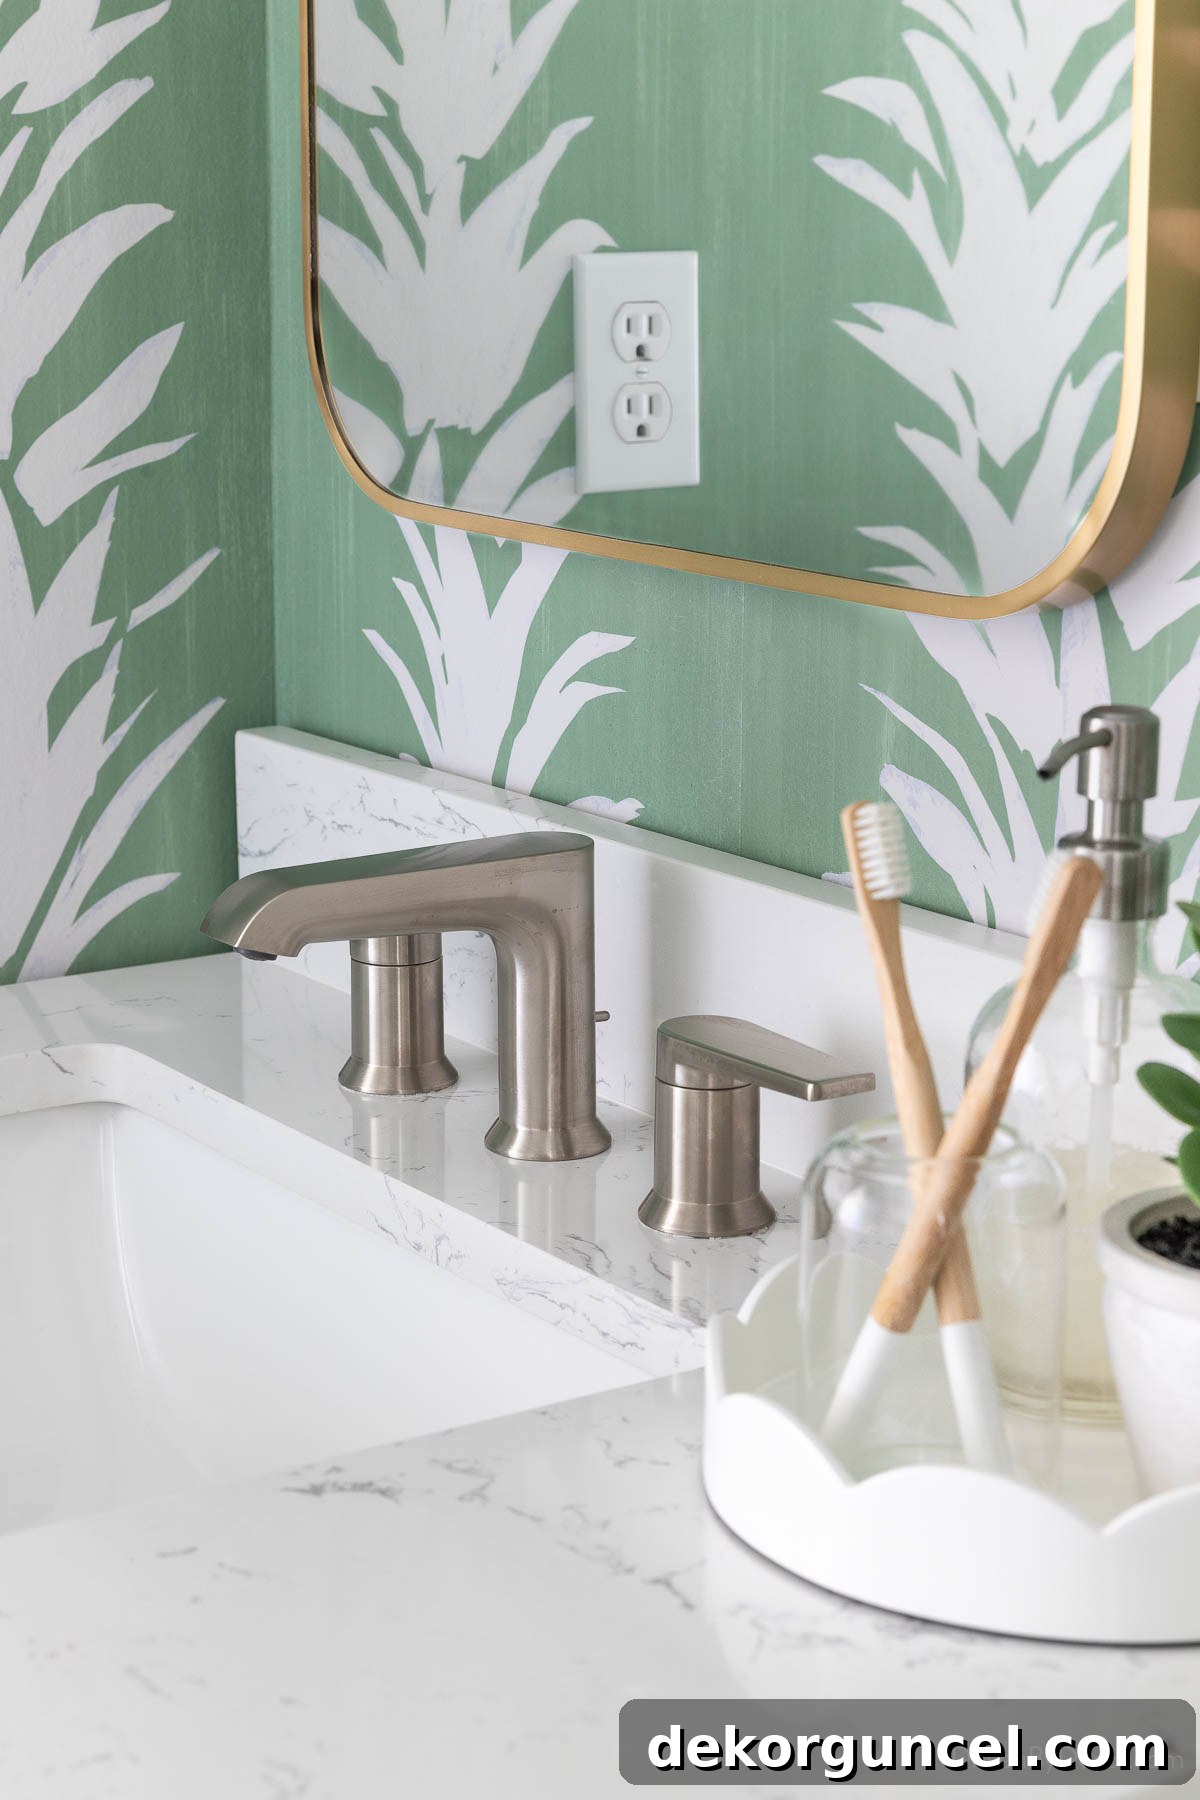
Our choice of faucets was guided by a desire for clean, simple lines that wouldn’t detract from the vanity’s overall elegance, while also providing robust functionality. We ultimately selected these brushed nickel faucets, which offer a contemporary look and excellent durability. Their minimalist design perfectly complements the updated aesthetic of the double vanity, providing a sophisticated touch to the washing area. The brushed nickel finish is not only stylish but also practical, resisting fingerprints and water spots, making maintenance a breeze in a high-traffic bathroom.
Illuminating Style: Comprehensive Mirrors and Lighting Upgrades
The old mirror and vanity lights were prime candidates for a dramatic transformation. What was once a basic setup, perhaps lacking in both style and function, now exudes modern sophistication and offers enhanced utility. The original oversized mirror made the space feel less intimate, and the lighting was neither aesthetically pleasing nor highly effective. Let’s revisit the ‘before’ to truly appreciate the extent of this upgrade:
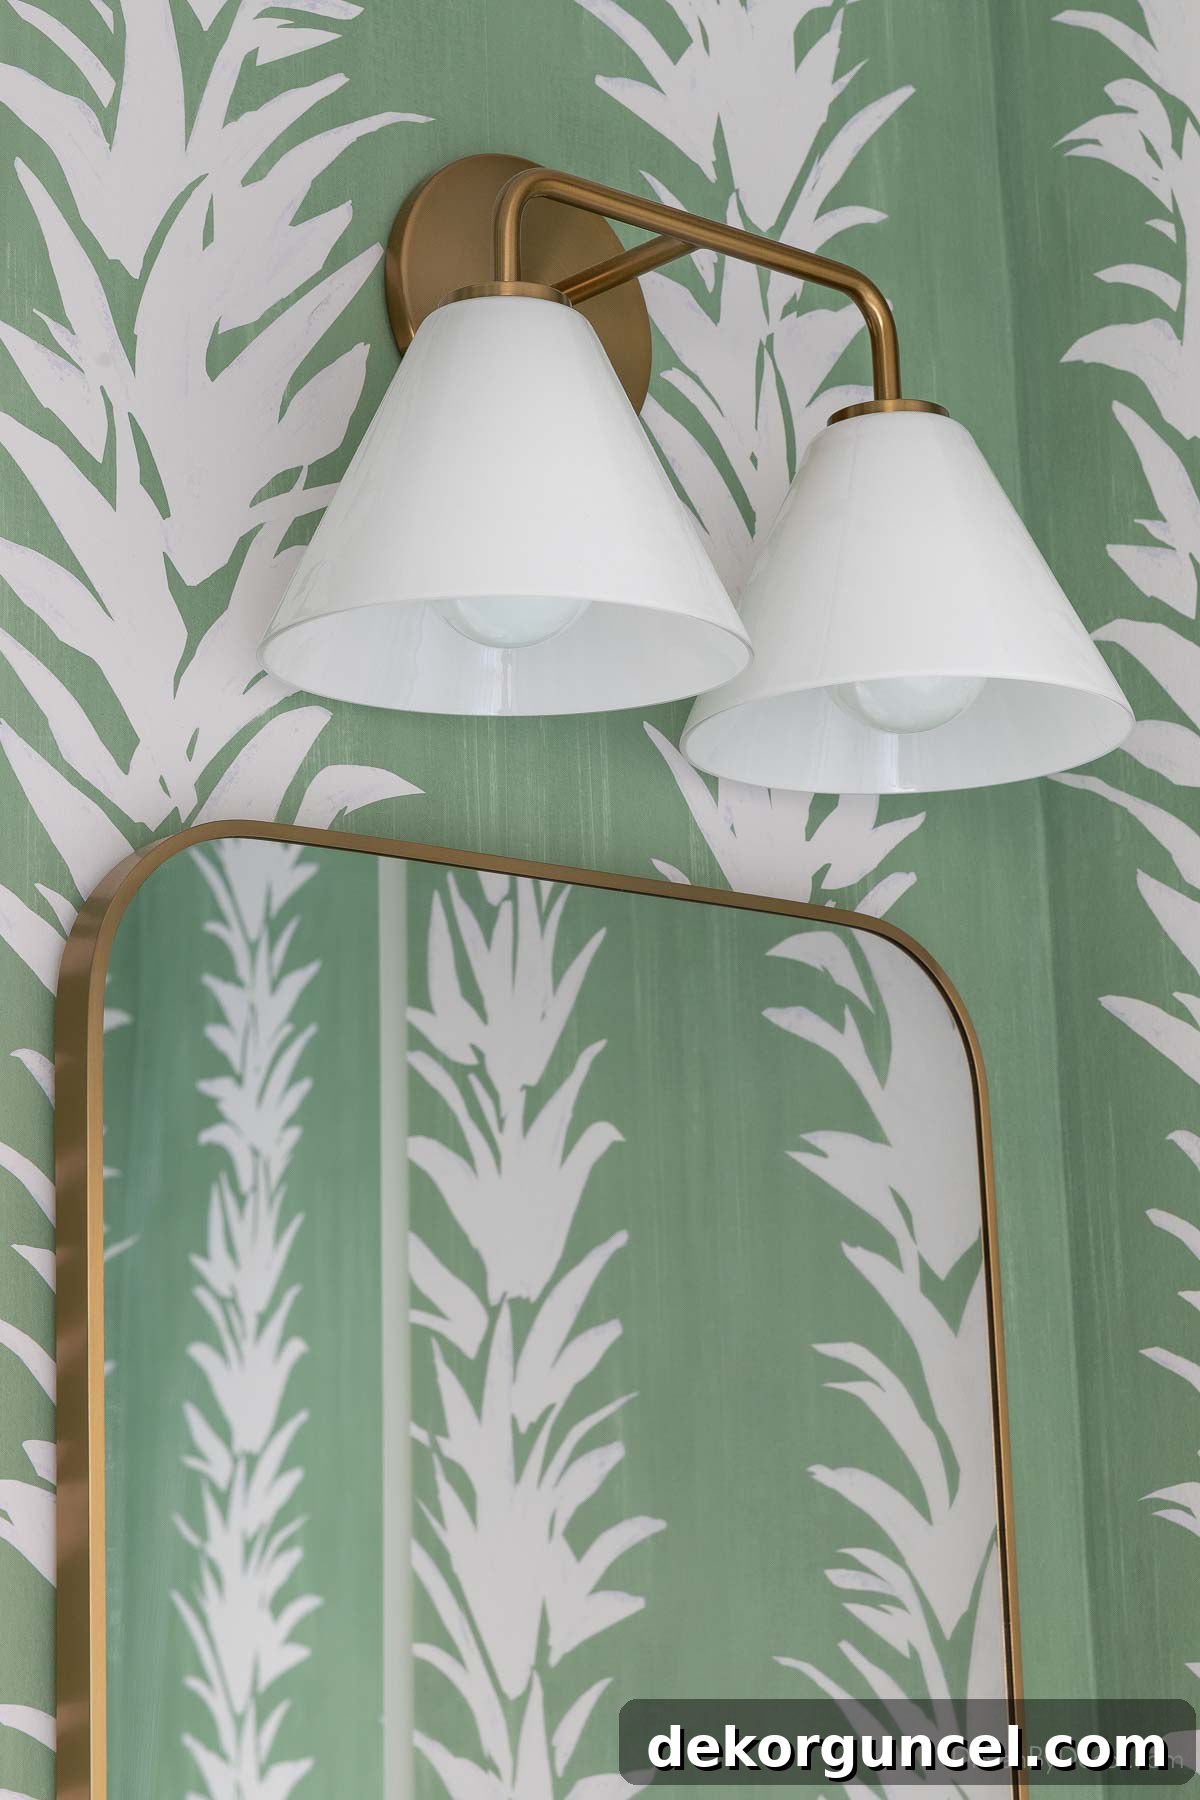
Today, the vanity area is brilliantly illuminated by these charming antique brass cone sconces, paired with elegant milk shades that cast a soft, inviting glow. Flanking these lights are these sophisticated antique brass medicine cabinet mirrors. This combination not only provides excellent task lighting essential for daily routines but also adds a touch of vintage-inspired glamour and functionality to the contemporary design, elevating the entire room’s ambiance.
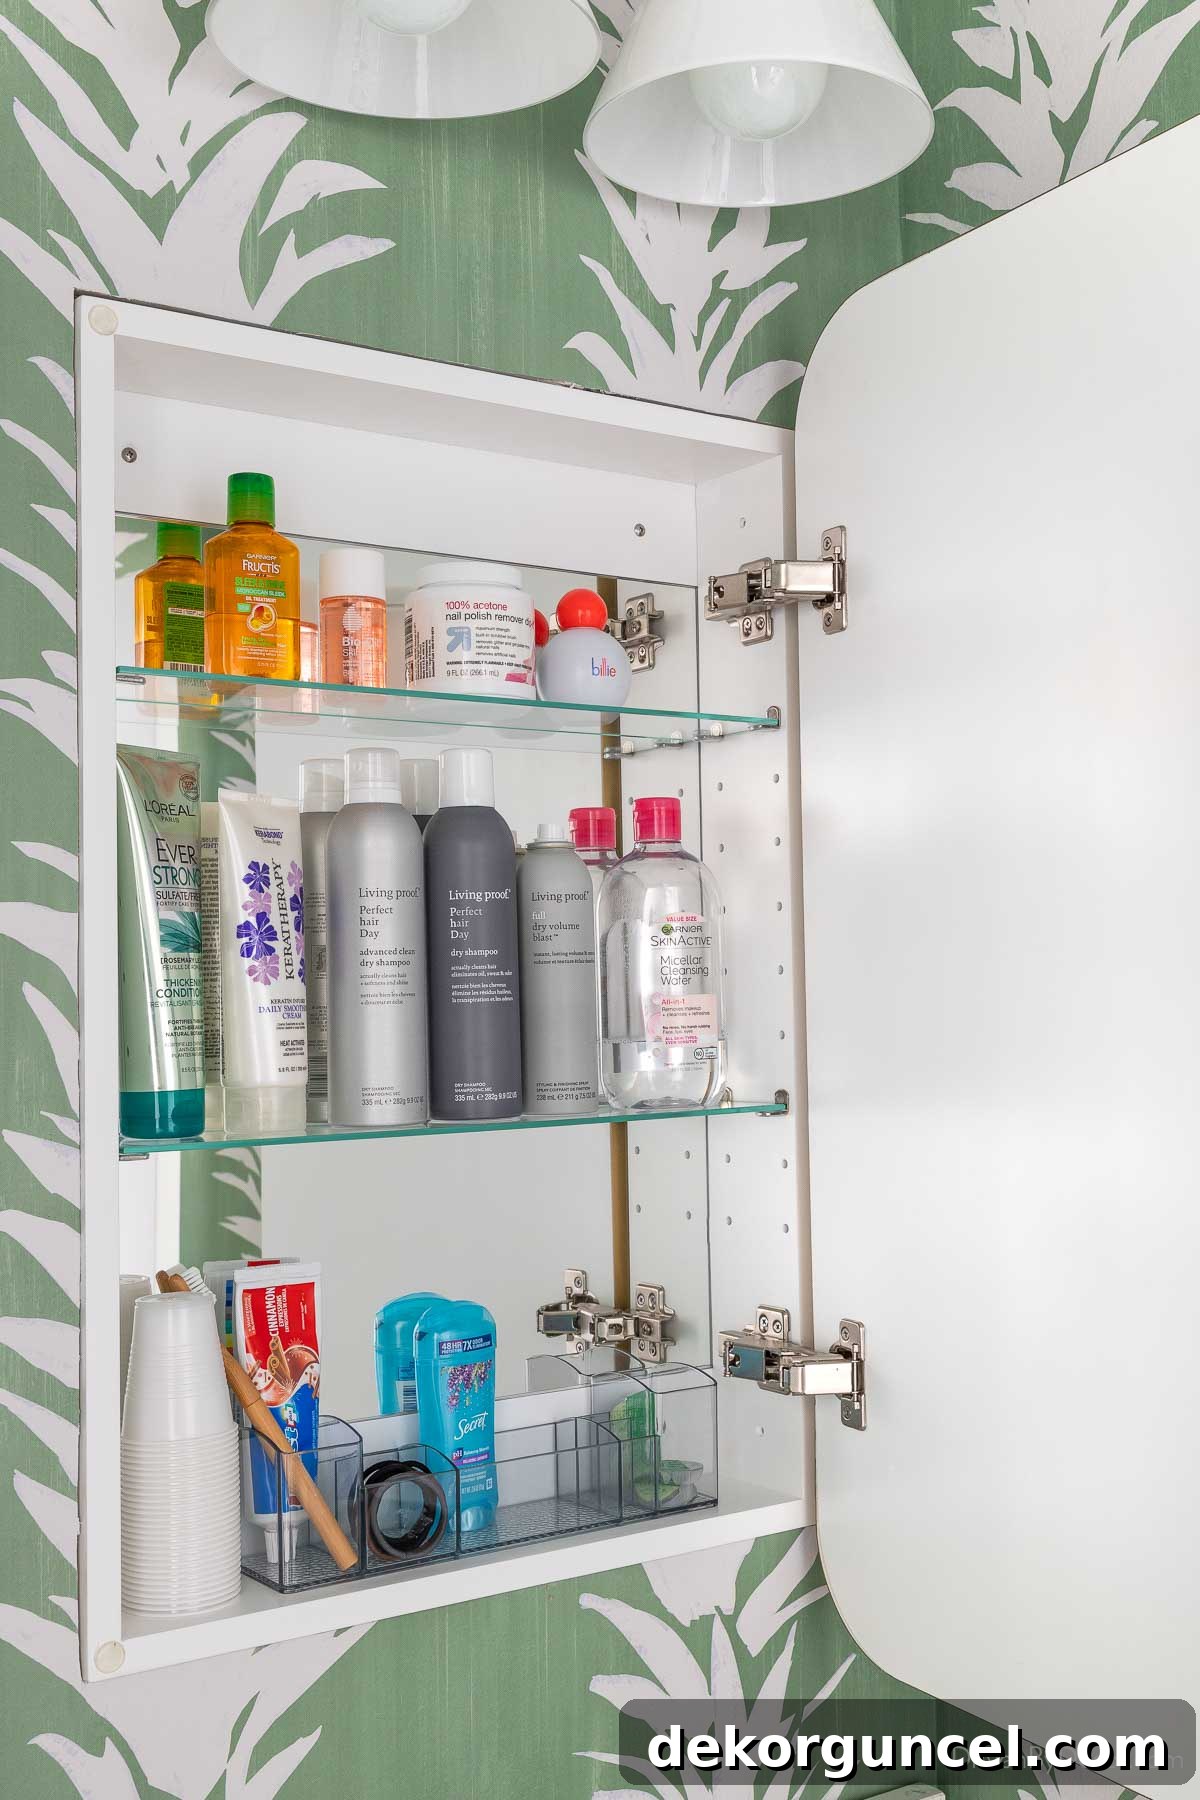
A true testament to clever design, these are no ordinary mirrors – they are, in fact, medicine cabinets, ingeniously recessed into the wall. Their flush appearance belies the substantial storage space contained within, making them an ideal solution for a shared bathroom where every inch of storage counts. Each of my girls now has a dedicated, hidden compartment for their personal toiletries, keeping the counter clear and organized. This feature is particularly valuable in a Jack and Jill setup, where personalized storage can prevent clutter and disagreements, ensuring a harmonious and tidy space for everyone.
For those who appreciate the art of combining different metallic finishes, you might have noticed my penchant for mixing metals in this bathroom. This approach adds depth and character, moving beyond a monochromatic look. If you’re looking to achieve a similar sophisticated, layered design, be sure to check out my post on mixing metals in bathrooms for my favorite tips and tricks to pull off this stylish technique effortlessly!
Addressing Practicalities: The Hand Towel Conundrum
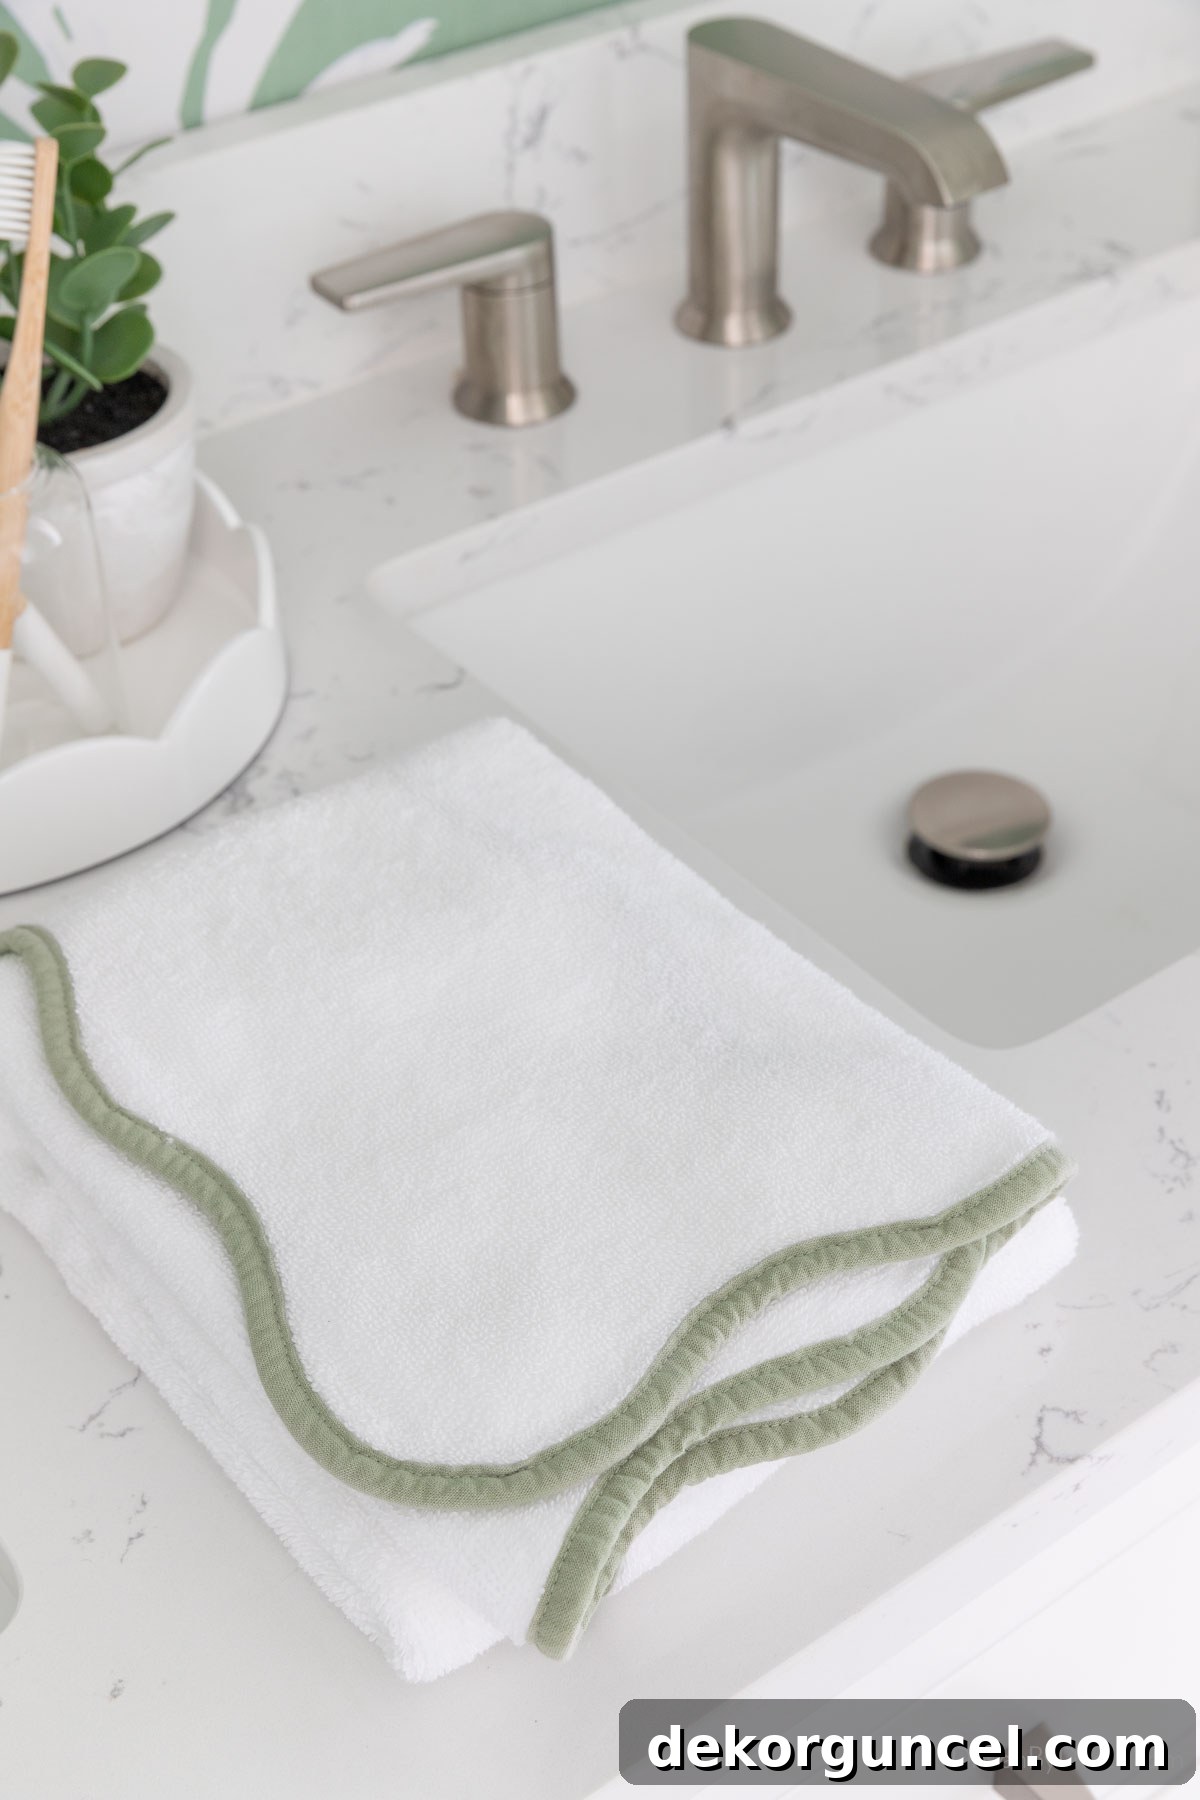
One minor design challenge we encountered revolves around hand towel placement. While there’s ample room for a towel ring on one side of the double sink, the other side features an inconveniently placed electrical outlet, preventing the installation of a symmetrical towel ring. In hindsight, relocating that outlet during the rough-in phase would have been ideal, but some obstacles only reveal themselves during the finishing stages! For now, a practical solution has been to simply keep one of these soft hand towels folded neatly between the two sinks, offering easy access for everyone. This temporary arrangement works well, maintaining both functionality and a clean aesthetic until a more permanent and aesthetically pleasing solution can be implemented.
Foundation of Style: Elegant New Floor Tiles for Durability and Aesthetics
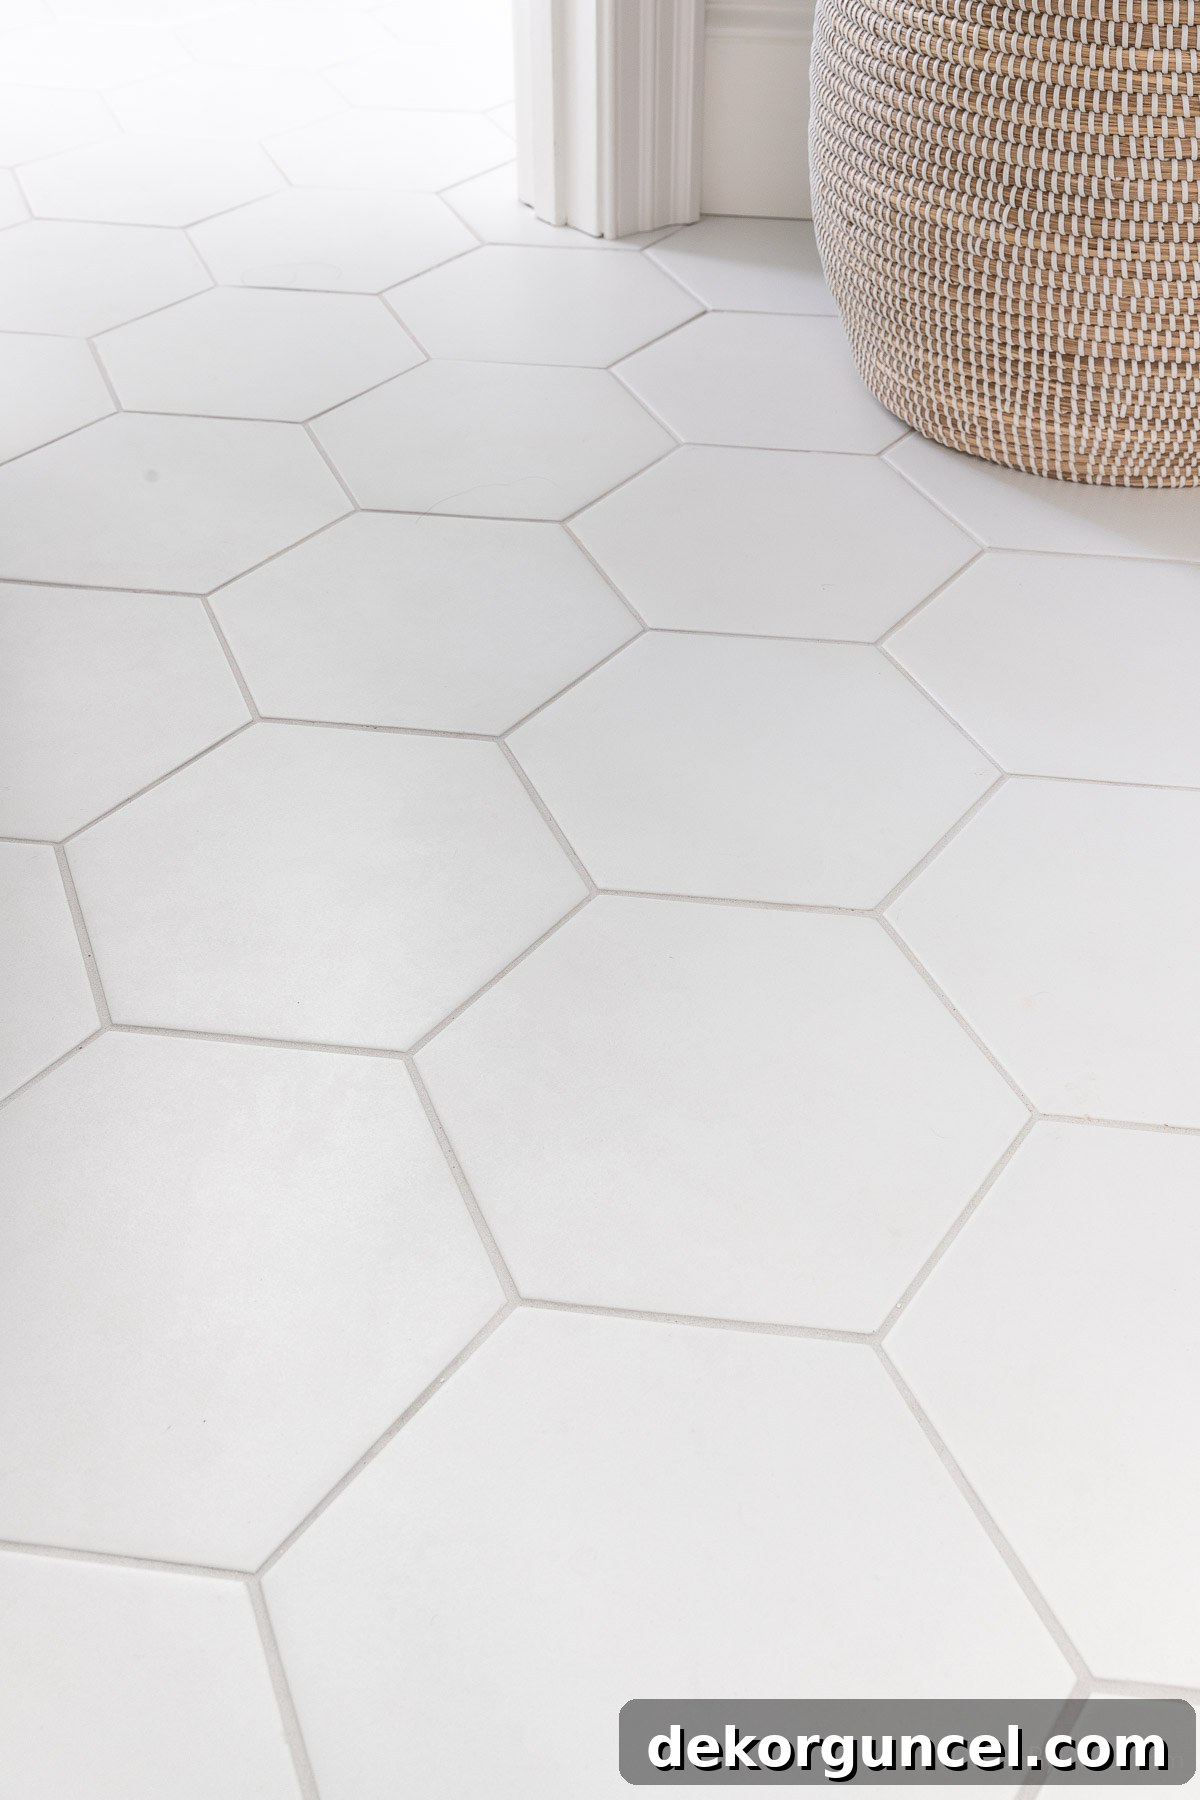
A significant upgrade that truly anchors the new design is the installation of fresh floor tiles throughout the bathroom. The original bathroom featured basic square tiles, which had accumulated numerous chips over the years, contributing to a dated and worn appearance. The flooring was certainly due for a refresh, impacting both the overall look and the practicality of the space, especially in a high-traffic shared bathroom.
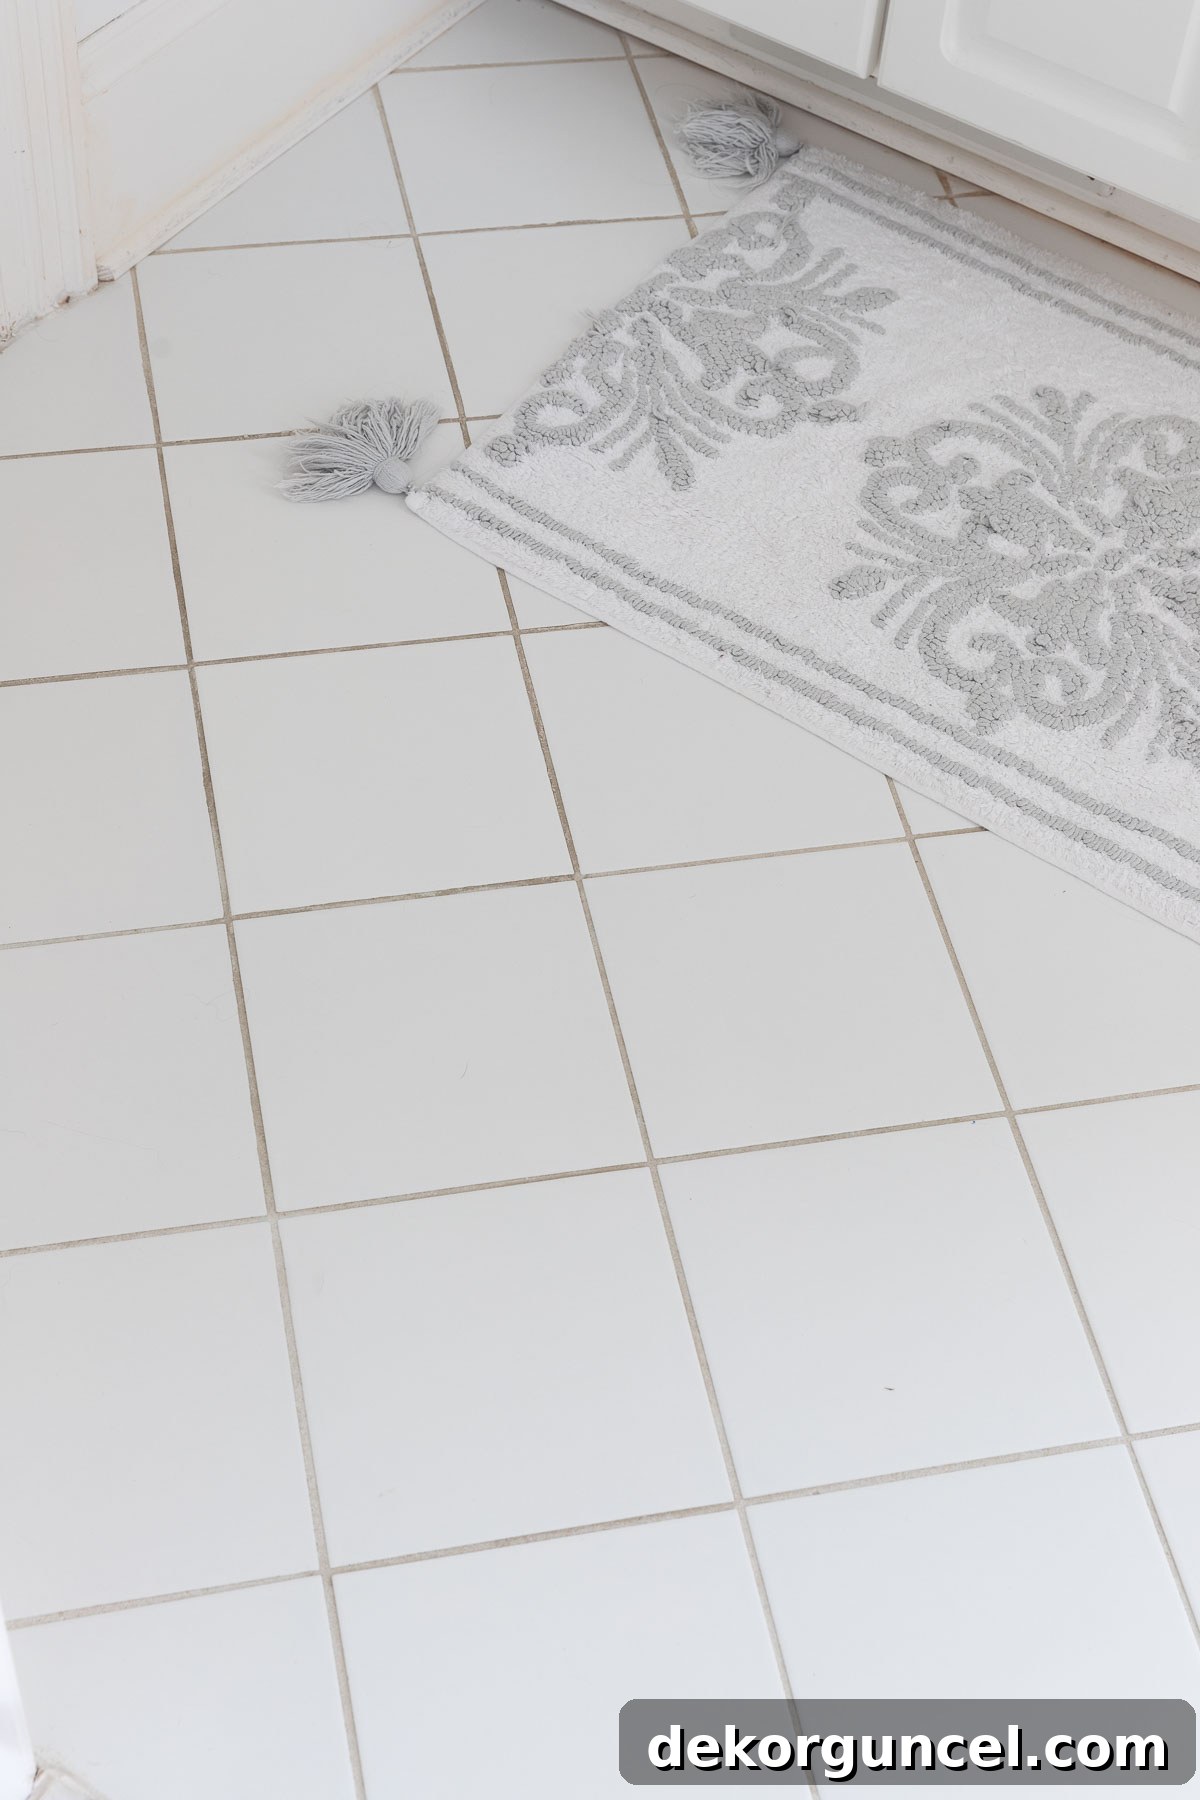
We chose to replace them with this stunning large white hexagon floor tile. This choice strikes the perfect balance between classic appeal and modern sensibility. Its neutral color ensures it will beautifully complement any future design changes a homeowner might consider, while its unique geometric shape offers far more visual interest and character than simple squares. The tiles are expertly grouted with Mapei Frost, a very pale gray grout that subtly enhances the hexagon pattern without stark contrast, providing a clean and seamless finish. This new flooring is both durable and stylish, a true upgrade in every sense, promising longevity and timeless appeal.
Smart Laundry Solution: A Stylish Hamper
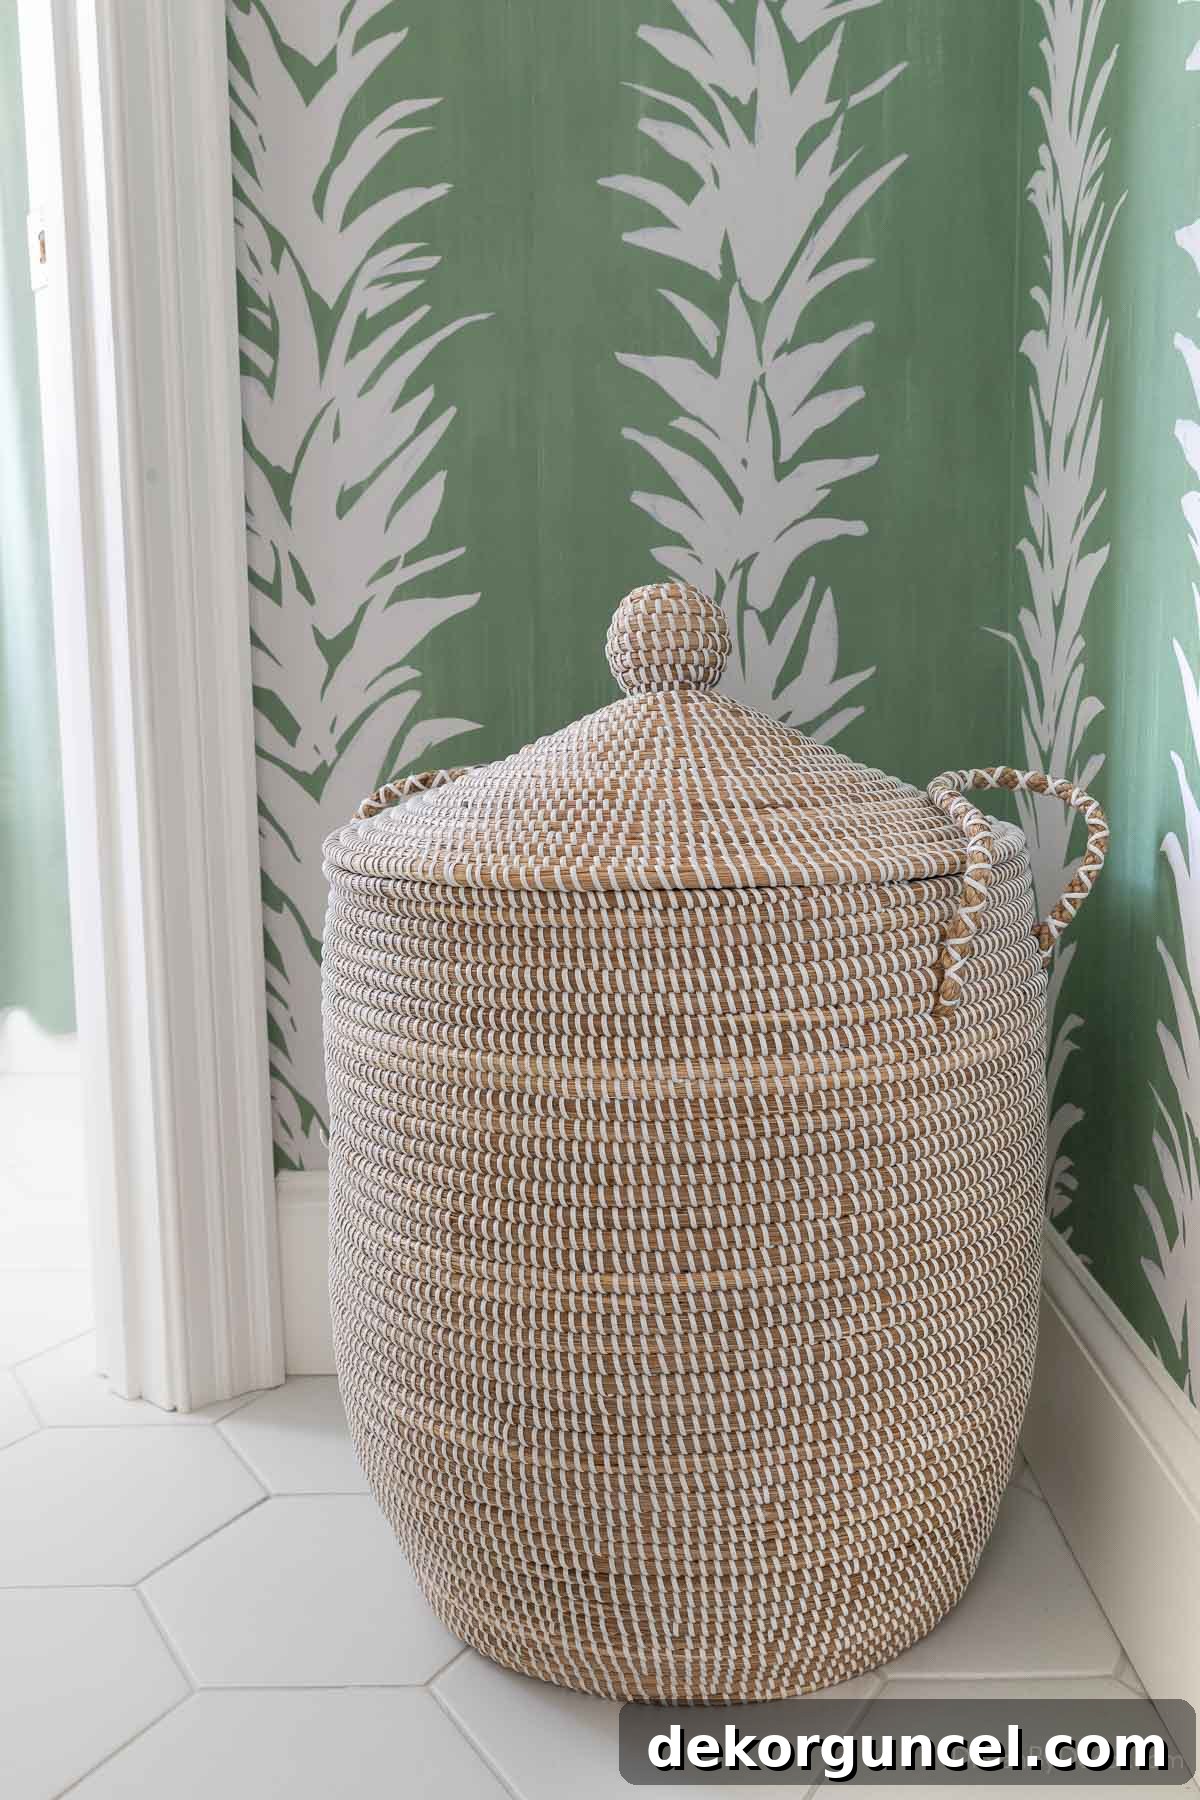
In the corner of this vanity space, I strategically placed this woven lidded basket (medium size). This is my absolute go-to clothes hamper for several compelling reasons. Its elegant woven texture and aesthetically pleasing shape integrate seamlessly with the bathroom decor, elevating it beyond a mere utility item. Crucially, unlike many cheaper woven hampers, this one is designed with a smooth interior to prevent snagging clothes, ensuring both functionality and care for fabrics. Its lid helps contain odors and keeps the space looking tidy, making it a stylish and practical solution for managing laundry in a shared bathroom without compromising on aesthetics.
The Private Retreat: Tub, Shower & Toilet Room Transformation
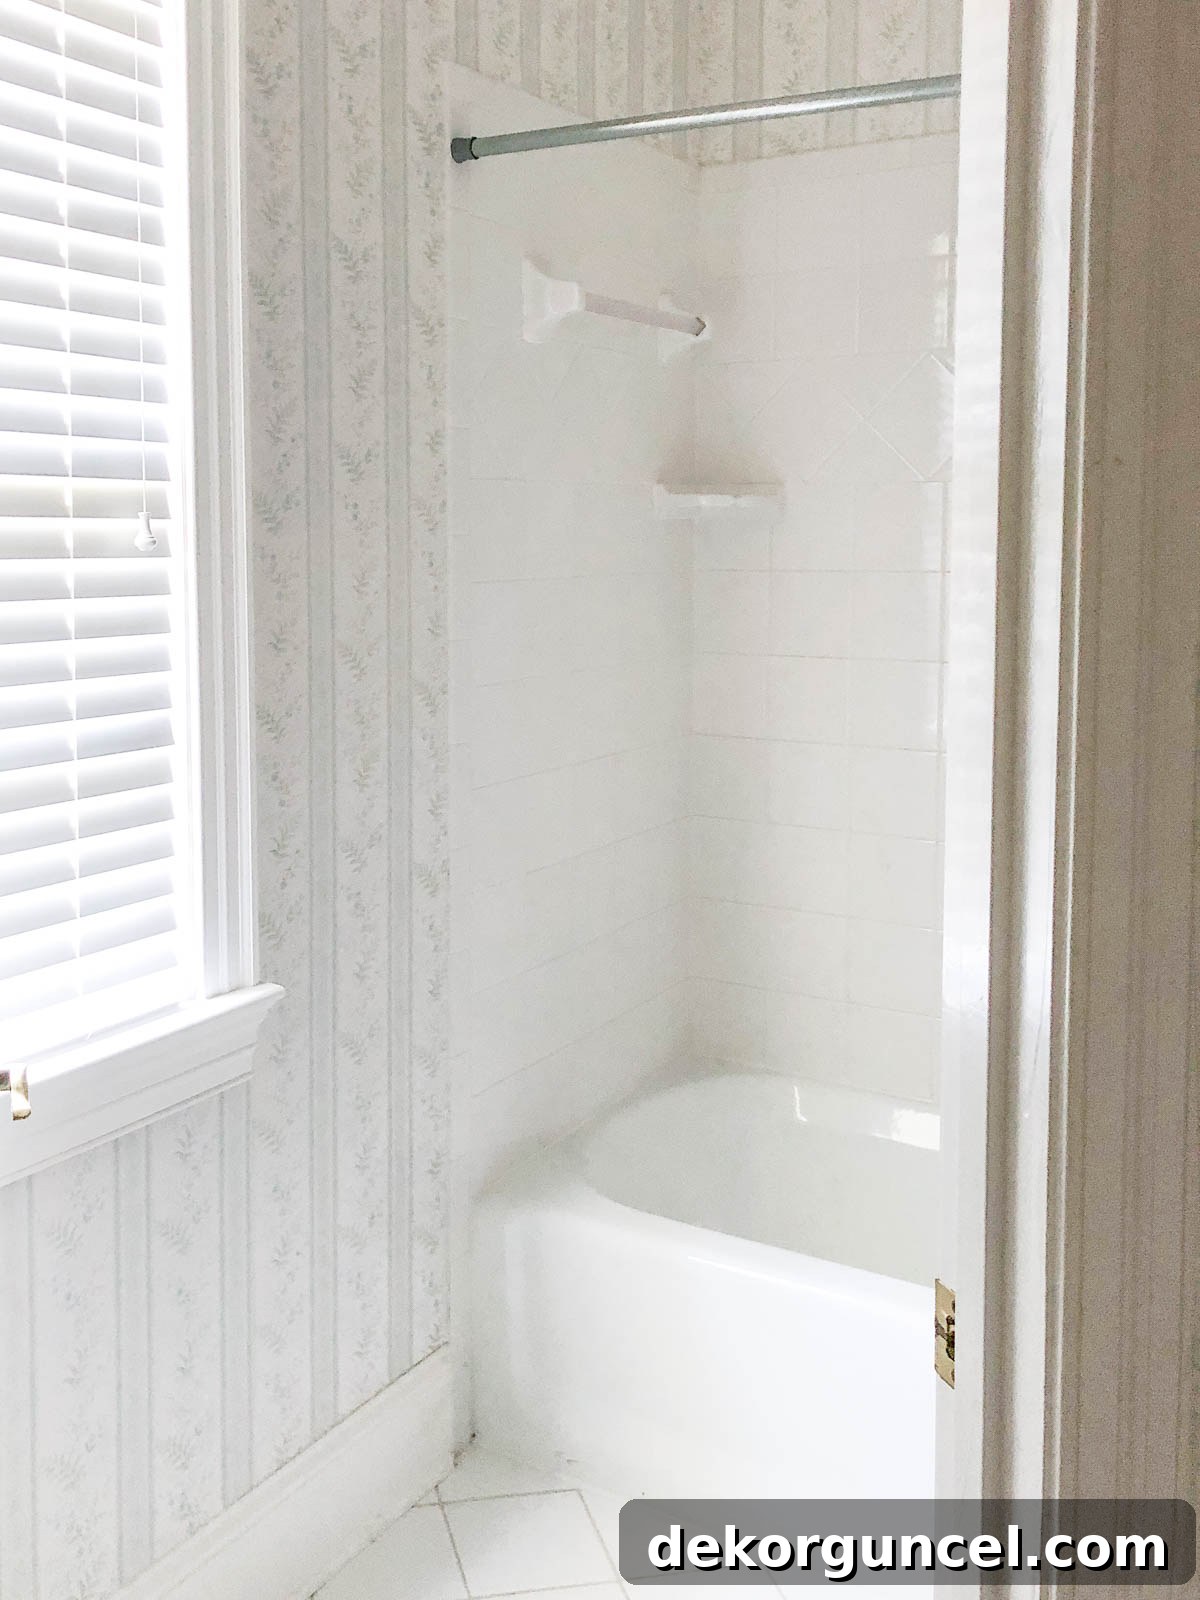
Now, let’s transition to the second, more private section of the Jack and Jill bathroom: the tub/shower and toilet room. This area, separated by a door from the vanity space, required a refresh to match the modern aesthetic established elsewhere. Before the renovation, this space was purely functional, lacking in design elements that would make it feel truly inviting or contemporary. Here’s a look at what this space encompassed before its stunning renovation:
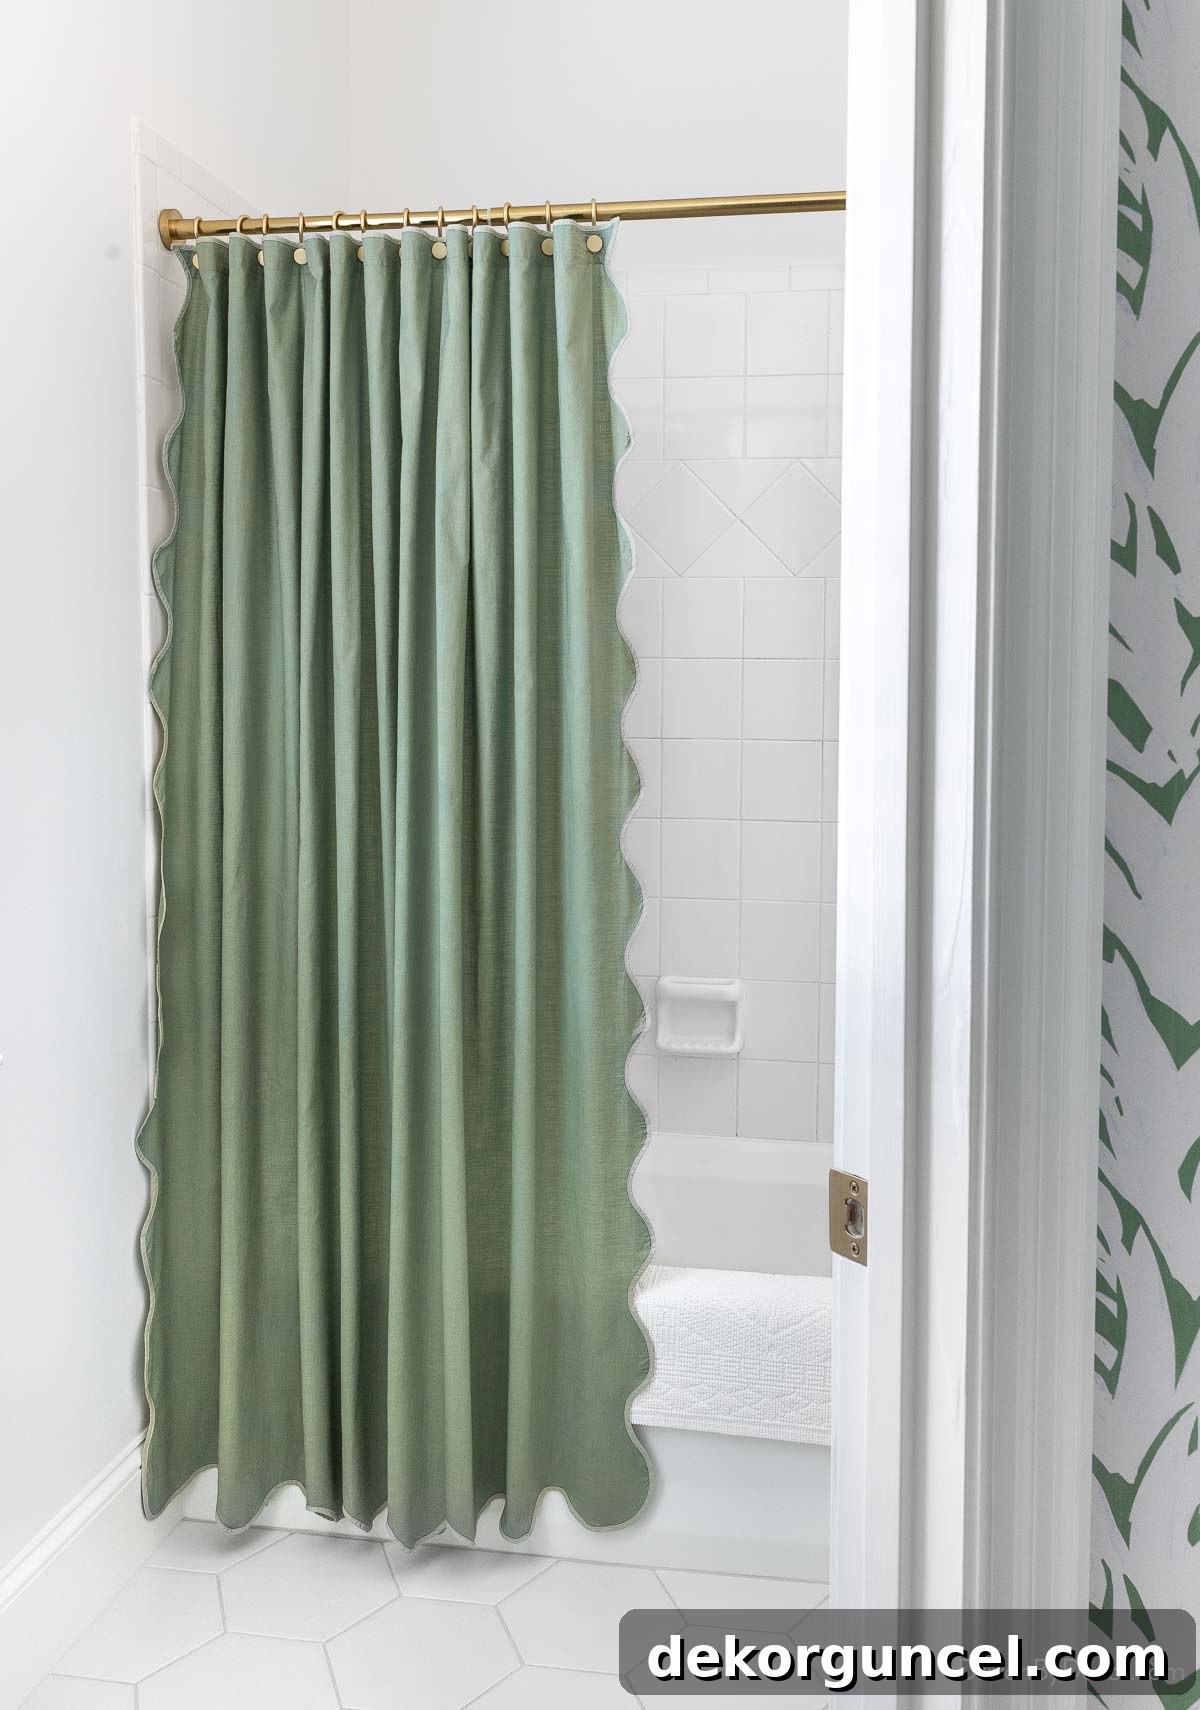
And behold the remarkable transformation! This space has been revitalized into a clean, serene, and highly functional wet zone, complete with thoughtful details that enhance both its visual appeal and daily utility. The shift from dated elements to contemporary choices is evident, creating a spa-like atmosphere that is both refreshing and practical. Every element, from the shower curtain to the new toilet, has been chosen to maximize comfort, style, and hygiene in this essential private area.
Shower Details: Blending Old and New for a Fresh Look
The beautiful new hexagon floor tile seamlessly extends into this section of the bathroom, ensuring a continuous and cohesive aesthetic from the vanity area to the wet zone. While we considered replacing the existing shower wall tile, we ultimately decided against it. The original tile was a perfectly neutral white and, despite its age, remained in excellent condition. The cost and effort of replacing it, particularly to extend it all the way to the ceiling as I ideally would have liked, simply wasn’t justifiable given the excellent state of the existing installation and our focus on more impactful, budget-friendly upgrades.
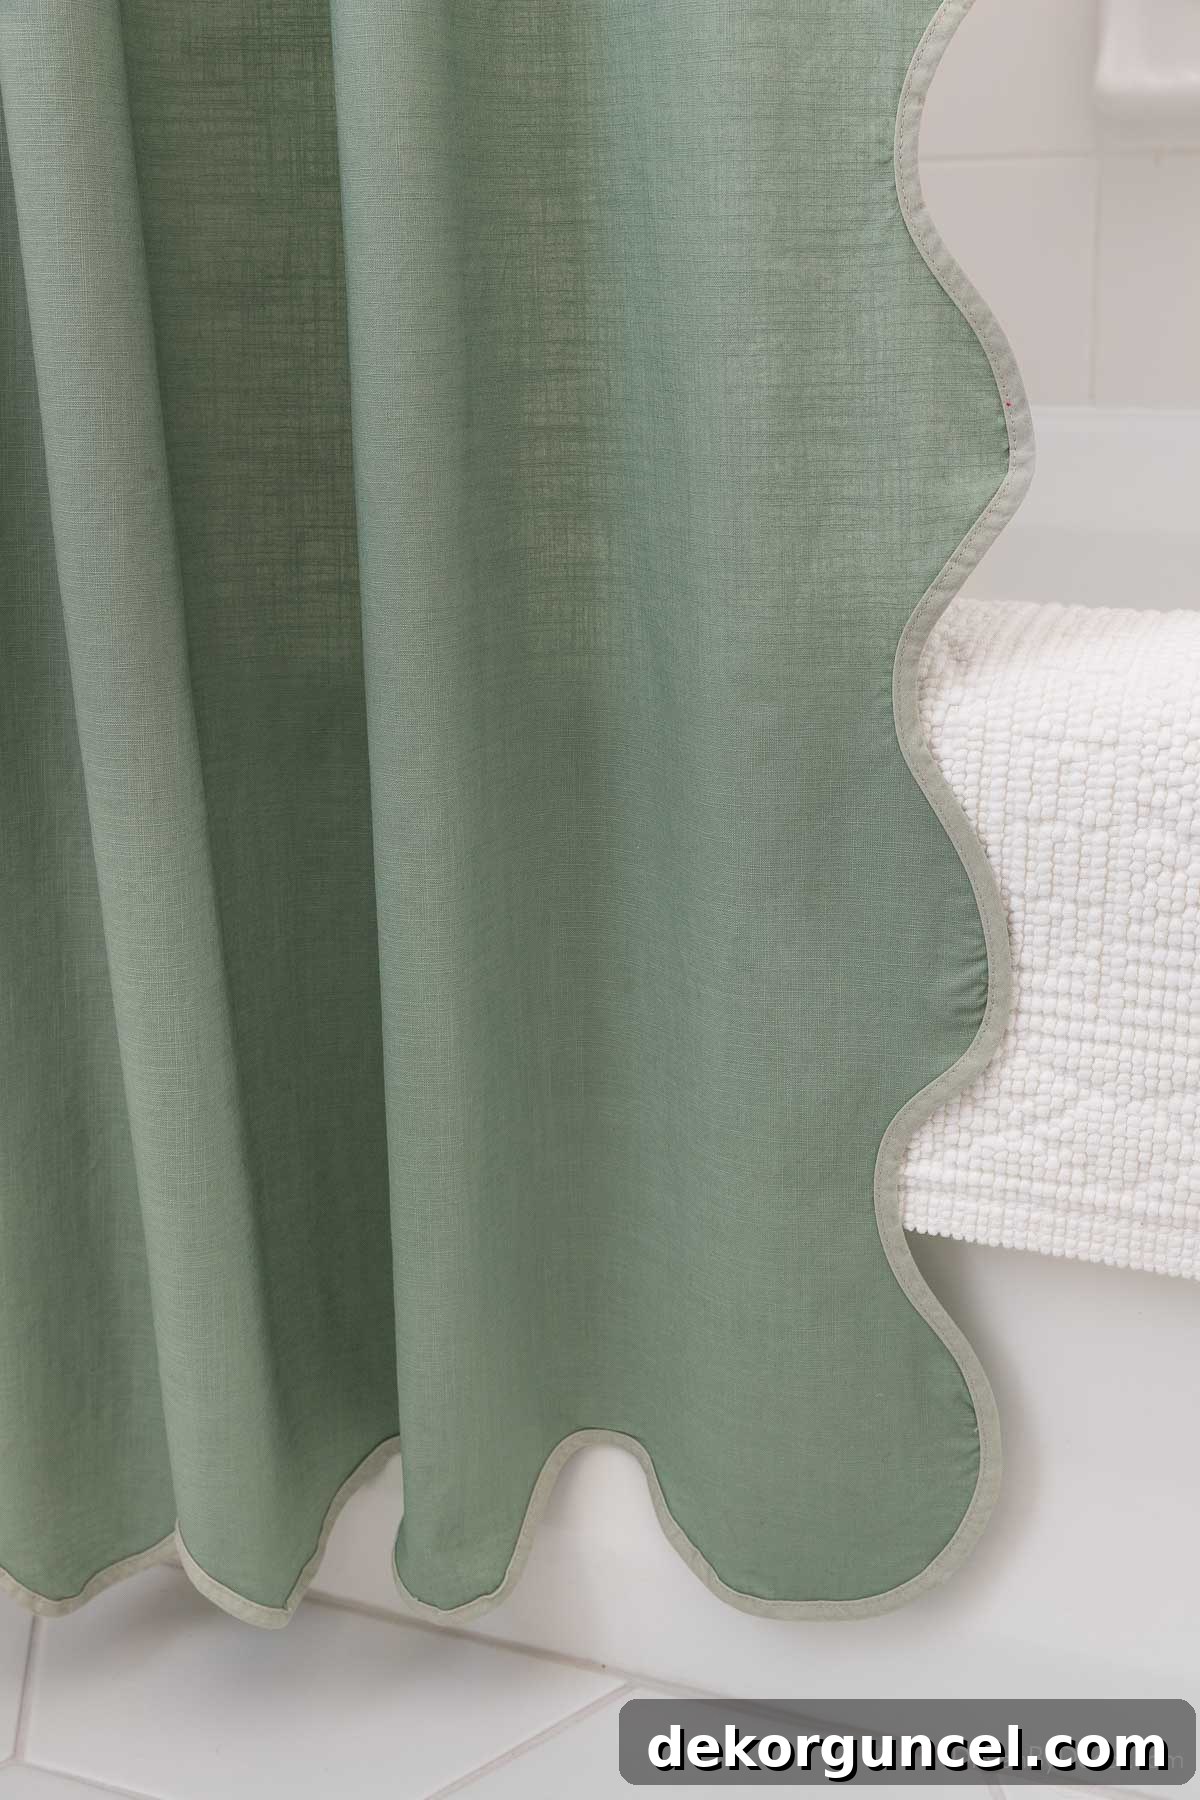
To dramatically enhance the look of the shower area, we introduced this elegant ripple shower curtain. Its subtle texture and gentle green hue couldn’t be more perfect, harmonizing beautifully with the wallpaper in the vanity area while adding its own distinct character. The curtain is stylishly suspended from this exquisite gold shower curtain rod, which adds a warm, luxurious metallic accent to the space, tying in with the other brass elements we’ve carefully integrated throughout the bathroom.
Completing the shower’s aesthetic, the curtain hangs from these utterly charming shower curtain rings. It may seem like a small detail, but these rings are truly darling and inject a touch of unexpected joy into the design. Their unique look enhances the overall whimsical yet sophisticated feel of the bathroom. Who knew shower curtain rings could be so remarkably cute and contribute so much to the overall feel and personality of the space!
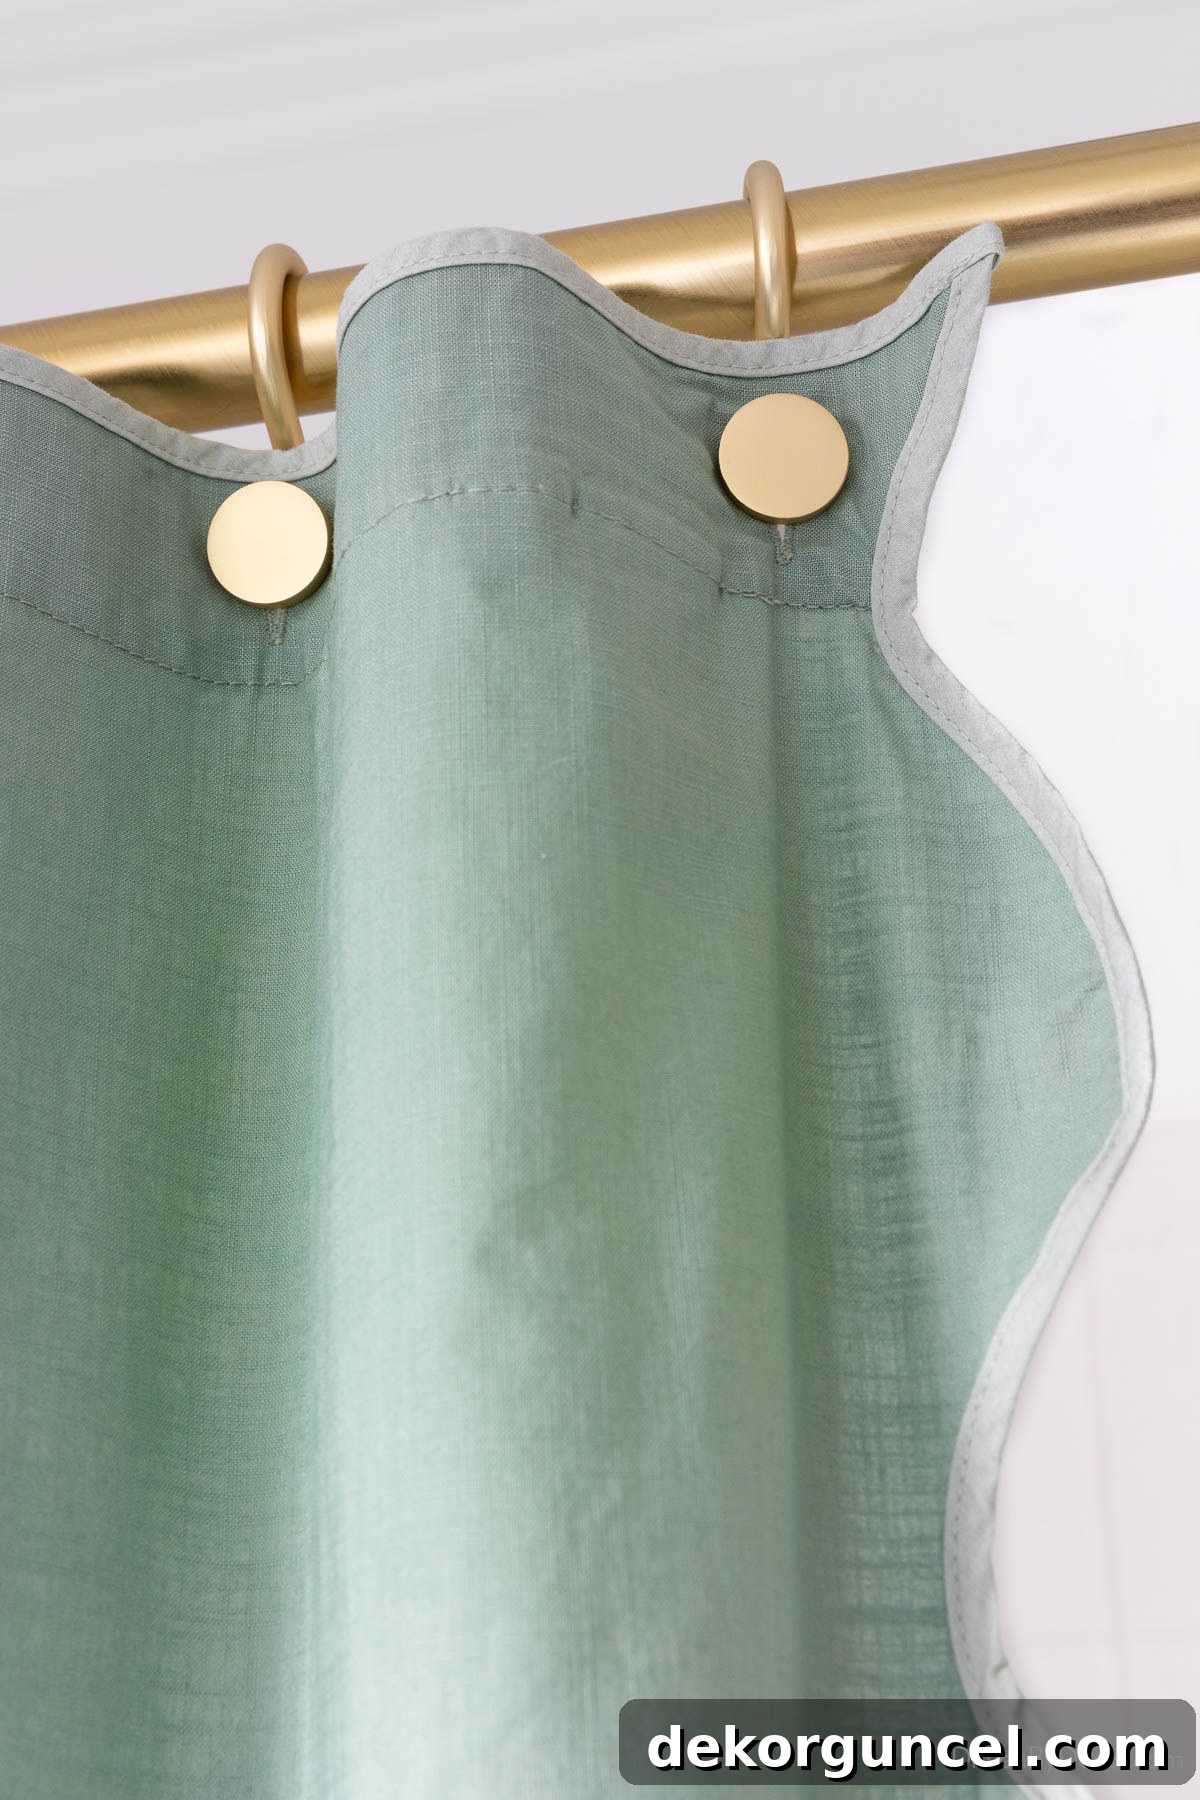
For seamless gliding action on telescoping shower rods, especially those with a joint that can cause rings to snag, I recommend a clever trick! Since my specific shower curtain rings are slightly smaller than average and just barely fit the rod, I opted for one of these rod joint ramp stickers placed strategically at the joint. This ensures the rings glide smoothly back and forth without catching or sticking. Normally, I’d suggest this glide tape for telescoping rods, but its thickness wasn’t compatible with my smaller rings in this particular instance. Discover more about these invaluable solutions in my post on preventing curtains from getting stuck on telescoping rods for a frustration-free shower experience!
Effortless Fixture Updates: Modernizing Shower Hardware
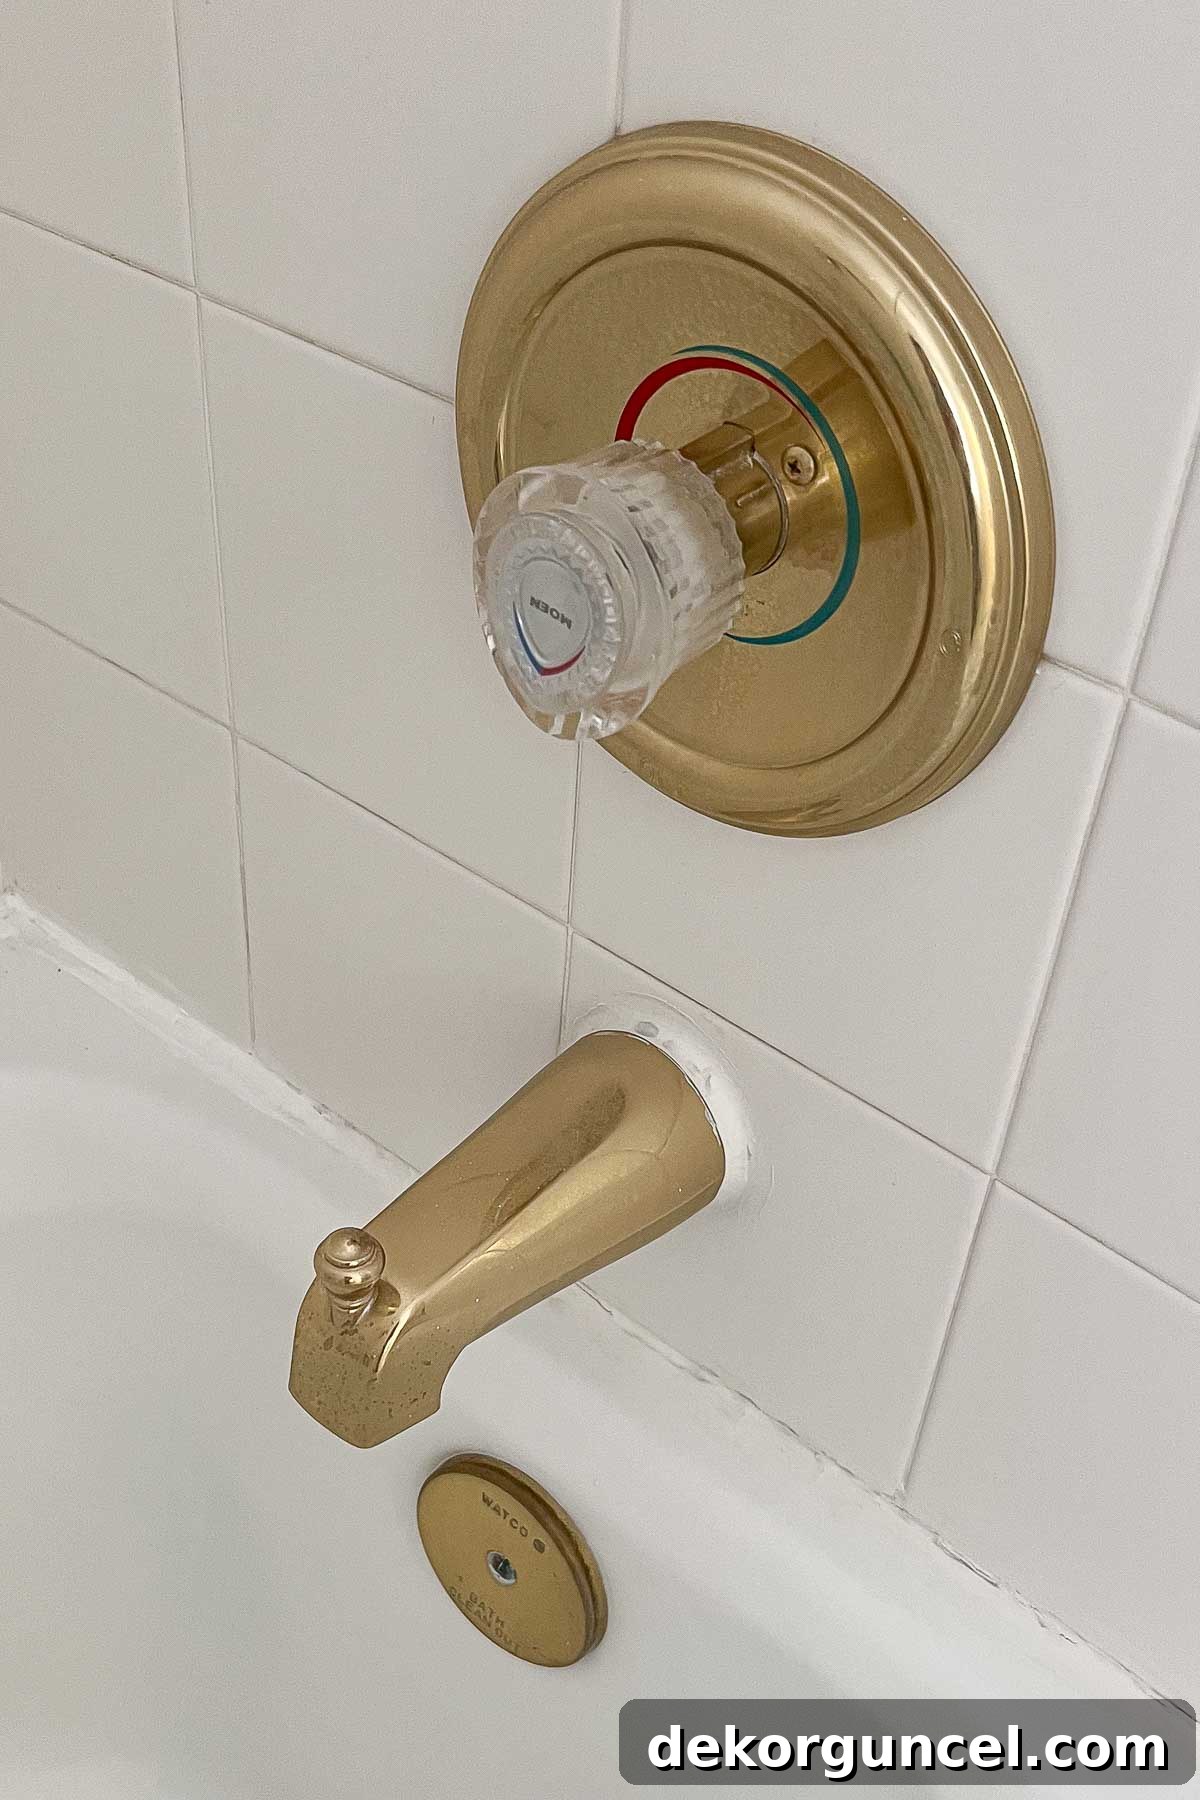
Updating the tub and shower hardware proved to be refreshingly straightforward, thanks to a stroke of luck! Typically, replacing shower fixtures involves the complex and often costly task of cutting into the tile or the wall behind the shower to access and replace the internal valve. However, the existing hardware in this bathroom was part of Moen’s incredibly convenient M-Pact common valve system. This innovative design allows for a simple change of the trim kit without the need to replace the entire valve itself, saving significant time, effort, and expense – a truly appreciated feature during a remodel!
We easily swapped out the previously tarnished gold hardware, which had lost its luster over the years and no longer matched our updated aesthetic. This dated fixture was an obvious candidate for an upgrade, bringing the shower zone into the modern era:
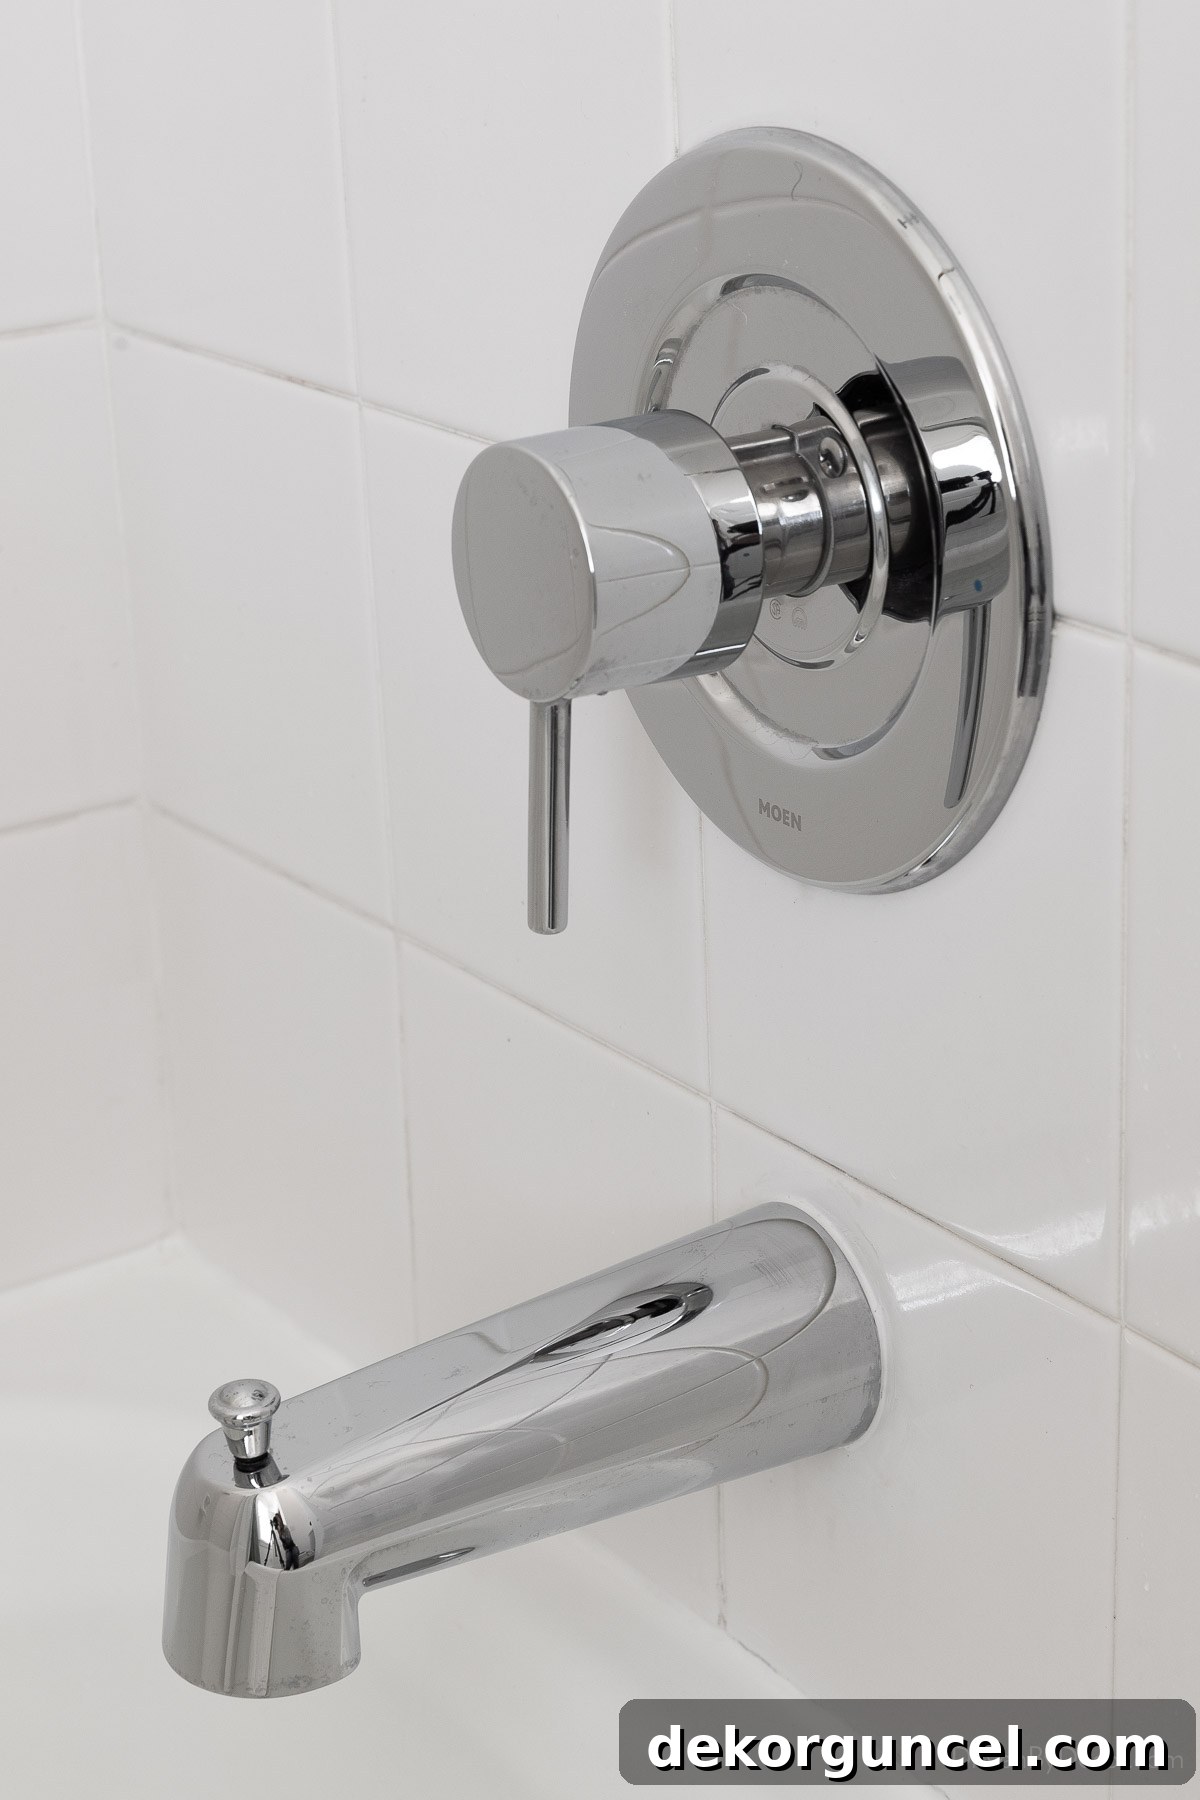
In its place, we installed this sleek, more modern shower/tub valve trim kit and this contemporary tub diverter spout. The result is a newly updated look that feels fresh, clean, and perfectly aligned with the overall modern and inviting design of the bathroom. The chrome finish provides a crisp contrast and a touch of brilliance, ensuring both aesthetic appeal and reliable performance for years to come.
While refreshing the fixtures, I also made sure to meticulously recaulk the bathtub, a task that was long overdue and significantly improved the appearance and hygiene of the tub area. Fresh caulk creates a clean seal, preventing water damage and unsightly mildew. If your bathtub caulk is looking a bit worse for wear and detracting from your bathroom’s appeal, don’t fret! I’ve shared my detailed, step-by-step guide on how to caulk a bathtub like a pro, offering all the tips and tricks you need for a flawless, professional-looking finish yourself.
The Perfect Porcelain Throne: A Modern Toilet Upgrade
The original toilet, being super old and notably low, was another essential item on our replacement list that could not be overlooked. I am a staunch advocate for Toto toilets, appreciating their elegant, clean lines, superior flushing power, and their almost unparalleled unclogging performance – features that are paramount in a busy shared bathroom. For our newly remodeled space, we opted for this elongated, comfort-height toilet. This choice not only enhances comfort for all users, including children and adults, but also contributes to the bathroom’s sleek, modern aesthetic. Its efficient design and reliable performance make it a truly smart and sustainable investment for any bathroom remodel, ensuring both style and lasting functionality.
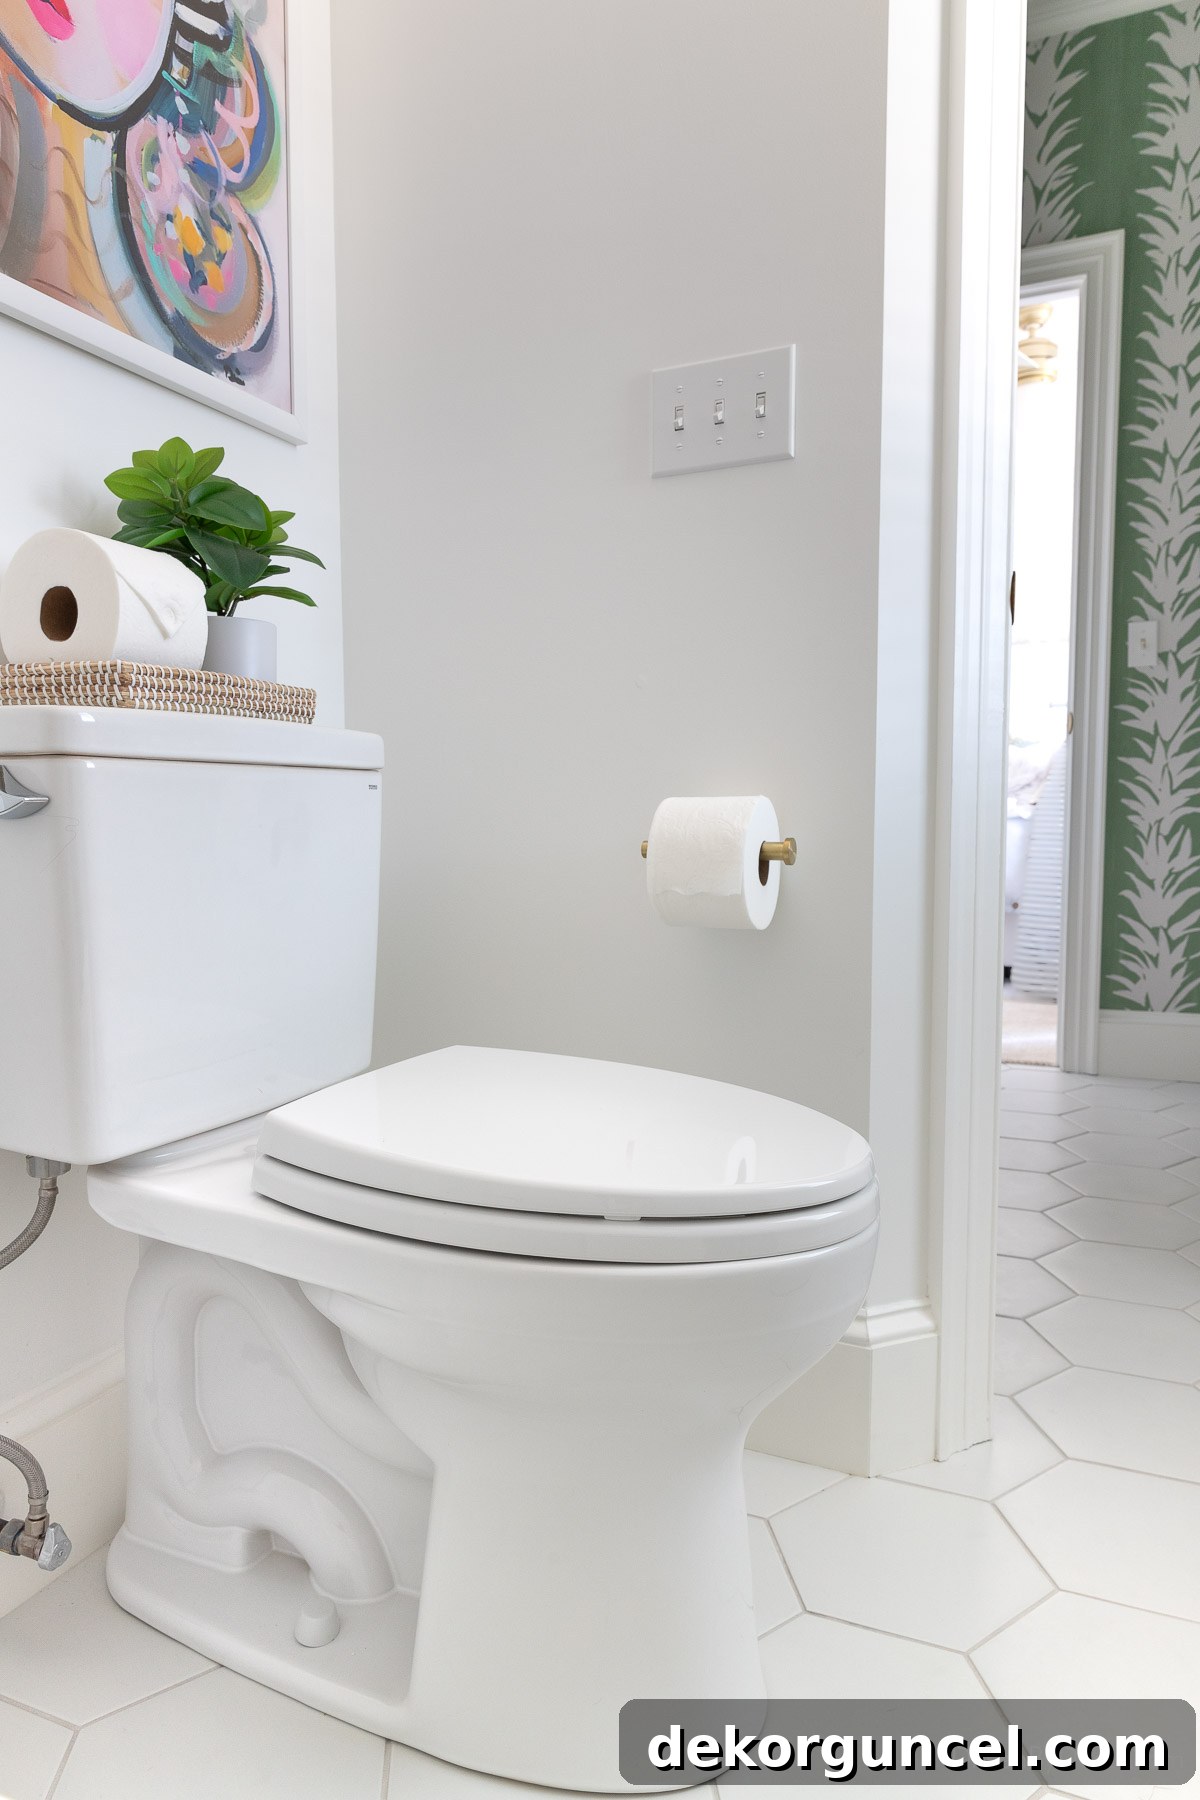
Stylish & Functional Toilet Tank Decor
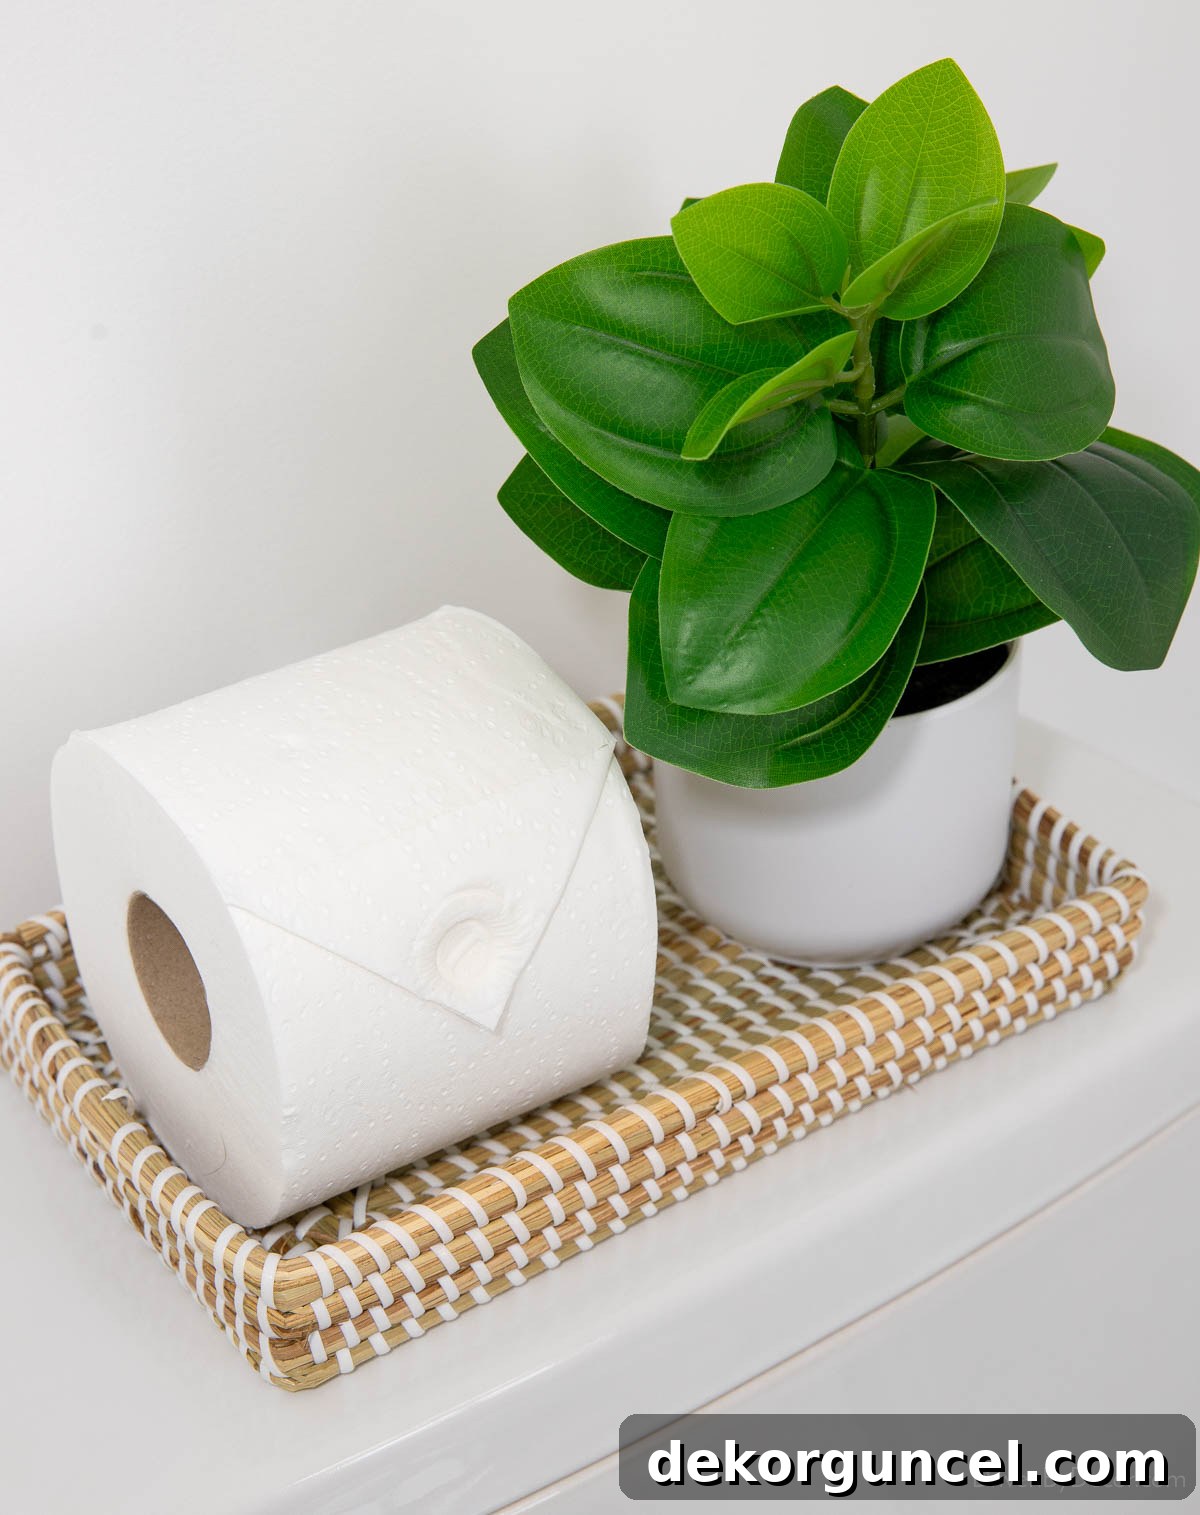
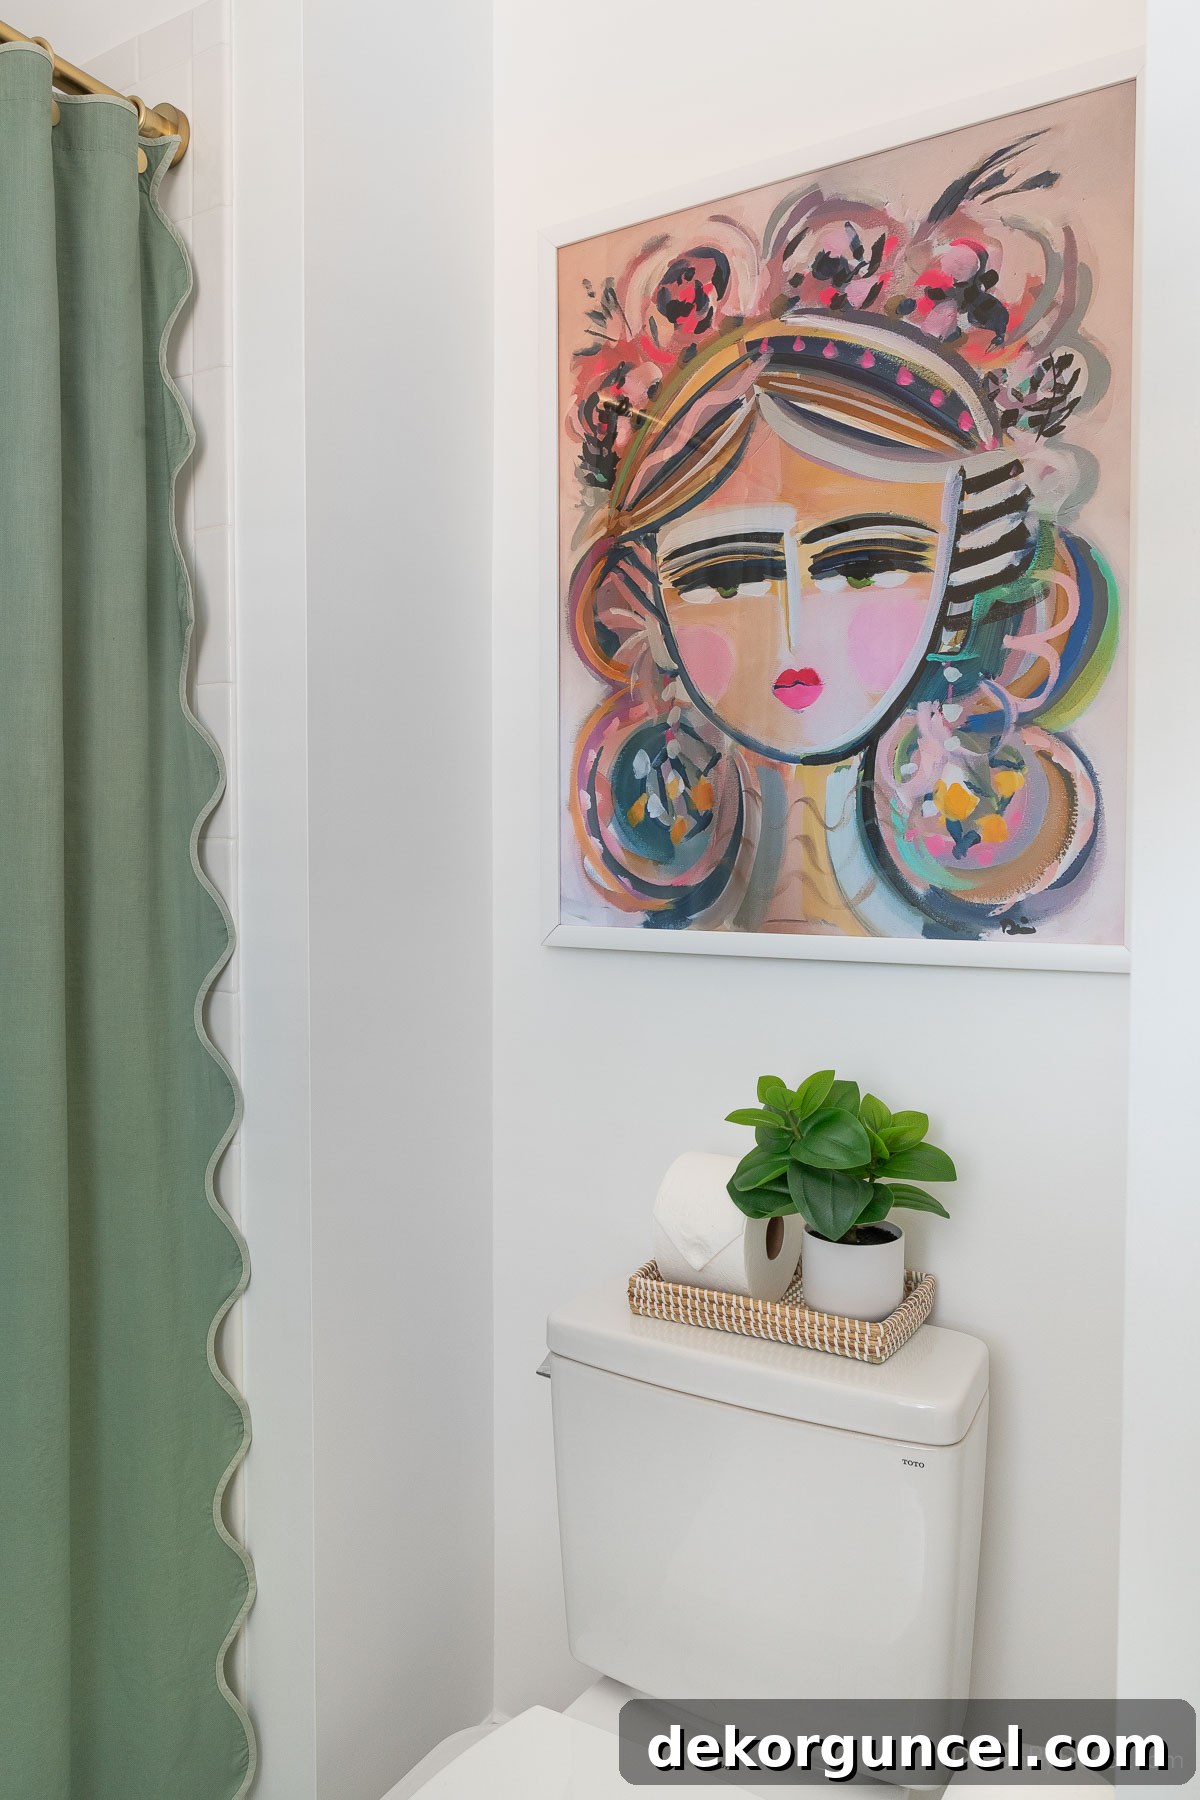
To add a touch of warmth and practicality to the toilet area, I placed this charming woven tray (small size) on top of the tank. It serves as a perfect spot to hold an extra roll of toilet paper, ensuring convenience and preventing any awkward situations for guests, and this realistic faux plant, which introduces a subtle organic element and a hint of nature without the need for maintenance. These small decorative touches contribute significantly to the overall inviting atmosphere, making even this functional area feel thoughtfully designed.
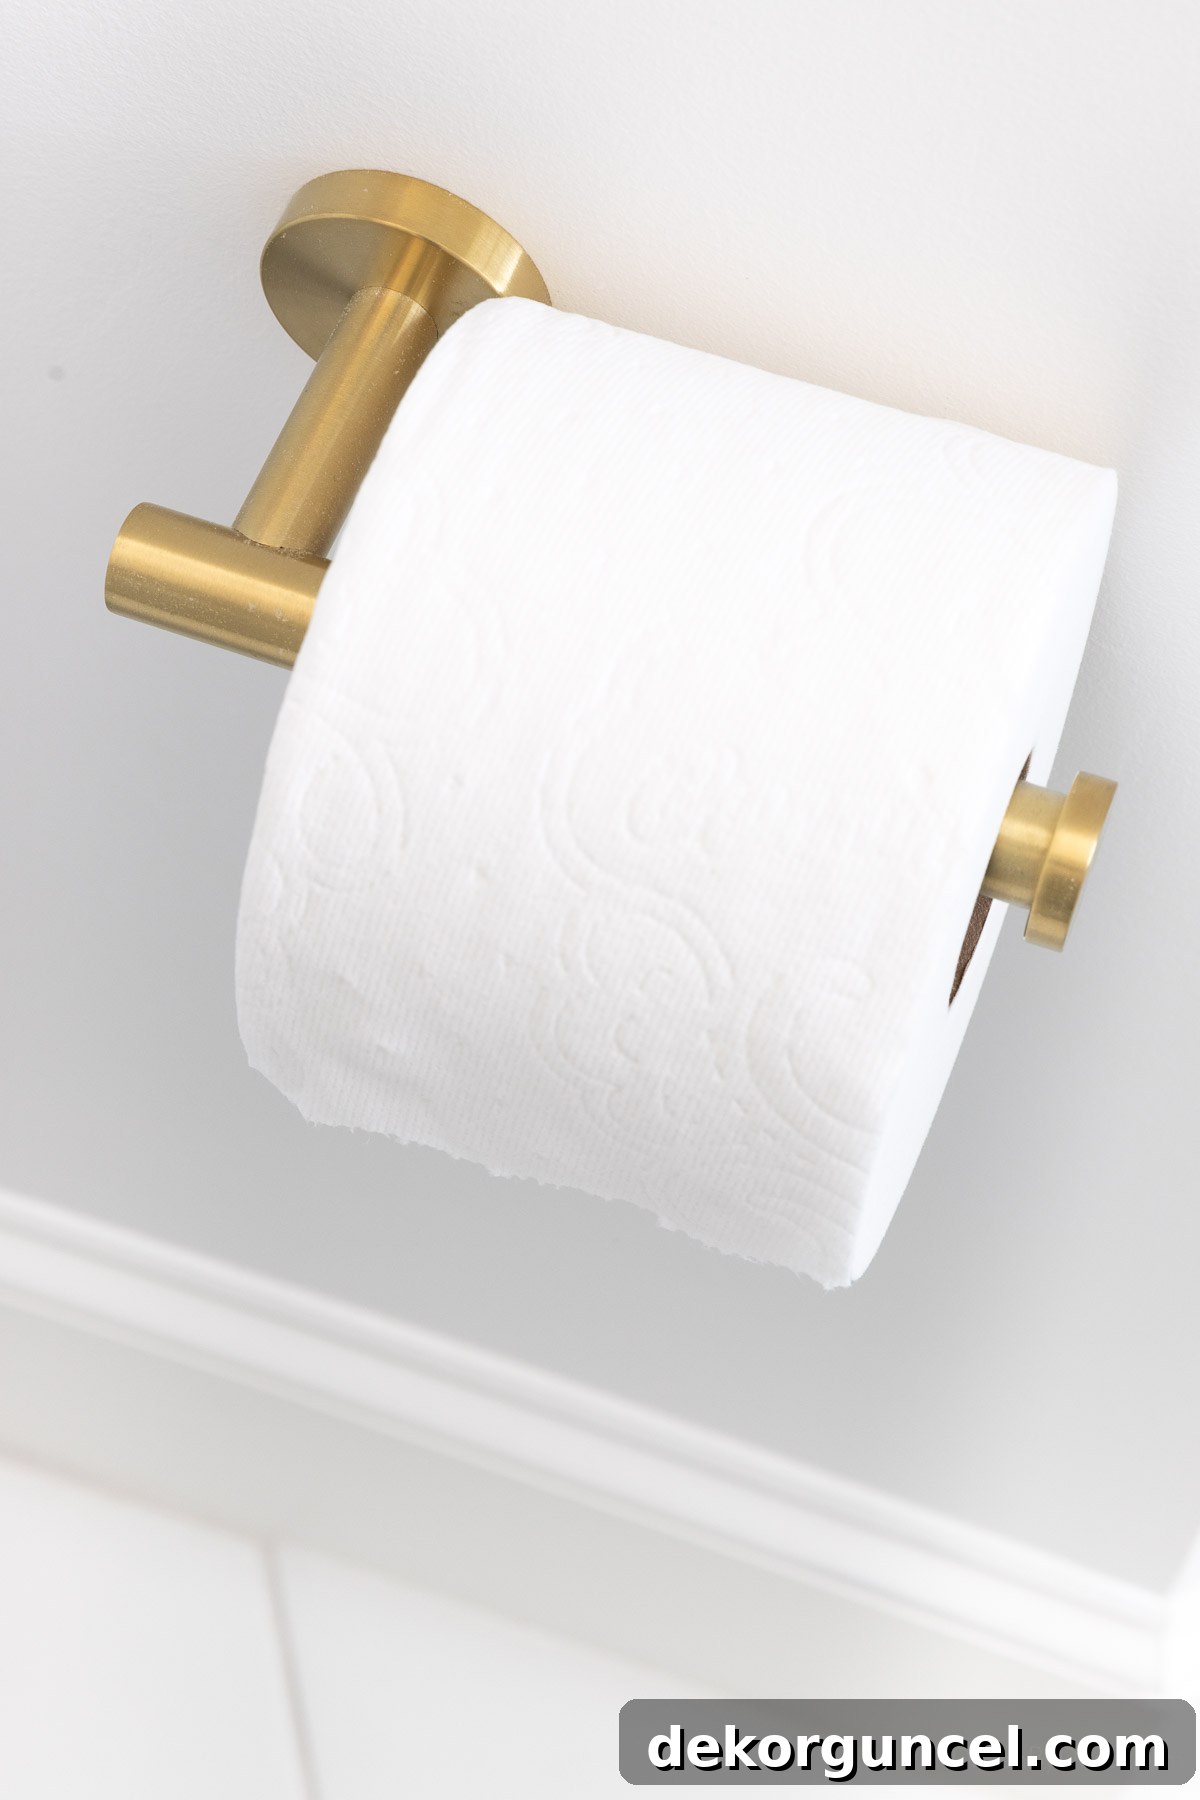
For the toilet paper holder, I chose my tried-and-true favorite: this brushed gold toilet paper holder. Its clean lines and elegant finish perfectly complement the brass accents found elsewhere in the bathroom, maintaining a cohesive and refined look. This choice exemplifies how even the smallest fixtures can contribute to a unified design, combining form and function seamlessly to provide both style and practical utility.
Searching for creative and elegant ways to style your toilet tank, transforming it from a mere fixture into a decorative element? Explore my comprehensive guide on toilet tank decor ideas to discover stylish and functional suggestions that will elevate your bathroom’s aesthetic and add a personal touch to even the smallest spaces.
A Smart & Hygienic Waste Solution
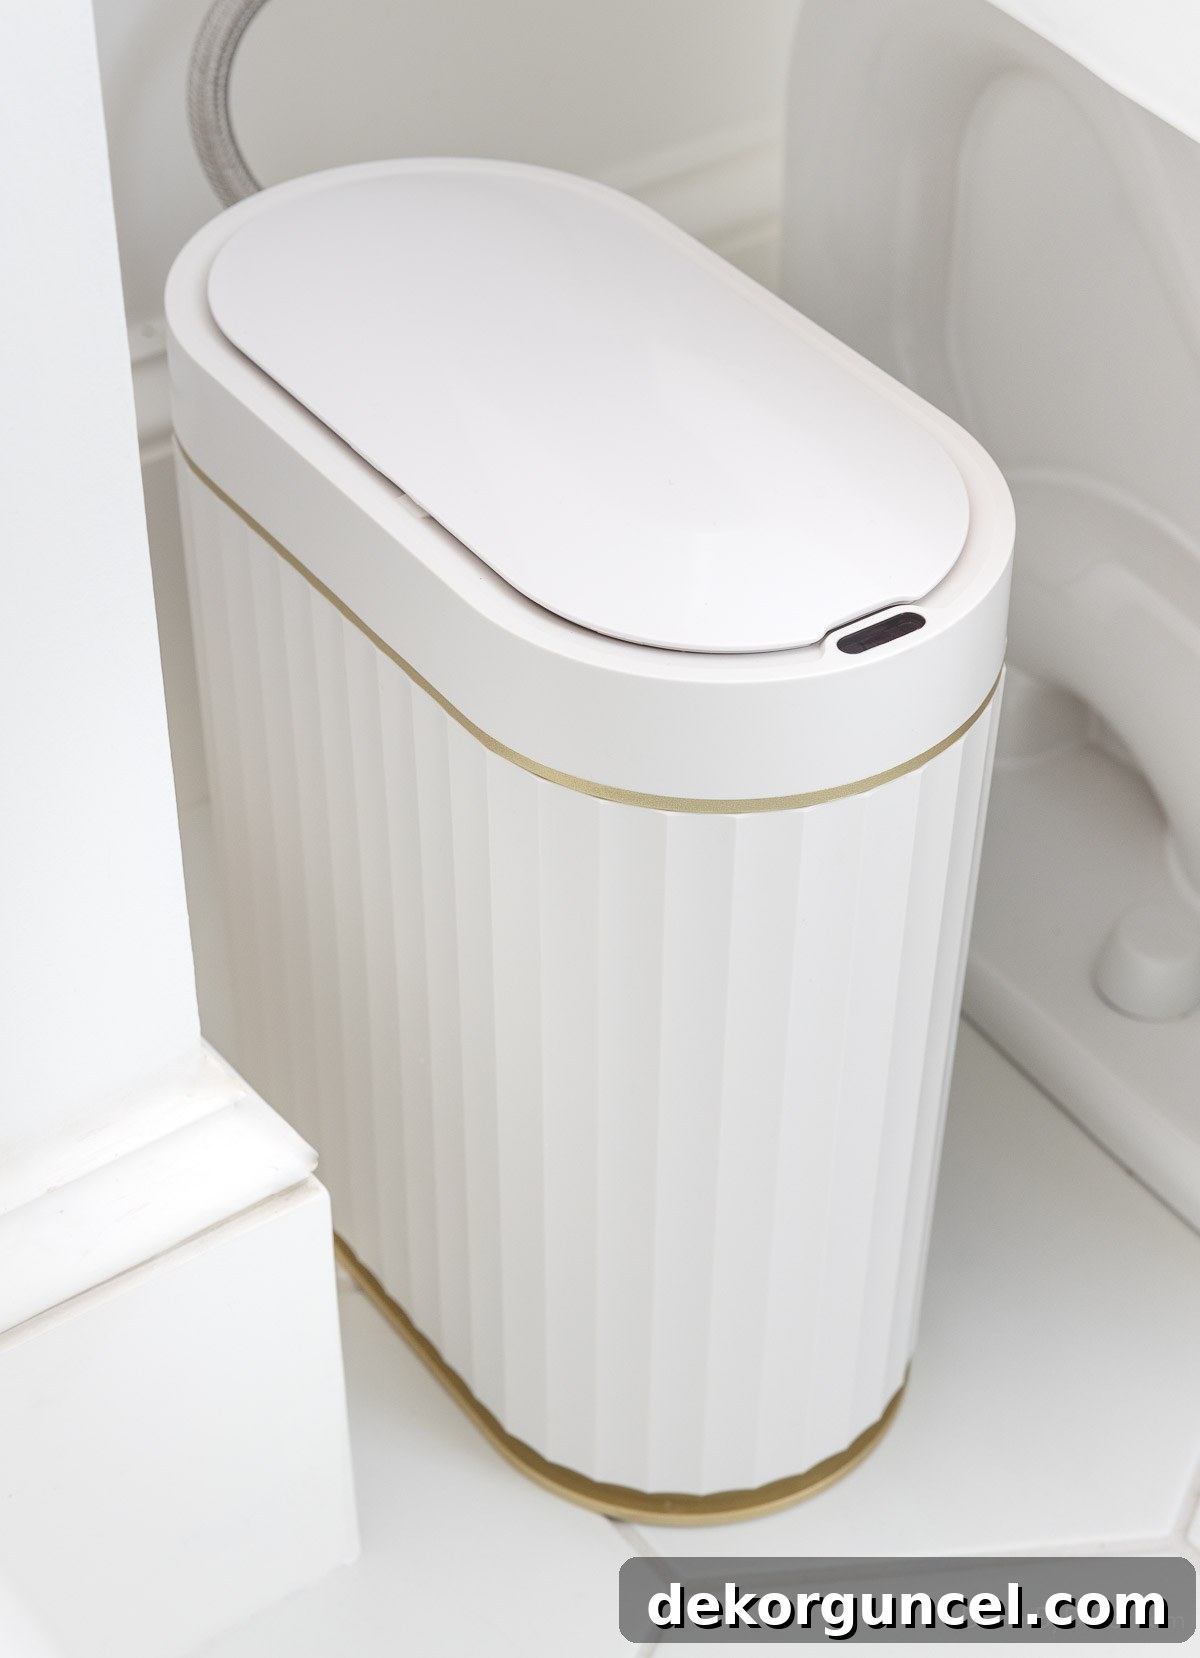
Next to the toilet, we installed this slim, motion-sensing trash can. This modern amenity is incredibly practical, opening effortlessly with a simple wave of the hand, minimizing contact and enhancing hygiene. Beyond its convenience, it offers a crucial benefit: it keeps our curious dog from rummaging through the trash, a common household challenge that many pet owners will appreciate! Its sleek, ribbed design also ensures it blends discreetly into the space, offering superior hygiene and functionality without being an eyesore, perfect for a contemporary bathroom.
Artful Touches & Smart Towel Storage Solutions
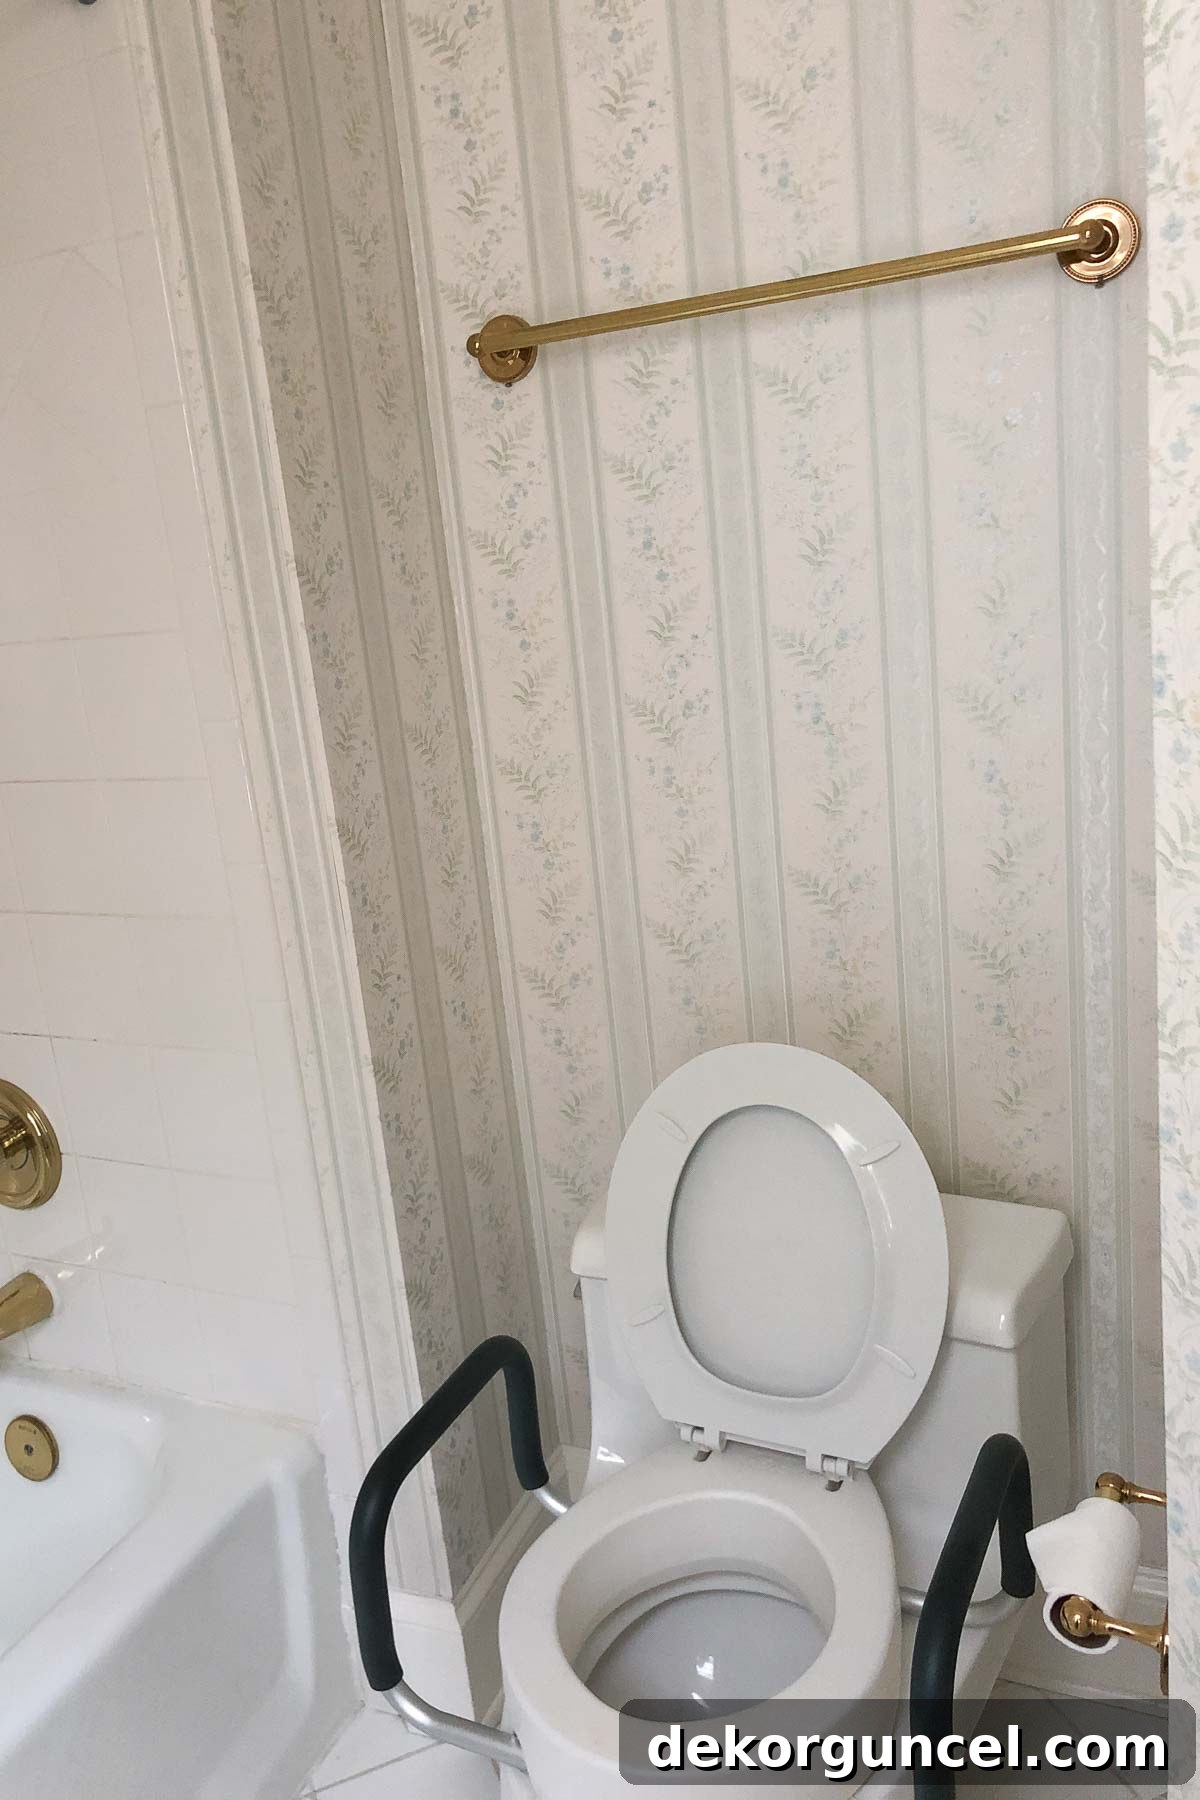
One design element that I was particularly keen to change was the old towel bar positioned directly over the toilet. I’ve never been a fan of this placement; it feels a little too close for comfort to all those bathroom germs and isn’t the most hygienic spot for clean towels! The previous setup, while functional in a basic sense, lacked aesthetic appeal and certainly didn’t align with our vision for a clean, inviting, and stylish space.
To rectify this, I removed the antiquated towel bar and instead hung this beautiful 24″ x 30″ art print, elegantly framed in this simple white frame, in its place. This single addition completely transformed the wall into a focal point, injecting personality and sophistication while drawing the eye away from the toilet itself. It’s a subtle yet powerful design decision that elevates the entire room, turning a utilitarian space into a curated visual experience.
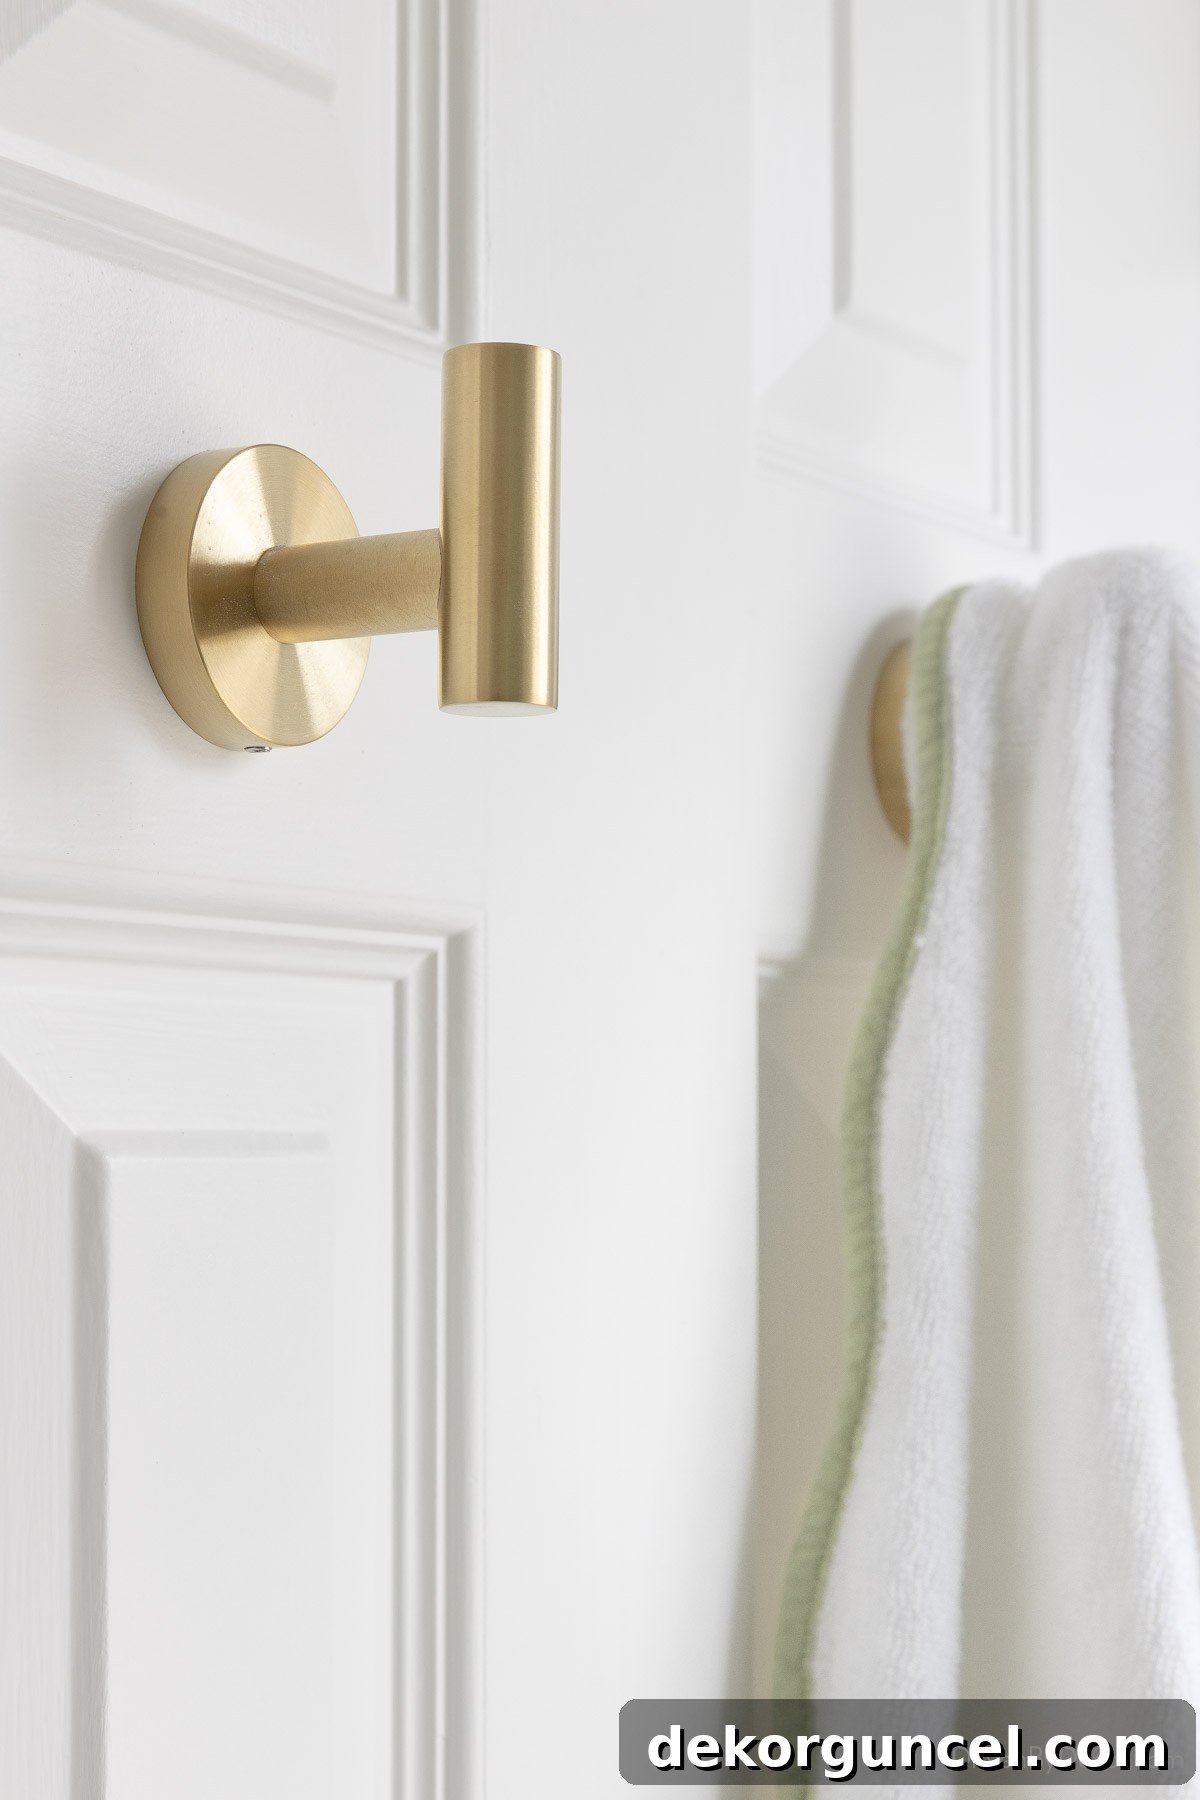
For a more hygienic and practical towel storage solution, especially in a shared bathroom where quick drying is essential, I added two of these sleek towel hooks to the back of the door. These hooks are perfect for hanging these charming scalloped towels, keeping them off the floor and easily accessible, yet discreetly hidden when the door is open. This approach ensures towels dry properly and remain fresh, a crucial detail in a busy family bathroom, and contributes to the overall neatness of the room.
Are you on the hunt for innovative and attractive wall hooks to organize coats in your entryway, purses in your closet, or towels in your bathroom? Look no further! My comprehensive post on decorative wall hooks showcases 16 of my absolute favorites, blending style with supreme functionality to help you declutter and organize any space beautifully.
Streamlined Shower Essentials: Dispensers for Guests and Convenience
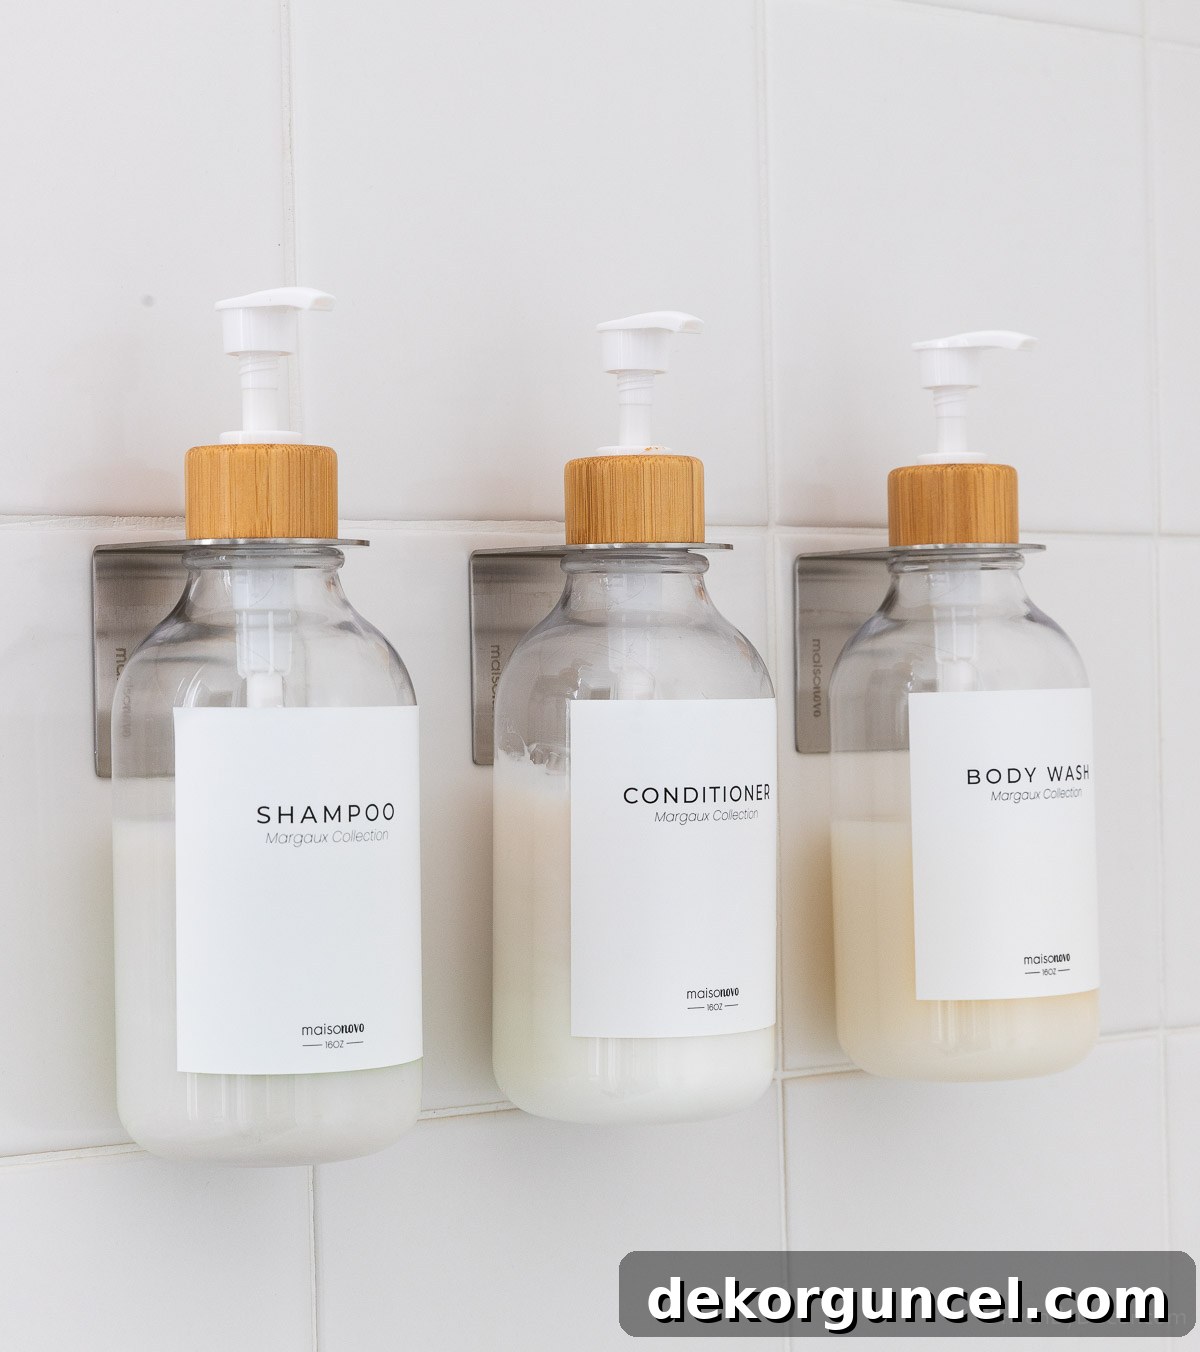
The final thoughtful touch in our Jack and Jill bathroom remodel was the addition of these convenient shampoo, conditioner, and body wash pumps to the back wall of the shower. Given that this bathroom often serves our guests, having these essential toiletries readily available is a wonderful amenity that makes them feel truly welcome and cared for. It’s particularly beneficial in this shower, which features only a very small corner shelf for holding bottles, preventing a cluttered look. These sleek dispensers eliminate bottle clutter, create a tidy appearance, and ensure our guests have easy access to high-quality products during their stay, making for a more luxurious and hassle-free experience.
A Remodel Success: Two Down, One to Go!
And with that, our Jack and Jill bathroom remodel is officially complete! We truly appreciate you sticking with us through this extensive tour – it was a project with many layers, but ultimately incredibly rewarding to see our vision come to life. This marks the second of three bathrooms in our home that we’ve lovingly revitalized, bringing modern design and enhanced functionality to each space. If you missed our powder room transformation, be sure to check out my post on bathroom shiplap for another dose of design inspiration and to see how we tackle different styles in our home!
The final major project on our list is our primary bathroom, which we’re planning to tackle in the near future. We’re already buzzing with ideas for that space, envisioning a true master retreat with luxurious finishes and thoughtful touches. So, stay tuned for more exciting renovation updates and design reveals coming your way soon! We can’t wait to share the next chapter of our home’s transformation with you as we continue our journey to create beautiful, functional living spaces. 🙌🏻
